Introduction
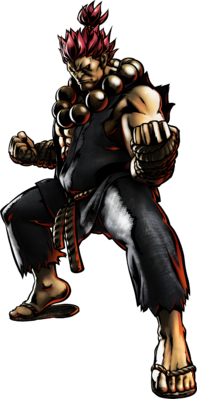
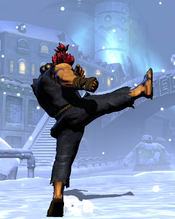
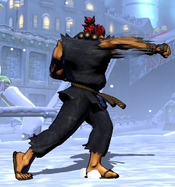
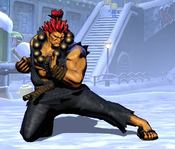
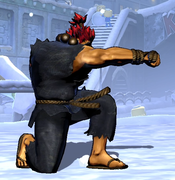
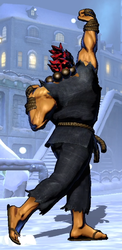
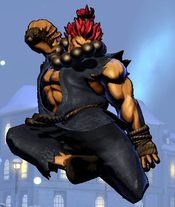
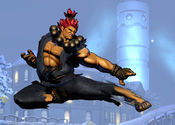
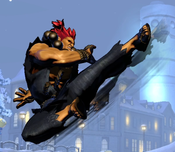
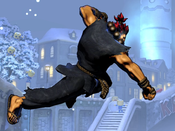
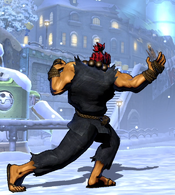
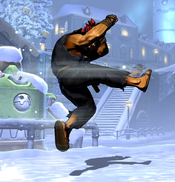
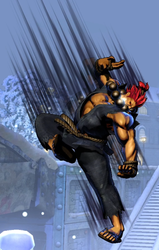
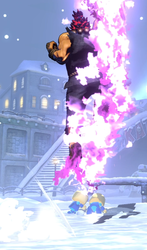
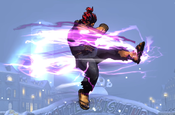
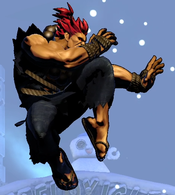
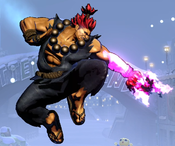
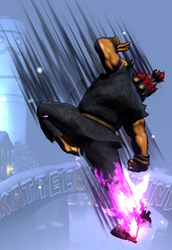
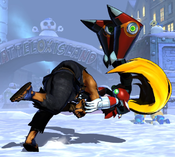
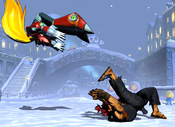
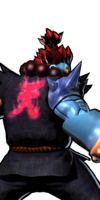
A recurring antagonist in the Street Fighter series, Akuma is a martial artist who became obsessed with the idea of growing stronger and defeating his opponents, often by killing them. Embracing the Satsui no Hadou, Akuma searches for worthy opponents to battle.
In UMvC3, Akuma is a simple but effective character who runs away while harassing with aerial fireballs and trying to snipe opponents with his fast beam hyper.
| Strengths | Weaknesses |
|---|---|
|
|
Move List
Assists
| Damage | Startup | Active | Recovery |
|---|---|---|---|
| 90,000 | 38 | - | 141, 111 |
| On Hit | On Block | Guard | Properties |
| - | - | Mid | Priority: Low, Durability: 5 |
|
THC Hyper: Messatsu Gohado. Extremely vanilla projectile assist. Although it comes out noticeably faster than common beam assists, this is usually negated by the fact that the projectile has to also physically travel to its target. It also loses on durability to many other projectile assists. Does stay on screen for a very long total time compared to many common assists, which can be useful. | |||
| Damage | Startup | Active | Recovery |
|---|---|---|---|
| 40,000 x2 + 70,000 | 32 | 17(6)6 | 110, 80 |
| On Hit | On Block | Guard | Properties |
| - | - | Mid | Fixed Hitstun, Nullifies low and medium priority projectiles |
|
THC Hyper: Messatsu Goshoryu. Recommended assist choice, and one of the primary reasons to use Akuma. Advances forward while kicking around him, hitting three total times. High amount of total lockdown, and can also be used to juggle opponents and convert stray hits or instant overheads. Unfortunately, this assist also carries the opponent quite far, so you will need to move quite quickly to follow up on it outside the corner. Additionally, Akuma's tatsu assist nullifies non-hyper projectiles it comes into contact with, including beams.
| |||
| Damage | Startup | Active | Recovery |
|---|---|---|---|
| 90,000 | 59 | 11 | 93, 63 |
| On Hit | On Block | Guard | Properties |
| - | - | OH | Invuln (as Crossover Counter) frames 1 - ???, |
|
THC Hyper: Messatsu Gohado. Akuma hops into the air and then divekicks back down. Because this move hits Overhead, it can be used to set up high/low unblockables or similar mixups when paired with a low attack from the point character. In practice, the short range of this assist makes a setup like this difficult to perform, and rarely worth the loss of Tatsu assist. | |||
Ground Normals
| Damage | Startup | Active | Recovery |
|---|---|---|---|
| 53,000 | 6 | 3 | 6 |
| On Hit | On Block | Guard | Properties |
| +6 | +5 | Mid | |
|
Fairly standard jab, although slower than the average 5L. Can be useful as an anti-air; its rapid fire property allows you to mash this attack and juggle an airborne opponent long enough to confirm into 5S. | |||
| Damage | Startup | Active | Recovery |
|---|---|---|---|
| 40,000 x2 | 9 | 5 | 14 |
| On Hit | On Block | Guard | Properties |
| +4 | +2 | Mid | - |
|
Double-hitting combo filler attack. 5M is less preferred compared to 2M due to the normal scaling from two hits. This does have a fairly high vertical hitbox so it can be useful for dashing under an opponent on incoming and using with an assist to cross-under an opponent. | |||
| Damage | Startup | Active | Recovery |
|---|---|---|---|
| 88,000 | 8 | 4 | 18 |
| On Hit | On Block | Guard | Properties |
| +3 | +1 | Mid | - |
|
Powerful standing normal. Akuma can combo into this from a myriad of ways and is a great normal with lots of hitstun that can be used later in combos. | |||
| Damage | Startup | Active | Recovery |
|---|---|---|---|
| 48,000 | 5 | 2 | 11 |
| On Hit | On Block | Guard | Properties |
| +2 | +1 | Low | |
|
Slightly faster than 5L, but still slower than many character's light attacks. Useful to stagger for baiting pushblock. | |||
| Damage | Startup | Active | Recovery |
|---|---|---|---|
| 75,000 | 6 | 3 | 14 |
| On Hit | On Block | Guard | Properties |
| +3 | +1 | Mid | - |
|
Note: Does not hit low. Akuma's 2M is aimed higher than most crouching normals. It is much faster than his 5M, more comparable to his light normals while also causing significantly more hitstun. However, 2L has slightly superior range. | |||
| Damage | Startup | Active | Recovery |
|---|---|---|---|
| 85,000 | 8 | 4 | 25 |
| On Hit | On Block | Guard | Properties |
| - | -6 | Low | |
|
Standard sweep attack. | |||
| Damage | Startup | Active | Recovery |
|---|---|---|---|
| 90,000 | 7 | 3 | 21 |
| On Hit | On Block | Guard | Properties |
| Launch | -1 | Mid | |
|
Safe launcher. Has poor horizontal range, but covers the area above Akuma quite well. Akuma can dash underneath an incoming character and attack with 5S for a crossup. | |||
Aerial Normals
| Damage | Startup | Active | Recovery |
|---|---|---|---|
| 53,000 | 8 | 9 | 7 |
| On Hit | On Block | Guard | Properties |
| +9 | +8 | OH | - |
|
Poor range, and unfortunately also too slow to hit as an instant overhead except against the largest opponents. | |||
| Damage | Startup | Active | Recovery |
|---|---|---|---|
| 70,000 | 10 | 3 | 23 |
| On Hit | On Block | Guard | Properties |
| +15 | +13 | OH | - |
|
Decent air-to-air and combo filler. Also has a (small) cross-up hitbox. Works as an instant overhead against big bodies. j. 5M can be inputted very late into Akuma's jump arch as it will typically still manifest just before Akuma lands and be used as a sneaky overhead under the cover of assists. | |||
| Damage | Startup | Active | Recovery |
|---|---|---|---|
| 88,000 | 10 | 3 | 23 |
| On Hit | On Block | Guard | Properties |
| +15 | +13 | OH | - |
|
Upward-angled airthrow OS attack. Useful for chasing down opponents who attempt to superjump away from Akuma. When using this attack in neutral (usually when fishing for an airthrow or throw tech), consider buffering a 421L. On a successful throw or throw tech, the special input will have no effect. If j.5H hits, you can confirm into Gosho (421L > L) to start a combo. If j.5H whiffs or is blocked, you can use the divekick or fireball follow-ups to safely escape instead. | |||
| Damage | Startup | Active | Recovery |
|---|---|---|---|
| 90,000 | 8 | 4 | 16 |
| On Hit | On Block | Guard | Properties |
| +17 | +15 | OH | |
|
Solid jump-in hitbox, although L Tatsu and j.5M are also competitive for this purpose. Deals more damage than any of Akuma's other air normals, and is useful in jump loops. | |||
Command Normals
| Damage | Startup | Active | Recovery |
|---|---|---|---|
| 45,000 x2 | 21 | 4 | 19 |
| On Hit | On Block | Guard | Properties |
| -1 | -3 | Overhead | |
|
Standing overhead. Akuma can chain into this from any of his Light or Medium normals. If Akuma has successfully used staggered lights to discourage opponents from mashing pushblock, he can open them up with this attack. 6M can be special-canceled. On hit, Akuma can easily confirm by simply chaining into 5S. As a gimmick, Akuma can fake out opponents by kara-canceling chop into his Raging Demon hyper. | |||
| Damage | Startup | Active | Recovery |
|---|---|---|---|
| 100,000 | 18 | 5 | 16 |
| On Hit | On Block | Guard | Properties |
| +10 | +2 | Mid | |
|
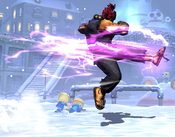
Akuma performs an advancing, spinning kick, similar to his Tatsumaki special move. However, it does not nullify projectiles in the way that Tatsu does. As an advancing attack that juggles opponents while being very advantageous, it is a solid combo tool. Despite appearances, this move is not airborne at any point in its duration. Akuma will be put in standing recovery if he is hit during this attack, and he can be thrown out of the startup. | |||
| Damage | Startup | Active | Recovery |
|---|---|---|---|
| 80,000 | 14 | Until grounded | 8 |
| On Hit | On Block | Guard | Properties |
| +11* | +9* | Mid | Not cancelable |
|
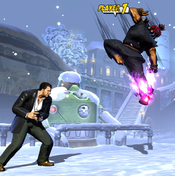
Divekick attack. Akuma halts any existing aerial momentum and kicks downwards, with a very slight amount of forward velocity as well. Divekick can not be chained in to, and it also cannot be canceled into anything except for X-Factor, so its combo utility is minimal. However, it has great frame advantage, and can be used as an oppressive neutral tool and combo starter. If this move connects, a safe choice is to mash 5L on landing, which can juggle an airborne opponent while also confirm against a grounded one. Divekick has a minimum height requirement for activation, similar to the minimum height for airdashes on characters that have them. If attempted below this height, Akuma will perform a regular j.5M instead. | |||
Special Moves
| L |
Damage | Startup | Active | Recovery |
|---|---|---|---|---|
| 90,000 | 14 | - | 28 | |
| On Hit | On Block | Guard | Properties | |
| -4 | -6 | Mid | Priority: Low, Durability: 5 | |
| M |
Damage | Startup | Active | Recovery |
| 90,000 | 14 | - | 31 | |
| On Hit | On Block | Guard | Properties | |
| -7 | -9 | Mid | Priority: Low, Durability: 5 | |
| H |
Damage | Startup | Active | Recovery |
| 90,000 | 14 | - | 34 | |
| On Hit | On Block | Guard | Properties | |
| -10 | -12 | Mid | Priority: Low, Durability: 5 | |
|
Standard projectile special. Button strength determines Akuma's recovery and the speed at which the projectile travels - H version travels fastest and has the longest recovery. Compared to aerial Gohadoken, this move is more dangerous to use, as it holds Akuma in one place for the duration. | ||||
| L (air) |
Damage | Startup | Active | Recovery |
|---|---|---|---|---|
| 90,000 | 10 | - | 35 | |
| On Hit | On Block | Guard | Properties | |
| - | - | Mid | Priority: Low, Durability: 5 | |
| M (air) |
Damage | Startup | Active | Recovery |
| 90,000 | 10 | - | 40 | |
| On Hit | On Block | Guard | Properties | |
| - | - | Mid | Priority: Low, Durability: 5 | |
| H (air) |
Damage | Startup | Active | Recovery |
| 90,000 | 10 | - | 45 | |
| On Hit | On Block | Guard | Properties | |
| - | - | Mid | Priority: Low, Durability: 5 | |
|
Aerial version of Akuma's fireball special. Notably, this move does not halt Akuma's aerial momentum, allowing him to stay mobile while putting out projectiles on either approach or retreat. Button strength changes the angle of the fireball - but all versions travel down-forward, so the difference is fairly minor. Akuma is limited to one fireball per jump. Even if Akuma recovers from this move, and even if the first fireball is destroyed, Akuma can not fire another one until he touches the ground. This limit can be (somewhat) circumvented by using his Demon Flip fireball. | ||||
| L |
Damage | Startup | Active | Recovery |
|---|---|---|---|---|
| 90,000 | 6 | 14 | 24 | |
| On Hit | On Block | Guard | Properties | |
| -2 | -15 | Mid | Invuln until frame 6, airborne from frame 7, | |
| M |
Damage | Startup | Active | Recovery |
| 55,000 + 70,000 | 4 | 5(1)10 | 30 | |
| On Hit | On Block | Guard | Properties | |
| -4 | -23 | Mid | Invuln until frame 7, airborne from frame 5, | |
| H |
Damage | Startup | Active | Recovery |
| 40,000 x2 + 70,000 | 3 | 6(1)10 | 44 | |
| On Hit | On Block | Guard | Properties | |
| - | -36 | Mid | Invuln until frame 10, airborne from frame 5, | |
|
One of the few meterless invincible reversals in the game. Can be used to mash out of pressure, or on reaction to hypers that would otherwise punish him (so long as the hyper is not 0f after the flash). As a bonus, Akuma can cancel into his fireball hyper, even on whiff, to protect himself from being punished. All versions of Goshoryuken are not subject to hitstun deterioration. | ||||
| L |
Damage | Startup | Active | Recovery |
|---|---|---|---|---|
| 110,000 | 8 | 7 | 18 | |
| On Hit | On Block | Guard | Properties | |
| - | -1 | Mid | ||
| M |
Damage | Startup | Active | Recovery |
| 40,000 x2 + 70,000 | 8 | 17(6)6 | 14 | |
| On Hit | On Block | Guard | Properties | |
| +11 | +3 | Mid | ||
| H |
Damage | Startup | Active | Recovery |
| 35,000 x4 + 70,000 | 8 | 41(6)6 | 16 | |
| On Hit | On Block | Guard | Properties | |
| +9 | +1 | Mid | ||
|
Akuma advances forward while attacking 1/3/5 times, depending on button strength. This special will nullify non-hpyer projectiles it comes into contact with, although this move can still be beaten by projectiles that clip Akuma's head while avoiding the hitbox. Akuma can convert an M or H tatsu hit that carries to the corner by mashing 5S. Outside of the corner, conversion is difficult. Tatsu is safe on block, but aware opponents can punish it by pushblocking the even-numbered hits, which will cause the 3rd/5th hits to whiff and become unsafe. Tatsu M version hits 1-2 and Tatsu H version hits 1-4 are not subject to hitstun deterioration. These hits will always work regardless of point in time in combo while landing the respective version of Tatsu. The final hit of each Tatsu version will occur and is subject to hitstun deterioration. | ||||
| L (air) |
Damage | Startup | Active | Recovery |
|---|---|---|---|---|
| 110,000 | 5 | 28 | Until grounded +6 | |
| On Hit | On Block | Guard | Properties | |
| +13 | +12 | Mid | ||
| M (air) |
Damage | Startup | Active | Recovery |
| 40,000 x2 + 60,000 | 5 | 18(4)6 | Until grounded +6 | |
| On Hit | On Block | Guard | Properties | |
| +13 | +12 | Mid | ||
| H (air) |
Damage | Startup | Active | Recovery |
| 35,000 x4 + 60,000 | 5 | 42(4)6 | Until grounded +6 | |
| On Hit | On Block | Guard | Properties | |
| +13 | +12 | Mid | ||
|
Aerial version of Akuma's tatsu special. This move does not alter Akuma's aerial momentum - he will continue to move in his current jump arc while kicking around him. Has a very solid cross-up hitbox and retains the projectile nullification of the grounded version, making it a solid jump-in. In air combos, L Tatsu is preferred as it does all of the damage in a single, up-front hit. Air Tatsu L version and Air Tatsu M version hits 1-2 are not subject to hitstun deterioration. These hits will always work regardless of point in time in combo while landing the respective version of Air Tatsu. The final hit of each Tatsu version will occur and is subject to hitstun deterioration. All hits of the Air Tatsu H version are subject to hitstun deterioration. | ||||
| Damage | Startup | Active | Recovery |
|---|---|---|---|
| - | 14 | - | 37/42/53 |
| On Hit | On Block | Guard | Properties |
| - | - | - | |
|
Command jump that can be performed while on the ground or while airborne. Button strength changes the height of the flip. Akuma has three follow-up attacks he can perform during Demon Flip (detailed below), for each of the three normal attack buttons. These attacks can be performed from frame 14 onward. Akuma can stall at superjump height by repeatedly doing Demon Flips into whiffed L follow-up, although he is still limited by the three-specials-per-jump rule. | |||
| Damage | Startup | Active | Recovery |
|---|---|---|---|
| 100,000 | 9 | 4 | 15 |
| On Hit | On Block | Guard | Properties |
| - | +12 | OH | |
|
Akuma performs a downward angled palm strike with limited range. It is an overhead, but typically outclassed by 6M and Gojin Divekick for that purpose. It is the fastest of Akuma's Demon Flip follow-ups, and thus the safest to whiff. Gosho's primarily useful as a combo tool. j.5H xx 421L > L lets Akuma convert almost any air hit into a ground bounce and relaunch. Hyakki Gosho is not subject to hitstun deterioration. | |||
| Damage | Startup | Active | Recovery |
|---|---|---|---|
| 90,000 | 14 | Until Grounded | 8 |
| On Hit | On Block | Guard | Properties |
| +13 | +11 | OH | |
|
Falling kick attack with a similar angle to his j.2M command normal. Unlike the command normal version, this attack is an overhead. It also can hit cross-up, and is a solid mixup tool. Also useful for picking up after airthrows and in certain combo routes. Despite the purple flame effect, this move's hitbox is identical to the regular j.2M divekick. | |||
| Damage | Startup | Active | Recovery |
|---|---|---|---|
| 90,000 | 10 | - | Until grounded |
| On Hit | On Block | Guard | Properties |
| - | - | Mid | Priority: Low, Durability: 5 |
|
Downward-angled fireball. Can circumvent Akuma's normal limit of one fireball per jump: j.236X, 421X > H can put out two shots in a single jump for additional coverage. As a bonus, this move automatically corrects Akuma's facing if he switched sides with the opponent during Demon Flip. Once Akuma uses Goho, he is stuck in recovery until he lands, which can only be canceled by hyper or X-Factor. | |||
| Damage | Startup | Active | Recovery |
|---|---|---|---|
| - | 14 | - | 20 |
| On Hit | On Block | Guard | Properties |
| - | - | - | Invuln frames 14-30 |
|
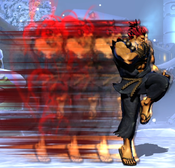
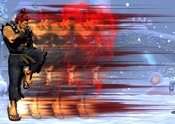
Akuma phases out and then "teleports" across the stage. 623S input will cause Akuma to teleport to the right, while 421S input will make Akuma teleport to the left. Although this move has some invincibility, it does not occur until 14f in, making it a poor reversal. Instead, Ashura is decent as an offensive tool. It can be used to pass through an opponent, even in the corner, which can create a cross-up situation when paired with an assist. | |||
Hyper Combos
| Damage | Startup | Active | Recovery |
|---|---|---|---|
| 11,000 x48 - x96 | 7+1 | 76 | 50 |
| On Hit | On Block | Guard | Properties |
| - | - | Mid | |
|
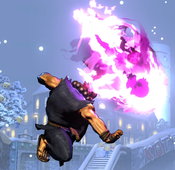
Akuma unleashes a barrage of fireballs. Although this hyper has very high damage potential if it "shotguns" most of the fireballs, in practice a good percentage of them will whiff. The travel time of the fireballs makes it difficult to use this hyper in neutral, as opponents have additional time to recover. However, this hyper is also very safe on block. Messatsu Gohado Agyo has variations and is subject to RNG. The number of variations in unclear but RNG is certain. If Akuma holds H during the super flash of this hyper, he will instead perform its beam version (see below). | |||
| Damage | Startup | Active | Recovery |
|---|---|---|---|
| 18,000 x25 - x50 | 7+1 | 80 | 46 |
| On Hit | On Block | Guard | Properties |
| - | -34 | Mid | |
|
If H is held during the startup, Akuma fires a single large beam instead of the fireball barrage. As a beam, this hyper reaches across the screen much faster, can hit multiple opponents at once, and deals more consistent damage. To compensate, its maximum damage potential is slightly slower than the "cotton candy" version, and it is much worse on block. This hyper (and its aerial version), are a core part of Akuma's threat as a zoner. Akuma can react to an opponents projectiles or assist calls with this hyper to snipe them from across the screen, shutting down a lot of options as long as he has meter. | |||
| Damage | Startup | Active | Recovery |
|---|---|---|---|
| 11,000 x48 - x96 | 7+2 | 76 | 16 |
| On Hit | On Block | Guard | Properties |
| - | - | Mid | mashable, Priority: High, Durability: 5 per projectile, scales by 0.97 |
|
Air version of Akuma's fireball hyper. Akuma shoots the barrage at a down-forward angle. Compared to the ground version, it has one additional frame of post-flash startup, but MUCH less recovery, and is almost impossible to punish on block. Tenma Gozanku Agyo has variations and is subject to RNG. The number of variations in unclear but RNG is certain.
In the corner, it is also possible to follow-up with a gimmicky Down or Side TAC. | |||
| Damage | Startup | Active | Recovery |
|---|---|---|---|
| 18,000 x25 - x50 | 7+2 | 80 | 13 |
| On Hit | On Block | Guard | Properties |
| - | -1 | Mid | |
|
Air version of Akuma's beam hyper. Compared to the ground version, it has one extra frame of post-flash startup, but significantly less recovery. As a fast hyper with solid damage, it can be used to snipe assist calls or punish an opponent's whiffed attacks. As an OTG, allows Akuma to get some damage on knocked down opponents when he does not have time to set up Hyakki Gojin. If you catch an assist with this low to the ground: you can land, rejump, and hyper again to catch them before they recover. | |||
| Damage | Startup | Active | Recovery |
|---|---|---|---|
| 40,000 x8 + 150,000 | 13+3 | 14(6)14(6)14 | 40 |
| On Hit | On Block | Guard | Properties |
| -4 | -22 | Mid | Invuln until frame 22, |
|
Invincible reversal hyper. Deals respectable damage but synergizes awkwardly with DHCs. Since Akuma almost always runs Tatsu assist, this will usually be his Team Hyper. Anchor Akuma can abuse this by mashing A1+A2 during blockstun. He will automatically perform this invincible reversal as soon as a gap appears, while being able to block freely in the meantime. As long as Akuma still has X-Factor to cancel the recovery, he can protect himself if this reversal is baited, and start an easy kill combo if it hits. | |||
| Damage | Startup | Active | Recovery |
|---|---|---|---|
| 465,000 - 561,000 | 5+0 | 40 | 4 |
| On Hit | On Block | Guard | Properties |
| - | - | Throw | Mashable, Unvuln until frame 39, |
|
Cinematic level 3 hyper. Akuma slides across the ground. If he comes into contact with a grounded opponent, he command grabs them, dealing heavy damage and ending with a hard knockdown. Rarely useful, since it cannot connect against airborne opponents. May be possible to use in guard breaks, or as anti-Dark Phoenix technology. Its invincibility can be used to blow through other grounded hypers. If it does connect, Akuma can connect a very fast tiger knee j.2369XX (Beam) hyper before the opponent recovers. Sentinel-specific - If you superjump quickly after Raging Demon is completed and cancel the superjump into Tenma Gozanku Ungyo, it is possible to connect a j. M Tatsu after and continue into a combo as shows in this video. | |||
Universal Mechanics
| Damage | Startup | Active | Recovery |
|---|---|---|---|
| 80,000 | 1 | 1 | - |
| On Hit | On Block | Guard | Properties |
| - | - | Throw | |
|
Standard ground throw that results in the opponent knocked down. Forward throw places the opponent right next to Akuma, where they can be hit only with a very fast Tiger Knee'd Air Beam hyper. Back throw sends the opponent further away, and Akuma can do a regular jump into air Beam Hyper with more lenient timing. | |||
| Damage | Startup | Active | Recovery |
|---|---|---|---|
| 80,000 | 1 | 1 | - |
| On Hit | On Block | Guard | Properties |
| - | - | Airthrow | |
|
Standard airthrow that results in a Hard Knockdown. Air Backthrow sends the opponent further away, but has much better combo opportunities than the forward throw, and should be used whenever possible. | |||
| Damage | Startup | Active | Recovery |
|---|---|---|---|
| 50,000 | 2 | 4 | 18 |
| On Hit | On Block | Guard | Properties |
| - | +1 | Mid | Snapback |
|
Animation and hitbox based on 5H. | |||
| Damage | Startup | Active | Recovery |
|---|---|---|---|
| 30,000 | - | 20 | 34 |
| On Hit | On Block | Guard | Properties |
| - | -16 | OH | |
|
Animation and hitbox based on j.M. | |||
Team Position
Akuma is almost always played as an Anchor character. He brings an exceptionally strong assist, so placing him in the third slot maximizes the amount of time your team will be able to access it. He also scales very well with X-Factor, which greatly enhances the chip damage of his fireballs and makes his 8f beam hyper an extremely threatening tool for punishing whiffed attacks or assist calls.
Notable Synergies
Wolverine: Wolverine and Akuma have historically been referred to as "best friends" in UMvC3, owing mostly to Akuma's Tatsumaki assist as a support tool for Wolverine. Tatsu assist destroys (non-hyper) projectiles it collides with, allowing Wolverine to close the distance against zoning opponents. It also has a very long duration, meaning it can keep opponents in hitstun or blockstun for quite a long time. If Wolverine can call Akuma and then attempt either an Instant Overhead or a cross-up Berserker Slash. If these attacks hit, Akuma will juggle the opponent long enough for Wolverine to recover and start a combo for free. If the opponent manages to block, Akuma will still keep Wolverine safe.
Players to Watch: Clegg Madness (Wolvie/Spencer/Akuma), SBK (Wolvie/Dante/Akuma), Justin Wong (Wolverine/Storm/Akuma), SumBrwnKid (Wolvie/Dante/Akuma)
Iron Fist: While not a projectile itself, Akuma's Tatsumaki assist destroys projectiles. It also has relatively long duration and can keep opponents in blockstun for a significant amount of time. These factors make Akuma with tatsu assist a solid choice for any rushdown-focused character, and Iron Fist is no exception. Akuma's assist can also be called while attempting an Instant Overhead, and juggles long enough for Iron Fist to confirm if it connects, while also keeping him safe if it is blocked.
Players to Watch: Justin Wong (Iron Fist/Storm/Akuma, rarely, or Wolverine/Iron Fist/Akuma, rarely)
Spencer: Similar to the other characters on this list, Spencer is a rushdown character with limited mobility and short range. He benefits from having Akuma assist to cover his approach, and can also use the Tatsu for offensive pressure or to extend combos. Tatsu called before Spencer's command overhead gives him more damaging follow-ups than what he could do solo.
Players to Watch: Clegg Madness (Wolvie/Spencer/Akuma), Raid (Phoenix Wright/Spencer/Akuma)
Other Players to Watch: Brian Kasugano (Chun/Ryu/Akuma), Zenpool (Deadpool/Ryu/Akuma), LivinLegend26 (Chris/Wesker/Akuma), oAcentric (Chun/Ryu/Akuma)
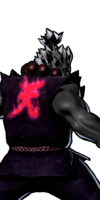
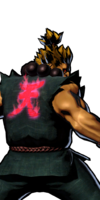
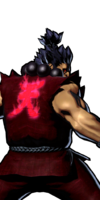
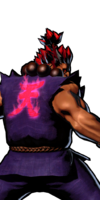
Alternate Colors
| Color 1 | Color 2 | Color 3 | Color 4 | Color 5 | Color 6 | Alt Color |
|---|---|---|---|---|---|---|
|
|
|
|
|
|
|

