Introduction
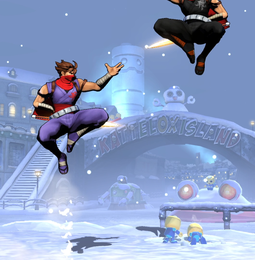
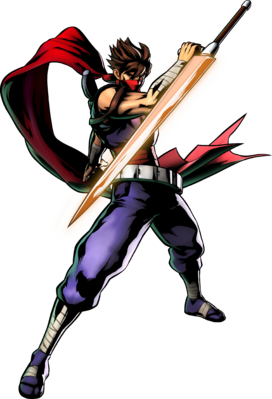
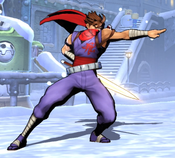
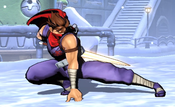
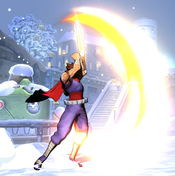
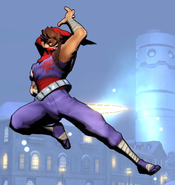
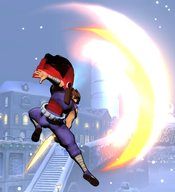
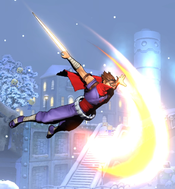
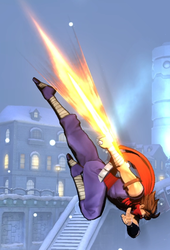
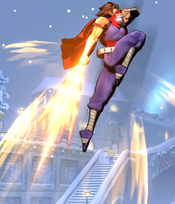
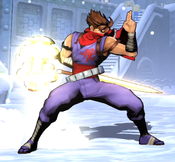
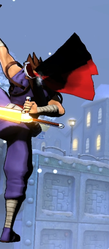
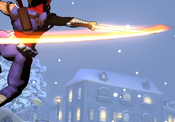
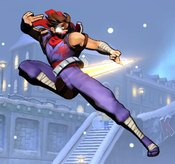
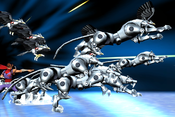
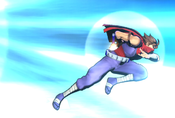
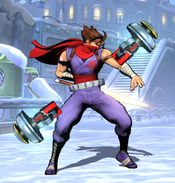
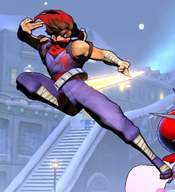
"Striders" are an organization of highly advanced cybernetic ninjas based in the future (the 2040's, approximately). Hiryu originally debuted in his self-titled manga, Strider Hiryu, as well as a tie-in game, Strider. Hiryu is the youngest strider in the organization's history to reach elite status, and is often deployed on dangerous solo missions. His arsenal includes a plasma-emitting sword called Falchion and a set of robotic "Options" which he can summon to assist him in combat.
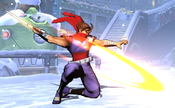
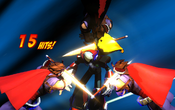
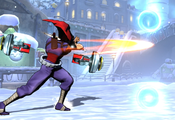
In UMvC3, Strider is an extremely high-speed character with a focus on crafty mixups. From a distance, Strider can use Formation (214X) to summon his options as a form a pseudo assist to cover his approach. When he has the opponent where he wants them, Strider his teleport special, as well as his Wall Cling attacks in order to mix up the defender and start a combo. Although Strider is very agile and has many dangerous offensive tools, he suffers from low health and poor damage outside of X-Factor. In particular, his minimum damage scaling values are some of the worst in the game, and his level 1 hyper is notoriously low in damage. Strider's most iconic ability is his "Ouroboros" Level 3 install hyper (214XX). Ouroboros surrounds Strider in orbs that automatically fire projectiles as he attacks, giving him seven seconds of nearly incontestable offense.
| Strengths | Weaknesses |
|---|---|
|
|
Unique Movement
Strider's double-jump is uniquely short among characters who have one. This can be utilized to perform a lower jump than what would otherwise be possible. Unlike an airdash, there is no minimum height requirement for a double-jump - it can be performed instantly upon leaving the ground. This is true for any character who has a double-jump, but is especially important for Strider. Strider's regular jump is floatier than average, and his double-jump is much shorter than average. As a result, if Strider inputs a double-jump immediately upon leaving the ground, the double-jump momentum will override his regular jump momentum, and he will stay very close to the ground. This is called an Instant Air Double-Jump, or just Instant Double Jump (IADJ/IDJ).
An optimal Instant Double Jump is done by inputting any jump, waiting 3 frames for the pre-jump animation, and then inputting a second jump on the fourth frame. However, even much sloppier inputs can still result in a shorter jump arc than normal. A 10-frame gap between jump inputs will result in a height that is effectively the same as a normal jump, and shortening the gap will result in progressively shorter jumps.
The primary advantage of Instant Double Jump is to gain quick access to Strider's air normals while remaining low enough that they can be used against grounded opponents. This drastically improves Strider's High/Low mixup game by allowing him to perform fast Instant Overhead attacks and then convert them solo into a combo or additional block pressure.
Move List
Assists
| Damage | Startup | Active | Recovery |
|---|---|---|---|
| 80,000 | 47 | 4 | 116, 86 |
| On Hit | On Block | Guard | Properties |
| - | - | Mid | |
|
THC Hyper: Legion. Causes Strider to advance forward before slashing, oftentimes ahead of the point character, which makes this assist risky to use outside of combos. | |||
| Damage | Startup | Active | Recovery |
|---|---|---|---|
| 90,000 | 49 | 5 | 118, 88 |
| On Hit | On Block | Guard | Properties |
| - | - | Mid | Invuln (as Crossover Counter) frames 1 - ???, |
|
THC Hyper: Legion. Kinda slow assist based off of medium gram. Has okay range, and causes a wall bounce, making it pretty okay for combos and converting off of stray hits. Pretty much never used over Vajra | |||
| Damage | Startup | Active | Recovery |
|---|---|---|---|
| 80,000 | 58 | 10 | 102, 72 |
| On Hit | On Block | Guard | Properties |
| - | - | Mid | |
|
THC Hyper: Legion. Recommended Assist. Strider disappears on the ground and reappears above the opponent's point character, attacking downwards. Vajra has very good (but not infallible) tracking and can connect with an opponent almost anywhere on the stage, including at superjump height.
Very threatening assist when paired with a point character that can solo OTG pickup into a full combo. | |||
Ground Normals
| Damage | Startup | Active | Recovery |
|---|---|---|---|
| 35,000 | 4 | 2 | 11 |
| On Hit | On Block | Guard | Properties |
| 0 | -2 | Mid | |
|
Due to the very low total active and recovery frames, if this attack is pushblocked, Strider gains a large amount of frame advantage. Enough to dash back in and continue his offense. | |||
| Damage | Startup | Active | Recovery |
|---|---|---|---|
| 48,000 | 6 | 3 | 15 |
| On Hit | On Block | Guard | Properties |
| 0 | -2 | Mid | - |
|
Like with 5L, this attack is quite advantageous on pushblock, although not quite to the same extent. Has a pretty impressive hitbox horizontally against grounded opponents, but struggles to hit airborne opponents. | |||
| Damage | Startup | Active | Recovery |
|---|---|---|---|
| 60,000 | 9 | 4 | 23 |
| On Hit | On Block | Guard | Properties |
| -4 | -6 | Mid | - |
|
Strider steps forward during this attack about one character length, which extends this move's range and gives it some kara-cancel potential. However, Strider steps back to his original position duriing the recovery, at which time he is very vulnerable. Whiff cancel this move into specials when using in neutral to partially negate its dangerous recovery. Has a large amount of pushback on hit/block, which can make follow-ups with 5S difficult. | |||
| Damage | Startup | Active | Recovery |
|---|---|---|---|
| 33,000 | 5 | 2 | 11 |
| On Hit | On Block | Guard | Properties |
| 0 | -2 | Low | |
|
Low-hitting alternative to 5L. Strider's crouching hurtbox is naturally lower than average, and so this move is not any more low-profile than crouching normally. | |||
| Damage | Startup | Active | Recovery |
|---|---|---|---|
| 50,000 | 8 | 3 | 15 |
| On Hit | On Block | Guard | Properties |
| 0 | -2 | Low | - |
|
Causes Strider's hurtbox to rise slightly compared to his regular crouching stance, making this dangerous to use in neutral. | |||
| Damage | Startup | Active | Recovery |
|---|---|---|---|
| 60,000 | 10 | 3 | 26 |
| On Hit | On Block | Guard | Properties |
| - | -8 | Low | |
|
Less pushback than 5H, making it preferable in certain combo routes. 2H is not subject to hitstun deterioration and will work at any point in combo where you can connect 2h. | |||
| Damage | Startup | Active | Recovery |
|---|---|---|---|
| 65,000 | 9 | 4 | 29 |
| On Hit | On Block | Guard | Properties |
| Launch | -12 | Mid | |
|
- | |||
Aerial Normals
| Damage | Startup | Active | Recovery |
|---|---|---|---|
| 40,000 | 5 | 3 | 15 |
| On Hit | On Block | Guard | Properties |
| +11 | +9 | OH | |
|
Works naturally as an instant overhead against almost every character. Using instant air doublejump beforehand keeps Strider low to the ground, allowing him to solo convert this instant overhead with j.5L > j.5H > j.5S. Can also convert without instant air doublejump against big bodies or by using an assist/X-Factor. | |||
| Damage | Startup | Active | Recovery |
|---|---|---|---|
| 50,000 | 7 | 3 | 21 |
| On Hit | On Block | Guard | Properties |
| +16 | +14 | OH | |
|
Similar to grounded 5M. Has a respectable horizontal hitbox but almost no vertical reach. Whiffs often versus grounded opponents. | |||
| Damage | Startup | Active | Recovery |
|---|---|---|---|
| 60,000 | 9 | 4 | 23 |
| On Hit | On Block | Guard | Properties |
| +18 | +16 | OH | - |
|
Works as an instant overhead when used out of instant air doublejump. Compared to using j.5L, it is mechanically easier to pull off but slightly slower. | |||
| Damage | Startup | Active | Recovery |
|---|---|---|---|
| 63,000 | 10 | 3 | 26 |
| On Hit | On Block | Guard | Properties |
| +14 | +12 | OH | |
|
- | |||
Command Normals
| Damage | Startup | Active | Recovery |
|---|---|---|---|
| 63,000 | 10 | 4 | 22 |
| On Hit | On Block | Guard | Properties |
| -3 | -5 | Mid | - |
|
Strider advances forward while attacking, which can help negate the pushback from 5H/2H and get Strider closer for a follow-up 623L or 5S. | |||
| Damage | Startup | Active | Recovery |
|---|---|---|---|
| 55,000 | 9 | 10 | 22 |
| On Hit | On Block | Guard | Properties |
| - | -11 | Low | |
|
Very low profile OTG attack comparable to Wolverine's 3M. Strider needs X-Factor or an assist to convert this attack into anything. 3H is not subject to hitstun deterioration. | |||
Special Moves
| L |
Damage | Startup | Active | Recovery |
|---|---|---|---|---|
| 70,000 | 15 | 4 | 27 | |
| On Hit | On Block | Guard | Properties | |
| - | -10 | Mid | ||
| M |
Damage | Startup | Active | Recovery |
| 80,000 | 23 | 4 | 25 | |
| On Hit | On Block | Guard | Properties | |
| - | -8 | Mid | ||
| H |
Damage | Startup | Active | Recovery |
| 90,000 | 31 | 4 | 22 | |
| On Hit | On Block | Guard | Properties | |
| - | -5 | Mid | ||
|
Strider steps forward and then performs a slash that causes a Ground Bounce. Higher strength versions run farther forward before attacking, but recover faster and thus allows for a stronger follow-up.
If Strider already has Formation B (214S) summoned, he can cancel the this attack at any point into Formation B Shot. All versions of Ame-no-Murakamo are not subject to hitstun scaling but will only ground bounce once. | ||||
| L |
Damage | Startup | Active | Recovery |
|---|---|---|---|---|
| 90,000 | 18 | 5 | 26* | |
| On Hit | On Block | Guard | Properties | |
| - | -10 (air: 0) | Mid | ||
| M |
Damage | Startup | Active | Recovery |
| 90,000 | 25 | 5 | 26* | |
| On Hit | On Block | Guard | Properties | |
| - | -10 (air: +8) | Mid | ||
| H |
Damage | Startup | Active | Recovery |
| 90,000 | 33 | 5 | 26* | |
| On Hit | On Block | Guard | Properties | |
| - | -10 (air: +16) | Mid | ||
|
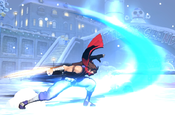
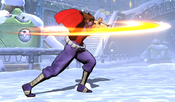
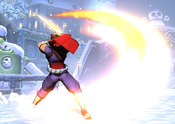
Strider charges up and then attacks with a large horizontal slash of energy. Higher button strength takes longer to charge but produces a much larger attack, with the H version reaching nearly fullscreen. Strider can easily combo into L version on his own, but making use of stronger versions typically requires outside assistance. All versions are Air OK. If done in the air, Strider recovers on landing instead of having a fixed recovery duration. Air Gram causes Strider to halt any aerial momentum he had and start to slowly float towards the ground while it occurs. If Strider already has Formation B (214S) summoned, he can cancel the grounded version of attack at any point into Formation B Shot. All versions of Gram, grounded or air versions, are not subject to hitstun deterioration but the M and H will only wall bounce once. | ||||
| L (in air) |
Damage | Startup | Active | Recovery |
|---|---|---|---|---|
| 30,000 x4 | 10 | 15 | 11* | |
| On Hit | On Block | Guard | Properties | |
| +10 | +8 | Mid | - | |
| M (in air) |
Damage | Startup | Active | Recovery |
| 30,000 x4 | 10 | 15 | 26 | |
| On Hit | On Block | Guard | Properties | |
| -9 | -11 | Mid | - | |
| H (in air) |
Damage | Startup | Active | Recovery |
| 30,000 x4 | 10 | 15 | 26 | |
| On Hit | On Block | Guard | Properties | |
| -9 | -11 | Mid | - | |
|
Strider quickly flies across the stage while attacking. Button strength determines direction:
The L version is quite useful for air-to-air conversions and combo extensions as Strider can land and rejump to continue the combo afterwards. H version has niche use especially in X-Factor as Strider can sometimes link j.S afterwards. | ||||
| Formation A1 |
Damage | Startup | Active | Recovery |
|---|---|---|---|---|
| 80,000 | 21 | - | 14 | |
| On Hit | On Block | Guard | Properties | |
| +13 | +11 | Mid | Priority: Low, Durability: 3 | |
| Formation A2 |
Damage | Startup | Active | Recovery |
| 40,000 | 21 | - | 14 | |
| On Hit | On Block | Guard | Properties | |
| +14 | +12 | Mid | Priority: Low, Durability: 3 | |
| Formation C |
Damage | Startup | Active | Recovery |
| 90,000 | 36 | - | 4 | |
| On Hit | On Block | Guard | Properties | |
| - | - | Mid | Priority: Low, Durability: 3 (Bird), 5* (Bomb), 5 (Explosion), | |
|
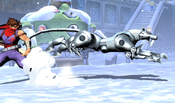
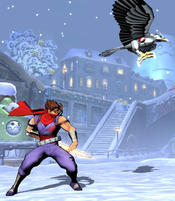
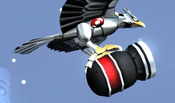
Strider summons a cybernetic animal assist that appears behind him and advances forward.
Strider's formation specials give him significant mixup potential when paired with his excellent mobility via teleports, wallclings, or standard movement to cross up the opponent. The H version also has use in combos if Strider can use X-Factor or an assist to cover its startup. Formation also allows Strider to play a fairly effective keepaway game in certain matchups. 214H's bomb has an odd anti-beam property* that allows it to destroy the majority of beams and still explode for full damage afterwards. Also, all three versions are quite fast and spammable.
| ||||
| Damage | Startup | Active | Recovery |
|---|---|---|---|
| - | 11 | - | 9 |
| On Hit | On Block | Guard | Properties |
| - | - | - | Duration: 600 frames |
|
Strider summons a bomb which hovers behind him for 10 seconds, or until Strider is hit by any attack. The bomb is inactive, and this move by itself does nothing except enable him to later use Formation B (Shot). This move has a very short total duration, and so Strider can cancel 5H, 2H or 6H into this special in order to recover faster while also preparing a bomb for later use. | |||
| Damage | Startup | Active | Recovery |
|---|---|---|---|
| 80,000 | 2 | - | 18 |
| On Hit | On Block | Guard | Properties |
| +12 | +8 | Mid | |
|
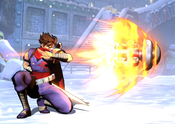
Strider fires the bomb he deployed in Formation B straight forward. This attack is a very fast and very powerful projectile, with the caveat that it had to be prepared in advance. Strider can use the OTG property of this attack to relaunch after a Hard Knockdown, even if he does not already have a bomb prepared. Both Ame-no-Murakamo (236X) and Gram (623X) can be canceled into Formation B Shot (but not normal Formation B). Constant use of Formation B - both to cancel normals with the activation and to cancel specials by firing - allows Strider to maintain consistent pressure for a long time even with minimal assistance. | |||
| L |
Damage | Startup | Active | Recovery |
|---|---|---|---|---|
| - | 12 | 9 | 10 | |
| On Hit | On Block | Guard | Properties | |
| - | - | - | Invuln frames 12-20 | |
| M |
Damage | Startup | Active | Recovery |
| - | 12 | 9 | 10 | |
| On Hit | On Block | Guard | Properties | |
| - | - | - | Invuln frames 12-20 | |
| H |
Damage | Startup | Active | Recovery |
| 80,000 | 33 | Until Grounded | 11 | |
| On Hit | On Block | Guard | Properties | |
| +2 | -7 | Mid | Invuln frames 13-29, | |
|
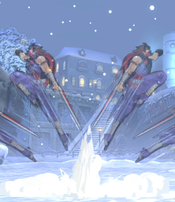
Strider's teleport. Allows for standard left/right mixups as 421L Vajra places Strider above and in front of the opponent, while 421M places Strider above and behind. After recovering, Strider falls towards the ground and can attack with his air moves as normal. If the opponent is in blockstun while you activate Vajra, the opponent can pushblock on reaction. This will cause the M version to be pushed back over the opponent towards the front side, negating the left/right mixup. If the opponent is not locked down when Vajra is activated, the opponent may be able to react with a quick airthrow punish. 421H Vajra causes Strider to appear above the opponent and automatically attack with a diving kick. This can be used to punish many character's aerial zoning patterns. For example, Strider can use H Vajra on reaction to Doctor Doom performing air Plasma Beam or Finger Lasers to punish with a Hard Knockdown. Vajra H version is not subject to hitstun deterioration. Like with the assist version, H Vajra is vulnerable to upward angled attacks such as 5S launchers, and opponents can Chicken Block immediately off the ground to make its already negative on-block recovery even worse, so it is risky to throw out in neutral. | ||||
| Damage | Startup | Active | Recovery |
|---|---|---|---|
| - | Until walled | - | -1 |
| On Hit | On Block | Guard | Properties |
| - | - | - | - |
|
Strider leaps towards the opposite edge of the screen, and then clings to it. He will remain there for 295 frames (~5 seconds) or until he performs an attack that causes him to leave the wall (or until he is hit). Wall Cling's movement is impervious to pushblock, and so Strider can use it to create cross-up situations which are more challenging to block than Vajra cross-ups. While on the wall, Strider has several unique actions he can perform. He can also press Forward ( | |||
| Ladder Kick |
Damage | Startup | Active | Recovery |
|---|---|---|---|---|
| 55,000 | 8 | 11 | 16 | |
| On Hit | On Block | Guard | Properties | |
| -4 | -6 | OH | Maintains Wall Cling | |
| Cypher Attack |
Damage | Startup | Active | Recovery |
| 60,000 | 6 | 3 | 23 | |
| On Hit | On Block | Guard | Properties | |
| -3 | -5 | OH | Maintains Wall Cling | |
| Jump Kick |
Damage | Startup | Active | Recovery |
| 70,000 | 10 | Until Grounded | 10 | |
| On Hit | On Block | Guard | Properties | |
| +12 | +10 | OH | ||
| Wall Exchange |
Damage | Startup | Active | Recovery |
| - | 27 | - | 1 | |
| On Hit | On Block | Guard | Properties | |
| - | - | - | Maintain Wall Cling (on opposite wall) | |
|
Strider's various attacks from Wall Cling. He can chain them together in a standard magic series fashion (L > M > H), excluding S. H follow-up is the most useful by far, as a quick and safe overhead that allows Strider to convert off the cross-up he just attempted during Wall Cling. Keep in mind that all of these attacks are considered normal attacks, and thus can be canceled into specials even on whiff. This is mainly useful for canceling Jump Kick into Gram in certain combo routes. | ||||
Hyper Combos
| Damage | Startup | Active | Recovery |
|---|---|---|---|
| 25,000 x15 | 9+1 | - | 76 |
| On Hit | On Block | Guard | Properties |
| +12 | +6 | Mid | |
|
This hyper sucks. Strider summons a random assortment of approximately 20 tigers, leaping tigers, and eagles. This hyper hits OTG, and is mainly used as a combo ender after an Air Combo Finisher or other Hard Knockdown. Since the animals appear from the back end of the screen (like in Formation specials), it takes deceptively long to actually connect with the opponent, and they can recover in time to avoid the attack depending on spacing. Even if it does connect, the damage is quite inconsistent and tends toward being underwhelming. Despite being a hyper, the individual animals summoned are Low priority. They can be partially or even wholly negated by your opponent's regular projectiles, and opposing hypers will destroy them entirely. | |||
| Damage | Startup | Active | Recovery |
|---|---|---|---|
| 430,000 | 8+0 | 21 | 33 |
| On Hit | On Block | Guard | Properties |
| - | -33 | Mid | Invuln frames 1-20, |
|
Strider dashes forward and (hopefully) catches the opponent in a standard cinematic level 3 hyper. Significant amount of invulnerability, circumvents damage scaling, and deals large amounts of damage. Can be used in combos fairly easily. Because it has 0 frames of post-flash startup, if the opponent is close and is not already holding block when the super flash begins, they will not be able to block the attack. | |||
| Damage | Startup | Active | Recovery |
|---|---|---|---|
| 15,000 (Projectiles), 40,000 (Satellites) | 13+2 | - | 7 |
| On Hit | On Block | Guard | Properties |
| - | - | Mid | Priority: Low, Durability: 3 per projectile, satellites scale by 0.9 |
|
Install hyper. Strider surrounds himself with orbiting satellites that have active hitboxes and last for 420 frames (7 seconds). While Ouroboros is active, any press of L, M, or H will cause the satellites to each fire a projectile directly forward, in addition to the regular effect of pressing that button. Strider does not build meter for the duration. | |||
Universal Mechanics
| Damage | Startup | Active | Recovery |
|---|---|---|---|
| 80,000 | 1 | 1 | - |
| On Hit | On Block | Guard | Properties |
| - | - | Throw | |
|
Strider performs an Izuna Drop on the opponent, ending with them knocked down a short distance away. With good timing, it is possible to both prepare and fire a Formation B shot to hit OTG and start a combo. Strider's forward throw and back throw are slightly different, although the distinction is hard to notice visually. Critically, Strider can not 214S 214S OTG after a backthrow against normal-sized characters, it will only work against big body characters, no matter how fast and perfect the inputs are. Conversely, Strider can pick up regular characters from a forward throw consistently even if he does not already have a Formation B deployed. | |||
| Damage | Startup | Active | Recovery |
|---|---|---|---|
| 80,000 | 1 | 1 | - |
| On Hit | On Block | Guard | Properties |
| - | - | Airthrow | |
|
Strider stomps the opponent down towards the ground, then hops a short distance away. Unlike his ground throw, Strider can consistently pick up after both directions of airthrow with 214S 214S, provided it performed quickly. | |||
| Damage | Startup | Active | Recovery |
|---|---|---|---|
| 50,000 | 2 | 4 | 22 |
| On Hit | On Block | Guard | Properties |
| - | -5 | Mid | Snapback |
|
Animation and hitbox based on 236L | |||
| Damage | Startup | Active | Recovery |
|---|---|---|---|
| 30,000 | - | 18 | 31 |
| On Hit | On Block | Guard | Properties |
| - | -12 | OH | |
|
- | |||
Team Position
Strider is almost always chosen as an Anchor character. With the possible exception of Phoenix, there is no other character in the game where the difference between their normal strength and their potential as an anchor is more apparent. Several factors contribute to this:
- At only 3% (7% for specials), Strider's minimum damage scaling is the worst in the entire game. After only about seven hits in a combo, Strider's damage will have deteriorated well below what most character's attacks would do. Activating X-Factor forcibly sets his minimum damage scaling to 35% instead, so it is almost mandatory for him to deal any significant damage.
- Strider has two very powerful Level 3 Hypers: a standard cinematic level 3 and his Ouroboros install, but his Level 1 hyper is quite weak. Strider is significantly more threatening if he enters the fight with several bars of meter already built by his teammates.
- Strider's speed boost in high levels of X-Factor is one of the strongest in the game (only Chun-Li's speed boost is higher). This speed boost drastically increases the effectiveness of his teleports and wall clings as mixup tools, making them much more difficult for the opponent to react against.
As consolation, Strider's "Vajra" assist is among the game's best assists (although its effectiveness varies heavily based on the point character calling it). It is one of a handful of assists that reaches superjump height, has very strong tracking and is difficult for many characters to punish. Strider still offers a lot of support in the backline while waiting to enter the stage as an anchor character.
Notable Synergies
Doctor Doom: Doom may have the easiest time of any character in the game converting off a hard knockdown, such as after an air Vajra assist hit. His fantastic mobility and OTG-hitting normals (5M and 5H) allow Doom to easily convert a Vajra hit into a full, highly-damaging combo. Doom also makes an excellent battery for Strider, as he has several meter-positive combo routes as well as reliable TAC infinites to rapidly build up meter for Strider to spend. If Strider ever gets snapped in, Doom has several DHC options to allow him to escape at the cost of 2 bars.
Players to Watch: Dead X Pride, (Vergil/Doom/Strider), Artiztikk (Vergil, Doom, Strider), Clockw0rk (Vergil/Doom/Strider), Marvelo (Nova/Doom or Strange/Strider), Static Alpha (C.Viper/Doom/Strider)
C.Viper Viper is a fast, aggressive point character who sometimes struggles against airborne zoning as her main long-range options are ground-only. Strider serves as an excellent check on characters like Doom, Magneto and Modok who would otherwise be able to run away from Viper by escaping to superjump height. Thanks to jump-cancel Seismo, Viper can easily convert the hard knockdown from a Vajra hit into a full combo.
Players to Watch: Static Alpha (Viper/Doom/Strider), Crazy Joe (Viper/Dante/Strider)
Nova: Nova can run simple but effective strike/throw mixups by calling Vajra and jumping up to an opponent to attempt a throw. Opponents who mash throw break risk getting caught by Strider. Nova has multiple solo pickup options after a hard knockdown, and gets great damage off of both a throw and a Vajra hit.
Players to Watch: Marvelo (Nova/Doom or Strange/Strider), Amongst_Shadows (Nova/Strange/Strider)
Dante: Jam Session is an excellent assist that provides a large amount of total lockdown. It pairs well with Strider's Vajra assist, as one of Vajra's biggest weaknesses is the lack of blockstun, which can be compensated for by also running Jam Session. Dante himself also makes good use of Vajra assist, as he can solo pickup using either 3HH or 623M. Like with Doom, Dante has access to Devil Trigger as a safe DHC option to rescue Strider if he gets snapped in early.
Players to Watch: Richard Nguyen (Zero/Dante/Strider), Marvelo (Nova/Dante/Strider), Terry Bogard (Morrigan/Dante/Strider), Crazy Joe (Viper/Dante/Strider), YourSenpai(Vergil/Dante/Strider)
Other Players to Watch: ask for Coach Arithmatic (Strider/MODOK/Rocket Raccoon)
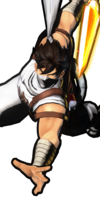
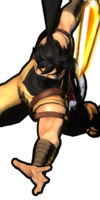
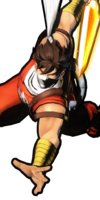
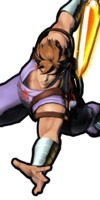
Alternate Colors
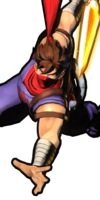
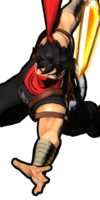
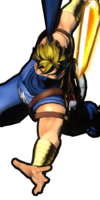
| Color 1 | Color 2 | Color 3 | Color 4 | Color 5 | Color 6 | Alt Color |
|---|---|---|---|---|---|---|
|
|
|
|
|
|
|
