Introduction
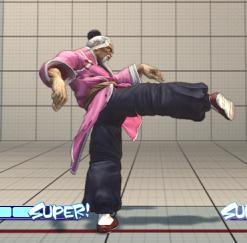
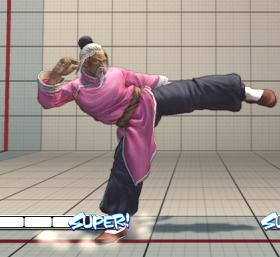
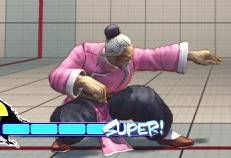
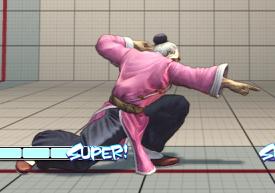
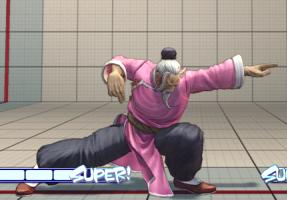
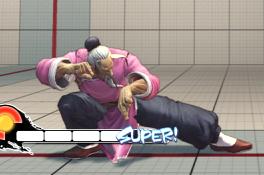
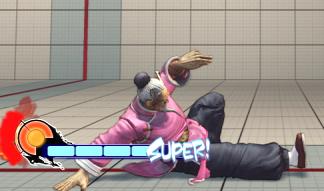
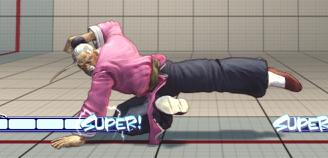
Gen is in an essence a character with a Swiss army knife of normals. He's centered around the the ability to switch stances have different moves from each stance, each with different properties and damage. In general his Mantis stance has quicker attacks while his crane stance has the stronger attacks. Knowing how to chain these two stances into one blended fighting style can make Gen into an imposing fighter with answer for most situations. The following Wiki will familiarize you with his move set, his stances and his combos, in an effort to build a solid foundation of his gameplay. His learning curve is steep, but once you get the hang of things Gen has the ability to be a very good character.
Move Analysis
Walking/Jumping
Walking and jumping with Gen are different from other character because each stance has unique properties to ALL of Gen's attributes.
When walking in each stance Gen actually gains speed in the Crane stance. This is currently rated as one of the fastest walks in the game alongside other speed characters such as Chun Li. His crane stance on the other hand does not fall off that much but falls more along the middle tier of walkers in the game.
As per Mnszyk the following data pertains to Gen's walking speed using the Training level as a base, and the squares as a unit of measure
The units are arbitrary, essentially the number of training squares moved in an arbitrary amount of time.
Gen Mantis - 10
Gen Crane - 12
Sagat - 6
Ryu - 10
Chun-Li - ~13
Not that this is particularly useful for anything the way frame data is, but Gen basically gets a 20% speed increase in crane stance.
Normal Moves
Mantis
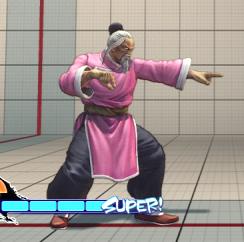 S.LP -30 damage, 50 stun, 20 super
This is a standard fare quick hitting move for Gen that can be used to tick throw or build combos. It loses 1 frame on block unlike it's crouching version, but it's not so readily punishable either. The the range is standard as well, likely usages will revolve around using it in combos or hit verification. JiBbo has pointed out that when jumping in, using s.lp instead of c.lp will actually remove the ability for some shotos to break up your combo strings with a random dp (c.lp actually is a 4 frame move, while s.lp is a 3 frame move).
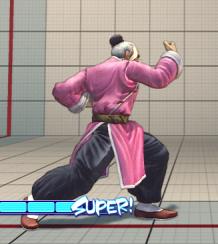 S.MP - 70 damage (80 if far away), 100 stun, 40 super
Gen's s.mp has so interesting properties when compared to other people's s.mp. It causes 23 hit stun, gen gains 2 frames on block, on hit 6, and is only a frame slower in startup in comparison to s.lp (while having 2 more active frames). This move can be canceled into c.lk in crane (as shown in the trials) and can be linked with s.hp in mantis and c.hp because of the hit stun. Excellent in combos, a good way to start combos, this punch is useful for gen in that it is quick and causes so much stun. Linking in combos may be problematic depending on the normal used before hand.
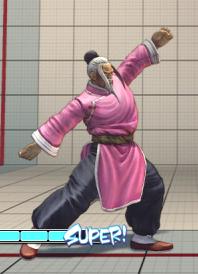 S.HP - 80*60 damage, 200 stun, 60 super
The double hitting fierce punch is an important move in Gen's repertoire. Since it hits twice you can break focus and Super Armor moves by just throwing this out (for example, Balrog's ex dash punches can be stuffed on reaction by this move). Another interesting property about this move is that the second hit can be canceled for one of Gen's Mantis special moves (super as well). Overall this is a good move to combo into, and provides an up close option to enter a combo string into hands.
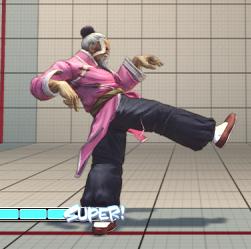 S.LK - 30 damage, 50 stun, 20 super
Standard fare s.lk, but with 5 frames of startup and -3 on block, this move is not to be thrown out lightly. Range is nice but use right now is questionable, and should be avoided. Use s.mk instead same startup, better range)
Back dashing still leaves you at range for mantis standing forward. Can punish whiffed command grabs (gief, abel) on wake-up with back-dash standing forward > super.
Mantis standing forward hits damn near half screen and is bufferable. It's fast on startup and recovers fairly well. I believe this is his best mid-screen zoning tool. If you're familiar with 3rd strike Dudley Roundhouse into EX - MGB, you can treat it the same way. If you're in range where standing forward would normally whiff but would counter hit anything that sticks out (Ie tiger shot, character moving to advance), you can buffer the super and it will activate only on hit. I believe when used properly this can be a devastating tool and allow for zoning mind games. If you have super and ultra stocked, nobody is gonna want to get hit by that and lose well over half life.
J.LP
J.MP
J.HP
Crane
S.LP
S.MP
S.HP
S.LK
S.MK
S.HK
C.LP
C.MP
C.HP
C.LK
C.MK
C.HK
J.LP
J.MP
J.HP
Normal Throws
This is one of the few sections that Gen does not need to have split up due to his stances, there is however a difference when kara throwing (more on that later)
Gen's back and forward throws are essentially the best tools when initiating the cross-up mixup game that you may get yourself into (although you should NOT abuse this) The have identical stats, and both garner you 40 points of super meter, but one thing you should take of note is that the forward grab takes off 10 points more (important if it is going to the be the last grab you attempt in a match)
When it comes to Kara throwing (i.e. the practice of canceling a normal attack to increase the range of a throw, there are some interesting things to take of note from each stance
As per Ouroborus
Gen can kara throw with:
Mantis: MP, MK, HP, HK
Crane: MP, HP, HK.
Additionally Shin Shitenshuu states
Gen's Mantis style st. mk has a Kara throw distance of 2-1/2 to almost 3 squares in training mode! I assume it's because of st. mk having a quick start-up.
The usages of this are varied, with a good kara throw Gen can enter block strings and from a distance attempt throws that don't seem possible some kara throw setups are (credit to JiBbo):
- Mantis
Low Jab, (Kara)
Low Short, Low Jab (Kara)
Low Jab, Low Jab (walk foward slightly) (Kara)
Command Normals
STANCE CHANGE PPP OR KKK (depending on which style you are in)
This is probably the biggest and most important of his special moves, and is what gen is built around. With the stance switch he is able to fluidly move from one move set to another giving him 12 normals and 4 specials. Usage of this stance switch is an important fundamental in Gen's game, and with that you should know what this move entails. When gen performs his stance change from a neutral, walking or crouching position, it will cost him 5 frames to do so. This is important to note because during this period he is vulnerable! While dashing, jumping or performing a move (normal or special), no frames are made to show the transition, so he is allowed to stance change without the 5 frame penalty. Some things to note: -normals from either stance can then transition to a normal in another stance as long as the stance change is buffered during the first normal (example: s.mp in mantis into c.lk crane) -you can begin your charges in mantis for crane specials
From Crane Stance Shakudan
Performed by pressing HK>HK in the air, this move has the following properties:
-It is mash-able, so you don't have to wait for the second hit
-adds 50 more damage
-has juggle properties to go into Ryukoha or Jyakoha
-both hits are over head and both must be blocked High
Somethings to note about the Shakudan
-It can be used after a successful wall dive
-Can be used to beat a lot of air to airs (although Gen has other normals that would be preferable)
-On a standing opponent that knows about shakudan, you actually can play mixup games by going into grabs and lows off of one hit of the shakudan (Credit to JiBbo)
-To complete the Shakudan, your opponent must be slightly under your outstreched leg so that both hits will land
Focus / Saving Attack
Mantis
The father reaching of his two focus attacks, this one is also slower than the Crane focus atack. Due to it's great range, you will be able to hit this focus attack from about half screen. There are some floating hitbox pixels in front of Gen so be aware of these as well (because you will be able to sometimes hit them when it appears you are out of range)
Crane
Less range, quicker to hit, the Crane focus attack should be the least used of the two.
Special Moves
Mantis
Hyarukeno - Whiffing hands constantly builds meter really fast. Liable to get punished if not careful, even full screen (i.e. Bison Knee Press)After hands Gen can link standing forward on hit. EX hands leaves shorter distance.
EX - Hyarukeno
Gekiro - Gen's main anti air, this move has STRIKE INVINCIBILITY and can be
EX - Gekiro -
Crane
Oga - Wall dive kicks can be safe at certain ranges. EX-Oga is invincible on startup. Using it as a wake-up option is ideal for getting away from grapple characters and escaping the corner. ABUSE THIS.The direction changes which the opponent has to block falling kick, depending on which wall you jump on. Try it!
Super Move
Mantis
Zanei- Damage 20x5*80 Startup 6 frames
Easily the best Super of the 2, the Zanei is not only the more damaging of the 2, but the fact that it can be linked afterwards, can be linked off normals, makes it the more useful pick of the two.
This super can be linked off a multitude of things including -Wall Dive -s.mk mantis -c.lk crane -c.mk mantis
and so on (refer to the above combo section for more openers into this special just hit ctrl+F for Zanei)
Not only does it have good damage and can be linked, but each different version of the Zanei has special properties (all have armor break properties)
Invincible
LP 1~11 - 11 Frames of invincibility make the best in short situations, covers the least distance but has a big period in case you see a close range fireball (extremely close)
MP 1~8 - The medium variety has 8 frames but has good distance, and generally is the one that is to be used most of the time.
HP 1~5 - The most distance but with only 5 frames of invincibility, This is best used to punish ultras that leave too much distance to be covered, or things such as air fireballs from Akuma (refer to the character specific strategies for more potential usages)
Crane
Jakoha Damage 300, 0 Startup
The weaker of the two supers, the main point for this super is the fact that it is an anti-air grab. When your opponent is at the peak of his/her jump you can perform the movement to super them. You can also cancel it off of the gekiro and c.lk in crane.
Each version of the Jakoha covers different distances as well (like the Mantis super)
LK 1~12- The most invincibility was given to the grab that has the least range. More often than not this is the one you will use when you use this super.
MK 1~8 - The mk version travels at angle that is baout 20 degrees in the given direction. Less invincibilty but more ground covered.
HK 1~5 - The final one has the most range, almost at a 30-35 degrees from where Gen currently is positioned.
You should more often than not look for the PPP super due to it's recovery, combo ability, and damage, but if you have a super stock and you want to finish the fight off in a flashy way, then by all means...
Ultra Move
Mantis
Crane
The Basics
Combos
When it comes to combos, Gen has plenty of options due to his multiple stances. In this section we will review the best possible punishes and also some of the more flashy combos that gen has in his arsenal. Note that this section is broken up by stance, and by combo starter, that way if you would like to know what kind of combos Gen has that start from a s.lp in mantis, then you can refer to that section specifically.
Mantis Combos
S.LP
S.LP>S.LP - 30 damage, out of kara distance
S.LP>S.LP>S.LP - 84 damage, out of kara distance
S.LP>S.LP>S.LK
S.LP>S.LK
S.LP>S.LK>S.LP
S.LP>C.LP
S.LP>C.LP>S.MP
S.LP>C.LP>S.MP>S.HP
S.LP>C.LP>S.MP>S.HP (cancel first hit)>Hyakurenko
S.LP>C.LP>S.MP>S.HP (cancel first hit)>Gekiro
S.MP
S.HP
S.LK
S.MK
1. S.MK xx HP Hands thread on shoryuken
Difficult move to pull off when you first attempt it, this move is debatable as to whether it is Bread and Butter combo or not. Why should you use it? Well first off it gives the best poke gen has (rangewise) more to work with, here are a little stats from the shoryuken thread, credit goes to Mnszyk for the data
This is why you should do Medium Kick xx Fierce Hands:
Medium Kick 70 damage, 100 stun, 40 meter Your opponent will be pushed ~4 training room squares in the other direction High priority, long range Block Advantage: -2 Hit Advantage: +2
Medium Kick xx Fierce Hands 134 damage, 180 stun, 110 meter Your opponent will be pushed ~18 training room squares in the other direction. At max range, you'll advance yourself about ~9 squares for free. Armor Breaking - Your opponent will never be able to safely focus your pokes if you do this Block Advantage: +5 Hit Advantage: +9
Almost doubled damage and stun, the ability to push your opponent around like crazy, nearly triple meter, armor breaking, and high safety ... what would you weigh that against?
As you can see, there are plenty of reasons to MKhands. It allows you to effectively zone and punish whiffs that Gen normally could not. He can also use it to punish things like (list is still growing) Blocked Shoto Roundhouse Close Range tiger shot Close range fireball (Shotos) MP or HP Headbutt (Honda) Punish rekkas (fei or abel) early rolls by abel wheel kicks (abel) TAP (Balrog)
This combo alone gives him the ability to increase his zone, whereas most of the combos gen has have to be up in your face, this lets him start the pressure and force the issue with opponent.
So How do you do it?
There are many different manners of doing it, first thing is first let's break down how the combo works
MK itself has 5 frames of startup which is not too bad at all, but the active frames are only 3, so within these active frames you have to get hands out. At first this may seem like a daunting task because....
Hands requires 5 P button inputs to activate. So in practice you can hit any P button 5 times and Hands will come out (this must be done rapidly). What aids this process is that any combination of P buttons can be used and the 5th one will determine the strength of the hands (with HP being the best). Being able to piano the inputs would be the best method here but there are different ways to get MK hands to come out:
SecretCharacter's method My method of doing it is; Lp+Mk, then piano from right to left, Fp, Mp, Lp, Fp (Notice how he uses LP+MK, when this input is done the higher button input will come out and the lower button input will still be recorded)
Kruldar's Method video links Piano Method Slide Method
B izm's method LP+MKx2, LP MP HP
SLVRNBLK's method Same as the piano but with 2 fingers on mp (middle and ring) so that you can drum that button twice
FROM MK hands you can also cancel the first three hits of hands to another mk hands or mk super. The mk hands to mk hands works in block strings as well
S.MK>Zan'ei
S.MK>Zan'ei>LP RESET - Setups up crossup by either double dashing to the other side or dashing in front of him
S.MK>Zan'ei>Gekiro
S.MK>Zan'ei>Gekiro>Ryuhoka
S.MK>Zan'ei>Hyarukeno .. .knocks them full screen away
S.MK>Zan'ei>c.HP
S.MK>Zan'ei>C.RH
S.MK>Zan'ei>Ryuhoka
S.MK>Zan'ei>Zetsuei
S.HK
C.LP
C.MP
C.HP
C.LK
C.MK
C.HK
J.LP
J.MP
J.HP
Hyakurenkou
EX Hyakurenkou
Gekirou/Waterfall Kick
Gekirou > Ryukoha (Ultra) Damage ?
To perform this combo you first need to enter the Gekirou with the MK version or above (to be verified) and maintain your opponent ABOVE Gen. Normally you would want him to remain level with Gen but in this case we are not going to complete the Gekirou. Instead we will finish a couple of hits into it (Best way is just to mash mercilessly when you want to end it) and at which time Gen will drop before his opponent. When he lands you should already have quarter circle buffered, just enter one more and KKK and the Ultra should connect. Practice is neccesary to get a visual of where your opponent should be, this should be used as an AA finisher due to the poor amount of damage this combo does.
EX Gekirou/Waterfall Kick
No combos can be started with this move.
Crane Combos
S.LP
S.MP
No combos can be started with this move.
S.HP
No combos can be started with this move.
S.LK
S.MK
S.HK
No combos can be started with this move.
C.LP
C.MP
C.HP
No combos can be started with this move.
C.LK
C.MK
C.HK
No combos can be started with this move.
J.LP
J.MP
J.HP
Jasen/Roll attack
EX Jasen/Roll attack
Oga/Wall JumpDive
EX Oga/Wall JumpDive
Focus Combos
Strategy
Matchups
The following section will review Gen's matchup's versus the entire cast. Here you will find general strategy of fighting Offensive, Defensive, and Balanced characters. After that you will find a list of moves the character has and what you can punish those with.
Abel
Tougeki March 09 Matchup = 5-5
JiBbo's view on the matchup: 6-4
Offensive -
Defensive -
Punishes -
Random Notes:
Abel can't be Abel against Gen, so long as Gen has meter. Abel's air defense is poor, whereas Gen's air offense is ridiculous.
- If he knocks you down, his mixup becomes null so long as you have meter. Just ex-oga to the wall on the opposite side. This has worked for me 100% of the time, and until I see an Abel do something about it I'm gonna keep whoring it out.
Akuma
Tougeki March 09 Matchup = 5-5
JiBbo's view on the matchup: 6-4 Gen
Offensive -
Defensive -
Punishes -
Random Notes: Akuma does good damage but he also takes bad damage. What makes Akuma good is that he can he has a strong rush down and a strong run away game. Gen neutralizes his jump fireball as soon as he has ultra/super... and if akuma gets hit by either the round is basically over for him.
- Jump back fireballs? ULTRA or SUPER = FREE.
Balrog (Boxer)
Tougeki March 09 Matchup = 5-5
JiBbo's view on the matchup: 5-5
Offensive -
Defensive -
Punishes -
Random Notes:
- Crouching fierce beats dash punches at certain ranges.
Blanka
Tougeki March 09 Matchup = 5-5
JiBbo's view on the matchup: 5-5
Offensive -
Defensive -
Punishes -
Random Notes:
- Blanka Ball is punishable by super and ultra on block.
- Mantis crouching fierce beats Blanka ball, but is difficult to beat on reaction unless it is at least half screen. However, whiffing crouching fierce in front of Blanka is not a great idea.
- Focus the rainbow ball.
- After the first hit of his ultra (the ground pound) you can punish him with Gekiro, both Supers and Ultras.
Cammy
Tougeki March 09 Matchup = 5-5
Offensive -
Defensive -
Punishes -
Random Notes:
Chun Li
Tougeki March 09 Matchup = 5-5
Offensive -
Defensive -
Punishes -
Random Notes:
Crimson Viper
Tougeki March 09 Matchup = 5-5
Offensive -
Defensive -
Punishes -
Random Notes:
Dan
Tougeki March 09 Matchup = 5-5
Offensive -
Defensive -
Punishes -
Random Notes:
Dhalsim
Tougeki March 09 Matchup = 5-5
JiBbo's view on the matchup: 6-4 Gen
Offensive -
Defensive -
Punishes -
Random Notes:
I haven't really played good dhalsims offline, but with online experience and having played a little dhalsim myself I have a basic concept of how things go. Basically I believe Gen's damage potential beats Dhalsim's poking and zoning games.
- Get in his face and press lots of buttons. Seriously. Have you ever played Dhalsim? He wants to keep you away for a reason.
- Wall dives keep him in check. You don't even have to do them, just Oga to the wall. Oh you landed onto a fireball? So what? Not much harm done. Do whatever you can to get in his face. I really believe you should just go nuts in this match up.
- If you don't feel confident with yoga fire pressure, just neutral jump or back jump and hit forward. If he teleports toward you to chase his fireball, you'll probably hit him while you're in the air.
- FDC his long range normals to close the distance. You don't have to attack him if you're not sure if you can hit him. Just get closer and be alert on defense.
E. Honda
Tougeki March 09 Matchup = 5-5 JiBbo's view on the matchup: 6-4 Honda
Offensive -
Defensive -
This version of Honda is dangerous in the fact that Gen does not have a projectile to pressure Honda to move forward (Honda's biggest weakness). Most of the times this Honda will sit and maintain a crouched charge, in which he can unleash Sumo Splash and his best move the Sumo Headbutt. Additionally his normals such as S.HK or his S.HP cover good room and take off a GREAT deal of damage. In short Gen has to be careful because Honda can capitalize off so little. When approaching him you should take note MK hands is an excellent way to pressure punished whiffed normals or LP Headbutts that fall short. Your main tactic should be to be extremely careful and punish what you can to build a Health lead and then force Honda to come to you. When jumping in you should beware of three things, J.neutral HP, Headbutt and Splash. Honda does not really have great anti airs but things like EX Headbutt have enough invincibility to either punish or get away from your jump in shenanigans. When trying to jump in, ideally you want to cross him up to hit the back part of his sumo headbutts (except the EX version) and to clear his sumo splashes. Also make sure to punish mp or hp headbutts with mk hands if he chooses to throw them out (it may require a brief walk forward). Tick throwing is also your friend once you see a blocked crossup. In general you must be extremely patient, as is the case with most Charge characters, your best friend is to wait and bait after gaining a good health lead.
Punishes:
Random Notes: - This may be one of the hardest matchups for Gen. I really think you have to sit on a life lead, especially if the honda player is abusing ex-headbutts defensively. Do whatever it takes to get him to lose his charge. Build meter with hands from across the screen. Oga over him on wake up. Whatever. You're really better off not fighting a good honda head to head.
- All normal headbutts are reversable by super and ultra on block. EX Headbutt, however, is not punishable on block.
- Headbutts can be punished by walk-up mantis standing forward.
- You can baseball headbutts with standing roundhouse, crouching jab and crouching fierce. I don't recommend doing this, because the timing is strict and headbutts HURT on counter hit. Also, they're reversable by standing forward on block, so may as well block.
- EX Headbutt it is possible to jump back roundhouse x2 and ultra, catching him on your way down.
- Abuse crossups on wake-up. Yes I said it. Crossing up Honda will take away his charge in both directions, if he wants to block it. I swear you can probably get away with mantis jumping forward > standing jab > low jab > repeat all day. Well not really... but use it when you have the chance. Chances are, that he will ex-sumo smash because crossing him up will not lose his down charge.
- All Butt Drops are invincible on startup for at least 9 frames, so crossing him up when he has meter is not always safe to do. However, I don't believe it is safe for him to whiff. On block, butt drops are at worst -3. I have some testing to do.
El Fuerte
Tougeki March 09 Matchup = 5-5
Offensive -
Defensive -
Punishes -
Random Notes:
Fei Long
Tougeki March 09 Matchup = 5-5
Offensive -
Defensive -
Punishes -
Random Notes:
Gen
Tougeki March 09 Matchup = 5-5
Offensive -
Defensive -
Punishes -
Random Notes:
Gouken
Tougeki March 09 Matchup = 5-5
Offensive -
Defensive -
Punishes -
Random Notes:
Guile
Tougeki March 09 Matchup = 5-5
Offensive -
Defensive -
Punishes -
Random Notes:
Ken
Tougeki March 09 Matchup = 5-5
Offensive -
Defensive -
Punishes -
Random Notes:
M. Bison (Dictator)
Tougeki March 09 Matchup = 5-5
Offensive -
Defensive -
Punishes -
Random Notes:
Rose
Tougeki March 09 Matchup = 5-5
Offensive -
Defensive -
Punishes -
Random Notes:
Rufus
Tougeki March 09 Matchup = 5-5
JiBbo's view on the matchup: 5-5
Offensive -
Defensive -
Punishes -
Random Notes:
- Blocked EX Messiah kicks. Gekiro beats the overhead finish but trades with the low finish. PPP Ultra beats overhead and low finish, but the timing on the overhead is slightly slower and if you ultra too early you will go under. Same with PPP super. KKK super/ultra beats only the high finish.
- Crouching fierce is punishable on block by super and ultra, so long as you're close enough.
- Gekiro is awesome against Rufus since it is strike invincible and Rufus is always in the air trying to pressure. As with any dp move on wake-up, it is risky to do so but I believe it is important to understand that it is an option on wake-up.
Ryu
Tougeki March 09 Matchup = 5-5 Offensive -
Defensive -
Punishes -
Random Notes:
Sagat
Tougeki March 09 Matchup = 7-3 Sagat
JiBbo's view on the matchup: 6-4 Sagat
Offensive -
Defensive -
Punishes -
Random Notes:
- HE'S TALL. Crane jumping forward is pretty goofy on him.
- Mantis Crouching fierce beats his whiffed far standing roundhouse.
- You can punish a blocked tiger upper with jumping crane roundhouse x2 > ultra.
- If Sagat ever throws a high tiger shot while you're about less than half screen away, Sweeeeeeeeeep.
- I think strong PPP super is the best for punishing tiger shots. It has the most rounded amount of invinciblity frames and speed to punish more consistently.
- If you're full screen and try to punish tiger shots with ultra, Sagat will recover in time to gaurd it. You need to be about one dash from full screen to be in range to punish tiger shots with ultra.
- You must WTF kick him EVERYTIME he jumps in at the right range. This will stop his ground movement significantly and bound him to tiger knees, kara > whatever.
- When Sagat has less that 30% life compared to you having 50+%... you know what he wants. Don't tunnel vision.
Sakura
Tougeki March 09 Matchup = 5-5
Offensive -
Defensive -
Punishes -
Random Notes:
Seth
Tougeki March 09 Matchup = 7-3
Offensive -
Defensive -
Punishes -
Random Notes:
Vega (Claw)
Tougeki March 09 Matchup = 5-5
Offensive -
Defensive -
Punishes -
Random Notes:
Zangief
Tougeki March 09 Matchup = 5-5
JiBbo's view on the matchup: 5-5
Offensive -
Defensive -
Punishes -
Random Notes:
I think this is even only because of the Gief randomness factor. Eventually with more experience, I will probably think that Gen will have the advantage, but for now I think this match is even solely because random spd factor. If Gief didn't have that, there should be no reason a good Gen would lose ever.
- PPP Lariot is punishable full screen by super and ultra. KKK however, isn't.
- If you reversal super his PPP lariat, he'll beat you everytime it seems. I solved this by back dashing and then supering. The timing is somewhat tight, but I'm not getting hit out of it doing the super this way. You can also just wait a moment and then super, but backdashing gives you the correct timing everytime. Also, the ultra doesn't get hit as a reversal. If you don't have either, just sweep.
- EX-Oga if Gief is on top of you. Same as Abel.
- Neutral jump roundhouse beats his jump-in attempts. If you're not able to jump up time, gauge the distance of his jump and AA with crane low roundhouse or mantis low fierce. Back dash as a safe option if you're uncertain. Also, if you can react to Geif jumping you can a2a him with crane roundhouse. Most of Gief's normals are just to slow on startup to beat Gen in the air even if he jumps before you.
- Standing forward zones him out.
Frame Data
| MANTIS STYLE | |||||||||||||||
|---|---|---|---|---|---|---|---|---|---|---|---|---|---|---|---|
| Frames | Frames | Frames of | Frames of | Super Meter | Cancel | Ability | |||||||||
| Move Name | Damage | Stun | Startup | Active | Recovery | Total | On Block | On Hit | Block Stun | Hit Stun | Gain | Chain | Special | Super | Notes |
| LP | 30 | 50 | 3 | 3 | 10 | 15 | -1 | +1 | 11 | 13 | 20 | O | O | O | - |
| MP | 70 | 100 | 4 | 5 | 14 | 22 | +2 | +6 | 20 | 23 | 40 | X | O | O | Far version 80 damage |
| HP | 80*60 | 100*100 | 5 | 2*4 | ?? | 27 | -3 | +1 | ?? | ?? | 40*20 | X | O | O | Forces stand, 1st hit cancellable |
| LK | 30 | 50 | 5 | 4 | 13 | 21 | -3 | -2 | 13 | 14 | 20 | X | X | O | Far version 40 damage |
| MK | 70 | 100 | 5 | 3 | 20 | 27 | -2 | +2 | 20 | 24 | 40 | X | O | O | - |
| HK | 110 | 200 | 8 | 2 | 20 | 29 | -4 | 0 | 17 | 21 | 60 | X | X | X | - |
| crouch LP | 30 | 50 | 4 | 2 | 8 | 13 | +1 | +4 | 10 | 13 | 20 | O | O | O | - |
| crouch MP | 70 | 100 | 7 | 4 | 11 | 21 | -1 | +1 | 13 | 15 | 40 | X | O | O | - |
| crouch HP | 100 | 200 | 7 | 4 | 19 | 29 | -5 | -1 | 17 | 21 | 60 | X | X | X | - |
| crouch LK | 30 | 50 | 5 | 4 | 8 | 16 | -1 | +2 | 10 | 13 | 20 | O | O | O | Low attack |
| crouch MK | 70 | 100 | 7 | 3 | 17 | 26 | +1 | +3 | 20 | 22 | 40 | X | O | O | Low attack |
| crouch HK | 100 | 200 | 8 | 3 | 28 | 38 | -13 | D | 17 | - | 60 | X | X | X | Low attack, cannot fast recover |
| Jump LP | 40 | 50 | 4 | 7 | - | - | - | - | - | - | 20 | - | - | - | - |
| Jump MP | 70 | 100 | 5 | 5 | - | - | - | - | - | - | 40 | - | - | - | - |
| Jump HP | 100 | 200 | 6 | 4 | - | - | - | - | - | - | 60 | - | - | - | - |
| Jump LK | 40 | 50 | 5 | 8 | - | - | - | - | - | - | 20 | - | - | - | Mid attack, straight jump 30 damage |
| Jump MK | 70 | 100 | 4 | 8 | - | - | - | - | - | - | 40 | - | - | - | Mid attack, straight jump 80 damage |
| Jump HK | 100 | 200 | 6 | 3 | - | - | - | - | - | - | 60 | - | - | - | - |
| Focus Attack LVL 1 | 60 | 100 | 21 | 2 | 35 | 57 | -21 | -21 | 15 | 15 | 20 | - | - | - | - |
| Focus attack LVL 2 | 90 | 150 | 18+11 | 2 | 35 | 65 | -15 | D | 21 | - | 40 | - | - | - | - |
| Focus attack LVL 3 | 150 | 200 | 65 | 2 | 35 | 101 | D | D | - | - | 60 | - | - | - | - |
| Forward Throw | 130 | 100 | 3 | 2 | 20 | 24 | - | D | - | - | 40 | - | - | - | Throw range 0.95 |
| Back Throw | 120 | 100 | 3 | 2 | 20 | 24 | - | D | - | - | 40 | - | - | - | Throw range 1.05 |
| Hyakurenkou LP | 16xn | 20xn | 5 | 3xn | 48 | +5 | +9 | 30/10xn | X | X | O | Armor break, (translate) | |||
| Hyakurenkou MP | 16xn | 20xn | 4 | 3xn | 41 | +5 | +9 | 30/10xn | X | X | O | Armor break, (translate) | |||
| Hyakurenkou HP | 16xn | 20xn | 4 | 3xn | 40 | +5 | +9 | 30/10xn | X | X | O | Armor break, (translate) | |||
| Hyakurenkou EX | 16xn | 20xn | 4 | 3xn | 40 | +5 | +9 | 0/0 | X | X | O | Armor break, (translate) | |||
| Gekirou LK | 100*10x4*20 | 80*10x5 | 7 | 15 | 45 | -35 | D | 30(20)/40*20x5 | X | X | X | 1~4f strike invincible, (translate) | |||
| Gekirou MK | 100*10x5*40 | 80*10x6 | 7 | 15 | 46 | -35 | D | 30(20)/40*20x6 | X | X | X | 1~4f strike invincible, (translate) | |||
| Gekirou HK | 100*10x6*90 | 80*10x6*80 | 7 | 15 | 47 | -35 | D | 30(20)/40*20x7 | X | X | X | 1~4f strike invincible, (translate) | |||
| Gekirou EX | 100*10x6*90 | 80*10x6*80 | 7 | 15 | 47 | -35 | D | 0/0 | X | X | X | 1~4f strike invincible | |||
| Zanei | 20x5*80 | 0 | 6 | 16 | 87 | -61 | D | 0/0 | - | - | - | Invincible LP 1~11/MP 1~8/HP 1~5, Armor break, (translate) | |||
| Zetsuei | 15x12*225 | 0 | 11 | 11 | 78 | -49 | D | 0/0 | - | - | - | 1~10f invincible, Armor break | |||
| Switch Style | - | - | - | - | - | - | - | - | - | - | - | - | |||
| CRANE STYLE | |||||||||||||||
| Frames | Frames of | Super Meter | Cancel | Ability | |||||||||||
| Move Name | Damage | Stun | Startup | Active | Recovery | Total | On Guard | On Hit | Block Stun | Hit Stun | Gain | Chain | Special | Super | Notes |
| LP | 30 | 50 | 4 | 3 | 12 | 18 | -3 | -1 | 11 | 13 | 20 | O | O | O | - |
| MP | 50*50 | 50*50 | 23 | 2*2 | ?? | 48 | -3 | +1 | ?? | ?? | 20*20 | X | X | X | Mid attack |
| HP | 100*100 | 100*100 | 22 | 2*4 | ?? | 46 | -5 | 0 | ?? | ?? | 40*20 | X | X | X | 2nd hit forces stand, 1st hit low attack |
| LK | 40 | 50 | 8 | 4 | 12 | 23 | -2 | -1 | 13 | 14 | 20 | X | X | O | - |
| MK | 80 | 100 | 7 | 4 | 22 | 32 | -5 | -1 | 20 | 24 | 40 | X | X | X | - |
| HK | 80*70 | 100*100 | 5 | 3*2 | ?? | 40 | -6 | -2 | ?? | ?? | 40*20 | X | X | X | - |
| crouch LP | 40 | 50 | 4 | 2 | 11 | 16 | -2 | +1 | 10 | 13 | 20 | X | O | O | - |
| crouch MP | 90 | 100 | 5 | 4 | 20 | 28 | -10 | -8 | 13 | 15 | 40 | X | O | O | - |
| crouch HP | 180 | 300 | 21 | 5 | 16 | 41 | -3 | +1 | 17 | 21 | 60 | X | X | X | - |
| crouch LK | 30 | 50 | 5 | 6 | 16 | 26 | -8 | D | 13 | - | 20 | X | X | O | Low attack, (translate) |
| crouch MK | 80 | 100 | 8 | 3 | 21 | 31 | -3 | -1 | 20 | 22 | 40 | X | X | O | Low attack, (translate) |
| crouch HK | 120 | 150 | 5 | 2 | 37 | 43 | -21 | -17 | 17 | 21 | 60 | X | X | X | - |
| Jump LP | 50 | 50 | 4 | 7 | - | - | - | - | - | - | 20 | - | - | - | - |
| Jump MP | 90 | 100 | 4 | 5 | - | - | - | - | - | - | 40 | - | - | - | straight jump 80 damage |
| Jump HP | 110 | 200 | 5 | 7 | - | - | - | - | - | - | 60 | - | - | - | straight jump 100 damage |
| Jump LK | 40 | 50 | 4 | 9 | - | - | - | - | - | - | 20 | - | - | - | - |
| Jump MK | 80 | 100 | 4 | 8 | - | - | - | - | - | - | 40 | - | - | - | straight jump 90 damage |
| Jump HK | 100 | 200 | 6 | 3 | - | - | - | - | - | - | 60 | - | - | - | - |
| Shakudan(overhead) | 50 | 50 | - | 2 | - | - | - | 20 | - | - | - | Pursuit property | |||
| Focus Attack LVL 1 | 60 | 100 | 21 | 2 | 35 | 57 | -21 | -21 | 15 | 15 | 20 | - | - | - | - |
| Focus attack LVL 2 | 90 | 150 | 18+11 | 2 | 35 | 65 | -15 | D | 21 | - | 40 | - | - | - | - |
| Focus attack LVL 3 | 150 | 200 | 65 | 2 | 35 | 101 | D | D | - | - | 60 | - | - | - | - |
| Forward Throw | 130 | 100 | 3 | 2 | 20 | 24 | - | D | - | - | 40 | - | - | - | Throw range 0.95 |
| Back Throw | 120 | 100 | 3 | 2 | 20 | 24 | - | D | - | - | 40 | - | - | - | Throw range 1.05 |
| Jasen LP | 20*20*80 | 50*50*50 | 6 | 3*1*4 | 43 | -3 | +1 | 35/10x2*30 | X | X | O | 1~3 hits cancellable | |||
| Jasen MP | 20x3*80 | 50x4 | 6 | 3*3*1*4 | 59 | -3 | +1 | 35/10x3*30 | X | X | O | 1~3 hits cancellable | |||
| Jasen HP | 20x4*80 | 50x5 | 6 | 3x3*1*4 | 74 | -3 | +1 | 35/10x4*30 | X | X | O | 1~3 hits cancellable | |||
| Jasen EX | 20x4*80 | 50x5 | 6 | 3x3*1*4 | 74 | -3 | +1 | 0/0 | X | X | O | 1~45f projectile invincible, 1~5 hits cancellable | |||
| Oga | - | - | - | - | - | - | - | 0/0 | - | - | - | - | |||
| Oga EX | - | - | - | - | - | - | - | 0/0 | - | - | - | (translate) | |||
| Oga Stop | - | - | - | - | - | - | - | 0/0 | - | - | - | - | |||
| Oga Close | 100 | 150 | 15 | Until ground | - | - | D | 30/90 | - | - | - | (translate), Armor break | |||
| Oga Far | 100 | 150 | 14 | Until ground | - | - | D | 30/90 | - | - | - | (translate), Armor break | |||
| Oga Ceiling | - | - | - | - | - | - | - | 0/0 | - | - | - | - | |||
| Oga Ceiling Drop | 100 | 150 | 11 | Until ground | - | - | D | 30/90 | - | - | - | (translate), Armor break | |||
| Oga Super Close | 100 | 150 | 11 | Until ground | - | - | D | 30/90 | - | - | - | (translate), Armor break | |||
| Jakoha | 300 | 0 | 11 | 19 | 31 | 60 | - | D | 0/0 | - | - | - | Invincible LK 1~12/MK 1~8/HK 1~5, Pursuit property | ||
| Ryukoha | 150*248 | 0 | 11 | 8 | 53 | 71 | - | D | 0/0 | - | - | - | 1~11f invincible, Pursuit property | ||
| Switch Style | - | - | - | - | - | - | - | - | - | - | - | - | |||
| Frames | Frames | Frames of | Frames of | Super Meter | Cancel | Ability | |||||||||
| Move Name | Damage | Stun | Startup | Active | Recovery | Total | On Block | On Hit | Block Stun | Hit Stun | Gain | Chain | Special | Super | Notes |
The 1 frame discrepancy you see between Startup+Active+Recovery and Total is because when it says a move has 4 frames startup, it really has 3 frames startup and hits on frame 4. It was written this way so you don't have to do any math to figure out what frame a move first hits on.
