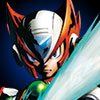

Zero
In a nutshell
Zero is a tricky character with a large variety of moves that are complimented by different assists in different ways. He can play keepaway with his buster arm and Hadangeki slashes, or he can try to get behind you with his teleports and his Raikousen. Dedicated Zero players will find that their teammates are the key to a decisive victory against any opponent.
Video Walkthrough
Move List
Assist Types
Name
Type
Damage
Special Properties
Cross-Over Combination
Normal Moves
Standing Light
35,000
Crouching Light
30,000
Standing Medium
53,000
Crouching Medium
56,000
Standing Heavy
25,000 x3
Crouching Heavy
70,000
Shippuga
30,000 x3
Standing Special
80,000
Jumping Light
air 
33,000
Jumping Medium
air 
55,000
Jumping Heavy
air 
25,000 x 3
Cancels only into Jumping Special or TAC
Reverse Jumping Heavy
air  +
+ 
25,000 x 3
Jumping Special
air 
75,000
Down TAC
60,000
Up TAC
60,000
Side TAC
b/f +  during air combo
38,000
Special Moves
Hadangeki
70,000 
70,000
104,500 (55,000 x 2)
70,000
104,500 (55,000 x 2)
Ryuenjin
70,000 
81,200 (30,000 x 3)
102,300 (25,000 x 5)
81,200 (30,000 x 3)
102,300 (25,000 x 5)
Raikousen
102,300 (25,000 x 5)
Nocancel
Sentsuizan
fake 
60,000
80,000
60,000
80,000
Hienkyaku
Hyper Zero Blaster
hold  then release
Lvl 1: 40,000
Lvl 2: 70,000
Lvl3: 108,300 (40,000 x 3)
Lvl 2: 70,000
Lvl3: 108,300 (40,000 x 3)
Lvl 3 grants
Hyper Moves
Rekkoha
269,300 (15,000 x 30)
Damage scales by 0.96
Sougenmu
Grants shadow attack that mimics Zero's attacks
Genmu Zero
350,000
Apprentice Combos
Strategy
Tips and Tricks
- Zero can activate Sougenmu and then tag out to pause the timer and keep the shadow clone on his assists. This is particularly useful with his projectile assist.
- Calling an assist and teleporting through your opponent is as effective as ever with Zero. Now, you can include his Raikousen into this tactic as an alternate way of getting behind your opponent.
- The recovery on Sougenmu is pretty quick, so you can DHC a mistimed super into this to keep the team safe and let Zero start some offense.
- You can charge the Zero Blaster with any attack. While charging, you can switch buttons. For instance, while holding Light, start holding Heavy and then release Light. You'll still be charging the blaster.
- While Zero doesn't have any ground moves that hit overhead, jumping with an instant air-dash followed by air
 is super-fast, an easy hit-confirm into massive combos and will cross-up if you know your spacing. The cross-up version is particularly useful when coupled with assists (especially low-hitting ones) as it makes it really hard for the opponent to block and as such is often a great way to start a round.
 - Zero's crouching
 is a great normal. The startup leaves a bit to be desired, but it does more damage than his standing
  and has insane priority. This is the move that annoys everyone in footsies because Zero can just throw it out and win most poke wars, following up with standing
  for a mad easy hit-confirm into massive combos. Because these normals are so good, it's generally the prevalent consensus for players who like to keep a mega buster charge to use the
  button to do so.
