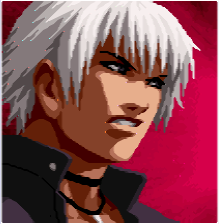
| Kを超えるもの, He Who Surpasses K | |
|---|---|
| Tier Placement | S |
| Ratio Cost (Sarsen) | 6 Points (8 Points Leader) of 15 |
| Ratio Cost (China) | 11 Points of 20 |
| Best Position | Anchor |
| Good LDM? | Amazing |
| Crouch Height | Medium |
| Wakeup Speed | 24 Frames |
| Stun Value | 900 |
Introduction
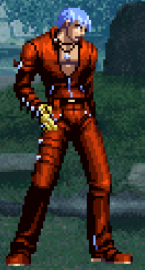
「 K' 」
| Strengths | Weaknesses |
|---|---|
|
|
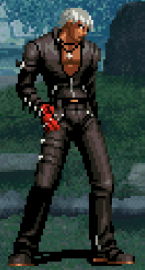
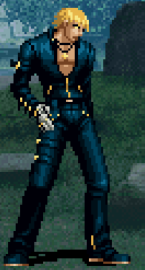
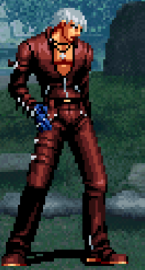
Colors
|
|
|
|
Movelist
UNDER CONSTRUCTION
Normals
Far Normals
| Damage | Counter Dmg | Guard | Guard Damage | Damage Scaling | Stun | CH Stun | Meter | Cancel Properties | Startup | Active | Recovery | Total | Hit Advantage | Block Advantage | Invulnerability |
|---|---|---|---|---|---|---|---|---|---|---|---|---|---|---|---|
| - | - | Mid | - | - | - | - | - | - | - | - | - | - | - | - | - |
Close Range Normals
| Damage | Counter Dmg | Guard | Guard Damage | Damage Scaling | Stun | CH Stun | Meter | Cancel Properties | Startup | Active | Recovery | Total | Hit Advantage | Block Advantage | Invulnerability |
|---|---|---|---|---|---|---|---|---|---|---|---|---|---|---|---|
| - | - | Mid | - | - | - | - | - | - | - | - | - | - | - | - | - |
Crouching Normals
| Damage | Counter Dmg | Guard | Guard Damage | Damage Scaling | Stun | CH Stun | Meter | Cancel Properties | Startup | Active | Recovery | Total | Hit Advantage | Block Advantage | Invulnerability |
|---|---|---|---|---|---|---|---|---|---|---|---|---|---|---|---|
| - | - | Mid | - | - | - | - | - | - | - | - | - | - | - | - | - |
| Damage | Counter Dmg | Guard | Guard Damage | Damage Scaling | Stun | CH Stun | Meter | Cancel Properties | Startup | Active | Recovery | Total | Hit Advantage | Block Advantage | Invulnerability |
|---|---|---|---|---|---|---|---|---|---|---|---|---|---|---|---|
| - | - | Low | - | - | - | - | - | - | - | - | - | - | - | - | - |
| Damage | Counter Dmg | Guard | Guard Damage | Damage Scaling | Stun | CH Stun | Meter | Cancel Properties | Startup | Active | Recovery | Total | Hit Advantage | Block Advantage | Invulnerability |
|---|---|---|---|---|---|---|---|---|---|---|---|---|---|---|---|
| - | - | Mid | - | - | - | - | - | None | - | - | - | - | - | - | - |
| Damage | Counter Dmg | Guard | Guard Damage | Damage Scaling | Stun | CH Stun | Meter | Cancel Properties | Startup | Active | Recovery | Total | Hit Advantage | Block Advantage | Invulnerability |
|---|---|---|---|---|---|---|---|---|---|---|---|---|---|---|---|
| - | - | Low | - | - | - | - | - | - | - | - | - | - | KD | - | - |
Neutral Jumping Normals
| Damage | Counter Dmg | Guard | Guard Damage | Damage Scaling | Stun | CH Stun | Meter | Cancel Properties | Startup | Active | Recovery | Total | Hit Advantage | Block Advantage | Invulnerability |
|---|---|---|---|---|---|---|---|---|---|---|---|---|---|---|---|
| - | - | Overhead | - | - | - | - | - | - | - | - | - | - | - | - | - |
Diagonal Jump Normals
| Damage | Counter Dmg | Guard | Guard Damage | Damage Scaling | Stun | CH Stun | Meter | Cancel Properties | Startup | Active | Recovery | Total | Hit Advantage | Block Advantage | Invulnerability |
|---|---|---|---|---|---|---|---|---|---|---|---|---|---|---|---|
| - | - | Overhead | - | - | - | - | - | - | - | - | - | - | - | - | - |
Throws
| Damage | Counter Dmg | Guard | Guard Damage | Damage Scaling | Stun | CH Stun | Meter | Cancel Properties | Startup | Active | Recovery | Total | Hit Advantage | Block Advantage | Invulnerability |
|---|---|---|---|---|---|---|---|---|---|---|---|---|---|---|---|
| - | - | Throw | - | - | - | - | - | - | - | - | - | - | - | - | - |
MSA
| Damage | Counter Dmg | Guard | Guard Damage | Damage Scaling | Stun | CH Stun | Meter | Cancel Properties | Startup | Active | Recovery | Total | Hit Advantage | Block Advantage | Invulnerability |
|---|---|---|---|---|---|---|---|---|---|---|---|---|---|---|---|
| - | - | Mid | - | - | - | - | - | - | - | - | - | - | - | - | Strike/Projectile |
| Damage | Counter Dmg | Guard | Guard Damage | Damage Scaling | Stun | CH Stun | Meter | Cancel Properties | Startup | Active | Recovery | Total | Hit Advantage | Block Advantage | Invulnerability |
|---|---|---|---|---|---|---|---|---|---|---|---|---|---|---|---|
| - | - | Mid | - | - | - | - | - | - | - | - | - | - | - | - | - |
Command Normals
| Damage | Counter Dmg | Guard | Guard Damage | Damage Scaling | Stun | CH Stun | Meter | Cancel Properties | Startup | Active | Recovery | Total | Hit Advantage | Block Advantage | Invulnerability |
|---|---|---|---|---|---|---|---|---|---|---|---|---|---|---|---|
| - | - | Mid | - | - | - | - | - | - | - | - | - | - | - | - | - |
Special Moves
| Version | Damage | Counter Dmg | Guard | Guard Damage | Damage Scaling | Stun | CH Stun | Meter | Cancel Properties | Startup | Active | Recovery | Total | Hit Advantage | Block Advantage | Invulnerability |
|---|---|---|---|---|---|---|---|---|---|---|---|---|---|---|---|---|
| Minute Spike | - | - | - | - | - | - | - | - | - | - | - | - | - | - | - | - |
| Version | Damage | Counter Dmg | Guard | Guard Damage | Damage Scaling | Stun | CH Stun | Meter | Cancel Properties | Startup | Active | Recovery | Total | Hit Advantage | Block Advantage | Invulnerability |
| Narrow Spike | - | - | - | - | - | - | - | - | - | - | - | - | - | - | - | - |
| ||||||||||||||||
| Damage | Counter Dmg | Guard | Guard Damage | Damage Scaling | Stun | CH Stun | Meter | Cancel Properties | Startup | Active | Recovery | Total | Hit Advantage | Block Advantage | Invulnerability |
|---|---|---|---|---|---|---|---|---|---|---|---|---|---|---|---|
| - | - | - | - | - | - | - | - | - | - | - | - | - | - | - | - |
Super Moves
| Damage | Counter Dmg | Guard | Guard Damage | Damage Scaling | Stun | CH Stun | Meter | Cancel Properties | Startup | Active | Recovery | Total | Hit Advantage | Block Advantage | Invulnerability |
|---|---|---|---|---|---|---|---|---|---|---|---|---|---|---|---|
| - | - | - | - | - | - | - | - | - | - | - | - | - | - | - | - |
LDM
| Damage | Counter Dmg | Guard | Guard Damage | Damage Scaling | Stun | CH Stun | Meter | Cancel Properties | Startup | Active | Recovery | Total | Hit Advantage | Block Advantage | Invulnerability |
|---|---|---|---|---|---|---|---|---|---|---|---|---|---|---|---|
| - | - | - | - | - | - | - | - | - | - | - | - | - | - | - | - |
Combos
General notes:
- when landing from a standing MSA, remember to do the bnb's rather than the MSA ender (some Bnb's are more favored than others in this secnario)
- for the most part, counterwire combos are dependant on where you landed the move.
BnBs:
- (cl.A, cr.A), f.B, qcb K
- basic light confirm.
- (cl.B, cl.B)/(cr.B, cr.A), f.B, qcb K
- low light confirms. cr.B, cr.A does more dmg but the link itself is strict.
- (cl.A, cr.A)/(cl.B, cl.B)/(cr.B, cr.A), qcfx2 K
- light confirms into qcfx2 K. Deals good dmg and not that hard to confirm into.
- cl.C(2), f+B, qcb+K
- abit of an inconsistent combo as f.B can sometimes whiff randomly. don't even bother.
- (j.X,) cl.C (1)/cr.C/cl.D, qcf.P~f.B/dp.C~f.K/qcb K
- meterless bnb's. qcb K does the most dmg and offers a ton of wall travel, While dp.C grants a hard KND. qcf.P~f.B is the safest option out of them but also deals the least amount of dmg compared to the others, it also can whiff if you impliment a jump-in due to the pushback.
- cl.C (1)/cr.C/cl.D, f.A, qcb K~qcb K (SC)qcfx2 K)
- The opponent will almost always drop out of the 2nd DP (in qcfx2 K) since the 1st DP launches the opponent too high for the 2nd DP to connect.
- (j.X,) cl.C (1)/cr.C/cl.D, (f.A), qcfx2 P/qcfx2 K/LDM
- basic heavy starter into super. qcfx2 and LDM (if you have K' as leader) are the preferred supers to combo into since they generally deal more dmg than qcfx2 P. If you have k' as your leader then this is your go-to metered MSA ender (standing) midscreen. If you implimented f.A, always go for qcfx2 P on crouching opponents as Chain Drive will not connect after cl.C(1) f+A & Heaven’s Gate whiffs against crouchers (due to pushback).
- f.A(CH), dp C/qcf P~f.B/dpx2 K
- counterwire combo.
- f.A(CH), qcf A~f.D, qcb K
- this combo is really dependant on where you hit f.A as the timming for getting qcf A~f.D can change.
(corner)
- cl.C (1)/cr.C/cl.D, f.A, qcf A~f.D, dp A / qcb K
- when using ein-trigger in corner combos, keep in mind you have to delay the follow-up by alot in order to get dp A or qcb K after. doing it too early will make you recover too slow to follow-up with anything and doing it late will cause the f.D to not come out.
- (j.X,) cl.C (1)/cr.C, qcf A~f.D, qcfx2 P/qcfx2 K
- corner combo into ethier super. Both deal about the same dmg.
- (j.X,) cl.C (1)/cr.C, qcf A~f.D, dp A (SC)qcfx2 K)
- same as the combo above but instead your adding a SC into qcfx2 K.
- (j.X,) cr.C, qcf A~f.D, LDM
- combo into LDM. Deals monsterous dmg and is defiantly one of K's go-to MSA enders on a standing opponent. Requires some timming, especially with timming the LDM after qcf A~f.D.
- (while opponent is downed) qcf A (whiff)~b.B, qcfx2 K
- unblockable set-up into super. see the strategy part for more information about the unblockable
MSA Starters:
- (J.X), st.A, MSA
- K's st.A gives enough + frames to combo into MSA. Takes some time to get use to the link.
(corner)
- (j.X,), cl.C(1)/ cr.C/ cl.D, qcf A~f.D, MSA
- F.A (CH), MSA
- Counterwire into MSA.
- (while opponent is downed) qcf A (whiff)~b.B, MSA
- MSA starter involving the unblockable. see the strategy part for more information about the unblockable
MSA Enders:
- (After landing from MSA), dp A
Strategy
K's Unblockable Ein Trigger
A very well known glitch in KOF2003 is k's ability to make ein trigger unblockable and is one of the reasons he's considered top tier in this game. The way it works is upon knocking down the opponent, do Ein Trigger (preferrability A) as a meaty into blackout (qcf P~b.K). The game will consider K' not to be attacking, and until Blackout ends, Ein Trigger will turn unblockable (Example: https://youtu.be/TzewMHWmQZk). While the timing isn’t strict, doing it too early means the active frames will end before your opponent starts to get up, and doing it too late means your opponent will be able to block it. To make this easier, try to look for the standing frames of the opponents wake-up, that way you can time the set-up more reliably. It's usually best to use A ein trigger since it launches the opponent as they wake up which not only allows K' to combo into his qcfx2 K DM or a MSA, but it also allows you to rinse and repeat the situation, creating a looping okizeme of unblockable ein triggers(A).
The downside to this is that The qcf A~b.K is tech rollable. This makes the oki less effective outside of the corner, as you can escape the loop. You can circumvent this with qcf A~b.D to put yourself behind your opponent as the tech roll with a frame advantage. If they don’t tech roll, you can use the unblockable again until they do. It’s still unblockable as the opponent tech rolls or wakes up, and in the corner it’s inescapable. Once you have the opponent in the corner, use qcf A~b.B, for a quicker recovery as well as a combo into MSA.
Match Up
UNDER CONSTRUCTION
| - Ash:
| - Duo Lon:
| - Shen:
| - Terry:
| - Joe:
| - Tizoc:
| - Ryo:
| - Robert:
| - Yuri:
| - Kim:
| - Chang:
| - Jhun:
| - Leona:
| - Ralf:
| - Clark:
| - Gato:
| - Billy:
| - Yamazaki:
| - King:
| - Mai:
| - Mary:
| - Benimaru:
| - Shingo:
| - Daimon:
| - Athena:
| - Hinako:
| - Malin:
| - K':
| - Maxima:
| - Whip:
| - Kyo:
| - Chizuru:
| - KUSANAGI:
| - Maki:
| - Adelheid:
| - Mukai:
