Introduction
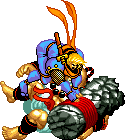
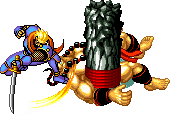
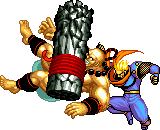
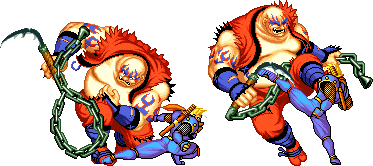
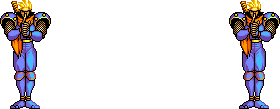
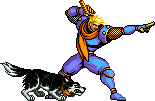
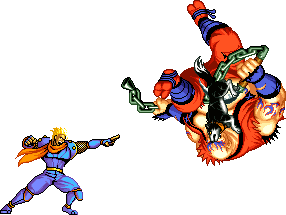
He’s a fighter who wants to be a lover, and he’s out to spread peace and justice at the tip of a sword. He’s Galford D. Weller, American ninja! If you enjoy versatility, speed, and mobility without being a stereotypical featherweight pixie, Galford is for you.
Story
According to SNK cannon (gathered from the series intros, endings, etc., including SSRPG), Galford is the nice guy son of an American Sheriff killed in the line of duty. He left his family behind and became a sailor, whereupon his journeys he heard stories of ninja and their amazing exploits. Intrigued, Galford sought out Hanzo (yes, that one). Hazno did not train Galford personally, but gave him and Eathquake (huh?!) both permission to learn under the wife of his master.
Earthquake quit in short order, though obviously not before learning quite a few tricks. Galford stuck with it and now uses his skills to defend “justice”. His sword, “Sword of Justice” is forged using metal from the bullet that killed his father, though at the time of SSII Galford does not yet know who the killer is (this is a little nebulous – the timeline of Samurai Shodown Sen is not well established and might even be a retcon).
Also unexplained is where Galford acquired his control of electricity - later games make it pretty clear his electrical powers are an innate ability and not tied to specific techniques like Hanzo’s various fire based attacks.
At some point during all of this, Galford met and went ga-ga over Nakoruru, but whether or not she returns his feelings, her duties to nature usually prevent anything coming of it. Sieger’s SSII ending also implies he, Galford, Wan-Fu, and Charlotte are all allies. It’s probably safe to say Gaflord is on friendly terms with all the non-evil cast members.
Moves List
Normal Moves
Standing
Standing, Close
Standing Unarmed

|
All three versions use the same animation with subtle differences in speed and reach. Each comes out fast with solid range and top tier damage output compared to other characters' punches. |
Standing Unarmed, Close
Crouching
Crouching, Close
Crouching Unarmed
Jump
Jump, Horizontal
Jump Unarmed
Throws
All of Galford’s throws cause the same amount of damage but vary wildly in their positioning effects, so chose the one that suits your strategy best. There does appear to be a throw priority in place, and if so Galford must be high on it. I find playing as Galford or Hanzo I can consistently throw my opponents in situations most other characters can’t. Feel free to toss most of the cast about at your leisure.
Special Moves
Super Moves
The Basics
On paper Galford can appear quite overpowered. First of all he's arguably the most mobile character in the game: Fast walk, teleports, wall jumps, and insane dash speed. Add to that an excellent normal move set, abusive bread and butter attacks, some scary single strike damage, and even a no whiff command throw. Sounds almost ban worthy right? Here's the catch - getting the most out Galford requires absolute perfect timing and twitch mastery over some extremely complex move commands. Most characters in SSII have one or two high execution commands they don't really need. Galford is loaded with them, and they are all essential to his game. Otherwise he has no way to effectively defend himself under pressure and his offense becomes one dimensional. Furthermore Galford most of Galford's shenanigans an easy counter strategy. It's the ability to blend them together and switch up on the fly that makes Galford dangerous. In other words, start practicing. You have more options at your disposal than anyone else, so use them! One minute you can get in their faces looking to land a big hit or grab, in the next instant you can switch to long range play throwing electricity and sending Poppy from every direction. Keep them guessing. Look for any opportunity to knock your opponent down, even if it costs you some life. Once mastered your mobility will allow you to dictate the distance and pace of the fight at all times.
Generally the one thing you want to avoid is getting into a war of attrition at footsie distance, but if this does happen Galford’s can play a decent poking game. ![]() is your main weapon and its a good one. Just don't stand there whoring it like the other buttons are broken, mix things up! Standing
is your main weapon and its a good one. Just don't stand there whoring it like the other buttons are broken, mix things up! Standing ![]() is perfect for stuffing incoming pokes on reaction and lacks any block recoil. Crouching
is perfect for stuffing incoming pokes on reaction and lacks any block recoil. Crouching ![]() will drop them in their tracks from quite a distance and set them up perfectly for a rush trap.
will drop them in their tracks from quite a distance and set them up perfectly for a rush trap.
But again, why sit around trading if you don't have to? Mobility is your trump card. Use it to break their pattern and set them up for that nasty ![]() slash or Strike Heads. Once you have them afraid of those, bring on Poppy!
slash or Strike Heads. Once you have them afraid of those, bring on Poppy!
Advanced Strategy
Rush Trap
This nasty trap more or less boils down to a wake up game, and once going is a nightmare for your opponent. Here’s how it works:
- Knock your opponent down. Doesn’t really matter how.
- Time a dashing low
 or Strike Heads to hit just as your opponent gets up.
 - If they guess Strike Heads and try to escape, the crouching
 hits for heavy damage, dizzy chance and a knockdown. Back to step 2. If they anticipate the
  with a block and you use Strike Heads, they go for a ride. Back to step 2.
 - If they guess right and block the
 , cancel into Rush Dog or Plasma Blade for safe chip damage. Optionally rush in immediately after for Strike Heads and then its right back to step 2.
Once started, the best your opponent can do is escape to a neutral position. If they guess wrong, a big portion of their lifebar is gone and the cycle continues. Go for it every chance you get. It’s this trap that makes trading a hit to land Machine Gun Dog well worth the sacrifice. Once she has your opponent down, start this trap and make them pay dearly.
Defense
One of Galford’s main weaknesses is defense. Galford has no instant hitting reversal when pinned down. On top of that his wide stance is a big target for cross up attempts, and in SSII Galford lacks any singularly reliable way to control overhead space. You'll need to pick one of the following depending on the situation:
Air
- Replica Dog. Perform this on reaction and Poppy will meet them halfway in the air.
- Crouching
 . That odd hitbox makes this a dangerous but highly rewarding counter for cross-up attempts.
 - Forward Dash. Galford's insanely quick dash allows him to run under a lot of air attacks with ample time to turn and punish.
- Air Throw. Galford’s air throw is often forgotten since they are so rare in this game. Combine that with its supreme priority and you have yourself a nasty surprise air defense. Risky, but effective.
- Jumping
 . Galford’s jumping
  hits well above him and can be used to snuff many air to ground moves on reaction.
Ground
- Machine Gun Dog. Trade for this - Unless you get dizzied or killed, it’s in your favor.
- Replica Attack. If you have the reflexes it's a humiliating and devastating counter against heavy slashes and expansion moves. If they see it coming, you’re going to get hurt, but at least you can bounce out of the corner and there’s not a thing they can do to keep you there.
 . Low or high, this button can break a lot of frame traps and stuff other quick moves.
Disarmed
Galford just happens to be the best unarmed fighter in the game. He's the only character in SSII who keeps his full special move set while disarmed, and his basic unarmed attacks are excellent. Still, you carry that sword for a reason right? Let’s go over some of the losses.
- Jumping
 . It’s a damage dealer, but your
  handles air to ground just as well and you have plenty of other tools for air to air.
 - The devastating close
 . This isn’t a huge issue because it’s more of an opportunity punisher, and you still have Strike Heads to make up for it.
 - Crouching
 . This is easily your biggest loss. Crouching
  and
and  are fine, but they just don't have the same output.
 - The rush trap. It’s still possible to do (use
 ), but not nearly as effective.
Otherwise you should be fine. Galford’s kicks and unarmed strikes are top-notch, second only to Wan-Fu. Combined together they cover all the same angles as your weapon attacks. All of your specials are available with minimal change (only the Replica Attacks are modified and it’s a trivial difference). In fact you gain a couple of cancels and pressure combos not possible while armed, not to mention a new ![]() throw perfect for cornering. If you must have that sword back, Shadow Copy is your ticket.
throw perfect for cornering. If you must have that sword back, Shadow Copy is your ticket.
Otherwise don’t risk yourself running away or flitting about trying to recover a lost weapon. Just get in there and get busy. You can mix standing ![]() ,
, ![]() and
and ![]() , to poke, but close quarters is really where you want to be. Use close
, to poke, but close quarters is really where you want to be. Use close ![]() cancels to keep pressure on, and take em’ for a ride with Strike Heads at every opportunity.
cancels to keep pressure on, and take em’ for a ride with Strike Heads at every opportunity.
Match-ups
Vs. Cham Cham:
This little girl is either a big pain or easy meat. First, forget Poppy and Plasma Blades. She’ll chuck her boomerang right through any of them and lay you flat. Her next threat is Tobi Hikkaki (leaping scratch). It hurts quite a bit and has some serious priority. If you can do Rear Replica on reaction (you did practice that yes?) you can vanish right out from under it and catch her on the recoil for free. Otherwise don’t panic – just dash forward to make her whiff, turn around and give her a standing ![]() . If you’re extra daring, you can also jump up and air throw her right out of it. Pretty risky, but will send a clear message. If she dares try a normal jump in, air throw her without hesitation - she’s especially susceptible to it.
. If you’re extra daring, you can also jump up and air throw her right out of it. Pretty risky, but will send a clear message. If she dares try a normal jump in, air throw her without hesitation - she’s especially susceptible to it.
The last two threats are her super quick ![]() slashes and crouching
slashes and crouching ![]() (slide kick). The later has a long recovery but insane range. Good players will do this at max range where you can’t counter. Both are nullified with good blocking and judicious use of your own crouching kicks. Don’t worry too much about Paku Paku. His monkey shines are weak for the most part. If you are low on life and she tries to finish you with a meaty Paku Gaburu, Replica out on wake up. If you're fast enough you'll teleport right through it and possibly catch her sleeping. It's a gamble since she'll probably block the Replica and kill you anyway, but that's still better than just sitting there and losing for sure on block damage. You shouldn't ever be in this situation to begin with though. Once you get past her effective but limited bag of tricks, Cham-Cham dies horribly to Galford.
(slide kick). The later has a long recovery but insane range. Good players will do this at max range where you can’t counter. Both are nullified with good blocking and judicious use of your own crouching kicks. Don’t worry too much about Paku Paku. His monkey shines are weak for the most part. If you are low on life and she tries to finish you with a meaty Paku Gaburu, Replica out on wake up. If you're fast enough you'll teleport right through it and possibly catch her sleeping. It's a gamble since she'll probably block the Replica and kill you anyway, but that's still better than just sitting there and losing for sure on block damage. You shouldn't ever be in this situation to begin with though. Once you get past her effective but limited bag of tricks, Cham-Cham dies horribly to Galford.
Vs. Charlotte:
Here’s a tough one. Charlotte can’t keep up with you damage wise, but her poking game is second only to Ukyo. In other words it’s a lot better than yours, and she can keep you out all day. Don’t try jumping in with ![]() , she’ll use her hopping kicks to send you packing. If you can get her to commit to a Splash Fountain and send Poppy for a bite, the fight is over. Good Charlotte players rarely fall for that though. The secret is to beat her at her own game (frustration). Start chucking Plasma Blades and Rush Dog at her from just out of jump range. She might try to respond with her triangle projectile, but it’s easily nullified with Rush Dog (take one for the team Poppy!) or better yet ducked by laying down. Keep this up until she dies, the timer runs out or she gets sick of being chipped to death and comes after you.
, she’ll use her hopping kicks to send you packing. If you can get her to commit to a Splash Fountain and send Poppy for a bite, the fight is over. Good Charlotte players rarely fall for that though. The secret is to beat her at her own game (frustration). Start chucking Plasma Blades and Rush Dog at her from just out of jump range. She might try to respond with her triangle projectile, but it’s easily nullified with Rush Dog (take one for the team Poppy!) or better yet ducked by laying down. Keep this up until she dies, the timer runs out or she gets sick of being chipped to death and comes after you.
Now the real fight begins. You have the advantage once she goes offensive, but don’t underestimate her. Switch to Machine Gun Dog, but don’t go for the rush trap. For whatever reason Charlotte is a bit harder to catch with Strike Heads than other characters so the rush trap loses a bit of its shine on her. Stick to the release combo instead. Cross her up if you can with a meaty jumping ![]() – it beats her kicks and uppercut startup. If you hit, keep up the pressure. If not, get out of poking range and start wearing her down with projectile wars again. The most patient player wins this matchup.
– it beats her kicks and uppercut startup. If you hit, keep up the pressure. If not, get out of poking range and start wearing her down with projectile wars again. The most patient player wins this matchup.
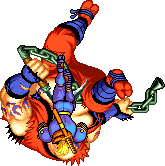
Vs. Earthquake:
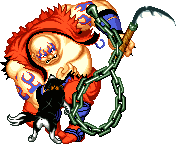
Earthquake’s size nullifies your air throw and… that’s about it in his favor. Otherwise he’s a huge target and highly susceptible to the rush trap. Earthquake players love to abuse their crouch ![]() , and for good reason. That thing rips a massive chunk off your life and reaches out to forever. Unfortunately for Earthquake, Poppy is less than impressed and can grab him out of it with ease. Use this to your advantage and bait him into sticking it out. Trade for Machine Gun Dog, start up the rush trap and this round is yours. Otherwise just don’t give him any breathing room and he’ll go down in no time.
, and for good reason. That thing rips a massive chunk off your life and reaches out to forever. Unfortunately for Earthquake, Poppy is less than impressed and can grab him out of it with ease. Use this to your advantage and bait him into sticking it out. Trade for Machine Gun Dog, start up the rush trap and this round is yours. Otherwise just don’t give him any breathing room and he’ll go down in no time.
Vs. Galford (self):
On paper mirror matches come down to execution, and Galford is a high execution character. Don’t forget though, this is SSII - spacing and timing are just as important. Obviously watch for some of the same tricks you might pull, but don’t expect the other Galford to play like you. Galford’s versatility means the other player could have a completely different approach.
CPU Galford is usually a pushover, but once in a while it will turn up the heat and then you’ll get a quick lesson on how vicious Galford can be. He’ll happily swarm all over you with a mix of teleports, Poppy, and his normal attacks – counter perfectly with specials, and then dash in to grab you out of nowhere when you least expect it. Or even when you do. Make note and try out some of these tactics for yourself. The CPU can read controls but is otherwise limited to the same rules you are. Everything it does is viable in human play with enough practice.
Vs. Gen-an:
Gen-an can be a problem, but he’s more than beatable. Poison puffs and a well-timed Slaughterhouse Tumble will ruin your day if you aren’t careful, and his normal moves are pretty good at zoning. He’s also quite proficient at grabbing out of nowhere with regular throws – just like you.
This is one of the few fights where the optimal place to be is mid-range. If he comes out of the gate with poison puffs, sacrifice Poppy and teleport to get where you want to be. Otherwise just walk right up and harass him with your standing ![]() at its maximum range. Throw in an occasional poppy or Plasma Blade cancel, and there won’t be much he can do. At that range you can easily stuff or block his slides, standing
at its maximum range. Throw in an occasional poppy or Plasma Blade cancel, and there won’t be much he can do. At that range you can easily stuff or block his slides, standing ![]() , and poison due to their start up. His own standing and crouching
, and poison due to their start up. His own standing and crouching ![]() are pretty effective, but your standing
are pretty effective, but your standing ![]() will still beat them. That leaves Slaughterhouse Tumble. He might try it to break through, but this risk is clearly in your favor. So long as you’re keeping a close eye on him you’ll have plenty of time to block it and make him pay. One electric toasted gremlin coming right up!
will still beat them. That leaves Slaughterhouse Tumble. He might try it to break through, but this risk is clearly in your favor. So long as you’re keeping a close eye on him you’ll have plenty of time to block it and make him pay. One electric toasted gremlin coming right up!
One last note - if you're an absolute maniac, it's possible to grab Gen-an right out of his Slaughterhouse Tumble with a running ![]() Strike Heads. I've managed to do this out of sheer luck a time or two, but maybe those of you with quicker fingers can take advantage. It's crazy risky but absolutely humiliating for the Gen-an player.
Strike Heads. I've managed to do this out of sheer luck a time or two, but maybe those of you with quicker fingers can take advantage. It's crazy risky but absolutely humiliating for the Gen-an player.
Vs. Genjuro:
Genjuro players want to intimidate you with his high damage, dizzy potential, and a bad attitude. Oh I'm so scared! That said, his moves do hurt, especially the standing ![]() , and he’s good at landing it, so don’t give him free shots. Genjuro is also the closest thing SSII has to a Ken/Ryu clone. His card projectile, uppercut, and Rekka slashes are mechanically analogous to Hadouken, Shoryuken, and Tatsumakisenpukayaku respectively. In a gimmick heavy game like SSII, the good old fashioned fireball and dragon punch strategy can wreak havoc. He also has some surprisingly effective kicks.
, and he’s good at landing it, so don’t give him free shots. Genjuro is also the closest thing SSII has to a Ken/Ryu clone. His card projectile, uppercut, and Rekka slashes are mechanically analogous to Hadouken, Shoryuken, and Tatsumakisenpukayaku respectively. In a gimmick heavy game like SSII, the good old fashioned fireball and dragon punch strategy can wreak havoc. He also has some surprisingly effective kicks.
There really isn’t a particular method to beating Genjuro. He doesn’t have any specific advantages against you, but his general strategy is pretty effective and he can end the round in a heartbeat. Best thing to do is stay on the move, bait him out and go for big hits of your own. He tends to leave himself open, so there should be ample opportunity for punishment. Genjuro also happens to be one of the characters vulnerable to extra hits while in Poppy’s clutches, meaning with the right setup you can end the round even faster than he can. Surprise, who’s the heavy hitter now? Overall you’ve got more tools to work with than he does, so just run a fairly mistake free fight and Genjuro should fall.
Vs. Hanzo:
This is an interesting matchup. Although the characters are head swaps, there are several subtle differences between Hanzo and Galford besides their special moves. Let’s look at how they stack up:
+Your close ![]() is much stronger than Hanzo’s.
is much stronger than Hanzo’s.
+You have Poppy and her “assist” factor.
+All of your moves are available unarmed (Hanzo loses his super).
-Hanzo’s ground projectile is harder to avoid, recovers more quickly, and knocks you down.
-Hanzo has an air projectile.
-As good as your Strike Heads is, Hanzo’s Mozo Otoshi is that much better. Landing just one of these can turn the whole round in his favor.
Essentially Galford is the everyman fighter whereas Hanzo is more focused on specific maneuvers. In game terms this means staying on the move and mixing it up. Hanzo will always be looking to nail you with the Mozo Otoshi - better Hanzo players will use it as an intimidation tool to control space. You have plenty of mobility to stay out, but then Hanzo gains a big advantage anyway by controlling the fight.
The best counter is to fight fire with fire. Practice, practice, and practice the Strike Heads it becomes second nature. You don’t really need to try and land it all the time so much as to make Hanzo aware he risks going for his own ride by getting close. It’s a win for you because the Mozo Otoshi is a much bigger part of Hanzo’s game. Now that you’ve got the upper hand all that remains is to make Hanzo proud by showing him a student has surpassed the master.
Vs. Haohmaru:
In my opinion this is by far your toughest fight. Yes, much tougher than Ukyo. It's not that Haohmaru is king of the mountain (though he IS effective in the right hands), he just happens to be a great counter character for Galford. He's certainly beatable, but you've got your hands full. First, don't worry about his over hyped standing ![]() , that's not his real weapon. The true threats are standing
, that's not his real weapon. The true threats are standing ![]() , crouching
, crouching ![]() , and crouching
, and crouching ![]() . The standing
. The standing ![]() is nearly quick as yours, but reaches twice as far, and does almost double the damage. The crouching
is nearly quick as yours, but reaches twice as far, and does almost double the damage. The crouching ![]() and
and ![]() are even worse. Both out prioritize all of your own crouching attacks, taking away a big part of Galford's game. In fact it's not a bad strategy on Haomaru's part to just sit around and hack at Galford's ankles until he drops or time runs out.
are even worse. Both out prioritize all of your own crouching attacks, taking away a big part of Galford's game. In fact it's not a bad strategy on Haomaru's part to just sit around and hack at Galford's ankles until he drops or time runs out.
To overcome these advantages you’ll want to stay right in his face or far out of range. The Senpuzan and Kogetsuzan are not really a threat. Both are too slow for him to play a Ryu/Ken style game and if he tries you’ve just found a rookie player who shouldn’t be hard to beat.
Believe it or not, your strongest attacks out damage his, but in actual matches nobody wins a slug fest with the big H, so don't go that route. Experienced Haohmaru players are just too good at landing their big hits more than you land yours, and they'll always be working to keep you in that middle zone where his range and power simply overwhelm you. It’s possible to win a strategic poking war, but one misstep and you’re well behind. And as mentioned before, his crouching priority over your moves eliminates many of your best attacks right out of the gate. Your entire goal should be to avoid this kind of play by alternating run away and rush down to keep him off balance.
When in run away mode, dance around and pepper him with Rush Dog and Plasma Blades. If you run into the rare player who bothers reflecting your Plasma Blades or smacking Poppy, try sneaking in a Machine Gun Dog. If you catch him, it's rush trap time! Once in a while he might chuck a Kogetsuzan or Secret Earthquake Slash to keep you honest, but so long as you stay alert neither of those should be a problem. If you are quick enough (and you should be), both leave him wide open for a Rear Replica Attack. Watch out though - if you're a split second too slow, he gets a standing ![]() counter hit for free, and you'll be very, VERY sorry.
counter hit for free, and you'll be very, VERY sorry.
To help get in when playing rush down style, bait him out and counter with Poppy. You might have to eat a ![]() or even an
or even an ![]() , but if she gets hold it's well worth the sacrifice. Rush trap and introduce him to the ground a few times - he won't be so cocky after a taste of that. If he gets away, switch back to run away mode to louse up his momentum and then rush him again at the first opportunity.
, but if she gets hold it's well worth the sacrifice. Rush trap and introduce him to the ground a few times - he won't be so cocky after a taste of that. If he gets away, switch back to run away mode to louse up his momentum and then rush him again at the first opportunity.
Vs. Jubei:
With his limited arsenal Jubei seems one dimensional, but he has all the right tools when played correctly. Jubei's projectile is one of the best, but he’s still no match for you at long range, so that’s the safest bet. You can also take him on head to head – but be aware it’s risky to do so. His close ![]() is fast on the draw, does even more damage than yours, and he can follow it up with a tight pressure game. His jump ins are also pretty effective due to their awkward trajectory. You’ll have to rely on a mistake free combo of low
is fast on the draw, does even more damage than yours, and he can follow it up with a tight pressure game. His jump ins are also pretty effective due to their awkward trajectory. You’ll have to rely on a mistake free combo of low ![]() , throwing game, and Strike Heads to overpower him.
, throwing game, and Strike Heads to overpower him.
Just like fighting Haohmaru, you want to stay out of poking range. Here his counters and rush combos come into play and you’ll be at a serious disadvantage. You have far superior mobility, so it’s your own fault if this happens consistently.
Vs. Kyoshiro:
You probably won’t see much of Kyoshiro, but that’s more to do with his look than anything else. He’s surprisingly evasive and comes equipped with IMO the best set of armed normal attacks in the game. They’re fast, long reaching and all do solid damage. His specials aren’t that inspiring, but they cover all his needs.
Bait and trade to get a bite from poppy is probably your best bet. Close in for the rush trap and you can finish him quickly. Otherwise rely on standing ![]() , crouching
, crouching ![]() , and your superior mobility.
, and your superior mobility.
Vs. Nakoruru:
Galford may be love-struck for our favorite Ainu priestess, but that doesn't make this match any more fair for her. Nak has her animal companion and speed. You have both those plus teleports, better moves, more reach, and twice the damage output. Nak relies on you making mistakes and then capitalizing with quick expansion attacks. Problem is she has no way to create openings on her own and lacks the reach or damage to play any reasonable poking game. All you have to do is make her come to you, avoid silly mistakes and it's all over. One thing to note is that she can quite easily run down all of Poppy’s attacks (and you) with her Mutsube rush specials. Might not win her the fight, but it’s pretty embarrassing to see both Galford and Poppy laid out in one stroke, so don’t get TOO careless.
After he kicks her butt clear across the Pacific, maybe she'll be impressed enough for that date after all. ;)
Vs. Nicotine:
Unless completely outmatched as a player, you have no business losing this one. Nicotine relies mostly on decent normal attacks and a ton of gimmicky projectiles. That would be great for him except they’re all slow and easily evaded or countered. Wear him down with your own projectiles or close in and take him to pieces. If you want to give him a chance, play the poking game. It’s your weakest area and you should still beat him without too much trouble. Just be aware of his size and the advantage it gives him for dodging attacks. Outside of that you’re a ninja in top condition with sharp blades, armor, magic, and a vicious dog. He’s a chest high old man with a stick, robe, and some tarot cards. Do the math and don’t embarrass yourself.
Vs. Seiger:
Seiger is kind of like a bigger Cham Cham, and you can fight him much the same way. His Blitz Jaeger covers a bigger space than Cham Cham’s Tobi Hikkaki and it’s even better at crossing you up, but it’s also just as vulnerable to the same counter strategies. In particular, it’s quite easy to air throw him out of it once you learn the spacing. His normal jump game also enjoys high priority and cross up potential, but your air throw can shut it down just as hard.
Once you’ve made it clear who owns the air, his options are severely limited. Seiger’s ground game is nothing outstanding, but be does have the best close ![]() in the game. It's fast enough that he doesn't have to set it up or wait for a punish opportunity. Just *smack* right up the side of your head out of nowhere for more than 1/4 life. When close in, nail him with Strike Heads or a regular throw and do it fast! Otherwise feel free to play the poke game with him. The standard mix of
in the game. It's fast enough that he doesn't have to set it up or wait for a punish opportunity. Just *smack* right up the side of your head out of nowhere for more than 1/4 life. When close in, nail him with Strike Heads or a regular throw and do it fast! Otherwise feel free to play the poke game with him. The standard mix of ![]() ,
, ![]() and
and ![]() will do fine, but Seiger's huge hit boxes also let you bring in standing
will do fine, but Seiger's huge hit boxes also let you bring in standing ![]() . Throw it on reaction when he sticks something out for a solid counter hit. Don’t worry too much about his Tigerkopf (command grab) – the CPU seems to land a lot of them but it’s rarely a factor in human matches. The Vulcan Cannon is a bit more threatening, but so long as you aren’t careless it’s no big deal. Most of his moves have a fair bit of recovery lag, so a scrubby but effective tactic is to wait for him to attack first, block and then rush him with Strike Heads.
. Throw it on reaction when he sticks something out for a solid counter hit. Don’t worry too much about his Tigerkopf (command grab) – the CPU seems to land a lot of them but it’s rarely a factor in human matches. The Vulcan Cannon is a bit more threatening, but so long as you aren’t careless it’s no big deal. Most of his moves have a fair bit of recovery lag, so a scrubby but effective tactic is to wait for him to attack first, block and then rush him with Strike Heads.
Vs. Ukyo:
Ukyo sits at the top of every tier list, so you’re going to be seeing a lot of him. He’s boring, methodical and obviously tough to beat, but you have the tools to take him down. So what makes Ukyo so dangerous? Well, he doesn’t have great mobility, damage output, combinations, or truly awe inspiring moves. Thing is, he doesn’t need any of that stuff. His strategy mostly revolves around wearing you down with Swallow Swipes which he can launch from any angle with almost no recovery. Outside of that he likes to harass you with his best in the cast poking game and top tier mix ups. But that’s just the start. Make even the slightest mistake and you eat a shadow slide attack. This last move is what really glues everything together and makes him the pain that he is. It’s ultra-fast to come out, hits hard and recovers quickly. Moreover only the last image is vulnerable to attack. Stick anything out in hopes of stopping him and you get nailed by the first image while the “real” Ukyo stays safe and sound. Now you’ve lost a chunk of life and have to fight your way back in range all over again. His basic moves cover every angle regardless of range, and as if all that wasn’t enough, Ukyo’s rage lasts longer than anyone else in the game.
The good news is that Galford (and Hanzo) have the perfect tool set to counter Ukyo. To take advantage though, you can't be timid, risk averse, or intimidated by his tier status. Watch advanced matches against Ukyo. The players who stick to “safe” poking patterns are inevitably worn down and killed – the players who go right after Ukyo are the ones who come out on top. Make use of jumping in and Shadow Copy to feel him out. Dash about the screen and use your speed so he won’t know which angle of Swallow Swipe to throw. Practice Rear Replica Attack until you can do it in your sleep – if you can perform it instantly on reaction to a Swallow Swipe, you’ll take away a huge part of his game. Ukyo Swallow Swipes, you drop on his head, and keep it up until he learns his lesson. If you can’t do that, try rolling in. With good timing you can close distance by rolling right under most of his Swallow Swipes. Not quite as hot as the Rear Replica, but it doesn’t require you to be a ninja on the controls.
Get Poppy involved. Walk right up to his optimal middle range and trade for the Machine Gun Dog if you must. Do whatever it takes to get a single knockdown. At that point, it’s HIS turn to feel the frustration. Start up the rush trap and don’t let up for a second - he doesn't have great answer once caught. Good as Ukyo is, his best shenanigans require a bit of space. Even up close he’s no pushover, but you’ll have the advantage with your greater damage output and maneuverability. Make the most of it and stick to him like glue. If does escape or push you away the pendulum swings in his direction and you're back to square one.
Given he's SSII's best poker and your poking game is mid card, it might sound insane to play footsie, but oddly enough you can do just that. There is a range just about two steps back where your crouching ![]() can hit and stuff nearly anything he sticks out. Ukyo’s only retort is his own crouching
can hit and stuff nearly anything he sticks out. Ukyo’s only retort is his own crouching ![]() , but yours reaches just a touch farther. The sweet spot is small, but that's where your movement speed comes in. Ukyo players are not used to getting poked at and you might be able to throw him off. Just be careful that he doesn't sneak in a Shadow Slide.
, but yours reaches just a touch farther. The sweet spot is small, but that's where your movement speed comes in. Ukyo players are not used to getting poked at and you might be able to throw him off. Just be careful that he doesn't sneak in a Shadow Slide.
All combined, these strategies add up to a slight advantage in your favor overall. Ukyo players REALLY aren't used to that, so jump in there and teach them a little lesson in humility. Then get ready for the real fight when they switch to Haohmaru...
Vs. Wan-Fu:
Unless you can pull off Strike Heads with razor timing you’ll want to stay back a bit in this matchup. Wan-Fu is deceptively fast and one of the few characters who can out throw you, a fact he’ll be glad to painfully demonstrate. Good Wan-Fu players have no fear of chucking his weapon aside, and they are also more than happy to move in for close quarter combat. He’s got the best unarmed normal attacks in the game by far, and once inside can use them to play a nasty pressure trap. Keep him away with a mix of standing ![]() , standing
, standing ![]() , and Poppy. If he closes in, Shadow Copy out or back him off with crouching
, and Poppy. If he closes in, Shadow Copy out or back him off with crouching ![]() and repeat. Armed Wan-Fu isn’t as much of a threat. He can still lay down some hurt if you get careless, but his throwing game isn’t as good and he’s easy to bait. If he hangs on to the pillar and comes after you feel free to take him apart at your leisure.
and repeat. Armed Wan-Fu isn’t as much of a threat. He can still lay down some hurt if you get careless, but his throwing game isn’t as good and he’s easy to bait. If he hangs on to the pillar and comes after you feel free to take him apart at your leisure.
If you CAN pull Strike Heads with razor timing, ignore all the above. Let him close in all he wants, then show him what crash landings are all about.
| General | Introduction | Notation | Game Mechanics | Basic Strategy | Advanced Strategy | Tiers | |
| The Characters | Cham Cham | Charlotte | Earthquake | Galford | Gen-an | Genjuro | Hanzo | Haohmaru | Jubei | Kyoshiro | Nakoruru | Nicotine | Sieger | Ukyo | Wan-Fu |


