Introduction
W̴̱̐͐̎̔͋̓̈̀͘ḧ̶̡͕̲̱̰̻͊̍̌̃͐͑̔̏̚͜ė̶̩̲͕̥̋͛̅̊͜ę̵̧͇̪͔̬͇͚́̐l̶̦̾͂͝͠ ̵̨̛̣͙̥̟̟̦͇̲̑̀k̷͈̀̅̆̓̅͘͝ỉ̵̡̝͖̬͙̭̳̞̃̄̈̀̒͊͑̀͘͜ç̷̲̗̹̖̓̐͘k̶̢̛̙͍͚̭̻͔̯͕̽̒̊̍̌̃̒̚͜͝
Ray easily has THE game breaking move: Wheel Kick. He is otherwise still an amazing character but Wheel Kick makes him the best. If Ryoko had Wheel Kick, she would be top tier. That is how good Wheel Kick is.
Enough about wheel kicks. There are many other reasons Ray is a great character: long range pokes with great priority, a solid projectile, highly damaging combos, an instant dizzy move on some characters (Thunder Dynamite Tackle), and practically no bad matchups. He can effectively play offense or defense depending on what kind of situation he's in. Perhaps the worst thing about Ray is his weak spot - it's the lightning bolt symbol on his shirt. Since a lot of moves tend to hit the chest area, Ray is prone to being dizzied rather easily.
Ray is a solid choice for a beginner, as all of his moves are rather straightforward to figure out. In the hands of an experienced player, he's even more deadly.
Weak Spot
 |
 |
 |
 | |
| Frame count | - | 2 | 2 | - |
Ray's weak spot is on his chest, so you'll have a bad time getting dizzied by most moves. Although on the other hand, it's safe while mid-air and also safe against jump-ins. It's also worth noticing that the weak spot is located at the center of Ray's hurtbox. This is unique to Ray - other weak spots are moved forward. Because of this, Ray's weak spot is safe against fireballs from range and will avoid pokes sometimes.
Color Options
| Punch | Kick |
 |
 |
Moves List
Quick Reference
Normal Moves
Light Punch 
- Standing LP (Close): activation range = 47
| Damage | 7 | Startup |  |
Recovery |
| Chain cancel | yes | |||
| Special cancel | yes | |||
| On hit | +6 | |||
| On block | +7 | |||
| Frame count | 2 | 3 | 3 | |
Elbow attack that does hit crouchers. Chainable.
- Standing LP (Far):
| Damage | 7 | Startup |  |
Recovery |
| Chain cancel | yes | |||
| Special cancel | yes | |||
| On hit | +6 | |||
| On block | +7 | |||
| Frame count | 2 | 3 | 3 | |
High jab that unfortunately whiffs against every crouching character. Chainable into another light/heavy attack.
- Crouching LP:
| Damage | 7 | Startup |  |
Recovery |
| Chain cancel | yes | |||
| Special cancel | yes | |||
| On hit | +6 | |||
| On block | +7 | |||
| Frame count | 2 | 3 | 3 | |
Standard low jab. Good for combos. Chainable.
- Jumping LP (Diagonal/Neutral):
| Damage | 12 | Startup |  |
| Chain cancel | no | ||
| Special cancel | yes | ||
| Frame count | 4 | ∞ | |
Not a very useful attack as it has rather low priority. You can sometimes crossup with it but it's inconsistent.
Heavy Punch 
- Standing HP (Close): activation range = 59
| Damage | 28 | Startup |  |
 |
 |
Recovery |
| Chain cancel | no | |||||
| Special cancel | yes | |||||
| On hit | -3 | |||||
| On block | -8 | |||||
| Frame count | 4 | 3 | 3 | (6) 18 | ||
High uppercut-angled punch. Can be okay as a meaty against certain characters with higher weak spots. Make sure to cancel it into a special for safety.
- Standing HP (Far):
| Damage | 28 | Startup | 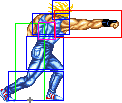 |
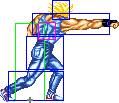 |
Recovery |
| Chain cancel | no | ||||
| Special cancel | yes | ||||
| On hit | -3 | ||||
| On block | -8 | ||||
| Frame count | 4 | 6 | (6) 18 | ||
Usually the best ender for ground chains. Always cancel it into a Big Tornado or Dynamite Tackle.
- Crouching HP:
| Damage | 28 | Startup |  |
 |
 |
Recovery |
| Chain cancel | no | |||||
| Special cancel | yes | |||||
| On hit | -3 | |||||
| On block | -8 | |||||
| Frame count | 4 | 3 | 3 | (6) 18 | ||
Classic shoto uppercut punch. Priority is good enough to use instead of Wheel Kick if you don't have time to input it or if you want to stay away from your opponent.
- Jumping HP (Diagonal):
| Damage | 28 | Startup |  |
Recovery |
| Chain cancel | no | |||
| Special cancel | yes | |||
| Frame count | 4 | 6 | ∞ | |
Same animation frames as LP, but does more damage and hitbox extended downwards a bit. Pretty good as a jump-in.
- Jumping HP (Neutral):
| Damage | 28 | Startup |  |
Recovery |
| Chain cancel | no | |||
| Special cancel | yes | |||
| Frame count | 4 | 6 | ∞ | |
Hitbox of this one extends downwards even more than the diagonal version but loses horizontal reach. Unfortunately doesn't really offer anything over the diagonal version - this would be decent as an air-to-air if their hitboxes were switched.
Light Kick 
- Standing LK (Close): activation range = 39
| Damage | 7 | Startup |  |
Recovery |
| Chain cancel | yes | |||
| Special cancel | yes | |||
| On hit | +6 | |||
| On block | +7 | |||
| Frame count | 2 | 3 | 3 | |
Mid-level knee attack. Chainable.
- Standing LK (Far):
| Damage | 7 | Startup | 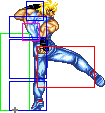 |
 |
Recovery |
| Chain cancel | no | ||||
| Special cancel | yes | ||||
| On hit | +3 | ||||
| On block | +4 | ||||
| Frame count | 2 | 3 | (3) 6 | ||
Knee-level kick with decent range. However, it's not chainable into other attacks, so it's a bit limited in usefulness.
- Crouching LK:
| Damage | 7 | Startup |  |
Recovery |
| Chain cancel | yes | |||
| Special cancel | yes | |||
| On hit | +6 | |||
| On block | +7 | |||
| Frame count | 2 | 3 | 3 | |
Has more range than Crouching LP, so use this as your primary means of extending chains or hit-confirming combos. Chainable.
- Jumping LK (Diagonal):
| Damage | 12 | Startup |  |
| Chain cancel | no | ||
| Special cancel | yes | ||
| Frame count | 4 | ∞ | |
Knee attack that stays out for the duration of the jump. Has the potential to crossup.
- Jumping LK (Neutral):
| Damage | 12 | Startup |  |
| Chain cancel | no | ||
| Special cancel | yes | ||
| Frame count | 4 | ∞ | |
A weird high stretch kick. Not sure what this could be used for. It could maybe be a decent air-to-air assuming the priority is better than j.HP.
Heavy Kick 
- Standing HK (Close): activation range = 55
| Damage | 28 | Startup |  |
 |
Recovery |
| Chain cancel | no | ||||
| Special cancel | yes | ||||
| On hit | -3 | ||||
| On block | -8 | ||||
| Frame count | 4 | 6 | (6) 18 | ||
High kick. Not much reason to try to start combos with this when you can just use HP instead and option select an added throw attempt.
- Standing HK (Far):
| Damage | 28 | Startup | 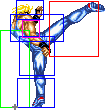 |
Recovery |
| Chain cancel | no | |||
| Special cancel | yes | |||
| On hit | +3 | |||
| On block | -2 | |||
| Frame count | 4 | 5 | 13 | |
Roundhouse kick that recovers amazingly quick to be safe on hit (rare for heavy normals in FHD). It's an excellent poke to use even if you think it will whiff. Has marginally less range than far Standing HP, but is still a good chain ender.
- Crouching HK:
| Damage | 28 | Startup |  |
 |
Recovery |
| Chain cancel | no | ||||
| Special cancel | yes | ||||
| On hit | kd | ||||
| On block | -8 | ||||
| Frame count | 4 | 6 | (6) 18 | ||
Standard sweep kick with nice range and decent recovery.
- Jumping HK (Diagonal):
| Damage | 28 | Startup | 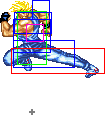 |
Recovery |
| Chain cancel | no | |||
| Special cancel | yes | |||
| Frame count | 4 | 6 | ∞ | |
Ray's best crossup attack with nice priority.
- Jumping HK (Neutral):
| Damage | 28 | Startup | 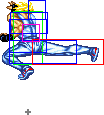 |
Recovery |
| Chain cancel | no | |||
| Special cancel | yes | |||
| Frame count | 4 | 6 | ∞ | |
A different jump kick with more horizontal range than the regular jumping HK. Might be worth trying from a distance since opponents might underestimate the range. Won't have many options for combos though...
Throws
Ground Throws
| Damage | 32 |  |
| Range (From pushbox) |
34 |
DDT! Ray does this classic pro wrestling maneuver to bring the opponent to the ground. Ray recovers right next to the opponent which is great if you want to keep the pressure on. Ray also recovers much sooner than the opponent, meaning that there's plenty of time to push them to the other side of the screen or go for a crossup.
Aerial Throws
| Damage | 40 |  |
| Range (From pushbox) |
18 |
Air throw version of the DDT. Functions exactly like the ground version and does slightly more damage to boot. The range is the worst compared to the other air throws. This move isn't too useful except in the Karnov matchup.
Special Moves
| Damage | 16 | Startup |  |
Recovery |
| On hit | +3 | |||
| On block | -2 | |||
| Frame count | 11 | 1 | 30 | |
A fairly standard fireball. Faster startup but worse recovery compared to other fireballs. Not that great for combos, but it recovers fast enough to use to pressure the opponent. Especially if you can coax them into jumping, because then you can hit them with the...
| Damage | Light 24 Heavy 36 total |
Ground only |
Air only |
 |
 |
 |
 |
Recovery | Landing |
| On hit | Light kd* Heavy kd** |
 |
 | ||||||
| On block | Light -12* Heavy -18** | ||||||||
| Frame count | Light | 2 | 2 | 1 | 6 | 3 | 10 | 6 | |
| Heavy | 2 | 2 | 1 | 10 | 4 | 14 | 6 | ||
*Frame advantage is measured from the first hitbox
**Frame advantage is measured from the second hit
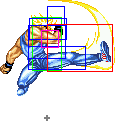
Easily one of the best moves in the game. Ray is invincible for a long period with this move - enough to beat any other similar move with invincibility if they're done at the same time.
Great anti-air, beating jump-ins cleanly (unless they're Karnov, in which case he can only be hit when he is coming down from Balloon). However, anti-airing with this move tends to leave the opponent fairly close, so be ready to back away if trying to keep a distance. This move can also be used to pass through fireballs, or even punish them if close enough.
Generally, you will want to stick to using the LK version of Wheel Kick - the HK version goes in a higher arc, meaning more recovery. The LK version recovers pretty fast - so fast that it's possible to completely take a blocking opponent by surprise, and then throw them before they can do anything. The HK version can still be useful if needing to hit particularly high opponents (usually Clown or Yungmei). The HK version can also be used to side switch if the opponent jumps from close enough.
Wheel Kick can be performed in the air as well, but it doesn't have many uses outside of escaping corner traps. Obviously it's good for winning air-to-air battles, but if you guess wrong then it's a long fall to the ground, leaving you a sitting duck.
While this move is strong, be careful with overusing it, since smart opponents will start to be more patient and wait for it and then punish with a throw or combo. The only other downside to Wheel Kick (and it's a pretty major one) is that it whiffs against crouching opponents. It won't beat sweeps and the like, but it can travel over certain attacks and sometimes recover before the opponent.
| Damage | 36 total | Startup |  |
Charge movement starts |
 |
Recovery |
| On hit | kd* | |||||
| On block | -1* | |||||
| Frame count | Light | 4 | 4 | 2 | 6 | 14 |
| Heavy | 4 | 4 | 2 | 10 | 14 |
*Frame advantage is measured from the second hit, after the second hit has additional 3 frames of lag before other 14
Ray charges forward and tackles the opponent with a headbutt. Knocks down on hit and is safe on block due to knockback. The LP version travels half screen, while The HP version travels full screen and actually may go through opponent-specific frames of end lag. The best move to end any combo or block string with if you want to keep the pressure on the opponent. The only thing you have to watch out for is when doing the move from too far, you can potentially be hit or thrown out of it. When done right next to the opponent, it will actually hit twice, but this isn't too practical outside of comboing off a single light attack. Most of the time you will only see the one-hit version.
| Damage | 72 total |
 |
 |
 |
Charge movement starts, weak spot reappears |
 |
 |
 |
 |
Recovery | |||
| On hit | kd* | ||||||||||||
| On block | -2* | ||||||||||||
| Frame count | 4 | 2 | 2 | 4 | 2 | 2 | 2 | 2 | 2 | 2 | 2 | 16 | |
*Frame advantage is measured from the last hit
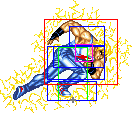
Ray's hidden move is a beefed-up Dynamite Tackle in which Ray is charged with electricity. This hits up to 5 times depending on distance. It usually hits 3 times in combos, which is enough. It does more damage and hits a wide variety of weak spots, with certain characters being unable to avoid a dizzy by stance shifting. The downside of this move is its long charge time. New players may have trouble with either the charge or quickly completing the forward-forward motion afterwards. Master doing this consistently, because it's the key to doing big damage and triggering stuns with Ray. Light and Heavy versions differ in travel distance. Heavy version is usually preferred for combos.
Weak spot hits:
Standing or Crouching: Ray, Feilin, Samchay*, Lee, Jean, Yungmie
Crouch only: Ryoko, Matlok, Mizoguchi*, Zazie, Clown, Karnov
Neither: Marstorius
* Not the first hit
The Basics
As mentioned before, Ray is a versatile character. He can be played defensively, antagonizing the opponent with Big Tornado's and then doing Wheel Kick or cr.HP when they jump in. However, he can also be played aggressively, using Wheel Kick and his solid junping normals to beat fireballs, using Dynamite Tackle to keep pressure after blockstrings, and countering with a Wheel Kick when the opponent tries to stop Ray.
In either case, he still needs to be played smart - Ray might arguably be the best character in the game, but he's far from unbeatable, especially if you start to get locked into patterns. Depending on the character, you don't want to throw fireballs mindlessly because they may have a move that takes them over/under/through the fireball to nail you.
Combos
- j. indicates the jumping variant of a move
- f. indicates the far variant of a move
- cl. indicates the close variant of a move
- , indicates a link
- > indicates a cancel
- / indicates an alternative move
- (xN) indicates to repeat the move N number of times
| Combo | Position | Damage | Notes | Video |
|---|---|---|---|---|
| 2C (x3), 5B > 66B | Anywhere | 60 | BnB without needing charge. Do less 2Cs if further away. 2C can be skipped entirely if poking with 5B. | [1] |
| 2C (x3), 5B > [4]66B | Anywhere | 84 | Thunder Dynamite Tackle ender. BnB with higher damage and more hits that can potentially stun, but requires long charge time. | [2] |
| j.A/j.C, 2C (x2), 5B > 66B/[4]66B | Anywhere | 65/89 | Light jump-in combo. You might have to settle for regular Dynamite Tackle if crossing up. Do one 2C if further away. | [3] [4] |
| j.B/j.D, 5B/5D > 66B/[4]66B | Anywhere | WIP | Heavy jump-in combo. You might have to settle for regular Dynamite Tackle if crossing up. | WIP |
| j.B/j.D, 2C, 5B > 66B/[4]66B | Anywhere | 101 | Heavy jump-in combo. You might have to settle for regular Dynamite Tackle if crossing up. | WIP |
| j.B/j.D, 5B/5D > 214C | Anywhere | 89/95 | Heavy jump-in combo with alternate ender. Won't work on crouchers. | [5] [6] |
Advanced Strategy
Here's a fun trick to take your opponent by surprise - first off, score a knockdown in the corner (throw, Wheel Kick, Dynamite Tackle, etc). While they're on the ground, do a Dynamite Tackle. You will pass over their body and wind up on the other side, with you in the corner now. If they are still holding towards the corner on the joystick, they will not be able to block your attacks in time since they're holding the wrong way! This is a good opportunity to hit them with a couple c.LK's into s.HP into Dynamite Tackle to knock them back down. Of course, after you do this once the opponent will know to start looking out for this. In that case, try doing a Wheel Kick that's timed to pass back over them the instant they get up. If you time it right, they'll be crossed up again and have to block in the direction of the corner for that. It's a very bizarre guessing game, but worth taking advantage of if you get the opportunity.
Match-ups
| Ray | Lee | Zaz | Kar | Jea | Miz | Sam | Yun | Mat | Clo | Fei | Mar | Ryo | |
| Ray | - | - | - | - | - | 6 | - | - | - | - | - | - | - |
Vs. Clown:
An easy match. Wheel Kick through Clown's fireballs and Wheel Kick if he tries his vertical spinning ball. The only thing you really have to worry about is his Head Stamp, which can nail you if you throw a fireball at the wrong time. If you can fake him into doing it early, it's a free hit for you while he falls to the ground.
Vs. Jean:
Don't throw too many fireballs from close range, since Jean can slide under them. Jean's flash kick and 2B are excellent anti-airs so you can't jump on him too much. Howecer, you can sometimes throw off his flash kick and make it whiff completely with a mid-air Wheel Kick.
Vs. Ryoko:
Throw fireballs and trip if she jumps in deep enough. It's really that easy.
Vs. Karnov:
Ray's probably the best character in the game to take down the fat fire-breathing Russian. He has two ways to stop BALLOOOON abuse - Wheel Kick and air throw. This will give Karnov second thoughts about floating in the air too much. When timed right, you can also get out of his triple kick lockdown with a Wheel Kick if he leaves any gaps in his attack strings. Unfortunately, when you Wheel Kick through Karnov's fireballs, you won't be able to hit him since he crouches low to the ground, but you may be able to throw him before he recovers. Karnov is still very much a threat in this match, but Ray has all the tools to win. Good luck!
Vs. Lee:
Worst matchup for Ray by far. All of Lee's hop punch combos will hit Ray's weak point so it's extremely easy for Lee to score a dizzy, and then land HUGE damage on you when you're dizzied. You need to fight defensively - keep him out with fireballs, since he doesn't have any practical way of getting through them outside of jumping. Remember that you can also stop his hop punches cold with standing/crouching jabs. It also helps to be consistent at doing the Thunder Dynamite Tackle motion - if you throw out a random Thunder Dynamite Tackle and it hits Lee, chances are you'll dizzy him instantly. Even if you get a dizzy and wind up ahead on life, don't relax until Lee is dead. All he needs is one combo to completely turn around the round.
Vs. Feilin:
Feilin's sliding uppercut can go through your fireballs and potentially hit your weak spot once. She can also do an early air fireball to fake out anti-air Wheel Kick attempts, but even then she's often vulnerable on the way down. There isn't much else to worry about in this matchup.
Vs. Yungmie:
Yungmie can play runaway well, but Wheel Kick will help chase her down and potentially hit through her air fireballs. If she does her uppercut kick, you can Wheel Kick between the two hits on reaction if you're fast enough.
Vs. Marstorius:
Standard anti-Marstorius strategy - throw lots of fireballs, Wheel Kick him out of the air if he jumps. You need to stay away at all costs. Don't do random tackles, since Marstorius has so much range he can potentially Double German you out of it. Just be patient in this match.
Vs. Matlok:
Matlok's most dangerous attack is the Overhead Kick, so don't get caught crouching too much. On the other hand, if Matlok is recklessly doing Overhead Kicks and Spinning Waves, Wheel Kick will take him down.
Vs. Mizoguchi:
6/5.5-4/4.5
Big Tornado is a far better projectile than Mizoguchi's one, so stick to using that. Mizoguchi will want to jump and dp, so of course watch for that and be ready with Wheel Kick. Mizoguchi can also destroy your weak spot with ease so be careful.
Vs. Ray (self):
RAY WINS
Vs. Samchay:
Your response to Samchay's normally dangerous jump-ins and Ti Kau Koon is of course Wheel Kick. Keep in mind that your fireball is faster than Samchay's, so a simple fb lock down may prove deadly for him.


