Universal Defense
Guarding
By holding the ![]() button, you can block incoming attacks, completely negating the damage of some and strongly reducing the damage of others, such as Ki Blasts and Blast 1/2s. Holding the
button, you can block incoming attacks, completely negating the damage of some and strongly reducing the damage of others, such as Ki Blasts and Blast 1/2s. Holding the ![]() will lock your character rotation, pressing
will lock your character rotation, pressing ![]() or
or ![]() while guarding will change your guard stance to either a high or low guard, respectively, these alternate guard stances will defend against different types of attacks such as directional Smash Attacks or different Rushing Techniques. Damage done to a guarding opponent is called Chip Damage, Chip for short, this damage is around 30% of what would normally be taken and can't kill the opponent. Attacks that deal Chip are:
while guarding will change your guard stance to either a high or low guard, respectively, these alternate guard stances will defend against different types of attacks such as directional Smash Attacks or different Rushing Techniques. Damage done to a guarding opponent is called Chip Damage, Chip for short, this damage is around 30% of what would normally be taken and can't kill the opponent. Attacks that deal Chip are:
- Explosive Waves
- Barriers
- Blast 2s/Ultimate Blasts
- Ki Blasts
- Rush Ki Wave
There are eight different ways melee moves can interact with guard which are named Any, Sweep, Low, Mid, High, Overhead, Crush, and Unblockable. Sweep is blocked with a Low Guard, Low is blocked with Low or Mid Guards, Mid is blocked with Mid Guards, High is blocked with Mid or High Guards, Overhead is blocked with a High Guard, Crush moves will Guard Crush any Guard, Unblockable moves can't be blocked at all.
Alignment
As explained here, ensuring that you're properly aligned with the opponent can greatly reduce damage taken, as allowing your opponent to attack you from behind will nearly always result in them dealing a higher amount of damage to you. The most basic way to realign is by tapping the ![]() button, however, you can align more effectively as detailed here.
button, however, you can align more effectively as detailed here.
Defensive Vanishing
Defensive Vanishing is one of the most useful methods of defense to master, as it can be done in many scenarios against many types of attacks, and completely avoids any damage regardless of type. This can be done by tapping ![]() right before an attack that can be vanished hits you, and some attacks, mainly Blast or Explosive Wave type B2s, require multiple sequential vanishes to properly avoid all incoming damage. This can be done while facing away from the opponent.
right before an attack that can be vanished hits you, and some attacks, mainly Blast or Explosive Wave type B2s, require multiple sequential vanishes to properly avoid all incoming damage. This can be done while facing away from the opponent.
Melee Defense
Melee Moves' Interaction with Defense
- Blaster Wave
- Cannot be Vanished
- Can be Charged
- Can be Z-Countered
- Any Guard at Level 1 Charge
- Guard Crushes at Level 2 Charge
- Unblockable at Level 3 Charge
- Kiai Cannon
- Cannot be Vanished
- Can be Charged
- Can be Z-Countered
- Any Guard at Level 1 Charge
- Guard Crushes at Level 2 Charge
- Unblockable at Level 3 Charge
- Flying Kick
- Cannot be Vanished
- Cannot be Charged
- Can be Z-Countered
- Lightly stuns opponent
- Overhead Guard
- Can be blocked during hitstun if frontturned
- Heavy Finish
- Can be Vanished
- Can be Charged
- Can be Z-Countered
- Stuns opponent
- Mid Guard at Level 1 & 2 Charge
- Guard Crushes Mid Guard at Level 3 Charge
- Unblockable for Low/High guard at Level 3 Charge
- Rolling Hammer
- Can be Vanished
- Can be Charged
- Can be Z-Countered
- Reverses opponent's alignment
- Mid Guard on Level 1 & 2 Charge
- Unblockable for Low/High guard on Level 3 Charge
- Rush Ki Wave
- Cannot be Vanished
- Can be Charged
- Can be Z-Countered
- Deals Chip Damage
- Soft Neutral Knockback on Level 1 Charge
- Soft Up Knockback on Level 2 Charge
- Hard Up Knockback on Level 3 Charge
- Any Guard
- Lift Strike
- Can be Vanished
- Can be Charged
- Can be Z-Countered
- Low or Mid Guard on Level 1 & 2 Guard
- Sweep on Level 3 Charge
- Ground Slash
- Can be Vanished
- Can be Charged
- Can be Z-Countered
- Low or Mid Guard on Level 1 & 2 Guard
- Sweep Guard on Level 3 Charge
- Auto-Counter
- Cannot be Vanished
- Can be Z-Countered
- Sonic Sway
- Cannot be Vanished
- Can be Z-Countered in certain matchups
Z-Countering
Z-Countering is a very precise defensive mechanic, and should also only be done conditionally, this can be done by pressing ![]() while holding
while holding ![]() on the exact frame a melee attack of any kind (excl. Blast 2s/Ultimate Blasts). If you successfully perform this technique, you'll vanish behind your opponent and hit them with a counter-attack that can be vanished, if they vanish this, it will begin a string of vanishing back and forth between opponents, in which the first to fail or the one with the most Ki will lose the vanish string. If fail to vanish you'll be hit by the Z-Counter counter-attack which will lead to a Dragon Smash String. If you have less Ki an no one fails to vanish, you'll vanish a final time but will not counter-attack automatically, meaning you can manually attack them with a safe option such as Rush Attacks. These are all the attacks that can be Z-Countered:
on the exact frame a melee attack of any kind (excl. Blast 2s/Ultimate Blasts). If you successfully perform this technique, you'll vanish behind your opponent and hit them with a counter-attack that can be vanished, if they vanish this, it will begin a string of vanishing back and forth between opponents, in which the first to fail or the one with the most Ki will lose the vanish string. If fail to vanish you'll be hit by the Z-Counter counter-attack which will lead to a Dragon Smash String. If you have less Ki an no one fails to vanish, you'll vanish a final time but will not counter-attack automatically, meaning you can manually attack them with a safe option such as Rush Attacks. These are all the attacks that can be Z-Countered:
- Rush Attacks
- Rush-In Attack
- All Rushing Techniques except Rush Ki Wave
- All Smash Attacks
- Throws
- The final two hits of Rush Finish
This can all be done while facing away from the opponent.
Auto-Counter
Auto-Countering can be initiated in four ways, by tapping ![]() while holding
while holding ![]() , by tapping
, by tapping ![]() during a Step-In, or by tapping
during a Step-In, or by tapping ![]() during a Rush String, or by tapping
during a Rush String, or by tapping ![]() after a Lift Strike lands. Any method of Auto-Countering will cause you to enter a stance which you will be locked into until at least half bar of Ki has been drained, however, you can hold this stance for longer at the cost of more Ki drain. While in this stance, Rush Attacks will automatically be counter-attacked with some characters having the option to follow this counter-attack with a second attack called "Auto-Smash Counter," done by tapping
after a Lift Strike lands. Any method of Auto-Countering will cause you to enter a stance which you will be locked into until at least half bar of Ki has been drained, however, you can hold this stance for longer at the cost of more Ki drain. While in this stance, Rush Attacks will automatically be counter-attacked with some characters having the option to follow this counter-attack with a second attack called "Auto-Smash Counter," done by tapping ![]() afterwards.
afterwards.
Sonic Sway
Sonic Sway works essentially identical to Auto-Counter, being done the same way and having the same result for the most part. Sonic Sway is activated interestingly, as for the user all you need to do is go into your Auto-Counter stance, if someone happens to try to hit you with a Rush Attack as your character is going into this stance however, a Sonic Sway will be initiated, in which a cutscene will be activated where the user's character model will dodge a flurry of melee attacks released by the opponent, this will drain a single bar of Ki from the opponent. This attack also has a follow-up that is identical to Auto-Smash Counter, being called Sonic Sway attack and being done the same way. This cutscene can be manipulated however, as shown in the GIF below:

GIF Credit: Creatful_Chaos
Z-Countering Sonic Sway
File:DBZBT3 Sonic Sway ZC.gif
As seen above, the counterhit at the end of Sonic Sway can be Z-Countered, unfortunatly this is not universal and only certain characters can do this. <W.I.P.>
Ranged Defense
Deflecting
Deflecting is the most basic form of defense against Ki Blasts, excluding guarding, being done by pressing ![]() and
and ![]() repeatedly while holding
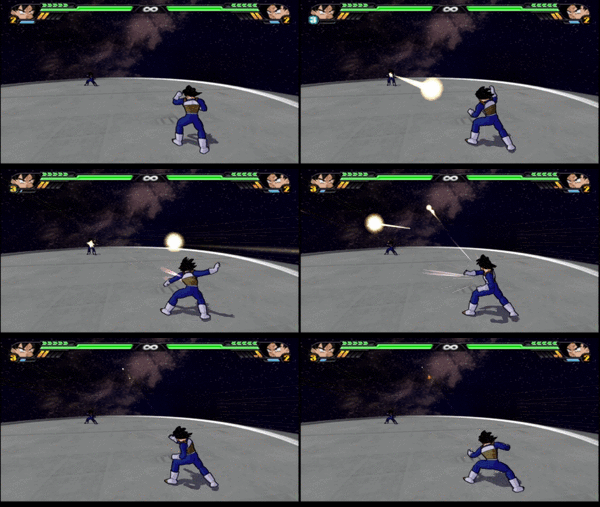
repeatedly while holding ![]() . If an enemy Ki Blast is active, doing these inputs will result in your character swinging their arm back and forth to slap any incoming Ki Blasts as demonstrated below:
. If an enemy Ki Blast is active, doing these inputs will result in your character swinging their arm back and forth to slap any incoming Ki Blasts as demonstrated below:

Upon Deflecting a blast, it will fly to the side and is unlikely to hit the opponent, however, in close-range combat, such as someone doing Ki Blasts after Flying Kick, there is a chance that the Ki Blasts will hit the original attacker. Deflecting cannot be done against Blade-type Smash Blasts. Upon successfully Deflecting a Ki Blast, your Blast Stock gauge will fill slightly.
Reflecting
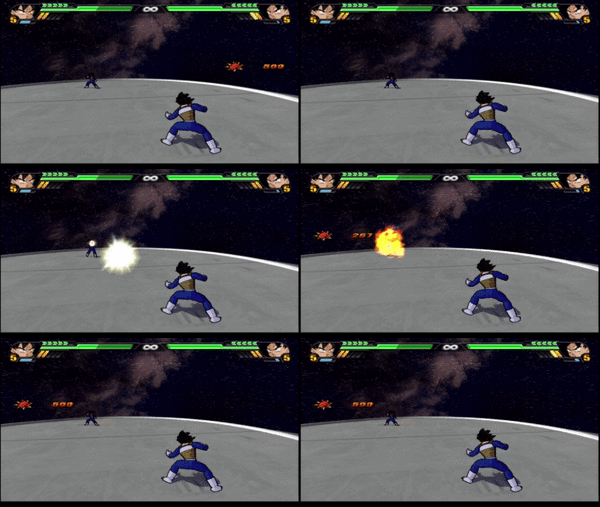
Reflecting is similar to Deflecting, but a bit more advanced, it's done similarly to a Defensive Vanish, by tapping ![]() right before the Ki Blast hits you. Unlike Deflecting, this form of defense only works against Smash Blasts and will have no effect on Rush Blasts. Also unlike Deflecting, Reflecting will actually make the Ki Blast go back towards your opponent with enough accuracy to often hit them, as demonstrated below:
right before the Ki Blast hits you. Unlike Deflecting, this form of defense only works against Smash Blasts and will have no effect on Rush Blasts. Also unlike Deflecting, Reflecting will actually make the Ki Blast go back towards your opponent with enough accuracy to often hit them, as demonstrated below:

Reflecting cannot be done against Blade-type Smash Blasts. Upon successfully Reflecting a Ki Blast, your Blast Stock gauge will fill slightly.
Blast 1s
Blast 1s, B1s for short, are typically a defensive or assisting type of move that drains your Blast Stock upon use, done by tapping ![]() while holding
while holding ![]() , there are many Defensive or defense-adjacent.
, there are many Defensive or defense-adjacent.
Directly Defensive Blast 1s
Afterimage
Afterimage is by far the best Blast 1 in the game, generally having a cost of 2 Blast Stocks with certain characters such as Nam being an exception, as well as Hirudegarn whose secondary Blast 1 is called "Dark Eyes," yet functions identically to Afterimage in every way. Upon activation, Afterimage will end all hitstun, more info here, and won't do anything else until the user is hit with either a melee attack or a Blast 2/Ultimate Blast. Once the user has been hit they'll vanish away from the attack and be allowed to counter-attack, this vanish can be directed just like an offensive or defensive vanish. This Blast 1 can be stacked up to three times.
After Image Strike
After Image Strike (Afterimage Strike in NTSC), works nearly identical to Afterimage, yet is more expensive, generally costing 3 Blast Stocks with some characters such as Grandpa Gohan having it cost 2 Blast Stocks. Rather than being stackable, or only vanishing one attack, After Image Strike will vanish the same things as Afterimage for 15 seconds after activation.
Wild Sense
Wild Sense is a rather bad defensive Blast 1, it cannot be activated during hitstun like Afterimage, After Image Strike, Explosive Wave, or Barrier. Wild Sense always costs 2 Blast Stocks and vanishes the same things as Afterimage and After Image Strike however if the user is close enough to the attacker they'll automatically counter-attack once hit. This counter-attack can be avoided or vanished very easily and is also rather predicable, as a result of this, Wild Sense's best use case is against Blast 2s, though even that can be impractical.