Introduction
Why pick Old Honda? Old Honda loses ST Honda's Oicho mixups, but gains important things as well:
- Regains his standing sweep kicks
- Has better ground fierce attacks
- Retains moving handslap
So the basics are HF-style grabby-into-slappy mixups.
O.Honda must be played with a fundamental understanding of SF2 mechanics and basic gameplay since he loses the ability to negative-edge oicho throw out many pressure situations and setups. O.Honda's general style will be more reliant on an understanding of proper usage of normals, throws, sweeps and footsies (stuffing attacks, baiting attacks, and continually applying safe pressure).
Competitive Overview
O.Honda does very well against non-fireball characters, but keep in mind that two of his worst matchups (Guile and DeeJay) are generally made even more difficult without the ability to quickly advance with Fierce HHS or continuously lock down your opponent with oicho setups in the corner. Shotos present a very difficult fight, especially O.Ken as he limits your ability to pressure with HHS due to his excellent SRK hitbox. As such, in a competitive environment you will ultimately end up facing many disadvantaged matchups and must learn to play perfectly in order to succeed. On the plus side, Honda vs. Claw is a very even matchup and perfectly winnable as long as you do not get knocked down midscreen.
Picking Old E.Honda
To select O.E.Honda, choose E.Honda and then press ↑ ↑ ↑ ↓ Jab/Fierce, pressing Short simultaneously with the punch button for the alternate color.
| Normal | Secondary |
 |

|
--Born2SPD
New & Old Versions Comparison
Here is the list of differences:
- Obvious stuff: O.E.Honda can not tech throws, does not have the Oicho Throw and Super;
- O.E.Honda has some differences in some of his normals:
- Close Standing Jab is exactly like the Far version. N.E.Honda received a new Close punch that combos into itself;
- Far Standing Jab has faster startup/recovery and can be special canceled;
- Crouching Jab can be special canceled;
- Close Standing Strong is exactly like the Far version. N.E.Honda received a new Close punch that can be used in ticking;
- Far Standing Strong has faster recovery;
- Crouching Strong has better range and priority and can be used as anti air;
- Close Standing Fierce first active part has less active frames and the other active part has more active frames and better priority/range. The total of active frames is the same though;
- Far Standing Fierce is exactly like the Far version. N.E.Honda has a different version of O.E.Honda's Crouching Fierce with worse priority, worse startup, no knockdown, less damage potential, and no special cancel, but with a lot better recovery;
- Crouching Fierce is his classic sweep punch. N.E.Honda received a new Crouching punch that hits twice;
- Close Standing Short is a low hitting kick. N.E.Honda received a new Close knee that can be used in ticking;
- Far Standing Short is a fast hitting sweep. N.E.Honda has a different version of O.E.Honda's Crouching Short with bigger hurtbox and worse priority;
- Crouching Short is his classic spear kick. N.E.Honda received a near identical version of O.E.Honda Close Standing Short instead;
- Close Standing Forward is a low hitting kick. N.E.Honda received a new Close knee that can be used in ticking;
- Far Standing Forward is a fast hitting sweep. N.E.Honda has a different version of O.E.Honda's Crouching Forward with bigger hurtbox, less damage on the first hit and worse priority;
- Crouching Forward is his classic 2-hit spear kick. N.E.Honda received a near identical version of O.E.Honda Close Standing Forward;
- Far Standing Roundhouse is his classic long range sweep. For N.E.Honda it's the same as the Close version and that long range sweep became a Command Normal;
- Neutral Jumping Jab is basically the same but with bigger hurtbox during the active frames. The horizontal priority is the same though;
- Diagonal Jumping Jab has faster startup and a lot more active frames but with bigger hurtbox during the active frames. The horizontal priority is the same though;
- Neutral Jumping Strong second active part has bigger hurtbox. The horizontal priority is the same though;
- Diagonal Jumping Strong has 2 active parts and more active frames, but the first hitting part has less active frames if compared with N.E.Honda's version;
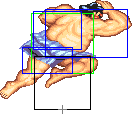
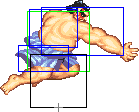
- Neutral Jumping Fierce can not be steered and has bigger hurtbox during the active frames and some frames later. The horizontal priority is the same though;
- Diagonal Jumping Fierce has bigger hurtbox during the active frames and some frames later. The horizontal priority is the same though;
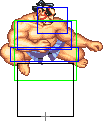
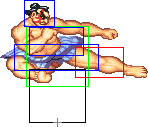
- Neutral Jumping Short has better horizontal priority;
- Both Jumping Forwards have better horizontal priority but worse vertical priority. All in all N.E.Honda's version is better;
- Neutral Jumping Roundhouse has a lot better priority and twice as many active frames;
- Diagonal Jumping Roundhouse has a lot better priority but can not be used as a crossup attack;
- O.E.Honda's HHS behaves differently: has a little faster startup, a lot faster recovery, less minimal attacking duration and steerable properties. N.E.Honda's version is slower and can not be steered but Strong and Fierce versions create a fast impulse once activated;
- O.E.Honda's Headbutts do less knockback on block/hit;
- O.E.Honda's Jab Headbutt has slower startup and Strong headbutt has twice as much active frames;
- O.E.Honda's Butt Drop has smaller hitbox on the second active part (when he's falling) which gives him worse crossup ability;
In general, O.E.Honda has a better normal set (has a awesome Standing Jab, can use his Fierce Chop from any range, has all his knockdown normals from HF and most of his other normals have little benefits). But because his HHS is so different he is played in a different way (like HF Honda). Both versions have pretty much the same strength though, they are just played differently. Choose whichever version suits your style better.
Moves Analysis
Disclaimer: To better understand the diagrams, read this.
Normal Moves
Ground Normals
- Close/Far Standing Jab:
| Damage | 20[1] |  |
 |
 |
 |

|
| Stun | 0~5 | |||||
| Stun Timer | 40 | |||||
| Chain Cancel | No | |||||
| Special Cancel | Yes* | |||||
| Frame Advantage | +6 | |||||
| Frame Count | 2 | 2 | 4 | 2 | 1 | |
| Simplified | 1 + 4 | 4 | 3 | |||
O.Honda's single most important normal due to the fast speed, great range, and invincible hitbox along the length of arm. This move will hit standing and crouching characters. Constantly poke with this move to apply safe pressure at max range, stuff your opponent's normals and specials, and bait reversals. This move is also special-cancellable, often used to cancel into jab HHS for combos, pressure and punishing. This move also makes a good anti-air.
- Crouching Jab:
| Damage | 20[1] |  |
 |
 |
 |

|
| Stun | 0~5 | |||||
| Stun Timer | 40 | |||||
| Chain Cancel | No | |||||
| Special Cancel | Yes* | |||||
| Frame Advantage | +2 | |||||
| Frame Count | 2 | 2 | 8 | 2 | 1 | |
| Simplified | 1 + 4 | 8 | 3 | |||
Due to the range of this attack, it is often used for pressure after a blocked jump-in and has some use in combos. It is also special-cancellable, for example into HHS.
- Close/Far Standing Strong:
| Damage | 24[1] |  |
 |
 |
 |
 |
 |

|
| Stun | 5~11 | |||||||
| Stun Timer | 60 | |||||||
| Chain Cancel | No | |||||||
| Special Cancel | No | |||||||
| Frame Advantage | +9 | |||||||
| Frame Count | 2 | 2 | 2 | 4 | 2 | 2 | 1 | |
| Simplified | 1 + 6 | 4 | 5 | |||||
Seemingly limited use outside of combos as other normals serve better in the neutral and punishing game.
- Crouching Strong:
| Damage | 24[1] |  |
 |
 |
 |
 |
 |

|
| Stun | 5~11 | |||||||
| Stun Timer | 60 | |||||||
| Chain Cancel | No | |||||||
| Special Cancel | No | |||||||
| Frame Advantage | -1 | |||||||
| Frame Count | 2 | 2 | 2 | 8 | 6 | 4 | 1 | |
| Simplified | 1 + 6 | 8 | 11 | |||||
- Close/Far Standing Fierce:
| Damage | 30[2] |  |
 |
 |

|
| Stun | 10~16 | ||||
| Stun Timer | 80 | ||||
| Chain Cancel | No | ||||
| Special Cancel | No | ||||
| Frame Advantage | -3 / +0 | ||||
| Frame Count | 3 | 3 | 3 | 4 | |
| Simplified | 1 + 6 | 7 | |||
 |
 |
 |
 |

| |
| Frame Count | 7 | 5 | 3 | 2 | 1 |
| Simplified | 18 | ||||
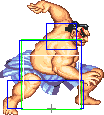
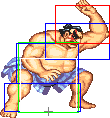
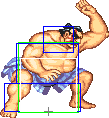
Excellent attack that N.Honda players wish they had. The first part of this move makes for an excellent late anti-air/trade, just wait for the opponent to almost reach you before throwing out. This is also a pretty good range poke/punish, that can be used to punish SRK recovery and fireball startup, for example, if you have nothing else to attack with.
- Crouching Fierce:
| Damage | 32[2] |  |
 |

|
| Stun | 5~11 | |||
| Stun Timer | 130 | |||
| Chain Cancel | No | |||
| Special Cancel | Yes* | |||
| Frame Advantage | -10 | |||
| Frame Count | 2 | 3 | 4 | |
| Simplified | 1 + 5 | 4 | ||
 |
 |
 |
 |
 |

| |
| Frame Count | 6 | 8 | 6 | 4 | 3 | 1 |
| Simplified | 28 | |||||
This attack is crucial to O.Honda's throw mixup game. Since throwing is done with back or forward plus an attack, opponents must STAND to throw or counter-throw. Use this normal in situations where you expect your opponent to throw or counter-throw, or just throw this move out to condition players to expect this attack. Grants a sweep knockdown so you can continue forward with pressure. This move has pretty bad recovery, so you are best to cancel to fierce HHS every time you use cr.fierce.
- Close Standing Short:
| Damage | 18[1] |  |
 |
 |
 |

|
| Stun | 0~5 | |||||
| Stun Timer | 40 | |||||
| Chain Cancel | No | |||||
| Special Cancel | Yes | |||||
| Frame Advantage | +6 | |||||
| Frame Count | 1 | 2 | 3 | 3 | 1 | |
| Simplified | 1 + 3 | 3 | 4 | |||
Fast low hitting normal that can be combo'ed off of with some practice. This move is useful in mixing up O.Honda's tick-throw game.
- Far Standing Short:
| Damage | 20[1] |  |
 |
 |
 |
 |
 |

|
| Stun | 5~11 | |||||||
| Stun Timer | 130 | |||||||
| Chain Cancel | No | |||||||
| Special Cancel | No | |||||||
| Frame Advantage | +2 | |||||||
| Frame Count | 3 | 3 | 3 | 4 | 3 | 3 | 1 | |
| Simplified | 1 + 9 | 4 | 7 | |||||
Fast standing normal that grants a sweep knockdown if it hits. Generally if you are close enough to use this attack you have other options available, but keep it in mind.
- Crouching Short:
| Damage | 18[1] |  |
 |
 |
 |
 |
 |

|
| Stun | 0~5 | |||||||
| Stun Timer | 40 | |||||||
| Chain Cancel | No | |||||||
| Special Cancel | No | |||||||
| Frame Advantage | +3 | |||||||
| Frame Count | 3 | 3 | 3 | 3 | 3 | 3 | 1 | |
| Simplified | 1 + 9 | 3 | 7 | |||||
While this move has a good hitbox, it is rarely used when st.jab could be used in its stead. Some additional experimentation may yield some good uses for this normal.
- Close Standing Forward:
| Damage | 22[1] |  |
 |
 |
 |

|
| Stun | 5~11 | |||||
| Stun Timer | 60 | |||||
| Chain Cancel | No | |||||
| Special Cancel | No | |||||
| Frame Advantage | +5 | |||||
| Frame Count | 3 | 3 | 5 | 7 | 1 | |
| Simplified | 1 + 6 | 5 | 8 | |||
- Far Standing Forward:
| Damage | 24[1] |  |
 |
 |
 |
 |
 |

|
| Stun | 5~11 | |||||||
| Stun Timer | 130 | |||||||
| Chain Cancel | No | |||||||
| Special Cancel | No | |||||||
| Frame Advantage | +2 | |||||||
| Frame Count | 3 | 3 | 3 | 4 | 5 | 6 | 1 | |
| Simplified | 1 + 9 | 4 | 12 | |||||
Sweep knockdown low hitting attack, great to interrupt the startup or recovery of certain attacks. To be used in conjunction with far standing RH, depending on distance.
- Crouching Forward:
| Damage | 14[1] + 24[1] |  |
 |
 |
 |
 |
 |

|
| Stun | 5~11 + 5~11 | |||||||
| Stun Timer | 60 + 60 | |||||||
| Chain Cancel | No | |||||||
| Special Cancel | No | |||||||
| Frame Advantage | -1 / +2(+1) | |||||||
| Frame Count | 3 | 3 | 3 | 6 | 5 | 4 | 1 | |
| Simplified | 1 + 6 | 3 | 6 | 10 | ||||
A beefy hitbox and large active time make this a great normal to whiff in front of you if expecting the opponent to throw something out, or to stuff attacks already on-screen. Funnily enough, this is a great normal to use in a Honda mirror match as it beats HHS and headbutt.
- Close Standing Roundhouse:
| Damage | 4[2] + 30[0] |  |
 |
 |
 |
|
| Stun | 3~9 + 10~16 | |||||
| Stun Timer | 40 + 80 | |||||
| Chain Cancel | No | |||||
| Special Cancel | No | |||||
| Frame Advantage | -4 / -1(-2) | |||||
| Frame Count | 2 | 2 | 3 | 3 | 5 | |
| Simplified | 1 + 7 | 3 | 5 | |||
 |
 |
 |

| |
| Frame Count | 8 | 6 | 3 | 1 |
| Simplified | 18 | |||
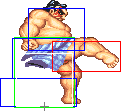
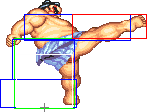
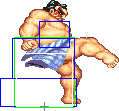
Good damage and stun but no followups. Has use as an O/S between throw/opponent jumping out of your throw attempt.
- Far Standing Roundhouse:
| Damage | 28[2] |  |
 |
 |
 |
 |
 |

|
| Stun | 5~11 | |||||||
| Stun Timer | 130 | |||||||
| Chain Cancel | No | |||||||
| Special Cancel | No | |||||||
| Frame Advantage | -3 | |||||||
| Frame Count | 3 | 3 | 3 | 6 | 8 | 10 | 1 | |
| Simplified | 1 + 9 | 6 | 19 | |||||
This is your other go-to normal aside from st.jab. Excellent long-range poke that knocks down on hit. It can beat or trade with fireball startup, can punish the recovery of whiffed normals and specials, and is an all-around annoying attack to use. At max or near-max range from hitting this normal, immediately holding up-forward to jump at your opponent will present you with a safe jump in the sense that you will land before their recovery but you will be too early to hit them with a jumping normal. If you wish to pressure them with a jumping normal, delay slightly, otherwise be satisfied that you have jumped into perfect range for st.jab and throw attempts (walk forward a few pixels to be in throw range).
- Crouching Roundhouse:
| Damage | 32[2] |  |
 |
 |
 |
 |
 |

|
| Stun | 5~11 | |||||||
| Stun Timer | 130 | |||||||
| Chain Cancel | No | |||||||
| Special Cancel | No | |||||||
| Frame Advantage | -3 / +7 | |||||||
| Frame Count | 3 | 4 | 6 | 4 | 8 | 6 | 1 | |
| Simplified | 1 + 7 | 6 | 4 | 8 | 7 | |||
Due to the length of active frames, this move has great use as an 'early' counter-poke, a move to throw out and beat your opponent's attack and sweep him in the process. This is especially good in the Guile matchup when expecting Guile to poke with cr.forward or a sweep of his own. This move is also ripe for wake-up shenanigans, as your opponent will often have to block the wrong way if this is used as a meaty on their wakeup or landing from the air.
Aerial Normals
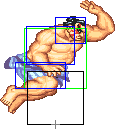
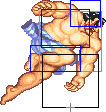
- Neutral Jumping Jab:
| Damage | 20[1] |  |
 |
 |
 |
|
| Stun | 1~7(-2) | |||||
| Stun Timer | 40 | |||||
| Frame Count | 2 | 3 | 3 | 30 | ∞ | |
| Simplified | 8 | 30 | ∞ | |||
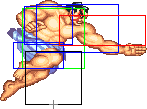
- Diagonal Jumping Jab:
| Damage | 16[1] |  |
 |
 |
 |

|
| Stun | 1~7(-2) | |||||
| Stun Timer | 40 | |||||
| Frame Count | 2 | 3 | 3 | 30 | ∞ | |
| Simplified | 8 | 30 | ∞ | |||
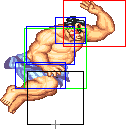
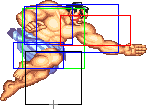
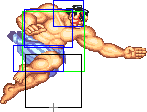
- Neutral Jumping Strong:
| Damage | 22[1] |  |
 |
 |
|
| Stun | 5~11 | ||||
| Stun Timer | 50(+10) | ||||
| Frame Count | 3 | 4 | 4 | 12 | |
| Simplified | 7 | 16 | |||
 |
 |
 |

| |
| Frame Count | 8 | 4 | 4 | ∞ |
| Simplified | ∞ | |||
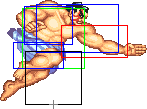
- Diagonal Jumping Strong:
| Damage | 22[1] |  |
 |
 |
|
| Stun | 5~11 | ||||
| Stun Timer | 50(+10) | ||||
| Frame Count | 3 | 4 | 4 | 12 | |
| Simplified | 7 | 16 | |||
 |
 |
 |

| |
| Frame Count | 8 | 4 | 4 | ∞ |
| Simplified | ∞ | |||
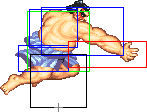
- Neutral Jumping Fierce:
| Damage | 32[2] |  |
 |
 |
 |
 |
 |

|
| Stun | 11~17(-1) | |||||||
| Stun Timer | 60(+20) | |||||||
| Frame Count | 3 | 4 | 6 | 8 | 4 | 4 | ∞ | |
| Simplified | 7 | 6 | ∞ | |||||
- Diagonal Jumping Fierce:
| Damage | 30[2] |  |
 |
 |
 |
 |
 |

|
| Stun | 3~9 | |||||||
| Stun Timer | 40 | |||||||
| Frame Count | 3 | 4 | 8 | 8 | 4 | 4 | ∞ | |
| Simplified | 7 | 8 | ∞ | |||||
- Neutral Jumping Short:
| Damage | 16[1] |  |
 |
 |
 |

|
| Stun | 1~7(-2) | |||||
| Stun Timer | 40 | |||||
| Frame Count | 3 | 4 | 30 | 4 | ∞ | |
| Simplified | 7 | 30 | ∞ | |||
- Diagonal Jumping Short:
| Damage | 16[1] | 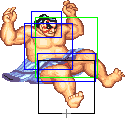 |
 |

|
| Stun | 1~7(-2) | |||
| Stun Timer | 40 | |||
| Frame Count | 3 | 4 | ∞ | |
| Simplified | 7 | ∞ | ||
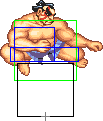
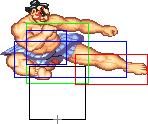
- Neutral Jumping Forward:
| Damage | 22[1] |  |
 |
 |
 |
 |
 |
 |
 |

|
| Stun | 5~11 | |||||||||
| Stun Timer | 50(+10) | |||||||||
| Frame Count | 3 | 4 | 12 | 4 | 4 | 4 | 4 | 4 | ∞ | |
| Simplified | 7 | 12 | ∞ | |||||||
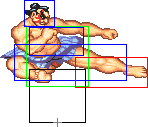
- Diagonal Jumping Forward:
| Damage | 22[1] |  |
 |
 |
 |
 |
 |
 |
 |

|
| Stun | 5~11 | |||||||||
| Stun Timer | 50(+10) | |||||||||
| Frame Count | 3 | 4 | 12 | 4 | 4 | 4 | 4 | 4 | ∞ | |
| Simplified | 7 | 12 | ∞ | |||||||
- Neutral Jumping Roundhouse:
| Damage | 30[2] |  |
 |
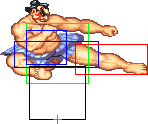 |
 |
 |
 |
 |
 |

|
| Stun | 11~17(-1) | |||||||||
| Stun Timer | 60(+20) | |||||||||
| Frame Count | 3 | 4 | 12 | 4 | 4 | 4 | 4 | 4 | ∞ | |
| Simplified | 7 | 12 | ∞ | |||||||
- Diagonal Jumping Roundhouse:
| Damage | 30[2] |  |
 |
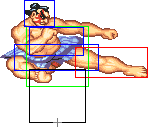 |
 |
 |
 |
 |
 |

|
| Stun | 3~9 | |||||||||
| Stun Timer | 40 | |||||||||
| Frame Count | 3 | 4 | 10 | 4 | 4 | 4 | 4 | 4 | ∞ | |
| Simplified | 7 | 10 | ∞ | |||||||
Command Normals
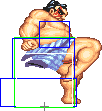
- Double Knee Attack: (On ground and close, ←/→ + Forward)
| Damage | 26[1] + 16[1] |  |
 |
 |
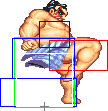 |
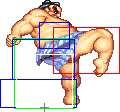
|
| Stun | 5~11 + 5~11 | |||||
| Stun Timer | 60 + 60 | |||||
| Chain Cancel | No | |||||
| Special Cancel | No | |||||
| Frame Advantage | +5 / +8(+7) | |||||
| Frame Count | 3 | 3 | 3 | 3 | 3 | |
| Simplified | 1 + 9 | 3 | 3 | |||
 |
 |
 |

| |
| Frame Count | 2 | 2 | 2 | 1 |
| Simplified | 7 | |||
- Flying Sumo Press: (Jump diagonally, ↙/↓/↘ + Forward)
| Damage | 24[2] | 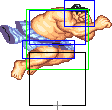 |
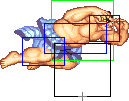 |
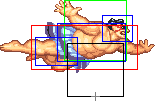
|
| Stun | 5~11 | |||
| Stun Timer | 50 | |||
| Frame Count | 3 | 4 | ∞ | |
| Simplified | 7 | ∞ | ||
Throws
E.Honda can throw using Strong, Fierce and Roundhouse. All his throws have the same range, which happens to be the best normal throw range in the game.
- Grabs Throwboxes:
| Throw | Holds |  |
 |

| |||
| Damage | 32 | Damage | 24 + 4*n | ||||
| Stun | 7~13 | Set amount of hits | 8 / 7 | ||||
| Stun Timer | 100 | Holds do no stun | |||||
| Range | (from axis) | 64 | (from throwable box) | 36 | |||
- Tawara Nage: (←/→ + Strong)
E.Honda tosses the opponent. The direction of the joystick determines the direction the enemy gets tossed at. Useful to throw characters at a corner.
- Saba Ori: (←/→ + Fierce)
This is the throw you will be using the most. It's untechable, does nice damage, and sets up crossup / walk under / tick shenanigans. You can even crossup / walk under when in the corner after a fierce grab (you can walk under, cr. RH for a crossup, or go for a crossup d + Forward, cr.Jab, Oicho, etc). Note that some characters (Balrog, Cammy, DeeJay, Vega, Fei Long) cannot be walked under outside of the corner.
- Sekkan Kyaku: (←/→ + Roundhouse)
You can start a loop against any character with this grab (unless they recover against the corner). After a successful HK grab, hold up-forward to jump in with an air attack (such as j.MK) while the character is still recovering in the air, and you'll get to repeat the tick again. This usually does one hit less than the Fierce Grab.
Special Moves
- Hyakuretsu Harite a.k.a. Hundred Hands Slap: (Press P repeatedly)
- Startup:
 |

| |
| Frame Count (Jab) | 1 | 3 |
| Simplified (Jab) | 4 | |
| Frame Count (Strong) | 3 | 4 |
| Simplified (Strong) | 7 | |
| Frame Count (Fierce) | 4 | 6 |
| Simplified (Fierce) | 10 | |
- Active:
| Jab | Strong | Fierce |  |
 |

| |
| Damage | 24[1] / 22[1] | 26[2] / 24[2] | 28[3] / 26[3] | |||
| Stun | 5~11 | |||||
| Stun Timer | 100 | |||||
| Frame Count (Jab) | 4 | 4 | 4 | |||
| Frame Count (Strong) | 2 | 2 | 2 | |||
| Frame Count (Fierce) | 1 | 1 | 1 | |||
 |
 |

| |
| Frame Count (Jab) | 4 | 4 | 4 |
| Frame Count (Strong) | 2 | 2 | 2 |
| Frame Count (Fierce) | 1 | 1 | 1 |
NOTE: That frame data only provides the frame data for one "cycle" of the HHS animation, but does not present the Minimal Durations of the move. So, in case you only do the 4 punch presses needed you will get the minimal duration. Note that O.E.Honda can slap forever unlike N.E.Honda which has a limit. That detailed frame data can be found here:
| Cycles | 1 | 2 | 3 | Total | ||||||||||||||||
| Jab | MIN | 4 | 4 | 4 | 3 | X | X | 15 | ||||||||||||
| Strong | MIN | 2 | 2 | 2 | 2 | 2 | 2 | 2 | 1 | X | X | X | X | 15 | ||||||
| Fierce | MIN | 1 | 1 | 1 | 1 | 1 | 1 | 1 | 1 | 1 | 1 | 1 | 1 | 1 | 1 | 1 | X | X | X | 15 |
| Cycles | 1 | 2 | 3 | Total | ||||||||||||||||
- Recovery:
 |

| |
| Frame Count (Jab) | 1 | 1 |
| Simplified (Jab) | 2 | |
| Frame Count (Strong) | 3 | 1 |
| Simplified (Strong) | 4 | |
| Frame Count (Fierce) | 5 | 1 |
| Simplified (Fierce) | 6 | |
The lower damage value is for the low hitting frames.
- Super Zutsuki a.k.a. Headbutt: (Charge ←, →, P)
Detailed Input: (Charge ← for at least 60f, [0~7f] → [0~10/9/7f] Jab/Strong/Fierce. It is needed to wait at least 1 frame after leaving the charge direction to enter with the P button)
- Startup + Active:
NOTE: The last damage value is for the advancing/flying part of the move.
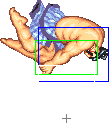
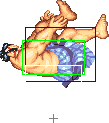
- Recovery/Knockback: (If it hits during the airbone part, the knockback will be airbone till the 4º hitbox image)
 |
 |
 |
 |
 |
 |

| |
| Frame Count | 4 | 4 | 4 | 8/9 | 2 | 2 | 1 |
| Simplified | 25/26 | ||||||
Jab headbutt will be your main defensive tool. It has invincibility on startup and has excellent vertical and horizontal range, which makes jumping in or getting in-close Honda a nearly impossible task. Learn to time your Jab headbutt and matches against non-fireballers will become way easier.
Fierce version is very fast and can be used to safely pressure and punish mistakes (whiffs or people coming down from a jumping attack for example) at mid range. Avoid using it from full-screen especially if out opponent is near the corner as he can jump it on reaction and punish you afterwards.
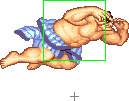
- Super Hyakkan Otoshi a.k.a. Butt Drop: (Charge ↓, ↑, K)
Detailed Input: (Charge ↓ for at least 60f, [0~7f] ↑ [0~10/9/7/5f] Short/Forward/Roundhouse/any K if you are at a jumpable state. It is needed to wait at least 1 frame after leaving the charge direction to enter with the K button)
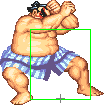
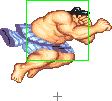
- Startup:
 |
 |
 |
 |
 |
| |
| Frame Count (Short) | 1 | 4 | 5 | 2 | 5 | 4 |
| Simplified (Short) | 21 | |||||
| Frame Count (Forward) | 1 | 3 | 4 | 2 | 5 | 4 |
| Simplified (Forward) | 19 | |||||
| Frame Count (Rh) | 1 | 3 | 4 | 2 | 4 | 4 |
| Simplified (Rh) | 18... (42) | |||||
- Active + Recovery:
| Short | Forward | Rh | Short & Forward | Roundhouse | File:OEHonda bdrop8to10anm.png |  |
 |
 |

| |
| Damage | 24[2] | 28[2] | 32[2] |  |
| |||||
| Stun | 9~15 / 2~8 | 9~15 | 9~15 | |||||||
| Stun Timer | 100 / 90 | 100 | 100 | |||||||
| Frame Count (Short) | 9 | 9 (3 + 3 + 3) | 2 | 2 | 10 | 4 | ||||
| Simplified (Short) | 9 | 13 | 10 | 4 | ||||||
| Frame Count (Forward) | 9 | 9 (3 + 3 + 3) | 2 | 2 | 12 | 5 | ||||
| Simplified (Forward) | 9 | 13 | 12 | 5 | ||||||
| Frame Count (Rh) | 11 | 9 (3 + 3 + 3) | 2 | 2 | 15 | 6 | ||||
| Simplified (Rh) | ...24 (42) | 15 | 6 | |||||||
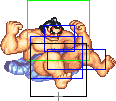
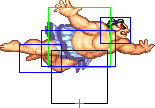
Short version hits on the way up (so it's a decent antiand is useful to get over projectiles from far away. Forward hits on the way up too, can be used to stuff projectile attempts at the right distance, and is a risky way to get over projectiles (can be punished by sweeps -shotos- and jumping attacks -Guile, DeeJay- if they see it coming). Roundhouse should be used mainly for crossups, mixups and setting ticks rather than as a way to avoid projectiles, as it is extremely easy to punish in those situations. It hits only on the way down unlike the other versions.
To use as a pressure / mixup tool, it's a good idea to do cr.Short xx Smash, varying strenghts to make the opponent guess if you are going to cross-up or not, and mixing up ticks in-between.
The lower stun value is for the downward active part of the Short version only.
