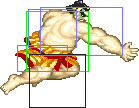
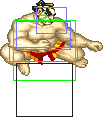
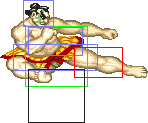
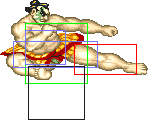
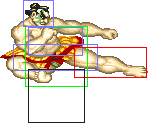
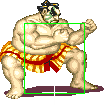
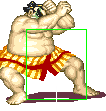
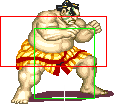
Street Fighter 2: Hyper Fighting/E. Honda

From SuperCombo Wiki
< Street Fighter 2: Hyper Fighting
Revision as of 13:20, 26 December 2012 by Fluxcore (talk | contribs) (initial lp headbuttness)
Street Fighter 2: Hyper FightingSf2hf-logo.png
Street Fighter 2: Hyper Fighting#Game ElementsStreet Fighter 2: Hyper Fighting#Game ElementsStreet Fighter 2: Hyper Fighting#CharactersStreet Fighter 2: Hyper Fighting#System InfoStreet Fighter 2: Hyper Fighting#MiscellaneousStreet Fighter 2: Hyper Fighting#Basic StrategyMvC3HeaderButtons.png

E. Honda

Sf2hf-honda-portrait.gif

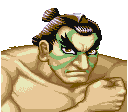
While growing up in Japan he always admired the art of sumo wrestling and he hoped to one day become the greatest sumo wrestler of all time. He spent the rest of his life dedicated to sumo, and eventually received the second-highest title of Ōzeki (the highest title is Yokozuna). He also acquires his own dojo where he teaches his students about discipline and respect for your opponent, which Honda believes are the marks of a true sumo wrestler. At some point, he went searching for worthy opponents of other fighting disciplines to prove that sumo wrestlers are the greatest fighters in the world. During this quest he was challenged by Sodom to join Mad Gear. Honda fought Sodom, won, and declined his invitation. He also fought Ryu at least once, and told Sakura (and maybe Juni found out from him, too) where to find Ryu. It is rumored that he teamed-up with Zangief to help take down the Shadaloo. He found some of the Dolls in the wake of Shadaloo's destruction that had amnesia due to the explosion and couldn't even remember their own names. He took pity on them, and brought them to his dojo, where they could be taken care of. He told them that they could leave if they wished once they regained their memory. Some time later he resumed his quest to prove the superiority of sumo in the fighting arts. It was at this time that he began actively competing in the World Warrior tournament. His star pupils at the time were Hatonoyama, Marunoumi, Yasuhanada, and Nishinofuji. He's still a sumo wrestler, as always. And training his students, of course.

In a nutshell

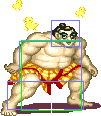
E.Honda is a decent character in Hyper Fighting, with some good matches, but also some bad ones, particularly against characters with projectiles (the Ryu matchup is very bad). His gameplay is generally defensive, although his throws set him up for some good pressure.


Character Specific Information

Character Data
Damage Scaling Factor:
25/32
Pre-Jump Frames:
5f
Jump duration (b/u/f):
45f/45f/43f


Color Options

Default Start
File:Sf2hf-honda-1p.png File:Sf2hf-honda-2p.png

Moves List

Normal Moves

  • Standing Normal Moves (st.)
Name
Command
Base Damage
Random damage table
Stun
Stun Timer
Startup
Active
Recov.
Adv On Hit/Block
Notes
Standing Light Punch
{{#motion: lp }}
16
4
40
5
4
3
+7/+8
{{#motion: }}
Standing Medium Punch
{{#motion: mp }}
20
8
60
7
4
5
+10/+11
{{#motion: }}
Standing Hard Punch
{{#motion: hp }}
26
14
80
7
7
18
-2/-1
{{#motion: }}
Standing Light Kick
{{#motion: lk }}
14
8
130
10
4
7
KD/+4
{{#motion: low knockdown }}
Standing Medium Kick
{{#motion: mk }}
18
8
130
10
4
12
KD/+4
{{#motion: low knockdown }}
Standing Hard Kick
{{#motion: hk }}
24
8
130
10
6
19
KD/-1
{{#motion: low knockdown }}
  • Close Standing Normal Moves (cl.)
Name
Command
Base Damage
Random damage table
Stun
Stun Timer
Startup
Active
Recov.
Adv On Hit/Block
Notes
Close Light Kick
{{#motion: (near opponent) lk }}
16
4
40
7
3
4
+7/+8
{{#motion: }}
Close Medium Kick
{{#motion: (near opponent) mk }}
20
8
60
7
5
8
+6/+7
{{#motion: }}
Close Hard Kick
{{#motion: (near opponent) hk }}
26,18
14,7
80,80
8
3,5
18
-1/+0
{{#motion: }}
  • Crouching Normal Moves (cr.)
Name
Command
Base Damage
Random damage table
Stun
Stun Timer
Startup
Active
Recov.
Adv On Hit/Block
Notes
Crouching Light Punch
{{#motion: any d + lp }}
14
4
40
5
8
3
+3/+4
{{#motion: }}
Crouching Medium Punch
{{#motion: any d + mp }}
18
8
60
7
8
11
+0/+1
{{#motion: }}
Crouching Hard Punch
{{#motion: any d + hp }}
24
8
130
6
4
28
KD/-8
{{#motion: low knockdown }}
Crouching Light Kick
{{#motion: any d + lk }}
14
4
40
10
3
7
+4/+5
{{#motion: }}
Crouching Medium Kick
{{#motion: any d + mk }}
18,18
8,8
60,60
7
3,6
10
+2/+3
{{#motion: }}
Crouching Hard Kick
{{#motion: any d + hk }}
24
8
130
8
6(4)8
7
KD/-1
{{#motion: low knockdown }}
  • Jumping Normal Moves (nj.)
Name
Command
Base Damage
Random damage table
Stun
Stun Timer
Startup
Active
Recov.
Adv On Hit/Block
Notes
Neutral Jumping Light Punch
{{#motion: u + lp }}
18
4
40
12
30
-
{{#motion: high }}
Neutral Jumping Medium Punch
{{#motion: u + mp }}
22
8
50
8
16
-
{{#motion: high }}
Neutral Jumping Hard Punch
{{#motion: u + hp }}
28
14
60
8
6
-
{{#motion: high }}
Neutral Jumping Light Kick
{{#motion: u + lk }}
18
4
40
8
30
-
{{#motion: high }}
Neutral Jumping Medium Kick
{{#motion: u + mk }}
22
8
50
8
12
-
{{#motion: high }}
Neutral Jumping Hard Kick
{{#motion: u + hk }}
28
14
60
8
6
-
{{#motion: high }}
  • Diagonal Jumping Normal Moves (j.)
Name
Command
Base Damage
Random damage table
Stun
Stun Timer
Startup
Active
Recov.
Adv On Hit/Block
Notes
Diagonal Jumping Light Punch
{{#motion: ub / uf + lp }}
16
4
40
12
30
-
{{#motion: high }}
Diagonal Jumping Medium Punch
{{#motion: ub / uf + mp }}
20
8
50
8
16
-
{{#motion: high }}
Diagonal Jumping Hard Punch
{{#motion: ub / uf + hp }}
26
14
60
8
6
-
{{#motion: high }}
Diagonal Jumping Light Kick
{{#motion: ub / uf + lk }}
16
4
40
8
-
-
{{#motion: high }}
Diagonal Jumping Medium Kick
{{#motion: ub / uf + mk }}
20
8
50
8
-
-
{{#motion: high }}
Diagonal Jumping Hard Kick
{{#motion: ub / uf + hk }}
26
14
60
8
12
-
{{#motion: high }}
  • Unique Moves
Name
Command
Base Damage
Random damage table
Stun
Stun Timer
Startup
Active
Recov.
Adv On Hit/Block
Notes
Hiza Geri
{{#motion: b / f + mk }}
22,22
8,8
60,60
11
3,3
7
+8/+9
{{#motion: }}
  • Throws
Name
Command
Base Damage
Random damage table
Stun
Stun Timer
Startup
Active
Recov.
Adv On Hit/Block
Notes
Tawara Nage
{{#motion: b / f + mp }}
30
-
10
99
-
-
-
-
{{#motion: throw }}
Saba Ori (Bear Hug)
{{#motion: b / f + hp }}
22 + (4*n)
-
4
40
-
-
-
-
{{#motion: Grab.png }}
Sekkan Kyaku (Knee Bash)
{{#motion: b / f + hk }}
22 + (4*n)
-
14
80
-
-
-
-
{{#motion: Grab.png }}
  • Special Moves
Name
Command
Base Damage
Random damage table
Stun
Stun Timer
Startup
Active
Recov.
Adv On Hit/Block
Notes
Hundred Hand Slap
{{#motion: press lp repeatedly }}
24*n
8
120
5
 ?
 ?
 ?/?
{{#motion: b or f to move during HHS
Requires 5 button presses }}
Hundred Hand Slap
{{#motion: press mp repeatedly }}
26*n
8
120
8
 ?
 ?
 ?/?
{{#motion: b or f to move during HHS
Requires 5 button presses }}
Hundred Hand Slap
{{#motion: press hp repeatedly }}
28*n
8
120
11
 ?
 ?
 ?/?
{{#motion: b or f to move during HHS
Requires 5 button presses }}
Sumo Headbutt
{{#motion: any b (charge), any f + lp }}
18
16
120
14
9
25
-11/-14
{{#motion: startupinv
hardknockdown (after invincibility)
60f charge }}
Sumo Headbutt
{{#motion: any b (charge), any f + mp }}
26
16
120
12*
4
25
KD/-4
{{#motion: startupinv hardknockdown
60f charge }}
Sumo Headbutt
{{#motion: any b (charge), any f + hp }}
28
16
120
7*
3
25
KD/-4
{{#motion: startupinv hardknockdown
60f charge }}
Sumo Butt Drop
{{#motion: any d (charge), u + lk }}
18
16
120
21*
4
18
-5/-8
{{#motion: startupinv
hardknockdown (downward hit only)
60f charge }}
Sumo Butt Drop
{{#motion: any d (charge), u + mk }}
22
16
120
21
4
20
-11/-14
{{#motion: startupinv
hardknockdown (downward hit only)
60f charge }}
Sumo Butt Drop
{{#motion: any d (charge), u + hk }}
26
16
120
21
4
22
-17/-20
{{#motion: startupinv
hardknockdown (downward hit only)
60f charge }}

The Basics

Honda is a classic turtle character, but depending on the circumstances, he can attack a bit in Hyper Fighting as well. This is because Honda's moves have good recovery time and there are no big super combos to set you back.

However, his defense should be stressed; if you have a good lead and the opponent doesn't have a fireball, you can be good by just crouching across the screen from the other guy and staring at him. If he tries to move in for a grab, headbutt him; if he jumps in, jab headbutt to counter.

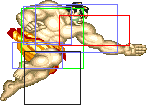
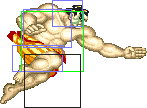
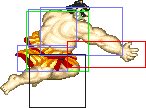
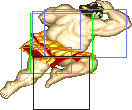
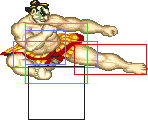
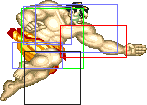
All headbutts have invincibility, however only the LP headbutt will hit during the invincible frames - however this hit will not knock the opponent down. MP and HP headbutts will at best trade with another hit, but will knockdown. LP headbutt is generally your best bet to use as a reversal move.

In HF, Honda's primary way of attacking is throwing; his bear hug gives you a little mix-up afterward. If they don't have a good reversal, start a hundred hand slap and chip some life. Even if they do, you can bait their reversal and grab again.

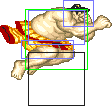
You can also use the butt drop to keep them guessing. Know your ranges and do butt drops slightly past their sprites so they have to block the other way. Don't do this predictably, of course.

Advanced Strategy

http://www.youtube.com/watch?v=pB1_TIoJy1o

Combos

Match-ups

  • Vs. Balrog (boxer):

Hundred-Hand Slap throughout the whole fight, the only thing Balrog can do is trade hits (the trade is usually in E. Honda's favor).


  • Vs. Blanka:


  • Vs. Chun-Li:


  • Vs. Dhalsim:


  • Vs. E. Honda (self):


  • Vs. Guile:


  • Vs. Ken:


  • Vs. M. Bison (dictator):


  • Vs. Ryu:

This fight is terrible for Honda, and to win this requires the opponent to give it away. Fortunately, most people do. Look for flags on the opponent's part before he throws a fireball; that way, you can "psychically" jump forward and kick him out of his recovery time. Most players don't catch on. Of the ones that do, you will be forced to be tricky. That's up to you.


  • Vs. Sagat:


  • Vs. Vega (claw):


  • Vs. Zangief:


Hitboxes

Standing Normals

  • Standing LP:
Sf2hf-honda-lp-s0.png File:Sf2hf-honda-lp-s1.png File:Sf2hf-honda-lp-a1.png File:Sf2hf-honda-lp-s1.png
1 2 2 4 2 1
5 4 3
  • Standing MP:
Sf2hf-honda-lp-s0.png File:Sf2hf-honda-mp-s1.png File:Sf2hf-honda-mp-s2.png File:Sf2hf-honda-mp-a1.png File:Sf2hf-honda-mp-s2.png File:Sf2hf-honda-mp-s1.png
1 2 2 2 4 2 2 1
7 4 5
  • Standing HP:
Sf2hf-honda-lp-s0.png File:Sf2hf-honda-hp-s1.png File:Sf2hf-honda-hp-a1.png File:Sf2hf-honda-hp-a2.png File:Sf2hf-honda-hp-r1.png File:Sf2hf-honda-hp-r2.png File:Sf2hf-honda-hp-r3.png File:Sf2hf-honda-hp-s1.png
1 3 3 3 4 7 5 3 2 1
7 4 18


  • Standing LK:
Sf2hf-honda-lp-s0.png File:Sf2hf-honda-lk-s1.png File:Sf2hf-honda-lk-s2.png File:Sf2hf-honda-lk-a1.png File:Sf2hf-honda-lk-s2.png File:Sf2hf-honda-lk-s1.png
1 3 3 3 4 3 3 1
10 4 7
  • Standing MK:
Sf2hf-honda-lp-s0.png File:Sf2hf-honda-lk-s1.png File:Sf2hf-honda-lk-s2.png File:Sf2hf-honda-mk-a1.png File:Sf2hf-honda-lk-s2.png File:Sf2hf-honda-lk-s1.png
1 3 3 3 4 5 6 1
10 4 12
  • Standing HK:
Sf2hf-honda-lp-s0.png File:Sf2hf-honda-lk-s1.png File:Sf2hf-honda-lk-s2.png File:Sf2hf-honda-hk-a1.png File:Sf2hf-honda-lk-s2.png File:Sf2hf-honda-lk-s1.png
1 3 3 3 6 8 10 1
10 6 19

Close Standing Normals

  • Close LK:
Sf2hf-honda-lp-s0.png File:Sf2hf--cllk-s4-6.png File:Sf2hf--cllk-a7-9.png File:Sf2hf--cllk-s4-6.png
1 3 3 3 3 1
7 3 4
  • Close MK:
Sf2hf-honda-lp-s0.png File:Sf2hf--cllk-s4-6.png File:Sf2hf--clmk-a7-11.png File:Sf2hf--cllk-s4-6.png
1 3 3 5 7 1
7 5 8
  • Close HK:
Sf2hf-honda-lp-s0.png File:Sf2hf--clhk-r30-32.png File:Sf2hf--clhk-r24-29.png File:Sf2hf--clhk-a8-10.png File:Sf2hf--clhk-a11-15.png File:Sf2hf--clhk-r16-23.png File:Sf2hf--clhk-r24-29.png File:Sf2hf--clhk-r30-32.png
1 2 2 3 3 5 8 6 3 1
8 8 18

Crouching Normals

  • Crouching LP:
File:Sf2hf-honda-crmp-s1-2.png File:Sf2hf-honda-crlp-s3-4.png File:Sf2hf-honda-lp-crlp-a5-12.png File:Sf2hf-honda-crlp-s3-4.png
1 2 2 8 2 1
5 8 3
  • Crouching MP:
File:Sf2hf-honda-crmp-s1-2.png File:Sf2hf-honda-crmp-s3-4.png File:Sf2hf-honda-crmp-s5-6.png File:Sf2hf-lp-crmp-a7-14.png File:Sf2hf-honda-crmp-s5-6.png File:Sf2hf-honda-crmp-s3-4.png
1 2 2 2 8 6 4 1
7 8 11
  • Crouching HP:
File:Sf2hf-honda-crmp-s1-2.png File:Sf2hf-honda-crhp-s3-5.png File:Sf2hf-lp-crhp-a6-9.png File:Sf2hf-honda-crhp-r10-15.png File:Sf2hf-honda-crhp-r16-23.png File:Sf2hf-honda-crhp-r10-15.png File:Sf2hf-honda-crhp-r30-33.png File:Sf2hf-honda-crhp-r34-36.png
1 2 3 4 6 8 6 4 3 1
6 4 28
  • Crouching LK:
File:Sf2hf-honda-crmp-s1-2.png File:Sf2hf-lp-crlk-s4-6.png File:Sf2hf-lp-crlk-s7-9.png File:Sf2hf-honda-lp-crlk-a10-12.png File:Sf2hf-lp-crlk-s7-9.png File:Sf2hf-lp-crlk-s4-6.png
1 3 3 3 3 3 3 1
10 3 7
  • Crouching MK:
File:Sf2hf-honda-crmp-s1-2.png File:Sf2hf-lp-crlk-s4-6.png File:Sf2hf-honda-lp-crmk-a7-9.png File:Sf2hf-honda-lp-crmk-a10-15.png File:Sf2hf-lp-crlk-s7-9.png File:Sf2hf-lp-crlk-s4-6.png
1 3 3 3 6 5 4 1
7 9 10
  • Crouching HK:
File:Sf2hf-honda-crmp-s1-2.png File:Sf2hf-honda-crhk-s4-7.png File:Sf2hf-honda-crhk-a8-13.png File:Sf2hf-honda-crhk-a14-9.png File:Sf2hf-honda-crhk-a10-17.png File:Sf2hf-honda-crhk-r18-23.png
1 3 4 6 4 8 6 1
8 18 7

Aerial Normals

  • Neutral Jumping LP:
Sf2hf-honda-djlp-s0-2.png Sf2hf-honda-djlp-s3-6.png Sf2hf-honda-djlp-s7-10.png Sf2hf-honda-njlp-a11-40.png Sf2hf-honda-djlp-r.png
3 4 4 30
11 30
  • Neutral Jumping MP:
Sf2hf-honda-djlp-s0-2.png Sf2hf-honda-djlp-s3-6.png Sf2hf-honda-djmp-a7-10.png Sf2hf-honda-djmp-a11-22.png Sf2hf-honda-djlp-r.png Sf2hf-honda-djmp-r31-34.png Sf2hf-honda-djlp-s7-10.png Sf2hf-honda-djlp-s3-6.png
3 4 4 12 8 4 4
7 16
  • Neutral Jumping HP:
Sf2hf-honda-djlp-s0-2.png Sf2hf-honda-djhp-r25-28.png Sf2hf-honda-djhp-a7-12.png Sf2hf-honda-djhp-r13-20.png Sf2hf-honda-djhp-r21-24.png Sf2hf-honda-djhp-r25-28.png Sf2hf-honda-djlp-s0-2.png
3 4 6 8 4 4
7 6
  • Neutral Jumping LK:
Sf2hf-honda-djhk-s0-2.png Sf2hf-honda-djhk-s3-6.png Sf2hf-honda-njlk-a7-36.png Sf2hf-honda-djhk-s3-6.png Sf2hf-honda-djhk-s0-2.png
3 4 30 4
7 30
  • Neutral Jumping MK:
Sf2hf-honda-djhk-s0-2.png Sf2hf-honda-djhk-s3-6.png Sf2hf-honda-njmk-a7-18.png Sf2hf-honda-djhk-s3-6.png Sf2hf-honda-djhk-s0-2.png Sf2hf-honda-djhk-r27-30.png Sf2hf-honda-djhk-r31-34.png Sf2hf-honda-njmk-r35-38.png Sf2hf-honda-djlp-s0-2.png
3 4 12 4 4 4 4 4
7 12
  • Neutral Jumping HK:
Sf2hf-honda-djhk-s0-2.png Sf2hf-honda-djhk-s3-6.png Sf2hf-honda-njhk-a7-12.png Sf2hf-honda-djhk-s3-6.png Sf2hf-honda-djhk-s0-2.png Sf2hf-honda-djhk-r27-30.png Sf2hf-honda-djhk-r31-34.png Sf2hf-honda-njmk-r35-38.png Sf2hf-honda-djlp-s0-2.png
2 4 6 4 4 4 4 4
7 6
  • Diagonal Jumping LP:
Sf2hf-honda-djlp-s0-2.png Sf2hf-honda-djlp-s3-6.png Sf2hf-honda-djlp-s7-10.png Sf2hf-honda-djlp-a11-40.png Sf2hf-honda-djlp-r.png
3 4 4 30
11 30
  • Diagonal Jumping MP:
Sf2hf-honda-djlp-s0-2.png Sf2hf-honda-djlp-s3-6.png Sf2hf-honda-djmp-a7-10.png Sf2hf-honda-djmp-a11-22.png Sf2hf-honda-djlp-r.png Sf2hf-honda-djmp-r31-34.png Sf2hf-honda-djlp-s7-10.png Sf2hf-honda-djlp-s3-6.png
3 4 4 12 8 4 4
7 16
  • Diagonal Jumping HP:
Sf2hf-honda-djlp-s0-2.png Sf2hf-honda-djhp-r25-28.png Sf2hf-honda-djhp-a7-12.png Sf2hf-honda-djhp-r13-20.png Sf2hf-honda-djhp-r21-24.png Sf2hf-honda-djhp-r25-28.png Sf2hf-honda-djlp-s0-2.png
3 4 6 8 4 4
7 6
  • Diagonal Jumping LK:
Sf2hf-honda-djlk-s0-2.png Sf2hf-honda-djlk-s3-6.png Sf2hf-honda-djlk-a7-Infinity.png
3 4
7
  • Diagonal Jumping MK:
Sf2hf-honda-djmk-s0-2.png Sf2hf-honda-djmk-s3-6.png Sf2hf-honda-djmk-a7-Infinity.png
3 4
7
  • Diagonal Jumping HK:
Sf2hf-honda-djhk-s0-2.png Sf2hf-honda-djhk-s3-6.png Sf2hf-honda-djhk-a7-18.png Sf2hf-honda-djhk-s3-6.png Sf2hf-honda-djhk-s0-2.png Sf2hf-honda-djhk-r27-30.png Sf2hf-honda-djhk-r31-34.png Sf2hf-honda-njmk-r35-38.png Sf2hf-honda-djlp-s0-2.png
3 4 12 4 4 4 4 4
7 12

Unique Normals

  • Hiza Geri aka Double Knee:
Sf2hf-honda-lp-s0.png File:Sf2hf-honda-lk-s1.png File:Sf2hf--clhk-r24-29.png File:Sf2hf-honda-fmk-a10-12.png File:Sf2hf-honda-fmk-a13-15.png File:Sf2hf-honda-fmk-r16-17.png File:Sf2hf--clhk-r24-29.png File:Sf2hf-honda-lk-s1.png
1 3 3 3 3 3 2 2 2 1
10 6 7


Special Moves

  • Sumo Headbutt:
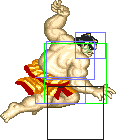
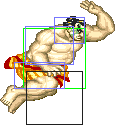
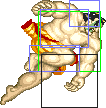
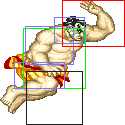
Sf2hf-honda-hblp-s0-2.png Sf2hf-honda-hblp-s3-6.png Sf2hf-honda-hblp-s7-12.png Sf2hf-honda-hblp-a0-2.png Sf2hf-honda-hblp-a3-5.png Sf2hf-honda-hblp-a6-8.png
3 4 6 3 3 3
13 9
Sf2hf-honda-hblp-r0-3f.png Sf2hf-honda-hblp-r4-7f.png Sf2hf-honda-hblp-r8-11f.png Sf2hf-honda-hblp-r12.png
4 4 4 8 2 2 1
25

Misc Animations

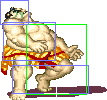
Walk back Neutral Walk Fwd Crouch
Sf2hf-honda-bwd.png File:Sf2hf-honda-n.png Sf2hf-honda-fwd.png Sf2hf-honda-cr.png
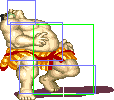
  • Standing reel:
Sf2hf-honda-reel1.png Sf2hf-honda-reel2.png Sf2hf-honda-reel3.png
  • Standing gut reel:
Sf2hf-honda-gutreel1.png Sf2hf-honda-gutreel2.png Sf2hf-honda-gutreel3.png
  • Crouching reel:
Sf2hf-honda-creel1.png Sf2hf-honda-creel2.png
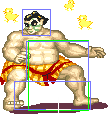
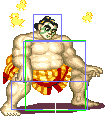
  • Dizzy:
Sf2hf-honda-dizzy1.png Sf2hf-honda-dizzy2.png Sf2hf-honda-dizzy3.png