Introduction
Honda is a strange character. He destroys most non-fireball characters, yet he's destroyed by most fireball characters. He alternates between rushdown and mixups to extreme turtling.
If you are willing to use Honda, just be aware that fighting against good zoning characters is an extremely hard task, as his ways to get in are easily countered by good anti-air moves. You'll spend all the match patiently trying to get in once, and if you manage to get in, you have to be brutal enough and end the round right there.
Competitive Overview
Strengths & Weaknesses
New & Old Versions Comparison
To select O.E.Honda, choose E.Honda and then press ← → → → Jab/Fierce, pressing Short simultaneously with the punch button for the alternate color.
Here is the list of differences:
- Obvious stuff: O.E.Honda can not tech throws, does not have the Oicho Throw and Super;
- O.E.Honda has some differences in some of his normals:
- Close Standing Jab is exactly like the Far version. N.E.Honda received a new Close punch that combos into itself;
- Far Standing Jab has faster startup/recovery and can be special canceled;
- Crouching Jab can be special canceled;
- Close Standing Strong is exactly like the Far version. N.E.Honda received a new Close punch that can be used in ticking;
- Far Standing Strong has faster recovery;
- Crouching Strong has better range and priority and can be used as anti air;
- Close Standing Fierce first active part has less active frames and the other active part has more active frames and better priority/range. The total of active frames is the same though;
- Far Standing Fierce is exactly like the Far version. N.E.Honda has a different version of O.E.Honda's Crouching Fierce with worse priority, worse startup, no knockdown, less damage potential, and no special cancel, but with a lot better recovery;
- Crouching Fierce is his classic sweep punch. N.E.Honda received a new Crouching punch that hits twice;
- Close Standing Short is a low hitting kick. N.E.Honda received a new Close knee that can be used in ticking;
- Far Standing Short is a fast hitting sweep. N.E.Honda has a different version of O.E.Honda's Crouching Short with bigger hurtbox and worse priority;
- Crouching Short is his classic spear kick. N.E.Honda received a near identical version of O.E.Honda Close Standing Short instead;
- Close Standing Forward is a low hitting kick. N.E.Honda received a new Close knee that can be used in ticking;
- Far Standing Forward is a fast hitting sweep. N.E.Honda has a different version of O.E.Honda's Crouching Forward with bigger hurtbox, less damage on the first hit and worse priority;
- Crouching Forward is his classic 2-hit spear kick. N.E.Honda received a near identical version of O.E.Honda Close Standing Forward;
- Far Standing Roundhouse is his classic long range sweep. For N.E.Honda it's the same as the Close version and that long range sweep became a Command Normal;
- Neutral Jumping Jab is basically the same but with bigger hurtbox during the active frames. The horizontal priority is the same though;
- Diagonal Jumping Jab has faster startup and a lot more active frames but with bigger hurtbox during the active frames. The horizontal priority is the same though;
- Neutral Jumping Strong second active part has bigger hurtbox. The horizontal priority is the same though;
- Diagonal Jumping Strong has 2 active parts and more active frames, but the first hitting part has less active frames if compared with N.E.Honda's version;
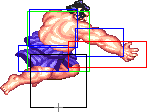
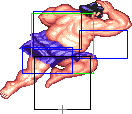
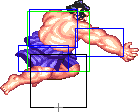
- Neutral Jumping Fierce can not be steered and has bigger hurtbox during the active frames and some frames later. The horizontal priority is the same though;
- Diagonal Jumping Fierce has bigger hurtbox during the active frames and some frames later. The horizontal priority is the same though;
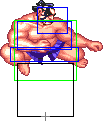
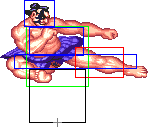
- Neutral Jumping Short has better horizontal priority;
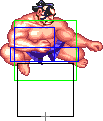
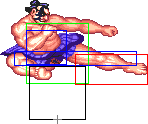
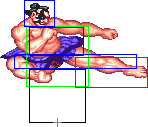
- Both Jumping Forwards have better horizontal priority but worse vertical priority. All in all N.E.Honda's version is better;
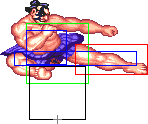
- Neutral Jumping Roundhouse has a lot better priority and twice as many active frames;
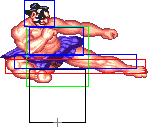
- Diagonal Jumping Roundhouse has a lot better priority but can not be used as a crossup attack;
- O.E.Honda's HHS behaves differently: has a little faster startup, a lot faster recovery, less minimal attacking duration and steerable properties. N.E.Honda's version is slower and can not be steered but Strong and Fierce versions create a fast impulse once activated;
- O.E.Honda's Headbutts do less knockback on block/hit;
- O.E.Honda's Jab Headbutt has slower startup and Strong headbutt has twice as much active frames;
- O.E.Honda's Butt Drop has smaller hitbox on the second active part (when he's falling) which gives him worse crossup ability;
In general, O.E.Honda has a better normal set (has a awesome Standing Jab, can use his Fierce Chop from any range, has all his knockdown normals from HF and most of his other normals have little benefits). But because his HHS is so different he is played in a different way (like HF Honda). Both versions have pretty much the same strength though, they are just played differently. Choose whichever version suits your style better.
Color Options
| Jab | Strong | Fierce | Start | Old |
 |
 |
 |
 |

|
 |
 |
 |
 |

|
| Short | Forward | Roundhouse | Hold | Old Alternative |
--Born2SPD
Moves Analysis
Normal Moves
Ground Normals
Disclaimer: Ground normals take one extra frame to enter their start-up, which is the reason for the additional frame on the 'Simplified' row.
- Close Standing Jab:
| Damage | 17 |  |
 |
 |
 |
 |

|
| Stun | 0~5 | ||||||
| Stun Timer | 40 | ||||||
| Chain Cancel | No | ||||||
| Special Cancel | Yes | ||||||
| Super Cancel | Yes | ||||||
| Frame Advantage | ? | ||||||
| Frame Count | 1 | 2 | 2 | 1 | 1 | 1 | |
| Simplified | 1 + 3 | 2 | 3 | ||||
Good as a tick and for some combos, but not much else.
- Far Standing Jab:
| Damage | 17 |  |
 |
 |
 |

|
| Stun | 0~5 | |||||
| Stun Timer | 40 | |||||
| Chain Cancel | No | |||||
| Special Cancel | No | |||||
| Super Cancel | No | |||||
| Frame Advantage | ? | |||||
| Frame Count | 2 | 3 | 4 | 4 | 1 | |
| Simplified | 1 + 5 | 4 | 5 | |||
Good priority makes it a great way to deal with "rushing" moves (Blanka Rolls, Hawk dives, Honda Headbutts, etc) and can be used as an anti-air. Will beat most pokes. The best attack to start your HP hands from since it's quite fast, but for that same reason it requires more execution.
- Crouching Jab:
| Damage | 17 |  |
 |
 |
 |

|
| Stun | 0~5 | |||||
| Stun Timer | 40 | |||||
| Chain Cancel | No | |||||
| Special Cancel | No | |||||
| Super Cancel | Yes | |||||
| Frame Advantage | ? | |||||
| Frame Count | 2 | 2 | 8 | 2 | 1 | |
| Simplified | 1 + 4 | 8 | 3 | |||
Nice poke, doesn't have as much priority as st.LP but has better range and is not as vulnerable to low attacks. It's great for buffering HP hands, either whiffed or blocked, due to its long active time. This also makes it a good meaty to start ticks.
- Close Standing Strong:
| Damage | 21 |  |
 |
 |
 |
 |

|
| Stun | 5~11 | ||||||
| Stun Timer | 60 | ||||||
| Chain Cancel | No | ||||||
| Special Cancel | No | ||||||
| Super Cancel | Yes | ||||||
| Frame Advantage | ? | ||||||
| Frame Count | 2 | 2 | 2 | 2 | 2 | 1 | |
| Simplified | 1 + 4 | 2 | 5 | ||||
- Far Standing Strong:
| Damage | 21 |  |
 |
 |
 |
 |
 |

|
| Stun | 5~11 | |||||||
| Stun Timer | 60 | |||||||
| Chain Cancel | No | |||||||
| Special Cancel | No | |||||||
| Super Cancel | No | |||||||
| Frame Advantage | ? | |||||||
| Frame Count | 2 | 2 | 2 | 4 | 3 | 2 | 1 | |
| Simplified | 1 + 6 | 4 | 6 | |||||
More range than st.LP, it's another good way to mask your HP hands.
- Crouching Strong:
| Damage | 21 |  |
 |
 |
 |
 |
 |

|
| Stun | 5~11 | |||||||
| Stun Timer | 60 | |||||||
| Chain Cancel | No | |||||||
| Special Cancel | No | |||||||
| Super Cancel | No | |||||||
| Frame Advantage | ? | |||||||
| Frame Count | 2 | 2 | 2 | 8 | 6 | 4 | 1 | |
| Simplified | 1 + 6 | 8 | 11 | |||||
Its hitbox makes it great for beating some key crouching attacks, like Guile's and Chun's cr.MK. A bit slow though.
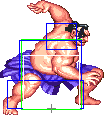
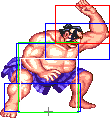
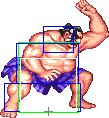
- Close Standing Fierce:
| Damage | 26 |  |
 |
 |

|
| Stun | 10~16 | ||||
| Stun Timer | 80 | ||||
| Chain Cancel | No | ||||
| Special Cancel | No | ||||
| Super Cancel | No | ||||
| Frame Advantage | ? | ||||
| Frame Count | 3 | 3 | 5 | 2 | |
| Simplified | 1 + 6 | 7 | |||
 |
 |
 |
 |

| |
| Frame Count | 7 | 5 | 3 | 2 | 1 |
| Simplified | 18 | ||||
Can be used to anti-air attacks directly above you (such as a Vega trying to wall-dive you against your corner, when you are cornered). Its main problem is that you have to be very close for this attack to come out. Time it incorrectly and far standing fierce will come out instead, leaving you completely open.
- Far Standing Fierce:
| Damage | 26 |  |
 |

|
| Stun | 10~16 | |||
| Stun Timer | 80 | |||
| Chain Cancel | No | |||
| Special Cancel | No | |||
| Super Cancel | No | |||
| Frame Advantage | ? | |||
| Frame Count | 3 | 4 | 4 | |
| Simplified | 1 + 7 | 4 | ||
 |
 |
 |
 |
 |

| |
| Frame Count | 4 | 6 | 4 | 2 | 1 | 1 |
| Simplified | 18 | |||||
Usually, what you get for mistiming cl.HP or not doing HP hands correctly. Unlike O.Honda's cr.HP, it doesn't hit low, it's not cancelable and is very slow. Outside of a particular combo, its only use is to leave you wide open.
- Crouching Fierce:
| Damage | 14+14 |  |
 |
 |
 |
 |

|
| Stun | 1~7+1~7 | ||||||
| Stun Timer | 70+70 | ||||||
| Chain Cancel | No | ||||||
| Special Cancel | No | ||||||
| Super Cancel | Yes/No | ||||||
| Frame Advantage | ? | ||||||
| Frame Count | 2 | 2 | 4 | 2 | 2 | 2 | |
| Simplified | 1 + 4 | 4 | 6 | ||||
 |
 |
 |

| |
| Frame Count | 8 | 6 | 4 | 1 |
| Simplified | 8 | 11 | ||
Not very useful outside a few combos.
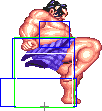
- Close Standing Short:
| Damage | 16 |  |
 |
 |
 |
 |
 |
 |

|
| Stun | 0~5 | ||||||||
| Stun Timer | 40 | ||||||||
| Chain Cancel | No | ||||||||
| Special Cancel | Yes | ||||||||
| Super Cancel | Yes | ||||||||
| Frame Advantage | ? | ||||||||
| Frame Count | 1 | 1 | 1 | 3 | 2 | 1 | 1 | 1 | |
| Simplified | 1 + 3 | 3 | 5 | ||||||
- Far Standing Short:
| Damage | 16 |  |
 |
 |
 |
 |
 |

|
| Stun | 0~5 | |||||||
| Stun Timer | 40 | |||||||
| Chain Cancel | No | |||||||
| Special Cancel | No | |||||||
| Super Cancel | No | |||||||
| Frame Advantage | ? | |||||||
| Frame Count | 3 | 3 | 3 | 3 | 3 | 3 | 1 | |
| Simplified | 1 + 9 | 3 | 7 | |||||
- Crouching Short:
| Damage | 16 |  |
 |
 |
 |

|
| Stun | 0~5 | |||||
| Stun Timer | 40 | |||||
| Chain Cancel | No | |||||
| Special Cancel | Yes | |||||
| Super Cancel | Yes | |||||
| Frame Advantage | ? | |||||
| Frame Count | 1 | 2 | 3 | 3 | 1 | |
| Simplified | 1 + 3 | 3 | 4 | |||
- Close Standing Forward:
| Damage | 19 |  |
 |
 |
 |
 |
 |
 |

|
| Stun | 5~11 | ||||||||
| Stun Timer | 60 | ||||||||
| Chain Cancel | No | ||||||||
| Special Cancel | No | ||||||||
| Super Cancel | No | ||||||||
| Frame Advantage | ? | ||||||||
| Frame Count | 1 | 2 | 2 | 3 | 2 | 2 | 2 | 1 | |
| Simplified | 1 + 5 | 3 | 7 | ||||||
- Far Standing Forward:
| Damage | 4+21 |  |
 |
 |
 |
 |
 |

|
| Stun | 5~11+5~11 | |||||||
| Stun Timer | 60+60 | |||||||
| Chain Cancel | No | |||||||
| Special Cancel | No | |||||||
| Super Cancel | No | |||||||
| Frame Advantage | ? | |||||||
| Frame Count | 3 | 3 | 3 | 6 | 5 | 4 | 1 | |
| Simplified | 1 + 6 | 3 | 6 | 10 | ||||
- Crouching Forward:
| Damage | 19 |  |
 |
 |
 |

|
| Stun | 5~11 | |||||
| Stun Timer | 60 | |||||
| Chain Cancel | No | |||||
| Special Cancel | No | |||||
| Super Cancel | No | |||||
| Frame Advantage | ? | |||||
| Frame Count | 3 | 3 | 5 | 7 | 1 | |
| Simplified | 1 + 6 | 5 | 8 | |||
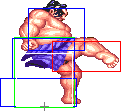
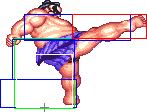
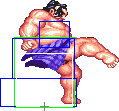
- Close/Far Standing Roundhouse:
| Damage | 4+26 |  |
 |
 |
 |
|
| Stun | 3~9+10~16 | |||||
| Stun Timer | 40+80 | |||||
| Chain Cancel | No | |||||
| Special Cancel | No | |||||
| Super Cancel | No | |||||
| Frame Advantage | ? | |||||
| Frame Count | 2 | 2 | 3 | 3 | 5 | |
| Simplified | 1 + 7 | 3 | 5 | |||
 |
 |
 |

| |
| Frame Count | 8 | 6 | 3 | 1 |
| Simplified | 18 | |||
- Crouching Roundhouse:
| Damage | 27 |  |
 |
 |
 |
 |
 |

|
| Stun | 5~11 | |||||||
| Stun Timer | 130 | |||||||
| Chain Cancel | No | |||||||
| Special Cancel | No | |||||||
| Super Cancel | No | |||||||
| Frame Advantage | ? | |||||||
| Frame Count | 3 | 4 | 6 | 4 | 8 | 6 | 1 | |
| Simplified | 1 + 7 | 6 | 4 | 8 | 7 | |||
Aerial Normals
- Neutral Jumping Jab:
| Damage | 17 |  |
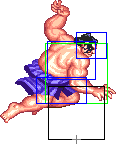 |
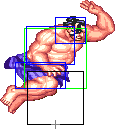 |
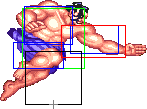 |
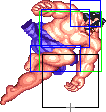
|
| Stun | 1~7 | |||||
| Stun Timer | 40 | |||||
| Frame Count | 2 | 3 | 3 | 30 | ∞ | |
| Simplified | 8 | 30 | ∞ | |||
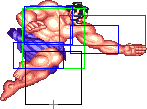
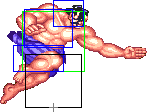
- Diagonal Jumping Jab:
| Damage | 14 |  |
 |
 |
|
| Stun | 1~7 | ||||
| Stun Timer | 40 | ||||
| Frame Count | 1 | 2 | 2 | 12 | |
| Simplified | 5 | 12 | |||
 |
 |
 |
 |

| |
| Frame Count | 8 | 4 | 4 | 4 | ∞ |
| Simplified | ∞ | ||||
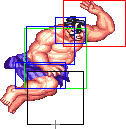
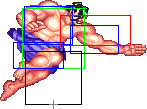
- Neutral Jumping Strong:
| Damage | 19 |  |
 |
 |
|
| Stun | 5~11 | ||||
| Stun Timer | 50 | ||||
| Frame Count | 3 | 4 | 4 | 12 | |
| Simplified | 7 | 16 | |||
 |
 |
 |

| |
| Frame Count | 8 | 4 | 4 | ∞ |
| Simplified | ∞ | |||
- Diagonal Jumping Strong:
| Damage | 19 |  |
 |

|
| Stun | 5~11 | |||
| Stun Timer | 50 | |||
| Frame Count | 3 | 4 | 8 | |
| Simplified | 7 | 8 | ||
 |
 |
 |
 |
 |

| |
| Frame Count | 6 | 8 | 4 | 4 | 4 | ∞ |
| Simplified | ∞ | |||||
- Neutral Jumping Fierce:
| Damage | 27 |  |
 |
 |
 |
 |
 |

|
| Stun | 11~17 | |||||||
| Stun Timer | 60 | |||||||
| Frame Count | 3 | 4 | 6 | 8 | 4 | 4 | ∞ | |
| Simplified | 7 | 6 | ∞ | |||||
- Diagonal Jumping Fierce:
| Damage | 26 |  |
 |
 |
 |
 |
 |

|
| Stun | 3~9 | |||||||
| Stun Timer | 40 | |||||||
| Frame Count | 3 | 4 | 8 | 8 | 4 | 4 | ∞ | |
| Simplified | 7 | 8 | ∞ | |||||
- Neutral Jumping Short:
| Damage | 14 |  |
 |
 |
 |

|
| Stun | 1~7 | |||||
| Stun Timer | 40 | |||||
| Frame Count | 3 | 4 | 30 | 4 | ∞ | |
| Simplified | 7 | 30 | ∞ | |||
- Diagonal Jumping Short:
| Damage | 14 |  |
 |

|
| Stun | 1~7 | |||
| Stun Timer | 40 | |||
| Frame Count | 3 | 4 | ∞ | |
| Simplified | 7 | ∞ | ||
- Neutral Jumping Forward:
| Damage | 19 |  |
 |
 |
 |
 |
 |
 |
 |

|
| Stun | 5~11 | |||||||||
| Stun Timer | 50 | |||||||||
| Frame Count | 3 | 4 | 12 | 4 | 4 | 4 | 4 | 4 | ∞ | |
| Simplified | 7 | 12 | ∞ | |||||||
- Diagonal Jumping Forward:
| Damage | 19 |  |
 |
 |
 |
 |
 |
 |
 |

|
| Stun | 5~11 | |||||||||
| Stun Timer | 50 | |||||||||
| Frame Count | 3 | 4 | 12 | 4 | 4 | 4 | 4 | 4 | ∞ | |
| Simplified | 7 | 12 | ∞ | |||||||
- Neutral Jumping Roundhouse:
| Damage | 26 |  |
 |
 |
 |
 |
 |
 |
 |

|
| Stun | 11~17 | |||||||||
| Stun Timer | 60 | |||||||||
| Frame Count | 3 | 4 | 6 | 4 | 4 | 4 | 4 | 4 | ∞ | |
| Simplified | 7 | 6 | ∞ | |||||||
- Diagonal Jumping Roundhouse:
| Damage | 26 |  |
 |
 |
 |
 |
 |
 |
 |

|
| Stun | 3~9 | |||||||||
| Stun Timer | 40 | |||||||||
| Frame Count | 3 | 4 | 10 | 4 | 4 | 4 | 4 | 4 | ∞ | |
| Simplified | 7 | 10 | ∞ | |||||||
Command Normals
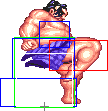
- Double Knee Attack: (On ground and close, ←/→ + Forward)
| Damage | 22+14 |  |
 |
 |
 |
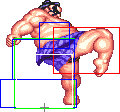
|
| Stun | 5~11+5~11 | |||||
| Stun Timer | 60+60 | |||||
| Chain Cancel | No | |||||
| Special Cancel | No | |||||
| Super Cancel | No | |||||
| Frame Advantage | ? | |||||
| Frame Count | 3 | 3 | 3 | 3 | 3 | |
| Simplified | 1 + 9 | 3 | 3 | |||
 |
 |
 |

| |
| Frame Count | 2 | 2 | 2 | 1 |
| Simplified | 7 | |||
- Harai Geri a.k.a. Sweep: (On ground, ←/→ + Roundhouse)
| Damage | 24 |  |
 |
 |
 |
 |
 |

|
| Stun | 5~11 | |||||||
| Stun Timer | 130 | |||||||
| Chain Cancel | No | |||||||
| Special Cancel | No | |||||||
| Super Cancel | No | |||||||
| Frame Advantage | ? | |||||||
| Frame Count | 3 | 3 | 3 | 6 | 8 | 10 | 1 | |
| Simplified | 1 + 9 | 6 | 19 | |||||
Honda's longest ranged normal, you'll be using it a lot against projectile characters. You can use it from max range to stop or trade with projectile attempts. Since it knocks down, you'll keep the initiative and get a chance to get in close.
- Flying Sumo Press: (Jump diagonally, ↙/↓/↘ + Forward)
| Damage | 21 | 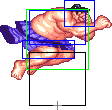 |
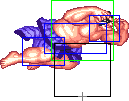 |
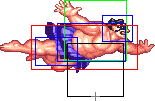
|
| Stun | 5~11 | |||
| Stun Timer | 50 | |||
| Frame Count | 3 | 4 | ∞ | |
| Simplified | 7 | ∞ | ||
Good crossup. Not much priority for frontal jumps though.
Normal Throws
E.Honda can throw using Strong, Fierce and Roundhouse. All his throws have the same range, which happens to be the best normal throw range in the game.
- Tawara Nage: (←/→ + Strong)
| Damage | 32 |  |
 |

|
| Stun | 7~13 | |||
| Stun Timer | 100 | |||
| Range (from axis) | 64 | |||
| (from throwable box) | 36 |
E.Honda tosses the opponent. The direction of the joystick determines the direction the enemy gets tossed at. Useful to throw characters at a corner.
- Saba Ori: (←/→ + Fierce)
| Damage | 24 + 4*n |  |
 |

|
| Set amount of hits | 8 | |||
| Holds do no stun | ||||
| Range (from axis) | 64 | |||
| (from throwable box) | 36 | |||
This is the throw you will be using the most. It's untechable, does nice damage, and sets up crossup / walk under / tick shenanigans. You can even crossup / walk under when in the corner after a fierce grab (you can walk under, cr. RH for a crossup, or go for a crossup d + Forward, cr.Jab, Oicho, etc). Note that some characters (Balrog, Cammy, DeeJay, Vega, Fei Long) cannot be walked under outside of the corner.
- Sekkan Kyaku: (←/→ + Roundhouse)
| Damage | 24 + 4*n |  |
 |

|
| Set amount of hits | 7 | |||
| Holds do no stun | ||||
| Range (from axis) | 64 | |||
| (from throwable box) | 36 | |||
You can start a loop against any character with this grab (unless they recover against the corner). After a successful HK grab, hold up-forward to jump in with an air attack (such as j.MK) while the character is still recovering in the air, and you'll get to repeat the tick again.
Special Moves
All motions are listed under the assumption that E.Honda is facing right.
- Hyakuretsu Harite a.k.a. Hundred Hands Slap: (Press P repeatedly)
- Startup:
| Super Meter | 6 |  |

|
| Frame Count (Jab) | 2 | 3 | |
| Simplified (Jab) | 5 | ||
| Frame Count (Strong) | 4 | 4 | |
| Simplified (Strong) | 8 | ||
| Frame Count (Fierce) | 5 | 6 | |
| Simplified (Fierce) | 11 | ||
- Active:
| Damage (Jab) | 21/19 |  |
 |

|
| Damage (Strong) | 22/21 | |||
| Damage (Fierce) | 24/22 | |||
| Stun | 5~11 | |||
| Stun Timer | 100 | |||
| Frame Count (Jab) | 4 | 4 | 4 | |
| Frame Count (Strong) | 2 | 2 | 2 | |
| Frame Count (Fierce) | 1 | 1 | 1 | |
 |
 |

| |
| Frame Count (Jab) | 4 | 4 | 3 |
| Frame Count (Strong) | 2 | 2 | 1 |
| Frame Count (Fierce) | 1 | 1 | 1 |
NOTE: That frame data only provides the frame data for one "cycle" of the HHS animation, but does not present the Minimal and Maximum durations of the move. So, in case you only do the 4 punch presses needed you will get the minimal duration. If you keep mashing at some point Honda will stop slapping. Another important point is that the frame data is not always the same in all cycles, since the first active hitbox of the first cycle will always have one additional frame and the Fierce HHS has some frames skipped. That detailed frame data can be found here:
| Cycles | 1 | 2 | 3 | 4 | 5 | 6 | 7 | Total | ||||||||||||||||||||||||||||||||||||
| Jab | MIN | 5 | 4 | 4 | 4 | 4 | 3 | 24 | ||||||||||||||||||||||||||||||||||||
| Jab | MAX | 5 | 4 | 4 | 4 | 4 | 3 | 4 | 4 | 4 | 4 | 4 | 3 | 4 | 4 | 4 | 4 | 4 | 3 | 70 | ||||||||||||||||||||||||
| Strong | MIN | 3 | 2 | 2 | 2 | 2 | 1 | 12 | ||||||||||||||||||||||||||||||||||||
| Strong | MAX | 3 | 2 | 2 | 2 | 2 | 1 | 2 | 2 | 2 | 2 | 2 | 1 | 2 | 2 | 2 | 2 | 2 | 1 | 34 | ||||||||||||||||||||||||
| Fierce | MIN | 2 | 1 | 1 | 1 | 1 | 1 | 1 | 1 | 1 | 1 | 1 | X | 12 | ||||||||||||||||||||||||||||||
| Fierce | MAX | 2 | 1 | 1 | 1 | 1 | 1 | 1 | 1 | 1 | 1 | 1 | 1 | 1 | 1 | 1 | 1 | 1 | X | 1 | 1 | 1 | 1 | 1 | 1 | 1 | 1 | 1 | 1 | 1 | X | 1 | 1 | 1 | 1 | 1 | 1 | 1 | 1 | 1 | 1 | 1 | X | 40 |
| Cycles | 1 | 2 | 3 | 4 | 5 | 6 | 7 | Total | ||||||||||||||||||||||||||||||||||||
- Recovery:
 |
 |
 |
 |

| |
| Frame Count (Jab) | 5 | 2 | 3 | 2 | 1 |
| Simplified (Jab) | 13 | ||||
| Frame Count (Strong) | 7 | 2 | 3 | 2 | 1 |
| Simplified (Strong) | 15 | ||||
| Frame Count (Fierce) | 8 | 3 | 4 | 3 | 1 |
| Simplified (Fierce) | 19 | ||||
Jab is stationary and a good way to turtle and build meter fast.
Strong is great to pressure, ticking and chipping. It moves you forward a bit too. Except for when you are chipping, don't keep mashing (this goes for all versions really) strong so the HHS recovers very quickly, which allows you to go for a throw if you are relatively close, or a second HHS to catch your opponent if they try to retaliate. Another good pressure option is to use it after a f + roundhouse.
Fierce moves you further forward than Strong, and faster too. It also has bigger priority, and is a good way to attempt to get into certain fireballers (such as Chun), especially after a neutral jumping fierce.
The lower damage value is for the low hitting frames.
- Super Zutsuki a.k.a. Headbutt: (Charge ←, →, P)
Detailed Input: (Charge ← for at least 60f, [0~7f] → [0~10/9/7f] Jab/Strong/Fierce. It is needed to wait at least 1 frame after leaving the charge direction to enter with the P button)
- Startup+Active:
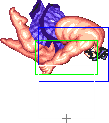
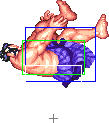
- Recovery/knockback: (If it hits during the airbone part, the knockback will be airbone till the 4º hitbox image)
 |
 |
 |
 |
 |
 |

| |
| Frame Count | 4 | 4 | 4 | 8/9 | 2 | 2 | 1 |
| Simplified | 25/26 | ||||||
Jab headbutt will be your main defensive tool. It has invincibility on startup and has excellent vertical and horizontal range, which makes jumping in or getting in-close Honda a nearly impossible task. Learn to time your Jab headbutt and matches against non-fireballers will become way easier.
Fierce version is very fast and can be used to safely pressure and punish mistakes (whiffs or people coming down from a jumping attack for example) at mid range. Avoid using it from full-screen especially if out opponent is near the corner as he can jump it on reaction and punish you afterwards.
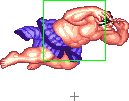
- Super Hyakkan Otoshi a.k.a. Butt Drop: (Charge ↓, ↑, K)
Detailed Input: (Charge ↓ for at least 60f, [0~7f] ↑ [0~10/9/7/5f] Short/Forward/Roundhouse/any K if you are at a jumpable state. It is needed to wait at least 1 frame after leaving the charge direction to enter with the K button)
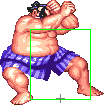
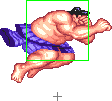
- Startup:
| Super Meter | 9 |  |
 |
 |
 |
 |
|
| Frame Count (Short) | 1 | 4 | 5 | 2 | 5 | 4 | |
| Simplified (Short) | 21 | ||||||
| Frame Count (Forward) | 1 | 3 | 4 | 2 | 5 | 4 | |
| Simplified (Forward) | 19 | ||||||
| Frame Count (Rh) | 1 | 3 | 4 | 2 | 4 | 4 | |
| Simplified (Rh) | 18... (42) | ||||||
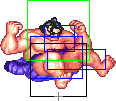
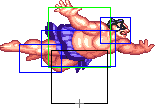
- Active+Recovery:
| Damage (Short) | 21 | Short & Forward | Roundhouse | File:EHonda bdrop8to10anm.png |  |
 |
 |

|
| Damage (Frwrd) | 24 | 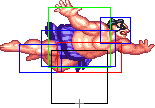 |
| |||||
| Damage (Rh) | 27 | |||||||
| Stun | 9~15/2~8 | |||||||
| Stun Timer | 100/90 | |||||||
| Frame Count (Short) | 9 | 9 (3 + 3 +3) | 2 | 2 | 10 | 4 | ||
| Simplified (Short) | 9 | 13 | 10 | 4 | ||||
| Frame Count (Forward) | 9 | 9 (3 + 3 +3) | 2 | 2 | 12 | 5 | ||
| Simplified (Forward) | 9 | 13 | 12 | 5 | ||||
| Frame Count (Rh) | 11 | 9 (3 + 3 +3) | 2 | 2 | 15 | 6 | ||
| Simplified (Rh) | ...24 (42) | 15 | 6 | |||||
Short version hits on the way up (so it's a decent antiand is useful to get over projectiles from far away. Also, it's a good mixup in Oicho setups. Forward hits on the way up too, can be used to stuff projectile attempts at the right distance, and is a risky way to get over projectiles (can be punished by sweeps -shotos- and jumping attacks -Guile, DeeJay- if they see it coming). Roundhouse should be used mainly for crossups, mixups and setting ticks rather than as a way to avoid projectiles, as it is extremely easy to punish in those situations. It hits only on the way down unlike the other versions.
To use as a pressure / mixup tool, it's a good idea to do cr.Short xx Smash, varying strenghts to make the opponent guess if you are going to cross-up or not, and mixing up ticks in-between.
The lower stun value is for the downward active part of the Short version only.
- Ooichou Nage: (→↘↓↙ + P)
Detailed Input: (→ [0~6f] ↘ [0~6f] ↓ [0~6f] ↙ [0~10/9/7f] Jab/Strong/Fierce. This is the fixed motion from HSF2. In ST, there is a bug in the input of this move which allows you to keep it stored as much as you want if you keep holding ↖, ← or ↙. You have a window of 10 frames to go to any other direction and then go back to ↖, ← or ↙ and still keep it stored. In HSF2 this was fixed, but there is a "hidden" version of E.Honda which still has this bug. To select it, hold start while choosing the character version, if done right you'll hear a different sound)
| Damage (Jab) | 14+24 |  |

|
| Damage (Strong) | 16+26 | ||
| Damage (Fierce) | 17+27 | ||
| Stun | 7~13+7~13 | ||
| Stun Timer | 100+100 | ||
| Range (from axis) | 69 | ||
| (from throwable box) | 41 | ||
| Super Meter | 12 |
Honda's most powerful move. Easy to tick into, very good damage, high dizzy, it's his main offensive weapon and can end a round by itself when in the corner. Besides of its obvious offensive uses, the Oicho Throw is also an excellent defensive tool due to a programming bug: the stored Oicho (see the Advanced Strategy section for more info).
Super Move
- Oni Musou: (Charge ←, → ← → P)
Detailed Input: (Charge ← for at least 60f, [0~6f] → [0~6f] ← [0~6f] → [0~13f] P. This is the fixed motion from HSF2. In ST, there is a bug in the input of this move which allows you to keep it stored as much as you want if you keep holding ↗, → or ↘. You have a window of 14 frames to go to any other direction and then go back to ↗, → or ↘ and still keep it stored. In HSF2 this was fixed, but it has a "hidden" version of E.Honda which still has this bug. To select it, hold start while choosing the character version, if done right you'll hear a different sound)
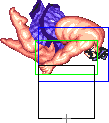
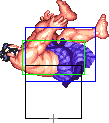
| Damage | 17*4 |  |
 |
 |
 |
 |
 |
 |
|
| Stun | 0~4*4 | ||||||||
| Stun Timer | 20*4 | ||||||||
| Frame Count | 1 | [18] + 4 | 1 | 1 | 53? | 1 | 1 | 1 | |
| Simplified | 6 | 1 | 53? | 3... (7) | |||||
 |
 |
 |
 |
 |
 |

| |
| Frame Count | 3 | 1 | 1 | 53? | 4 | 4 | 4 |
| Simplified | ...4 (7) | 1 | 53? | 12... (25) | |||
 |
 |
 |

| |
| Frame Count | 8 | 2 | 2 | 1 |
| Simplified | ... 13 (25) | |||
- Recovery:
 |
 |
 |
 |
 |
 |

| |
| Frame Count | 4 | 4 | 4 | 8 | 2 | 2 | 1 |
| Simplified | 25 | ||||||
Honda's Super is sadly one of the worst in the game. It's extremely unsafe on block (some characters can Dragon Punch / Flash Kick after blocking the first hit, and others can punish you heavily after blocking both), the second hit will randomly miss, low priority (can be stopped by standing jabs)...
On the plus side, it can go through projectiles and (this can be a downside too) sometimes it won't knock down leaving you just beside your opponent, allowing to Oicho him afterwards. Also, like Chun's super, it can be stored by doing the super motion and hold forward. But still it's a very unreliable move and you should use it sparingly.
The Basics
Honda's overall strategy has two main variations. Against non-fireballers, turtling is usually the way to go. Jab headbutt can beat practically every attempt to get into Honda, while Oicho Throw (especially when piano-ed) can take care of throw attempts, and you make things even harder to your opponents with HHS pressure (while keeping charge to headbutt / sumo smash and storing an Oicho at the same time!), which gives Honda the upper hand against most characters that lack a fireball.
Against characters with projectiles things become difficult though...
Anti-Projectile Strategy
One of the major hurdles a beginner Honda player will run into is dealing with projectile spam - at the start you'll probably think its a lost cause dealing with the random hits/block damage caused due to his size, but after a while you'll learn how to deal with it.
First thing to know is NEVER EVER use HK Sumo Splash, that thing is serious counter bait, don't use it.
LK Sumo Splash over projectiles from max distance away does very well if you are willing to "creep" towards your opponent - remember that patience will serve you well in the long run as all it takes is to win is 1 mistake or trapping the opponent in the corner and keeping them there.
MK Sumo Splash is very risky, especially against shotos, but if it is used once in a while it may help gain some ground if you have the health to take the risk with.
Straight Up j.HP - this is controllable, so you can move forward slightly while in the air, learning to do this is pretty essential because overuse of any type of Sumo Splash will lead to being countered all the time.
The Super - Don't forget about it and remember to have a back up plan if it doesn't work correctly.
j.LK - this comes in handy since makes Honda a smaller target and seems to have pretty high priority, i've seen this do pretty really well against Guile in particular.
MP HHS - this isn't “avoiding” the projectile par say, but if you are willing to be a man (and have the health to back it up), you can at least trade hits from a fair distance away, this can be a psychological advantage knowing you always have a way to at least trade off in the damage department.
I’ll also use the MP (and sometimes HP) HHS after a straight up j.HP, this can be decent pressure against characters with longer projectile recovery time, New Ken and New Sagat being prime targets.
Another method of countering projectile spam is by simply trying to “bulldog” your way to the opponent - walk forward, block, repeat (and perhaps do the occastional poke now and then)... you'll slowly but surely back your opponent up into a corner. This is, of course, a very dangerous way of getting in, as proven in one of the A-cho tournaments, it can actually get you completely owned so only use this if you have strong reactions.
As stated earlier, patience is the key against someone who knows how to use their projectiles, take your time with the confidence that you'll eventually get in (even if it takes the whole round and nearly all your health to do it) and you should go far.
--RWD
Advanced Strategy
Stored Oicho
The nightmare move of ST... this makes Honda an iron fortress and is arguably the most broken thing in the game - learning to use and abuse this is completely essential for high level play.
Oicho is performed with a HCB + P movement right? Well, a glitch in ST makes it so Honda can store the move and use it at will - this is done by doing the HCB movement then holding onto either Back, Up-Back or Down-Back and not letting go.
Why is this technique so good? Oochio is a zero frame command throw (with no whiff animation, unlike Gief's SPD) with decent range, which means under reversal circumstances it will beat every ground based attack in the game... period. This also means when Honda is knockdowned, he can store Oochio and basically be impossible to meaty attack.
Other plus points is the fact when your holding onto Back/Down-Back so you are essentially charging up for Sumo Headbutt and Sumo Splash while having a perfect reversal waiting. In other words, everything you want for the "tank-like" defensive is covered, if you wanted, you could also use MP and HP slaps as a way of moving forward while keeping all 3 attacks ready.
One last point; when the opponent isn't in range for an Oicho, you can use any normal attack you wish and not lose the store.
Oicho Options
Whenever you land an Oicho (stored or not) you have a whole host of options to play with, here we go:
c.MK - this doesn't work on all characters and i'll update this with a list at a later date, but because Oicho does a HUGE amount of stun damage, generally, the next hit will probably dizzy the opponent.
MP HHS - this is a no brainer, the lunging slaps get chip damage for free... unless your opponent is a reversal demon they'll most likely do the safe option and block.
c.MK > MP HHS - an extention of the above, if the c.MK doesn't get them... the chip damage from the HHS will...
HK Sumo Splash - this will cross the opponent over and probably dizzy them if it connects.
MK Sumo Splash - just to mix up paranoia about the crossover HK Sumo Splash with a non-crossover Sumo Splash.
j-d.MK (the splash) > Oicho - this is risky but is worth it if you connect with another Oicho afterwards.
(in the corner) c.LK xx Sumo Splash - the c.LK is cancellable so it should flow like a thing of beauty for a high/low block string, can also lead to another Oochio.
(in the corner) LP HHS - like the MP HHS, chip damage for all, just watch out for those reversal throws.
(in the corner) Oicho Loop - see the next section...
B/F+HK - the sweep of doom, use if you forget the above follow ups... >_>
c.LP > Oicho - this can be done when you land an Oicho close to the corner but you still switch sides with the opponent, this is done the same way as the Oicho Loop (talked about in the next section) only you can’t carry with the loop after the second Oicho hits.
Oicho Corner Loop
This is Honda’s fast route to 100% victory, here is how to do it:
Step 1) Get opponent into the corner and knock them down.
Step 2) Do a point blank meaty c.LP (stand LP and c.LK are also options, but c.LP is by far the better attack).
Step 3) Oicho them when they recover from block/hit stun - this can be done by 3 methods;
- By quick storing then piano tapping the Oochio - this gives 6 chances for the Oochio to connect with the opponent but also runs the risk of being reversaled by a special move easier if a normal comes out during a mistime.
- By quick storing, holding down the 3 punches when the c.LP is still out, and releasing them one after the other piano style - this method cuts the number of chances for the Oochio to come out by 3, but also removes the risk of being reversaled by a special move since Honda will always block it instead.
- Or by doing it “normally” with a brief pause between the c.LP and Oochio (like you would when doing something like Gief's LK > SPD) - I seriously recommend not using this method at all.
Step 4) Repeat Steps 2 and 3 - the Oochio in the corner puts the opponent into perfect position for another meaty c.LP, so this is a pretty easy loop to learn.
While this trick is pretty nasty, it can (like anything else) be escaped by reversals - I generally don't recommend using this against characters with access to a hold rather than a throw since at least if you get reversal thrown while attempting this, odds are you can tech out of it for minimal damage... unlike most holds while lead to a whole load of pain even if you escape quickly.
To make things easier, here is a list of characters that you should not attempt the Oicho Loop on unless you are feeling brave and have the health to spare:
Dhalsim, Boxer, Blanka, T-Hawk and (New) Ken
T-Hawk, Gief and Honda (obviously) can also use their own command grabs to get out the loop
When doing the loop, I recommend mixing it up with LP slaps, Sumo Splashes and LP Sumo Headbutt’s to keep the opponent from thinking twice when trying to reversal throw you - of course, this is still open to something like a reversal DP, but mixing up your options even when it might not be needed will keep your Honda from being predictable.
--RWD
Sumo Auto mix-up
When using E.Honda you can take advantage of his stored command throw glitch to do a special Sumo Auto Mix-up that can defeat some tick escape attempts.
Here is the command for this trick:
→↘↓↙ charge ↖ + P + K
In plain english we've got:
- Half circle back stopping at down-back to store the Oicho command throw
- Continue to hold down-back for a couple seconds to charge a butt slam
- Up-back plus punch plus kick to complete the auto mix-up
You'll want to use this as part of a tick. After you knock your opponent down, make them block a crouching jab as they stand up then finish the above command. If they do nothing you'll snatch them with a command throw. If they try to escape the tick with a special move you'll pass right through it with a butt slam attack. At least, you'll start to go through it -- this trick won't work against all reversal attacks.
Note that in order to have the butt slam charged in time you'll need to do the first part of the command well before you try to tick.
Combos
Honda doesn't really need combos, but there are some useful ones (especially on dizzied opponents)
- j.Fierce, cr.Short, Fierce Headbutt (start charging db as soon as you jump)
- Crossup d + Forward, cl.st.Jab, cl.st.Strong, st.Fierce (may dizzy)
Match-ups
Matchups classified with this diagram in mind. For the old characters I guessed the positions.
--Born2SPD
Serious Advantage Match-ups
Vs. Blanka:
- 7.5 - 2.5
Vs. Cammy:
- 8 - 2
Vs. Fei Long:
- 7 - 3
Vs. Zangief:
- 8.5 - 1.5
Advantage Match-ups
Vs. M. Bison (dictator):
- 6.5 - 3.5
Vs. T. Hawk:
- 6.5 - 3.5
Vs. O. T. Hawk:
- 6.5 - 3.5
This is one of Hondas best matchups. The air game should not come into play at all in this matchup because Honda does not need to jump or be in the air at all. Honda must beware of a few things against Hawk. The first being his short dive into DP. nice trick easily stopped by either headbutt after the DP or hands. Headbutt the dive itself (if in range). if not in range. use hands or safe low jab. Hawk is unable to use Far dives that will hit deep or high. Headbutt stops this. Headbutt stops just about everything that Hawk has to offer. WARNING DO NOT GET KNOCKED DOWN! Get to the air if Hawk is able to get in after he knocks you down. Jumping back with out hitting any buttons is preferred it tightens your hitboxes and you become tougher to hit. if not Hit fierce or RH very Early. Get in the corner and sit there, headbutt every jumpin and hands often to build meter. If things get up-close and personal Ochio. I cannot emphasize this more
- DO NOT GET KNOCKED DOWN!
- Head butt ALL jump ins.
- Do Hands often to keep him out of typhoon range.
--Ehonda
Fair Match-ups
Vs. E. Honda (self):
Disadvantage Match-ups
Vs. Balrog (boxer):
- 3.5 - 6.5
Against defensive Balrogs, bulldog up to standing roundhouse range, blocking dash punches on reaction or prediction, throwing out standing or crouching jab from time to time both to beat out dash punches and to hide the startup of an occasional strong hands. Don't do the hands too close to Boxer because they can actually lose to his jabs, and don't leave them out very long because you can get punished by low dash punch, use them mostly as a quick dash. But don't do the slaps too much, they're not as safe as just trying to walk up.
At some point before you actually get into standing roundhouse range it becomes impossible to block a dash punch on reaction, so start throwing out crouching jab more and more frequently because it really contains Boxer well (but obviously don't get too predictable with it). If he tries to do a crouching attack to beat your crouching strong, that's fine, it means you've broken his standing jab defense and can go into other stuff.
Vs. Dhalsim:
- 3.5 - 6.5
He has an answer to almost all of Sim's moves. Crouching Jab stops the slide and his hands pretty much own everthing else. Dhalsim's objective is to keep Honda away. If you can keep Honda guessing and keep him out you can win easily. I just need one knock down and this sets up the buttsmash insanity. When you do crossup butt smash (after a knock down) you can do many things. Either a low short into head butt or another smash, a f + Roundhouse to trip him and crossup starts all over again. Next you can do the Oicho grab (after buttsmash). Crossup butt smash again. And hope he tries to counter grab, then do another low move or smash. But at this point Sim has lost over 75% and is pretty much toasted. Once in the corner punish with hands again. The Slide beats hands cleanly so change up with low jabs to stop the slide then link the jab into more hands.
Also, you must learn how to cancel your medium hands into another medium hands. Tough to do but once you get the timing down it can lead to big chip damage. Another way on knocking Sim down or stunning him is through Jumping fierce or jumping med splash. Constantly change up your jump ins. once you get your meter built up sacrifice it to get in close by going through one of his FBs with it. Learn the timing of his Yoga Flame to sneak a full screen Fierce headbutt in as it dissipates. Once Sim has his meter built up things change and you need to bait him into blowing it off at the wrong time. Sometimes you can get over it with a butt smash but this rarely works. I still try and remain aggressive, don't let Sim get his feet settled or he can keep you away again. His drills/mummys can be tricky the trick here is to not use your instincts to headbutt them but buttsmash them instead. Or block them and attempt an Oicho; it's tough because of block stun against this move. This pretty much sums up that matchup.
--Ehonda
Vs. Vega (claw):
- 4 - 6
The main problems Honda has vs. Claw are Claw's jumping speed and is mid screen cross up game. First thing to know when fighting claw: get in the corner as fast as you can. If you get caught in the middle of the screen, you more than likely will take chip damage from the crossup walldives, enough to put Claw on the run and you want to have a lead vs Claw, not be chasing him all over the board. You must make Claw come to you. (If he gets the lead it will be extremely difficult to get it back.). Sit in that corner and splash or headbutt every jump in he attempts. Another trick is to block then Ochio the jump-in. you may notice that you cannot headbutt claws jumps most of the time. This is due to the speed of his jumps.
The Air game: Honda actually fairs quite well in this. Jump back jab stops just about all of the wall dives. Anything off of the wall, jump back jab. If he goes off of his wall sit and head butt it. If he tries to go off of your wall you must use jump back jab to prevent Claw from going of off your wall and causing you to lose your charge. If you are caught not charging or with cement feet use standing fierce.
The ground game: Honda does well, but beware of the rolls, sometimes they can hit all of Honda's ground moves. Hands is a nice way to get him out of his ground game. Another danger is the full screen headbutt. Most expert Claw players invite you to do full screen HB then they can do a single back flip then throw you then RUN! Scrolling the screen also meses up Claw so doing repeated Hands (even if they miss) can screw his wall game up.
--Ehonda
Vs. Sagat:
- 3.5 - 6.5
Serious Disadvantage Match-ups
Vs. Chun-Li:
- 2.5 - 7.5
Getting around Chun's fireballs is really your biggest hurdle. If you can manage to accomplish that, the match isn't so hard.
Hundred Hand Slap is really good against Chun, 'cause she doesn't have anything solid to beat it consistently. So say you j.Forward over a fireball, hit or blocked, you're guaranteed some free chip damage with hands unless she has super.
She also has a tough time with the butt slam in the corner. If she doesn't predict it, the only thing she can really do is Short upkicks, but that's kinda hard to time.
Also, just his regular punches (st.Jab and st.Strong especially) are great pokes. If you're in close, but not close enough for an Ochio, you can do a st.Jab or st.Strong and keep mashing on punch to get free block damage. Charge down while you're doing this, so that if she throws a fireball, you can butt slam.
--NKI
Vs. Dee Jay:
- 1.5 - 8.5
Vs. Guile:
- 2 - 8
Honda's key here is to bait Guile into throwing Booms. Even if Honda does anticipate, Guile can still jump up to counter a buttsmash over the Boom, since Guiles lag time after the boom is very short. The Key in this situation is to be as close to Guile as possible and do Medium B.Smash through the boom hitting him on the way up. If you are to far away to hit him on the way up you will hit him on the way down (unless Guile jumps away or air grabs him [tough to do ] Guile can recover and counter this move when you land.
Pinning Guile in the corner is essential to beating him. Using ticks and foot games with cr.short, cr.forward, standing roundhouse and low strong and jab. These prevent booms and various moves in Guiles arsenal. You cannot fight Guile mid screen (much like against Vega). Chipping away at Guile with 100 hands is a nice way to get block damage and to close to set up the Oicho. I like early Jumps vs Guile as well after you knock him down do a Crossup Msplash early hope that Guile does a wake up and then Hit him with Hands 2X the 1st will hit, the other will make them block. Or after the initial hit do Bsmash. And attempt to grab or do low Short into Headbutt. Try not to knock him down again until you have done sufficient damage to him.
Here are a list of NEVERS:
- Never do Forward or Rhouse smashes over booms from full screen. only use short until close.
- Never Turtle. ( unless you have an 80% lead or so and time is running out of course)
- Never do full screen Headbutts.
- Never allow him to jump in.
- Never allow him to tick throw you. * you do have oichio remember that!!!!!!!!!
This strategy section is for both versions of Guile.
--Ehonda
Guile can be pretty annoying. You wanna limit jumping over booms to attack him to a minimum, because you're probably gonna get flash kicked and maybe crouching fierced. The only time that's a reasonable thing to do is if you're standing at about the range of your jumping forward or roundhouse and you have great reactions and jump over a boom as soon as it comes out, but that's pretty rare. Jumping is also ok if see the Guile player standing... also rare.
Better ways to get around booms depend on where you are on screen, but usually you want controllable neutral jumping fierce or neutral jumping kick or just bulldogging (walking up and blocking booms on reaction, then walking forward again), but toward jumping forward/roundhouse/short and forward buttslam are fine in some situations too. Make sure that if you're going to jump over a boom that you recognize what speed it is first, and if in doubt just block. You can follow up a jump over a boom with strong/fierce slaps, bulldogging, buttslam, headbutt, jumping toward forward/roundhouse, or toward standing roundhouse sweep.
A great spot for you to try to stand is at like standing sweep range. Here you can sweep Guile with toward standing roundhouse, chip him strong/fierce slaps, beat out crouching forward with your crouching forward/strong/roundhouse, or do walk up fierce grab or ochio.
One thing to note is that if you do fierce grab on Guile midscreen, you can hold jumping toward and do down+fierce for the splash, and it'll usually cross him up and always be a safe jump. The only problem is that since it usually but randomly crosses up, you can't be sure which way to block if Guile does a reversal flash kick/super. Generally just block like you're gonna cross up. It's stupid for Guile to try reversal most of the time because most of the time you'll safe jump, so he'll probably just block expecting a cross up. Once you're there, you can do all sorts of things, like crouching jab to fierce grab or ochio, crouching short to whatever-strength buttslam, strong slaps, crouching roundhouse, whatever. You can also mix this up by just doing toward jumping forward after the fierce grab, which will never be a crossup.
Vs. Ken:
- 3 - 7
Vs. O. Ken:
Vs. Ryu:
- 2 - 8
Vs. O. Sagat:
- 2.5 - 7.5
This match is one of the more difficult ones for Honda to Handle. The speed of Sagats Tigers are formidable. Also Sagats jumping RH is difficult to get around. Your reactions must be at their best. The air Game: Honda Jumping towards Fierce works well as well as his early jumping jab. Sagats jumping roundhouse can keep you at bay through out the match. Timing a headbutt after the RH retracts till when they hit the ground is not recommended.
Ground game: You MUST keep constant pressure on Sagat so he cannot set up his tigers. His Tigers in reality are not that difficult to get around. Jumping over the slow high ones or crouching under the fast high ones make them worthless against Honda. The ones you have to worry about are the low ones. Believe it or not the slow low Tigers are Jail Bait. If go over these from full screen you will be DPed and if you go over the fast ones you need to almost guess at what is being throw unless you are full screen and the slow tigers may trade anyways because Honda can land on the slow low tigers after Honda Hits Sagat. Reacting and guessing correctly is key. So I do not recommend going over low tigers too much, unless they are just throwing constant low tigers then keep them honest.. So how do you keep on the pressure? Constant Hands as well as f + roundhouse. If you can link these together you can keep a constant barrage of hits going (not a combo). E.g. hands - f + Rh -hands - f + Rh repeat. Hondas Butt smash has very little use unless you have him trapped. If you do do it you must execute it early so that J.RH does not snuff it out.
Throws: Normal throws work great vs. OG sagat but if you face off against new sagat use the Oicho when in close as much as possible. Starting off the match many Sagat players will start with a j.roundhouse or a Tiger or a tiger knee into DP. If they do the latter then punish them as the DP is landing. if the J.roundhouse do a f + roundhouse to trip them. if they catch on to this, pause just a second and make them guess at what is coming. As for how you can start... Hands, f + roundhouse, Block, Cr. Jab. or if you can guess a tiger then use forward Buttsmash. Another trick is to do Short butt smashes over the low tigers as well as his short squat jump over them.
--Ehonda
