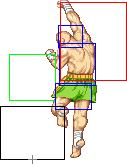
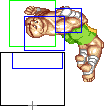
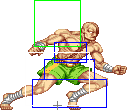
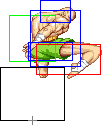
Introduction
Competitive Overview
Strengths & Weaknesses
New & Old Versions Comparison
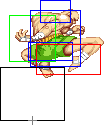
To select O.Sagat, choose Sagat and then press ↑ ↓ ↓ ↑ Jab/Fierce, pressing Short simultaneously with the punch button for the alternate color.
Here is the list of differences:
- Obvious stuff: O.Sagat can not tech throws and does not has a Super;
- O.Sagat has a slightly smaller hitbox than N.Sagat but it's unknown if it has any relevance. Note that this affects most standing normals as well so it will not be listed on the normal moves differences list;
- O.Sagat has a faster pre-jump animation by 2 frames;
- O.Sagat has some differences in some of his normals:
- Far Standing Strong can be special canceled;
- Close Standing Fierce can not be special canceled but do a little more damage;
- Far Standing Fierce do a little more damage;
- Crouching Fierce do a little more damage;
- Second hit of Standing Short can be special canceled and it has better low level priority but worse higher level priority;
- Crouching Short do a little more damage;
- Standing Forward's first hit do a little more damage. Second hit can be special canceled and has better priority as a poke but worse priority as anti air;
- Crouching Roundhouse do more damage;
- Both Jumping Fierces do more damage;
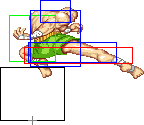
- Diagonal Jumping Forward can not be used as a crossup attack;
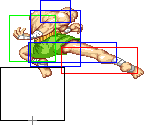
- Both Jumping Roundhouses do more damage;
- High Tiger Shots have the same recovery for all versions plus it has better foot hurtbox;
- Low Tiger Shots have faster startup, the same recovery for all version plus it has better hurtbox;
- Fierce Tiger Uppercut is a single hit move so it always does full damage;
Color Options
| Jab | Strong | Fierce | Start | Old |
 |
 |
 |
 |

|
 |
 |
 |
 |

|
| Short | Forward | Roundhouse | Hold | Old Alternative |
--Born2SPD
Moves Analysis
Normal Moves
Ground Normals
Disclaimer: Ground normals take one extra frame to enter their start-up, which is the reason for the additional frame on the 'Simplified' row.
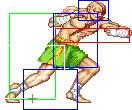
- Close Standing Jab:
| Damage | 11 |  |
 |

|
| Stun | 0~5 | |||
| Stun Timer | 40 | |||
| Chain Cancel | No | |||
| Special Cancel | Yes | |||
| Super Cancel | Yes | |||
| Frame Advantage | ? | |||
| Frame Count | 3 | 4 | 4 | |
| Simplified | 1 + 3 | 4 | 4 | |
- Far Standing Jab:
| Damage | 11 | 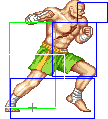 |
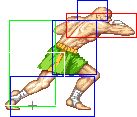 |
 |

|
| Stun | 0~5 | ||||
| Stun Timer | 40 | ||||
| Chain Cancel | No | ||||
| Special Cancel | Yes | ||||
| Super Cancel | Yes | ||||
| Frame Advantage | ? | ||||
| Frame Count | 3 | 4 | 4 | 1 | |
| Simplified | 1 + 3 | 4 | 5 | ||
- Crouching Jab:
| Damage | 11 |  |
 |
 |

|
| Stun | 0~5 | ||||
| Stun Timer | 40 | ||||
| Chain Cancel | No | ||||
| Special Cancel | Yes | ||||
| Super Cancel | Yes | ||||
| Frame Advantage | ? | ||||
| Frame Count | 2 | 2 | 3 | 4 | |
| Simplified | 1 + 4 | 3 | 4 | ||
- Close Standing Strong:
| Damage | 19 |  |
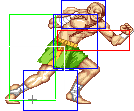 |
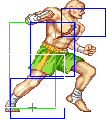 |

|
| Stun | 5~11 | ||||
| Stun Timer | 60 | ||||
| Chain Cancel | No | ||||
| Special Cancel | Yes | ||||
| Super Cancel | Yes | ||||
| Frame Advantage | ? | ||||
| Frame Count | 3 | 6 | 6 | 1 | |
| Simplified | 1 + 3 | 6 | 7 | ||
- Far Standing Strong:
| Damage | 19 |  |
 |
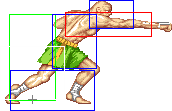 |
 |
 |

|
| Stun | 5~11 | ||||||
| Stun Timer | 60 | ||||||
| Chain Cancel | No | ||||||
| Special Cancel | No | ||||||
| Super Cancel | Yes | ||||||
| Frame Advantage | ? | ||||||
| Frame Count | 3 | 2 | 4 | 4 | 4 | 1 | |
| Simplified | 1 + 5 | 4 | 9 | ||||
- Crouching Strong:
| Damage | 19 |  |
 |
 |

|
| Stun | 5~11 | ||||
| Stun Timer | 60 | ||||
| Chain Cancel | No | ||||
| Special Cancel | Yes | ||||
| Super Cancel | Yes | ||||
| Frame Advantage | ? | ||||
| Frame Count | 2 | 2 | 4 | 6 | |
| Simplified | 1 + 4 | 4 | 6 | ||
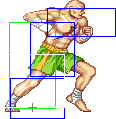
- Close Standing Fierce:
| Damage | 21 |  |
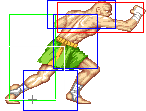 |
 |

|
| Stun | 10~16 | ||||
| Stun Timer | 80 | ||||
| Chain Cancel | No | ||||
| Special Cancel | Yes | ||||
| Super Cancel | Yes | ||||
| Frame Advantage | ? | ||||
| Frame Count | 3 | 8 | 10 | 1 | |
| Simplified | 1 + 3 | 8 | 11 | ||
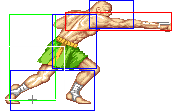
- Far Standing Fierce:
| Damage | 21 |  |
 |
 |
 |
 |

|
| Stun | 10~16 | ||||||
| Stun Timer | 80 | ||||||
| Chain Cancel | No | ||||||
| Special Cancel | No | ||||||
| Super Cancel | No | ||||||
| Frame Advantage | ? | ||||||
| Frame Count | 4 | 3 | 6 | 10 | 12 | 1 | |
| Simplified | 1 + 7 | 6 | 23 | ||||
- Crouching Fierce:
| Damage | 21 |  |
 |
 |

|
| Stun | 10~16 | ||||
| Stun Timer | 80 | ||||
| Chain Cancel | No | ||||
| Special Cancel | No | ||||
| Super Cancel | No | ||||
| Frame Advantage | ? | ||||
| Frame Count | 6 | 6 | 12 | 1 | |
| Simplified | 1 + 6 | 6 | 13 | ||
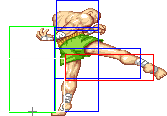
- Close/Far Standing Short:
| Damage | 11+11 | 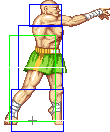 |
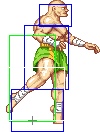 |
 |
 |
 |
 |

|
| Stun | 0~5+0~5 | |||||||
| Stun Timer | 40+40 | |||||||
| Chain Cancel | No | |||||||
| Special Cancel | Yes/No | |||||||
| Super Cancel | Yes/Yes | |||||||
| Frame Advantage | ? | |||||||
| Frame Count | 2 | 1 | 2 | 2 | 2 | 2 | 3 | |
| Simplified | 1 + 3 | 2 | 2 | 7 | ||||
- Crouching Short:
| Damage | 4 |  |
 |
 |

|
| Stun | 0~5 | ||||
| Stun Timer | 40 | ||||
| Chain Cancel | No | ||||
| Special Cancel | Yes | ||||
| Super Cancel | Yes | ||||
| Frame Advantage | ? | ||||
| Frame Count | 4 | 4 | 4 | 1 | |
| Simplified | 1 + 4 | 4 | 5 | ||
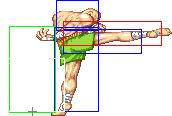
- Close/Far Standing Forward:
| Damage | 12+16 |  |
 |
 |
 |
 |
 |

|
| Stun | 5~11+5~11 | |||||||
| Stun Timer | 60+60 | |||||||
| Chain Cancel | No | |||||||
| Special Cancel | Yes/No | |||||||
| Super Cancel | Yes/Yes | |||||||
| Frame Advantage | ? | |||||||
| Frame Count | 2 | 1 | 2 | 2 | 3 | 4 | 6 | |
| Simplified | 1 + 3 | 2 | 2 | 13 | ||||
- Crouching Forward:
| Damage | 19 |  |
 |
 |
 |

|
| Stun | 5~11 | |||||
| Stun Timer | 60 | |||||
| Chain Cancel | No | |||||
| Special Cancel | Yes | |||||
| Super Cancel | Yes | |||||
| Frame Advantage | ? | |||||
| Frame Count | 2 | 2 | 4 | 3 | 4 | |
| Simplified | 1 + 4 | 4 | 7 | |||
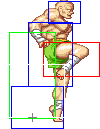
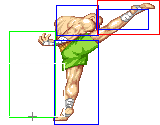
- Close/Far Standing Roundhouse:
| Damage | 14/20 |  |
 |
 |
 |
 |
 |

|
| Stun | 10~16/1~7 | |||||||
| Stun Timer | 80/70 | |||||||
| Chain Cancel | No | |||||||
| Special Cancel | Yes/No | |||||||
| Super Cancel | Yes/No | |||||||
| Frame Advantage | ? | |||||||
| Frame Count | 2 | 1 | 3 | 3 | 6 | 7 | 10 | |
| Simplified | 1 + 3 | 3 | 3 | 23 | ||||
Great anti-air and anti-cross-up.
- Crouching Roundhouse:
| Damage | 21 |  |
 |
 |
 |

|
| Stun | 5~11 | |||||
| Stun Timer | 130 | |||||
| Chain Cancel | No | |||||
| Special Cancel | No | |||||
| Super Cancel | No | |||||
| Frame Advantage | ? | |||||
| Frame Count | 4 | 2 | 6 | 8 | 9 | |
| Simplified | 1 + 6 | 6 | 17 | |||
This is Sagat's sweep attack. It has better range than most sweeps, so Sagat is able to safely trip jump-ins that characters such as shotos and Zangief can not.
Aerial Normals
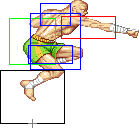
- Neutral Jumping Jab:
| Damage | 11 |  |
|
| Stun | 1~7 | ||
| Stun Timer | 40 | ||
| Frame Count | ? | ∞ | |
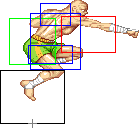
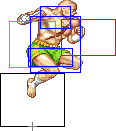
- Diagonal Jumping Jab:
| Damage | 11 |  |
 |
 |
 |

| |
| Stun | 1~7 | ||||||
| Stun Timer | 40 | ||||||
| Frame Count | ? | ? | ? | ? | ∞ | ||
| Simplified | ? | ? | ? | ∞ | |||
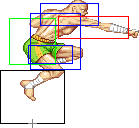
- Neutral Jumping Strong:
| Damage | 19 |  |
 |
 |
 |

|
| Stun | 5~11 | |||||
| Stun Timer | 50 | |||||
| Frame Count | ? | ? | ? | ? | ∞ | |
| Simplified | ? | ? | ∞ | |||
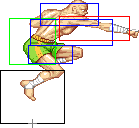
- Diagonal Jumping Strong:
| Damage | 19 |  |
 |
 |
 |

|
| Stun | 5~11 | |||||
| Stun Timer | 50 | |||||
| Frame Count | ? | ? | ? | ? | ∞ | |
| Simplified | ? | ? | ∞ | |||
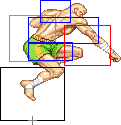
- Neutral Jumping Fierce:
| Damage | 21 |  |
 |
 |
 |

|
| Stun | 11~17 | |||||
| Stun Timer | 60 | |||||
| Frame Count | ? | ? | ? | ? | ∞ | |
| Simplified | ? | ? | ∞ | |||
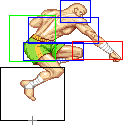
- Diagonal Jumping Fierce:
| Damage | 21 |  |
 |
 |
 |

|
| Stun | 11~17 | |||||
| Stun Timer | 60 | |||||
| Frame Count | ? | ? | ? | ? | ∞ | |
| Simplified | ? | ? | ∞ | |||
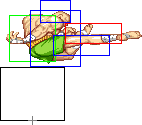
- Neutral Jumping Short:
| Damage | 12 |  |
|
| Stun | 1~7 | ||
| Stun Timer | 40 | ||
| Frame Count | ? | ∞ | |
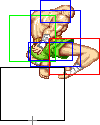
- Diagonal Jumping Short:
| Damage | 14 |  |
|
| Stun | 1~7 | ||
| Stun Timer | 40 | ||
| Frame Count | ? | ∞ | |
- Neutral Jumping Forward:
| Damage | 19 |  |
 |
 |
 |

|
| Stun | 5~11 | |||||
| Stun Timer | 50 | |||||
| Frame Count | ? | ? | ? | ? | ∞ | |
| Simplified | ? | ? | ∞ | |||
- Diagonal Jumping Forward:
| Damage | 19 |  |
 |
 |
 |

|
| Stun | 5~11 | |||||
| Stun Timer | 50 | |||||
| Frame Count | ? | ? | ? | ? | ∞ | |
| Simplified | ? | ? | ∞ | |||
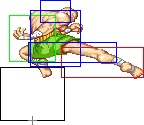
- Neutral Jumping Roundhouse:
| Damage | 21 |  |
 |
 |
 |

|
| Stun | 11~17 | |||||
| Stun Timer | 60 | |||||
| Frame Count | ? | ? | ? | ? | ∞ | |
| Simplified | ? | ? | ∞ | |||
- Diagonal Jumping Roundhouse:
| Damage | 21 |  |
 |
 |
 |

|
| Stun | 11~17 | |||||
| Stun Timer | 60 | |||||
| Frame Count | ? | ? | ? | ? | ∞ | |
| Simplified | ? | ? | ∞ | |||
Throws
Sagat has only one throw, which is a shoulder toss. It is performed by moving the joystick left or right and pressing either Strong or Fierce. The direction you move the stick is the direction your enemy will get tossed at. This does around 22% damage.
Sagat's throw range is not very good: he is only at an advantage against Fei Long. Boxer's Fierce throw and T. Hawk's normal throws have less range, but those characters have longer reach options.
- Tiger Carry: (←/→ + Strong/Fierce)
| Damage | 32 | 
|
| Stun | 7~13 | |
| Stun Timer | 100 | |
| Range (from axis) | 48 | |
| (from throwable box) | 16 |
Special Moves
All motions are listed under the assumption that Sagat is facing right.
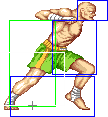
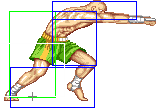
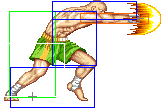
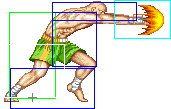
- Tiger Shot a.k.a. High Tiger: (↓↘→ + P)
Detailed Input: (↓ [0~6f] ↘ [0~6f] → [0~10/9/7f] Jab/Strong/Fierce)
- Startup:
| Super Meter | 3 |  |
 |
| |
| Frame Count | 6 | 3 | 1 | ||
| Simplified | 10 | ||||
- Active:
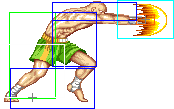
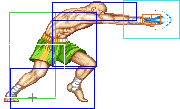
- Jab Version:
| Damage | 16 |  |
 |
 |
 |
|
| Stun | 9~15 | |||||
| Stun Timer | 100 | |||||
| Frame Count | 1 | 1 | 1 | 2 | 1... | |
| Simplified | ? | |||||
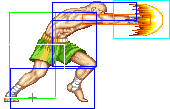
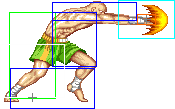
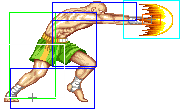
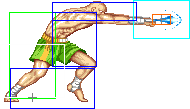
- Strong Version:
| Damage | 17 | 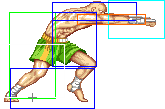 |
 |
 |
 |
|
| Stun | 9~15 | |||||
| Stun Timer | 100 | |||||
| Frame Count | 1 | 1 | 1 | 2 | 1... | |
| Simplified | ? | |||||
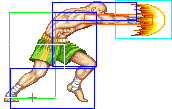
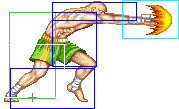
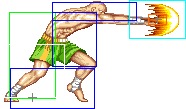
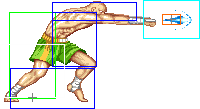
- Fierce Version:
| Damage | 19 |  |
 |
 |
 |
|
| Stun | 9~15 | |||||
| Stun Timer | 100 | |||||
| Frame Count | 1 | 1 | 1 | 2 | 1... | |
| Simplified | ? | |||||
Sagat shouts his trademark move name and throws a projectile while standing still. The strength of the punch determines the speed and damage of the projectile, being Jab the lowest and Fierce the highest. This can be avoided by crouching under the projectile.
- Ground Tiger Shot a.k.a. Low Tiger: (↓↘→ + K)
Detailed Input: (↓ [0~6f] ↘ [0~6f] → [0~10/9/7f] Short/Forward/Roundhouse)
- Startup:
| Super Meter | 3 |  |
 |

| |
| Frame Count | 6 | 5 | 1 | ||
| Simplified | 12 | ||||
- Active:
- Short Version:
| Damage | 15 |  |
 |
 |
 |

|
| Stun | 9~15 | |||||
| Stun Timer | 100 | |||||
| Frame Count | 1 | 1 | 1 | 2 | 1... | |
| Simplified | ? | |||||
- Forward Version:
| Damage | 16 |  |
 |
 |
 |

|
| Stun | 9~15 | |||||
| Stun Timer | 100 | |||||
| Frame Count | 1 | 1 | 1 | 2 | 1... | |
| Simplified | ? | |||||
- Roundhouse Version:
| Damage | 17 |  |
 |
 |
 |

|
| Stun | 9~15 | |||||
| Stun Timer | 100 | |||||
| Frame Count | 1 | 1 | 1 | 2 | 1... | |
| Simplified | ? | |||||
Sagat shouts his trademark move name and throws a projectile while crouching. The kick version determines the speed and damage of the projectile, being Short the lowest and Roundhouse the highest. This move hits low, so the enemy must either evade it with a jump or special move, or crouch block.
- Tiger Uppercut: (→↓↘ + P)
Detailed Input: (→ [0~6f] ↓ [0~6f] ↘ [0~10/9/7f] Jab/Strong/Fierce)
Sagat performs a punch similar to a Shoryuken that hits once for big damage(Jab and Strong versions) or juggles into 4 or 5 hits (Fierce version). This move is invulnerable for a split second, making it an unavoidable anti-air if timed right. The second Stun and Stun Timer values are for the Fierce version.
- Tiger Knee Crush: (↓→↗ + K)
Detailed Input: (↓ [0~6f] → [0~6f] ↗ [0~10/9/7/3f] Short/Forward/Roundhouse/any K if you are at a jumpable state)
- Startup + Active:
- Recovery:
 |
 |
 |

| |
| Frame Count (Short) | ? | ? | ? | ? |
| Simplified (Short) | ? | |||
| Frame Count (Forward) | ? | ? | ? | ? |
| Simplified (Forward) | ? | |||
| Frame Count (Rh) | ? | ? | ? | ? |
| Simplified (Rh) | ? | |||
Sagat performs an aerial knee bash attack that hits up to two times. The range, damage and recovery are determined by the kick version, being Short the shortest range and recovery and lowest damage; and Roundhouse the longest reach, longest recovery and highest damage. The first attack does from 14% to 16% damage and forces standing hitstun on the enemy while the second hit does 11% damage and causes a full knock down. This move can be used to avoid projectiles if timed right, finish combos and quickly get close to the enemy, often surprising him with a throw or Tiger Uppercut.
Super Move
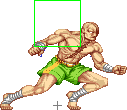
- Tiger Genocide: (↓↘→↓↘ + P)
Detailed Input: (↓ [0~14f] ↘ [0~14f] → [0~14f] ↓ [0~14f] ↘ [0~10f] P)
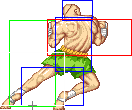
| Damage | 14*6 |  |
 |
 |
 |
 |
 |
 |
 |
 |

|
| Stun | 0~4*6 | ||||||||||
| Stun Timer | 20*6 | ||||||||||
| Frame Count | ? | ? | ? | ? | ? | ? | ? | ? | ? | ? | |
| Simplified | ? | ? | ? | ? | |||||||
 |
 |
 |
 |
 |
 |

| |
| Frame Count | ? | ? | ? | ? | ? | ? | ? |
| Simplified | ? | ? | ? | ? | |||
Can pass through fireballs, but doesn't have much horizontal range. You can add a HP Uppercut in the corner after the super.
The Basics
Taken from DarksydePhil's post at: http://forums.shoryuken.com/showthread.php?t=97281&page=4
From far away, throw low tigers to pin them down. When they jump, Tiger uppercut of they are close enough, if not do standing FP to knock them out of the air.
When jumping, always use jump RH, it magically beats a million things and does massive damage on connect. If you happen to land a jumping RH, combo into either: 1. low forward kick, roundhouse tiger shot (sometimes dizzies) 2. stand light kick (1-2 hits depending on distance), roundhouse tiger shot 3. if you land DEEP, 1-2 hit standing forward kick with OPTION of either 1-hit Tiger uppercut or roundhouse tiger knee for 1-2 hits.
Basically what you want to choose as your combo depends on your distance from your opponent. If you want to go for a quick dizzy and you've landed deep enough, go for the low forward kick into tiger shot. However, this doesn't always combo if you're not close enough and also doesn't always dizzy. A more reliable combo is option 2, where the stand light kick ALWAYS connects for 1-2 hits and then the tiger shot is guaranteed. If you get lucky enough to connect the jump RH and you land deep, do the standing forward and judging on the results, either cancel into Tiger uppercut after 1 hit or go for the gold with the 2-hit tiger knee if the forward is deep enough to land twice.
What do you do if your jump RH doesn't connect, and they block? In that case either do a blocked standing light kick into tiger shot, or just do the roundhouse tiger shot by itself as soon as you land. This will keep them pinned and taking a bit of block damage.
Now if you end up close, O.Sagat has two awesome options. One is simply his low roundhouse, which is very fast, has decent range, and does a crapload of damage. If you time it right, you can play a wicked game of footsies that will really damage the opponent if they're just slightly out of range and keep whiffing, and you just sweep to punish them afterwards. The other option is just stand light kick, with the option of following with a roundhouse tiger shot. This is good for guaranteed block damage and you don't have to worry about missing and getting counter-swept, since the stand light kick has considerable range and keeps them blocking.
My only warning with O.Sagat is getting over-zealous. DON'T do too many "psychic" tiger uppercuts or you will be getting your ass handed to you. Also, don't try to play TOO many footsies with stand short or crouching roundhouse and just assume you're going to hit every time...sometimes you can get stuffed with DPs or special moves and it can get frustrating to get back to your "zone game" when the opponent has control of the round after a knockdown.
Advanced Strategy
Combos
Match-ups
Matchups classified with this diagram in mind. For the old characters i guessed the positions.
--Born2SPD
Serious Advantage Match-ups
Vs. Blanka:
- 8 - 2
Vs. Cammy:
- 7 - 3
Advantage Match-ups
Vs. E. Honda:
- 6.5 - 3.5
Vs. Fei Long:
- 6.5 - 3.5
Vs. T. Hawk:
- 6.5 - 3.5
Vs. O. T. Hawk:
Vs. Zangief:
- 6 - 4
Fair Match-ups
Vs. Ken:
- 5 - 5
Vs. O. Ken:
Vs. Dee Jay:
- 4.5 - 5.5
Vs. Sagat (self):
Disadvantage Match-ups
Vs. Ryu:
- 3.5 - 6.5
Vs. Chun-Li:
- 3.5 - 6.5
Vs. Guile:
- 3.5 - 6.5
Vs. M. Bison (dictator):
- 3.5 - 6.5
Vs. O. Sagat:
Serious Disadvantage Match-ups
Vs. Balrog (boxer):
- 2 - 8
Vs. Dhalsim:
- 1 - 9
Vs. Vega (claw):
- 2.5 - 7.5


