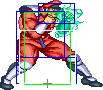
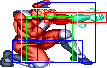
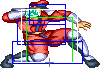
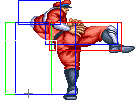
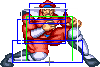
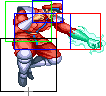
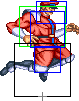
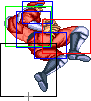
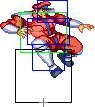
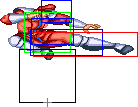
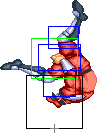
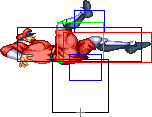
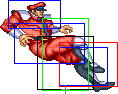
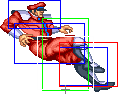
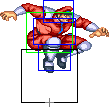
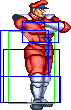
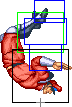
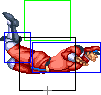
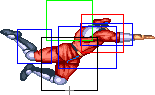
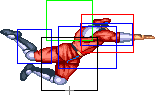
Normal Moves
Note: If I don't mention what the move does, I'm not generally using it that much. My style may differ quite a bit from your Bison style, so if you find something that works, put it up here.
Ground Normals
| Damage |
4 |
 |
 |
|
| Stun |
0-5
|
| Stun Timer |
40
|
| Chain Cancel |
Yes
|
| Special Cancel |
Yes
|
| Frame Count |
3 |
4 |
4
|
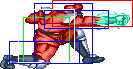
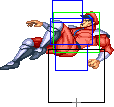
Bison does a quick standing jab, can be rapid fired to stop Honda's Torpedos and Blanka's Ball though it's not entirely reliable, useful in some anti-air situations.
| Damage |
4 |
 |
 |
|
| Stun |
0-5
|
| Stun Timer |
40
|
| Chain Cancel |
Yes
|
| Special Cancel |
Yes
|
| Frame Count |
3 |
4 |
4
|
This is a rapid-fire move that is used in combos and ticks. The priority is hideous, so it has mostly no use anywhere else.
| Damage |
19 |
 |
 |
 |
|
| Stun |
5-11
|
| Stun Timer |
60
|
| Chain Cancel |
No
|
| Special Cancel |
Yes
|
| Frame Count |
2 |
4 |
4 |
8
|
| Simplified |
2 |
8 |
8
|
Bison does a body shot that can be used in ticks, also doubles as a throw command, can favorably trade with Dhalsim.
| Damage |
19 |
|
 |
|
|
| Stun |
5-11
|
| Stun Timer |
60
|
| Chain Cancel |
No
|
| Special Cancel |
No
|
| Frame Count |
2 |
4 |
4 |
8
|
| Simplified |
6 |
4 |
8
|
| Damage |
19 |
 |
 |
 |
|
| Stun |
5-11
|
| Stun Timer |
60
|
| Chain Cancel |
No
|
| Special Cancel |
Yes
|
| Frame Count |
2 |
2 |
4 |
8
|
| Simplified |
4 |
4 |
8
|
| Damage |
24 |
|
|
|
|
| Stun |
10-16
|
| Stun Timer |
80
|
| Chain Cancel |
No
|
| Special Cancel |
No
|
| Frame Count |
4 |
4 |
6 |
19
|
| Simplified |
8 |
6 |
19
|
| Damage |
24 |
|
|
 |
|
| Stun |
10-16
|
| Stun Timer |
80
|
| Chain Cancel |
No
|
| Special Cancel |
No
|
| Frame Count |
4 |
4 |
6 |
19
|
| Simplified |
8 |
6 |
19
|
Bison's main ground to air defense in lieu of a Knee Press Nightmare, also doubles as a throw command, can favorably trade with Dhalsim.
| Damage |
24 |
|
|
 |
|
| Stun |
10-16
|
| Stun Timer |
80
|
| Chain Cancel |
No
|
| Special Cancel |
Yes
|
| Frame Count |
4 |
4 |
6 |
19
|
| Simplified |
8 |
6 |
19
|
Bison does a slow punch while crouching, with correct timing it can be used to beat T.Hawk's splash, as well as other moves when used as an anti-air.
| Damage |
12 |
 |
 |
|
| Stun |
0-5
|
| Stun Timer |
40
|
| Chain Cancel |
No
|
| Special Cancel |
Yes
|
| Frame Count |
2 |
2 |
1
|
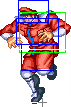
Bison does a quick knee that is used mainly in combos and ticking.
| Damage |
12 |
|
 |
 |
|
| Stun |
0-5
|
| Stun Timer |
40
|
| Chain Cancel |
No
|
| Special Cancel |
Yes
|
| Frame Count |
2 |
2 |
4 |
3
|
| Simplified |
4 |
4 |
3
|
| Damage |
12 |
 |
 |
|
| Stun |
0-5
|
| Stun Timer |
40
|
| Chain Cancel |
No
|
| Special Cancel |
Yes
|
| Frame Count |
4 |
4 |
5
|
| Damage |
19 |
|
|
 |
|
|
| Stun |
5-11
|
| Stun Timer |
60
|
| Chain Cancel |
No
|
| Special Cancel |
No
|
| Frame Count |
3 |
3 |
5 |
8 |
1
|
| Simplified |
6 |
5 |
9
|
| Damage |
21 |
|
|
 |
|
|
| Stun |
5-11
|
| Stun Timer |
60
|
| Chain Cancel |
No
|
| Special Cancel |
No
|
| Frame Count |
3 |
3 |
5 |
8 |
1
|
| Simplified |
6 |
5 |
9
|
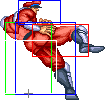
Bison's main "harassment" move. It is safe, beats fireballs, controls a large amount of space, and can be whiffed while charging to start a pindown.
| Damage |
21 |
|
 |
|
| Stun |
5-11
|
| Stun Timer |
60
|
| Chain Cancel |
No
|
| Special Cancel |
Yes
|
| Frame Count |
4 |
8 |
5
|
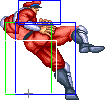
This move is great as a meaty on wakeup because it can stuff even Shoryus with proper timing. Bufferable, on block can safely be used to setup an lk Scissor Kick for a pindown.
- Close Standing Roundhouse:
| Damage |
26 |
|
|
 |
|
|
| Stun |
10-16
|
| Stun Timer |
80
|
| Chain Cancel |
No
|
| Special Cancel |
No
|
| Frame Count |
3 |
3 |
6 |
17 |
1
|
| Simplified |
6 |
6 |
18
|
| Damage |
26 |
|
|
 |
|
|
| Stun |
10-16
|
| Stun Timer |
80
|
| Chain Cancel |
No
|
| Special Cancel |
No
|
| Frame Count |
3 |
3 |
6 |
17 |
1
|
| Simplified |
6 |
6 |
18
|
A slower version of MK. Deals really solid damage and stun and has some of the same uses as MK. It is great as a whiff punisher for things such as OG Ken Jab Shoryuken.
| Damage |
26 |
 |
 |
|
| Stun |
5-11
|
| Stun Timer |
130
|
| Chain Cancel |
No
|
| Special Cancel |
No
|
| Frame Count |
6 |
29 |
17
|
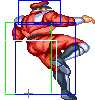
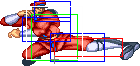
Slide trip. It is useful if opponent techs your tick throw, and also great for positioning with a knockdown. This is quite unsafe on block, from most distances. It also does not work as anti-air.
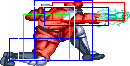
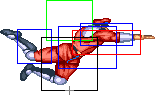
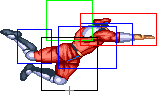
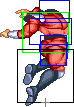
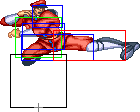
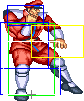
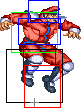
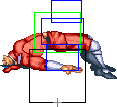
Aerial Normals
| Damage |
11 |
 |
|
| Stun |
1-7
|
| Stun Timer |
40
|
|
|
| Frame Count |
3 |
∞
|
| Damage |
11 |
 |
 |
|

|
| Stun |
1-7
|
| Stun Timer |
40
|
|
|
| Frame Count |
2 |
40 |
6 |
∞
|
| Simplified |
2 |
40 |
∞
|
Can be used as a crossup.
| Damage |
19 |
|
|
|
| Stun |
5-11
|
| Stun Timer |
50
|
|
|
| Frame Count |
3 |
20 |
∞
|
| Damage |
19 |
|
 |
|
|
| Stun |
5-11
|
| Stun Timer |
50
|
|
|
| Frame Count |
3 |
20 |
6 |
∞
|
| Simplified |
3 |
20 |
∞
|
| Damage |
24 |
 |
 |
 |
|
|
| Stun |
11-17
|
| Stun Timer |
60
|
|
|
| Frame Count |
2 |
4 |
10 |
6 |
∞
|
| Simplified |
6 |
10 |
∞
|
| Damage |
24 |
 |
 |
 |
|
|
| Stun |
11-17
|
| Stun Timer |
60
|
|
|
| Frame Count |
3 |
6 |
12 |
5 |
∞
|
| Simplified |
9 |
12 |
∞
|
| Damage |
11 |
 |
 |
|
|
| Stun |
1-7
|
| Stun Timer |
40
|
|
|
| Frame Count |
2 |
40 |
3 |
∞
|
| Simplified |
2 |
40 |
∞
|
Great priority, stays out for a really long time, low damage but it does beat a lot air to air.
| Damage |
11 |
 |
 |
|
|
| Stun |
1-7
|
| Stun Timer |
40
|
|
|
| Frame Count |
2 |
40 |
3 |
∞
|
| Simplified |
2 |
40 |
∞
|
| Damage |
21 |
 |
 |
 |
|
| Stun |
5-11
|
| Stun Timer |
50
|
|
|
| Frame Count |
1 |
2 |
20 |
∞
|
| Simplified |
3 |
20 |
∞
|
Stay out a decent amount of time, horizontal kick can stuff problem jump ins like Shoto j.hk quite well.
- Diagonal Jumping Forward:
| Damage |
21 |
 |
 |
 |
|
| Stun |
5-11
|
| Stun Timer |
50
|
|
|
| Frame Count |
3 |
20 |
5 |
∞
|
| Simplified |
3 |
20 |
∞
|
Great when used as an instant overhead, excellent cross-up, can stuff Blanka's Up Ball which comes into play very often.
- Neutral Jumping Roundhouse:
| Damage |
26 |
|
|
 |
|
| Stun |
11-17
|
| Stun Timer |
60
|
|
|
| Frame Count |
3 |
2 |
8 |
∞
|
| Simplified |
5 |
8 |
∞
|
Like the neutral jumping forward but with more range and priority but less attacking frames.
- Diagonal Jumping Roundhouse:
| Damage |
26 |
 |
 |
|
|
| Stun |
11-17
|
| Stun Timer |
60
|
|
|
| Frame Count |
5 |
8 |
5 |
∞
|
| Simplified |
5 |
8 |
∞
|
Great crossup, big damage, easier to use than j.Fowd on slimmer characters. Decent priority air to air.
Throws
O.M.Bison can only throw with Strong and Fierce. He has no kick throws, but Bison can still tech throws with any medium or higher punch or kick even if Bison has no kick throws. This rule applies to all characters.
- Deadly Throw: (←/→ + Strong/Fierce)
| Damage |
32(+2) |
 |
 |

|
| Stun |
8-13
|
| Stun Timer |
100
|
| Range (from axis) |
52
|
| Range advantage |
24
|
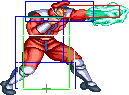
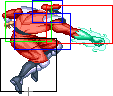
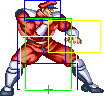
Special Moves
All motions are listed under the assumption that O.M.Bison is facing right.
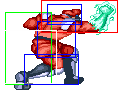
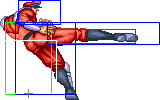
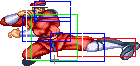
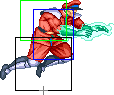
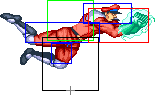
- Psycho Crusher a.k.a. Torpedo: (Charge ←, →, P)
| Damage (Jab) |
22 |
 |
 |
 |
File:OMBison pc4&6.png |
File:OMBison pc5anm.png
|
| Damage (Strng) |
24
|
| Damage (Frc) |
26
|
| Stun |
10-15
|
| Stun Timer |
100
|
| Frame Count (Jab) |
3 |
4 |
4 |
7 |
32
|
| Simplified (Jab) |
18 |
32
|
| Frame Count (Strng) |
2 |
3 |
3 |
7 |
36
|
| Simplified (Strng) |
15 |
36
|
| Frame Count (Frc) |
1 |
1 |
2 |
7 |
62
|
| Simplified (Frc) |
11 |
62
|
Bison flies across the screen in flames. It can do a maximum of 3 blocked hits. The distance and the speed at which it travels depends on the strength of the punch. It has been severely weakened since Super SFII, no longer has great priority besides the Jab version. Can be used to escape corners at times and can also hit opponents from behind/underneath with ridiculous timing and a lot of balls. Generally, stick with the scissor kick. If you make a mistake you can easily corner yourself. Normals beat this far too easily.
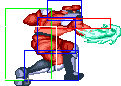
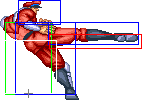
- Double Knee Press a.k.a. Scissor Kick: (Charge ←, →, K)
| Damage (Shrt) |
19+11 |
 |
 |
 |
 |
 |
 |
|
| Damage (Frwrd) |
21+11
|
| Damage (Rh) |
22+11
|
| Stun |
10-15/1-7
|
| Stun Timer |
100/50
|
|
|
| Frame Count (Shrt) |
3 |
1 |
1 |
3 |
8 |
10 |
10
|
| Simplified (Shrt) |
8 |
8 |
10 |
10
|
| Frame Count (Frwrd) |
3 |
1 |
1 |
3 |
8 |
10 |
11
|
| Simplified (Frwrd) |
8 |
8 |
10 |
11
|
| Frame Count (Rh) |
3 |
1 |
1 |
3 |
8 |
10 |
12
|
| Simplified (Rh) |
8 |
8 |
10 |
12
|
Bison kicks the opponent twice in a forward motion. The distance and speed at which it travels depends on the strength of the kick. When properly spaced to do only one hit, they can be quite safe and useful in pindown strategies. They also are quite useful for scoring knockdowns if opponent tries to counter standing kicks or do low attacks. Can be used as a ghetto anti air, unlike the Psycho Crusher which gets stuffed a lot.
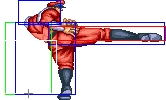
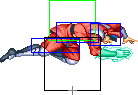
- Head Stomp: (Charge ↓, ↑, K)
- Short Version:
| Damage |
17 |
 |
 |
 |
 |

|
| Stun |
10-15
|
| Stun Timer |
100
|
|
|
| Frame Count |
? |
? |
? |
? |
?
|
| Simplified |
? |
?
|
- Forward/Roundhouse Version:
| Damage (Frwrd) |
19 |
|
|
|
|
|
| Damage (Rh) |
21
|
| Stun |
10-15
|
| Stun Timer |
100
|
|
|
| Frame Count |
? |
? |
? |
? |
?
|
| Simplified |
? |
?
|
|
 |
 |
|
 |
 |
 |
|
|
| Frame Count |
? |
? |
? |
? |
? |
? |
? |
?
|
| Simplified |
? |
?
|
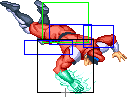
Bison flies towards the opponent and stomps their head with his boots. You can move very flexibly after the head stomp makes contact with a grounded opponent, but when the head stomp hits an airborne opponent, the control over mobility is not as flexible. Works well to get over fireballs.
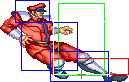
- Somersault Skull Diver: (P, during the Bounce/Recovery animation of Head Stomp)
- Jab Version:
| Damage |
22 |
 |
 |

|
| Stun |
10-15
|
| Stun Timer |
100
|
|
|
| Frame Count |
? |
∞ |
?
|
| Damage |
24 |
|
 |
|
 |
|
| Stun |
10-15
|
| Stun Timer |
100
|
|
|
| Frame Count |
? |
? |
? |
∞ |
?
|
| Simplified |
? |
? |
∞ |
?
|
| Damage |
26 |
|
 |
|
|
|
| Stun |
10-15
|
| Stun Timer |
100
|
|
|
| Frame Count |
? |
? |
? |
∞ |
?
|
| Simplified |
? |
? |
∞ |
?
|
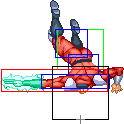
This is the punch that hits the opponent's head after head stomp. You can move left or right using the joystick while performing this move. The active hitting duration of the move depends on the strength of the punch. This can combo in really weird situations.
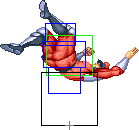
- Devil Reverse: (Charge ↓, ↑, P)
| Damage (Jab) |
24 |
 |
 |
 |
 |
 |
 |
|
| Damage (Strng) |
26
|
| Damage (Frc) |
27
|
| Stun |
10-15
|
| Stun Timer |
100
|
| Frame Count |
? |
? |
? |
? |
? |
? |
?
|
| Simplified |
? |
?
|
|
 |
 |
 |

|
| Frame Count (Jab) |
? |
? |
? |
?
|
| Simplified (Jab) |
? |
?
|
| Frame Count (Strng) |
? |
? |
? |
?
|
| Simplified (Strng) |
? |
?
|
| Frame Count (Frc) |
? |
? |
? |
?
|
| Simplified (Frc) |
? |
?
|
Template:Super Turbo


