Introduction
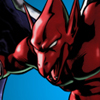
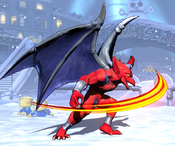
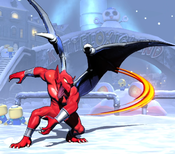
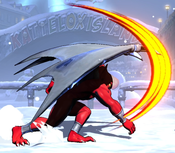
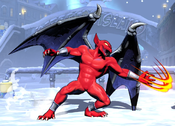
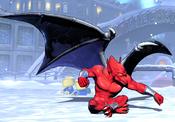
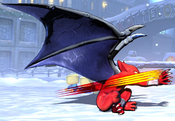
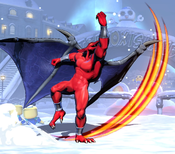
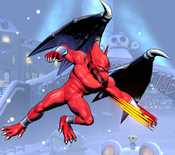
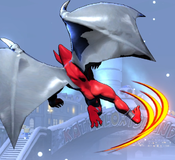
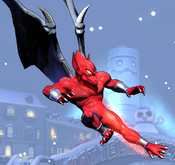
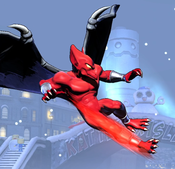
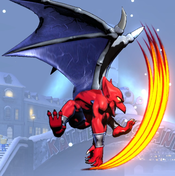
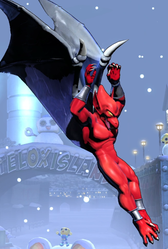
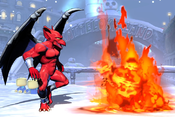
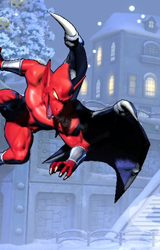
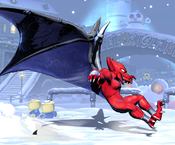
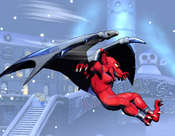
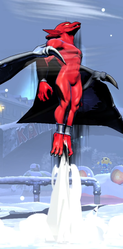
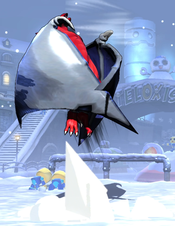
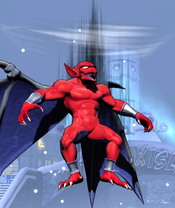
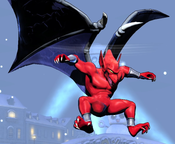
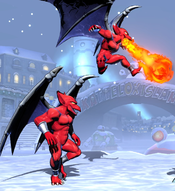
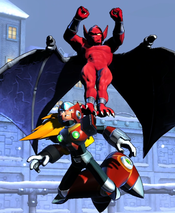
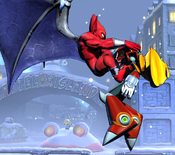
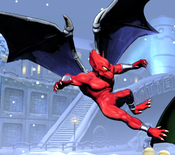
As a member of the Arremer race, Firebrand is a demon and opponent of the knight Arthur. He was primarily infamous as an annoying enemy in Ghouls 'n' Ghosts. He is also the main character of his own game, Demon Crest.
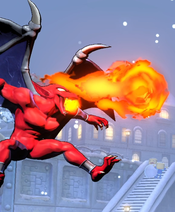
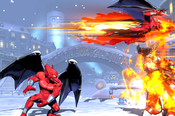
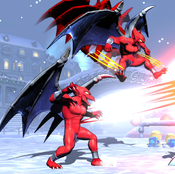
In UMvC3, Firebrand is a technical character, who weaves in and out of his flight mode through various attacks to open the opponent's defenses. He also has a special move that moves him through the air in place of a regular airdash. Although he can be difficult to master, and has low solo damage, Firebrand can harass from afar with fireballs while fishing for any clean hit, which he can convert into repeated Unblockable setups with his Charged Demon Missile (623[H]) attack.
| Strengths | Weaknesses |
|---|---|
|
|
| Firebrand | |
|---|---|
| Character Data | |
| Health | 850,000 |
| Ground Magic Series | ZigZag |
| Air Chain Combo Limit | None |
| Forward Dash Duration | 22 frames |
| Backdash Duration | 22 frames |
| Jump Duration | 40 frames |
| Superjump Duration | 81 frames |
| Walljump? | Cling |
| Doublejump? | No |
| Airdash? | No |
| X-Factor Damage Boost (1/2/3) | 15% / 35% / 55% |
| X-Factor Speed Boost (1/2/3) | 25% / 35% / 45% |
| Minimum Damage Scaling (Normals, Specials) | 10% |
| Minimum Damage Scaling (Hypers) | 35% |
| Minimum Damage Scaling (X-Factor) | 35% |
Move List
Assists
| Damage | Startup | Active | Recovery |
|---|---|---|---|
| 100,000 + 15,000 x5 | 50 | - | 111, 81 |
| On Hit | On Block | Guard | Properties |
| - | - | Mid | |
|
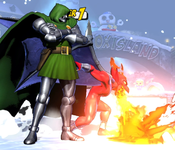
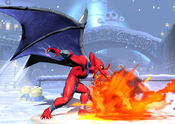
THC Hyper: Dark Fire. Firebrand spits a fireball on the ground directly in front of himself. The fireball takes 4 frames to reach the ground, and an additional 2 frames to erupt. Once on the ground, the fireball bursts into flames, which hit repeatedly while slowly advancing forward. The flames are active for 62 frames before disappearing. Spitfire can be useful as an OTG assist, although it is slower than many other choices, such as Wesker's Gunshot. | |||
| Damage | Startup | Active | Recovery |
|---|---|---|---|
| 100,000 | 39 | 20 | 112, 82 |
| On Hit | On Block | Guard | Properties |
| - | - | Mid | |
|
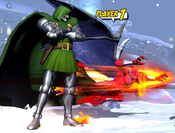
THC Hyper: Dark Fire. Firebrand charges horizontally across the stage as an active hitbox. Although Firebrand travels the entire screen length during this move, his active frames run out early; he can only hit an opponent who is at most 2/3 of fullscreen distance away. Although this assist is decently fast and has good range, the fact that it is a physical hit and not a projectile means Firebrand is vulnerable to being stuffed by the opponent's own assists or attacks, and it is dangerous to call outside of combos. | |||
| Damage | Startup | Active | Recovery |
|---|---|---|---|
| 80,000 | 50 | 31 | 112, 82 |
| On Hit | On Block | Guard | Properties |
| - | - | Mid | - |
|
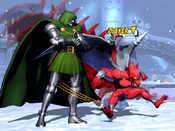
THC Hyper: Dark Fire. Firebrand leaps into the air, and then swoops across the stage in an arc. Has decent coverage, but no special properties and causes minimal hitstun/blockstun. | |||
Ground Normals
| Damage | Startup | Active | Recovery |
|---|---|---|---|
| 33,000 | 5 | 3 | 9 |
| On Hit | On Block | Guard | Properties |
| +6 | +6 | Mid | |
|
- | |||
| Damage | Startup | Active | Recovery |
|---|---|---|---|
| 45,000 | 8 | 3 | 15 |
| On Hit | On Block | Guard | Properties |
| +1 | 0 | Mid | - |
|
Has fairly good reach for its speed, and good frame advantage. Canceling into 623M or 214X off this attack while calling an assist is a good way to start an offense. | |||
| Damage | Startup | Active | Recovery |
|---|---|---|---|
| 35,000 + 45,000 | 10 | 2(7)4 | 18 |
| On Hit | On Block | Guard | Properties |
| +2 | +1 | Mid | - |
|
Hits twice. | |||
| Damage | Startup | Active | Recovery |
|---|---|---|---|
| 33,000 | 4 | 2 | 12 |
| On Hit | On Block | Guard | Properties |
| 0 | -1 | Low | |
|
- | |||
| Damage | Startup | Active | Recovery |
|---|---|---|---|
| 48,000 | 8 | 4 | 17 |
| On Hit | On Block | Guard | Properties |
| -2 | -3 | Low | - |
|
Functions similar to 5M, but has worse reach in exchange for hitting low. | |||
| Damage | Startup | Active | Recovery |
|---|---|---|---|
| 65,000 | 10 | 8 | 26 |
| On Hit | On Block | Guard | Properties |
| - | -11 | Low | |
|
Firebrand slides along the ground. Advances forward approximately 1/4 of fullscreen distance. He can then cancel 2H into other mobility options, such as 214X Hell's Elevator for additional mobility. Despite appearances, this attack actually has a higher profile than Firebrand's regular crouch. He can naturally duck underneath many projectiles, but attempting to 2H slide underneath them will cause Firebrand to get hit. | |||
| Damage | Startup | Active | Recovery |
|---|---|---|---|
| 75,000 | 9 | 5 | 30 |
| On Hit | On Block | Guard | Properties |
| Launch | -12 | Mid | |
|
Steps forward about one character length while swiping upwards. This is a bad thing, because 5S is quite unsafe. | |||
Aerial Normals
| Damage | Startup | Active | Recovery |
|---|---|---|---|
| 35,000 | 5 | 3 | 17 |
| On Hit | On Block | Guard | Properties |
| +12 | +11 | OH | - |
|
Works naturally as an instant overhead against normal-sized characters. Converting this hit into anything meaningful is difficult and depends on Firebrand's current state:
| |||
| Damage | Startup | Active | Recovery |
|---|---|---|---|
| 48,000 | 8 | 4 | 22 |
| On Hit | On Block | Guard | Properties |
| +17 | +16 | OH | - |
|
Works as an instant overhead naturally against large-body characters, or on normal-sized characters when set up via Fuzzy Guard. This has the advantage of always comboing into j.236S Kidnap, even without any speed boosts active. | |||
| Damage | Startup | Active | Recovery |
|---|---|---|---|
| 40,000 + 40,000 | 8 | 3(2)4 | 29 |
| On Hit | On Block | Guard | Properties |
| +19 | +18 | OH | - |
|
Hits twice. | |||
| Damage | Startup | Active | Recovery |
|---|---|---|---|
| 70,000 | 10 | 4 | 32 |
| On Hit | On Block | Guard | Properties |
| +15 | +14 | OH | |
|
Can hit cross-up. | |||
Command Normals
| Damage | Startup | Active | Recovery |
|---|---|---|---|
| 70,000 | 18 | Until grounded | 11 |
| On Hit | On Block | Guard | Properties |
| - | +11 | Mid | |
|
Firebrand dives down-forward at a steep angle, attacking with his feet. It can option-select a throw by being input as j.3H or j.1H, but keep in mind it is slower than j.5H as an option. If Devil's Claw makes contact with an opponent, Firebrand will bounce off of them, rising slightly higher into the air, and then automatically enter his Hover Mode. If it doesn't make contact with an opponent, Firebrand recovers normally upon reaching the ground. j.2H causes a Ground Bounce on hit, and Firebrand can consistently follow up this hit by canceling his Hover state into j.214L Fast-Fall. This gives Firebrand a reliable way to convert stray air-to-air hits into full combos, and so it is an important part of his offense besides being a helpful combo tool. | |||
Special Moves
| L |
Damage | Startup | Active | Recovery |
|---|---|---|---|---|
| 100,000 | 16 | - | 29 | |
| On Hit | On Block | Guard | Properties | |
| 0 | -1 | Mid | ||
| M |
Damage | Startup | Active | Recovery |
| 100,000 | 16 | - | 29 | |
| On Hit | On Block | Guard | Properties | |
| 0 | -1 | Mid | ||
| H |
Damage | Startup | Active | Recovery |
| 100,000 + 15,000 x5 | 26 | - | 20 (Until grounded in air) | |
| On Hit | On Block | Guard | Properties | |
| - | +54 | Mid | ||
|
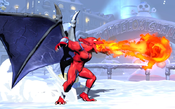
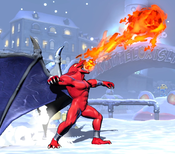
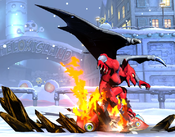
Firebrand's projectile special. If done in the air, Firebrand floats in place while shooting, halting any aerial momentum. L version shoots a fireball directly forwards. M version fires up-forward while on the ground, or down-forward while airborne, at a 45 degree angle. The H version is special. Firebrand shoots his fireball almost straight down. Upon hitting the ground, it erupts into flames, which hit multiple times and can OTG. This is Firebrand's primary OTG tool and allow him to convert off Hard Knockdowns, such as throws. Spitfire has average durability and fairly long recovery, so under normal circumstances it quickly falls behind other characters' projectiles in zoning battles. It can be fired much faster by taking advantage of Firebrands Wall Cling special (see below). | ||||
| Damage | Startup | Active | Recovery |
|---|---|---|---|
| - | - | - | - |
| On Hit | On Block | Guard | Properties |
| - | - | - | - |
|
Note: Exact Frame data for Wall Cling is not known at this time. Firebrand clings to the edge of the stage, holding himself in place in the air. He will remain in place for roughly 2 seconds, or until any of the main attack buttons is pressed. Pressing L, M, or H will cause Firebrand to hop off the wall and perform a variant of his Hell Spitfire projectile attack. The fireball pattern mirrors that of the regular special move: L going directly forward, M going down-forward, H being an OTG. However, Firebrand continues to move through the air during the fireball, and can land-cancel the recovery to make the fireball much faster than would otherwise be possible. Conversely, Firebrand can not recover from a Wall Cling fireball until touching the ground, so a projectile shot from very high in the air is much less safe than normal. Pressing S causes Firebrand to dismount from the wall without attacking, and Firebrand can immediately act normally upon leaving the wall. Wall cling into S has some odd properties and can sometimes preserve momentum. For example, if you are Firebrand and on incoming, if you wall cling instantly as you enter the screen and then press S right away, Firebrand will jump nearly full screen off the wall, amplifying his momentum from him entering the stage. This is great for escaping incoming mix-ups if you time it well, but be wary of meaty set-ups. This can method can also transfer momentum from the screen shrinking. As in, if you wall cling at full screen and then jump off instantly, you can sometimes do the same full-screen jump. As a special move, Wall Cling counts against the "3 special moves per jump state" limit, and performing any of the fireball follow-ups counts as a second special against the same limit. However, Firebrand can still use the fireball follow-ups as a fourth special, even if Wall Cling was his third special in that jump. Dismounting from the wall using S does not count as using a Special Move. Although Wall Cling requires Firebrand to be in the air, it is desireable to perform the cling immediately off the ground, to get better recovery on his fireballs and allow them to hit grounded opponents. This is called an "Instant Wall Cling Fireball". The standard input for this technique looks like this: If done perfectly, Firebrand's L fireball will be low enough to hit normal-sized standing opponents, or big-body characters that are crouching. It will also have excellent recovery due to Firebrand landing almost immediately, allowing him to perform another Fireball right away (or any other action). You can see a video example here. Instant Wall Cling Fireball greatly enhances Firebrand's long-range game and allows him to advance on an opponent - or zone them out - behind several successive projectiles. | |||
| Damage | Startup | Active | Recovery |
|---|---|---|---|
| 20,000 per drag + 70,000 | 13 | 15 | 28 |
| On Hit | On Block | Guard | Properties |
| - | -30 (+10 in air) | Mid | |
|
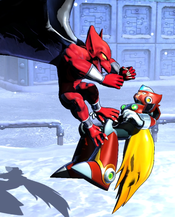
Firebrand lunges forward, or down-forward if he is airborne, attempting to snatch the opponent. This move is a hitgrab, so it can be blocked, but places Firebrand and the opponent into a throw-like animation if it successfully hits, and can be combod into. If Firebrand successfully hits the point character with this attack, he will drag them along the ground towards the corner. Being dragged deals repeated damage to the opponent, and Firebrand always drags the opponent all the way to the corner regardless of distance, and so this attack deals higher damage if Firebrand is farther from the corner when he lands it. Upon reaching the corner, Firebrand tosses the opponent into the wall. This causes a Wall Bounce, which leads into a Hard Knockdown. If Wall Bounce has already been consumed earlier in the combo, Kidnap causes a "fake" Wall Bounce which instead results in a Soft Knockdown. While dragging the opponent as part of this attack, Firebrand can not be harmed by most attacks. Consequently, Bon Voyage can be used to dodge assists or other delayed attacks that the opponent may be using to protect themselves. This is commonly used as a consistent way to combo around an opponent's Hidden Missiles assist, which might otherwise force Firebrand to drop or shorten his combo. Bon Voyage is an important tool for Firebrand as it gives him a very consistent way to convert most hits and guarantees that he will reach the corner for the rest of the combo. It does cause sizeable damage scaling, but this can be circumvented by making use of Firebrands multiple tools for resets once in the corner. The lengthy Wall Bounce into Hard Knockdown caused by this move gives Firebrand a way to combo into a Hard Tag to another character. Firebrand can make use of this by circumventing his own underwhelming damage by hard tagging to a more damaging character. However, specific Hard Tag setups off Kidnap depend on several factors. Bon Voyage can connect at 3 different heights (ground, normal jump, super jump), and at 4 different screen positions (corner, near corner, near full screen, full screen). This causes 12 different ways that Bon Voyage can hit. While each of them have minuscule differences, the most important thing to note is that grounded Bon Voyage ALWAYS throws farther into the corner than normal or super jump Bon Voyage. This is important when considering hard tags, because a midscreen grounded Bon Voyage into hardtag will NOT work the same way as a midscreen normal jump Bon Voyage. Pay attention to where your Kidnap setup connected when deciding whether to attempt a Hard Tag setup, and notice that Hard Tag setups off grounded Bon Voyage are not guaranteed to work on the more common air version. | |||
| L |
Damage | Startup | Active | Recovery |
|---|---|---|---|---|
| 100,000 | 15 | 20 | 21 | |
| On Hit | On Block | Guard | Properties | |
| +2 | +1 | Mid | - | |
| M |
Damage | Startup | Active | Recovery |
| 100,000 | 15 | 20 | 21 | |
| On Hit | On Block | Guard | Properties | |
| -17 | -18 | Mid | - | |
|
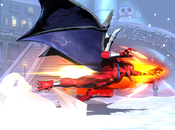
Firebrand charges forward as an active hitbox. For the L version, Firebrand will bounce off the opponent if he makes contact with them, ending with him airborne in his Hover state at roughly jump height. The M version does not have the bounce effect, and instead allows Firebrand to pass through opponents, on hit or block, and continue charging through to the other side. Calling and assist and then canceling into M Demon Missile is a simple way to create an ambiguous cross-up. | ||||
| Damage | Startup | Active | Recovery |
|---|---|---|---|
| 80,000 / 100,000 | 23 ~ 83(?) | 30 | 0 |
| On Hit | On Block | Guard | Properties |
| - | - | Good luck! | |
|
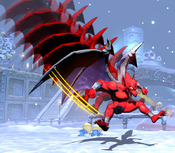
Firebrand hops into the air and then swoops forward in an arc. Done normally, this attack is fairly underwhelming. It hits once as a Mid, then leaves Firebrand in the air, automatically putting him into his Hover state, with poor frame advantage. This move is notable in that it can be charged by holding down the H button. Fully charging 623H improves its damage and hitstun, but more importantly makes the move Unblockable. This is different from a throw, which does not work on opponents who are in hitstun. Firebrand can keep an opponent locked down via an assist while charging this move, then connect the Unblockable attack with effectively no chance for the opponent to the escape. Performing this setup, then confirming it into a combo and looping it back into itself, is what allows Firebrand to perform so-called "300%" setups, where any hit on any character can snowball into a game win. | |||
Unblockable Basics
Firebrand can set up unblockables using his charged Demon Missile H. This seems overpowered at first glance, but there is more to it than meets the eye. As a Firebrand player, it is up to you to know what set-ups your team has, but also how to escape them. Here are some factors to be aware of when trying to unblockable an enemy:
- Incoming height/options: Different characters come in at different heights on incoming. For example, Magneto comes out significantly higher than Vergil. This makes it a lot easier for him to escape even meaty set-ups. Dante and Strider also come out significantly higher than others, but also have double jumps. This makes it a lot easier for them to escape solo or poorly timed incoming unblockables. Sentinel has an air okay invincible super, so he has a pretty good chance of escaping any unblockable that has a gap. Try to be aware of what options your opponent has on incoming and the heights their characters come in at.
- X-Factor: A lot of unblockables can be escaped using Xfactor. Set-ups that seem guaranteed can be escaped using XFactor guard cancelling. For example, Angelic's "Heaven or Hell" set-up (Shown above) can be escaped by blocking the Stalking Flare, and then XFactor cancelling the block stun and then taking the hit from the Purification assist. This carries you up too high for Firebrand to convert. Some characters can also XFactor cancel blockstun into invincible hypers. While it seems advantageous to force your opponent to use XFactor, try to be aware of how much of your resources you commit to your set-up.
- Available resources: As mentioned in the above paragraph, be very aware of your available resources. You do not want to blow all of your meter to unblockable a character and then be unable to kill them once you get the hit. You also do not want to waste a lot of meter only to have the opponent escape your set-up. Firebrand requires a lot of resource management.
- Opposing team composition: When trying to unblockable an enemy, make sure you are very aware of their team composition. If you were to get a hit on Magneto/Doom/Vergil, you could kill Magneto and attempt to unblockable Doom, but then later end up having to deal with anchor Vergil. On the other hand though, if you were to get a hit on a Magneto/Dormammu/Doom team, it would be better to unblockable Dormammu and leave the with anchor Doom. This aspect of unblockabling is open to interpretation and can vary a lot based on the player. However, it is still something to be aware of and requires a lot of thought.
- Ground vs Air: If at all possible, it is usually better to go for air-based unblockables. Only three characters in the game have air-okay invincible supers (Phoenix, Sentinel, and Morrigan). However, a large portion of the cast have invincible ground supers. Be very conscious of the opponent's available meter and whether they have XFactor, as you don't want to attempt a ground unblockable on Spencer, only for them to XFactor cancel into Bionic Arm and hit both Firebrand and the assist you are using to unblockable.
| Damage | Startup | Active | Recovery |
|---|---|---|---|
| - | 26 | - | 1 |
| On Hit | On Block | Guard | Properties |
| - | - | - | - |
|
Special command jump and mobility tool for Firebrand alongside Hell Dive - the aerial version.
Regardless of the version used, Firebrand automatically enters his Hover state on recovery. | |||
| Damage | Startup | Active | Recovery |
|---|---|---|---|
| - | 15 | - | - |
| On Hit | On Block | Guard | Properties |
| - | - | - | - |
|
Air version of Hell's Elevator. Acts as a pseudo-airdash, giving Firebrand additional mobility in the air.
Hell Dive is very fast and can be quickly followed up with other moves. Similar to an airdash, Firebrand can perform normal attacks while diving, and the attacks will inherit Hell Dive's aerial momentum, letting him advance or retreat quickly while attacking. Firebrand can also follow up Hell Dive with other versions of Hell Dive, or follow it up with Wall Cling, in order to make his movement patterns even harder to pin down. Keep in mind that using Hell Spitfire (j.236X) out of Hell Dive will still cause Firebrand to come to a dead stop in the air. | |||
| Damage | Startup | Active | Recovery |
|---|---|---|---|
| - | 30 | 90 | - |
| On Hit | On Block | Guard | Properties |
| - | - | - | |
|
Fairly standard Flight Mode. Firebrand floats in place in the air, and can slowly move in any direction without falling. Firebrand does not have a normal airdash, but he still has the ability to surpass the normal three-specials-per-jump limit while in Flight Mode, letting him repeatedly dash via Hell Dive or throw fireballs via Hell Spitfire. Hover startup is much slower than the Flight startup for most characters who have it - only Thor has startup as slow. It is not particularly effective to cancel attacks directly into Flight the way that characters like Magneto can. Instead, it makes more sense to cancel in Hell Dive or Hell's Elevator (214X). As detailed in the descriptions for those moves, Firebrand automatically enters Hover during the recovery of certain moves, notably j.2H (on contact), 623L and 623H, and 214X. This prevents Firebrand from manually activating Hover via its input during the remainder of that airborne state, although he can still activate Hover a second time in the air by connecting j.2H, which always forces Hover. As with other Flight modes, Firebrand can cancel Hover early by inputting 214S again, and performing j.5S automatically ends Flight as well. | |||
Hyper Combos
| Damage | Startup | Active | Recovery |
|---|---|---|---|
| 23,000 x20 ~ x40 | 12+1 | 50 | 33 (In Air: 33 + Until Grounded) |
| On Hit | On Block | Guard | Properties |
| -14 | -25 | Mid | |
|
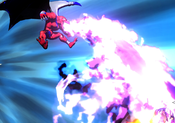
Firebrand breathes a continuous stream of purple flames. He starts by aiming at the ground below him, which can hit OTG. He then sweeps the flames upwards into the air, dragging the opponent up on hit. This is Firebrand's only directly-damaging hyper and thus his standard combo ender. Unfortunately, because it carries opponents so high into the air on hit, many hypers can not easily be DHC'd into from this one. Dark Fire can be performed on the ground or in the air, and the air version can be done very close to the ground using a Tiger Knee motion (2369XX). In most cases, Air Dark Fire will hit additional times as a combo ender, and thus deal slightly higher damage. However, Air Dark Fire has additional recovery compared to the grounded version, and the grounded version's recovery is already quite bad. In addition to the normal 33 frames of post-hyper recovery, Firebrand remains vulnerable after the air version until he returns to the ground. Opponents hit by this hyper are usually juggled into the air above Firebrand, but characters with fast, downward-angled attacks - such as Doom's Footdive and Vergil's Helm Breaker - can punish Air Dark Fire on hit. When ending a combo, consider using Air Dark Fire if you expect the hyper to kill the opponent, or if you are going to DHC out, in order to benefit from the extra damage. If you do not plan to kill or DHC, instead consider using the grounded version for better recovery, or even not performing a hyper at all and forcing the opponent to wake up into your mixup game. | |||
| Damage | Startup | Active | Recovery |
|---|---|---|---|
| - | 9+11 | - | - |
| On Hit | On Block | Guard | Properties |
| - | - | - | |
|
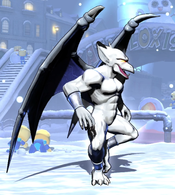
Install hyper. Firebrand's body becomes shiny, and he gains a global 25% speed boost to his attacks and movement. This boost is identical to the speed boost Firebrand gains from Level 1 X-Factor, and the two bonuses can stack. Luminous Body has no other effects besides increasing speed, but the boost gives Firebrand additional combo and pressure options, and makes him more mobile. Luminous Body is fairly unique among install hypers because it does not prevent Firebrand from building meter during the duration. Although Firebrand's meter-build is not the best, it is even possible Firebrand to rebuild the meter spent on Luminous Body, to reactivate it again after it expires. Firebrand can tag out to another character while in Luminous Body, and he will retain the speed bonus as an assist character without depleting the install's duration. | |||
| Damage | Startup | Active | Recovery |
|---|---|---|---|
| - | 9+0 | 579 | 20 |
| On Hit | On Block | Guard | Properties |
| - | - | - | Summons a buddy |
|
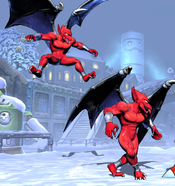
Firebrand calls forth another - slightly smaller - Arremer. For the duration of the hyper, pressing L, M or H will (in addition to controlling Firebrand normally) cause the small Arremer to perform an attack as well:
The buddy himself has no hurtbox and can not be attacked or nullified by projectiles (although the fireballs he shoots can be destroyed like normal). His M and H attacks function like assists - pushblocking them will not affect Firebrand. However, pushblocking the projectile created by the L attack will affect Firebrand. The buddy also benefits from speed boosts due to X-Factor, and even transforms to gain the speed boost of Luminous Body if Firebrand has enough meter to activate both at the same time. With the benefits of this extra speed, you can keep an opponent locked down indefinitely through repeated uses of the H attack, or by alternating H and L attacks. As with Luminous Body, Firebrand can continue to build meter while this hyper is active. However, tagging out Firebrand by any means immediately ends the hyper, causing your buddy to fly off-screen. | |||
Universal Mechanics
| Damage | Startup | Active | Recovery |
|---|---|---|---|
| 80,000 | 1 | 1 | - |
| On Hit | On Block | Guard | Properties |
| - | - | Throw | |
|
Standard ground throw that results in the opponent knocked down. Forward throw has significantly better advantage than back throw, with Backthrow not being convertable outside of X-Factor/Luminous Body speed boosts. Forward throw can universally be followed up with an OTG 236H. However, smaller characters tend to fall out of the flames from 236H before Firebrand can launch them. To combat this, dash up after a forward throw before performing the H Fireball, to maximize the time that the flames will hit them. Ground Throw option-selects 5H, which is a strong normal with two hits for hit-confirming, which is plus on block. Additionally, consider buffering a 2L or 623M (with assist) when attempting a ground throw. Timed properly, these moves will only come out if the opponent actually techs your throw, and will beat most non-invincible options the opponent has post-throw. | |||
| Damage | Startup | Active | Recovery |
|---|---|---|---|
| 80,000 | 1 | 1 | - |
| On Hit | On Block | Guard | Properties |
| - | - | Airthrow | |
|
Standard airthrow that results in the opponent being thrown away, ending in a Hard Knockdown. Contrasted with Firebrand's ground throw, his Back Airthrow is preferred over the forward version, due to being easier to combo afterwards. At normal jump height, comboing can be done easily by performing an air j.236H Fireball just as you finish the throw. At superjump height, Firebrand can convert a backthrow with 214M > j.5L (whiff), land, 236H to close the distance. As with ground throw, Firebrand's airthrow option-selects the relatively strong j.5H normal, and Firebrand can buffer a j.236S or j.2H after the throw attempt to remain advantageous on block and start a combo on hit. | |||
| Damage | Startup | Active | Recovery |
|---|---|---|---|
| 50,000 | 2 | 3 | 24 |
| On Hit | On Block | Guard | Properties |
| - | -4 | Mid | Snapback |
|
Animation and hitbox based on the second hit of 5H. | |||
| Damage | Startup | Active | Recovery |
|---|---|---|---|
| 27,000 | - | 20 | 33 |
| On Hit | On Block | Guard | Properties |
| - | -13 | OH | |
|
- | |||
Team Position
Firebrand is usually chosen as a Point character. Successful Firebrand teams are typically "300%" teams, that score one hit with Firebrand, kill the opponent's character, and then snowball with Unblockable setups on oncoming. Firebrand's assists, while not useless, are definitely below-average, and so there is little incentive not to put him in the point position if you intend to use him.
Notable Synergies
Dante/Amaterasu/Super Skrull: As a momentum-focused point character, Firebrand benefits from assists that provide a large amount of blockstun (or hitstun). Jam Session, Cold Star, and Tenderizer respectively provide enough lockdown for Firebrand to fully charge his 623H unblockable, or simply to use while running a more standard mixup game. These characters all also make for reasonably solid anchor characters, should Firebrand die before he can set up.
Players to Watch: Zak Bennet (Firebrand/Dorm/Ammy), Apologyman (Firebrand/Doom/Skrull), Udaterasu (Firebrand/Vergil/Ammy), SkilldatKillz (Firebrand/Doom/Ammy)
Doctor Doom: Firebrand's combo potential is quite low, something that effective teams usually work around by using Hard Tag setups to start a combo with Firebrand and finish with another character. Doom is an excellent choice as a partner for this setup. Firebrand's 236S kidnap move is fairly easy to combo into, and causes a wall bounce into a hard knockdown, giving plenty of time for Doom to be tagged in. Doom has excellent solo damage and can easily pick up after knockdowns with 5M or 5H.
Players to Watch: Marvisto (Firebrand/Doom/Taskmaster), Apologyman (Firebrand/Doom/Skrull), Kresent (Firebrand/Dorm/Doom), SkilldatKillz (Firebrand/Doom/Ammy), Sothea (Firebrand/Doom/Iron Man), Babaghanoush (Firebrand/Doom/Iron Man)
Other Players to Watch: Angelic (Firebrand/Dorm/Shuma, sometimes)
Combos
Solo Combos
2L > 2M > 2H > 5S sjc. j.5H xx 214M, j.5H, land, 5H > 5S sjc. j.5M > j.5H > j.2H, 214L, land, 2H > 5S sjc. j.5M > j.5H xx 236S, short dash, 5S sjc. j.5H > j.5S, land, 236XX (558,000 for 1 bar, builds ~0.9 bars of meter)
Standard Firebrand BnB. Uses all three of his standard combo extension tools:
- j.5H canceled into M Hell Dive to link another j.5H.
- j.2H followed by Fast Fall L Hell Dive to relaunch.
- Canceling just about any hit into 214S to extend via the Wall Bounce.
As a rule, these extensions should be done in the order used above. The Hell Dive and j.2H extensions are more likely to drop as hitstun deterioration progresses, and should be done as early as possible. Bon Voyage (236S) is much more hitstun-agnostic, and can be done basically whenever, so it should be saved for last.
(air-to-air) j.5M/H > j.2H, 214L, land, 2M > 5H > 2H > 5S sjc. j.5M > j.5M > j.5H xx j.236S, short dash, 5S sjc. j.5M > j.5M > j.5H > j.5S, land, 236XX (540,000 for 1 bar, builds ~0.75 bars of meter)
Standard way to confirm random air-to-air hits using j.2H. Otherwise very similar to the standard BnB.
(basically any hit) xx 236S, short dash, 2M > 5H > 2H > 5S sjc. j.5M > j.5M > j.5H > j.2H, j.214L, land, 2H > 5S sjc. j.5M > j.5M > j.5H > j.5S, land, 236XX
Firebrand can convert just about any normal hit, or hit off an assist, into 236S Kidnap to start this combo.
Forward Throw, short dash, 236H, jump, j.5M > j.5H > j.5S, land, 5H > 2H > 5S sjc. j.5M > j.5H > j.2H, j.214L, land, 2H > 5S sjc. j.5H xx j.236S, short dash, 5S sjc. j.5H > j.5S, land, 236XX (411,000 for 1 bar, builds 0.95 bars of meter)
Video Example. Firebrand gets poor damage off throws, but this is worth learning to maximize meter build, and it is largely the same as his standard BnB route.
Air Back Throw, j.236S, land, 236H, 5H > 5S sjc. j.5M > j.5M > j.5H > j.2H, j.214L, land, 2H > 5S sjc. j.5M > j.5M > j.5H xx 236S, short dash, 5S sjc. j.5H > j.5S, land, 236XX
Standard confirm off air back throw from normal jump height. If throwing from superjump height, it can be modified by replacing the j.236S with j.214M~L to reach the ground in time for OTG 236H.
(In Luminous Body) [4754 (Instant Wall Cling) > L]x20, 2H > whatever
Video Example. Instant Wall Fireball combos into itself when done as quickly as possible via the speed boost from X-Factor or Luminous Body. Easier against big bodies, but can work against normal-sized characters if done perfectly.
X-Factor Combos
X-Factor Combos
X-Factor Level 3
Sample Team Combos
Combo Video featuring various solo and team extensions
Using VJoe Bomb to softlock opponent out of Kidnap
Same concept as above via opponent's Acid Rain
Hard Tag Setups
Firebrand/Doom Hard Tag
Firebrand/Doom/Skrull Hard Tag
Firebrand/Doom Hard Tag feat. Dormammu
Firebrand/Strange Hard Tag
Alternate Firebrand/Strange Hard Tag
Firebrand/Strange THC Hard Tags feat. Ammy and Iron Man
Firebrand/Zero Hard Tag
Firebrand/Zero Hard Tag feat. Dante
The Zak Bennet - Firebrand Hard Tag to Dormammu Note this only works on Wolverine, Rocket, and Firebrand
Alternate Zak Bennet
Firebrand/Iron Man Hard Tag feat. Dante
TAC Infinites
Videos and External Resources
Hitbox Display
Guides
Beginner's Guide to Firebrand by Kresent
r/MVC3 Week of Firebrand Discusion Thread
r/MVC3 Week of Firebrand Matchup Thread
r/MVC3 Week of Firebrand Teambuilding Thread
Setup/Mixup Videos
Firebrand/Dorm Unblockable Setups
Firebrand/Dorm Reset into Unblockable
Firebrand/Strange/Dante Unblockable Setups
Firebrand/Storm/Doom Unblocakble
Firebrand/Ammy/Sentinel Unblockables
Guardbreak Airthrow into Unblockable with Firebrand/Strange/Skrull
