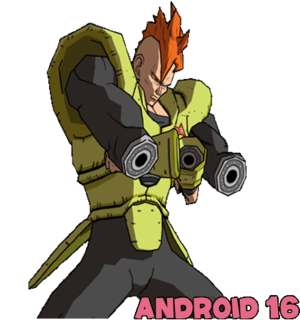
Introduction
A funny quip about the character if desired
A brief introduction to the character, going over general gameplan, strengths and weaknesses
| Pros | Cons |
|
|
Skill Tree
under construction
Ground Tempest is invincible, but the opponent can jump/sidestep/backdash to escape after the super freeze.
Movelist
| Damage | Startup | Active | Recovery | Frame Adv | Cancel | Wall Smash |
|---|---|---|---|---|---|---|
| - | - | - | - | - | - | |
|
L is safe, making it useful for tick throws. L and LL are bufferable. | ||||||
| Damage | Startup | Active | Recovery | Frame Adv | Cancel | Wall Smash |
|---|---|---|---|---|---|---|
| - | - | - | - | - | - | |
|
H is safe if spaced properly. H can only be super canceled. Kara canceling H gives more reach than anything else. H is easily used as a meaty. | ||||||
Special Moves
| Version | Damage | Startup | Active | Recovery | Frame Adv | Cancel | Wall Smash |
|---|---|---|---|---|---|---|---|
| L | - | - | - | - | - | ||
|
move description | |||||||
| H | - | - | - | - | - | ||
|
The H version of Rocket Punch has 5 hits so it will penetrate most projectiles. However, it has no tracking so it should primarily be used defensively. | |||||||
| Version | Damage | Startup | Active | Recovery | Frame Adv | Cancel | Wall Smash |
|---|---|---|---|---|---|---|---|
| L | - | - | - | - | - | ||
|
Mega Tackle is invincible to ki attacks as soon as the move is activated, making it a great reversal in certain situations. If you slam an opponent into a wall with it, they will be stunned, even without the Wall Smash skill. It's laggy, so be careful. | |||||||
| H | - | - | - | - | - | ||
|
H version travels further than the L version. | |||||||
| Damage | Startup | Active | Recovery | Frame Adv | Cancel | Wall Smash |
|---|---|---|---|---|---|---|
| - | - | - | - | - | ||
|
You can use the splash for ambiguous crossups, but it drains your action. The risk-reward on this move is heavily in your opponent's favor because it doesn't even do 20% if it works, while your opponent gets a free launcher if it's blocked. They even have frame advantage after getting hit if they flip forward. Use sparingly. | ||||||
| Version | Damage | Startup | Active | Recovery | Frame Adv | Cancel | Wall Smash |
|---|---|---|---|---|---|---|---|
| L | - | - | - | - | - | ||
|
Evolution Buster grows stronger the first 3 times it's used, then repeats the cycle. The L version is faster than the H version. | |||||||
| H | - | - | - | - | - | ||
|
The H version has better range than the L version. | |||||||
Super Moves
| Damage | Startup | Active | Recovery | Frame Adv | Cancel | Wall Smash |
|---|---|---|---|---|---|---|
| - | - | - | - | - | ||
|
A blocked Hell Flash pins your opponent for a launch/dash up throw mixup. | ||||||
Strategy
360 shortcut:
A hcb (or hcf, or any 180º spin) is not enough, but a 270º spin isn't necessary, either. The minimum input required is a 180º spin plus another direction. EX: hcf,uf or hcb,ub or ub,hcf, etc. Even things like u,hcf do work
The following attacks faze Armored 16 immediately (1st hit):
throws
dash attacks
H homing
Goku's DP, Flurry Kick, Kiai Blast, Super Kamehameha, SSJ, lvl3
Trunks's Aura Smash, Cannon Shot, DP
Piccolo's Beam Cannon, Dimensional Barrier, supers
16's Mega Tackle, splash, Hell Flash
Frieza's disc, supers
Cell's tail, Judgement, Barrier, Endive
Vegeta's G-Slicer, Counter Break, Endive, SSJ, lvl3
Chi-Chi's red tornado, giant blue tornado, supers
17's Violence Hold, L Surrond Attack, Infinity Break, Energy Field
18's Violence Hold, L Surrond Attack
Krillin's Scatter Blast, Destructo Disc, After Image, Super Destructo Disc
Gohan's SDS, Energy Barrage (ball, not field), SSJ, lvl3
Nappa's Flame Pillar
Dragon Finishers
Buu's Hurricane Dash, Megaton Drop
Majin Vegeta's G-Slicer, Counter Break, Barion Ray, Endive
King Piccolo's Dimensional Barrier, supers
Ultimate Gohan's u+H, Fissure Kick, Switch Sword, Energy Barrage (ball, not field), dp, Tornado Cutter
Combos
H xx Hell Flash, L+G, LL xx Hell Flash, H+G 122
launch xx Hell Flash, dash H xx Hell Flash, L+G, LL xx Hell Flash 124
launch xx L+G, unfly H, jump H, LLH 99


