Introduction
She is an awful answer of Data East to Capcom's Chun Li. Nothing else to say.
Weak Spot
 |
 |
 |
 | |
| Frame count | - | 2 | 2 | - |
Potentially the worst weak spot in the game. It's big, doesn't shrink in crouch and catches the most of the special moves. It still have some pluses: stance shifting helps a bit and in crouch position weak spot hides some part behind hurtbox. But still, Fei can be dizzied with ease.
Color Options
| Punch | Kick |
 |
 |
Moves List
Quick Reference
Normal Moves
Light Punch 
- Standing (Close):
| Damage | 6 | Startup |  |
Recovery |
| Chain cancel | yes | |||
| Special cancel | yes | |||
| On hit | +6 | |||
| On block | +7 | |||
| Frame count | 2 | 3 | 3 | |
A usual elbow attack. Hits a bit higher than far LP.
- Standing (Far):
| Damage | 6 | Startup |  |
Recovery |
| Chain cancel | yes | |||
| Special cancel | yes | |||
| On hit | +6 | |||
| On block | +7 | |||
| Frame count | 2 | 3 | 3 | |
Standart jab attack (but without knuckle... what the heck, Feilin). The range is pretty bad comparing to other characters, but it's best light attack Fei has i terms of range (cr.LK is 1px worse). But you can't charge Swan Punch if you use it for chain string. Just better use cr.LK.
- Crouching:
| Damage | 6 | Startup |  |
Recovery |
| Chain cancel | yes | |||
| Special cancel | yes | |||
| On hit | +6 | |||
| On block | +7 | |||
| Frame count | 2 | 3 | 3 | |
Looks like st.LP but with even less range, don't use it.
- Jumping (Diagonal):
| Damage | 12 | Startup | 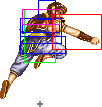 |
| Chain cancel | no | ||
| Special cancel | yes | ||
| Frame count | 4 | ∞ | |
Good air-to-air.
- Jumping (Neutral):
| Damage | 12 | Startup |  |
| Chain cancel | no | ||
| Special cancel | yes | ||
| Frame count | 4 | ∞ | |
Strong Punch 
- Standing (Close):
| Damage | 28 | Startup |  |
 |
Recovery |
| Chain cancel | no | ||||
| Special cancel | yes | ||||
| On hit | -3 | ||||
| On block | -8 | ||||
| Frame count | 4 | 6 | (6) 18 | ||
- Standing (Far):
| Damage | 28 | Startup | 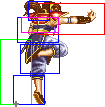 |
 |
Recovery |
| Chain cancel | no | ||||
| Special cancel | yes | ||||
| On hit | -3 | ||||
| On block | -8 | ||||
| Frame count | 4 | 6 | (6) 18 | ||
Another non-knuckle punch, but this ime with very nice range. Fei stands on a toe while doing it, thus it hits higher than cl.HP. Solid against far jump-ins. Great all-around attack.
- Crouching:
| Damage | 28 | Startup |  |
 |
Recovery |
| Chain cancel | no | ||||
| Special cancel | yes | ||||
| On hit | -3 | ||||
| On block | -8 | ||||
| Frame count | 4 | 6 | (6) 18 | ||
Similar attack to st.HP, can't be used as anti-air. But instead it's great for comboing it into Sliding Swan Punch.
- Jumping (Diagonal):
| Damage | 28 | Startup | 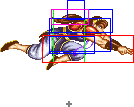 |
Recovery |
| Chain cancel | no | |||
| Special cancel | yes | |||
| Frame count | 4 | 6 | ∞ | |
Great crossup with safe weak spot position.
- Jumping (Neutral):
| Damage | 28 | Startup |  |
Recovery |
| Chain cancel | no | |||
| Special cancel | yes | |||
| Frame count | 4 | 6 | ∞ | |
This priority might have it's uses, but I dunno.
Light Kick 
- Standing (Close):
| Damage | 6 | Startup |  |
Recovery |
| Chain cancel | no | |||
| Special cancel | yes | |||
| On hit | +6 | |||
| On block | +7 | |||
| Frame count | 2 | 3 | 3 | |
Might be used to target weak spots, but not much else.
- Standing (Far):
| Damage | 6 | Startup |  |
Recovery |
| Chain cancel | no | |||
| Special cancel | yes | |||
| On hit | +5 | |||
| On block | +6 | |||
| Frame count | 4 | 3 | 4 | |
Useless.
- Crouching:
| Damage | 6 | Startup |  |
Recovery |
| Chain cancel | yes | |||
| Special cancel | yes | |||
| On hit | +6 | |||
| On block | +7 | |||
| Frame count | 2 | 3 | 3 | |
Main tool for chain strings. It's 1px less range than far st.LP but allows to charge special moves meanwhile. So, beter use this attack instead.
- Jumping (Diagonal):
| Damage | 12 | Startup | 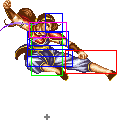 |
| Chain cancel | no | ||
| Special cancel | yes | ||
| Frame count | 4 | ∞ | |
Good for safe jumps. Can crossup.
- Jumping (Neutral):
| Damage | 12 | Startup |  |
| Chain cancel | no | ||
| Special cancel | yes | ||
| Frame count | 4 | ∞ | |
Neutralizes overhead assaults fairly well.
Strong Kick 
- Standing (Close/Far):
| Damage | 16 | Startup |  |
Recovery |
| Chain cancel | no | |||
| Special cancel | yes | |||
| On hit | -3 | |||
| On block | -8 | |||
| Frame count | 4 | 6 | 18 | |
A high kick, best anti-air normal in Feilin's disposal. This attack is the same situation as with Zazie's st.HP. In actuality it's a command normal and intended HKs are can be used if you'll hold ![]() /
/ ![]() while attacking. Those attacks will be listed in "Special Normals" section.
while attacking. Those attacks will be listed in "Special Normals" section.
- Crouching:
| Damage | 28 | Startup |  |
 |
Recovery |
| Chain cancel | no | ||||
| Special cancel | yes | ||||
| On hit | kd | ||||
| On block | -8 | ||||
| Frame count | 4 | 6 | (6) 18 | ||
Sweep with excellent range. A solid attack for your ground game. But be careful, priority isn't great.
- Jumping (Diagonal/Neutral):
| Damage | 28 | Startup | 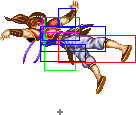 |
Recovery |
| Chain cancel | no | |||
| Special cancel | yes | |||
| Frame count | 4 | 6 | ∞ | |
Good jump in with alright damage. Decent priority to boot.
Special Normals
| Damage | 28 | Startup |  |
 |
Recovery |
| Chain cancel | no | ||||
| Special cancel | yes | ||||
| On hit | -3 | ||||
| On block | -8 | ||||
| Frame count | 4 | 3 | 3 | 18 | |
The actual f.HK: a weird backwards roundhouse kick. It can be used as an anti-air, but nothing more than that.
| Damage | 28 | Startup |  |
Recovery |
| Chain cancel | no | |||
| Special cancel | yes | |||
| On hit | -3 | |||
| On block | -8 | |||
| Frame count | 4 | 8 | 16 | |
The actual cl.HK: a high kick. You might get this attack occasionaly instead of usual st.HK at anti-air situation. It's a bit worse priority, but stays active for longer. Btw both usual st.HK and ![]() +HK hits high enough to damage Zazie's standing weak spot. So, there's not a big deal if you'll do this move accidentally.
+HK hits high enough to damage Zazie's standing weak spot. So, there's not a big deal if you'll do this move accidentally.
| Damage | 24 | Startup |  |
 |
If whiffs | |
| Chain cancel | no | Recovery | Landing | |||
| Special cancel | no | |||||
| On hit | ? | |||||
| On block | ? | |||||
| Frame count | 11 | 3 | 3 | 2 | 6 | |
A very odd divekick. The window of activation is very tight, just at the apex of jump. Arcs down at a less extreme angle than Aerial Mantis Claw. If divekick hits or gets blocked Fei does a huge hop backwards, thus it's hard to punish this attack. If you'll get used to perform it consistently you can also use it to fly behind unaware opponent. But still, it's hard to use and if you want to make attempts more safe, push LK + HK simultaneously. If you missed activation window, Feilin will perform j.LK instead of j.HK and make your landing more safe (because of LK button's higher priority).
Throws
| Damage | 32 |  |
| Range (From pushbox) |
33 |
Special Moves
| Damage | 16 | Startup |  |
Recovery |
| On hit | +7 | |||
| On block | +2 | |||
| Frame count | 19 | 1 | 26 | |
A fireball. Both versions are fairly slow on the recovery, but the projectile is big enough to catch Marstorius jumps. Note that Ryoko cannot roll under this.
| Damage | 16 | Startup |  |
Recovery | Landing |
| On hit | ? | ||||
| On block | ? | ||||
| Frame count | 8 | 1 | varies | 6 | |
This air fireball arcs sharply downward. Comes out very fast and must be blocked high. It keeps Feilin in air for a while, thus making it risky. It can be used for whiffpunishing when opponent's limbs becomes vulnerable, particularly sweeps.
| Damage | Light 18 Hard 30 total |
 |
 |
 |
 |
 |
 |
Recovery | Landing |
| On hit | Light kd/kd Hard -/kd | ||||||||
| On block | Light -/-12 Hard -/-27 | ||||||||
| Frame count | Light | 2 | 4 | 1 | 1 | 1 | 3 | 17 | 6 |
| Hard | 2 | 4 | 1 | 2 | 3 | 4 | 28 | 6 |
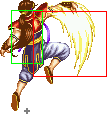
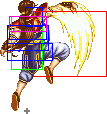
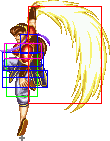
A usual Flash Kick type move that always used as an anti-air. Both versions have good priority that hard to beat. Works as reversal. The 1st hit always connects with the 2nd.
Hidden Move
Input note: you can do charge with ![]() /
/ ![]() /
/ ![]() then the rest of the input and the move will still come out.
then the rest of the input and the move will still come out.
| Damage | 24 total |  |
Dash frames |  |
 |
 |
Recovery | Landing |
| On hit | Light/Hard -/kd |
 | ||||||
| On block | Light -/-36 Hard -4*/-36 | |||||||
| Frame count | Light | 4 | 8 | 2 | 4 | 3 | 39 | 6 |
| Hard | 4 | 18 | 2 | 4 | 3 | 39 | 6 |
*Frame advantage is measured relatively from the first hit to the second hit
Feilin rushes forward while being invincible and then does her enhanced Swan Punch. Deals 2 hits total. LP version travels 1/2 screen, when HP version travels ~90% screen. Feilin recovers very slow, so expect to be dizzied on landing. Plus opponent might throw you after blocking 1st hit and sometimes dash can occasionally go through opponent. But even though, this move is great. You would be best off using this to punish fireballs, also as main combo ender.
The Basics
She is a orthodox character with projectiles and anti-air only esque. Surprisely she only have as a charge move her anti-air one with a ground and overhead projectiles. Your objetive will be about keepaway your opponent and overhead press him when its at medium range, when you throw projectiles you can charge down to release an uppercut if opponent jumps to you.
Combos
- cr.LP x 1-2 xx Weak Uppercut
- j.HP,cr.HP xx Fireball
- j.HP, cr.LP,cr.LK,cr.HP xx Sliding Uppercut
- j.HP, Air fireball (In corner can be a follow up)
Advanced Strategy
Depends of the height and speed of the characters, you will be jump him with your overhead, spam him your projectiles on ground and air, or charge down for your anti-air.
Match-ups
| Ray | Lee | Zaz | Kar | Jea | Miz | Sam | Yun | Mat | Clo | Fei | Mar | Ryo | |
| Feilin | - | - | - | - | - | - | - | - | - | - | - | - | - |
Vs. Clown:
Don't overhead him, try to wait for the Clown special of use and counter him, trade hits Head Stomp or Roll with Swan Upper
Vs. Jean:
Against Jeans who like to jump a lot, be ready to stHK them out of the air everytime. You can react to Ball Rose with HP Swan Punch if you're in range or Sliding Swan Punch if you're far away. Don't get cocky throwing too many fireballs because Jean can easily slide under them. Don't jump at him too much in this match unless you read one of his fireballs. One good thing you have going for in this match is that Sliding Swan Punch will always hit his weak spot. Other than that, play solidly and do not allow Jean to get close to you since he can then start his Needle Shower shenanigans. If he happens to dizzy you, do NOT hold downback if he knows how to execute Needle Shower loops.
Vs. Ryoko:
A solid matchup for Feilin. Throw fireballs, standing strong as an anti-air. This matchup should be easy. Just don't let Ryoko get in a position to cross you up (aka misjudging standing strong).
Vs. Karnov:
Anti airing Balloon is nearly impossible since he can change the timing on his air attacks. If he forces you to block a jumping normal and then cancels it to Balloon, you can no longer anti air it since you don't have charge for your Crane Strike. Midscreen your best answer to Balloon pressure from the front is to just backdash the fuck out of there. Stopping random 100 Kicks in neutral is tough, you have to mash stLP and then you can link that into your sweep to get some knockdown pressure. If he does his usual cLPx2, stHP xx 100 Kicks blockstring, make sure to punish him with Crane Strike as there is a gap between the stHP and the 100 Kicks. If he starts throwing fireballs from fullscreen, respond with your own fireball, and always be on the lookout for any teleport attempts, as they're always unsafe.
Vs. Lee:
Mash cLP at the ranges where his Zetsu won't hit you with the tip, anti air all of his jump ins with LP Crane Strike, and zone him the fuck out. Make him whiff his stHP and cHP and whiff punish him with your sweep (it will hit his weakspot). If Lee jumps over one of your fireballs from full screen, do NOT throw another one afterwards, you're just asking to eat a Zetsu. I don't have much else to say in this MU, Lee shits out damage and you don't, pray he doesn't dizzy you because the round is basically over at that point.
Vs. Feilin (self):
Look for sweeps on opponent's fireball startup, or just use Sliding Swan Punch. Standing hard punch is solid in this matchup, don't get hit by it.
Vs. Yungmie:
Not a great match up for Feilin, especially if the Yungmie player is good. This is one of the few fights where you have you go in yourself, as Yungmie will wear you down with her fireball spam. Using your Sliding Crane Strike to punish her fireballs is ill-advised, unless you know it's going to hit (also, stick to the light version); instead, neutral jump fullscreen fireballs and close the distance little by little. Once you are at footsies range, she will most likely try to sweep you, the answer to which is to whiff punish her sweep with your own; she might also try to keep chunking fireballs at you from that distance, which will beat your sweeps, however, your stHP will hit her out of her fireball during its startup frames; basically, at this distance it's a matter of guessing between these 2 options. Finally, if the Yungmie player misses her fireball input, she will most likely end up jumping towards you defenseless, which you can capitalize on by anti-airing her or by doing a full combo on her as she lands.
Vs. Marstorius:
Your sweep does not hit his weakspot... how incredibly annoying. Thankfully, your Sliding Crane Strike will. Abuse your fireball from far away since it's fat and Marstorius has a hard time going over it. If he's charging downback, that means he's going to try to LK Rising Knee over your fireball, do not let him get away with this, as even from full screen your can walk in and sweep him before he recovers from the landing. Marstorius has to jump over your fireballs, which is tricky for him, so it's not uncommon to get dizzies in this match up. The key to this fight is to not let him get close, annoy him to death with your zoning, change fireball strengths and timings to make his life hell. It's also good to know that all versions of Crane Strike will hit his weakspot.
Vs. Matlok:
Not too bad. Take advantage of Matlok's terrible anti airs by jumping at unexpected moments. On his wake up, you can bait his flash kicks and then get a full combo punish on him. Your instant overhead fireball can be particularly useful in this match up as Matlok has a head weak spot. Read Matlok's sonic boom patterns and punish accordingly with Sliding Swan Punch, but you have to anticipate a fireball from him, as otherwise he will have already recovered by the time you're doing your move. You can also use your Flying Kick to counter a bad sonic boom from him, especially if he's about to be dizzied. Be careful when throwing fireballs in this match up, as Matlok has plenty of options against them. If he does Overhead Kick at any point, Swan Punch will hit his weak spot. Finally, I want to talk about what to do while being comboed: if he cannot charge during his combo, your best strategy is to stand up, as none of his normals will hit your dizzy spot; however, if he's doing a punish or dizzy combo on you, it's best to crouch in order to avoid his most dangerous normals from hittng your weak point.
Vs. Mizoguchi:
There's not much to the mirror match. stLK and fHK are good buttons in this fight, use them. You can react to fireballs with both your HP Crane Strike and Sliding Crane Strike. All of your usual anti airs work wonderfully in this fight. If you play a solid ground game, you will most likely come out on top.
Vs. Ray:
This match up is awful for several reasons. Ray has better pokes, better special moves, and the ability to dizzy you instantly with his Thunder Dynamite Tackle. Read your opponent's fireball patterns and punish accordingly with your Sliding Crane Strike. Don't jump at Ray unless you have a read on a bad fireball, in which case have your combo prepared. Pressure the fuck out of Ray with crLK on wake up if you manage to get a knockdown, as his only reversal option whiffs on crouching opponents. Always be ready to punish random Wheel Kicks in neutral, as this could be the opening that you need. Be very wary of Dynamite Tackles, as they will hit your weakspot, and always check if Ray is charging, because otherwise he won't be able to do his Thunder Dynamite Tackle; Dynamite Tackles are safe, but you may be able to walk up to them and grab them if they're blocking afterwards, or sweep them if they press buttons. The key to this matchup is to get a knockdown and pressure Ray until he's dead.
Vs. Samchay:
Samchay's fireballs are harder to react to than a lot of the cast, but it's still doable if you've got the practice with HP Crane Strike if you're in range or Sliding Crane Strike if you're far away. Punish badly spaced tiger knees with throw. Do not engage in a fireball war because his fireball is much better than yours. Use fHK to poke in this match, as it will always hit Samchay's weakspot. Samchay also has unreliable/inconsistent anti airs, so you can definitely jump a lot more in this fight. I don't have much else to add, the fight is annoying because Samchay does almost everything you do just a little bit better, but it's still very much a winnable fight.
Vs. Zazie:
This is a terrible match up. Use your sweep to punish all of his Hell Fires (though the timing is very tight). Crane Strike will whiff punish his ABCD punches special, and you can also mash crouching jab to an extent to beat it (both the risk and the reward are lower). Don't use your fireball at all unless he's at fullscreen distance. Jumping at Zazie isn't a terrible idea, as his anti airs are slow and a bit unreliable, and you should be able to hit his weakpoint at least twice in that combo. This is also one match up where your instant overhead will prove to be very useful, as Zazie has a headband dizzy spot. Other than that, play VERY defensively and hope that Zazie makes mistakes that you can capitalize on. Don't make mistakes yourself, as he has the potential to drain your life bar in one c


