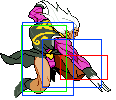
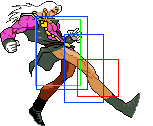
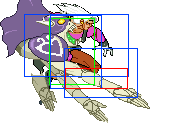
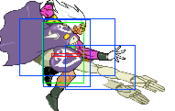
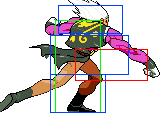
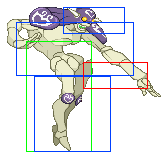
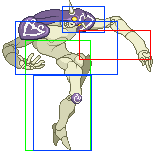
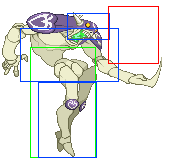
Movelist
Stand Off Normal Moves
| Startup | Active | Recovery | Damage | Guard | ||||
|---|---|---|---|---|---|---|---|---|
| - | - | - | - | - | ||||
| Hit Adv. | Block Adv. | Pushblock Adv. | Cancel | Properties | ||||
| - | {{{block}}} | - | - | - | ||||
|
Good at instantly disrupting fast jump-ins like Chaka hyperhop because it comes out so fast, but only really useful if you don't really think you'll be able to use S.6c fast enough | ||||||||
| Startup | Active | Recovery | Damage | Guard | ||||
|---|---|---|---|---|---|---|---|---|
| - | - | - | - | - | ||||
| Hit Adv. | Block Adv. | Pushblock Adv. | Cancel | Properties | ||||
| - | {{{block}}} | - | - | - | ||||
|
Good for meatying a character who is about to land as it usually only hits characters that are on the ground (Stand on Ice is the only known exception to this as his hurtbox there is huge). Also good for unblockable oki against Petshop, cause 662a whiffs against him. | ||||||||
| Startup | Active | Recovery | Damage | Guard | ||||
|---|---|---|---|---|---|---|---|---|
| - | - | - | - | - | ||||
| Hit Adv. | Block Adv. | Pushblock Adv. | Cancel | Properties | ||||
| - | {{{block}}} | - | - | - | ||||
|
Comes out very fast and has good range, but would only really recommend as a stand off anti-air for hitting characters that have just jumped off the ground | ||||||||
| Startup | Active | Recovery | Damage | Guard | ||||
|---|---|---|---|---|---|---|---|---|
| - | - | - | - | - | ||||
| Hit Adv. | Block Adv. | Pushblock Adv. | Cancel | Properties | ||||
| - | {{{block}}} | - | - | - | ||||
|
Great 2a that is very mashable, good for poking toes for frame advantage and going from there, like dashing and then cancelling into something like S.6c (if you want to counter people trying to upback) or S.2b S.2c (if you wanna check your opponent for buttons) | ||||||||
| Startup | Active | Recovery | Damage | Guard | ||||
|---|---|---|---|---|---|---|---|---|
| - | - | - | - | - | ||||
| Hit Adv. | Block Adv. | Pushblock Adv. | Cancel | Properties | ||||
| - | {{{block}}} | - | - | - | ||||
|
This normal only comes in handy for a specific oki that should only be used against petshop, because 2c doesnt hit him | ||||||||
| Startup | Active | Recovery | Damage | Guard | ||||
|---|---|---|---|---|---|---|---|---|
| - | - | - | - | - | ||||
| Hit Adv. | Block Adv. | Pushblock Adv. | Cancel | Properties | ||||
| - | {{{block}}} | - | - | - | ||||
|
Very good to throw out as a poke, but theres a lot of situations where Ices other pokes are better, so play Ice more to learn when that might be as its a bit fluid. | ||||||||
| Startup | Active | Recovery | Damage | Guard | ||||
|---|---|---|---|---|---|---|---|---|
| - | - | - | - | - | ||||
| Hit Adv. | Block Adv. | Pushblock Adv. | Cancel | Properties | ||||
| - | {{{block}}} | - | - | - | ||||
|
Grade-A normal overall because its hitbox stays out until Ice lands, and its hitstun also makes it easy to combo out of almost any situation. It also has a gross amount of hit/blockstun | ||||||||
| Startup | Active | Recovery | Damage | Guard | ||||
|---|---|---|---|---|---|---|---|---|
| - | - | - | - | - | ||||
| Hit Adv. | Block Adv. | Pushblock Adv. | Cancel | Properties | ||||
| - | {{{block}}} | - | - | - | ||||
|
Great defensive normal overall, and it can hit characters with low hurtboxes like crouching Devo | ||||||||
| Startup | Active | Recovery | Damage | Guard | ||||
|---|---|---|---|---|---|---|---|---|
| - | - | - | - | - | ||||
| Hit Adv. | Block Adv. | Pushblock Adv. | Cancel | Properties | ||||
| - | {{{block}}} | - | - | - | ||||
|
Good to throw out when youre hyperhopping, just dont over-do it. Can condition people into respecting your jumps, if that happens you can empty jump and try to go for a grab. Also links into s2c easily. | ||||||||
Stand off Dashing Normals
| Startup | Active | Recovery | Damage | Guard | ||||
|---|---|---|---|---|---|---|---|---|
| - | - | - | - | - | ||||
| Hit Adv. | Block Adv. | Pushblock Adv. | Cancel | Properties | ||||
| - | {{{block}}} | - | - | - | ||||
|
Good for specific punishes/combos. | ||||||||
| Startup | Active | Recovery | Damage | Guard | ||||
|---|---|---|---|---|---|---|---|---|
| - | - | - | - | - | ||||
| Hit Adv. | Block Adv. | Pushblock Adv. | Cancel | Properties | ||||
| - | {{{block}}} | - | - | - | ||||
|
This move is awful, it comes out after like a full second of startup and if you actually hit it, you probably wont be able to confirm it into tandem because of how little hitstun it has. | ||||||||
| Startup | Active | Recovery | Damage | Guard | ||||
|---|---|---|---|---|---|---|---|---|
| - | - | - | - | - | ||||
| Hit Adv. | Block Adv. | Pushblock Adv. | Cancel | Properties | ||||
| - | {{{block}}} | - | - | - | ||||
|
Useful for approachingin neutral/pressuring, only problem is being predictable with it cause its hitbox makes it simple to counter. Buffering stand off dash can make this move basically unreactable cause when you buffer a stand off dash, it immediately has you dash out of stand on without any startup, so 66c is pretty amazing in that regard and kinda reminds me of jotaro's s66a just a bit more situational | ||||||||
| Startup | Active | Recovery | Damage | Guard | ||||
|---|---|---|---|---|---|---|---|---|
| - | - | - | - | - | ||||
| Hit Adv. | Block Adv. | Pushblock Adv. | Cancel | Properties | ||||
| - | {{{block}}} | - | - | - | ||||
|
Great for hitconfirming into your combos, but if blocked you can be grabbed before you can put out another 2a, therefore if you want to use this as an approach youll need to space it properly so that the 662a connects and will be able to confirm into 2a while also keeping you safe from grabs. | ||||||||
| Startup | Active | Recovery | Damage | Guard | ||||
|---|---|---|---|---|---|---|---|---|
| - | - | - | - | - | ||||
| Hit Adv. | Block Adv. | Pushblock Adv. | Cancel | Properties | ||||
| - | {{{block}}} | - | - | - | ||||
|
Bad framedata and hitbox, with that f/ckness combined it can be snuffed out super easily. | ||||||||
| Startup | Active | Recovery | Damage | Guard | ||||
|---|---|---|---|---|---|---|---|---|
| - | - | - | - | - | ||||
| Hit Adv. | Block Adv. | Pushblock Adv. | Cancel | Properties | ||||
| - | {{{block}}} | - | - | - | ||||
|
There are better options than this. Just dashing up and using stand normals does the same thing as this but better. | ||||||||
Stand off Command Normals
| Startup | Active | Recovery | Damage | Guard | ||||
|---|---|---|---|---|---|---|---|---|
| - | - | - | - | - | ||||
| Hit Adv. | Block Adv. | Pushblock Adv. | Cancel | Properties | ||||
| - | {{{block}}} | - | - | - | ||||
|
There is no reason to use this over 2a whatsoever if you need a low, plus it doesn't combo into anything | ||||||||
| Startup | Active | Recovery | Damage | Guard | ||||
|---|---|---|---|---|---|---|---|---|
| - | - | - | - | - | ||||
| Hit Adv. | Block Adv. | Pushblock Adv. | Cancel | Properties | ||||
| - | {{{block}}} | - | - | - | ||||
|
Very strong poke as it has great range and you can tandem out of it incase things go messy for you, also easily confirms into tandem. I dont actually throw this out in neutral much at all though | ||||||||
| Startup | Active | Recovery | Damage | Guard | ||||
|---|---|---|---|---|---|---|---|---|
| - | - | - | - | - | ||||
| Hit Adv. | Block Adv. | Pushblock Adv. | Cancel | Properties | ||||
| - | {{{block}}} | - | - | - | ||||
|
Decent air-to-air, but you shouldnt really be using jumping normals for your anti-airs as Ice except for 8a, so you should probably just use 8a instead. | ||||||||
| Startup | Active | Recovery | Damage | Guard | ||||
|---|---|---|---|---|---|---|---|---|
| - | - | - | - | - | ||||
| Hit Adv. | Block Adv. | Pushblock Adv. | Cancel | Properties | ||||
| - | {{{block}}} | - | - | - | ||||
|
Great for starting combos, just be careful throwing this out because it has long recovery | ||||||||
Stand on Normals
| Startup | Active | Recovery | Damage | Guard | ||||
|---|---|---|---|---|---|---|---|---|
| - | - | - | - | - | ||||
| Hit Adv. | Block Adv. | Pushblock Adv. | Cancel | Properties | ||||
| - | {{{block}}} | - | - | - | ||||
|
Too much recovery to properly use as a poke and its overshadowed by S.6a in combos. | ||||||||
| Startup | Active | Recovery | Damage | Guard | ||||
|---|---|---|---|---|---|---|---|---|
| - | - | - | - | - | ||||
| Hit Adv. | Block Adv. | Pushblock Adv. | Cancel | Properties | ||||
| - | {{{block}}} | - | - | - | ||||
|
Good for up-close anti-airs for the optimal punish of s5b s5c s623aa that you wouldnt get off of solo s6c | ||||||||
| Startup | Active | Recovery | Damage | Guard | ||||
|---|---|---|---|---|---|---|---|---|
| - | - | - | - | - | ||||
| Hit Adv. | Block Adv. | Pushblock Adv. | Cancel | Properties | ||||
| - | {{{block}}} | - | - | - | ||||
|
Has worse start-up and horizontal range than S.6c, but S.5c can cover options such as super jump, which S.6c cant. | ||||||||
| Startup | Active | Recovery | Damage | Guard | ||||
|---|---|---|---|---|---|---|---|---|
| - | - | - | - | - | ||||
| Hit Adv. | Block Adv. | Pushblock Adv. | Cancel | Properties | ||||
| - | {{{block}}} | - | - | - | ||||
|
Solid poke because it hits low and is tandem cancellable. S.2a into S.2c can be a decent frametrap for pressure purposes cause it has good range | ||||||||
| Startup | Active | Recovery | Damage | Guard | ||||
|---|---|---|---|---|---|---|---|---|
| - | - | - | - | - | ||||
| Hit Adv. | Block Adv. | Pushblock Adv. | Cancel | Properties | ||||
| - | {{{block}}} | - | - | - | ||||
|
Very good move which gatlings into S.2c for a quick and hard to punish poke. This is your main poke and a decent part of your gameplan as Ice. Keep in mind that sometimes its better to just not gatling into S.2c in order to be able to safely tandem out of S.2b. | ||||||||
| Startup | Active | Recovery | Damage | Guard | ||||
|---|---|---|---|---|---|---|---|---|
| - | - | - | - | - | ||||
| Hit Adv. | Block Adv. | Pushblock Adv. | Cancel | Properties | ||||
| - | {{{block}}} | - | - | - | ||||
|
Not a good move to just throw out because S.2a is better out of empty IADs, and the hitbox on S.2c isnt anything special either. S.2c also cant be cancelled into tandem. | ||||||||
| Startup | Active | Recovery | Damage | Guard | ||||
|---|---|---|---|---|---|---|---|---|
| - | - | - | - | - | ||||
| Hit Adv. | Block Adv. | Pushblock Adv. | Cancel | Properties | ||||
| - | {{{block}}} | - | - | - | ||||
|
Good out of 2a in a blockstring as you can easily get a cheeky overhead with j.S.8a which you can confirm into (44, backwards airdash)S.(8)4c for decent damage and some distance between you and your opponent. | ||||||||
| Startup | Active | Recovery | Damage | Guard | ||||
|---|---|---|---|---|---|---|---|---|
| - | - | - | - | - | ||||
| Hit Adv. | Block Adv. | Pushblock Adv. | Cancel | Properties | ||||
| - | {{{block}}} | - | - | - | ||||
|
This move is overshadowed in every way by every other Stand on air normal Ice has. | ||||||||
| Startup | Active | Recovery | Damage | Guard | ||||
|---|---|---|---|---|---|---|---|---|
| - | - | - | - | - | ||||
| Hit Adv. | Block Adv. | Pushblock Adv. | Cancel | Properties | ||||
| - | {{{block}}} | - | - | - | ||||
|
Falls into the same boat as S.8b. | ||||||||
NONE of his stand on dashing normals should ever be used. Just dash cancel into one of your stand on normals instead.
Stand on Command Normals
| Startup | Active | Recovery | Damage | Guard | ||||
|---|---|---|---|---|---|---|---|---|
| - | - | - | - | - | ||||
| Hit Adv. | Block Adv. | Pushblock Adv. | Cancel | Properties | ||||
| - | {{{block}}} | - | - | - | ||||
|
Range is too short to stuff anything as a poke, so it only sees use in combos. | ||||||||
| Startup | Active | Recovery | Damage | Guard | ||||
|---|---|---|---|---|---|---|---|---|
| - | - | - | - | - | ||||
| Hit Adv. | Block Adv. | Pushblock Adv. | Cancel | Properties | ||||
| - | {{{block}}} | - | - | - | ||||
|
There is zero incentive to use this move over any other option you have. | ||||||||
| Startup | Active | Recovery | Damage | Guard | ||||
|---|---|---|---|---|---|---|---|---|
| - | - | - | - | - | ||||
| Hit Adv. | Block Adv. | Pushblock Adv. | Cancel | Properties | ||||
| - | {{{block}}} | - | - | - | ||||
|
Amazing range and great stand-alone poke damage make this a fucking grade-A antiair to snuff out hyper/hop jump-ins. | ||||||||
| Startup | Active | Recovery | Damage | Guard | ||||
|---|---|---|---|---|---|---|---|---|
| - | - | - | - | - | ||||
| Hit Adv. | Block Adv. | Pushblock Adv. | Cancel | Properties | ||||
| - | {{{block}}} | - | - | - | ||||
|
You probably didn't even know this normal existed... and you didn't need to. | ||||||||
| Startup | Active | Recovery | Damage | Guard | ||||
|---|---|---|---|---|---|---|---|---|
| - | - | - | - | - | ||||
| Hit Adv. | Block Adv. | Pushblock Adv. | Cancel | Properties | ||||
| - | {{{block}}} | - | - | - | ||||
|
Great start-up and range make this the best option out of your instant air dash, also very decent if you want to continue a combo off of a hitconfirmed anti-air s6c. | ||||||||
| Startup | Active | Recovery | Damage | Guard | ||||
|---|---|---|---|---|---|---|---|---|
| - | - | - | - | - | ||||
| Hit Adv. | Block Adv. | Pushblock Adv. | Cancel | Properties | ||||
| - | {{{block}}} | - | - | - | ||||
|
Combos out of S.8a, so you could do 2a on block into S.8a and combo into (44, backwards airdash)S.(8)4c for a safe mixup | ||||||||
Special Moves
| Startup | Active | Recovery | Damage | Guard | ||||
|---|---|---|---|---|---|---|---|---|
| - | - | - | - | - | ||||
| Hit Adv. | Block Adv. | Pushblock Adv. | Cancel | Properties | ||||
| - | {{{block}}} | - | - | - | ||||
|
Stand off Ball has a hitbox that makes it hard to beat with any normal that isnt disjointed, meaning if you throw it out and your opponent isnt expecting it, youll probably beat them. Just know that its one of Ices most punishable moves, can be punished by supers and can also be punished with a full combo if your opponent meaties you while youre landing so be careful with it. It also anti-airs Stand on Ball travels either really slow (236+A) or really quick (236+C) but doesnt really have much function as its decently punishable and pretty reactable too. Air Stand off Ball is awful, dont use pls. Air Stand on Ball is actually pretty good when your opponent isnt expecting it, but youll have to play Ice a bit to get an understanding for when that is. Also its super fast so you might be able to use it to escape some !@#$ty situations You can also use Tiger Knee Stand on Ball (inputting 2369+A/B/C instead of just 236+A/B/C) to quickly get in/get a cheeky approach. If youve spaced this properly then it should be hard for your opponent to properly punish it Both forms of ballz have wide-ass hitboxes so they can end up crossing up if you play your cards right (like balling just after where your opponent is rolling so that the big hitbox that hits around ice meaties and crosses them up out of their roll.) They also usually always give you time to set up oki if you land a hit with them (except stand off ball against stand on chars) | ||||||||
| Startup | Active | Recovery | Damage | Guard | ||||
|---|---|---|---|---|---|---|---|---|
| - | - | - | - | - | ||||
| Hit Adv. | Block Adv. | Pushblock Adv. | Cancel | Properties | ||||
| - | {{{block}}} | - | - | - | ||||
|
Stand off 214+A is important for Ice's okizeme, which is written later on the page. Stand on 214+A/B/C is just bad, don't use it. Its not something you throw out in neutral | ||||||||
| Startup | Active | Recovery | Damage | Guard | ||||
|---|---|---|---|---|---|---|---|---|
| - | - | - | - | - | ||||
| Hit Adv. | Block Adv. | Pushblock Adv. | Cancel | Properties | ||||
| - | {{{block}}} | - | - | - | ||||
|
Very punishable in neutral and is generally pretty bad, but if properly set up can be... still bad, but its the somewhat janky kind of bad Say you're in the middle of the screen and use S.6c for an AA and know they're gonna forward tech toward you, you could cancel s6c into S.421A/C (depending on which side you're facing, L/R) which will fk up what they're doing and after they've blocked/gotten hit by it, you'll both probably be back at neutral and bitches will be baffled by it. If your opponent sees that you're doing this move, you're gonna eat shit | ||||||||
| Startup | Active | Recovery | Damage | Guard | ||||
|---|---|---|---|---|---|---|---|---|
| - | - | - | - | - | ||||
| Hit Adv. | Block Adv. | Pushblock Adv. | Cancel | Properties | ||||
| - | {{{block}}} | - | - | - | ||||
|
Fuckin' thing SUCKS! | ||||||||
| Startup | Active | Recovery | Damage | Guard | ||||
|---|---|---|---|---|---|---|---|---|
| - | - | - | - | - | ||||
| Hit Adv. | Block Adv. | Pushblock Adv. | Cancel | Properties | ||||
| - | {{{block}}} | - | - | - | ||||
|
Good as a meterless round ender | ||||||||
Super Moves
| Startup | Active | Recovery | Damage | Guard | ||||
|---|---|---|---|---|---|---|---|---|
| - | - | - | - | - | ||||
| Hit Adv. | Block Adv. | Pushblock Adv. | Cancel | Properties | ||||
| - | {{{block}}} | - | - | - | ||||
|
Usually tandem is better for punishes but incase you've already used tandem in the last 1 and a half seconds then you can use the i-frames on this for a punish where you would've been hit trying to use tandem again when its on cooldown. Good for ending rounds too. | ||||||||
| Startup | Active | Recovery | Damage | Guard | ||||
|---|---|---|---|---|---|---|---|---|
| - | - | - | - | - | ||||
| Hit Adv. | Block Adv. | Pushblock Adv. | Cancel | Properties | ||||
| - | {{{block}}} | - | - | - | ||||
|
Terrible super with almost no advantage to using it... except for when the timer is at 5 seconds left, because you can abuse the fact that Ice is completely invulnerable during it to make sure your win is secured. Basically, its just a good way to timer scam your opponent. Oh, it also takes 2 meter, so try to avoid accidentally inputting it because on top of looking like a masher and potentially (disclaimer: most probably) being punished by supers, you're also losing 2 meter. | ||||||||
| Startup | Active | Recovery | Damage | Guard | ||||
|---|---|---|---|---|---|---|---|---|
| - | - | - | - | - | ||||
| Hit Adv. | Block Adv. | Pushblock Adv. | Cancel | Properties | ||||
| - | {{{block}}} | - | - | - | ||||
|
Frame 1 antiair super with good i-frames Best used as an antiair, or obviously when a frame 1 super with good i-frames is useful at Its also nearly unpunishable on block (Watch out for characters that can do combos out of their GCs). | ||||||||
