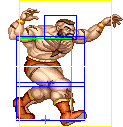
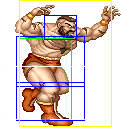
Introduction
Competitive Overview
Zangief is often regarded as either the 3rd or 4th worst character in the game, so he is considered a low tier. He has a relatively large number of seriously unfavorable match-ups (3-7 or worse), and no seriously favorable ones, according to the latest Arcadia Magazine diagram. On the other hand, excluding the E.Honda, Guile and O.Sagat match-ups, it is still possible to win in a consistent manner, you will just need to work harder.
Some believe that there is only one "style"/way to play Zangief, but comparing the top two Zangief players from Japan, one will notice how different they play. Check these videos to better understand this: Pony's solid, classic style and Gunze's more Lariat-heavy one. Sure Zangief is not as crafty as Cammy and Fei Long, but it is still possible to create your own Zangief style.
If you're starting to play this game now or you play another character and you are somewhat interested in Zangief, then go for it. It is a hard character to learn, but when you get past a certain level you will certainly agree that he is one of the most fun characters to play with.
Strengths & Weaknesses
Strengths
- Very strong in close range. Excluding T.Hawk, who can not do anything else, all the cast must rely on keep away tactics because of how strong Zangief's close range game is.
- Lariats allow Zangief to barely ever take damage from projectiles from a distance.
- The range on SPD is amazing; it allows you to tick anyone outside of their throw range, and allows some cool walk-up grabs.
- It is the only character in the game with a crouching normal throw, which can save your life against a lot of different mix-ups.
- Hard to cross-up and has the best cross-up move in the game, priority wise (Fierce splash).
- Zangief takes less damage and usually is harder to dizzy, giving him more survivability.
- Has a decent combo potential.
- Has the most damaging super in the game.
Weaknesses
- Does not have a projectile, you have to be on offense all the time or you not gonna win.
- Most normals have poor priority.
- His super has a very short range; even his normal throws have more range.
- Zangief has no invulnerable or high priority anti-air moves.
- Has a hard time against keep away tactics.
- Has the second worst match-up in the whole game, against E.Honda, and many hard ones (O.Sagat, N/O.Guile, N/O.Chun Li, Dhalsim, Fei Long).
New & Old Versions Comparison
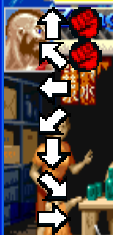
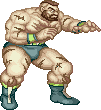
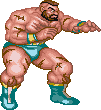
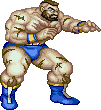
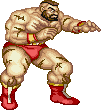
To select O.Zangief, choose Zangief and then press ← → → → Jab/Fierce, pressing Short simultaneously with the punch button for the alternate color.
Here is the list of differences:
- Obvious stuff: O.Zangief can not tech throws, does not have the Fierce/Strong hops, Green Hand and Super;
- O.Zangief's empty jumps have fatter hurtboxes;
- O.Zangief has some differences in some of his normals:
- Close Standing Jab is a bit worse (does not has that improved hitbox on the first active frame, the other active frames are a bit worse and has a smaller activation range);
- Close/Far Standing Strong can be special canceled and do a little more damage;
- Close/Far Standing Fierce do a little more damage;
- Crouching Fierce do a little more damage;
- Close Standing Short have worse priority, but this is meaningless;
- Far Standing Short can be special canceled;
- Far Standing Forward has better anti-air priority, but worse ground priority and horizontal range;
- Close Standing Roundhouse do a little more damage;
- Far Standing Roundhouse has very poor priority but can be special canceled and do a little more damage;
- Crouching Roundhouse can be special canceled and do a little more damage, this is nice;
- Most of his aerial attacks have fatter body hurtboxes, including his splash and headbutts. They hardly alter the air to air priority though;
- Neutral Jumping Fierce do a little more damage;
- Diagonal Jumping Fierce do a little more damage;
- Neutral Jumping Roundhouse do a little more damage;
- Diagonal Jumping Roundhouse do a little more damage;
- O.Zangief Knee Drops do more damage;
- O.Zangief has some differences in his Lariats:
- Both Punch and Kick versions have a different head hurtbox during the start-up frames: better horizontal priority and different vertical priority; that last one allows O.Zangief to beat Shoto's Tatsus from a crouched position with 100% success while with N.Zangief you actually need to time it right or lariat will be beaten. On the other way, it will be worse against Vega(Claw)'s Wall Dives. The better horizontal priority helps against T.Hawk to counter his dives during the 7 first frames easier. All in all it's a little buff/nerf for O.Zangief in these matchups, but it's basically the same really;
- Kick version does not have the improved foot hurtbox which lets N.Zangief beat some supers and pass through low Tiger shots. This is vital and totally compromises O.Zangief in that match-up;
In the WORLD version of the arcade ST there is a bug in O.Zangief’s Roundhouse Suplex, if done as reversal: will grab the opponent from any range if he is throwable, even from full screen away. Perhaps, if someone mastered this, it could make Zangief vs E.Honda a fair match or something. Just think, blocked HHS -> Reversal Suplex, madness. (This is a bug, though, so you should not take this seriously)
O.Zangief can special cancel some normals that N.Zangief can not, but that's it. Stick to N.Zangief; only use O.Zangief for casual play, or if you want to troll someone with his Roundhouse Suplex bug.
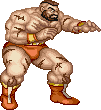
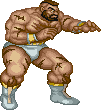
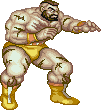
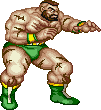
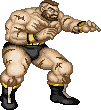
Color Options
| Jab | Strong | Fierce | Start | Old |
 |
 |
 |
 |
|
 |
 |
 |
 |

|
| Short | Forward | Roundhouse | Hold | Old Alternative |
--Born2SPD
Moves Analysis
Disclaimer: To better understand the diagrams, read this.
Normal Moves
Ground Normals
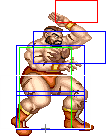
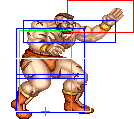
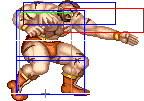
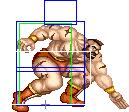
- Close Standing Jab: (Base max activation range: 48)
| Damage | 16[1] / 14[1] / 14[1] |  |
 |
 |
 |
 |
 |
 |

|
| Stun | 0~5 | ||||||||
| Stun Timer | 40 | ||||||||
| Chain Cancel | Yes | ||||||||
| Special Cancel | Yes / Yes / No | ||||||||
| Frame Advantage | -8 / -6 / -4 | ||||||||
| Frame Count | 1 | 2 | 2 | 2 | 2 | 4 | 4 | 5 | |
| Simplified | 1 + 1 | 6 | 15 | ||||||
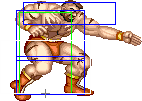
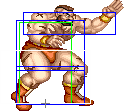
Zangief does a knife hand strike from above his head until towards. The first and second active parts make this move a very good anti air: when in the right range it can beat almost anything, while doing slightly more damage with the first active part. The second active part is important because it is Zangief's only ground response to Ken's Jumping Fierce. The third part has no specific use because it leaves Zangief at frame disadvantage so limit the usage of this move as an anti air only. If you hit the opponent out of the air it may be a good idea to cancel the Jab into a Green Hand, as you will recover before the opponent lands and you will be just in range for the tick mix-up. Since this move has incredibly short start up (1 frame!) it makes it a lot easier to use as a close normal anti-air. If someone is right on top of you, pressing jab is almost always the right thing to do.
- Far Standing Jab:
| Damage | 16[1] | 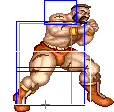 |
 |

|
| Stun | 0~5 | |||
| Stun Timer | 40 | |||
| Chain Cancel | Yes | |||
| Special Cancel | Yes | |||
| Frame Advantage | +4 | |||
| Frame Count | 2 | 4 | 5 | |
| Simplified | 1 + 2 | 4 | 5 | |
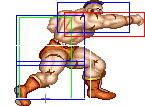
Zangief performs a fast straight punch that can be canceled into itself. This happens to be a very damaging Jab, it even does the strong sound when it hits. Unlike most character's rapid fire Jabs, Zangief's Standing Jab should not be used to beat advance moves like Blanka's rolls or E.Honda's Headbutt. It is, however, very important when facing Boxer, because it is Zangief's only reliable way to deal with his Low Rushes. It also beats Cammy's Roundhouse Cannon Drills and trades with Dictator's Scissor Kicks. Other than that, this move is better suited as a poke (e.g. beats Claw's Crouching Jab/Strong and Dictator's Standing Forward from the right range) or as a tick (e.g. allows you to tick Dhalsim from a more comfortable range). But keep in mind that this move hits high and will whiff on most characters if they are crouching. Boxer, Dhalsim, O.Fei Long, Sagat, T.Hawk and another Zangief are the characters which are vulnerable to this move even when they are crouching. This move can also be used in footsies as a whiff to force the opponent to get stuck in the block animation, allowing you to attempt a walk in SPD.
- Crouching Jab:
| Damage | 4[1] |  |

|
| Stun | 0~5 | ||
| Stun Timer | 40 | ||
| Chain Cancel | Yes | ||
| Special Cancel | Yes | ||
| Frame Advantage | +8 | ||
| Frame Count | 3 | 5 | |
| Simplified | 1 + 3 | 5 | |
Crouching spear hand strike. This move does very low damage, but it is your most important ticking move and can also be used into hit confirm combos such as Crouching Jab (n times) linked into Standing Short or Crouching Roundhouse. It can beat a lot of different moves like E.Honda's Headbutt and HHS, Blanka's Beast Rolls and Fierce Slide, Dictator's Scissor Kicks and some varied normals. This move has no recovery frames which allows it to be used as a safe tick/meaty.
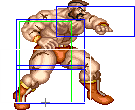
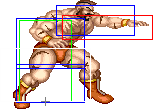
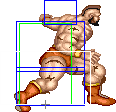
- Close/Far Standing Strong:
| Damage | 24[1] | 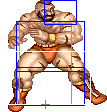 |
 |
 |
|
| Stun | 5~11 | ||||
| Stun Timer | 60 | ||||
| Chain Cancel | No | ||||
| Special Cancel | No | ||||
| Frame Advantage | +10 | ||||
| Frame Count | 2 | 2 | 3 | 5 | |
| Simplified | 1 + 4 | 3 | 5 | ||
Relatively fast horizontal knife hand strike. Doing it close or far will result in the exact same move. This attack is used in most of his combos because of the solid damage and the fairly good frame advantage which allows Zangief to link it to most of his normals. It can also be used as a poke just like Standing Jab because it has very similar hitboxes with the plus of the added damage and stun. Note that with O.Zangief this move can be considered a little better since you can move freely and poke at the same time (i.e. a hop won't come out). Be aware though that move is not as spammable as the Standing Jab because it has a slower start up and it can be more easily stuffed before becoming active due to premature projected hurtboxes. It also whiffs on most characters if they are crouching. O.Zangief happens to be able to Special Cancel this move, but it does not add much into his potential. Also, O.Zangief does a little more damage with this move.
- Crouching Strong:
| Damage | 24[1] |  |
 |
 |
 |

|
| Stun | 5~11 | |||||
| Stun Timer | 60 | |||||
| Chain Cancel | No | |||||
| Special Cancel | No | |||||
| Frame Advantage | +1 | |||||
| Frame Count | 3 | 3 | 8 | 4 | 5 | |
| Simplified | 1 + 6 | 8 | 9 | |||
A crouching straight punch that hits around the stomach, with moderate recovery. It can be used used as a poke or to trade damage with some moves. It also excels as a tick into Atomic Suplex for two reasons: leaves Zangief at perfect range (outside most characters normal throw range but inside Roundhouse Atomic Suplex range) and it leaves Zangief at one frame of advantage so a Running Bear Grab will rarely come out.
- Close/Far Standing Fierce:
| Damage | 30[1] |  |
 |
 |
 |
 |
 |

|
| Stun | 10~16 | |||||||
| Stun Timer | 80 | |||||||
| Chain Cancel | No | |||||||
| Special Cancel | No | |||||||
| Frame Advantage | -13 | |||||||
| Frame Count | 3 | 3 | 6 | 10 | 8 | 6 | 5 | |
| Simplified | 1 + 6 | 6 | 29 | |||||
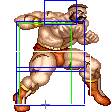
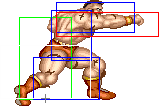
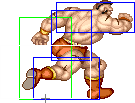
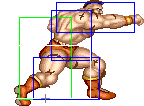
A powerful straight punch with very long recovery. Doing it close or far will result in the exactly same move. Has a nice damage and dizzy potential. It can be linked from a Standing Strong for dizzy combos. It also can be used as a trade anti air. In most cases you should avoid this move though, the exaggerated recovery kills any viable use. O.Zangief does a little more damage with this move.
- Crouching Fierce:
| Damage | 30[1] |  |
 |
 |
 |

|
| Stun | 10~16 | |||||
| Stun Timer | 80 | |||||
| Chain Cancel | No | |||||
| Special Cancel | No | |||||
| Frame Advantage | -9 | |||||
| Frame Count | 3 | 3 | 8 | 10 | 13 | |
| Simplified | 1 + 6 | 8 | 23 | |||
Another crouching straight punch that hits around the stomach, but with much longer recovery than the Strong version. It works decently as an anti air against certain moves (e.g. T.Hawk's Jumping Jab, Fei Long's Jumping Jab, Blanka's Jumping Jab and Strong, Vega(claw)'s Dive). It works decently as a trade move against E.Honda's HHS or as a punish for Shoto's Tatsus, but not as a poke since it has very long recovery. O.Zangief does a little more damage with this move.
- Close Standing Short: (Base max activation range: 32)
| Damage | 18[1] |  |
 |
 |
 |
 |

|
| Stun | 0~5 | ||||||
| Stun Timer | 40 | ||||||
| Chain Cancel | No | ||||||
| Special Cancel | No | ||||||
| Frame Advantage | +0 | ||||||
| Frame Count | 3 | 2 | 2 | 8 | 4 | 1 | |
| Simplified | 1 + 7 | 8 | 5 | ||||
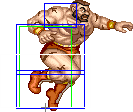
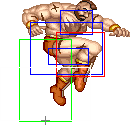
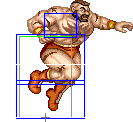
Zangief's does a weak knee attack. Ticking move for dummies. It is Zangief's easiest move to use as tick because of the fairly long duration. Leaves Zangief at optimal range to tick into Super and at no frame advantage or disadvantage which makes it a good move to tick into Atomic Suplex (i.e. if the normal move wasn't meaty timed then a Running Bear Grab will never come out). Zangief has better moves though and once you get better at the art of ticking you should never use this move again.
- Far Standing Short:
| Damage | 18[1] | 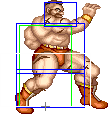 |
 |
|
| Stun | 0~5 | |||
| Stun Timer | 40 | |||
| Chain Cancel | No | |||
| Special Cancel | No | |||
| Frame Advantage | +8 | |||
| Frame Count | 2 | 2 | 5 | |
| Simplified | 1 + 4 | 5 | ||
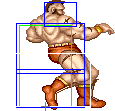
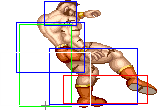
Zangief performs a low hitting kick. One of Zangief's most important normals as it is Zangief's best standing tick. During the opponents wake up it is a killer: you can mix between tick into SPD or linked sweep to give your opponent extra trouble when trying to reverse. Also, this move has no recovery frames which allows it to be used as a safe tick/meaty. Master the safe tick pattern and most match ups will be a lot easier. Watch out for reversal tatsus or upkicks when using this against a knocked down opponent. Strangely, O.Zangief has the ability to Special Cancel this move.
- Crouching Short:
| Damage | 18[1] |  |
 |

|
| Stun | 0~5 | |||
| Stun Timer | 40 | |||
| Chain Cancel | No | |||
| Special Cancel | Yes | |||
| Frame Advantage | +2 | |||
| Frame Count | 3 | 4 | 7 | |
| Simplified | 1 + 3 | 4 | 7 | |
Fast crouching side kick with poor priority. It's Zangief's best ground move to tick into Super. It's also OK as a tick into his other grabs. Has Special Cancel properties which allows Zangief to combo it into a Lariat or a Green Hand, but Crouching Forward is better suited for that. You can also cancel a Running Bear Grab out of it, which will usually connect but doesn't do much damage. It can also be used in footsies once in a while to lure the opponent into punishing a Crouching Roundhouse, since it animates the same but recovers a lot faster.
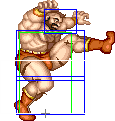
- Close Standing Forward: (Base max activation range: 56)
| Damage | 24[1] |  |
 |
 |
 |

|
| Stun | 5~11 | |||||
| Stun Timer | 60 | |||||
| Chain Cancel | No | |||||
| Special Cancel | No | |||||
| Frame Advantage | +5 | |||||
| Frame Count | 3 | 3 | 4 | 4 | 5 | |
| Simplified | 1 + 6 | 4 | 9 | |||
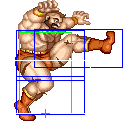
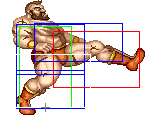
Zangief does a front kick with moderate start up and recovery. Does not have any specific use that I can think of. It is too slow to be used in combos, the only practical normal to link into is the Far Standing Jab, but it's not too good because it whiffs against the majority of the cast if they're crouching. It is too fast to be used as a tick into Suplex, it can be used as a tick into SPD but you have better options for that.
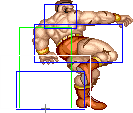
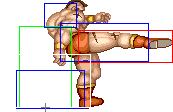
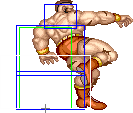
- Far Standing Forward:
| Damage | 24[1] |  |
 |
 |
 |

|
| Stun | 5~11 | |||||
| Stun Timer | 60 | |||||
| Chain Cancel | No | |||||
| Special Cancel | No | |||||
| Frame Advantage | +5 | |||||
| Frame Count | 3 | 3 | 4 | 4 | 5 | |
| Simplified | 1 + 6 | 4 | 9 | |||
Semi-circular middle kick. This is Zangief's main poke. Due to its long range, this attack is very good for punishing missed low pokes. It also hits mid against most (all?) of the cast, which means it won't wiff against someone who is crouching. It has a little more range than your SPD so use it as a punish if you are too far for it. It can beat Tatsus cleanly if done early. It can also be used as a safe meaty. This is a key move, but know it has poor priority: do not spam it as it can be punished on prediction if it whiffs.
- Crouching Forward:
| Damage | 24[1] |  |
 |

|
| Stun | 5~11 | |||
| Stun Timer | 60 | |||
| Chain Cancel | No | |||
| Special Cancel | Yes | |||
| Frame Advantage | +3 | |||
| Frame Count | 3 | 6 | 9 | |
| Simplified | 1 + 3 | 6 | 9 | |
Crouching side kick. Better damage and priority than Crouching Short, but longer recovery. It has Special Cancel properties just like the former so you can cancel into Lariat, Green Hand or Running Bear Grab. Cross-up Fierce splash, Crouching Forward into Kick Lariat is a particularly hot combo. It can also be used as a tick into SPD or Suplex, but you usually have better options for that, unless you're specifically looking for the medium block stun.
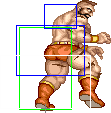
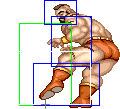
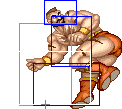
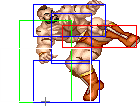
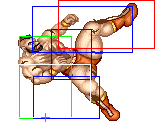
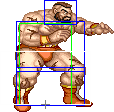
- Close Standing Roundhouse: (Base max activation range: 56)
| Damage | 30[1] + 4[1] | 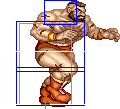 |
 |
 |
 |
 |
 |
 |
 |
 |
|
| Stun | 10~16 + 1~7 | ||||||||||
| Stun Timer | 80 + 70 | ||||||||||
| Chain Cancel | No | ||||||||||
| Special Cancel | No | ||||||||||
| Frame Advantage | -23 / -17(-18) | ||||||||||
| Frame Count | 2 | 2 | 2 | 3 | 6 | 8 | 8 | 10 | 8 | 5 | |
| Simplified | 1 + 9 | 6 | 8 | 31 | |||||||
Weird butterfly kick that hits twice. It is a quite useless move. It can hit twice from close range and it is the most damaging normal Zangief have, but it has long start-up and recovery. The second hit has a decent anti-air priority but the situations where you can use it like that are limited and the use is often shadowed by Close Standing Jab (i.e. worse start up, does less damage and has worse priority). O.Zangief does a little more damage with this move.
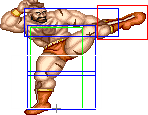
- Far Standing Roundhouse:
| Damage | 30[1] |  |
 |

|
| Stun | 10~16 | |||
| Stun Timer | 80 | |||
| Chain Cancel | No | |||
| Special Cancel | No | |||
| Frame Advantage | +3 | |||
| Frame Count | 4 | 8 | 11 | |
| Simplified | 1 + 4 | 8 | 11 | |
Zangief performs a high side kick. This move is a good anti-air, specially if done early. At any rate, would the enemy stuff this move, get your reversal SPD ready as he lands. It is also good for shenanigans: whiff it into SPD after the opponent wakes up from a knockdown. It can be used to beat E.Honda's Headbutts since it has just enough priority, is in general a fast move, stays active for a sufficient amount of time and does solid damage. It's also Zangief's only decent counter to N.Chun Li's Neutral Jumping Roundhouse: if spaced at round start distance it will beat it cleanly. The range is very specific though, if spaced farther both moves will just whiff and if spaced closer you may get a trade but if her kick is done early you'll get beat everytime. Note that O.Zangief can special cancel this move but in his case it has pretty bad priority. Also, O.Zangief does a little more damage with this move.
- Crouching Roundhouse:
| Damage | 30[1] |  |
 |
 |

|
| Stun | 5~11 | ||||
| Stun Timer | 130 | ||||
| Chain Cancel | No | ||||
| Special Cancel | No | ||||
| Frame Advantage | +1 | ||||
| Frame Count | 4 | 8 | 12 | 1 | |
| Simplified | 1 + 4 | 8 | 13 | ||
Zangief's sweep kick. Animates the same as Zangief's other crouching kicks, but with longer recovery. This is a pretty awesome move, with good recovery for a Roundhouse sweep and deceptive reach. It can be linked into well, comes out relatively fast, does good damage, has decent recovery, not to say the precious knockdown which can lead into ticking mix-ups or safe jumps. This move is very important in tick mix-ups, together with Far Standing Short: both can be used to punish the enemy for standing up, which is often necessary for inputting invulnerable reversal moves. Always going for the SPD from max range can get predictable, so this is one of the possible mix-ups one can do. O.Zangief has the interesting ability to Special Cancel this move, which does help him a little. Also, O.Zangief does a little more damage with this move.
Aerial Normals
- Neutral Jumping Jab:
| Damage | 18[1] | 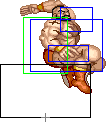 |
 |
 |
|
| Stun | 1~7(-2) | ||||
| Stun Timer | 40 | ||||
| Frame Count | 2 | 3 | 8 | ∞ | |
| Simplified | 2 | 11 | ∞ | ||
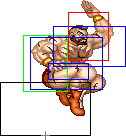
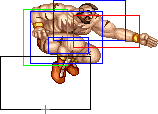
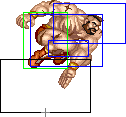
Aerial knife hand strike. Totally outprioritized by the Strong and Fierce versions since it has the same frame data but worse priority and damage. Avoid this move.
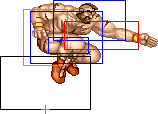
- Diagonal Jumping Jab:
| Damage | 18[1] |  |
 |
 |

|
| Stun | 1~7(-2) | ||||
| Stun Timer | 40 | ||||
| Frame Count | 2 | 3 | 8 | ∞ | |
| Simplified | 2 | 11 | ∞ | ||
Animates the same as the Neutral Jumping version. Somewhat out prioritized by the Strong version. It has better vertical priority by 2 pixels but the damage and horizontal priority/range is a lot worse. Not useful for anything really.
- Neutral Jumping Strong:
| Damage | 22[1] |  |
 |
 |

|
| Stun | 1~7(-2) | ||||
| Stun Timer | 40 | ||||
| Frame Count | 2 | 3 | 8 | ∞ | |
| Simplified | 2 | 11 | ∞ | ||
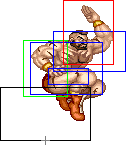
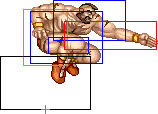
Yet another knife hand strike in the air. Totally out prioritized by the Fierce version since it has same everything but worse priority and damage. Also, it does an unusually low stun for a Strong attack.
- Diagonal Jumping Strong:
| Damage | 22[1] |  |
 |
 |

|
| Stun | 5~11 | ||||
| Stun Timer | 50(+10) | ||||
| Frame Count | 2 | 3 | 8 | ∞ | |
| Simplified | 2 | 11 | ∞ | ||
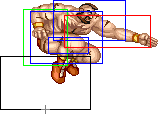
Animates like the Neutral Jumping version as well. It's Zangief's main air to air option. It is not that great at it but it can beat some moves like Blanka's Jumping Strong, for example. Also, it's his Diagonal Jumping move with the longest range.
- Neutral Jumping Fierce:
| Damage | 30[1] |  |
 |
 |

|
| Stun | 11~17(-1) | ||||
| Stun Timer | 60(+20) | ||||
| Frame Count | 2 | 3 | 8 | ∞ | |
| Simplified | 2 | 11 | ∞ | ||
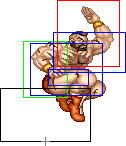
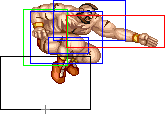
Animates like his Jumping Jabs and Strongs. This is Zangief's Neutral Jumping move with the best priority air to air. At least it's good enough to beat Cammy's Thrust Kick (if done from far enough) and Claw's Wall Dive. O.Zangief does a little more damage with this move.
- Diagonal Jumping Fierce:
| Damage | 30[1] | 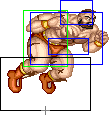 |
 |
 |
 |
 |
 |

|
| Stun | 11~17(-1) | |||||||
| Stun Timer | 60(+20) | |||||||
| Frame Count | 1 | 3 | 3 | 7 | 3 | 3 | ∞ | |
| Simplified | 7 | 7 | ∞ | |||||
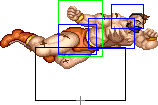
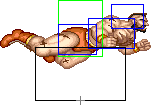
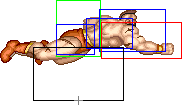
Zangief does an aerial long punch. It is Zangief's main air to ground attack: great at jumping over fireballs, at surprise jumps and as a combo starter. It can also be used to tick into SPD. If you hit the opponent close enough, it's a good idea to do a SPD exactly when Zangief lands, for massive damage. O.Zangief does a little more damage with this move.
- Neutral Jumping Short:
| Damage | 18[1] | 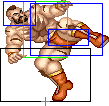 |
|
| Stun | 1~7(-2) | ||
| Stun Timer | 40 | ||
| Frame Count | 3 | ∞ | |
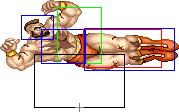
Zangief does a weak two foot kick which stays active for the entire jump. OK for tick throwing if you ever find yourself in the range and with enough momentum. This will basically never happen though.
- Diagonal Jumping Short:
| Damage | 18[1] |  |
 |
 |
 |
 |
|
| Stun | 1~7(-2) | ||||||
| Stun Timer | 40 | ||||||
| Frame Count | 3 | 16 | 8 | 6 | 4 | ∞ | |
| Simplified | 3 | 16 | ∞ | ||||
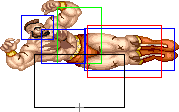
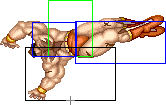
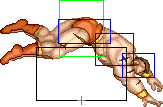
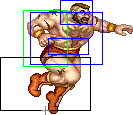
Zangief does a weak two foot kick which stays active a lot less time than the Neutral Jumping version. It's Zangief's main air ticking move. It excels at it because it has good range and you don't need to care if it hits or if it's blocked: the timing for the SPD when landing will be the same because aerial light attacks do equal stun on hit or block. If your opponent happens to be able to constantly reverse these tick attempts then a possible mix-up exists: use Forward or Roundhouse instead, since they animate the same the opponent will not be able to tell the difference until it hits, but keep in mind that this will only be really effective if the opponent actually blocks it (remember: aerial block stun is gradual but aerial hit stun is constant). It can also be used for safe jumps and as an instant overhead.
- Neutral Jumping Forward:
| Damage | 22[1] |  |
 |
 |
 |
 |

|
| Stun | 5~11 | ||||||
| Stun Timer | 50(+10) | ||||||
| Frame Count | 3 | 16 | 8 | 6 | 4 | ∞ | |
| Simplified | 3 | 16 | ∞ | ||||
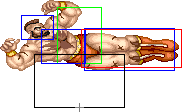
Another two foot aerial kick but with a little more damage, stun, priority and range. With that aside, it's as useless as the Short version.
- Diagonal Jumping Forward:
| Damage | 22[1] |  |
 |
 |
 |
 |

|
| Stun | 5~11 | ||||||
| Stun Timer | 50(+10) | ||||||
| Frame Count | 3 | 16 | 8 | 6 | 4 | ∞ | |
| Simplified | 3 | 16 | ∞ | ||||
Animates like the Short version, it even has the same priority and frame data, but with more damage and stun potential of course. It can be used as a mix-up when air ticking with the Short version but its not as efficient because of the difference on the hit and block stuns. It's also Zangief's best move to use as an instant overhead.
- Neutral Jumping Roundhouse:
| Damage | 30[1] |  |
 |
 |
 |
 |

|
| Stun | 11~17(-1) | ||||||
| Stun Timer | 60(+20) | ||||||
| Frame Count | 3 | 8 | 8 | 6 | 4 | ∞ | |
| Simplified | 3 | 8 | ∞ | ||||
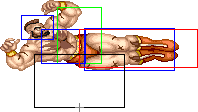
Zangief does a fast two foot aerial kick which has awesome range. It is the best Neutral Jumping kick, it has pretty much the same range as Neutral Jumping Fierce and less priority, but it hits lower which allows Zangief to beat some low moves (e.g. Blanka's Fierce Slide). Also, his startup hurtboxes are a lot smaller compared to the ones from the active part which makes this move very good for trading. It's a very good move for anticipating the opponent's jump-ins. O.Zangief does a little more damage with this move.
- Diagonal Jumping Roundhouse:
| Damage | 30[1] | 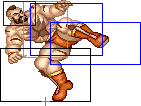 |
 |
 |
 |
 |

|
| Stun | 11~17(-1) | ||||||
| Stun Timer | 60(+20) | ||||||
| Frame Count | 3 | 8 | 8 | 6 | 4 | ∞ | |
| Simplified | 3 | 8 | ∞ | ||||
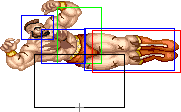
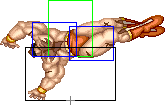
Yet another two foot kick. Good for anticipating jump ins. While it's a bad move for trading because of the premature projected hurtbox during startup, it's good for shenanigans: whiff it on purpose and do SPD exactly when Zangief lands. This only really work with Roundhouse because it has a unique hurtbox during the first recovery part: Zangief's leg hurtbox is a lot smaller compared to his other aerial kicks. It's also worth to mention that this move can also be used as an instant overhead, but the timing is much more strict than the other kicks and it's also impossible to perform against a considerable amount of characters so it's not really practical. O.Zangief does a little more damage with this move.
--Born2SPD
Command Normals
- Headbutt: (Jump straight up, ↖/↑/↗ + Strong/Fierce)
- Strong Version:
| Damage | 26[2] |  |
 |

|
| Stun | 21~27 28~34(JP) | |||
| Stun Timer | 100 90(JP) | |||
| Frame Count | 3 | 8 | ∞ | |
- Fierce Version:
| Damage | 32[2] |  |
 |

|
| Stun | 21~27 28~34(JP) | |||
| Stun Timer | 100 90(JP) | |||
| Frame Count | 3 | 6 | ∞ | |
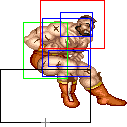
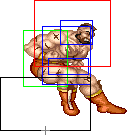
Zangief does a sort of headbutt thing. In the Japanese version it's often an instant dizzy, but in every other version it got nerfed, so it's not very useful. It still does a very high stun, but not enough to 1 hit dizzy. The Fierce version has better priority and does more damage but has less attacking frames. This may be the hardest move to land in the game on purpose. Train yourself to punish badly wiffed specials (think non-jab SRKs and the like) with this to get that instant dizzy. If you're feeling brave, try to use it against Dhalsim at max range to hit his limbs.
- Flying Body Attack a.k.a. Chest Splash: (Jump diagonally, ↙/↓/↘ + Fierce)
| Damage | 26[1] |  |
|
| Stun | 11~17(-1) | ||
| Stun Timer | 60(+20) | ||
| Frame Count | 5 | ∞ | |
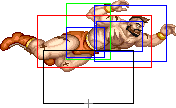
Zangief does a body press with his hairy chest. It's Zangief's only cross-up move and for that sole reason it's a valuable tool in Zangief's arsenal. Very important in cross-up combos or block strings into ticking. Its damage is a little nerfed for a Fierce move but the priority compensates it. It does a poor job in air to air but for air to ground it does OK against some flawed anti airs. Also, his legs are invulnerable which helps a lot when crossing up opponents as it allows Zangief to do it while being safe from certain special moves (e.g. Shoto's Shoryukens) when he is landing on the opposite side. There are some funny uses for this move: against N.Ryu, if he is about to die and you know he is reversal happy, you can just jump and do it late and it will trade with his Reversal Shoryuken for the win. It can also beat Sagat's Tiger Uppercut if timed to hit right after the invulnerable part. You can't rely on that kind of tactics though, since a experienced player can just delay his move a bit, which will then hit Zangief cleanly, for big damage.
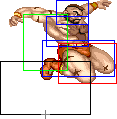
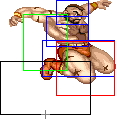
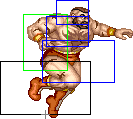
- Double Knee Drop: (Jump diagonally, ↙/↓/↘ + Short/Forward)
- Short Version:
| Damage | 16[1] | 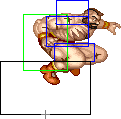 |
|
| Stun | 1~7(-2) | ||
| Stun Timer | 40 | ||
| Frame Count | 5 | ∞ | |
- Forward Version:
| Damage | 22[1] |  |
 |
 |
|
| Stun | 1~7(-2) | ||||
| Stun Timer | 40 | ||||
| Frame Count | 7 | 18 | 6 | ∞ | |
| Simplified | 7 | 18 | ∞ | ||
Zangief does a double knee attack in the air. The Short version has two main uses: it's perfect as a safe jump attack since it's a weak attack (i.e. you don't have to care about hit and block stun differences) that stays active for the whole jump and as a tick into Super. I recommend to mix it up with Diagonal Jumping Short when going for Super just to make them think that you're going to tick into SPD or whatever. I say this because when folks know that Zangief is going for Super they try to counter throw, and they tend to be successful at it because Zangief's Super has a mediocre throw range.
The Forward version is better used as an air to ground tool due to its amazing vertical priority. It's very good against low hitting kicks and some other anti airs if right timed. The right timing must be stressed: Its active for a limited amount of time, and the recovery has hurtboxes projected out of place which makes it easily punishable. You can also use it to beat E.Honda's Headbutt, but keep in mind that you have to land on top of E.Honda or it will be beaten, cleanly. Also, you can use it as an instant overhead against some characters, but Zangief has better options for that. Note that Zangief inflicts very low dizzy stun with this move so limit the use for when you actually needs its particular "anti-anti-air" priorities.
For some reason O.Zangief does more damage with these moves.
- Hop: (On ground, ←/→ + Strong/Fierce)
- Strong Version:
| Damage | 24[0] |  |
 |
 |
 |
 |
 |
 |
 |
 |

|
| Stun | 1~7 | ||||||||||
| Stun Timer | 70 | ||||||||||
| Frame Count | 1 | 1 | 1 | 2 | 3 | 6 | 8 | 8 | 6 | 3 | |
| Simplified | 1 + 14 | 8 | 17 | ||||||||
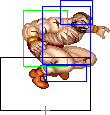
- Fierce Version:
| Damage | 26[1] |  |
 |
 |
 |
 |
 |
 |
 |
 |

|
| Stun | 1~7 | ||||||||||
| Stun Timer | 70 | ||||||||||
| Frame Count | 1 | 1 | 1 | 2 | 3 | 6 | 10 | 6 | 9 | 3 | |
| Simplified | 1 + 14 | 10 | 18 | ||||||||
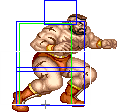
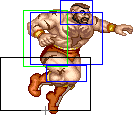
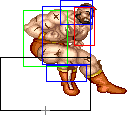
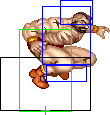
Zangief does a stupid little hop. The usage of this move is very limited because it has like no range, beats just about nothing out and on top of all that it has a long recovery. It was probably meant as a way for Zangief to be able to hop over opponent's low normals, but it's not very good at doing that. To be fair, against Shoto's Crouching Roundhouse and E.Honda's long range sweep it can be considered usable but against most low normals it's very far from being efficient. In resume it's mostly just an annoyance as it comes out when you mistime a Strong Throw and it also difficult the use of Standing Strong as a poke.
The Strong version has less attacking frames and less momentum but also less recovery. So, if you want to test your luck and want to try and fail with this move in footsies, make sure to use the Strong version, the over exaggerated recovery on the Fierce version makes it pretty much unusable. If you happens to land safely, do a Command Grab exactly when Zangief lands. The only real use for this move is as an easy and fast way to land the Super against a dizzied opponent.
This move also has two interesting properties: can be used to hop over Ground Tiger Shots, but it's not really usable (i.e. the timing is quite strict, only really works against the fast ones) and you can use it to hop over certain characters if they are crouching. There is a interesting setup for that last property: against N.Ryu, if he has super and you knocked him down, a Fierce Hop from point blank and with meaty timing can avoid his reversal super in the same fashion as Claw's Crouching Jab. As a plus, if he just wakes up crouching, Zangief will simply land on the other side, allowing Zangief to grab him with a command throw.
--Born2SPD and UltraDavid
Normal Throws
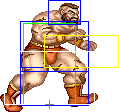
As the prototypical grappler, Zangief has the most Normal Throws in the game and even a couple of the best in his Strong and Roundhouse grabs. That said, because of the SPD his Normal Throws go mostly unused. Note that Zangief's Normal Throws lose in range to E.Honda's, Blanka's and Dhalsim's Normal Throws. He does out range all these characters by a comfortable amount with his SPD though.
- Standing Normal Grabs Throwboxes:
| Throws | Holds | 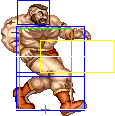 |
 |
| |||
| Damage | 32 | Damage | 26 + 4*n | ||||
| Stun | 7~13 | Set amount of hits | 4 | ||||
| Stun Timer | 100 | Holds do no stun | |||||
| Range | (from axis) | 69 | (from throwable box) | 24 | |||
- Pile Driver: (←/→ + Strong)
Zangief's most commonly-used Normal Throw. Zangief sits on the opponent's head, opponent always stays in front of Zangief. Sets up a cross-up Chest Splash when unteched. Because of that, it's incredibly good against Old Characters (since they can't tech throws) because you can "loop" it. It works like this: after you grab them, do a Green Hand, cross-up Splash, and now you can mixup with 0~2 Crouching Jabs and then Throw again.
- Iron Claw: (←/→ + Fierce)
Zangief does, I don't know, something to the opponent's face for multiple hits. Should never be used on purpose.
- Brain Buster: (←/→ + Forward)
Zangief throws the opponent over his head, opponent always ends up behind him. Not as useful as the Strong Throw because the opponent is Thrown too far for a cross-up, but if Zangief is in the corner and you want the opponent cornered, here ya go.
- Kamitsuki a.k.a. Bite: (←/→ + Roundhouse)
Zangief bites the opponent for multiple hits. For a normal throw this does great damage, and it would be awesome for any other character, but again, if you're going to Grab, a SPD would be the right choice. It's possible to cross under some characters if you got then trapped in the corner.
- Stomach Claw: (↙/↓/↘ + Strong/Fierce)
| Damage | 26 + 4*n | 
| |
| Set amount of hits | 4 | ||
| Holds do no stun | |||
| Range | (from axis) | 69 | |
| (from throwable box) | 24 | ||
Crouching version of the Fierce grab. This sometimes comes out when you want a crouching strong poke, and that's fine because the grab does more damage. What is so great about this grab is that you do it while crouching, which can save your ass from a lot of different mixups with ease.
- Deadly Driver: (Zangief and opponent in air, ↖/←/↙/↓/↘/→/↗ + Strong/Fierce)
| Damage | 42 | 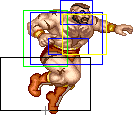
| |
| Stun | 7~13 | ||
| Stun Timer | 100 | ||
| Range | (from axis) | 61 | |
| (from throwable box) | 16 | ||
Zangief throws the opponent down in the direction pressed. Does more damage than the Kick Air Throw but the follow-up game is weaker.
- Leg Throw: (Zangief and opponent in air, ↖/←/↙/↓/↘/→/↗ + Forward/Roundhouse)
| Damage | 34 | 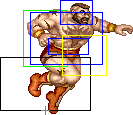
| |
| Stun | 7~13 | ||
| Stun Timer | 100 | ||
| Range | (from axis) | 61 | |
| (from throwable box) | 16 | ||
Zangief tosses over his head in the direction pressed. This is the better Air Throw because it leaves the opponent closer, but it's still very rarely used.
--Born2SPD and UltraDavid
Special Moves
- Spinning Pile Driver a.k.a. SPD: (360 + P)
Detailed Input: (→ [0~6f] ↓ [0~6f] ← [0~6f] ↑ [0~12/9/7/4f] Jab/Strong/Fierce/any P if you are at a jumpable state and the last direction was ↑. The first direction and the side you spin is not fixed. You just need to input the 4 main directions in order. More explanation here)
| Jab | Strong | Fierce | 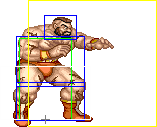
| |||
| Damage | 42[1] | 46[1] | 50[1] | |||
| Stun | 7~13 | |||||
| Stun Timer | 100 | |||||
| Super Meter | 20 | |||||
| Range | (from axis) | 111 | ||||
| (from throwable box) | 66 | |||||
- Whiff:
| Super Meter | 5 |  |
 |
 |
 |

|
| Frame Count (Jab) | 5 | 5 | 16 | 3 | 3 | |
| Simplified (Jab) | 32 | |||||
| Frame Count (Strong) | 5 | 5 | 18 | 3 | 3 | |
| Simplified (Strong) | 34 | |||||
| Frame Count (Fierce) | 5 | 5 | 20 | 3 | 3 | |
| Simplified (Fierce) | 36 | |||||
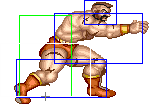
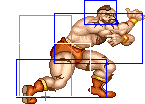
A command throw with great range that does good damage; this is Zangief's most important move. Zangief attempts a throw and after that remains stuck on an animation so that he can not block or move. The Jab version does the worst damage and Fierce does the highest, although it does not vary all that much. All versions have the same range. If done after a tick, the opponent can only escape by doing a reversal-timed instantly-invincible attack, like a dragon punch, or a move that puts the character in the air, like Blanka's rolling attack.
NOTE: SPD can have more active frames, but you must earn them!
- Atomic Suplex: (Close, 360 + K)
Detailed Input: (→ [0~6f] ↓ [0~6f] ← [0~6f] ↑ [0~12/9/7/4f] Short/Forward/Roundhouse/any K if you are at a jumpable state and the last direction was ↑. The first direction and the side you spin is not fixed. You just need to input the 4 main directions in order. More explanation here)
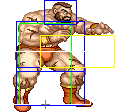
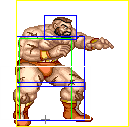
| Short | Forward | Rh | Short | Forward | Roundhouse | ||
| Damage | 20 + 30[0] | 20 + 32[0] | 20 + 34[0] | 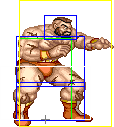 |
 |
| |
| Stun | 7~13 | ||||||
| Stun Timer | 100 | ||||||
| Super Meter | 24 | ||||||
| Range | (from axis) | 66 | 69 | 83 | |||
| (from throwable box) | 21 | 24 | 38 | ||||
This command throw is more damaging than SPD, but its range is much smaller. If you are right up close, go for this for more guaranteed damage. If done after a tick, the opponent can only escape by doing a reversal-timed instantly-invincible/airborne attack. If the grab attempt is not successful, this move turns into the Flying Power Bomb, also known as the Running Bear Grab. Always use the Roundhouse version because it has better range as well as damage potential. The best moves to tick this from are Close Standing Short and Crouching Strong because they both leave Zangief at very little or no frame advantage, this means that a Running Bear Grab will never come out or only rarely (unless the normal was meaty timed), with Crouching Strong leaving Zangief at optimal range for it. Something worth mentioning is that the Roundhouse version is Zangief's only command grab which can throw every character as a crossup before turning (the throwbox extends after the pushbox's back by some pixels).
- Flying Power Bomb a.k.a. Running Bear Grab: (Far, 360 + K)
Detailed Input: (→ [0~6f] ↓ [0~6f] ← [0~6f] ↑ [0~12/9/7/4f] Short/Forward/Roundhouse/any K if you are at a jumpable state and the last direction was ↑. The first direction and the side you spin is not fixed. You just need to input the 4 main directions in order. More explanation here)
- Startup + Active:
- Whiff:
| Super Meter | 5 |  |
 |
 |
 |

|
| Frame Count (Short) | 5 | 5 | 16 | 3 | 3 | |
| Simplified (Short) | 32 | |||||
| Frame Count (Forward) | 5 | 5 | 18 | 3 | 3 | |
| Simplified (Forward) | 34 | |||||
| Frame Count (Rh) | 5 | 5 | 20 | 3 | 3 | |
| Simplified (Rh) | 36 | |||||
Zangief runs a certain distance, and if he gets close enough, he grabs the opponent. This does less damage than SPD and SPD's range is only a little smaller than this move's max running range, but it's still useful in some match-ups and in surprise situations. All versions have the same range, but gradual running distances. The startup time means the opponent can jump or even hit Zangief out of it with a normal. It can also be triggered from a canceled normal (usually a crouching kick) for an almost granted grab, but from that range you should go for a SPD instead.
There's a little trick that most Zangief players don't know about which makes this move a little more efficient: a kara canceled Running Bear Grab will force the opponent to enter into blocking animation, this means that they will not be able to avoid it by just walking back, forcing them to actually have proper reactions and counter it with something.
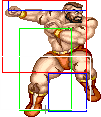
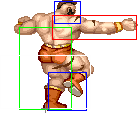
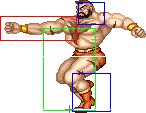
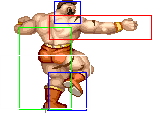
- Double Lariat a.k.a. Punch Lariat: (Jab + Strong + Fierce)
Detailed Input: (Can be done crouching, all buttons must be pressed on the same frame, negative edge not possible)
| Damage | 30[3] | 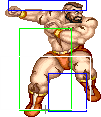 |
 |
 |
 |
 |
 |

|
| Stun | 9~15 | |||||||
| Stun Timer | 100 | |||||||
| Super Meter | 6 | |||||||
| Frame Count | 1 | 6 | 5 | 5 | 5 | 5 | 5 | |
 |
 |
 |
 |
 |

| |
| Frame Count | 5 | 5 | 5 | 5 | 5 | 3 |
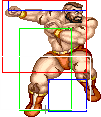
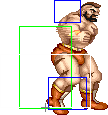
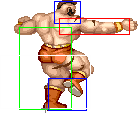
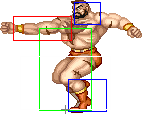
Zangief spins around with hands a-flailing, with mid body invulnerability. The attack range increases with each spin. This move goes through any projectile that is not a Low Tiger shot, and also through some supers and most high- and mid- level normals. The active hitbox extends to only one of Zangief's hands, so although the hand with the hitbox beats just about every non-invincible move in its range (Zangief's arm is fully invincible), the chance of that happening is a little less than 50%; as a result, while the Lariat can beat things like Honda's headbutt, it does so only occasionally.
- Quick Double Lariat a.k.a. Kick Lariat: (Short + Forward + Roundhouse)
Detailed Input: (Can be done crouching, all buttons must be pressed on the same frame, negative edge not possible)
| Damage | 30[3] | 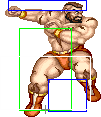 |
 |
 |
 |
 |
 |

|
| Stun | 9~15 | |||||||
| Stun Timer | 100 | |||||||
| Super Meter | 6 | |||||||
| Frame Count | 1 | 6 | 5 | 5 | 5 | 5 | 5 | |
 |
 |

| |
| Frame Count | 5 | 5 | 1 |
| Simplified | 5 | 6 | |
Like the punch Lariat, but this one has a shorter duration and range and doesn't move laterally as far. It also has better lower hurtbox, while punch Lariat beats Boxer's far standing Fierce better, kick Lariat beats Claw's crouching Strong better. This goes through Sagat's Low Tiger shots, and while it loses to moves you need to block low, it does go through a weird assortment of "lower" level normals.
- The Banishing Fist a.k.a. Green Hand: (→↘↓ + P)
Detailed Input: (→ [0~6f] ↘ [0~6f] ↓ [0~10/9/7f] Jab/Strong/Fierce)
- Jab Version:
| Damage | 26[2] | 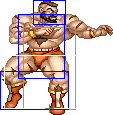 |
 |
 |
 |
 |
 |
 |
 |

|
| Stun | 0~4 | |||||||||
| Stun Timer | 20 | |||||||||
| Frame Advantage | -12 / -8 | |||||||||
| Super Meter | 6 | |||||||||
| Frame Count | 2 | 2 | 2 | 4 | 8 | 12 | 1 | 1 | 8 | |
| Simplified | 6 | 12 | 22 | |||||||
- Strong/Fierce Version:
| Damage | 26[2] |  |
 |
 |
 |
 |
 |
 |
 |

|
| Stun | 0~4 | |||||||||
| Stun Timer | 20 | |||||||||
| Frame Advantage | -12 / -8 | |||||||||
| Super Meter | 6 | |||||||||
| Frame Count | 2 | 2 | 2 | 4 | 8 | 12 | 1 | 1 | 8 | |
| Simplified | 6 | 12 | 22 | |||||||
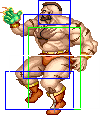
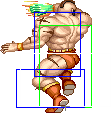
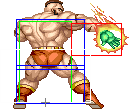
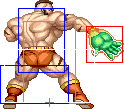
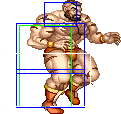
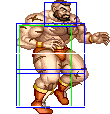
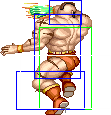
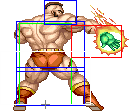
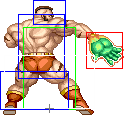
Zangief advances with a backfist, dissipating projectiles while the fist is glowing. It's used to move through projectiles, but it's generally not as good at that as the Lariat because of its unpractical recovery. You should always use the Jab version since it has better hitboxes in 3 animation frames, including the active ones, while everything else (damage, frame count, stun, etc) is the same. The hitbox at the fist is really robust, so it beats out just about everything if timed right. During the 40 frames of duration of this move, Zangief moves forward exactly the same ground as if he were walking for the same period, but with the advantage of being able to skip the landing frames, which makes it main use for this move: a quick way to get Zangief into better range after a command grab (while building free super meter).
--Born2SPD and UltraDavid
Super Move
- Final Atomic Buster a.k.a. FAB: (720 + P)
Detailed Input: (→ [0~14f] ↓ [0~14f] ← [0~14f] ↑ [0~14f] → [0~14f] ↓ [0~14f] ← [0~14f] ↑ [0~15f] P. The first direction and the side you spin is not fixed. You just need to input the 4 main directions in order and twice. More explanation here)
| Damage | 20 + 20 + 50[1] | 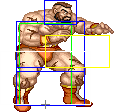
| |
| Stun | 7~13 | ||
| Stun Timer | 100 | ||
| Range | (from axis) | 64 | |
| (from throwable box) | 19 | ||
The range on this thing is very crappy (draws with Ryu/Ken throw range), even his normal throws have more range, but it can take off up to about 60% of the opponent's life. It's used pretty rarely because you need to be so close to land it, but if you get a chance, go for it. If done after a tick, the opponent can only escape by doing a reversal-timed instantly-invincible attack. The move does the same stun as other throws, but as the animation takes a lot of time to finish, it is pretty much impossible to stun anyone with it. A walking FAB is humanly impossible, because that would need you to input one direction per frame.
There's two main ways to land this: from ground or air ticking. In both cases, a weak tick (usually Short) is used, to not push the opponent too far (remember, it has bad range). For ground ticking, it's usually done after a crossup. Crouching Short is so far the best option, but Close Standing Short is usable too. As an aerial tick, both Diagonal Jumping Short and Short Knee Drop are good choices for it. Another possible way to land it is after a successful hop over a crouching normal, if Zangief is close enough of course. Using the hop to buffer the motion is also the best way to land it on a dizzy opponent. Execution wise, there's two main ways to do it: normal multiple button press (triple tap works really well here, frequently kara canceling from unexpected ground normals and landing it anyway) to grab them as soon as possible or the safe way. The first is better suited against opponents that try to counter throw and the second is against non-throw reversals.
--Born2SPD and UltraDavid
The Basics
Zangief's game revolves around landing his command grabs. He wants to be up close to the opponent ticking into SPD or getting a Running Bear Grab. Zangief uses his Lariats and Green Hand to get into footsie range, where he uses his excellent Crouching Roundhouse, Standing Short, and Standing Forward pokes as well as Lariats to get a knockdown or set up a SPD.
Ticking
Ticking is the action of following a blocked move with a throw so that the opponent is forced to take damage even though they successfully blocked your attack. Since Zangief relies heavily on ticks into his SPD, ticking is an important part of learning how to use Zangief. While Zangief can tick from almost all his moves, the following are his most common ticks and a good Zangief player should be able to do them all. The sections and the ticks in each section are roughly in order from easiest to most difficult.
Ticks from the Air
- Jumping Short/Forward/Roundhouse -> SPD
- Jumping ↓ + Short/Forward (Knee Press) -> SPD
- Jumping ↓ + Fierce (Chest Press) -> SPD
- Jumping Fierce -> SPD
Standing Ticks
- Far Standing Short -> SPD
- Far Standing Jab -> SPD
Crouching Ticks
- Crouching Roundhouse -> SPD
- Crouching Forward -> SPD
- Crouching Short -> SPD
- Crouching Jab -> SPD
- Crouching Strong -> SPD
- Crouching Fierce (Meaty) -> SPD
For Aerial ticking, Short and Knee Short are the main used ones. If your opponent starts to reverse these ticks, then you should use Forward or Knee Forward, which animate the same but do a bit more blockstun, which will probably disturb his reversal timing. His aerial Jab and Strong punches can be used for ticking as well but I really don't like them. You can also tick with Chest Splash, Fierce or Roundhouse to get the unusual high blockstun, but depending on your spacing you will have to walk a bit before doing the SPD (literally doing a walk in SPD after the tick).
If in ground, a string of Crouching Jabs is usually the way to go. But sometimes it's recommended to employ the medium or heavy blockstuns, like, if your opponent is having a too high success rate of reversing your ticking attempts, then you should use your crouching kicks, which all animate the same but naturally do different block/hitstuns, that will allow you to create another kind of guessing for your opponent to deal.
These last two ticks in the list above setups really good frame advantage situations and can mess up your opponents reversal timing. This really holds true for the meaty Crouching Fierce tick since your opponent is left in block/hit stun for so long. Depending on the character Zangief is fighting against the risk/reward is pretty high: If the meaty Fierce hits, you get damage from the fierce and SPD. If you mistime the meaty, Zangief can be left in a very large disadvantage situation where he's left open to attacks (sweeps, some specials, supers).
I only discovered recently that Crouching Roundhouse is a good ticking move. I was getting used to tick with Fierce to get the huge blockstun but it must be timed as a meaty which opens room to error. Crouching Roundhouse on the other hand does not need to be meaty, can knockdown if your opponent fails to reverse (which leads to repeat the same pattern) and gives you the unusual heavy hitstun that you may look for occasionally. Note that your SPD is the only throw in the game with enough range to tick out of a heavy attack and you must be almost point blank or it will whiff.
Effective ticking is all about learning the timing of these common ticks. If you do the tick too quickly, you will get the whiff animation for the SPD and you will be left wide open to attack. If you do the tick too slowly, your opponent will be able to either jump out of the tick or attack you. In contrast, the only way to counter a perfectly timed tick throw is to use a reversal. Learning the timing for these ticks is crucial since they are the core basics to Zangief's tick mix-up. If you have these down, then you should be able to learn his tick mix-up much more quickly.
--Born2SPD, Caliagent and Pesch
SAC SPDs
"Sac Throws" (abbreviation for sacrifice throw) is basically the action of accepting the enemy attack (letting it hit you) to counter it with a throw. In SF2, you suffer a blockstun of 11 frames if you block an aerial Jab/Short, 16 frames if you block an aerial Strong/Forward and 21 frames if you block an aerial Fierce/Roundhouse attack. But if the attack actually hits you, no matter the strength of the attack, you will always suffer the same 11 frames of hitstun. So if the enemy does an bad timed, early aerial attack it is possible to accept it (let it hit) and counter with a reversal throw just as your opponent lands. If you do it right there is nothing the opponent can do to avoid being thrown. For example: if you are at your feet and Ryu jumps at your direction and when he is at his jump apex he does his aerial Roundhouse, if you block it you will be left at blockstun for so long that he will be able to land safely and proceed with a block string that will give him some positioning advantage or allow him to mix up something or whatever. But if you let his j.Rh hit, you will recover almost twice as fast and you will be able to do a reversal SPD as he lands. You can also try to anti air with Standing Roundhouse, if it gets stuffed then you can reverse with a SPD, if not then it's good, you punished the opponent for jumping at you. The simply existence of SAC SPD is what makes jumping at Zangief a suicide tactic. Unless your opponent is T.Hawk I doubt that he will jump on you out of nowhere (unless he sucks or you have almost no life left). Of course, this does not means that you should accept any jump in, if it's timed late you will not be able to reverse it since you will still stuck into hitstun and you will probably eat a combo. Mastering SAC SPDs is essential for decent Zangief gameplay, you can't let them pressure you, it must be you the one to do the pressure! The execution is not any complicated, you just have to spin on reaction. Since the game will be stuck in the hit freeze it will be impossible to accidentally jump when doing the SPD motion so there is almost no training involved, just proper reaction time.
--Born2SPD
SPD Execution
An impeccable SPD motion execution is among the skills which are needed to have a good Zangief. Popular belief (and even some Capcom stickers) says that a 360 (full rotation) is needed, but this is not true. In fact, you can get a SPD with just 270-degree motion. But that is still not the "real" required motion. Precisely, you need to input the four main directions (→,↓,←,↑) in order (clockwise or counterclockwise) to get a SPD. This means that the diagonals aren't actually needed and that a 270 starting and ending in diagonals also wont work, so saying that SPD is a 270 motion isn't true. The same concept is valid for the Running Bear Grab/Suplex and also for the Super, which in that case is the 4 main directions in order and twice, resulting in a minimal of 8 directions which results in a 630, not a 720-degree motion.
Walk up SPD / Green hand
A lot of beginners get a green hand instead of a SPD when they try to do 360 from forward to up.
In SF2, the special moves can be executed with negative edge, for example, to throw a fireball, the motion is ↓↘→P. But since the motion is so fast, a lot of people will accidentally do ↓ ↘ P down → P up. The game will still register that as a fireball special
However, since the green hand motion overlapped with SPD motion if you start from forward to up. If you press the button before you hit up, a green hand will be registered, even though you might complete the spd motion one frame later.
To avoid that, you can exaggerate the spd motion. Even though the command only requires you to finish at up. You can finish the motion at up forward, before input the punch.
Controlling the SPD's Bounce
Depending on the last input you did for the SPD motion, you can make it bounce to the left or to the right. Learning on how to control this is key in some match-ups, like against Guile and Dhalsim, since you want to push them to the nearest corner whenever possible. Basically, you must be able to execute a SPD in 2 different motions for each situation (standing, walk-in and ticking). Independent of the side you're at, if you end the motion with ↘, → or ↗, the SPD will bounce to the right. If you end with any other direction it will bounce to the left. So if you are one of those Zangief players who learned a single way of doing the SPD, then I really recommend a bit of training on this thing, it is very important.
Most Used SPD Motions
I remember that when I was starting to play Zangief, I frequently wondered which motions the veterans used, and I sometimes saw people asking the same, so I decided to put here what works for me. Make sure you read (and understood) all the SPD execution part above. From my experience, the important points are the speed you execute, and the last direction confirmation (for the bounce direction), thats why I do not care if I input more directions than needed.
Walk in
Thats when you walk in the opponents direction and quickly performs the SPD motion, grabbing them.
NOTE: There's another method in case you're having trouble with the traditional way of spinning the stick.
- On left side that bounces forward (to the right): (→↘↓↙←↖↑↗→ + P)
Here I do a normal 360 starting and ending forward. If you're using this motion and the SPD is bouncing backwards then you're probably pressing the Punch button too early, what I recommend in this case is to add a diagonal in the end of the motion (↘) to "confirm" the direction.
- On left side that bounces backwards (to the left): (→↘↓↙←↖↑ + P)
Here I do the classic 270. Wait a bit in the ↑ before pressing a punch button or you can get a Green Hand instead. Note that when using this motion we're somewhat abusing the strange motion mechanics of the SPD (when ending a SPD in ↓/↑ the SPD will always bounce to the left), this means that the same concept does not work in the right side.
- On right side that bounces forward (to the left): (←↙↓↘→↗↑↖← + P)
Just like in the left side, just mirrored. I could use a 270 (←↙↓↘→↗↑ + P) but I like to put more directions in the motions to confirm the direction, because sometimes I press the punch button a bit earlier and in that case I would get a kara cancelled SPD (no problem), a green hand(huge recovery, easily punished) or even a hop.
- On right side that bounces backwards (to the right): (No specific motion)
As I just said above, on the left side we had the option to abuse the SPD direction mechanic which is somewhat 'strange' (the ↓/↑ directions should be neutral directions, they should vary depending on the direction you're facing, or something) so in this case you will not have a viable motion that starts in the walking direction. In that case I would stop walking and do the "left side that bounces forward" motion or whatever, but the fact that you have to switch directions tells that this is not very viable, but thats not a problem because walk in SPD that bounces backwards is not that important.
Standing Ticks
Going in depth is not needed here, use the walk in motions for whatever direction you want the SPD to bounce, if you want it to bounce to the left do ←↙↓↘→↗↑↖← + P, if you want it to bounce to the right do →↘↓↙←↖↑↗→ + P, you have more than enough time to switch directions (by switch directions I mean like if you're holding backwards while doing the normal move, and then you go forward to start the SPD motion) while ticking so its all OK here.
Crouching ticks
After a cr.Short or cr.Jab for example. I'll be assuming that you're ticking in the defensive crouch position (down back) which is the right behavior.
- On left side that bounces forward (to the right): (→↘↓↙←↖↑↗→ + P)
You will have to switch directions, unless you're a monster and can do ↙↓↘→↗↑↖←↙↓↘ + P while confirming ↘ direction. While switching directions is not that easy, it is more viable than doing the 450º motion I just said (if it were walking it would be possible, but while crouching your jump will start a lot earlier). Doing this after a Jab mixup can be difficult.
- On left side that bounces backwards (to the left): (←↙↓↘→↗↑↖← + P)
This one is more simple, you're holding down back while ticking, just do a 360 ending in that same direction.
- On right side that bounces forwards (to the left): (←↙↓↘→↗↑↖← + P)
You will have to switch directions in this case as well. That motion is the best option but you have other alternatives: you can do a 270 starting at back and ending at up, but switching from down back to back while ticking with speed can be annoying, you will often get hops instead. Another option that I just discovered recently is ↘→↗↑↖←↙↓ + P, it goes to the up directions first which may look strange, but you're ticking anyway, the directions will be pressed while the normal move is out so no problem here. You will have to press the Punch button a bit late.
- On right side that bounces backwards (to the right): (→↘↓↙←↖↑↗→ + P)
Not much to say here, uses the same concept as the "left side that bounces backwards" motion.
Jumping ticks
Just use whichever motion you need to get the SPD to bounce to the needed direction, you're in the air so you have enough time to input any motion. I personally use →↗↑↖←↙↓↘→ + P if I want it to steer to the right and ←↖↑↗→↘↓↙← + P if I want to steer it to the left. I go to the Up directions first so I can start the SPD motion near the end of the jump while avoiding the risky of an accidental jump when landing. If you're going to tick with a command normal (i.e. Knee Drop or Chest Splash), then just start with ↘/↙, respectively.
Additional Notes
All that stuff regarding directions is only important for SPDs. For the Run Grab, Suplex or Super the last direction pressed means nothing.
I can guarantee that all that stuff regarding execution can be done consistently (with enough training of course! At start it will fell very hard but just don't give up! If you focus on it in 2 or 3 months you will already be decent at it). I've used Sanwa's JLF with octagonal gate for a long time, it's the stick I learned to play Zangief, and I always could do all that stuff with no problems. I recently switched to Seimitsu's LS32 with round gate and I felt a bit of improvement. I really tried to stick with the standard (Square Gate) but I failed miserably. That gate is just horrible for SPDs. You can't ride the gate to do it fast, so most of the time I got some missed directions. But I believe that it's possible to master the SPD motions in it, it will just be 3 times harder. If you also play Hawk, forget the walk in Typhoons, you prolly won't be able to do them. If you want to stay with the Square gate there is a solution though.
If you're a pad warrior, the 270 motions are the way to go. Do a yoga flame motion and then go directly to up (←↙↓↘→↑ + P/ →↘↓↙←↑ + P). It is not that hard to tick and do walk in SPDs with a pad, it will lack the direction control but thats fine because you're already playing with something unsupported (ST was designed to be played in seimitsu parts or at least arcade parts). I suggest switching to a stick if you really care about playing Zangief in this game.
If it helps, here is a video showing TMF's (or is it his master Mayakon? By the color used it could be him) hands doing some SPDs. He doesn't do exactly how I do, but it works the same. Also note the way he holds the stick, it's somewhat like I do. Daigo's wineglass is bad for SPDs, at least for me.
--Born2SPD
Lariat usage
Both Punch and Kick Lariats are key moves for Zangief, which are mainly used for projectile avoiding. But Lariats are not only for that, they are very versatile moves: important anti airs (if used correctly) as well as combo enders and to beat some annoying pokes. A very common mistake done by Zangief newbies is to do a Lariat and move forward blindly, hoping that it works. Thats the wrong way to do it. Learning how to properly control it to avoid being punished for doing it is vital and is a basic skill that any decent Zangief player must have.
Mixing
It is very important to learn how to mix punch lariat with kick lariat. Is your opponent always knocking you down while you are spinning using the punch lariat(like, walking blindly forward and doing sweep)? Then do a kick lariat for a smaller duration and grab him with a SPD while he is walking, poke him with Forward kick or jump and do a simple combo (Chest splash into sweep works nice), crouch block to see how he reacts, whatever. Mix both versions properly and your opponent will think at least once before trying to punish it. Using only the kick version is a bad practice as well because it has a 1 frame of recovery, so your opponent can just throw a projectile and depending on the situation it can hit you, (lets say he throws it, and walks forward pretending to do a low move, you hold backwards to avoid the low move but the projectile is moving and you will not be able to block the projectile because of kick's lariat recovery). So to put it simple: mix both versions wisely, or you are screwed. Your opponent has no way to know which version you used (unless he saw your hands pressing the buttons or you screamed KICK LARIAT loudly or something lol).
Sometimes it is better to block
Another thing to learn is that even though lariat's main purpose is to deal with projectiles, they are not projectile nullifiers... In some situations you should not use them against projectiles. For example against Guile, unless you are far away, doing a lariat to bypass a sonic boom can be punished fairly easily: Guile can just walk a bit and do any low kick that he finds better. So sometimes it is better to do a jump attack or just suffer the minimal block damage instead of the risky of being knocked down (and lose all the ground advantage you could have).
Anti aerial usage
In SSF2 the lariats received a startup of 1f so they're not great trade anti airs as they were in HF, but they can still be used to anti air some stuff.
The right way to do it is from a crouching position, it can beat their stuff, but most of the time it will be a trade or you'll straight up lose (depends on which situation you're using it). Even if it trades, it does not matter, you are on your feet but they are not. Ticking/safe jump time! For anti aerial purpose the kick version is often preferred because of the smaller duration of it.
As I said, the lariats aren't good anti airs as they once were on their past iterations, so be aware of Zangief's other anti air options for then the opponent is right above you: Close Standing Jab or a SAC SPD.
Beating random stuff with lariats
Both Lariats have 1 frame of startup, where he is vulnerable around the head and feet. At the second frame, a very big body hitbox appears, with no hurtbox in that area, which lasts for 6 frames. Therefore, it beats pretty much anything that hits mid, if timed right. I'm talking about annoying pokes (Vega(Claws)'s Crouching Jab/Strong, for example), advance moves (Honda's headbutt/super, Blanka's beast rolls as well but only with kick lariat) etc. Against ChunLi and DeeJay's supers kick lariat is a very safe option that will beat them cleanly unless they hit you during the recovery frame. Both lariats work well against Balrog(Boxer)'s Super as well, but do not do it too close because if he does the kick super (starting with a upper punch) then it can beat lariat cleanly for the damaging 5 hits.
Dodge-SPD
There is a neat trick that I like a lot. It goes like this: from mid distance, mainly against a character with a projectile, you are trying to get in, as always. If he fires a predictable projectile, you do a kick Lariat advancing forward and get him with a SPD right after the Lariat. It can work sometimes against Ryu, Ken, DeeJay and maybe Chun Li as well. This is vulnerable to sweeps and two-in-ones like Ryu's cr.Forward xx Hadouken, so be cautious.
--Born2SPD
Shenanigans
Definition of Shenanigans: http://en.wiktionary.org/wiki/shenanigans.
Instant Overheads
Zangief has two aerial moves which can be considered practical instant overheads: Diagonal Jumping Short and Forward. Diagonal Jumping Roundhouse and Forward Knee Drop can be used as well but they wont work against a fair amount of characters and as a consequence they are also harder to time. In the end, Diagonal Jumping Forward should be favored because it does slightly more damage (and most importantly: more stun) than Diagonal Jumping Short. Remember that triple taping will simplify the timing. If you didn't got Seimitsu buttons it's okay to piano Short and Forward though.
The trick is to perform the jump attack during one of the first possible jumping frames and from point blank range. This will set a 50/50 setup: if your opponent is blocking low they will get hit by the overhead, or if they block high expecting it then he will be vulnerable to any low attack. But knowing that not many Zangief players actually go for it this will have very high chances of working, at least for the first time. This obviously only works well as a round finisher or when the opponent is just about to fall dizzy because you'll be defenseless until you hit the ground again. If the opponent happens to survive or not get dizzied from it, a grab when landing may work, but that's unlikely.
This can easily end the round if the opponent has 3 to 5 pixels of life, depending on which button you pressed (Short or Forward, Roundhouse is unpractical) and which character you are facing (heavy characters can suffer 1 pixel less damage in that situation). Unfortunately, against Blanka this is not possible at all and against other small characters like Cammy or M.Bison for example it's very hard to time it right, even if you piano or triple tap it. The funny thing is that this can trade with some very good reversals (e.g. N.Ryu's Shoryukens), which will make their effort to reverse useless (unless you are about to die as well of course).
--Born2SPD
Corpse Hopping
Now this is a thing that most players don't know about: it's possible to cross over opponents with Zangief's Hops but the situations where this is usable are very specific: they must be unthrowable (or a grab will come out instead), at block/hit stun (or they will be able to grab Zangief), at point blank range and crouching (or the Hop will not cross over them).
Well, there's exactly only one setup where all these requisites are satisfied: after a cross up. They will for sure try to block low if they block Zangief's cross up, because they don't want to risky eating a combo from Zangief (Splash cross up, Crouching Forward xx Lariat). All the other requisites are granted with the cross up block/hit.
By the way, there's some nuances which must be known: Fierce version is easier to hop with but has longer recovery (unsafer! Opponent may be able to react even when not expecting it). It's harder with Strong because its first recovery frame has a weird pushbox. You should use Strong where possible because it's safer, but you can only use it against a limited amount of characters. Here's a detailed list:
- Easy enough with Strong. No reason to use Fierce:
Cammy and Vega(claw)
- Easy with Fierce and OK with Strong. Unless the cross up hits too high, use Strong:
ChunLi, Guile, Ken, Ryu and Sagat
- OK with Fierce, hard with Strong because it requires the cross up to hit too late. Favor Fierce:
Blanka, E.Honda, FeiLong and M.Bison(dictator)
- Fierce requires the cross up to hit too late, impossible with Strong. Not really usable:
Balrog(boxer), Dhalsim, T.Hawk and Zangief
- Impossible:
Dee Jay
The best follow up is for sure a command grab (FAB, if you have meter). If the opponent was knocked down almost near the corner and you have enough momentum to cross up, consider this: a SPD after a hop cross over will position the opponent just where Zangief wants, trapped in the corner and ready to lose. It won't be any better than a well timed safe jump into a SPD tick though. This is not a tactic that will help you win matches where you used to lose, it's just little gimmick which you can use to show off.
--Born2SPD
Bite Cross Unders
Zangief happens to be able to cross under characters after his Roundhouse Grab (the bite), but it must be done in the corner and the ways to setup it are very character specific. This is a very unexpected mix-up, so the chances of the opponent falling on it are very high. The best follow up would be a tick into a command grab (FAB, if you have meter) or a simple combo (say, Crouching Forward cancelled into Lariat). Also note that it may require different spacing depending on which corner you are. I will refer as Near corner as the corner which is at your back when the round starts and Far corner as the other one.
Here's a detailed list, from easiest to hardest character to set it up:
- Vega(claw):
Easiest so far. Works on any corner with no specific range, just make sure that you're actually near the corner. A more sophisticated yet valid setup would be: Safe timed Jumping Short -- Crouching Jab into Bite and then the cross under.
- Ken/Ryu:
Not on point blank on the Far corner, any range on the Near corner. To simplify things, do a weak tick for spacing and you should be good.
- Cammy:
Doesn't work on point blank. If you're that close, then 1~2 Crouching Jabs will give the needed spacing.
- ChunLi:
Similar to Cammy but can't be considered safe since her reversal Up Kicks will come out regardless of you crossing her or not. Another annoyance is that Zangief's Crouching Forward xx Lariat combo whiffs against her. The safe jump setup is also not recommended because her Roundhouse Up Kicks negates safe jumps.
- Dhalsim:
Requires 2 Crouching Jabs done very quickly for the specific spacing. Chances are that he will grab you first though.
- E. Honda:
Works from really close to point blank only. Hardly usable.
It's also worth mentioning that using the Green Hand either by doing it exactly after the bite or after walking a little will allow you to cross under more characters as well as making it easier to cross the characters that are known for being possible to cross under. But the bite spacing and the amount of the ground to walk before doing the Green Hand are all very specific, so it's not usable at all. Plus, the opponent recovers faster than Zangief, negating any possible use. Works on Blanka, Guile, T.Hawk and Zangief. Listed just for documentation purposes.
--Born2SPD
Getting more throw attempts with the SPD
It's possible to get more active frames with the SPD while Zangief is on his SPD whiff animation, but only during a small period of time, and you must earn them. Even if you didn't know that I'm sure that you favored from it at least once. When you mistime the tick into SPD by some frames, you can notice that Zangief still grabs the opponent some frames later during his whiff animation, that happens because you released the Punch button you just pressed for the SPD.
Let's analyze the detailed input data for the SPD:
Detailed Input: (→ [0~6f] ↓ [0~6f] ← [0~6f] ↑ [0~12/9/7f] Jab/Strong/Fierce)
After pressing up (or the 4th direction required) you'll have 12 frames to input Jab to get the Jab SPD, 9 Frames for the Strong SPD and 7 frames for the Fierce SPD. So, if you input the 4 directions needed for the SPD and you press Jab right at the first possible frame, the Jab SPD will come out and you'll have 11 more frames to try to grab again, but if you pressed Jab 6 frames after the last direction you'll have only 6 more frames to attempt more grabs. What happens with SPD (and other command grabs as well like T.Hawk's Typhoon and E.Honda's Oicho, but not with Zangief's Atomic Suplex, because of the Running Bear Grab) is that if the game detects a punch press/release while in the move's leniency time (or the rest of it, since its pretty unlikely that you will active it on the first frame), it will register again for the command throw, so you will have multiple frames, but saying it again: you must earn them. Note that if you did a Jab SPD, you can only attempt more grabs with the Jab button (because it's a Jab SPD). The same principle is valid for the Strong and Fierce SPDs as well but with only one difference: they have shorter frame windows for the additional grab attempts, with Fierce having the shortest (as is reflected by the input data (Data Source, in japanese)).
How to abuse it
It's already known that this property in the SPDs helps when you accidentally misses the timing on the tick, but for what else can this be effective? Well, if you only press and release the button normally it will not be of much use. But here is the trick: if you do a triple tap instead (Seimitsu buttons are pretty much required for this, Sanwas are too soft) of the normal press and release you will have a total of 6 inputs (3 presses, 3 releases) in a turbo like speed, which will help you abuse that SPD mechanic. I'll list the main uses:
- It makes your jumping ticks always perfect (or near perfect) timed, don't giving the opponent the chance to react with anything other than a reversal, because you grab them as soon as you hit the ground;
- It helps you to do perfect timed ticks (having a active SPD frame at the opponent's first throwable frame). This is important against Dhalsim for example, because if your SPD is not perfect timed you can eat his non-reversal Super which will for sure ruin that round;
- Helps to tick characters which jump very fast (e.g. Dictator, if you tick into SPD him in the traditional way and you mistime it, when the release grab attempt comes out he may already be in the air);
- Makes SAC SPDs more effective. You may do a reversal SPD right after they hit you in the air, but what if they're not in the ground yet? You will probably be thrown or something when they land;
- Etc...
I find it a little hard to tick while trying to get more throwing frames with triple taping if I tick with a Crouching Jab or a Far Standing Short, because Zangief recovers too fast. If that's a problem for you as well, try using Zangief's Crouching Kicks, they all leave Zangief in frame advantage but also have a considerable recovery, which will give you more time to do the SPD while synchronizing the triple tap.
--Born2SPD
Advanced Strategy
Safe Jumps
Most specials moves don't start instantly (i.e. have a small startup) so it is possible to time a meaty jumping attack that will either hit them when they wake up or land safely if they perform a wake up reversal. There are some special moves that start instantly (N.Ken's Fierce Shoryuken and Blanka's Horizontal or Vertical Beast Rolls) which are impossible to safe jump. Other specials have very short startup (e.g. Ken's Jab and Strong Shoryukens, Chun Li's Roundhouse Up Kicks, Sagat's Tiger Uppercuts) which will be very hard or near impossible to safe jump. Also, some characters wake up faster than others (e.g. Claw wakes up a lot faster than Ryu) which will limit the use against these characters. If the knockdown happens in the corner, their wake up speed may be altered, pay attention for that as well. It's possible to safe jump both sweep and full knockdowns, but against characters which wake up fast it may not be always possible to safe jump a sweep knockdown.
You should always choose a light attack when going for a safe jump because you don't want to be pushed away too much when the opponent blocks it. Zangief's best moves for safe jumping are the Short Knee Drop (stays out for the entire jump) and the Diagonal Jumping Short (has better range than the previous but stays active for limited time).
I recommend to time the jumps based on visuals (e.g. on Shoto's full knockdown, look for the second bounce and jump a half of a second later). Here is a tool that illustrates all knockdown and wake up animations for all characters and tells you the frame right frame to jump based on the character you would be using and the one you would be facing.
Specials with less than 4 frames of startup can be considered very hard to safe jump, the ones with 4 or 5 are hard, but viable. Anything slower than that will require less precision and will be much easier to be safe jumped. Check the other characters pages for their frame data.
--Born2SPD
Safe Ticks/Meaties
An attack can be considered a safe meaty if it's possible to hit waking up opponents and be safe from their reversals, with the same timing. This is will be true if the attack either has very fast recovery (usually 2 or less frames) or has good range/priority and is spaced well enough to be considered safe.
Zangief has 3 safe meaties: Crouching Jab, Far Standing Short and Far Standing Forward.
Zangief's Crouching Jab and Far Standing Short are the only normals in the game with no frames of recovery, this allows you to use them as Safe Ticks. Some notables differences from Safe Jumps and Safe Ticks/Meaties are: you will always have enough momentum to try a Safe Tick/Meaty after a sweep knockdown but you will be ground throwable, which makes this very risky to use against E.Honda, T.Hawk and another Zangief, because they have very good range on their command grabs.
Far Standing Forward works only as a safe meaty because you have to do it from far away. After the active frames, Zangief's leg hurtbox retracts completely, that's why it can be used as a Safe Meaty, but that move has considerable recovery so you will be left open for advance attacks (e.g. E.Honda's Headbutt).
Mastering the Safe Ticks is one of the main milestones for Zangief players. The safe timed Far Standing Short into Crouching Roundhouse or SPD mix-up is very strong.
--Born2SPD
Safe Super
Zangief can negative edge his super just like T.Hawk can with his, but its not as easy to land and not as good (mainly because of the mediocre range), but it still is an important thing to learn. Here's how it works:
End the motion on the defensive crouch and instead of pressing the punch button(s), release it/them. If the motion is done correctly, a SPD will never come out, because FAB has higher priority (for overlapped input) and no whiff animation. But if you spin it wrong (one or more of the inputs for the FAB motion are missing) then a SPD or even a Green Hand may come out. To avoid this you can:
- Spin on the opposite direction in relation to the Green Hand's motion. For example, if you're at the 1P side, use ←↓→↑←↓→↑←↙.
- Only use Fierce. This will cut the chances of the SPD whiff animation coming out by a lot. The explanation for this is simple, compare the Punch buttons leniencies for both SPD and FAB (Source in japanese):
Detailed Input (SPD): (→ [0~6f] ↓ [0~6f] ← [0~6f] ↑ [0~12/9/7f] Jab/Strong/Fierce)
Detailed Input (FAB): (→ [0~14f] ↓ [0~14f] ← [0~14f] ↑ [0~14f] → [0~14f] ↓ [0~14f] ← [0~14f] ↑ [0~15f] P)
If you use Fierce, theres a comfortable difference of 8 frames between the SPD and FAB leniencies, but if you use Jab then the difference will be of minimal 3 frames. You want to avoid the SPD whiff animation here, so just release Fierce a little late (so a SPD will never come out). If you're not satisfied with only one button release, go ahead and use Strong as well, but release it after Fierce. You only have to care about this if your FAB execution is sloppy though, I don't really care for a SPD coming out since I don't miss my FABs, with the right setups it's easy to do the super perfectly, being it negative edge or not.
--Born2SPD
Flick SPDs a.k.a. Hajiki Screw
Read this post on Nohoho's blog.
I have to mention though that you shouldn't rely on it with Zangief, because you need to be able to control the bounce and with flick SPDs you have no control on it. Learning how to flick SPDs is not a needed skill with Zangief, since Pony doesn't use it, but learning it will surely only add to your game, not subtract, as long that you keep in mind the right situations to use it: only against whiffed low normals and not as a tick, in that case it's better to do the motion in the regular way instead, because you need the SPD to land closer to the nearest corner. Another notable use for this method is if you had trouble (as I had) to do walk in SPDs in a square gate stick: I had a hard time trying to be consistent with the walk in SPDs, so this would be a potential solution. Ticks into SPDs were fine though because it isn't needed to spin that fast.
--Born2SPD
Combos
Zangief only has a few cancelable moves, but his normals are remarkably linkable, so he still has some big combos. I'm going to put down all of his links (--) and cancels (xx) that combo and then I'll note a couple of his most-used combos. For moves that link into multiple things, I'll put the standing moves they link into first, the crouching moves second, and the special moves third.
Links
- Close Standing Jab -- Standing Jab
- Far Standing Jab -- Standing Jab
- Standing Strong -- Standing Strong/Standing Fierce/Far Standing Short/Standing Forward
- Standing Strong -- Crouching Fierce/Crouching Short/Crouching Forward/Crouching Roundhouse
- Standing Strong -- Green Hand
- Far Standing Short -- Standing Jab/Standing Strong/Standing Fierce/Far Standing Short/Standing Forward/Far Standing Roundhouse
- Far Standing Short -- Crouching Jab/Crouching Strong/Crouching Fierce/Crouching Forward/Crouching Roundhouse
- Far Standing Short -- Green Hand
- Close Standing Forward -- Standing Jab/Crouching Jab
- Crouching Jab -- Standing Jab/Standing Strong/Standing Fierce/Far Standing Short/Standing Forward/Far Standing Roundhouse
- Crouching Jab -- Crouching Jab/Crouching Strong/Crouching Fierce/Crouching Short/Crouching Forward/Crouching Roundhouse
Cancels
- Close Standing Jab xx Green Hand/Lariat
- Far Standing Jab xx Green Hand
- Crouching Jab xx Green Hand/Lariat
- Crouching Short xx Green Hand/Lariat
- Crouching Forward xx Green Hand/Lariat
Most Used Combos
- (Crossup Fierce Splash), Crouching Jab -- Crouching Jab -- Crouching Jab -- Crouching Roundhouse
A hit confirm combo. If the opponent is blocking it, use the Crouching Jab as a tick into SPD. If it's hitting then finalize it with a sweep for the knockdown, which can lead into a safe jump against some characters.
- (Crossup Fierce Splash), Crouching Jab -- Crouching Jab -- Far Standing Short -- Crouching Roundhouse
Another hit confirm combo. Just like the above but with more damage potential.
- (Crossup Fierce Splash), Standing Strong -- Far Standing Short -- Crouching Roundhouse
My favorite combo. Whenever I get a dizzy on my opponent and there is enough time to crossup I do this combo, unless I am facing one of the characters which allow me to do the 5 hit combo in the end of this list. The only weak point of this combo is that Standing Strong whiffs on most characters if they're Crouching (works on Balrog(Boxer), Dhalsim, O.FeiLong, Sagat, T.Hawk and Zangief). In that case, limit the usage of this combo to when they're dizzy only. Against the characters that Standing Strong doesn't whiffs go for it whenever you crossup them. If your opponent happens to block your crossup you can use this combo as a block string as a tick into SPD.
- (Crossup Fierce Splash), Standing Strong -- Crouching Forward xx Green Hand
I don't recommend this combo because it barely does more damage than the combo above but does not knockdown. It's OK if you know that the opponent will not survive though.
- (Crossup Fierce Splash), Crouching Forward xx Lariat
Zangief's easiest combo. It dizzies most characters but can not be considered a Touch of Death because if done twice it can leave the opponent with some life left. Favor using the kick lariat because it's less unsafe on block. Also, in that case remember this.
- (Jumping Fierce), Standing Strong -- Crouching Roundhouse
Zangief's most damaging non crossup combo. Against characters with large hitboxes you can actually add an Standing Short before the sweep. It does great damage and its very easy to perform as well, linking Crounching Roundhouse from Standing Strong is very easy. And it knocks down!
Misc Combos
- (Crossup Fierce Splash), Standing Strong -- Far Standing Short -- Far Standing Jab xx Green Hand
This combo only works against Dhalsim, Guile, Sagat and another Zangief, but it does a real nice damage. Against Dhalsim, you need to do the links as fast as possible or the Standing Jab will not connect. Against Guile it's devastating, if you are behind in rounds, following it with a Fierce SPD will grant you a 99~100% damage setup. But remember that The Standing Strong whiffs if he is crouch blocking. This combo has two weak points though, it rarely dizzies (green hand has mediocre dizzy potential) and gives you no knockdown, but the damage is gigantic and gives you the opportunity to connect an SPD right after it so its still worth doing it.
--Born2SPD and UltraDavid
Match-ups
Matchups classified with this diagram in mind. For the old characters I guessed the positions.
--Born2SPD
Serious Advantage Match-ups
Vs. O. Balrog (boxer):
- 9.5 - 0.5
Lariat all day. If he gets close, SPD him.
Advantage Match-ups
Vs. O. Dee Jay:
Vs. O. M. Bison (dictator):
Vs. Ken:
- 6 - 4
Advantage/Disadvantage
This is a good matchup for Zangief. His best in the game I believe, excluding some matchups against useless Old characters of course. The 6-4 from Gunze is pretty on point. Once you learn the matchup I'm sure you will feel very comfortable in it. I mean, it's not a terrible matchup for Ken, but he does struggle a bit to win since he does not has much in his favor. The hardest Kens you will face will be the ones with a strong footsie game.
Zangief's Game Plan
To trap him in the corner is your objective but you don't really need that to win. Ken will usually be at a medium distance because if too close you will own him, and from too far he will not be able to really hurt you. This means that if he makes a mistake you can hit him easier.
Ken's Game Plan
Since his fireball game is weak, he will need to play in an aggressive manner, with pokes, Jab Shoryus and occasional knee bashes, but while being careful to not be grabbed (of course).
Round Start
The best would be to just start crouch blocking or if you want to be a smart ass try a walk in SPD.
Main Strategy
Ken's Fireball game is kinda weak, Zangief can Lariat easily through Ken's Hadoukens since they have so much recovery. Green hand is surprisingly decent against Ken for the same reason. Good Kens know that and thus they will throw Hadoukens moderately. Zangief's basic answer for Ken's Hadoukens is the mixed usage of Punch and Kick Lariats. You can also jump over the Hadouken with Fierce, but that's riskier and will not be possible on most situations. Kick Lariat has less duration so it's risky for Ken to walk up sweep your Lariat because Zangief may recover before he can do anything and you will be able to punish his whiffed normal with a walk in sweep/SPD or a simple combo like Jumping Chest Splash -- sweep. Zangief can't really Kick Lariat through Ken's Hadouken and also hit because of its poor range and duration, it's just part of the mix-up. If you did a Punch Lariat, he can punish with a walk in sweep or Standing Roundhouse, but he will have to guess for that since his Standing Roundhouse whiffs against Kick Lariats. You may hit Ken if he throws a Hadouken, which could hit you if you did a Kick lariat. It's all part of a big mix-up, which IMO Zangief has a little advantage. This advantage can be negated by Ken if your opponent is experient enough to consistently kara cancel his sweeps into Jab Shoryukens, so he isn't left as vulnerable as a simple sweep whiff if it misses. Fortunatelly for Zangief, it's not easy for the Ken player to do that consistently thanks for the useless Crazy Kicks which can come out unintended while doing the sweep/Jab Shoryuken motion. Anyway, Ken can try to stuff your pokes with a Jab Shoryuken, and to mix it up with a walk in sweep or knee-bash, so be cautious. Punish his whiffed Jab Shoryus and sweeps with a walk in SPD, if you can't do that your sweep works too, but a SPD would be optimal.
He may also randomly poke you with his Standing Roundhouse, but unfortunately for him, your Standing Jab beats it cleanly from a very comfortable range. Your Standing Forward works well against it too, plus it can be used as a poke/punish to his low kicks.
Don't spam lariats against Ken, I know this is kinda obvious but against Ken I need to stress this. Ken can punish whiffed lariats from medium range brutally with his Diagonal Jumping Fierce xx Tatsu -- sweep combo. This is probably the only thing Ken has in his favor (other than his mix-up on your wakeup) so pay attention for that. If he happens to land one of these be cautious, the next hit you take will probably make you fall dizzy, and if it happens the round is lost. What I recommend in this situation is to chill out, just block all his attacks for some seconds till your stun(dizzy) meter resets (5 seconds of the in game clock, to be exact). Pay attention for a walk in Jab Shoryu/sweep/Standing Roundhouse, a Hadouken or even a walk up throw. All these options do enough stun to dizzy you at such situation.
His Diagonal Jumping Fierce has a very respectable priority, the only ground normal Zangief has which can beat it cleanly is the Close Standing Jab, but you must do it at the very last moment possible otherwise a Far Standing Jab will come out. If he happens to hit you with it, a SAC SPD may be possible, but only if he fails to cancel into Tatsu. It's not like he can jump freely at you anyway, because he can only cancel into Tatsu during the first active frames. If you're fighting a jumpy Ken, consider your Neutral Jumping Roundhouse as a counter, it has outstanding range and do great damage.
Jump ticks can be done but very rarely only, they must be unexpected because of Ken's excellent anti air (Jab Shoryu). The only 100% viable moment to jump at Ken is as a reaction to a bad timed Hadouken, as mentioned earlier.
If you're knocked down, don't try to reversal lariat his meaty Diagonal Jumping Jab/Fierce xx Tatsu because it will hit you every time. Just block it and try to escape his subsequent mix-up, which will basically be: Knee Bash or Jab Shoryuken. The only way for Zangief to escape this mix-up without guessing is with a safe super buffered from the Tatsu block stun, but this can be disrupted if he does a sweep after the Tatsu. Anyway, if you're unable to do that then you will have to guess, to SPD or not to SPD? If you guess right you reset the situation, but if you guess wrong he will just repeat it after the knockdown from the Jab Shoryu or after the last hit of the knee bash.
If you knocked him down, don't even try to safe jump. Ken is pretty much impossible to safe jump. His Fierce Shoryu has no startup so you can't really safe jump him and his other Shoryus have a 2 frame startup which are pretty much impossible to safe jump as well. The best you can do is try to time a safe tick Standing Short, which is a lot easier to time than a safe jump. Obviously you can't safe tick his Fierce Shoryu, but thats not problematic because if you get hit by it you will receive very low damage and will stay on your feet so you will be able to punish Ken on his way down with a lariat for the knock down and crossup. Smart Kens will prefer to reverse after your tick (your throw attempt). If he happens to do this constantly then you should mix it up with a linked sweep after the Standing Short or bait it and grab him with a SPD on his way down from his Jab Shoryu.
Conclusion
I believe this pretty much sums this matchup. The key is to not be knocked down, punish his mistakes with SPDs for the big damage and have a good footsie game.
Match-up videos
- Pony vs Aniken
- Pony vs Mattsun
- Gunze vs Aniken
- Gunze vs Mattsun
- Pony vs Kikai
- Jodim vs Alex Valle
--Born2SPD
Vs. O. Vega (claw):
Fair Match-ups
Vs. Balrog (boxer):
- 4.5 - 5.5
Match-up videos
- Pony vs Tsuji
- Gunze vs M.B★
Vs. O. Blanka:
Vs. Dee Jay:
- 5.5 - 4.5
You will have 2 parts to this match.
Part 1.
DJ has you zoned outside of his slide range. He will continually throw maxouts and then aa you if you jump or sweep you when you try to advance with lariat. And he can even st.RH you while the lariat is recovering and as an antiair from max range. This can be very difficult to get through. What I will do is position my self just out side of his max slide range and kkk lariat his maxout. If you guess right you can then begin to smother him with j.shorts and splashes and don’t forget the d.lk in the air. It will stuff or trade with the slide. Once you get in get the sweep in or a MP throw. This will allow you to advance on him when he is down. And that leads to part 2. If you don’t get the sweep/throw you will be reset and back in part one all over again.
Part 2
When you get your knock down force DJ into the corner. DJ is then at a disadvantage you can cr.jab him on wake up and it will strop his rising dredkicks and normal dredkicks clean and set you up for a SPD. All DJ can do at this point is attempt a reversal throw or super if he as meter. But being that DJ builds meter rather slow I doubt he will have it at this time in the match. So now you are in a guessing game with DJ and Gief has the upper hand. If you predict right DJ will be dead in 2-3 rotations of this.
If gief does not get DJ cornered with a knockdown he is at a great disadvantage. I would say its 70/30 DJ. When Gief has DJ down in the corner it flips 70/30 Gief.
--CigarBoB
Match-up videos
- Gunze vs Fujimon
- Gunze vs Yuzuru
Vs. O. Ken:
Vs. M. Bison (dictator):
- 5.5 - 4.5
Match-up videos
- Pony vs YuuVega
Vs. Ryu:
- 5.5 - 4.5
Match-up videos
- Gunze vs Shooting D
- Gunze vs Daigo
Vs. O. Ryu:
Vs. T. Hawk:
- 5.5 - 4.5
Match-up videos
- Pony vs Toutanki
Vs. O. T. Hawk:
- 5.5 - 4.5
Match-up videos
- Pony vs Toutanki
Vs. Zangief (self):
Match-up videos
- Pony vs Suzuki?
Vs. O. Zangief:
Disadvantage Match-ups
Vs. Blanka:
- 4 - 6
Match-up videos
- Pony vs Komoda
Vs. Cammy:
- 3.5 - 6.5
Vs. O. Cammy:
Vs. O. Dhalsim:
Vs. O. Fei Long:
Vs. Sagat:
- 4 - 6
Match-up videos
- Gunze vs yaya
- Gunze vs Yondaime
Vs. Vega (claw):
- 3.5 - 6.5
Match-up videos
- Pony vs ARG
- Gunze vs MAO
Serious Disadvantage Match-ups
Vs. Chun-Li:
- 2.5 - 7.5
Match-up videos
- Pony vs Otochun
- Gunze vs Otochun
- TMF vs Palestina, TMF vs Hide
Vs. O. Chun-Li:
Vs. Dhalsim:
- 2.5 - 7.5
You want to get in, but don't feel like you need to constantly be walking or jumping toward Sim, guessing when to jump and which jumping attack to use and so forth. The number one mistake in playing against Sim with a character Sim can zone out well is thinking that you need to run at him; Sim will eat you up if you do that.
Instead, try to make Sim scared about throwing out limbs all the time by counterpoking, especially in ways that knock him down. If you think he's going to do any far crouching attack, you can beat it out and knock him down with crouching roundhouse or just hit him and maybe cancel into running bear grab if close enough with crouching forward/short or standing short. If you think he's gonna do far standing roundhouse, do your standing roundhouse, punch lariat, crouching fierce, crouching strong, or crouching jab. If you think he's gonna do far standing fierce, do kick lariat, crouching roundhouse, crouching jab, or standing short. If you think he's gonna do far standing forward, do crouching jab, crouching strong, standing roundhouse, or punch lariat. You have attacks to beat each of Sim's attacks at particular ranges and timings, so figure that out, it's all very location- and situation-specific.
You also have air attacks that beat or trade with most of Sim's antiairs and Sim has antiairs that beat or trade with your air attacks, it all just depends on the spacing. You can use any of jumping down+short, jumping short, jumping down+forward, jumping forward, jumping roundhouse, jumping fierce, and jumping fierce splash against any of Sim's standing short, standing forward, standing roundhouse, back+short, back+forward, back+jab, down-back+jab, or jump back fierce. This is less effective than grounded counterpoking because you can't get a knockdown, it doesn't help you in positioning if you just trade attacks, and some of Sim's antiairs beat all of your crap in some situations, so don't depend on this quite as much.
You win in damage with both grounded counterpokes and jumping attacks almost regardless of what's trading, even sometimes in the case of your crouching jab v Sim's far standing fierce if random damage is on your side, so don't be scared about that, just realize that it's hard to keep your damage lead and you're not likely to win unless you get in. The name of the game in this matchup is still you trying to get in.
Also be aware that one knock down from a distance is not enough for you to get all the way in on Sim, so don't depend on trying to walk up with a tick into spd after one knockdown. The Sim player will probably just jump away or antiair your jumping tick with down+back jab or back+jab or super or something. You can choose between walking up farther, blocking, walking up with another crouching roundhouse, doing a couple green hands to get closer, or if Sim is expecting an attack or something, doing running bear grab or walk-up spd. There's a guessing game here, so try to use it to your advantage.
Random other stuff:
When you have Sim cornered and want to tick him to death, just tick him with max range standing jab. This is safer because it can't be reversal thrown by Sim (since you're out of his range), he can't slide under it like he can some of your jumping ticks, and if Sim does reversal teleport you're in a position onscreen that'll let you deal better with any of Sim's teleport locations and you have more time to react than you would if you were landing from a jumping attack.
Also, whenever you attack Sim on his wakeup, whether for a knockdown or a tick, always be sure that you do it as a real meaty. Sim doesn't have a reversal super, so he has no good reversal against meaty attacks other than teleport, but if you do your attack even a frame after he wakes up he can start up his fully invincible super to do 50% if you're on the ground or 30% if it juggles you in the air. This is something you have to worry about when trying to jump at Sim in any non-meaty situation, although because of its motion and startup it's not useful for the Sim player unless he's specifically looking to use it.
Match-up videos
- Pony vs Hakase
- Gunze vs KKY
Vs. E.Honda:
- 1.5 - 8.5
Advantage/Disadvantage
This is a match that is mostly lost. I agree with Gunze on the 1.5-8.5. It's just too easy for E.Honda to keep you away, he out-prioritizes you badly (Jab Headbutts anti-airs everything, HHS keeps you away, huge range sweep). If you win 20% of the rounds against a good E.Honda, consider it even. In order to win this match, you will need to use every tool at your disposal, while making as few mistakes as possible. Easier said than done, though. Because of that, I will try to cover every detail that I know about this match.
Zangief's Game Plan
To get in. Zangief will eventually get in via some rare openings and sometimes do one SPD, rarely two, maybe win a round, but that's it. The chances of winning 2 rounds out of 3 against a good E.Honda is like... huh, throwing 3 dices and getting the same number in all of them, its possible and it will happen eventually, but it's uncommon (the luck reference here is not accidental).
E.Honda's Game Plan
To keep you out. He can deal with you when you're close, but staying away is where he's most confortable. That is why this match is hard. When you face Dhalsim, for example, you suffer from his outstanding keep away potential, but when you get close you can apply damage safely. However, against E.Honda it is not like that. When you get close it is the moment of your life, but for E.Honda, it was Tuesday, haha.
Round Start
Usually E.Honda players start every round with Jab HHS to get a guaranteed health lead at the early start, in this case you can:
- Start the round blocking as you would normally do, but standing instead of crouching. This will avoid Jab HHS chip damage. Also, at that distance you're safe from his huge range sweep. Of course, Strong HHS will not whiff since it moves Honda forward. If you're SURE that he will start with Jab HHS, you can start with kick Lariat, spinning backwards, to get some ground (as Zangief you should never walk back, I know, but at that distance with E.Honda charged you're at disadvantage, not much you can do here), also, if you were wrong and he started the round with a Headbutt, you can maybe get a knockdown, which would be a great round start for Zangief;
- Start the round with a standing punch to get a trade. Jab HHS has a 5-frame start-up and does around 14% damage, your standing Strong has 5 frames of start-up and does a little more damage than a single Jab HHS hit. If you think he's going to use Strong HHS, you will be out-damaged by a little bit, but Strong HHS has 11 frames of start-up so if he starts to do it all the time you can risk doing a Standing Fierce which will out-damage his Fierce HHS as well (if he is smart he will not use Fierce HHS, because of its start-up);
For every other possible start by the E.Honda player, the right thing to do is block and react accordingly.
Main Strategy
This match is annoying because it's hard as hell to get in, you will spend most of the match eating chip damage from HHS, and from the few openings you find, you'll hardly get to throw him, you may even be counter-thrown if you don't tick from the right range. Also, even if you know how to tick E.Honda, if he reverses your safe tick/jump he will be in a safe distance from his blocked Headbutt. To make things worse, even if you know exactly when he will do his Reversal Headbutt, there isn't much you can do. T.Hawk could do his Tomahawk Buster for a Knockdown, but you can't do that. Well technically you can knockdown him, you just have to hit him during the first 7 frames of Lariat. But this is extremelly hard to do, and if you miss it by just one frame, Zangief will be beaten cleanly. And it's not like this is controllable at all by you since each Headbutt strenght have its flying speed. This right here is one of the two factors of why this matchup is totally broken: Not having a viable knockdown answer for Headbutts that you know that are coming. The other one is having a very difficult time getting in due to the almost impenetrable HHS wall.
This matchup is simply AWFUL. Thanks CAPCOM. To defeat a good E.Honda player you will need to outsmart him, you will need to rely a lot on right guesses, you will have to take calculated risks, you will have to be unpredictable, you will have to commit less mistakes as possible and of course you will have to know all the counters. You need to use every little trick at your disposal to win this match. Also, the best tip I can give to you is: play the player, not the matchup. Of course that can be said on any matchup, but on this one it is key: if the E.Honda player plays perfectly, you will have no chance. Notice as soon as possible what your opponent have trouble dealing with, and abuse that as much as possible.
If you managed to start the match without being at health disadvantage, there is a little risky thing you can do. You can start to spam kick Lariats, one after the another, from mid to full screen away, this will make most E.Honda's try to time a Fierce Headbutt. You do kick Lariat instead of punch because you want to hit him within the first 7 frames where Lariat beats Headbutt cleanly, since kick Lariat has less duration you will be able to be at these 7 frames sooner. Kick Lariat can lose to Headbutt but it can turn into a knockdown where you can apply pressure. The odds are of you being hit but you can hit him cleanly or trade as well, 2/3 of the time you will be hit though. Remember, this is an almost lost match, there is no safe/guaranteed way to win this match, so there is no harm in trying. Actually, you have to do risky things to win. If a trade happens and the random damage isn't on his side, he won't have life lead so you can continue with the same behavior. If you hit him cleanly then it's safe jumping time. At that distance he can do a Strong Headbutt to trick you, but if it doesn't hit you in this case you can react with a sweep or even with a SPD when he lands (Strong Headbutt does not travel full screen). Good E.Hondas know that this doesn't work, though. Also, less skilled E.Hondas will walk forward, fools! In this case they're making it easy for you, time to walk forward as well BUT watch out for his huge range sweep, if you manage to walk till its range, jump tick him (since he doesn't have his Headbutt charged, you should never jump at E.Honda while he is charged). Note that, even if he's not charged for a Headbutt it may be impossible to jump tick him, because his Standing Jab is an excellent anti air. If you're not positioned close enough so your jumping attack can hit E.Honda around his head, his Jab will beat every move you use. You still have an option though: your SPD outranges his Standing Jab by 9 pixels, so you can jump in with Roundhouse, timing it early for it to whiff and then do a SPD upon landing. This is hard to space, though.
If you have great reflexes, you can just beat Headbutts by doing Lariats on reaction. Always do the Lariat from a standing position because when crouching, Zangief's Hurtboxes are more projected forward, this means the Headbutt may hit you sooner, making it harder to counter it on the last moment possible which is what you want to do because you need it to hit on the on Lariat's first 7 frames which are the ones that can beat Headbutts cleanly. Also, always hold forward (the direction) before the first rotation ends: this will increase your chances of approaching Honda's Headbutt while you're still on the first 7 frames. As for the timings, if you're in mid range, do it instantly as you notice. If you're from full screen away, unless you have very slow reflexes you will need to wait a split of a second before doing the Lariat (remember, you want it to hit within the first 7 frames). This paragraph is directed at offline matches, on online matches it's not really viable to react to mid range Headbutts, even if the ping is good...
In my opinion, the right way to play this match is going for the big damage stuff that is risky (because there is no way to apply big damage to him in a safe way, unless he is dizzy), but till you see that opportunity you will need to play it safe, advance slowly (walk a bit -> crouch block, beware the surprise Headbutts!), looking for whatever he does, and react accordingly. Always go for the knockdown when possible. Getting a knockdown against him is always a glorious moment, since that rarelly happens, haha.
Good E.Hondas go for HHS frequently from mid range to push you into the corner and to make you take chip damage. When you know a HHS is coming, you can:
- Try to knock him down with Crouching Roundhouse. During the first and second active animation frames of HHS, both attacks will whiff. The third HHS animation frame can be beaten by sweep cleanly. But it's not easy to do this because the right next animation frame beats your sweep cleanly. This is the best option most of the time but try to don't get predictable with it or Honda will just counter it with a Headbutt;
- Jump with Fierce and then combo into Crouching Roundhouse. Risky;
- Jump with Fierce and do a SPD when you land. Generally better than Crouching Roundhouse;
- Try to beat it cleanly with Crouching Jab, this can trade sometimes and you end up receiving big damage, not good;
- Trade with Crouching Fierce, unless you're about to die this is a good option, because you will for sure win in damage and it does huge stun to E.Honda; getting a dizzy in this match is always nice;
- If you're knocked down you can try to Reversal SPD on wakeup, but good E.Honda's will space it in a way that this is not possible. Remember to make the SPD bounce to the corner;
- As for when you're knocked down and they go for HHS on your wakeup, here's a little trick: if you take the first hit you'll have time to do a reversal SPD right after it! This is possible because HHS's does more block stun than hit stun. I find this a little difficult to perform consitently though, and it also won't work if Honda spaces his HHS perfectly;
- After a knockdown, some less skilled Honda players may also go for jump in at Zangief from far away with Roundhouse (beats Reversal Lariat and if blocked gives huge block stun) and then do HHS to further push Zangief to the corner while doing massive chip damage. The counter for this is simple: just SAC SPD his jumping move;
Expert E.Honda players will stay whiffing standing punches in a way that you will not be able to tell when a HHS is coming, so its very hard to be sure. You can try a walk in sweep, but it's not easy.
Crossups at E.Honda must be as soon as possible otherwise Jab Headbutt beat them. If you manage to cross him up and you're far from the corner, do a sweep, if it knocks him down, cross-up again, if it doesn't, use it as a tick into SPD, it will for sure be out of his range. Actually any heavy attack will leave you out of his tick range, but to be within yours you also need to perform the move close enough (point blank). Medium attacks are good to tick E.Honda as well but if done at point-blank they will still be at his Oicho range! A string of three Crouching Jabs will leave you safe from his range as well.
If you knocked him down and want to tick him, there are some ways to do it:
- Standing Short, but from far away, because if you do it too close you'll be inside his throw range. Do it as a safe meaty so you will be safe if he reverses on wake up. If he proves to be able to reverse after blocking it, remember the basic but powerful mix-up that you probably already know: after the Standing Short, either a linked sweep or a SPD, this gives E.Honda nigthmares;
- Meaty Aerial Short or Forward, time it in a way that you can do SPD exactly when you land, mixing is important to disturb his reversal timing;
- Aerial Short with safe jump timing linked into Crouching Forward or a string of Crouching Jabs;
- Early Jump Forward Knee Drop into Suplex (or FAB), you are supposed to be above his head during his Headbutt invincible frames, risky but can work, and if it works, will give you a lot of ground (if you are at the mid of the screen, it will leave E.Honda cornered);
Basically, unless you're going for the risky suplex I mentioned or for the super (go for it if possible!) you should always tick him out of his range, this is vital.
Strangely, E.Honda is the only character (not counting mirror matches) in the game that after one SPD in mid-screen you can walk and be in range to tick again. So just Green hand as always and try one of the first two ways of ticking I listed above.
When you SPD E.Honda in the corner, he gets knocked down in a strange way which allows you to cross him up, and doing that is a good idea. This is like the only situation where Zangief has the clear advantage, because the quantity of mixups you can do is insane. When Zangief lands from the SPD, if you jump on the first possible moment, that jump will have safe jump timing! So at this point you can crossup Honda and proceed with various forms of ticking into SPD (being able to control the SPD to the corner is EXTREMELY important) or even better you can crossup again (so you're cornered again). Or, instead of going for crossups on the first place, you can do a Neutral Jump Short and set a tick into SPD, since that will also be a safe jump, it is pretty safe. If you opted for the neutral jump or for the double crossup, you will be back at your corner, so ticking into another SPD will allow you to repeat this mixup (Honda can escape the crossup mixup with a jump to be hit out of the mixup or sac-throw the second crossup, this is a mixup so you can't always go for the second crossup). So tick into SPD from a string of Crouching Jabs or from a Crouching Rh. Favor ticking with the sweep though, because with 2 jabs you'll be within oicho range, and with 3 jabs he will have enough charge for a Headbutt. If you didn't crossed up again you can tick with one of these methods or try to combo Crouching Forward into Lariat and maybe get a dizzy, or better yet you can go to Crouching Short into Super. Super is totally viable after one of these crossups. If you SPD him or knock him down from the other side the best option would be a safe jump. I don't recommend going for a combo because Zangief does not have any decent hit confirm combo so I opt to do that mixup instead. You can also do the crossunder after Bite trick, but you need to grab him very close to the corner so its not much useful.
If you block his Buttslam attack, its not safe to do a Reversal SPD, E.Honda will recover from it before you get out of block stun and does another Buttslam and knocks you down. I recommend you to wait and see what he does next, if he does another Buttslam you can knock him with a late crouch Lariat and go for the cross-up, if he walks forward he will probably grab you so just SPD him.
As for Safe Jumping, it's not as efficient as it is against the majority of the cast, because if E.Honda successfully reverses with a Headbutt he will be safe, you will not be able to grab him with a SPD. But it's still the best option you got because E.Honda will be at a tough situation and if he successfully reverses with a Heabutt you will only suffer the chip damage but if he blocks it then you'll be able to set a tick into SPD. I like to safe jump with Short and then link into Crouching Forward or Crouching Jab into Crouching Short or Crouching Jab x2 and then go for the SPD. All these options will leave you out of Oicho range.
Also, make sure to always abuse the additional frames on SPD when ticking E.Honda. This is because he is throwable after the Headbutt invincibility, so, even if he does it as a reversal you may still grab him out of it! This is may be hard to do when ticking with Crouching Jabs, this is why I tend to end my block strings with Crouching Short or Crouching Forward. If this gets predictable then you'll have to mix it with Crouching Jabs as well.
If E.Honda uses his Super, just like most characters in the game you can actually block the first hit and hit him before the second hit comes out by doing a reversal Lariat (kick Lariat is better because of faster recovery).
You need to use every tool you have at your disposal to win this match, you really need to "draw water from stone", so I will do an additional brief analysis on how to use and abuse some other moves Zangief has that got some use in the first place:
- Crouching Jab is decent to beat HHS but only if you're very far, its also the safe way to beat Headbutts, but it lets you go nowhere because the damage is mediocre and gives you no knockdown;
- Standing Forward actually out-ranges his huge command sweep by 2 pixels, so if he is somewhat close to you and start to do from a range where he thinks it's safe you can hit him, or at least trade, but if you do it far enough both attacks will whiff and if the E.Honda player is not familiar with it then you can surprise him with a jump in or whatever. This move is also one of Zangief better options against E.Honda's whiffed low punches... It can trade but it has great chances of winning because all of E.Honda's crouching punches have early/late projected hitboxes. Note that Crouching Roundhouse complettely whiffs against his Crouching Jab but may trade with his Crouching Strong. Against Headbutts, Standing Forward will probably trade, but has a minimal chance of beating them. It has just enough priority to beat them, so you can harass his lows pokes and also trade/beat with a Headbutt! Use this with caution;
- Standing Roundhouse beats Headbutts every time if timed right. It has fast start-up and a decent recovery, and good damage. Also, its your general anti air if he is close to you;
- Crouching Roundhouse is obviously very important, if you manage to knockdown him you can do the basic Standing Short to either sweep or SPD pressure. If the E.Honda player mashes to HHS while crouching you can use it to trade/beat his low punches, you will be on your feet so you can advance;
- Neutral Jumping Fierce and Rh, when done from far away are decent to deceive E.Honda into doing Headbutts. Rh must be done very early and Fierce early too but not as much as Rh. Not too useful but can be used once in a while. If you're allowed to land and you see that he's approaching you with a Headbutt then you can try to time a Lariat for a precious knockdown;
- The hop actually has a use in this match! If he is getting too spammy with his huge range sweep, you may hop over it and do a SPD exactly after it, since his sweep is kinda slow. Note that, if you don't time it soon enough he will recover first and then he will be able to hit you with a Headbutt, for example. You can bait this with a Kick Lariat for the knockdown;
- A well timed Green Hand can beat Headbutts, but its not that useful since you need to predict them. It always looks so amazing when this works though. It can also beat his HHS, but that also requires major guessing skills... but not really worthy, since you don't knockdown him doing that;
Conclusion
I can't stress this enough... to win against good E.Hondas you need to make your choices wisely, never make mistakes, punish everything, etc. This is Zangief's hardest match, for sure. I'm positive that I covered the most important points to this match, this is enough info to give you some wins against the decent E.Honda's you may face. If you face a good E.Honda, good luck...
TL;DR: You lose.
Match-up videos
- Pony vs Kusumondo
- Gunze vs Kusumondo
- Gunze vs Shogatsu
--Born2SPD, props to djfrijoles for the corner mixup info.
Vs. O. E. Honda:
Vs. Fei Long:
- 3 - 7
I am going to tell your right now, Fei gives Gief HELL. Especially NEW Fei. Your only hope is to knock him down and play wake up mind games and go for crossups whenever possible. Lariats are almost useless at midrange because Fei's chicken wing kick can counter it clean most of the time and sometimes combo into rekka punches off of it.
So you're going to have to play this one extra smart and choose your targets perfectly. Fei can't rush at you with rekka punches like he does against other fighters because your lariat can counter it clean. Once fei is on the floor he's in your world for just a few seconds but you have to fuck with their heads by mixing up your tick throws, waiting for Fei to counter with whiffed flame kicks and punish him when he misses. But thats the thing, if you face a Fei with good reversal skills it's going to make it harder for you to land a tick SPD.
If you must jump at Fei do so by using Giefs knee short or his body splash because this makes his jumps smaller and gives fei much less time to counter with a flame kick.
--Jumpsuit
Match-up videos
- Gunze vs Koemon
- Cello Tape vs Souzou
Vs. Guile:
- 2 - 8
Match-up videos
- Gunze vs Muteki
Vs. O. Guile:
- 2 - 8
Vs. O. Sagat:
- 2.5 - 7.5
Match-up videos
- TMF vs John Choi

