M. Bison
| ||||||||||||||||||||||||||||||||||||||||||||||||||||||||||||||||||||||||||||||
Summary
Bio
TBW
Why Pick M. Bison?
(As Street Fighter V is new, this section will be filled out after we learn more about how this character plays most effectively.)
Players To Watch
{{{5}}}
Move List
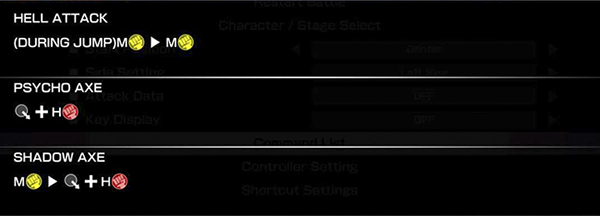
Unique Attacks
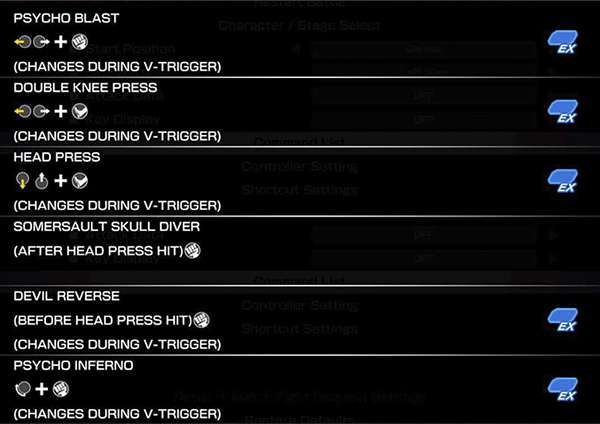
Special Moves
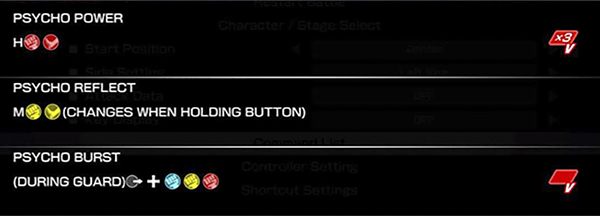
V-System (V-Trigger / V-Skill / V-Reversal)
Critical Art
MBison Discussions
Discussions regarding MBison
Bison-discussion MBison Shoryuken Forum
MBison Discord Link
Video Guides
Official Capcom Character Breakdown
Sajam's Character Breakdown
UltraChenTV's Character Breakdown
Frame Data
- Champion Edition data courtesy of @D4RK_ONION, @HatsonFGC, @Arlieth, @Frostdiener, BananaCyclone and the Frame Assist Tool team. - Huge thanks for their efforts! - See https://fullmeter.com/fatonline/#/home for more information
| Move Name | Command | Startup | Active | Rcvry | Adv Guard |
Adv Hit |
Adv Counter |
Damage | Stun | Hit Level |
Cancel Ability |
KD Adv Normal |
KD Adv Rise |
KD Adv Roll |
Chip Damage |
Counter Damage |
Counter Stun |
|---|---|---|---|---|---|---|---|---|---|---|---|---|---|---|---|---|---|
| stand LP | 4 | 30 | 70 | 3 | 6 | 4 | 3 | {{{21}}} | {{{22}}} | {{{23}}} | {{{24}}} | {{{25}}} | {{{26}}} | ||||
| stand MP | 7 | 60 | 100 | 3 | 13 | 6 | 2 | {{{21}}} | {{{22}}} | {{{23}}} | {{{24}}} | {{{25}}} | {{{26}}} | ||||
| stand HP | 11 | 80 | 150 | 3 | 21 | -1 | -6 | {{{21}}} | {{{22}}} | {{{23}}} | {{{24}}} | {{{25}}} | {{{26}}} | ||||
| stand LK | 4 | 30 | 70 | 2 | 8 | 4 | 2 | {{{21}}} | {{{22}}} | {{{23}}} | {{{24}}} | {{{25}}} | {{{26}}} | ||||
| stand MK | 7 | 60 | 100 | 3 | 13 | 2 | -2 | {{{21}}} | {{{22}}} | {{{23}}} | {{{24}}} | {{{25}}} | {{{26}}} | ||||
| stand HK | 9 | 80 | 150 | 3 | 13 | 6 | 3 | {{{21}}} | {{{22}}} | {{{23}}} | {{{24}}} | {{{25}}} | {{{26}}} | ||||
| crouch LP | 4 | 30 | 70 | 2 | 6 | 4 | 3 | {{{21}}} | {{{22}}} | {{{23}}} | {{{24}}} | {{{25}}} | {{{26}}} | ||||
| crouch MP | 6 | 60 | 100 | 2 | 12 | 3 | 0 | {{{21}}} | {{{22}}} | {{{23}}} | {{{24}}} | {{{25}}} | {{{26}}} | ||||
| crouch HP | 10 | 100[70] | 150 | 5 | 23 | -5 | -11 | {{{21}}} | {{{22}}} | {{{23}}} | {{{24}}} | {{{25}}} | {{{26}}} | ||||
| crouch LK | 4 | 20 | 70 | 2 | 7 | 3 | 2 | {{{21}}} | {{{22}}} | {{{23}}} | {{{24}}} | {{{25}}} | {{{26}}} | ||||
| crouch MK | 7 | 50 | 100 | 2 | 13 | -1 | -2 | {{{21}}} | {{{22}}} | {{{23}}} | {{{24}}} | {{{25}}} | {{{26}}} | ||||
| crouch HK | 15 | 90 | 150 | 69 | 10 | 18 | KD | -12 | {{{21}}} | {{{22}}} | {{{23}}} | {{{24}}} | {{{25}}} | {{{26}}} | |||
| jump LP | 4 | 40 | 70 | 6 | - | - | - | {{{21}}} | {{{22}}} | {{{23}}} | {{{24}}} | {{{25}}} | {{{26}}} | ||||
| jump MP | 7 | 50 | 100 | 3 | - | - | - | {{{21}}} | {{{22}}} | {{{23}}} | {{{24}}} | {{{25}}} | {{{26}}} | ||||
| jump HP | 8 | 90 | 150 | 6 | - | - | - | {{{21}}} | {{{22}}} | {{{23}}} | {{{24}}} | {{{25}}} | {{{26}}} | ||||
| jump LK | 3 | 40 | 70 | 6 | - | - | - | {{{21}}} | {{{22}}} | {{{23}}} | {{{24}}} | {{{25}}} | {{{26}}} | ||||
| jump MK | 6 | 60 | 100 | 8 | - | - | - | {{{21}}} | {{{22}}} | {{{23}}} | {{{24}}} | {{{25}}} | {{{26}}} | ||||
| jump HK | 8 | 90 | 150 | 6 | - | - | - | {{{21}}} | {{{22}}} | {{{23}}} | {{{24}}} | {{{25}}} | {{{26}}} | ||||
| hell attack | 5 | 50*63 | 100*45 | 4 | - | - | - | {{{21}}} | {{{22}}} | {{{23}}} | {{{24}}} | {{{25}}} | {{{26}}} | ||||
| psycho axe | 16 | 80 | 100 | 3 | 20 | 6 | 1 | {{{21}}} | {{{22}}} | {{{23}}} | {{{24}}} | {{{25}}} | {{{26}}} | ||||
| shadow axe | 16 | 60 | 60 | 3 | 20 | 6 | -5 | {{{21}}} | {{{22}}} | {{{23}}} | {{{24}}} | {{{25}}} | {{{26}}} | ||||
| psycho impact | 5 | 130 | 170 | 87 | 2 | 18 | KD | - | {{{21}}} | {{{22}}} | {{{23}}} | {{{24}}} | {{{25}}} | {{{26}}} | |||
| psycho fall | 5 | 110*40 | 150*50 | 64 | 2 | 18 | KD | - | {{{21}}} | {{{22}}} | {{{23}}} | {{{24}}} | {{{25}}} | {{{26}}} | |||
| psycho power | 56 | - | {{{21}}} | {{{22}}} | {{{23}}} | {{{24}}} | {{{25}}} | {{{26}}} | |||||||||
| psycho reflect | 6 | 42 | 7 | 30 | - | {{{21}}} | {{{22}}} | {{{23}}} | {{{24}}} | {{{25}}} | {{{26}}} | ||||||
| psycho burst | 15 | 60 | 0 | 2 | 20 | KD | -2 | {{{21}}} | {{{22}}} | {{{23}}} | {{{24}}} | {{{25}}} | {{{26}}} | ||||
| psycho blast LP | 10 | 70 | 100 | 84 | 10 | 21 | KD | -4 | {{{21}}} | {{{22}}} | {{{23}}} | {{{24}}} | {{{25}}} | {{{26}}} | |||
| psycho blast MP | 15 | 70 | 100 | 90 | 10 | 18 | KD | -1 | {{{21}}} | {{{22}}} | {{{23}}} | {{{24}}} | {{{25}}} | {{{26}}} | |||
| psycho blast HP | 19 | 70 | 100 | 90 | 10 | 14 | KD | 2 | {{{21}}} | {{{22}}} | {{{23}}} | {{{24}}} | {{{25}}} | {{{26}}} | |||
| psycho blast EX | 15 | 100 | 150 | 110 | - | 27 | KD | 2 | {{{21}}} | {{{22}}} | {{{23}}} | {{{24}}} | {{{25}}} | {{{26}}} | |||
| double knee press LK | 13 | 30*40 | 50*50 | 2(1)3 | 19 | 3 | -4 | {{{21}}} | {{{22}}} | {{{23}}} | {{{24}}} | {{{25}}} | {{{26}}} | ||||
| double knee press MK | 15 | 40*40 | 50*50 | 2(1)3 | 20 | 2 | -3 | {{{21}}} | {{{22}}} | {{{23}}} | {{{24}}} | {{{25}}} | {{{26}}} | ||||
| double knee press HK | 19 | 50*40 | 50*50 | 2(2)3 | 21 | 1 | -2 | {{{21}}} | {{{22}}} | {{{23}}} | {{{24}}} | {{{25}}} | {{{26}}} | ||||
| double knee press EX | 12 | 70*25*25*30 | 0*0*0*200 | 19 | 6 | 17 | KD | 1 | {{{21}}} | {{{22}}} | {{{23}}} | {{{24}}} | {{{25}}} | {{{26}}} | |||
| head press LK | 45 | 100 | 200 | - | - | - | - | {{{21}}} | {{{22}}} | {{{23}}} | {{{24}}} | {{{25}}} | {{{26}}} | ||||
| head press MK | 45 | 100 | 200 | - | - | - | - | {{{21}}} | {{{22}}} | {{{23}}} | {{{24}}} | {{{25}}} | {{{26}}} | ||||
| head press HK | 45 | 100 | 200 | - | - | - | - | {{{21}}} | {{{22}}} | {{{23}}} | {{{24}}} | {{{25}}} | {{{26}}} | ||||
| head press EX | 35 | 60*100 | 0*200 | 16 | - | - | KD | - | {{{21}}} | {{{22}}} | {{{23}}} | {{{24}}} | {{{25}}} | {{{26}}} | |||
| somersault skull diver | 5 | 80 | 100 | 10 | - | - | - | {{{21}}} | {{{22}}} | {{{23}}} | {{{24}}} | {{{25}}} | {{{26}}} | ||||
| devil reverse | 15 | 70 | 100 | 22 | - | KD | - | {{{21}}} | {{{22}}} | {{{23}}} | {{{24}}} | {{{25}}} | {{{26}}} | ||||
| psycho inferno LP | 14 | 30*30*30 | 20*20*60 | 96 | 12 | 31 | KD | -12 | {{{21}}} | {{{22}}} | {{{23}}} | {{{24}}} | {{{25}}} | {{{26}}} | |||
| psycho inferno MP | 16 | 25x4 | 20x3*40 | 99 | 14 | 29 | KD | -11 | {{{21}}} | {{{22}}} | {{{23}}} | {{{24}}} | {{{25}}} | {{{26}}} | |||
| psycho inferno HP | 18 | 20x4*30 | 20x5 | 101 | 16 | 30 | KD | -10 | {{{21}}} | {{{22}}} | {{{23}}} | {{{24}}} | {{{25}}} | {{{26}}} | |||
| psycho inferno EX | 15 | 20x4*60 | 20x4*70 | 110 | 18 | 22 | KD | -1 | {{{21}}} | {{{22}}} | {{{23}}} | {{{24}}} | {{{25}}} | {{{26}}} | |||
| ultimate psycho crusher | 6 | 340 | 0 | 27 | 30 | 48 | KD | -40 | {{{21}}} | {{{22}}} | {{{23}}} | {{{24}}} | {{{25}}} | {{{26}}} | |||
| Move Name | Command | Startup | Active | Rcvry | Adv Guard |
Adv Hit |
Adv Counter |
Damage | Stun | Hit Level |
Cancel Ability |
KD Adv Normal |
KD Adv Rise |
KD Adv Roll |
Chip Damage |
Counter Damage |
Counter Stun |


