Introduction
Competitive Overview
Chun is ranked high mid-tier. There are certain characters that she dominates, certain characters she has even matches with, and certain characters who dominate her. Some of her "even" matches are not even in the traditional sense. For example, against Fei she does really well as long as she's not in the corner. However, if Chun gets put in the corner and Fei starts doing st.Fierce xx Chicken Wing (his 3-hit spin kick), it is a nightmare for Chun, and she has no easy way out.
The same is true against Claw. Chun does well if she can keep the game on the ground, but if Claw can get his wall dive shenanigans going, Chun has no escape, and she must guess correctly which way to block, and that can be very difficult.
--NKI
Strengths & Weaknesses
Strengths
- st.Strong is an extremely good poke.
- j.Forward is a great jumping move.
- Can store her super.
- Lightning Legs will cleanly beat nearly every ground move in the game.
- Good throw range.
- Throw does a lot more damage than it probably should.
- Good dizzy combos.
- Fast walking speed.
- Very agile (can jump off walls, do attacks after head stomp).
- Is good at both turtling and rushing down.
- Has normal moves that can cause full knockdowns.
Weaknesses
- Has no solid anti-air.
- Upkicks will sometimes completely whiff, even at point blank range.
- Has no solid reversal to escape things like Claw's wall dives or Fei's Chicken Wing trap.
- Has a big jump arc which is easy to see and punish.
- Has a hard time with fireball traps.
--NKI 20:04, 8 May 2006 (CDT)
New & Old Versions Comparison
To select O.Chun Li, choose Chun Li and then press ↓ ↓ ↓ ↑ Jab/Fierce, pressing Short simultaneously with the punch button for the alternate color.
Here is the list of differences:
- Obvious stuff: O.Chun Li can not tech throws, does not has a new Upkicks special move and does not has a Super;
- O.Chun Li has some differences in some of her normals:
- Close Standing Jab has a 1 frame slower startup and 1 frame slower recovery;
- Crouching Jab has a 1 frame slower startup;
- Far Standing Strong hits high and so whiffs on crouching characters;
- Far Standing Fierce has special cancel properties;
- Close Standing Short has a 3 frames slower startup and can't be special canceled;
- Far Standing Short hits high and so whiffs on crouching characters;
- Crouching Short has a 2 frames slower startup and can't be special canceled;
- Close Standing Forward has a 3 frames slower startup and can't be special canceled;
- Diagonal Jumping Short have much better priority;
- Neutral Jumping Forward has much better priority plus 6 more active frames;
- Diagonal Jumping Forward have much better priority but can not be used as a cross up attack;
- Neutral Jumping Roundhouse have much better priority;
- Diagonal Jumping Roundhouse hits lower;
- O.Chun Li's flip kick and neck breaker command normals have proximity requirements;
- O.Chun Li's flip kick combo for two hits, the start-up is faster by 2 frames and can be special cancelled;
- O.Chun Li can kara-cancel Kikoukens from Roundhouse easily (for the shorter recovery), N.Chun Li has trouble with this due to the different command for the Spinning Bird Kick;
- O.Chun's Spinning Bird Kick does not become active and knocks down before the spinning part, and demands a "back/away" charge instead of a "down" one.
Basically, O.Chun Li has better aerial tools but worse ground ones, mainly for standing strong whiffing on crouched characters and the lack of super. Choose whichever version you think it's best suited for your style.
Color Options
| Jab | Strong | Fierce | Start | Old |
 |
 |
 |
 |

|
 |
 |
 |
 |

|
| Short | Forward | Roundhouse | Hold | Old Alternative |
--Born2SPD
Moves Analysis
Normal Moves
Ground Normals
- Close Standing Jab:
| Damage | 16 |  |
 |
 |
 |

|
| Stun | 0-5 | |||||
| Stun Timer | 40 | |||||
| Chain Cancel | Yes | |||||
| Special Cancel | Yes | |||||
| Super Cancel | Yes | |||||
| Frame Advantage | ? | |||||
| Frame Count | 2 | 1 | 4 | 3 | 1 | |
| Simplified | 3 | 4 | 4 | |||
- Far Standing Jab:
| Damage | 4 |  |
 |
 |
 |

|
| Stun | 0-5 | |||||
| Stun Timer | 40 | |||||
| Chain Cancel | Yes | |||||
| Special Cancel | Yes | |||||
| Super Cancel | Yes | |||||
| Frame Advantage | ? | |||||
| Frame Count | 2 | 2 | 4 | 3 | 1 | |
| Simplified | 2 | 2 | 8 | |||
- Crouching Jab:
| Damage | 4 |  |
 |
 |
 |

|
| Stun | 0-5 | |||||
| Stun Timer | 40 | |||||
| Chain Cancel | No | |||||
| Special Cancel | Yes | |||||
| Super Cancel | Yes | |||||
| Frame Advantage | ? | |||||
| Frame Count | 2 | 1 | 4 | 4 | 1 | |
| Simplified | 3 | 4 | 5 | |||
- Close Standing Strong:
| Damage | 19 |  |
 |
 |
 |

|
| Stun | 5-11 | |||||
| Stun Timer | 60 | |||||
| Chain Cancel | No | |||||
| Special Cancel | Yes | |||||
| Super Cancel | Yes | |||||
| Frame Advantage | ? | |||||
| Frame Count | 2 | 2 | 4 | 3 | 1 | |
| Simplified | 4 | 4 | 4 | |||
- Far Standing Strong:
| Damage | 19 |  |
 |
 |
 |

|
| Stun | 5-11 | |||||
| Stun Timer | 60 | |||||
| Chain Cancel | No | |||||
| Special Cancel | Yes | |||||
| Super Cancel | Yes | |||||
| Frame Advantage | ? | |||||
| Frame Count | 2 | 2 | 4 | 3 | 1 | |
| Simplified | 4 | 4 | 4 | |||
- Crouching Strong:
| Damage | 16 |  |
 |
 |
 |

|
| Stun | 5-11 | |||||
| Stun Timer | 60 | |||||
| Chain Cancel | No | |||||
| Special Cancel | Yes | |||||
| Super Cancel | Yes | |||||
| Frame Advantage | ? | |||||
| Frame Count | 2 | 2 | 4 | 4 | 1 | |
| Simplified | 4 | 4 | 5 | |||
- Close Standing Fierce:
| Damage | 21 |  |
 |

|
| Stun | 10-16 | |||
| Stun Timer | 80 | |||
| Chain Cancel | No | |||
| Special Cancel | Yes | |||
| Super Cancel | Yes | |||
| Frame Advantage | ? | |||
| Frame Count | 3 | 20 | 11 | |
- Far Standing Fierce:
| Damage | 21 |  |
 |
 |
 |
 |

|
| Stun | 10-16 | ||||||
| Stun Timer | 80 | ||||||
| Chain Cancel | No | ||||||
| Special Cancel | No | ||||||
| Super Cancel | Yes | ||||||
| Frame Advantage | ? | ||||||
| Frame Count | 2 | 3 | 6 | 10 | 7 | 1 | |
| Simplified | 5 | 6 | 18 | ||||
- Crouching Fierce:
| Damage | 19 |  |
 |
 |
 |

|
| Stun | 10-16 | |||||
| Stun Timer | 80 | |||||
| Chain Cancel | No | |||||
| Special Cancel | No | |||||
| Super Cancel | No | |||||
| Frame Advantage | ? | |||||
| Frame Count | 3 | 3 | 6 | 8 | 11 | |
| Simplified | 6 | 6 | 19 | |||
- Close Standing Short:
| Damage | 17 |  |
 |
 |
 |

|
| Stun | 0-5 | |||||
| Stun Timer | 40 | |||||
| Chain Cancel | No | |||||
| Special Cancel | Yes | |||||
| Super Cancel | Yes | |||||
| Frame Advantage | ? | |||||
| Frame Count | 2 | 1 | 5 | 4 | 1 | |
| Simplified | 3 | 5 | 5 | |||
- Far Standing Short:
| Damage | 17 |  |
 |
 |
 |

|
| Stun | 0-5 | |||||
| Stun Timer | 40 | |||||
| Chain Cancel | No | |||||
| Special Cancel | No | |||||
| Super Cancel | No | |||||
| Frame Advantage | ? | |||||
| Frame Count | 3 | 3 | 5 | 4 | 1 | |
| Simplified | 6 | 5 | 5 | |||
- Crouching Short:
| Damage | 12 |  |
 |
 |
 |

|
| Stun | 0-5 | |||||
| Stun Timer | 40 | |||||
| Chain Cancel | No | |||||
| Special Cancel | Yes | |||||
| Super Cancel | Yes | |||||
| Frame Advantage | ? | |||||
| Frame Count | 3 | 1 | 4 | 4 | 1 | |
| Simplified | 4 | 4 | 5 | |||
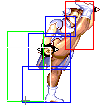
- Close Standing Forward:
| Damage | 21 |  |
 |
 |
 |
 |
 |

|
| Stun | 5-11 | |||||||
| Stun Timer | 60 | |||||||
| Chain Cancel | No | |||||||
| Special Cancel | Yes | |||||||
| Super Cancel | Yes | |||||||
| Frame Advantage | ? | |||||||
| Frame Count | 2 | 1 | 3 | 6 | 3 | 4 | 1 | |
| Simplified | 3 | 9 | 8 | |||||
- Far Standing Forward:
| Damage | 21 |  |
 |
 |
 |

|
| Stun | 5-11 | |||||
| Stun Timer | 60 | |||||
| Chain Cancel | No | |||||
| Special Cancel | No | |||||
| Super Cancel | No | |||||
| Frame Advantage | ? | |||||
| Frame Count | 3 | 3 | 5 | 4 | 4 | |
| Simplified | 6 | 5 | 8 | |||
- Crouching Forward:
| Damage | 16 |  |
 |

|
| Stun | 5-11 | |||
| Stun Timer | 60 | |||
| Chain Cancel | No | |||
| Special Cancel | Yes | |||
| Super Cancel | Yes | |||
| Frame Advantage | ? | |||
| Frame Count | 4 | 5 | 4 | |
- Close Standing Roundhouse:
| Damage | 24 |  |
 |
 |
 |
 |
 |
 |
 |

|
| Stun | 10-16 | |||||||||
| Stun Timer | 80 | |||||||||
| Chain Cancel | No | |||||||||
| Special Cancel | No | |||||||||
| Super Cancel | No | |||||||||
| Frame Advantage | ? | |||||||||
| Frame Count | 1 | 1 | 6 | 1 | 6 | 4 | 6 | 4 | 7 | |
| Simplified | 9 | 6 | 21 | |||||||
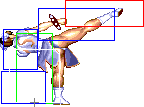
- Far Standing Roundhouse:
| Damage | 24 |  |
 |
 |
 |
 |

|
| Stun | 10-16 | ||||||
| Stun Timer | 80 | ||||||
| Chain Cancel | No | ||||||
| Special Cancel | No | ||||||
| Super Cancel | No | ||||||
| Frame Advantage | ? | ||||||
| Frame Count | 3 | 3 | 4 | 8 | 7 | 7 | |
| Simplified | 10 | 8 | 14 | ||||
- Crouching Roundhouse:
| Damage | 19 |  |
 |
 |
 |

|
| Stun | 5-11 | |||||
| Stun Timer | 130 | |||||
| Chain Cancel | No | |||||
| Special Cancel | No | |||||
| Super Cancel | No | |||||
| Frame Advantage | ? | |||||
| Frame Count | 3 | 3 | 6 | 8 | 11 | |
| Simplified | 6 | 6 | 19 | |||
Aerial Normals
- Neutral Jumping Jab:
| Damage | 16 |  |
 |
 |

|
| Stun | 1-7 | ||||
| Stun Timer | 40 | ||||
| Frame Count | 3 | 3 | 2 | ∞ | |
| Simplified | 8 | ∞ | |||
- Diagonal Jumping Jab:
| Damage | 14 |  |
 |

|
| Stun | 1-7 | |||
| Stun Timer | 40 | |||
| Frame Count | 3 | 3 | ∞ | |
| Simplified | 6 | ∞ | ||
- Neutral Jumping Strong:
| Damage | 19 |  |
 |
 |
 |
 |
 |
 |

|
| Stun | 5-11 | ||||||||
| Stun Timer | 50 | ||||||||
| Frame Count | 3 | 3 | 2 | 16 | 2 | 3 | 4 | ∞ | |
| Simplified | 8 | 16 | ∞ | ||||||
- Diagonal Jumping Strong:
| Damage | 16 |  |
 |
 |
 |
 |

|
| Stun | 5-11 | ||||||
| Stun Timer | 50 | ||||||
| Frame Count | 3 | 3 | 8 | 3 | 4 | ∞ | |
| Simplified | 6 | 8 | ∞ | ||||
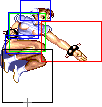
- Neutral Jumping Fierce:
| Damage | 22 |  |
 |
 |
 |
 |
 |
 |

|
| Stun | 11-17 | ||||||||
| Stun Timer | 60 | ||||||||
| Frame Count | 3 | 3 | 2 | 8 | 2 | 3 | 4 | ∞ | |
| Simplified | 8 | 8 | ∞ | ||||||
- Diagonal Jumping Fierce:
| Damage | 21 |  |
 |
 |
 |
 |

|
| Stun | 11-17 | ||||||
| Stun Timer | 50 | ||||||
| Frame Count | 3 | 3 | 8 | 3 | 4 | ∞ | |
| Simplified | 6 | 8 | ∞ | ||||
- Neutral Jumping Short:
| Damage | 16 |  |
 |

|
| Stun | 1-7 | |||
| Stun Timer | 40 | |||
| Frame Count | 3 | 3 | ∞ | |
| Simplified | 6 | ∞ | ||
- Diagonal Jumping Short:
| Damage | 17 |  |
 |

|
| Stun | 1-7 | |||
| Stun Timer | 40 | |||
| Frame Count | 3 | 3 | ∞ | |
| Simplified | 6 | ∞ | ||
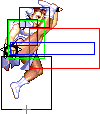
- Neutral Jumping Forward:
| Damage | 19 |  |
 |
 |
 |

|
| Stun | 5-11 | |||||
| Stun Timer | 50 | |||||
| Frame Count | 3 | 3 | 10 | 3 | ∞ | |
| Simplified | 6 | 10 | ∞ | |||
- Diagonal Jumping Forward:
| Damage | 16 |  |
 |
 |
 |

|
| Stun | 5-11 | |||||
| Stun Timer | 50 | |||||
| Frame Count | 3 | 3 | 16 | 3 | ∞ | |
| Simplified | 6 | 16 | ∞ | |||
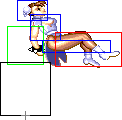
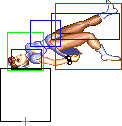
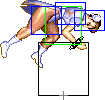
- Neutral Jumping Roundhouse:
| Damage | 22 |  |
 |
 |
 |
 |
 |
 |

|
| Stun | 10-16 | ||||||||
| Stun Timer | 80 | ||||||||
| Frame Count | 1 | 2 | 5 | 4 | 4 | 4 | 6 | ∞ | |
| Simplified | 3 | 9 | ∞ | ||||||
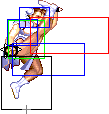
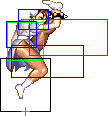
- Diagonal Jumping Roundhouse:
| Damage | 21 |  |
 |
 |
 |
 |
 |

|
| Stun | 11-17 | |||||||
| Stun Timer | 40 | |||||||
| Frame Count | 3 | 3 | 6 | 4 | 6 | 6 | ∞ | |
| Simplified | 6 | 6 | 4 | 6 | ∞ | |||
Command Normals
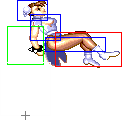
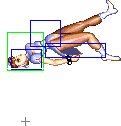
- Flip Kick: (On ground, ↘ + Forward)
| Damage | 19 |  |
 |
 |
 |
 |
 |
 |

|
| Stun | 0-5 | ||||||||
| Stun Timer | 40 | ||||||||
| Frame Count | 3 | 3 | 5 | 4 | 4 | 4 | 6 | 29 | |
| Simplified | 6 | 9 | 43 | ||||||
This move does not combo into itself anymore: the second active part knocks down, but it is unlikely that it would hit. Even though you use the Forward kick to obtain this move, it returns the same super meter as a Jab or Short. Avoid this move.
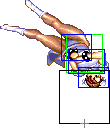
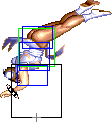
- Neck Breaker: (On ground, ↘ + Roundhouse)
| Damage | 17 |  |
 |
 |
 |
 |
 |
 |

|
| Stun | 10-16 | ||||||||
| Stun Timer | 40 | ||||||||
| Frame Count | 4 | 4 | 5 | 6 | 7 | 8 | 2 | 14 | |
| Simplified | 36 | 14 | |||||||
This move is good for shenannigans, or to simply force the enemy to block on wake-up, as it can avoid many moves in that situation. It does high stun, but the timer bonus is very short, so odds are it will hit and dizzy, or the enemy will recover from any dizzy damage by the time he gets up again.
- Head Stomp: (On air, ↙/↓ + Forward)
| Damage | 17 |  |
 |
 |
 |
 |
 |

|
| Stun | 2-8 | |||||||
| Stun Timer | 60 | |||||||
| Frame Count | 1 | 2 | 16 | 8 | 4 | 5 | ∞ | |
| Simplified | 3 | 16 | ∞ | |||||
It is possible to use this move as an instant overhead. Simply jump and immediately do a head stomp, and the enemy will have to block high to avoid getting hit.
Throws
Holding towards or back and pressing Strong or Fierce punch will produce Chun Li's throw. She can also air-throw this way. The direction on the joystick determines the direction the enemy gets thrown at.
- Shoulder Throw: (←/→ + Strong/Fierce)
| Damage | 38(+2)/32(+2) |  |
 |

|
| Stun | 5-11 | |||
| Stun Timer | 100 | |||
| Range (from axis) | 48 | |||
| Range advantage | 23 |
Although both the Strong and Fierce ground throws look identical, they're actually quite different for some weird reason. The Fierce throw deals an ordinary 22% damage, but the Strong throw does 26% damage, which is unusually high. Since the Strong throw has no other drawbacks, use it instead of the Fierce whenever possible.
- Air Shoulder Throw: (ChunLi and opponent in air, ↖/↙/←/→/↘/↗ + Strong/Fierce)
| Damage | 34(+2) | 
|
| Stun | 7-13 | |
| Stun Timer | 100 | |
| Range (from axis) | 58 | |
| Range advantage | 33 |
The air-throw versions are the same and do approximately 23.5% damage. Very good range for an air throw.
--Raisin (March 12, 2007), some info courtesy T.Akiba
Special Moves
All motions are listed under the assumption that ChunLi is facing right.
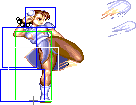
- Hyakuretsu Kyaku a.k.a. Lightning Legs: (Tap K repeatedly)
- Startup:
 |

| |
| Frame Count (Shrt) | 1 | 3 |
| Simplified (Shrt) | 4 | |
| Frame Count (Frwrd) | 3 | 4 |
| Simplified (Frwrd) | 7 | |
| Frame Count (Rh) | 4 | 6 |
| Simplified (Rh) | 10 | |
- Active:
| Damage (Shrt) | 24 |  |
 |
 |

|
| Damage (Frwrd) | 25 | ||||
| Damage (Rh) | 27 | ||||
| Stun | 5-11 | ||||
| Stun Timer | 100 | ||||
| Super Meter | 4 | ||||
| Frame Count (Shrt) | 4 | 4 | 4 | 4 | |
| Frame Count (Frwrd) | 2 | 2 | 2 | 2 | |
| Frame Count (Rh) | 1 | 1 | 1 | 1 | |
| Damage (Shrt) | 24 |  |
 |
 |

|
| Damage (Frwrd) | 25 | ||||
| Damage (Rh) | 27 | ||||
| Stun | 5-11 | ||||
| Stun Timer | 100 | ||||
| Super Meter | 4 | ||||
| Frame Count (Shrt) | 4 | 4 | 4 | 4 | |
| Frame Count (Frwrd) | 2 | 2 | 2 | 2 | |
| Frame Count (Rh) | 1 | 1 | 1 | 1 | |
NOTE: What I put there as the active part is a complete cycle but not the minimal duration (if you keep mashing, after the last animation frame it will go back to the first one, and this will be repeated while you keep the mashing). The minimal durations (if you only input the 5 Kick presses needed) are: a full cycle plus the 3 next animation frames for Short Version, 2 full cycles minus the last animation of a cycle for the Forward Version and almost 3 full cycles for the Roundhouse Version, lacking only the last animation like the Forward version.
- Recovery:
 |

| |
| Frame Count (Shrt) | 2 | 2 |
| Simplified (Shrt) | 4 | |
| Frame Count (Frwrd) | 4 | 4 |
| Simplified (Frwrd) | 8 | |
| Frame Count (Rh) | 6 | 6 |
| Simplified (Rh) | 12 | |
- Kikouken a.k.a. Fireball: (Charge ←, →, P)
- Startup:
 |
 |
 |
 |

| |
| Frame Count | 1 | 1 | 1 | 1 | 1 |
| Simplified | 5 | ||||
- Active:
- Jab Version:
| Damage | 15 |  |
 |
 |
 |
 |

|
| Stun | 6-13 | ||||||
| Stun Timer | 110 | ||||||
| Super Meter | 5 | ||||||
| Frame Count | 1 | 1 | 1 | 1 | 1 | 1... | |
| Simplified | 42 | ||||||
- Strong Version:
| Damage | 16 |  |
 |
 |
 |
 |

|
| Stun | 6-13 | ||||||
| Stun Timer | 110 | ||||||
| Super Meter | 5 | ||||||
| Frame Count | 1 | 1 | 1 | 1 | 1 | 1... | |
| Simplified | 40 | ||||||
- Fierce Version:
| Damage | 17 |  |
 |
 |
 |
 |

|
| Stun | 6-13 | ||||||
| Stun Timer | 110 | ||||||
| Super Meter | 5 | ||||||
| Frame Count | 1 | 1 | 1 | 1 | 1 | 1... | |
| Simplified | 38 | ||||||
- Total Distance Traveled:
| Jab: 222 pixels after 75 frames | Strong: 176 pixels after 45 frames | Fierce: 150 pixels after 31 frames |
 |
 |

|
You can change the recovery of any Kikouken to that of a Jab by kara-canceling a Jab or Short. Similarly to Strong Kikouken with Strong or Forward. The fastest recovery is obtained by kara-canceling a Fierce or Roundhouse.
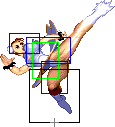
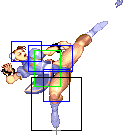
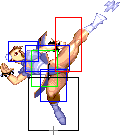
- Tenshou Kyaku a.k.a. Up Kicks: (Charge ↓, ↑, K)
- Short Version:
| Damage | 11 |  |
 |
 |
 |
 |
 |
 |
 |
 |
|
| Stun | 0-3 | ||||||||||
| Stun Timer | 20 | ||||||||||
| Super Meter | 8 | ||||||||||
| Frame Count | 6 | 4 | 1 | 1 | 2 | 4 | 2 | 2 | 2 | 2 | |
| Simplified | 6 | 4 | 4 | 4 | 8 | ||||||
| Damage | 11 | 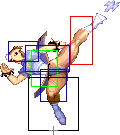 |
 |
 |
 |
 |

|
| Stun | 0-3 | ||||||
| Stun Timer | 20 | ||||||
| Super Meter | 8 | ||||||
| Frame Count | 4 | 3 | 3 | 3 | 24 | 4 | |
| Simplified | 4 | 37 | |||||
- Forward Version:
| Damage | 11 |  |
 |
 |
 |
 |
 |
 |
 |
 |

|
| Stun | 0-3 | ||||||||||
| Stun Timer | 20 | ||||||||||
| Super Meter | 8 | ||||||||||
| Frame Count | 4 | 4 | 1 | 1 | 2 | 4 | 2 | 2 | 2 | 2 | |
| Simplified | 4 | 4 | 4 | 4 | 8 | ||||||
| Damage | 11 |  |
 |
 |
 |
 |
|
| Stun | 0-3 | ||||||
| Stun Timer | 20 | ||||||
| Super Meter | 8 | ||||||
| Frame Count | 4 | 2 | 2 | 2 | 2 | 4 | |
| Simplified | 4 | 8 | 4 | ||||
| Damage | 11 |  |
 |
 |
 |

|
| Stun | 0-3 | |||||
| Stun Timer | 20 | |||||
| Super Meter | 8 | |||||
| Frame Count | 2 | 2 | 3 | 21 | 6 | |
| Simplified | 34 | |||||
- Roundhouse Version:
| Damage | 11 |  |
 |
 |
 |
 |
 |
 |
 |
 |

|
| Stun | 0-3 | ||||||||||
| Stun Timer | 20 | ||||||||||
| Super Meter | 8 | ||||||||||
| Frame Count | 2 | 2 | 2 | 2 | 4 | 2 | 2 | 2 | 2 | 4 | |
| Simplified | 2 | 2 | 4 | 4 | 8 | 4 | |||||
| Damage | 11 |  |
 |
 |
 |
 |
 |
 |
 |

|
| Stun | 0-3 | |||||||||
| Stun Timer | 20 | |||||||||
| Super Meter | 8 | |||||||||
| Frame Count | 2 | 2 | 2 | 2 | 4 | 2 | 2 | 2 | 2 | |
| Simplified | 8 | 4 | 8 | |||||||
| Damage | 11 |  |
 |
 |
 |
 |

|
| Stun | 0-3 | ||||||
| Stun Timer | 20 | ||||||
| Super Meter | 8 | ||||||
| Frame Count | 4 | 3 | 3 | 3 | 7 | 7 | |
| Simplified | 4 | 23 | |||||
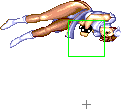
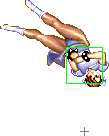
- Spinning Bird Kick: (Charge ←, → + K)
- Startup:
 |
 |
 |
 |
 |
 |

| ||
| Frame Count | 1 | 4 | 3 | 2 | 3 | 4 | 4 | 2 |
| Simplified | 23 | |||||||
- Active:
- Short Version:
| Damage | 12/11 | 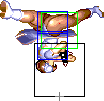 |
 |
 |
 |
 |
 |
 |
|
| Stun | 6-13 | ||||||||
| Stun Timer | 90 | ||||||||
| Super Meter | 8 | ||||||||
| Frame Count | 4 | 3 | 2 | 2 | 1 | 1 | 1 | 1 | |
| Simplified | 15 | ||||||||
| Damage | 12/11 |  |
 |
 |
 |
 |
 |
 |

|
| Stun | 6-13 | ||||||||
| Stun Timer | 90 | ||||||||
| Super Meter | 8 | ||||||||
| Frame Count | 2 | 1 | 2 | 2 | 3 | 4 | 4 | 2 | |
| Simplified | 20 | ||||||||
- Forward Version:
| Damage | 14/12 |  |
 |
 |
 |
 |
 |
 |

|
| Stun | 6-13 | ||||||||
| Stun Timer | 90 | ||||||||
| Super Meter | 8 | ||||||||
| Frame Count | 4 | 4 | 3 | 3 | 2 | 2 | 1 | 1 | |
| Simplified | 4 | 16 | |||||||
| Damage | 14/12 |  |
 |
 |
 |
 |
 |
 |

|
| Stun | 6-13 | ||||||||
| Stun Timer | 90 | ||||||||
| Super Meter | 8 | ||||||||
| Frame Count | 1 | 1 | 1 | 1 | 1 | 1 | 1 | 1 | |
| Simplified | 1 | 7 | |||||||
| Damage | 14/12 |  |
 |
 |
 |
 |
 |
 |

|
| Stun | 6-13 | ||||||||
| Stun Timer | 90 | ||||||||
| Super Meter | 8 | ||||||||
| Frame Count | 2 | 1 | 1 | 2 | 2 | 3 | 3 | 4 | |
| Simplified | 2 | 16 | |||||||
| Damage | 14/12 | 
|
| Stun | 6-13 | |
| Stun Timer | 90 | |
| Super Meter | 8 | |
| Frame Count | 2 | |
- Roundhouse Version:
| Damage | 16/14 |  |
 |
 |
 |
 |
 |
 |

|
| Stun | 6-13 | ||||||||
| Stun Timer | 90 | ||||||||
| Super Meter | 8 | ||||||||
| Frame Count | 5 | 4 | 4 | 3 | 3 | 2 | 2 | 2 | |
| Simplified | 25 | ||||||||
| Damage | 16/14 |  |
 |
 |
 |
 |
 |
 |

|
| Stun | 6-13 | ||||||||
| Stun Timer | 90 | ||||||||
| Super Meter | 8 | ||||||||
| Frame Count | 1 | 1 | 1 | 1 | 1 | 1 | 1 | 1 | |
| Simplified | 8 | ||||||||
| Damage | 16/14 |  |
 |
 |
 |
 |
 |
 |

|
| Stun | 6-13 | ||||||||
| Stun Timer | 90 | ||||||||
| Super Meter | 8 | ||||||||
| Frame Count | 1 | 1 | 1 | 1 | 1 | 1 | 1 | 1 | |
| Simplified | 8 | ||||||||
| Damage | 16/14 |  |
 |
 |
 |
 |
 |
 |

|
| Stun | 6-13 | ||||||||
| Stun Timer | 90 | ||||||||
| Super Meter | 8 | ||||||||
| Frame Count | 1 | 1 | 1 | 1 | 1 | 2 | 1 | 1 | |
| Simplified | 9 | ||||||||
| Damage | 16/14 |  |
 |
 |
 |
 |

|
| Stun | 6-13 | ||||||
| Stun Timer | 90 | ||||||
| Super Meter | 8 | ||||||
| Frame Count | 2 | 2 | 3 | 3 | 3 | 3 | |
| Simplified | 16 | ||||||
- Recovery:
- Short Version:
 |
 |
 |
 |
 |
 |

| |
| Frame Count | 2 | 3 | 2 | 2 | 3 | 3 | 6 |
| Simplified | 21 | ||||||
- Forward Version:
 |
 |
 |
 |
 |
 |

| |
| Frame Count | 2 | 3 | 2 | 2 | 3 | 3 | 6 |
| Simplified | 21 | ||||||
- Roundhouse Version:
 |
 |
 |
 |
 |
 |

| ||
| Frame Count | 2 | 3 | 2 | 2 | 3 | 3 | 4 | 6 |
| Simplified | 25 | |||||||
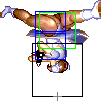
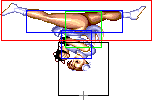
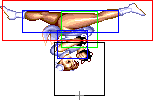
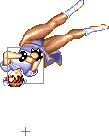
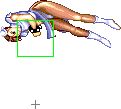
NOTE: This move has some oddities... First of all: in the active part, you see that little red dot near the center of the pushbox? At fist i thought it was just an imperfection in the sprites but that is actually a 1x1 sized active hitbox. So, in that cyclic(Active) part, the move is active all the time. The only exception is the Forward version, which has some gaps, all in the same animation frame(first one in the tables), so in that case i separated the cells in the Simplified Frame count. There is some oddities as well in the recovery part, like for the Short version it has a different pushbox in the second animation frame, and the Rh version having an extra animation frame before the landing frame. My guess is that this move was probably implemented in the game by a capcom Trainee or the programmer was lazy that day, lol.
The damage is different depending on which way Chun Li is facing. The higher damage values are related to the attack boxes when she is facing backwards during the spinning part.
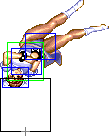
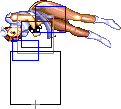
- Aerial Spinning Bird Kick: (Charge ←, →, K, in air)
 |
 |
 |
 |

| |
| Frame Count | 2 | 4 | 3 | 2 | 4 |
| Simplified | 15 | ||||
 |
 |
 |
 |

| |
| Frame Count | 3 | 2 | 3 | 3 | ∞ |
| Simplified | ∞ | ||||
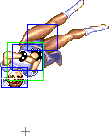
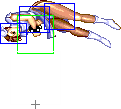
- Landing, partial: (When Chun lands before the last hitting frame)
 |
 |
 |
 |
 |
 |
 |

| |
| Frame Count | 3 | 3 | 2 | 2 | 3 | 3 | 4 | 5 |
| Simplified | 25 | |||||||
- Landing, complete: (When Chun lands after the last hitting frame)
 |
 |

| |
| Frame Count | 2 | 5 | 3 |
| Simplified | 10 | ||
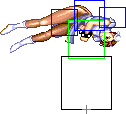
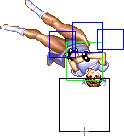
NOTE: Just like the ground version of the move, it has some active frames with a 1x1 sized hitbox.
Super Move
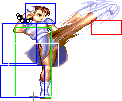
- Senretsu Kyaku: (Charge ←, → ← → K)
- Invincible part:
| Damage | 14x5 |  |
 |
 |
 |
 |

|
| Stun | 0-3 | ||||||
| Stun Timer | 20 | ||||||
| Frame Count | 2 | 2 | 2 | 2 | 2 | 4 | |
| Simplified | 10 | 4 | |||||
- Non-invincible part:
 |
 |
 |
 |
 |

| |
| Frame Count | 1 | 2 | 2 | 2 | 2 | 6 |
| Simplified | 9 | 6 | ||||
 |
 |
 |
 |
 |

| |
| Frame Count | 3 | 3 | 1 | 1 | 1 | 1 |
| Simplified | 6 | 1 | 1 | 1 | 1 | |
 |
 |
 |
 |
 |

| |
| Frame Count | 1 | 1 | 1 | 1 | 6 | 7 |
| Simplified | 1 | 1 | 1 | 14 | ||
The Basics
Anti-air
Chun does not have any one move (like a Shoryuken) that can be used as a general anti-air. She must use specific moves depending on what the opponent uses. Her useful anti-air moves are:
-jump straight up Short
-jump straight up Fierce
-jump straight up RH
-far or close st.Forward
-far st.Fierce
-far st.RH
-cr.Forward (make the opponent land on it)
Her absolute best anti-air is her super, which can be done so that the opponent is grounded and takes all 6 hits, followed by upkicks for massive damage. The timing differs depending on the speed of the opponent's jump. It is very difficult to do against Blanka and Claw, but it is easier on everyone else, especially against Ryu and Ken if they do air hurricane kick (because air hurricane kick has a lot of landing recovery).
For anti-air against a specific move or character, see the character breakdowns below.
--NKI 20:04, 8 May 2006 (CDT)
Ground Pokes/Footsies
Pokes
Chun's best poke is st.Strong. It can lock down characters with no good reversal, it has excellent range, and it beats a lot of moves cleanly. Very effective to rush down with st.Strongs mixed with throws.
st.Forward is also very effective to use against Shotos, done such that you are just outside of their cr.RH range. If they try to fireball, they will get hit cleanly.
Footsies
Her cr.Forward has good priority, and it's so fast it's practically unpunishable. She can also use her cr.RH to get the knock down, but cr.RH has a considerable amount of lag and should be used with caution.
--NKI 11:29, 9 May 2006 (CDT)
Super Move Usage
Stored Super
Chun is one of only two characters who can store her super. That is, you can input the [charge back, towards, back, towards] part of the command, then hold towards. The command will remain stored until you hit kick, at which point the super will come out. This is a technique that must be mastered to use Chun effectively.
Notes:
- It is still possible to keep your charge, even if you switch sides. You just need to switch which direction you're holding at the exact right time. This works whether you are the one doing the cross-up or you are the one being crossed-up.
- You can store the super motion even without meter. You can input b, f, b, f (hold), fill the remaining meter (with a fireball, lightning kicks, pokes, etc.) and then press a kick button to do the super.
- If you throw the opponent or get thrown (even if you stay on the same side), you will lose your charge. It is possible to keep your charge while throwing the opponent, but it is tricky. While holding towards with the super charged, hit Strong or Fierce to throw the opponent. Then you must quickly tap back, then return to towards and you will still have the super stored. If you simply held towards the whole time, you would lose your charge.
Using the Super Against Fireballs
Going through fireballs with Chun's super is entirely possible, but it is much harder than going through fireballs with Boxer's super, or Dic's super. The reason is because she has a very short window of invincibility, and after her invincibility her entire hit-box (where she is vulnerable) is behind her. That means that you have to activate the super JUST before the fireball hits you. Any earlier and you will not make it cleanly through.
Against fireball characters, if you have meter, whenever you do a fireball you should always double motion the super on top of it. In other words, you should do her fireball as [charge back, towards+punch, back, hold towards]. If the opponent jumps over your fireball, you can super them for free. If the opponent also threw a fireball to cancel out yours, you can super them for free. Else, walk up until you are just out of range of their longest normal and hold down towards. If they try any moves or try to jump, super. If they try to get fresh and walk towards you, st.Strong (while still holding towards and maintaining your charge).
--NKI 12:04, 9 May 2006 (CDT)
Advanced Strategy
Reversals
Upkicks - All three versions have invincibility at the beginning, but Short has the most. However, the Roundhouse version has the least start-up, just two frames. Use it if you want to prevent safe jumps that land right on top of you.
Spinning Bird Kick - Has more invincibility than upkicks, but it takes a long time to hit, so it's really more useful as a way to avoid the opponent's move, rather than to counter it.
Super - The only thing to watch out for is the opponent baiting your reversal super and jumping over it.
Avoiding Fireballs
Because she has to charge for her fireball, Chun has a problem against non-charge fireball characters. If you don't have time to charge, you have several options to try to avoid the fireballs:
Jump straight up head stomp - When Chun is doing her headstomp, her hitbox becomes thinner, so it's easier for her to jump over slow fireballs. The only downside to this is that you lose valuable charge time, because you need to do the headstomp on your way down, and the joystick needs to be straight down (down/back won't work).
D/F+RH - If you want to get over a fireball and gain a little bit of ground, you can use D/F+RH, but don't use it when you are too close, because it is easily punishable. Be sure to immediately start charge back after you hit RH so that you will have your charge when you land.
Spinning Bird Kick - Because it is invincible in the beginning, you can use SBK to go through fireballs, but it is very punishable and not recommended unless you are about to die from block damage.
Jump back air spinning bird kick - This should only be done in the corner, when your opponent is far enough away that they can not punish. (Air SBK has a lot of recovery when she lands.)
Jump straight up air spinning bird kick - This will give you slightly more meter than doing a fireball, but it is considerably harder, so it is not generally recommended.
Overhead Stomp
To do Chun's instant head stomp, jump at the opponent and immediately hit down+Forward kick. Because it's a jumping attack, it must be blocked high. It's too fast to see the stomp and react to it, so the opponent must guess. You are vulnerable as you're bouncing away, but keep in mind that you can do a move (say, j.Forward) on your way down. The overhead is especially good to use against people who like to reversal Dragon Punch, because her headstomp will beat DP clean.
Corner Awareness
Unfortunately for Chun, if she throws the opponent from point blank range into the corner and the opponent techs, the opponent recovers and lands so fast that Chun gets thrown for free. This is especially bad against Gief and Hawk, because they also get a free super on her.
Unless it will kill (or your opponent is O.Sagat), be sure to throw the opponent OUT of the corner. Also be aware that if you are in the corner charging back, then you go for a throw, you will end up getting a fireball, which might cost you. So be very careful when you're in the corner.
D/F+Roundhouse Shenanigans
Chun's D/F+RH is one of the craziest normals in the game. When done meaty enough, it will hit as a low move (must be duck-blocked), and it can be done as a completely safe meaty against several characters. If the opponent doesn't try to reverse, they will be forced to block it, but if they do reverse properly, they will still lose:
-Guile's Flash Kick will completely whiff (backwards)
-Ryu's DP will be blocked (backwards)
-Zangief's lariat will lose cleanly
-Deejay's upkicks will completely whiff (backwards)
As the opponent is getting up, she can whiff D/F+RH to get to the opposite side of any character, but if she immediately follows it up with a normal, it will be backwards (and will whiff), so it's not very useful.
The move will hit as a cross-up if done as a meaty from point blank range against certain characters. (Keep in mind that if done meaty enough, it is a low hit as well, so the opponent must block with down/towards.)
Which characters can Chun cross up?
Ryu: yes
Ken: yes
Honda: no
Chun: no
Blanka: no
Zangief: no
Guile: yes (see note)
Sim: no
Hawk: yes
Cammy: yes
Fei: yes
DeeJay: yes
Boxer: yes
Claw: no
Sagat: no
Dictator: no
Note: Chun can only cross-up Guile with her D/F+RH in very specific situations where Guile does not have a significant amount of pushback. She can not cross him up after an anti-air jump straight up+RH because Guile is falling away too fast, but she can do it after an air throw, or if a D/F+RH hits and pushes Guile towards Chun, etc.
--NKI 15:39, 20 June 2006 (CDT)
Combos
Dizzy Combos
Her bread-and-butter dizzy combo is j.RH, st.Strong, st.Fierce, but it will only work on characters that are standing. (The st.Fierce can not hit ducking opponents.) j.RH, st.Fierce xx fireball will also frequently dizzy. If you have the opportunity to do a meaty, go for cr.Forward, cr.Fierce. That also will dizzy the majority of the time.
Standard Combos
I feel that if you don't have meter, the best combo to do is j.RH, st.Strong, cr.RH. The reason I like that combo the best is because it knocks down, you are charged, you can throw a meaty fireball, and you retain control of the round. If you do something else, like [j.RH, st.Fierce xx Fireball], you are left in an awkward position where both you and your opponent are at
If you have a full meter (or nearly a full meter) and you are charged, go for j.RH, st.Fierce xx super. With the super stored, it's really not all that hard to pull off: charge back, towards, back, towards, then jump towards, hit RH as late as possible, then st.Fierce~any kick button.
--NKI 15:39, 20 June 2006 (CDT)
Match-ups
Matchups classified with this diagram in mind. For the old characters I guessed the positions.
--Born2SPD
Serious Advantage Match-ups
Vs. Blanka:
- 3 - 7
Vs. E. Honda:
- 7.5 - 2.5
Vs. M. Bison (dictator):
- 7 - 3
Vs. Zangief:
- 7.5 - 2.5
Advantage Match-ups
Vs. Cammy:
- 6 - 4
Vs. Dee Jay:
- 6.5 - 3.5
Vs. Guile:
- 6 - 4
Vs. Ken:
- 6.5 - 3.5
Vs. Sagat:
- 6.5 - 3.5
Fair Match-ups
Vs. Balrog (boxer):
- 5.5 - 4.5
Vs. Chun-Li:
Vs. Dhalsim:
- 5 - 5
Vs. O. Ken:
Vs. T. Hawk:
- 5.5 - 4.5
Disadvantage Match-ups
Vs. Fei Long:
- 4 - 6
Vs. Ryu:
- 4 - 6
Vs. O. Sagat:
Vs. O. T. Hawk:
Vs. Vega (claw):
- 4 - 6
Serious Disadvantage Match-ups
None!
