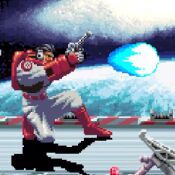
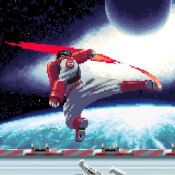
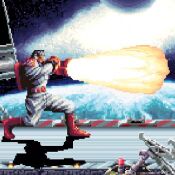
Introduction
Normals
| Standing Weak Attack 5A |
Regular Damage | Regular Startup | Regular Active | Regular Recovery |
|---|---|---|---|---|
| 7 | ||||
| Notes | Dash Damage | Dash Startup | Dash Active | Dash Recovery |
|
10 |
| Standing Normal Attack 5B |
Regular Damage | Regular Startup | Regular Active | Regular Recovery |
|---|---|---|---|---|
| 23 | ||||
| Notes | Dash Damage | Dash Startup | Dash Active | Dash Recovery |
|
34 |
| Standing Strong Attack 5C |
Regular Damage | Regular Startup | Regular Active | Regular Recovery |
|---|---|---|---|---|
| 32 | ||||
| Notes | Dash Damage | Dash Startup | Dash Active | Dash Recovery |
| * Both versions continue juggles. | 48 |
| Close Standing Weak Attack cl.5A |
Regular Damage | Regular Startup | Regular Active | Regular Recovery |
|---|---|---|---|---|
| 6 | ||||
| Notes | Dash Damage | Dash Startup | Dash Active | Dash Recovery |
|
9 |
| Close Standing Normal Attack cl.5B |
Regular Damage | Regular Startup | Regular Active | Regular Recovery |
|---|---|---|---|---|
| 22 | ||||
| Notes | Dash Damage | Dash Startup | Dash Active | Dash Recovery |
|
33 |
| Close Standing Strong Attack cl.5C |
Damage | Start | Active | Recovery |
|---|---|---|---|---|
| 55 | ||||
| Notes | Dash Damage | Dash Startup | Dash Active | Dash Recovery |
|
82 |
| Crouching Weak Attack 2+A |
Damage | Startup | Active | Recovery | Notes |
|---|---|---|---|---|---|
| 7 |
|
| Crouching Normal Attack 2+B |
Damage | Start | Active | Recovery | Notes |
|---|---|---|---|---|---|
| 23 |
|
| Crouching Strong Attack 2+C |
Damage | Start | Active | Recovery | Notes |
|---|---|---|---|---|---|
| 32 |
|
Command Normals
| Comet Tail 3+A |
Damage | Start | Active | Recovery | Notes |
|---|---|---|---|---|---|
 |
6 |
|
| Stardust Arrow 3+B |
Damage | Start | Active | Recovery | Notes |
|---|---|---|---|---|---|
 |
22 |
|
| Metro Launcher 3+C |
Damage | Start | Active | Recovery | Notes |
|---|---|---|---|---|---|
 |
32 |
|
Throws
| Boost Pressure 4/6+C |
Damage |
|---|---|
 |
32 |
Special Moves
| A | Damage | Startup, Active, and Recovery | On Hit | On Block | ||||||||
|---|---|---|---|---|---|---|---|---|---|---|---|---|
| - | - | - | - | |||||||||
| Dash Damage | Dash Startup, Active, and Recovery | On Dash Hit | On Dash Block | |||||||||
| - | - | - | - | |||||||||
| B | Damage | Startup, Active, and Recovery | On Hit | On Block | ||||||||
| - | - | - | - | |||||||||
| Dash Damage | Dash Startup, Active, and Recovery | On Dash Hit | On Dash Block | |||||||||
| - | - | - | - | |||||||||
| C | Damage | Startup, Active, and Recovery | On Hit | On Block | ||||||||
| - | - | - | - | |||||||||
| Dash Damage | Dash Startup, Active, and Recovery | On Dash Hit | On Dash Block | |||||||||
| - | - | - | - | |||||||||
|
Notes:
| ||||||||||||
| A | Damage | Startup, Active, and Recovery | On Hit | On Block | ||||||||
|---|---|---|---|---|---|---|---|---|---|---|---|---|
| - | - | - | - | |||||||||
| Dash Damage | Dash Startup, Active, and Recovery | On Dash Hit | On Dash Block | |||||||||
| - | - | - | - | |||||||||
| B | Damage | Startup, Active, and Recovery | On Hit | On Block | ||||||||
| - | - | - | - | |||||||||
| Dash Damage | Dash Startup, Active, and Recovery | On Dash Hit | On Dash Block | |||||||||
| - | - | - | - | |||||||||
| C | Damage | Startup, Active, and Recovery | On Hit | On Block | ||||||||
| - | - | - | - | |||||||||
| Dash Damage | Dash Startup, Active, and Recovery | On Dash Hit | On Dash Block | |||||||||
| - | - | - | - | |||||||||
|
Notes:
Counter Play:
| ||||||||||||
The Basics
Combos
- 66, 214+A, 2B xx 214+A
This combo instantly bubble stuns an opponent when fully connected. Another way of landing the combo is by crossing-up the opponent with the first 214+A.


