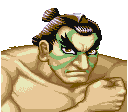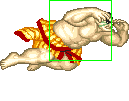

E. Honda
While growing up in Japan he always admired the art of sumo wrestling and he hoped to one day become the greatest sumo wrestler of all time. He spent the rest of his life dedicated to sumo, and eventually received the second-highest title of Ōzeki (the highest title is Yokozuna). He also acquires his own dojo where he teaches his students about discipline and respect for your opponent, which Honda believes are the marks of a true sumo wrestler. At some point, he went searching for worthy opponents of other fighting disciplines to prove that sumo wrestlers are the greatest fighters in the world. During this quest he was challenged by Sodom to join Mad Gear. Honda fought Sodom, won, and declined his invitation. He also fought Ryu at least once, and told Sakura (and maybe Juni found out from him, too) where to find Ryu. It is rumored that he teamed-up with Zangief to help take down the Shadaloo. He found some of the Dolls in the wake of Shadaloo's destruction that had amnesia due to the explosion and couldn't even remember their own names. He took pity on them, and brought them to his dojo, where they could be taken care of. He told them that they could leave if they wished once they regained their memory. Some time later he resumed his quest to prove the superiority of sumo in the fighting arts. It was at this time that he began actively competing in the World Warrior tournament. His star pupils at the time were Hatonoyama, Marunoumi, Yasuhanada, and Nishinofuji. He's still a sumo wrestler, as always. And training his students, of course.
In a nutshell
E.Honda is a decent character in Hyper Fighting based on turtling and poking strategies, with some good matches, but also some bad ones, particularly against characters with projectiles (the Ryu matchup is very bad). His gameplay is generally defensive, although his throws set him up for some good pressure and a new anti-air to overhead special move useful against projectiles.
Character Specific Information
Color Options
| Default | Start |
 |

|
Moves List
Normal Moves
- Standing Normal Moves (st.)
- Close Standing Normal Moves (cl.)
- Crouching Normal Moves (cr.)
- Jumping Normal Moves (nj.)
- Diagonal Jumping Normal Moves (j.)
Unique Moves
Throws
Special Moves
Requires 5 button presses }}
Requires 5 button presses }}
Requires 5 button presses }}
hardknockdown (after invincibility)
60f charge }}
60f charge }}
60f charge }}
hardknockdown (downward hit only)
60f charge }}
hardknockdown (downward hit only)
60f charge }}
hardknockdown (downward hit only)
60f charge }}
The Basics
Honda is a classic turtle character, but depending on the circumstances, he can attack a bit in Hyper Fighting as well. This is because Honda's moves have good recovery time and there are no big super combos to set you back.
However, his defense should be stressed; if you have a good lead and the opponent doesn't have a fireball, you can be good by just crouching across the screen from the other guy and staring at him. If he tries to move in for a grab, headbutt him; if he jumps in, jab headbutt to counter.
All headbutts have invincibility, however only the LP headbutt will hit during the invincible frames - however this hit will not knock the opponent down. MP and HP headbutts will at best trade with another hit, but will knockdown. LP headbutt is generally your best bet to use as a reversal move.
In HF, Honda's primary way of attacking is throwing; his bear hug gives you a little mix-up afterward. If they don't have a good reversal, start a hundred hand slap and chip some life. Even if they do, you can bait their reversal and grab again.
You can also use the butt drop to keep them guessing. Know your ranges and do butt drops slightly past their sprites so they have to block the other way. Don't do this predictably, of course.
From Dasrik:
HF Honda's too crazy. He wins with only a few moves.
- LP torpedo - the must-know move. In case you don't know why - Honda is, for all intents and purposes, totally invincible until he leaves the ground. That means against people without fireballs you can comfortably just down-back all day.
- cr.MP. it's not funny what this thing beats.
- dj.MK (belly flop). If you need to jump you should just use this move. I often use the dj.HK for the extra damage, but dj.MK is best. It's how Honda can beat Sim.
- HP grab. Painful, and unless you're fighting a l33t Ryu or Ken [who can reversal dragon punch], you get free chip afterwards with the hundred hand slap. and there's even ways around the shotos, so... fear.
You can get fancy and use HP torpedoes, jump MP for air-to-air, sumo splash and things like that, but those are really unnecessary. Honda's very basic. Just stick with what's good with him and you'll do fine.
Advanced Strategy
Throw Setups
E.Honda can still use Champion Edition strategies, one of them are the Throw Setups, now you can add a crouching attack and if blocked you can charge and use your Sumo Splash or also use the last one as a tick throw tool.
Combos
-s.LP,LP H.Harite
-j.MP,MP H.Harite/s.HK
-Cross Up j.MK,MP,cr.HP
Match-ups
Vs. Balrog (boxer):
Hundred-Hand Slap throughout the whole fight, the only thing Balrog can do is trade hits (the trade is usually in E. Honda's favor).
Vs. Blanka:
A Turtling and poking match,Rolls must be blocked and punished with Crouching Roundhouse.
Vs. Chun-Li:
Jump the Kikoken and use hold mixups.
Vs. Dhalsim:
If he teleports punish him with Hold mix ups.
Vs. E. Honda (self):
A perfect Honda its one that can use his hold setups at close combat, and Sumo Splash at medium range.
Vs. Guile:
If he Sonic Boom you use Headbutt
Vs. Ken:
Shoryuken is punished with Hunred Slaps and Hurricane Kick with Crouching Strong
Vs. M. Bison (dictator):
Headbutt defeats Psycho Crusher easily
Vs. Ryu:
This fight is terrible for Honda, and to win this requires the opponent to give it away. Fortunately, most people do. Look for flags on the opponent's part before he throws a fireball; that way, you can "psychically" jump forward and kick him out of his recovery time. Most players don't catch on. Of the ones that do, you will be forced to be tricky. That's up to you.
Vs. Sagat:
Sumo Splash counters Tiger Shots,Headbutt is useful for Low Tiger Shots too.
Vs. Vega (claw):
Heabdbutt can defeat Barcelona.
Vs. Zangief:
Headbutt can counter pokes and Crouching Roundhouse the Double Lariat.
Hitboxes
Standing Normals
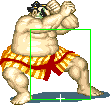
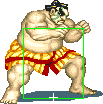
- Standing LP:
| Damage | 16 |  |
 |
 |
 |

|
| Stun | 1~7 | |||||
| Stun Timer | 40 | |||||
| Chain Cancel | No | |||||
| Special Cancel | Yes | |||||
| Frame Advantage | +7 | |||||
| Frame Count | 2 | 2 | 4 | 2 | 1 | |
| Frame Count | 1+4 | 4 | 3 | |||
- Standing MP:
| Damage | 20 |  |
 |
 |
 |
 |
 |

|
| Stun | 5~11 | |||||||
| Stun Timer | 60 | |||||||
| Chain Cancel | No | |||||||
| Special Cancel | No | |||||||
| Frame Advantage | +10 | |||||||
| Frame Count | 2 | 2 | 2 | 4 | 2 | 2 | 1 | |
| Frame Count | 1+6 | 4 | 5 | |||||
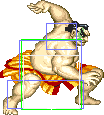
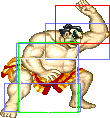
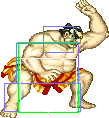
- Standing HP:
| Damage | 26 |  |
 |
 |
 |
 |
 |
 |
 |

|
| Stun | 11~17 | |||||||||
| Stun Timer | 80 | |||||||||
| Chain Cancel | No | |||||||||
| Special Cancel | No | |||||||||
| Frame Advantage | -2 | |||||||||
| Frame Count | 3 | 3 | 3 | 4 | 7 | 5 | 3 | 2 | 1 | |
| Frame Count | 1+6 | 4 | 18 | |||||||
- Standing LK:
| Damage | 14 |  |
 |
 |
 |
 |
 |

|
| Stun | 1~7 | |||||||
| Stun Timer | 40 | |||||||
| Chain Cancel | No | |||||||
| Special Cancel | No | |||||||
| Frame Advantage | +4 | |||||||
| Frame Count | 3 | 3 | 3 | 4 | 3 | 3 | 1 | |
| Frame Count | 1+9 | 4 | 7 | |||||
- Standing MK:
| Damage | 18 |  |
 |
 |
 |
 |
 |

|
| Stun | 5~11 | |||||||
| Stun Timer | 60 | |||||||
| Chain Cancel | No | |||||||
| Special Cancel | No | |||||||
| Frame Advantage | +4 | |||||||
| Frame Count | 3 | 3 | 3 | 4 | 5 | 6 | 1 | |
| Frame Count | 1+9 | 4 | 12 | |||||
- Standing HK:
| Damage | 24 |  |
 |
 |
 |
 |
 |

|
| Stun | 11~17 | |||||||
| Stun Timer | 80 | |||||||
| Chain Cancel | No | |||||||
| Special Cancel | No | |||||||
| Frame Advantage | -1 | |||||||
| Frame Count | 3 | 3 | 3 | 6 | 8 | 10 | 1 | |
| Frame Count | 1+9 | 6 | 19 | |||||
Close Standing Normals
- Close LK:
| Damage | 16 |  |
 |
 |
 |

|
| Stun | 1~7 | |||||
| Stun Timer | 40 | |||||
| Chain Cancel | No | |||||
| Special Cancel | No | |||||
| Frame Advantage | +7 | |||||
| Frame Count | 3 | 3 | 3 | 3 | 1 | |
| Frame Count | 1+6 | 3 | 4 | |||
- Close MK:
| Damage | 20 |  |
 |
 |
 |

|
| Stun | 5~11 | |||||
| Stun Timer | 60 | |||||
| Chain Cancel | No | |||||
| Special Cancel | No | |||||
| Frame Advantage | +6 | |||||
| Frame Count | 3 | 3 | 5 | 7 | 1 | |
| Frame Count | 1+6 | 5 | 8 | |||
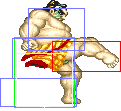
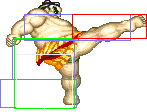
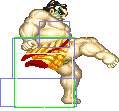
- Close HK:
| Damage | 26,18 |  |
 |
 |
 |
 |
 |
 |
 |

|
| Stun | 11~17 | |||||||||
| Stun Timer | 80 | |||||||||
| Chain Cancel | No | |||||||||
| Special Cancel | No | |||||||||
| Frame Advantage | +1 | |||||||||
| Frame Count | 2 | 2 | 3 | 3 | 5 | 8 | 6 | 3 | 1 | |
| Frame Count | 1+7 | 8 | 18 | |||||||
Crouching Normals
- Crouching LP:
| Damage | 14 |  |
 |
 |
 |

|
| Stun | 1~7 | |||||
| Stun Timer | 40 | |||||
| Chain Cancel | No | |||||
| Special Cancel | No | |||||
| Frame Advantage | +3 | |||||
| Frame Count | 2 | 2 | 8 | 2 | 1 | |
| Frame Count | 1+4 | 8 | 3 | |||
- Crouching MP:
| Damage | 18 |  |
 |
 |
 |
 |
 |

|
| Stun | 5~11 | |||||||
| Stun Timer | 60 | |||||||
| Chain Cancel | No | |||||||
| Special Cancel | No | |||||||
| Frame Advantage | +0 | |||||||
| Frame Count | 2 | 2 | 2 | 8 | 6 | 4 | 1 | |
| Frame Count | 1+6 | 8 | 11 | |||||
- Crouching HP:
| Damage | 24 |  |
 |
 |
 |
 |
 |
 |
 |

|
| Stun | 11~17 | |||||||||
| Stun Timer | 80 | |||||||||
| Chain Cancel | No | |||||||||
| Special Cancel | No | |||||||||
| Frame Advantage | -8 | |||||||||
| Frame Count | 2 | 3 | 4 | 6 | 8 | 6 | 4 | 3 | 1 | |
| Frame Count | 1+5 | 4 | 28 | |||||||
- Crouching LK:
| Damage | 14 |  |
 |
 |
 |
 |
 |

|
| Stun | 1~7 | |||||||
| Stun Timer | 40 | |||||||
| Chain Cancel | No | |||||||
| Special Cancel | No | |||||||
| Frame Advantage | +4 | |||||||
| Frame Count | 3 | 3 | 3 | 3 | 3 | 3 | 1 | |
| Frame Count | 1+9 | 3 | 7 | |||||
- Crouching MK:
| Damage | 18,18 |  |
 |
 |
 |
 |
 |

|
| Stun | 5~11 | |||||||
| Stun Timer | 60 | |||||||
| Chain Cancel | No | |||||||
| Special Cancel | No | |||||||
| Frame Advantage | +2 | |||||||
| Frame Count | 3 | 3 | 3 | 6 | 5 | 4 | 1 | |
| Frame Count | 1+6 | 9 | 10 | |||||
- Crouching HK:
| Damage | 24 |  |
 |
 |
 |
 |
 |

|
| Stun | 11~17 | |||||||
| Stun Timer | 80 | |||||||
| Chain Cancel | No | |||||||
| Special Cancel | No | |||||||
| Frame Advantage | -1 | |||||||
| Frame Count | 3 | 4 | 6 | 4 | 8 | 6 | 1 | |
| Frame Count | 1+7 | 18 | 7 | |||||
Aerial Normals
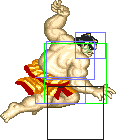
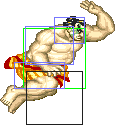
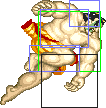
- Neutral Jumping LP:
| Damage | 18 |  |
 |
 |
 |
|
| Stun | 1~7 | |||||
| Stun Timer | 40 | |||||
| Frame Count | 3 | 4 | 4 | 30 | ∞ | |
| Simplified | 11 | 30 | ∞ | |||
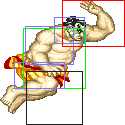
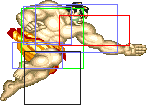
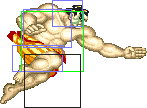
- Neutral Jumping MP:
| Damage | 22 |  |
 |
 |
 |
 |
 |
 |

|
| Stun | 5~11 | ||||||||
| Stun Timer | 50 | ||||||||
| Frame Count | 3 | 4 | 4 | 12 | 8 | 4 | 4 | ∞ | |
| Simplified | 7 | 16 | ∞ | ||||||
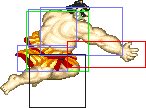
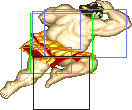
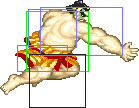
- Neutral Jumping HP:
| Damage | 28 |  |
 |
 |
 |
 |
 |

|
| Stun | 11~17 | |||||||
| Stun Timer | 60 | |||||||
| Frame Count | 3 | 4 | 6 | 8 | 4 | 4 | ∞ | |
| Simplified | 7 | 6 | ∞ | |||||
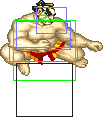
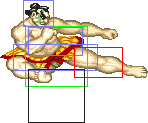
- Neutral Jumping LK:
| Damage | 18 |  |
 |
 |
 |

| |
| Stun | 1~7 | ||||||
| Stun Timer | 40 | ||||||
| Frame Count | 3 | 4 | 30 | 4 | ∞ | ||
| Simplified | 7 | 30 | ∞ | ||||
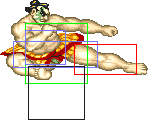
- Neutral Jumping MK:
| Damage | 22 |  |
 |
 |
 |
 |
 |
 |
 |

|
| Stun | 5~11 | |||||||||
| Stun Timer | 50 | |||||||||
| Frame Count | 3 | 4 | 12 | 4 | 4 | 4 | 4 | 4 | ∞ | |
| Simplified | 7 | 12 | ∞ | |||||||
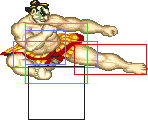
- Neutral Jumping HK:
| Damage | 28 |  |
 |
 |
 |
 |
 |
 |
 |

|
| Stun | 11~17 | |||||||||
| Stun Timer | 60 | |||||||||
| Frame Count | 2 | 4 | 6 | 4 | 4 | 4 | 4 | 4 | ∞ | |
| Frame Count | 7 | 6 | ∞ | |||||||
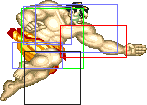
- Diagonal Jumping LP:
| Damage | 18 |  |
 |
 |
 |

|
| Stun | 1~7 | |||||
| Stun Timer | 40 | |||||
| Frame Count | 3 | 4 | 4 | 30 | ∞ | |
| Simplified | 11 | 30 | ∞ | |||
- Diagonal Jumping MP:
| Damage | 22 |  |
 |
 |
 |
 |
 |
 |

|
| Stun | 5~11 | ||||||||
| Stun Timer | 50 | ||||||||
| Frame Count | 3 | 4 | 4 | 12 | 8 | 4 | 4 | ∞ | |
| Simplified | 7 | 16 | ∞ | ||||||
- Diagonal Jumping HP:
| Damage | 28 |  |
 |
 |
 |
 |
 |

|
| Stun | 11~17 | |||||||
| Stun Timer | 60 | |||||||
| Frame Count | 3 | 4 | 6 | 8 | 4 | 4 | ∞ | |
| Simplified | 7 | 6 | ∞ | |||||
- Diagonal Jumping LK:
| Damage | 18 | 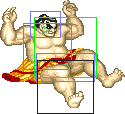 |
 |

|
| Stun | 1~7 | |||
| Stun Timer | 40 | |||
| Frame Count | 3 | 4 | ∞ | |
| Simplified | 7 | ∞ | ||
- Diagonal Jumping MK:
| Damage | 22 | 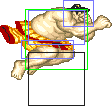 |
 |

|
| Stun | 5~11 | |||
| Stun Timer | 50 | |||
| Frame Count | 3 | 4 | ∞ | |
| Simplified | 7 | ∞ | ||
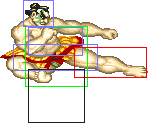
- Diagonal Jumping HK:
| Damage | 28 |  |
 |
 |
 |
 |
 |
 |
 |

|
| Stun | 11~17 | |||||||||
| Stun Timer | 60 | |||||||||
| Frame Count | 3 | 4 | 12 | 4 | 4 | 4 | 4 | 4 | ∞ | |
| Simplified | 7 | 12 | ∞ | |||||||
Unique Normals
- Hiza Geri aka Double Knee:
| Damage | 22,22 |  |
 |
 |
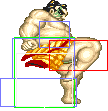 |
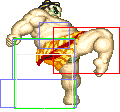 |
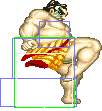 |
 |
 |

|
| Stun | 5~11,8 | |||||||||
| Stun Timer | 60,60 | |||||||||
| Chain Cancel | No | |||||||||
| Special Cancel | No | |||||||||
| Frame Advantage | +8 | |||||||||
| Frame Count | 3 | 3 | 3 | 3 | 3 | 2 | 2 | 2 | 1 | |
| Simplified | 1+9 | 6 | 7 | |||||||
Throw
Tawara Nage: (←/→ + Strong) , Saba Ori: (←/→ + Fierce) and Sekkan Kyaku: (←/→ + Roundhouse)
| Throw | Hold | 
| ||
| Damage | 32 | Damage | 22+(4*n) | |
| Duration | - | Duration | 300 | |
| Stun | 7~13 | Stun | 7~13 | |
| Stun Timer | 100 | Stun Timer | - | |
| Range (from axis) | 64 | Range (from axis) | 64 | |
| Range advantage | 36 | Range advantage | 36 | |
Special Moves
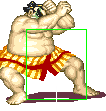
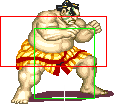
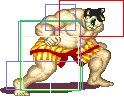
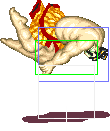
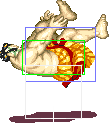
- Sumo Headbutt: (Charge ←, →, P) [charge time: 59f]
| Damage | 18/26/28 |  |
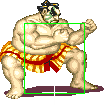 |
 |
 |
 |

| |
| Stun | 13~19 | |||||||
| Stun Timer | 120 | |||||||
| Frame Advantage | -11/-14,KD/-4 | |||||||
| Jab | 3 | 4 | 6 | 3 | 3 | 22 | ||
| Jab Simplified | 13 | 28 | ||||||
| Strong | 1 | 3 | 4 | 2 | 2 | 53 | ||
| Strong Simplified | 9 | 55 | ||||||
| Fierce | 1 | 4 | 1 | 1 | 63 | |||
| Fierce Simplified | 5 | 65 | ||||||
 |
 |
 |
 |
 |
 |

| |
| Jab | 4 | 4 | 4 | 8 | 2 | 2 | 1 |
| 25 | |||||||
| Strong | 4 | 4 | 4 | 8 | 2 | 2 | 1 |
| 25 | |||||||
| Fierce | 4 | 4 | 4 | 8 | 2 | 2 | 1 |
| 25 | |||||||
- One Hundred Slaps: Press Punch Repeatedly
Startup:
 |

| |
| Jab | 1 | 3 |
| Strong | 3 | 4 |
| Fierce | 4 | 6 |
Active:
| Damage | 24/26/28 |  |
 |
 |
 |
 |

|
| Stun | 13~19 | ||||||
| Stun Timer | 120 | ||||||
| Frame Advantage | ? | ||||||
| Jab | 4 | 4 | 4 | 4 | 4 | 4 | |
| Strong | 2 | 2 | 2 | 2 | 2 | 2 | |
| Fierce | 1 | 1 | 1 | 1 | 1 | 1 | |
Recovery
 |

| |
| Jab | 1 | 1 |
| Strong | 3 | 1 |
| Fierce | 5 | 1 |
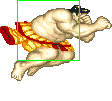
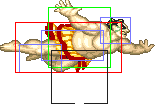
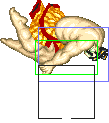
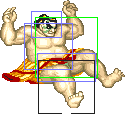
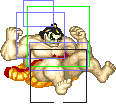
- Sumo Splash: (Charge ↓, ↑, K) [charge time: 59f]
 |
 |
 |
 |
 |

| ||
| Short | 4 | 4 | 4 | 2 | 6 | 8 | |
| Short Simplified | 26 | ||||||
| Foward | 6 | 4 | 4 | 2 | 8 | 9 | |
| Foward Simplified | 33 | ||||||
| Roundhouse | 7 | 4 | 4 | 2 | 11 | 11 | |
| Roundhouse Simplified | 39 | ||||||
Unlike all other "hold down then up" charge moves, Honda's Sumo Smash in Hyper Fighting must be completed at the Neutral Up position. Meaning you can't hold down-back and slide your stick to up-back to complete the move. This quirk does not follow Honda to his CPS2 iterations. Also, HF Honda is the only version of Honda with a Sumo Smash that has attacking frames on the RH version, leading to stuff he can punish or pressure that no other version of Honda can do. Mainly it means you can almost guarantee at least a trade against someone doing nothing but jumping in the corner with a high priority move daring you to counter it.
Misc Animations
| Walk back | Neutral | Walk Fwd | Crouch |
 |
 |
 |

|
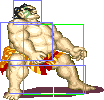
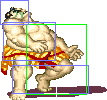
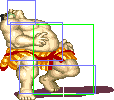
- Standing reel:
 |
 |
|
- Standing gut reel:
 |
 |

|
- Crouching reel:
 |

|
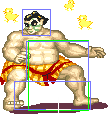
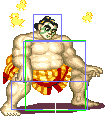
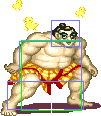
- Dizzy:
 |
 |
|
| General | Game Mechanics | Strategy | Tiers | |
| The Characters | Balrog (Boxer) | Blanka | Chun-Li | Dhalsim | E. Honda | Guile | Ken | M. Bison (Dictator) | Ryu | Sagat | Vega (Claw) | Zangief |
