(→Command Normals: Damage and stun data) |
|||
| Line 600: | Line 600: | ||
*<b>Chokka Raku Shou a.k.a. Hop Kick:</b> (On ground, ←/→ + Forward) | *<b>Chokka Raku Shou a.k.a. Hop Kick:</b> (On ground, ←/→ + Forward) | ||
{{STDiagramHeader}} | {{STDiagramHeader}} | ||
{{STDiagramCell| Damage}} |{{STDiagramCell| | {{STDiagramCell| Damage}} |{{STDiagramCell| 24[1]}} |{{STDiagramImageCell| 5 | OFeiLong_hopk1&10.png}} |{{STDiagramImageCell| 5 | OFeiLong_hopk2.png}} |{{STDiagramImageCell| 5 | OFeiLong_hopk3.png}} |{{STDiagramImageCell| 5 | OFeiLong_hopk4.png}} |{{STDiagramImageCell| 5 | OFeiLong_hopk5.png}} |{{STDiagramImageCell| 5 | OFeiLong_hopk6.png}} |{{STDiagramImageCell| 5 | OFeiLong_hopk7.png}} |{{STDiagramImageCell| 5 | OFeiLong_hopk8.png}} |{{STDiagramImageCell| 5 | OFeiLong_hopk9.png}} |{{STDiagramImageCell| 5 | OFeiLong_hopk1&10.png}} |{{STDiagramImageCell| 5 | OFeiLong_hopk11.png}} | ||
|- | |- | ||
{{STDiagramCell| Stun}} |{{STDiagramCell| | {{STDiagramCell| Stun}} |{{STDiagramCell| 3~9}} | ||
|- | |- | ||
{{STDiagramCell| Stun Timer}} |{{STDiagramCell| | {{STDiagramCell| Stun Timer}} |{{STDiagramCell| 40}} | ||
|- | |- | ||
{{STDiagramCell| Frame Advantage}} |{{STDiagramCell| -3}} | {{STDiagramCell| Frame Advantage}} |{{STDiagramCell| -3}} | ||
| Line 618: | Line 618: | ||
*<b>En Geki Shuu a.k.a. Double Kick:</b> (On ground, → + Roundhouse) | *<b>En Geki Shuu a.k.a. Double Kick:</b> (On ground, → + Roundhouse) | ||
{{STDiagramHeader}} | {{STDiagramHeader}} | ||
{{STDiagramCell| Damage}} |{{STDiagramCell| | {{STDiagramCell| Damage}} |{{STDiagramCell| 20[0] + 20[1]}} |{{STDiagramImageCell| 5 | OFeiLong_dk1.png}} |{{STDiagramImageCell| 5 | OFeiLong_dk2.png}} |{{STDiagramImageCell| 5 | OFeiLong_dk3.png}} |{{STDiagramImageCell| 5 | OFeiLong_dk4.png}} |{{STDiagramImageCell| 5 | OFeiLong_dk5.png}} |{{STDiagramImageCell| 5 | OFeiLong_dk6.png}} |{{STDiagramImageCell| 5 | OFeiLong_dk7.png}} |{{STDiagramImageCell| 5 | OFeiLong_dk8.png}} | ||
|- | |- | ||
{{STDiagramCell| Stun}} |{{STDiagramCell| | {{STDiagramCell| Stun}} |{{STDiagramCell| 2~8 + 10~16}} | ||
|- | |- | ||
{{STDiagramCell| Stun Timer}} |{{STDiagramCell| | {{STDiagramCell| Stun Timer}} |{{STDiagramCell| 90 + 80}} | ||
|- | |- | ||
{{STDiagramCell| Frame Advantage}} |{{STDiagramCell| +6 / +9(+8)}} | {{STDiagramCell| Frame Advantage}} |{{STDiagramCell| +6 / +9(+8)}} | ||
Revision as of 10:48, 11 July 2014
Introduction
Picking Old Fei Long
To select O.Fei Long, choose Fei Long and then press ← ← → → Jab or Fierce, pressing Short simultaneously with the punch button for the alternate color.
| Normal | Secondary |
 |

|
--Born2SPD
New & Old Versions Comparison
Here is the list of differences:
- Obvious stuff: O.FeiLong can not tech throws, does not have the Chicken Wing and Super;
- O.FeiLong has a 2 pixels taller head hurtbox compared to N.Feilong, which affects his grounded, walking, crouching and aerial stances. It is mainly relevant when O.FeiLong is crouched, since some moves that could be avoided by crouching with N.FeiLong can not for O.FeiLong. Also note that this affects most of his normals so it will not be listed on the normal moves differences list;
- O.FeiLong does not have an air throw;
- O.FeiLong has some differences in some of his normals:
- Crouching Jab last recovery frame has extended limbs;
- Far Standing Strong can be special canceled;
- Crouching Strong can be special canceled;
- Far Standing Fierce can be special canceled;
- Far Standing Short can be special canceled;
- Crouching Short can be special canceled;
- Close Standing Forward can be special canceled;
- Far Standing Forward can be special canceled but does less hit/block stun, pushback and stun(dizzy);
- Crouching Forward last recovery frame has extended limbs but can be special canceled;
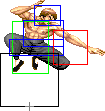
- Diagonal Jumping Strong animates like the Diagonal Jumping Jab, has nice priority air to ground and more active frames;
- Diagonal Jumping Fierce has better priority plus more attacking frames with very good air to ground priority;
- Diagonal Jumping Short has better priority (beats E.Honda's headbutt cleanly);
- Diagonal Jumping Forward has better horizontal priority but has worse vertical priority and its harder to use as a crossup;
- Diagonal Jumping Roundhouse has the Chicken Wing animation frames and different priorities;
- O.Feilong's hop kick command normal can not be steered forward and is not an overhead attack;
- O.FeiLong's Rekka Ken Punches have some differences: they recover faster (excluding the Jab version's first hit). On the other way, the first Rekka Ken punch has bigger hurtboxes during its recovery. All in all O.FeiLong's Rekka Kens are better;
O.FeiLong has better normals and safer Rekka Kens, but the lack of Chicken Wing, Super and throw teching really hurts him. He is viable but N.FeiLong is better (less bad I'd say).
Moves Analysis
Disclaimer: To better understand the diagrams, read this.
Normal Moves
Ground Normals
- Close Standing Jab:
| Damage | 4[0] |  |
 |

|
| Stun | 0~5 | |||
| Stun Timer | 40 | |||
| Chain Cancel | Yes | |||
| Special Cancel | Yes | |||
| Frame Advantage | +3 | |||
| Frame Count | 2 | 6 | 4 | |
| Simplified | 1 + 2 | 6 | 4 | |
A spear-hand attack to the head. This is a very good move to hit-confirm aerial attacks. You can cancel it into itself, another standing Jab, or a crouching Jab, which in turn can be cancelled into specials or super.
- Far Standing Jab:
| Damage | 4[0] |  |
 |
 |

|
| Stun | 0~5 | ||||
| Stun Timer | 40 | ||||
| Chain Cancel | Yes | ||||
| Special Cancel | Yes | ||||
| Frame Advantage | +3 | ||||
| Frame Count | 2 | 6 | 3 | 1 | |
| Simplified | 1 + 2 | 6 | 4 | ||
Rapid-fire hooks.
- Crouching Jab:
| Damage | 4[0] |  |
 |
 |

|
| Stun | 0~5 | ||||
| Stun Timer | 40 | ||||
| Chain Cancel | No | ||||
| Special Cancel | Yes | ||||
| Frame Advantage | +5 | ||||
| Frame Count | 2 | 4 | 3 | 1 | |
| Simplified | 1 + 2 | 4 | 4 | ||
A crouching elbow strike. This move is important in combos, specially after close standing Jabs. However, since O.Fei does not have the Rekka kicks (Chiken Wing) nor has an aerial attack that is tailored for cross-ups, he has fewer chances of using it.
- Close Standing Strong:
| Damage | 22[0] |  |
 |

|
| Stun | 5~11 | |||
| Stun Timer | 60 | |||
| Chain Cancel | No | |||
| Special Cancel | Yes | |||
| Frame Advantage | +9 | |||
| Frame Count | 3 | 4 | 5 | |
| Simplified | 1 + 3 | 4 | 5 | |
A backfist. Good start-up and recovery. This can also be used in combos, links into several other attacks (and into itself, from point-blank range) and lets you cancel into specials. It is also good for ticks and baits, such as throw-wait-Flame-Kick mix-ups. Note that this does more stun than close Fierce, which makes it easier to obtain dizzy combos with this move.
- Far Standing Strong:
| Damage | 22[0] |  |
 |
 |

|
| Stun | 5~11 | ||||
| Stun Timer | 60 | ||||
| Chain Cancel | No | ||||
| Special Cancel | Yes* | ||||
| Frame Advantage | +7 | ||||
| Frame Count | 2 | 2 | 6 | 5 | |
| Simplified | 1 + 4 | 6 | 5 | ||
Knife-hand attack. O.Fei can cancel this into specials.
- Crouching Strong:
| Damage | 22[0] |  |
 |
 |

|
| Stun | 5~11 | ||||
| Stun Timer | 60 | ||||
| Chain Cancel | No | ||||
| Special Cancel | Yes* | ||||
| Frame Advantage | +4 | ||||
| Frame Count | 2 | 2 | 6 | 8 | |
| Simplified | 1 + 4 | 6 | 8 | ||
A spear-hand attack with nice range but very bad priority. It has good speed and recovery. This is a good attack, but demands distance awareness, since Fei's whole arm is also vulnerable. This move is special-cancelable, but Rekkas may whiff if you hit with the tip of Fei's hands.
- Close Standing Fierce:
| Damage | 28[1] |  |
 |
 |

|
| Stun | 3~9 / 10~16 | ||||
| Stun Timer | 40 / 80 | ||||
| Chain Cancel | No | ||||
| Special Cancel | Yes / No | ||||
| Frame Advantage | +2 / +6 | ||||
| Frame Count | 3 | 4 | 10 | 6 | |
| Simplified | 1 + 3 | 14 | 6 | ||
An upper with very fast recovery. Good anti air and combo starter (canceling into Rekka Kens). Keep this in mind when you are getting crossed-up or when someone jumps and lands on top of you. It can also be used as a meaty.
- Far Standing Fierce:
| Damage | 28[1] |  |
 |
 |

|
| Stun | 10~16 | ||||
| Stun Timer | 80 | ||||
| Chain Cancel | No | ||||
| Special Cancel | Yes* | ||||
| Frame Advantage | +6 | ||||
| Frame Count | 2 | 2 | 10 | 6 | |
| Simplified | 1 + 4 | 10 | 6 | ||
Fei's famous "handshake" attack. It stays active for some time and also recovers very fast for a Fierce attack.
- Crouching Fierce:
| Damage | 28[1] |  |
 |
 |
 |

|
| Stun | 10~16 | |||||
| Stun Timer | 80 | |||||
| Chain Cancel | No | |||||
| Special Cancel | No | |||||
| Frame Advantage | +8 | |||||
| Frame Count | 2 | 2 | 2 | 8 | 6 | |
| Simplified | 1 + 6 | 8 | 6 | |||
Nice recovery, priority, range, damage and dizzy potential. Can be used to hit several characters under their projectiles.
- Close Standing Short:
| Damage | 4[0] |  |
 |

|
| Stun | 0~5 | |||
| Stun Timer | 40 | |||
| Chain Cancel | No | |||
| Special Cancel | Yes | |||
| Frame Advantage | +3 | |||
| Frame Count | 3 | 6 | 4 | |
| Simpified | 1 + 3 | 6 | 4 | |
A knee strike to the body. Good for tick throwing.
- Far Standing Short:
| Damage | 4[0] |  |
 |
 |
 |

|
| Stun | 0~5 | |||||
| Stun Timer | 40 | |||||
| Chain Cancel | Yes | |||||
| Special Cancel | Yes* | |||||
| Frame Advantage | -4 | |||||
| Frame Count | 2 | 2 | 8 | 5 | 4 | |
| Simplified | 1 + 4 | 8 | 9 | |||
A high side kick. One of Fei's best anti-airs.
- Crouching Short:
| Damage | 4[0] |  |
 |
 |

|
| Stun | 0~5 | ||||
| Stun Timer | 40 | ||||
| Chain Cancel | No | ||||
| Special Cancel | Yes* | ||||
| Frame Advantage | +5 | ||||
| Frame Count | 2 | 2 | 4 | 4 | |
| Simplified | 1 + 4 | 4 | 4 | ||
Crouching inside kick. O.Fei's ability to cancel it into specials makes it a much better move.
- Close Standing Forward:
| Damage | 22[0] |  |
 |

|
| Stun | 5~11 | |||
| Stun Timer | 60 | |||
| Chain Cancel | No | |||
| Special Cancel | Yes* | |||
| Frame Advantage | +7 | |||
| Frame Count | 4 | 6 | 5 | |
| Simplified | 1 + 4 | 6 | 5 | |
High vertical kick. Good recovery. This move is very interesting due to its ability to hit after ground cross-ups. It can lead to dizzy combos after softened kick throws or air resets.
- Far Standing Forward:
| Damage | 22[0] |  |
 |
 |
 |

|
| Stun | 0~5 | |||||
| Stun Timer | 40 | |||||
| Chain Cancel | No | |||||
| Special Cancel | Yes* | |||||
| Frame Advantage | -1 | |||||
| Frame Count | 2 | 2 | 6 | 4 | 4 | |
| Simplified | 1 + 4 | 6 | 8 | |||
High side kick. Good anti-air. Note that the O.Fei version of this move actually behaves like a Short (i.e. it does less hit/blockstun, pushback and stun(dizzy)).
- Crouching Forward:
| Damage | 22[0] |  |
 |
 |

|
| Stun | 5~11 | ||||
| Stun Timer | 60 | ||||
| Chain Cancel | No | ||||
| Special Cancel | Yes* | ||||
| Frame Advantage | +4 | ||||
| Frame Count | 4 | 6 | 7 | 1 | |
| Simplified | 1 + 4 | 6 | 8 | ||
A crouching side kick. Bad priority. Good for throw-Flame-Kick-low into Rekkas mixups.
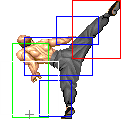
- Close Standing Roundhouse:
| Damage | 20[0] + 20[1] |  |
 |
 |
 |
 |
 |
 |

|
| Stun | 2~8 + 10~16 | ||||||||
| Stun Timer | 90 + 80 | ||||||||
| Chain Cancel | No | ||||||||
| Special Cancel | No | ||||||||
| Frame Advantage | +2 / +6(+5) | ||||||||
| Frame Count | 3 | 3 | 3 | 4 | 6 | 3 | 3 | 4 | |
| Simplified | 1 + 9 | 4 | 6 | 10 | |||||
A double-hitting roundhouse kick. It is an interesting attack, but since it does not lead to anything else, it does not get used much. Fei's several close-range cancelable and frame-advantage attacks are better options, most the time.
- Far Standing Roundhouse:
| Damage | 30[1] |  |
 |
 |
 |
 |

|
| Stun | 10~16 | ||||||
| Stun Timer | 80 | ||||||
| Chain Cancel | No | ||||||
| Special Cancel | No | ||||||
| Frame Advantage | +7 | ||||||
| Frame Count | 2 | 3 | 1 | 8 | 3 | 4 | |
| Simplified | 1 + 6 | 8 | 7 | ||||
A vertical kick with the rear leg. This can be used as an anti-air, but Fei also has better options.
- Crouching Roundhouse:
| Damage | 30[1] |  |
 |
 |
 |

|
| Stun | 5~11 | |||||
| Stun Timer | 130 | |||||
| Chain Cancel | No | |||||
| Special Cancel | No | |||||
| Frame Advantage | -1 | |||||
| Frame Count | 3 | 3 | 4 | 10 | 9 | |
| Simplified | 1 + 6 | 4 | 19 | |||
Some weird backwards roundhouse crouching kick. This generates a fast knockdown, but its short range makes it not that great an attack in O.Fei's arsenal, since he can cancel low attacks into Rekkas for much higher damage from that distance.
Aerial normals
- Neutral Jumping Jab:
| Damage | ? |  |
 |
 |
 |

|
| Stun | ?~? | |||||
| Stun Timer | ? | |||||
| Frame Count | 1 | 2 | 30 | 4 | ∞ | |
| Simplified | 3 | 30 | ∞ | |||
- Diagonal Jumping Jab:
| Damage | ? |  |
 |
 |

|
| Stun | ?~? | ||||
| Stun Timer | ? | ||||
| Frame Count | 1 | 2 | 30 | ∞ | |
| Simplified | 3 | 30 | ∞ | ||
- Neutral Jumping Strong:
| Damage | ? |  |
 |
 |
 |

|
| Stun | ?~? | |||||
| Stun Timer | ? | |||||
| Frame Count | 1 | 2 | 14 | 5 | ∞ | |
| Simplified | 3 | 14 | ∞ | |||
- Diagonal Jumping Strong:
| Damage | ? |  |
 |
 |

|
| Stun | ?~? | ||||
| Stun Timer | ? | ||||
| Frame Count | 1 | 2 | 14 | ∞ | |
| Simplified | 3 | 14 | ∞ | ||
- Neutral Jumping Fierce:
| Damage | ? |  |
 |
 |
 |

|
| Stun | ?~? | |||||
| Stun Timer | ? | |||||
| Frame Count | 1 | 2 | 8 | 6 | ∞ | |
| Simplified | 3 | 8 | ∞ | |||
- Diagonal Jumping Fierce:
| Damage | ? |  |
 |
 |
 |

|
| Stun | ?~? | |||||
| Stun Timer | ? | |||||
| Frame Count | 1 | 4 | 6 | 4 | ∞ | |
| Simplified | 5 | 10 | ∞ | |||
- Neutral Jumping Short:
| Damage | ? |  |
 |
 |

|
| Stun | ?~? | ||||
| Stun Timer | ? | ||||
| Frame Count | 3 | 20 | 4 | ∞ | |
| Simplified | 3 | 20 | ∞ | ||
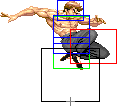
- Diagonal Jumping Short:
| Damage | ? |  |
 |
 |

|
| Stun | ?~? | ||||
| Stun Timer | ? | ||||
| Frame Count | 3 | 20 | 4 | ∞ | |
| Simplified | 3 | 20 | ∞ | ||
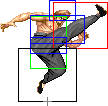
- Neutral Jumping Forward:
| Damage | ? |  |
 |
 |
 |

|
| Stun | ?~? | |||||
| Stun Timer | ? | |||||
| Frame Count | 1 | 2 | 8 | 5 | ∞ | |
| Simplified | 3 | 8 | ∞ | |||
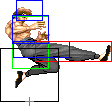
- Diagonal Jumping Forward:
| Damage | ? |  |
 |
 |

|
| Stun | ?~? | ||||
| Stun Timer | ? | ||||
| Frame Count | 3 | 10 | 5 | ∞ | |
| Simplified | 3 | 10 | ∞ | ||
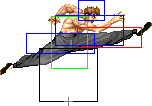
- Neutral Jumping Roundhouse:
| Damage | ? |  |
 |
 |
 |

|
| Stun | ?~? | |||||
| Stun Timer | ? | |||||
| Frame Count | 2 | 3 | 8 | 6 | ∞ | |
| Simplified | 5 | 8 | ∞ | |||
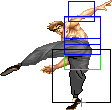
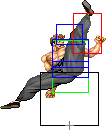
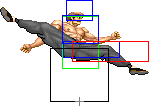
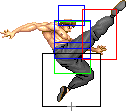
- Diagonal Jumping Roundhouse:
| Damage | ? |  |
 |
 |
 |
 |
 |
 |

|
| Stun | ?~? | ||||||||
| Stun Timer | ? | ||||||||
| Frame Count | 1 | 2 | 2 | 2 | 6 | 5 | 4 | ∞ | |
| Simplified | 5 | 13 | ∞ | ||||||
Command Normals
- Chokka Raku Shou a.k.a. Hop Kick: (On ground, ←/→ + Forward)
| Damage | 24[1] |  |
 |
 |
 |
 |
 |
 |
 |
 |
 |

|
| Stun | 3~9 | |||||||||||
| Stun Timer | 40 | |||||||||||
| Frame Advantage | -3 | |||||||||||
| Frame Count | 2 | 4 | 2 | 2 | 3 | 8 | 5 | 9 | 1 | 4 | 1 | |
| Simplified | 1 + 21 | 5 | 15 | |||||||||
Doing it while holding forward (the direction) will not make O.FeiLong move while attacking like N.FeiLong. Also, it does not has overhead properties like N.FeiLong's version of the move.
- En Geki Shuu a.k.a. Double Kick: (On ground, → + Roundhouse)
| Damage | 20[0] + 20[1] |  |
 |
 |
 |
 |
 |
 |

|
| Stun | 2~8 + 10~16 | ||||||||
| Stun Timer | 90 + 80 | ||||||||
| Frame Advantage | +6 / +9(+8) | ||||||||
| Frame Count | 1 | 8 | 6 | 1 | 3 | 4 | 4 | 5 | |
| Simplified | 1 + 16 | 3 | 4 | 9 | |||||
Throws
FeiLong can throw using Strong, Fierce, Forward and Roundhouse. Unlike N.FeiLong, O.FeiLong does not has an aerial throw. The direction of the joystick determines the direction the enemy gets thrown at. All his ground throws have the same range and do 32 points of damage (plus two more if behind in rounds). Even though he has the worst normal throw range in the game he still has a good tick throwing game.
- Throws Throwboxes:
| Damage | 32 |  |
 |

| |
| Stun | 7~13 | ||||
| Stun Timer | 100 | ||||
| Range | (from axis) | 40 | |||
| (from throwable box) | 11 | ||||
- Gankai Hou: (←/→ + Strong/Fierce)
- Shuu Kubi Kari: (←/→ + Forward/Roundhouse)
Special Moves
- Rekka Ken: (↓↘→ + P)
Detailed Input: (↓ [0~6f] ↘ [0~6f] → [0~10/9/7f] Jab/Strong/Fierce)
- First Punch:
- Second Punch:
- Last Punch:
| Jab | Strong | Fierce |  |
 |
 |
 |
File:OFeiLong rk35anm.png | |
| Damage | 22[2] | 24[2] | 26[2] | |||||
| Stun | 1~7 | |||||||
| Stun Timer | 30 | |||||||
| Frame Advantage | -11(-12)~-10(-11) | -15(-16) | -19(-20)~-21(-22) | |||||
| Frame Count (Jab) | 5 | 6 | 8 | 9~10 | 15 | |||
| Simplified (Jab) | 11 | 8 | 24~25 | |||||
| Frame Count (Strong) | 5 | 6 | 7 | 11 | 19 | |||
| Simplified (Strong) | 11 | 7 | 30 | |||||
| Frame Count (Fierce) | 4 | 5 | 7 | 11~13 | 23 | |||
| Simplified (Fierce) | 9 | 7 | 34~36 | |||||
Fei Long attacks the enemy with a cancelable punch while moving forward, attacking up to three times. The first punch is a jab that has good reach, the second one is a hook to the body and the last one is a backfist, followed by a relatively long recovery. Each punch has a unique animation and demands the input. Thus, to get all three punches, you need to input ↓↘→ + P for the jab, then ↓↘→ + P again for the body punch and, finally, ↓↘→ + P for the backfist. It's a known behavior of O.Fei's Rekkas that the last punch does not always have the same recovery timings: sometimes it can have less recovery, that's probably related to the distance it was performed, similar to Boxer's Rushes.
- Shien Kyaku a.k.a. Flame Kick: (←↓↙ + K)
Detailed Input: (← [0~6f] ↓ [0~6f] ↙ [0~10/9/7f] Short/Forward/Roundhouse)
- Startup + Invincible active part:
| Short | Forward | Rh |  |
 |
 |

| |
| Damage | 38[2] / 22[2] | 30[2] + 18[2] | |||||
| Stun | 9~15 | 2~8 + 2~8 | |||||
| Stun Timer | 100 | 90 + 90 | |||||
| Frame Advantage | -17 | -26 / -24(-25) | -36 / -34(-35) | ||||
| Frame Count | 2 | 2 | 2 | 2 | |||
| Simplified | 6 | 2 | |||||
- Non-invincible active part:
- Short Version:
- Forward Version:
| File:OFeiLong sk5&9shrt 5&9&13frwrd 5&9&13rh anm.png | 
| ||||
| Frame Count | 2 | 4 | |||
| Simplified | ...6 (22) | ||||
- Roundhouse Version:
| File:OFeiLong sk5&9shrt 5&9&13frwrd 5&9&13rh anm.png | File:OFeiLong sk6&10shrt 6&10frwrd 6&10&14rh anm.png | File:OFeiLong sk7&11shrt 7&11frwrd 7&11&15rh anm.png |  |

| |
| Frame Count | 2 | 2 | 2 | 1 | 4 |
| Simplified | ...11 (27) | ||||
- Recovery:
 |
 |
 |

| ||
| Frame Count (Short) | 4 | 4 + {5} | 2 | 4 | |
| Simplified (Short) | 19 | ||||
| Frame Count (Forward) | 12 + {5} | 2 | 5 | ||
| Simplified (Forward) | 24 | ||||
| Frame Count (Rh) | 4 | 12 + {5} | 2 | 6 | |
| Simplified (Rh) | 29 | ||||
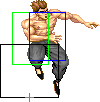
Fei Long becomes invulnerable for a split second, attacks with a low spinning roundhouse flaming kick, which turns into an ascending spinning kick (which is not anymore invincible). After that, Fei falls helpless as he recover from the move.


