Oldschool BR (talk | contribs) m (→Introduction: grammar) |
|||
| Line 11: | Line 11: | ||
===Picking Old Ken=== | ===Picking Old Ken=== | ||
To select O.Ken, choose Ken and then press | To select O.Ken, choose Ken and then press ← ← ← → Jab/Fierce, pressing Short simultaneously with the punch button for the alternate color. | ||
{| border="1em" cellspacing="0" style="border: 1px solid #999;" | {| border="1em" cellspacing="0" style="border: 1px solid #999;" | ||
| width="100pt" align="center" | Normal || width="100pt" align="center" | Secondary | | width="100pt" align="center" | Normal || width="100pt" align="center" | Secondary | ||
Revision as of 21:59, 2 December 2012
Introduction
Old Ken is the Super Street Fighter II version of Ken. He has a few different hitboxes and frame data on some of his normals, one frame better recovery Hadoukens, and Shoryukens which are completely invulnerable on the way up. He is a solid character in ST, considered almost as good as N.Ryu. As any old character, he can not soften throws and has no super, but his better Hadoukens and Shoryukens make him a better character for zoning than N.Ken.
Despite his power, few players choose to master Old Ken. Would you want to check good players on Youtube and Nico Nico Douga, search for PECO, who uses him as his main; and other strong players such as Otochun, Aniken, Hammer, Tatsumaki Ryu and Damdai, who use him as an alternate character - or just happen to play many characters at a high level.
Picking Old Ken
To select O.Ken, choose Ken and then press ← ← ← → Jab/Fierce, pressing Short simultaneously with the punch button for the alternate color.
| Normal | Secondary |
 |

|
--Born2SPD
New & Old Versions Comparison
Here is the list of differences:
- Obvious stuff: O.Ken can not tech throws, does not have the Crazy Kicks, Knee Bash grab and Super;
- O.Ken has a faster pre-jump animation by 1 frame;
- O.Ken does not have an air throw;
- O.Ken has some differences in some of his normals:
- Far Standing Jab has better priority;
- Close Standing Fierce second active hitbox has much better priority;
- Far Standing Short is the anti air kick like the Far Standing Kick while for N.Ken it's a low hitting kick like the close version;
- Crouching Short has much better priority;
- Far Standing Forward has a slower startup;
- Close Standing Forward is a knee attack, while for N.Ken is a high kick similar to his old Close Standing Roundhouse;
- Crouching Forward has much better priority;
- Close Standing Roundhouse is a useless kick with minor anti air priority that hits twice while for N.Ken its a kick that moves him forward while attacking low;
- Far Standing Roundhouse is the classic mediocre anti air shoto kick while for N.Ken its a kick that moves him forward while attacking low;
- Crouching Roundhouse has much better priority and do more damage;
- Both Jumping Fierces do more damage;
- Diagonal Jumping Short has worse priority during the first 10 active frames;
- Diagonal Jumping Forward is an aerial kick with very good priority while for N.Ken it's a new kick made almost exclusively for crossup, but its not easy to time like for O.Ken;
- Neutral Jumping Roundhouse has better air-to-air priority but worse air-to-ground priority and does more damage;
- Diagonal Jumping Roundhouse can be used as a cross-up attack and has better air-to-air priority, but has somewhat worse air-to-ground priority. It also does more damage;
- O.Ken's Hadoukens have a 1 frame faster startup. His Strong Hadoukens have 1 frame faster recovery and his Fierce ones have a 2 frame faster recovery;
- O.Ken's Shoryukens are invulnerable until their apex. Jab and Strong versions do not have 2 grounded frames where Ken is throwable;
Strengths & Weaknesses
- Good projectile and anti-air special moves, but with long recovery;
- Best anti-air move in the game in his Jab Shoryuken;
- Very dangerous option-selects;
- O.Ken's Shoryuken is fully invincible while active: it beats any other special attacks, but O.Ryu' Shoryuken and Buffalo Headbutt (from a certain distance, only);
- O.Ken's Hadouken has much better recovery than N.Ken's, and does not recover longer if you use a faster (stronger) version;
- Ground Tatsu has no invulnerability;
- No super;
- Average throw range;
- Most normals have average range;
- All shotos's diagonal jumping Fierce and Roundhouse attacks have nerfed dizzy properties;
- The normals with most range have a very long recovery time.
Moves Analysis
Normal Moves
Ground Normals
Disclaimer: Ground normals take one extra frame to enter their start-up, which is the reason for the additional frame on the 'Simplified' row.
- Close Standing Jab:
| Damage | 4 |  |
 |

|
| Stun | 0~5 | |||
| Stun Timer | 40 | |||
| Chain Cancel | No | |||
| Special Cancel | Yes | |||
| Frame Advantage | ? | |||
| Frame Count | 2 | 4 | 5 | |
| Simplified | 1 + 2 | 4 | 5 | |
O.Ken performs an elbow smash in front and above his head. Fast start-up anti-air up close, with just OK priority.
- Far Standing Jab:
| Damage | 4 |  |
 |
 |

|
| Stun | 0~5 | ||||
| Stun Timer | 40 | ||||
| Chain Cancel | Yes | ||||
| Special Cancel | Yes | ||||
| Frame Advantage | ? | ||||
| Frame Count | 2 | 4 | 4 | 1 | |
| Simplified | 1 + 2 | 4 | 5 | ||
Rapid-fire Jab that has very good priority (O.Ken's arm is completely invulnerable) but just acceptable reach and very low damage.
- Crouching Jab:
| Damage | 4 |  |
 |
 |

|
| Stun | 0~5 | ||||
| Stun Timer | 40 | ||||
| Chain Cancel | Yes | ||||
| Special Cancel | Yes | ||||
| Frame Advantage | ? | ||||
| Frame Count | 2 | 4 | 4 | 1 | |
| Simplified | 1 + 2 | 4 | 5 | ||
Rapid-fire ducking Jab with OK reach and very good priority. O.Ken's arm is completely invincible.
- Close Standing Strong:
| Damage | 21 |  |
 |
 |
 |
 |
 |

|
| Stun | 5~11 | |||||||
| Stun Timer | 60 | |||||||
| Chain Cancel | No | |||||||
| Special Cancel | Yes | |||||||
| Frame Advantage | ? | |||||||
| Frame Count | 1 | 2 | 2 | 6 | 4 | 3 | 4 | |
| Simplified | 1 + 3 | 2 | 17 | |||||
O.Ken performs a hook. This move has a not very good recovery, so try canceling it into some special such as the Hadouken to avoid punishment.
- Far Standing Strong:
| Damage | 19 |  |
 |
 |
 |
 |

|
| Stun | 5~11 | ||||||
| Stun Timer | 60 | ||||||
| Chain Cancel | No | ||||||
| Special Cancel | Yes | ||||||
| Frame Advantage | ? | ||||||
| Frame Count | 1 | 2 | 4 | 3 | 3 | 1 | |
| Simplified | 1 + 3 | 4 | 7 | ||||
O.Ken performs a straight punch. This move has very good recovery, reach and priority. Works as anti-air against some moves, but notice O.Ken's body moves forward a bit, so you need some room to use it correctly. O.Ken's whole arm is invincible in this attack.
- Crouching Strong:
| Damage | 19 |  |
 |
 |
 |
 |

|
| Stun | 5~11 | ||||||
| Stun Timer | 60 | ||||||
| Chain Cancel | No | ||||||
| Special Cancel | Yes | ||||||
| Frame Advantage | ? | ||||||
| Frame Count | 1 | 2 | 4 | 3 | 3 | 1 | |
| Simplified | 1 + 3 | 4 | 7 | ||||
O.Ken does a crouching straight. Good damage, stun, recovery and priority. O.Ken's whole arm is completely invincible.
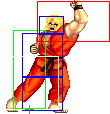
- Close Standing Fierce:
| Damage | 24 |  |
 |
 |
 |

|
| Stun | 3~9/10~16 | |||||
| Stun Timer | 40/80 | |||||
| Chain Cancel | No | |||||
| Special Cancel | Yes/No | |||||
| Frame Advantage | ? | |||||
| Frame Count | 3 | 2 | 6 | 10 | 13 | |
| Simplified | 1 + 3 | 8 | 23 | |||
O.Ken does a close upper. Good priority anti-air if the enemy is on top of you, and if he is close it can be canceled into any special attack for a basic but damaging combo. Bad recovery.
- Far Standing Fierce:
| Damage | 24 |  |
 |
 |
 |
 |

|
| Stun | 10~16 | ||||||
| Stun Timer | 80 | ||||||
| Chain Cancel | No | ||||||
| Special Cancel | No | ||||||
| Frame Advantage | ? | ||||||
| Frame Count | 3 | 2 | 6 | 10 | 12 | 1 | |
| Simplified | 1 + 5 | 6 | 23 | ||||
Similar to far.Strong, but with higher damage and longer reach, but the head hitbox moves forward just as much and the recovery is hideous. This move can not be canceled into specials, so make sure it hits or you will pay the price.
- Crouching Fierce:
| Damage | 24/19 |  |
 |
 |
 |
 |

|
| Stun | 3~9/10~16 | ||||||
| Stun Timer | 40/80 | ||||||
| Chain Cancel | No | ||||||
| Special Cancel | Yes/No | ||||||
| Frame Advantage | ? | ||||||
| Frame Count | 3 | 3 | 8 | 10 | 12 | 1 | |
| Simplified | 1 + 3 | 11 | 23 | ||||
Uppercut from crouching position. It does good damage and has a deceptively long horizontal reach, but just average to low priority and quite long recovery. This move is unsafe on block or hit and is mainly used in combos or as close-up anti-air. Favor standing Fierce if you can for the latter.
- Close Standing Short:
| Damage | 11 |  |
 |
 |
 |
 |

|
| Stun | 0~5 | ||||||
| Stun Timer | 40 | ||||||
| Chain Cancel | Yes | ||||||
| Special Cancel | No | ||||||
| Frame Advantage | ? | ||||||
| Frame Count | 2 | 3 | 2 | 4 | 3 | 1 | |
| Simplified | 1 + 5 | 2 | 8 | ||||
O.Ken performs a low kick that can be canceled into a far Short or crouching Short. This move must be blocked low.
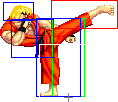
- Far Standing Short:
| Damage | 12 |  |
 |
 |
 |

|
| Stun | 0~5 | |||||
| Stun Timer | 40 | |||||
| Chain Cancel | Yes | |||||
| Special Cancel | No | |||||
| Frame Advantage | ? | |||||
| Frame Count | 3 | 3 | 8 | 4 | 1 | |
| Simplified | 1 + 6 | 8 | 5 | |||
High side kick with good priority, but sort of slow. Good anti-air, but it is slower than N.Ryu's.
- Crouching Short:
| Damage | 4 |  |
 |
 |

|
| Stun | 0~5 | ||||
| Stun Timer | 40 | ||||
| Chain Cancel | Yes | ||||
| Special Cancel | Yes | ||||
| Frame Advantage | ? | ||||
| Frame Count | 2 | 4 | 4 | 1 | |
| Simplified | 1 + 2 | 4 | 5 | ||
Rapid fire crouching low kick. This comes out slightly fasteer than N.Ryu's and has great priority: the whole leg is completely invincible during the move.
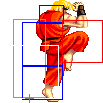
- Close Standing Forward:
| Damage | 21 |  |
 |
 |
 |
 |

|
| Stun | 5~11 | ||||||
| Stun Timer | 60 | ||||||
| Chain Cancel | No | ||||||
| Special Cancel | Yes | ||||||
| Frame Advantage | ? | ||||||
| Frame Count | 2 | 1 | 6 | 4 | 4 | 1 | |
| Simplified | 1 + 3 | 6 | 9 | ||||
Knee bash with a good recovery.
- Far Standing Forward:
| Damage | 19 |  |
 |
 |
 |

|
| Stun | 5~11 | |||||
| Stun Timer | 60 | |||||
| Chain Cancel | No | |||||
| Special Cancel | No | |||||
| Frame Advantage | ? | |||||
| Frame Count | 5 | 6 | 12 | 6 | 1 | |
| Simplified | 1 + 11 | 8 | 7 | |||
High side kick with good priority, but hideous start-up. Good anti-air if you can hit the button early enough, but odds are you can't.
- Crouching Forward:
| Damage | 19 |  |
 |
 |
 |
 |

|
| Stun | 5~11 | ||||||
| Stun Timer | 60 | ||||||
| Chain Cancel | No | ||||||
| Special Cancel | Yes | ||||||
| Frame Advantage | ? | ||||||
| Frame Count | 1 | 2 | 6 | 4 | 4 | 1 | |
| Simplified | 1 + 3 | 6 | 9 | ||||
Crouching side kick. This move has good reach and recovery, but is has projected vulnerable hitboxes before it becomes active. It is an important tool when closing the gap on the enemy and trying to push him into the corner as it can be canceled into Hadoukens. It is also used in bread and butter combos.
- Close Standing Roundhouse:
| Damage | 26+4 |  |
 |
 |
 |
 |

|
| Stun | 10~16+1~7 | ||||||
| Stun Timer | 80+70 | ||||||
| Chain Cancel | No | ||||||
| Special Cancel | No | ||||||
| Frame Advantage | ? | ||||||
| Frame Count | 3 | 4 | 8 | 4 | 10 | 1 | |
| Simplified | 1 + 7 | 8 | 4 | 11 | |||
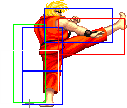
O.Ken performs an axe kick that hits twice if the enemy is close enough. This is not a very useful move, but it is safe on block from point-blank range and often trades with aerial attacks. If you use it as a meaty, you can combo a crouching kick for two or three hits. You often have better options, though.
- Far Standing Roundhouse:
| Damage | 26 |  |
 |
 |
 |

|
| Stun | 10~16 | |||||
| Stun Timer | 80 | |||||
| Chain Cancel | No | |||||
| Special Cancel | Yes/No | |||||
| Frame Advantage | ? | |||||
| Frame Count | 2 | 4 | 8 | 10 | 7 | |
| Simplified | 1 + 2 | 12 | 17 | |||
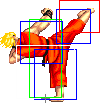
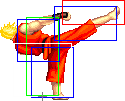
O.Ken's staple Roundhouse kick. Mediocre anti-air that can be canceled in the odd event that it hits during the first active part. This move can not be canceled into specials if it hits while the leg is fully extended - which is often the case.
- Crouching Roundhouse:
| Damage | 26 |  |
 |
 |
 |

|
| Stun | 5~11 | |||||
| Stun Timer | 130 | |||||
| Chain Cancel | No | |||||
| Special Cancel | Yes | |||||
| Frame Advantage | ? | |||||
| Frame Count | 3 | 6 | 6 | 8 | 11 | |
| Simplified | 1 + 3 | 6 | 25 | |||
O.Ken's sweep kick. This move generates a fast knockdown if it hits. It has good range and the priority is such that it beats or trades with a number of moves. The recovery, however, is very long, so good players will try to bait this move so as to punish it afterward. This can be canceled into Hadoukens so you can push the enemy towards his corner.
Aerial normals
- Neutral Jumping Jab:
| Damage | 11 |  |

|
| Stun | 1~7 | ||
| Stun Timer | 40 | ||
| Special Cancel | Yes | ||
| Frame Count | 2 | ∞ | |
O.Ken performs a jumping jab that is active throughout the whole jump. O.Ken's hand has a relatively large active hitbox around it, making this a good air-to-air move. It can be used for jumping on you opponent after a knockdown and not generate much push-back, allowing you to apply mix-ups such as throw, cr.forward xx Hadouken/super or delayed Jab SRK (to beat reversal throws).
- Diagonal Jumping Jab:
| Damage | 11 |  |

|
| Stun | 1~7 | ||
| Stun Timer | 40 | ||
| Special Cancel | Yes | ||
| Frame Count | 2 | ∞ | |
O.Ken performs a jumping jab that is active throughout the whole jump. O.Ken's hand has a relatively large active hitbox around it, making this a good air-to-air move. It can be used for jumping on you opponent after a knockdown and not generate much push-back, allowing you to apply mix-ups such as throw, cr.forward xx Hadouken/super or delayed Jab SRK (to beat reversal throws). This beats Zangief's Lariats from the right distance and still hits him if he crouches.
- Neutral Jumping Strong:
| Damage | 19 |  |
 |
 |
 |
 |
 |

|
| Stun | 5~11 | |||||||
| Stun Timer | 50 | |||||||
| Special Cancel | Yes* | |||||||
| Frame Count | 2 | 2 | 20 | 4 | 4 | 4 | ∞ | |
| Simplified | 4 | 20 | ∞ | |||||
This aerial punch stays active for quite some time, for a Strong punch. It has very good horizontal reach and O.Ken's arm is completely invincible. A move to be considered when afraid of wall dives crossing you or aerial attacks in general. This attack does not hit crouching opponents.
- Diagonal Jumping Strong:
| Damage | 19 |  |
 |
 |
 |
 |
 |

|
| Stun | 5~11 | |||||||
| Stun Timer | 50 | |||||||
| Special Cancel | Yes* | |||||||
| Frame Count | 2 | 2 | 8 | 4 | 4 | 4 | ∞ | |
| Simplified | 4 | 8 | ∞ | |||||
The same as above but with different frame count.
- Neutral Jumping Fierce:
| Damage | 24 |  |
 |
 |
 |
 |
 |

|
| Stun | 11~17 | |||||||
| Stun Timer | 60 | |||||||
| Special Cancel | Yes* | |||||||
| Frame Count | 2 | 2 | 20 | 4 | 4 | 4 | ∞ | |
| Simplified | 4 | 20 | ∞ | |||||
Stays active a lot of time, for a fierce punch.
- Diagonal Jumping Fierce:
| Damage | 24 |  |
 |
 |
 |
 |
 |

|
| Stun | 3~9 | |||||||
| Stun Timer | 40 | |||||||
| Special Cancel | Yes* | |||||||
| Frame Count | 2 | 2 | 8 | 4 | 4 | 4 | ∞ | |
| Simplified | 4 | 8 | ∞ | |||||
This move has very good air to ground priority, and O.Ken's arm is also completely invincible. It can be used as anti-air from certain distances, and also beats or trades most other aerial attacks.
- Neutral Jumping Short:
| Damage | 12 |  |
 |

|
| Stun | 1~7 | |||
| Stun Timer | 40 | |||
| Special Cancel | Yes | |||
| Frame Count | 3 | 40 | ∞ | |
This stays out for quite some time, but it has a very short reach. Mostly useless.
- Diagonal Jumping Short:
| Damage | 11 |  |
 |

| |
| Stun | 1~7 | ||||
| Stun Timer | 40 | ||||
| Special Cancel | No | ||||
| Frame Count | 2 | 3 | ∞ | ||
| Simplified | 5 | ∞ | |||
This stays out for quite some time, but safe jumps aside, this does not have many uses. Its main downside is the short reach. It can be useful against poor priority aerial attacks and wall dives, but do not trust it too much.
- Neutral Jumping Forward:
| Damage | 19 |  |
 |
 |
 |

|
| Stun | 5~11 | |||||
| Stun Timer | 50 | |||||
| Special Cancel | No | |||||
| Frame Count | 5 | 13 | 6 | 6 | ∞ | |
| Simplified | 5 | 13 | ∞ | |||
OK kick that stays active for some time. It can be used in certain situations where the enemy has trouble knowing which way to block. That aside, prefer neutral Strong, Fierce or Roundhouse.
- Diagonal Jumping Forward:
| Damage | 19 |  |
 |
 |
 |
 |
 |

|
| Stun | 5~11 | |||||||
| Stun Timer | 50 | |||||||
| Special Cancel | No | |||||||
| Frame Count | 2 | 3 | 13 | 3 | 3 | 3 | ∞ | |
| Simplified | 5 | 13 | ∞ | |||||
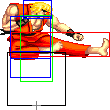
Rather long aerial kick great priority. It can be used as a cross-up aerial attack, but diagonal Roundhouse is better for that. It can also be used in safe jumps, to get less push-back if it gets blocked.
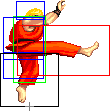
- Neutral Jumping Roundhouse:
| Damage | 26 |  |
 |
 |
 |
 |
 |

|
| Stun | 11~17 | |||||||
| Stun Timer | 60 | |||||||
| Special Cancel | Yes/No | |||||||
| Frame Count | 2 | 4 | 4 | 4 | 3 | 3 | ∞ | |
| Simplified | 2 | 8 | ∞ | |||||
Neutral spin kick that has great reach and priority. The first active part becomes active very fast, saving you from some troublesome situations.
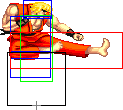
- Diagonal Jumping Roundhouse:
| Damage | 26 |  |
 |
 |
 |
 |
 |

|
| Stun | 3~9 | |||||||
| Stun Timer | 40 | |||||||
| Special Cancel | No | |||||||
| Frame Count | 2 | 3 | 7 | 3 | 3 | 3 | ∞ | |
| Simplified | 5 | 7 | ∞ | |||||
O.Ken's best cross-up attack. This also has good reach and great priority. Ken's leg is completely invulnerable. From certain distances, this can also be used as anti-air, in the same fashion as diagonal jumping Fierce.
Throws
O.Ken can throw using Strong, Fierce, Forward, and Roundhouse. The direction of the joystick determines the direction the enemy gets thrown at. All his throws have the same range and do 22% damage. As it approaches the corner faster, the Roundhouse throw is often preferred.
- Shoulder Throw a.k.a. Seoi Nage: (←/→ + Strong/Fierce)
| Damage | 32 |  |
 |

|
| Stun | 7~13 | |||
| Stun Timer | 100 | |||
| Range (from axis) | 48 | |||
| (from throwable box) | 19 |
Both punch throws are the same, which allow Ken to grab the enemy and throw him above his head.
- Rolling Circle Throw a.k.a. Jigoku Guruma: (←/→ + Forward/Roundhouse)
| Damage | 32 |  |
 |

|
| Stun | 7~13 | |||
| Stun Timer | 100 | |||
| Range (from axis) | 48 | |||
| (from throwable box) | 19 |
The kick throws are also the same and have Ken pull the enemy towards himself, roll on the ground while holding him and throw him with the aid of his leg.
Special Moves
All motions are listed under the assumption that O.Ken is facing right.
- Hadouken a.k.a. Fireball: (↓↘→ + P)
Detailed Input: (↓ [0~6f] ↘ [0~6f] → [0~10/9/7f] Jab/Strong/Fierce)
- Startup:
 |
 |
 |

| |
| Frame Count | 2 | 7 | 2 | 1 |
| Simplified | 12 | |||
- Active:
- Jab Version:
| Damage | 16 |  |
 |
 |

|
| Stun | 5~11 | ||||
| Stun Timer | 110 | ||||
| Frame Count | 1 | 1 | 2 | 2... | |
| Simplified | 40 | ||||
- Strong Version:
| Damage | 17 |  |
 |
 |

|
| Stun | 5~11 | ||||
| Stun Timer | 110 | ||||
| Frame Count | 1 | 1 | 2 | 2... | |
| Simplified | 40 | ||||
- Fierce Version:
| Damage | 19 |  |
 |
 |

|
| Stun | 5~11 | ||||
| Stun Timer | 110 | ||||
| Frame Count | 1 | 1 | 2 | 2... | |
| Simplified | 40 | ||||
O.Ken throws two flying fists which are engulfed by blue energy towards his enemy. The strength of the punch determines its speed: Jab flies the slowest, while Fierce flies the fastest. The Jab does 11% damage, the Strong does 12% damage and the Fierce one does 14%, which happens to be the highest damaging projectile in the game. All 3 versions (Jab, Strong, Fierce) have O.Ken release the projectile at the same interval, which is 12 frames, and have vulnerable "after-throw" state that takes 40 frames to recover. This is as fast as N.Ken's Jab Hadouken, but the start-up is faster by one frame. The overall recovery of the move is the same as N.Ryu's Jab Hadouken, which means no-one but O.Sagat and O.Ryu will be able to throw more projectiles than you in a projectile exchange. You do have, however, a slower start-up on your move and slower projectiles in general, so it is harder for you to hit them out of their moves with them. Your main goal is to force them to jump, as you have the best anti-air moves of the game: O.Ken's Shoryukens.
- Shouryuken a.k.a. Dragon Punch: (→↓↘ + P)
Detailed Input: (→ [0~6f] ↓ [0~6f] ↘ [0~10/9/7f] Jab/Strong/Fierce)
- Jab Version:
| Damage | 33/22 |  |
 |
 |
 |
 |

|
| Stun | 9~15/2~8 | ||||||
| Stun Timer | 100/90 | ||||||
| Frame Count (Jab) | 2 | 4 | 14 | 6 | 10 | 3 | |
| Simplified (Jab) | 2 | 18 | 19 | ||||
- Strong Version:
| Damage | 29+12 |  |
 |
 |
 |
 |

|
| Stun | 9~15+2~8 | ||||||
| Stun Timer | 100+90 | ||||||
| Frame Count | 2 | 4 | 22 | 6 | 18 | 3 | |
| Simplified | 2 | 4 | 22 | 27 | |||
- Fierce Version:
| Damage | 4+27+11 |  |
 |
File:OKen srk2frcanm.png | File:OKen srk3frcanm.png | File:OKen srk4frcanm.png | File:OKen srk5frcanm.png | File:OKen srk6frcanm.png |
| Stun | 1~7+9~15+1~7 | |||||||
| Stun Timer | 30+100+30 | |||||||
| Frame Count | 1 | 1 | 2 | 26 | 6 | 25 | 3 | |
| Simplified | 1 | 1 | 2 | 26 | 34 | |||
O.Ken becomes completely invincible and does an upper followed up with a rising punch, then remains completely defenseless as he falls back to the ground. The Jab version will cause a full knockdown on his enemy. It does 23% damage early and 14% while ascending. The Strong one hits up to two times and causes a full knockdown if the rising punch connects. The Fierce version forces a crouching flaming hitstun on the first, close hit; standing flaming hitstun on the second hit - the upper - and causes a full knockdown if the rising fist hits, but this often does not happen if the initial stages connect but from point-blank range. The Jab Shoryuken is very good for evading projectiles and it is O.Ken's best reversal move by far, possibly the best in the whole game, as it causes good damage if it hits early, always knocks down on hit and is safe on block against most characters.
O.Ken's Fierce Shoryuken does not do much damage when hitting while ascending, but it controls a good part of the air space in front of him. If you are not recovering from a move and the enemy jumped forward from a distance such that you are unsure if a late Jab Shoryuken will hit, use the Fierce version to knock him out of the air safely. It can also be used to prevent the enemy from jumping straight up in front of you from close to mid distance. Some floaty jumps over Hadoukens can be punished that way. Note that O.Ken's Fierce Shoryuken does not hit on the first frame, only N.Ken's have that property. A perfectly timed safe jump may work half the time against your other Shoryukens, but if you use the Fierce version, you are guaranteed to hit, albeit for low damage.
Since a properly-timed Dragon Punch will beat most other moves, its simplest and most common application is as a general anti-air counter, because you have a lot of time to react and time the attack as you see the opponent approaching through the air. Because it'll knock down, you can continue pressuring with whatever you like, such as a meaty fireball or a cross-up attack. In addition to it, any character that can not alter its jump arc will be unable to evade any versions of the move, as O.Ken is invulnerable during the whole active part. Notice that O.Ken does more damage if it hits early, so time it late if possible.
O.Ken's Jab Shoryuken is a very strong tool in footsies. You can stuff virtually any normal ground attack from your opponent, and the timing is much more lenient than for Ryu's Shoryuken, as O.Ken's has slightly more horizontal range and much better vertical range, making it easier to stuff low pokes.
- Tatsumaki Senpuu Kiaku a.k.a. Hurricane Kick: (↓↙← + K)
Detailed Input: (↓ [0~6f] ↙ [0~6f] ← [0~10/9/7f] Short/Forward/Roundhouse)
- Startup:
| Damage | 11 |  |
 |
 |
 |

|
| Stun | 3~9 | |||||
| Stun Timer | 90 | |||||
| Frame Count | 1 | 3 | 3 | 3 | 1 | |
| Simplified | 1 | 3 | 7 | |||
- Spin:
- Short Version: This happens 3 times.
- Forward Version: This happens 4 times.
- Roundhouse Version: This happens 5 times.
| Damage | 11 |  |
 |
 |

|
| Stun | 3~9 | ||||
| Stun Timer | 90 | ||||
| Frame Count | 2 | 1 | 2 | 2 | |
- Recovery:
 |
 |
 |

| |
| Frame Count | 4 | 4 | 4 | 0 |
| Simplified | 12 | 0 | ||
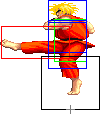
O.Ken immediately becomes airborne, attacks with a knee bash, then advances with fast spinning kicks that may combo one after the other. Different kicks have different effects: Short has the lowest duration and speed, while Roundhouse has the highest. Unlike Ryu, O.Ken is never invulnerable during this move.
O.Ken's Hurricane Kick also travels right over some projectiles and can be used to punish characters like Dhalsim and Guile for trying to use them. However, as it does not cause a knock down, O.Ken may be punished after or during the move. Because O.Ken has no invulnerability in his Tatsus, however, he can not use them to avoid meaty projectiles, even those of Dhalsim and Guile. He can not avoid safe jumps with them, too. As O.Ken is airborne as the move starts, he can avoid throws with it.
- Kuuchuu Tatsumaki Senpuu Kiaku a.k.a. Air Hurricane Kick: (In air, ↓↙← + K)
- Spin: (The Air version does not has a startup animation)
- Short Version: This happens 3 times.
- Forward Version: This happens 4 times.
- Roundhouse Version: This happens 5 times.
| Damage | 11 |  |
 |
 |

|
| Stun | 3~9 | ||||
| Stun Timer | 90 | ||||
| Frame Count | 2 | 1 | 2 | 2 | |
- Recovery:
 |
 |
 |
 |
 |

| |
| Frame Count | 4 | 4 | 4 | 4 | ∞ | 7 |
| Simplified | ∞ | 7 | ||||
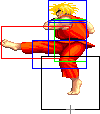
The Hurricane Kick can also be done while airborne. Again, stronger kicks give it longer duration. Unlike the ground version, it doesn't always move O.Ken forward; if performed while jumping backwards, O.Ken will continue moving in that direction. O.Ken's air tatsus have a 50% chance of being unblockable if the move connects on the first frame.
The Air Hurricane Kick has some interesting effects on the speed and trajectory of the jump, as felineki writes:
The character's vertical velocity is not directly affected. Rather, their gravity value is temporarily adjusted. Every character has their own jump gravity value (as I'm sure you've noticed, Dhalsim falls much more slowly from a jump than Claw). This normally stays constant throughout a jump. However, when a shoto performs a mid-air hurricane kick, their gravity value is temporarily decreased. This gives them the effect of falling more slowly if it is performed on the way down, or allowing them to gain more height if done on the way up.
The decreased gravity value lasts as long as the character's leg is out, able to hit. As soon as they pull their leg back in, the gravity value returns to normal.
In addition, they are given a slight boost in horizontal velocity as the kick starts (a forward boost if jumping forward or straight up, a backward boost if jumping back). This additional velocity lasts until they actually touch the ground.
Similarly to Ryu's, O.Ken's Air Hurricane Kick has a multitude of uses. It serves as an alternative air attack with alternative properties than Ken's normal attacks and may interact with opponent anti-air moves differently. As it changes jump properties, it can surprise the opponent. Done correctly, it can actually cross-up enemy air counters like the Flash Kick to hit the opponent from behind. O.Ken's air tatsu, however, can combo (for more than one hit) on the way down, hits crouching characters much more often and is much better for shennanigans. These include the cross-up tatsu and the juice kick.
While the air hurricane kick looks like the grounded one, in fact it has much worse priority. Also, it does not recover instantly when O.Ken touches the ground. Watch out for this if the enemy has a long reaching move or a super that moves it fast in your direction, such as Chun Li's, as this increased recovery can be exploited for major damage.
The Basics
Old Ken does not have the knee bash from N.Ken and can not soften throws, so you will want to avoid situations where you risk getting thrown. Against new characters, if both expect a throw, you will only do about half the damage they do to you when you get thrown, and you will also suffer a full knockdown, which gives them great positioning and time to build meter and position themselves for traps, cross-ups and other strategical advantageous situations. Use your powerful tools to zone them.
Old Ken's Jab Hadoukens are quite slow. His Fierce one is fast, so enemies who want to identify the projectile speed will often have to block the Fierce ones. If they jump straight up over Jab Hadoukens from close distance, sometimes you can Fierce Shoryuken them for free. This is your main advantage in this case: because of its range, you do not need to depend so much on standing punches and sweeps as anti-airs. If they jump right where you are, then a deep Jab Shoryuken will hurt them bad while still knocking them down. Your usual strategy is to throw as many Hadoukens as possible while feinting and giving them room to make mistakes so you can punish accordingly. Eventually, you will get them in the corner, where their options are very limited and you can press them with projectiles safely.
Advanced Strategy
Canceling into Hadoukens
You want to push your enemies into the corner in most your match-ups. A few of them actually have better ground normals than you do. As your projectile/anti-air game is strong, learning to push them away from you is important. One important skill is being able to walk up and cancel a crouching kick into Hadouken. Because of the threat of the walk-up Shoryuken, enemies will be worried about sticking too many pokes in front of you, which might give you time to do this. To ensure you get a Hadouken, cancel the crouching kick as late as possible, do not rush the move. If you are facing an opponent which has an horizontal super, never cancel your crouching kicks into Hadoukens, but the Forward kick from point-blank range. They have enough time to pull out the super and punish you hard for it.
Juice kicks
Ken's air Tatsumaki in ST is really nasty and there are several different variations on it. One of the best is known as the "Juice Kick." This is when you do an air Tatsumaki almost immediately after jumping. It can be used to escape certain situations or get some distance if you use a backward jump, but the best uses come from straight and towards jumps. If you do it right, Ken's arc of travel will be REALLY low to the ground. This almost has the effect of a Dhalsim-style teleport, but you hit at the same time! This is really good against Sagat; if you sense he is going to throw a Low Tiger, you can Juice Kick and connect with his limbs before he recovers! The up version can be used on wake-up to confuse the enemy even more, together with your other many tricks after a knockdown.
Cross-up tatsu
Do a safe jump as you normally would. At the peak of your jump, do an air Tatsumaki to increase your horizontal speed and land on the other side of your enemy. This is easier to do as Ken than Ryu due to his longer and faster air Tatsumaki. In addition to it, Ken can hit more than once and is left at a great frame advantage as he lands. This can be used to land an attack such as cr.Roundhouse or mix up throws, Shoryukens and low attacks.
Walk-up Shoryuken
Simply move the joystick towards your enemy. As you get close, quickly complete the Shoryuken motion, that is, move the joystick down and then down-towards while pressing Jab. Due to being invincible, this move will stuff most every other move in the game: most likely, a poke the enemy sticks out to prevent you from getting close and controlling space. Eventually, the fear of the walk-up Shoryuken will allow you to close in on your enemy and push them further back towards their corner with crouching kicks into Hadoukens or even throws.
Meaty into Shoryuken
This is a very basic option-select tool, that can be used here and there, specially against enemies that have trouble punishing your Jab Shoryuken on block. A basic meaty option could be to wait your enemy with a cr.Short or Forward just as he gets up, and cancel it normally, so you hit them for another knockdown or add some chip damage to the block string. The command would be ↓ + kick, then →↓↘ + Jab, of course. This can be countered right away in two ways: reversal throw and reversal special attacks (invulnerable or instantly-hitting ones). However, if you always kara-cancel the first hitting frames of the move, you can beat many reversal attacks. The command is →↓ + Short or Forward, ↘ + Jab. You have to time the Jab so that the crouching kick has enough time to come out. If the enemy misses his reversal, he eats a damaging two-hit combo into another knockdown. If he uses an invulnerable reversal that has any start-up, Ken's Jab Shoryuken beats it. If he blocks and you have spaced the kick correctly, his counter pokes whiffs, depending on the enemy character. This has some risk as you can get thrown out of it, but as throws are harder than specials when it comes to reversals, this is also risky for them. You must also time it right so that the kick is still cancellable: the last active (read hit-able) frames of most attacks are usually not cancellable.
A safer version is to simply use a Jab Shoryuken on the enemy's wake-up. This does less damage and stun, but is harder to mess up and gives the enemy one less frame of advantage as you recover. Meaty Shoryuken, meaty kick into Shoryuken, safe jumps and built-in [Shoryuken] will eventually train your enemy to block as he wakes up, which allows O.Ken to use another tricky option-select, the throw-SRK option-select.
Built-in Shoryuken
Built-in Shoryukens are explained here, be sure to read that. In a nutshell: as you perform a safe jump, do a Jab Shoryuken as you land so that it comes out if they reverse, stuffing their special move. Because Ken's Shoryukens are invulnerable on the way up, they can only ever lose to other moves during recovery. In practice, this happens mostly against Boxer's headbutts, depending on the range and the headbutt strenght. Here is a list of moves that Ken's built-in Jab Shoryuken will beat:
- Ryu: Tatsu, Shoryuken, super
- E.Honda: Headbutt, Sumo Drop, Super Headbutt
- Chun-Li: Super, upkicks;
- Guile: Flash Kick
- T.Hawk: Tomahawk Buster
- Fei-Long: Flame Kick, Chicken Kick, Super
- Cammy: Cannon Spike, Spin Knuckle, Super
- DeeJay: Machine Gun, upkicks;
- Boxer: Super
- Claw: Scarlet Terror
- Sagat: Tiger Uppercut
You can not safe jump against Chun Li's roundhouse upkicks, so avoid safe jumping her from the front if your enemy is good with one-button reversals.
Button-release Hadouken
Check this article from Nohoho's blog. This is important against E.Honda.
Throw-Shoryuken
A basic shoto strategy comes from mixing Shoryukens and throws at close range. Any shoto character can use that, but there is a variation that O.Ken, O.Ryu and Ryu can use to narrow the enemy's options when dealing with throws, which is the Throw-Shoryuken option-select. By using the command →↓↘→ + Forward~Jab, you can try to use the kick throw, if the enemy is in range and not invincible, and immediately obtain a Jab Shoryuken if he can not be thrown, dealing with late counter throws and reversals. This forces the enemy to resort to counter throws, which is harder than a special as a reversal and may fail if his throw range is shorter than the shotos'. The technique works better for the old Shotos, as their Shoryukens are fully invincible during the way up, and after an attack that leaves your enemy at close range, so you don't risk getting thrown even before finishing the SRK motion.
Check Super Turbo Saturdays episode 2 to see it in action.
Cross-ups
You can win a round with one cross-up combo. Old Ken has the old school diagonal jumping Roundhouse from the shotos, which is a good aerial attack for starting cross-up combos. There are a few options you will have:
- cross-up Roundhouse, cr.Short x 2: cancel into Jab Shoryuken if it hits, mix up with throw, throw/SRK option, non canceled Shoryuken, crouching kick from outside the throw range or wait for a whiffed move if it does not
- cross-up Roundhouse, cr.Strong: cancel into a Shoryuken if it hits, mix up throws, throw/SRK option, cr.roundhouse, non canceled Shoryuken or wait if it does not
- cross-up Roundhouse, st.Fierce (ToD): cancel into Strong or Fierce Shoryuken (depends on the enemy) if it hits, or Hadouken or Jab Shoryuken if it does not.
Match-ups
Vs. Balrog (boxer):
Use Hadoukens and standing Strong punches to keep Boxer at a distance. Avoid crouching kicks into Hadoukens as Boxer can react with a headbutt or super for free damage. If you stay just outside of his cr.Strong range, your cr.Strong beats his. Punish jump-ins with Shoryukens, standing punches or sweeps, according to the distance. If you get him at the corner, keep the button-release Hadouken in mind, so you can sweep or throw headbutts. Also, notice your projectile has sort of slow start-up, which can be used to react with a headbutt if you are too close, or trade with a rush or standing punch. Boxer has a slow reversal: take advantage of that with safe jumps.
Vs. Blanka:
Zone him with projectiles and use Shoryukens, standing Strong or sweep as anti-air. Due to the range of your Fierce Shoryuken, you will rarely need a standing punch, but it can be useful if he tries an aerial move from the wrong range. Do not cross him up on wake-up: his up-ball will knock you down for a horrible situation on your wake-up. Simply throw projectiles, or try a jumping fierce or strong with the tip of the fist if you want to be fancy and beat reversal rolling attacks. Blanka has trouble with your cr.Strong and cr.Jab, use them to discourage constant poking.
Vs. Cammy:
Avoid the use of Jab Hadoukens while zoning: she will simply jump over them, then close the gap walking. Her good and fast pokes give you hell, but try and stay calm until you can hit her with a crouching kick into a Hadouken for some space, or a sweep. Beat spinning knuckle, hooligan combination and jump-ins and Shoryukens. From a distance, use sweeps if she jumps in, then have her wake-up on a Hadouken.
Vs. Chun-Li:
Try to force her to jump with your projectiles and feints, then punish with a Shoryuken. Her pokes are much better than yours and can stuff your projectiles from close range. Either try a Hadouken in between the pokes, jump back or try a tiny step towards and Jab Shoryuken. Check what she does after throwing Kikoukens: do not try to evade them with Shoryukens if she follows them.
Chun has trouble against O.shotos aerial RH. After a Kikouken, she loses important options to deal with that move, so you can pressure her by reacting to her projectiles early and forcing her to block. Watch out for her super, since it can land all hits with the proper timing.
