m (→Throws) |
m (→Throws) |
||
| Line 504: | Line 504: | ||
| align="center" | Range (from axis) || align="center" | <strike>64</strike>/51/41 | | align="center" | Range (from axis) || align="center" | <strike>64</strike>/51/41 | ||
|- | |- | ||
| align="center" | | | align="center" | (from throwable box) || align="center" | <strike>37</strike>/24/14 | ||
|} | |} | ||
<b>NOTE:</b> Balrog's Grab is the only throw/grab in the game that actually has range restriction (i.e like the close normals). The first throw range values/image represent how his throw range actually is (but it has range restriction, so you cant activate it from that max range). The other values/images are <b>edits</b> of the original that represent how the Strong and Fierce grabs actually are in practice. | <b>NOTE:</b> Balrog's Grab is the only throw/grab in the game that actually has range restriction (i.e like the close normals). The first throw range values/image represent how his throw range actually is (but it has range restriction, so you cant activate it from that max range). The other values/images are <b>edits</b> of the original that represent how the Strong and Fierce grabs actually are in practice. | ||
Revision as of 13:07, 7 March 2012
Introduction
Picking Old Balrog
To select O.Balrog, choose Balrog and then press → ← ← → Jab or Fierce, pressing Short simultaneously with the punch button for the alternate color.
| Normal | Secondary |
 |

|
--Born2SPD
Moves Analysis
Normal Moves
Ground Normals
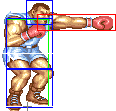
- Close/Far Standing Jab:
| Damage | ? |  |
 |

|
| Stun | ?~? | |||
| Stun Timer | ? | |||
| Chain Cancel | Yes | |||
| Special Cancel | Yes | |||
| Frame Advantage | ? | |||
| Frame Count | ? | ? | ? | |
Useful to cancel into super / rushes. Also good to stop some stuff (Honda's headbutts for example).
- Crouching Jab:
| Damage | ? |  |
 |

|
| Stun | ?~? | |||
| Stun Timer | ? | |||
| Chain Cancel | Yes | |||
| Special Cancel | Yes | |||
| Frame Advantage | ? | |||
| Frame Count | ? | ? | ? | |
It's very fast and has the repeating property (something low short doesn't), but it has a different hit box. I really dont use low short much, only low jab for cheating and combos.
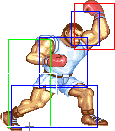
- Close Standing Strong:
| Damage | ? |  |
 |

|
| Stun | ?~? | |||
| Stun Timer | ? | |||
| Chain Cancel | No | |||
| Special Cancel | No | |||
| Frame Advantage | ? | |||
| Frame Count | ? | ? | ? | |
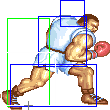
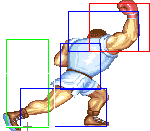
- Far Standing Strong:
| Damage | ? |  |
 |
 |
 |

|
| Stun | ?~? | |||||
| Stun Timer | ? | |||||
| Chain Cancel | No | |||||
| Special Cancel | No | |||||
| Frame Advantage | ? | |||||
| Frame Count | ? | ? | ? | ? | ? | |
| Simplified | ? | ? | ? | |||
Second best anti-air move. Has more range than cr.HP.
- Crouching Strong:
| Damage | ? |  |
 |
 |
 |

|
| Stun | ?~? | |||||
| Stun Timer | ? | |||||
| Chain Cancel | No | |||||
| Special Cancel | Yes | |||||
| Frame Advantage | ? | |||||
| Frame Count | ? | ? | ? | ? | ? | |
| Simplified | ? | ? | ? | |||
This is his best ground attack, despite not hitting low. The entire arm is safe and cannot be hit, but can hit the enemy (it's a completely red hitbox, no blue). Can cancel into rushes and link into Super.
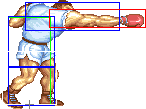
- Close Standing Fierce:
| Damage | ? |  |
 |
 |
 |

|
| Stun | ?~? | |||||
| Stun Timer | ? | |||||
| Chain Cancel | No | |||||
| Special Cancel | No | |||||
| Frame Advantage | ? | |||||
| Frame Count | ? | ? | ? | ? | ? | |
| Simplified | ? | ? | ? | |||
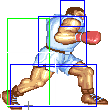
- Far Standing Fierce:
| Damage | ? |  |
 |
 |
 |

|
| Stun | ?~? | |||||
| Stun Timer | ? | |||||
| Chain Cancel | No | |||||
| Special Cancel | No | |||||
| Frame Advantage | ? | |||||
| Frame Count | ? | ? | ? | ? | ? | |
| Simplified | ? | ? | ? | |||
Great poke to use at max range. It _CAN'T_ hit the following opponents when they're crouching: Ryu, Blanka, Guile, Ken, Chun Li, Cammy and Dictator.
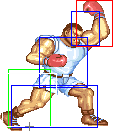
- Crouching Fierce:
| Damage | ? |  |
 |
 |
 |

|
| Stun | ?~? | |||||
| Stun Timer | ? | |||||
| Chain Cancel | No | |||||
| Special Cancel | No | |||||
| Frame Advantage | ? | |||||
| Frame Count | ? | ? | ? | ? | ? | |
| Simplified | ? | ? | ? | |||
Best anti-air non-special. Hits early and late, unlike most moves in game.
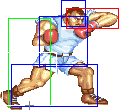
- Close/Far Standing Short:
| Damage | ? |  |
 |

|
| Stun | ?~? | |||
| Stun Timer | ? | |||
| Chain Cancel | No | |||
| Special Cancel | Yes | |||
| Frame Advantage | ? | |||
| Frame Count | ? | ? | ? | |
- Crouching Short:
| Damage | ? |  |
 |

|
| Stun | ?~? | |||
| Stun Timer | ? | |||
| Chain Cancel | No | |||
| Special Cancel | Yes | |||
| Frame Advantage | ? | |||
| Frame Count | ? | ? | ? | |
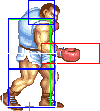
- Close Standing Forward:
| Damage | ? |  |
 |

|
| Stun | ?~? | |||
| Stun Timer | ? | |||
| Chain Cancel | No | |||
| Special Cancel | Yes | |||
| Frame Advantage | ? | |||
| Frame Count | ? | ? | ? | |
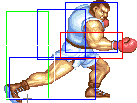
- Far Standing Forward:
| Damage | ? | 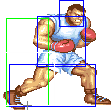 |
 |

|
| Stun | ?~? | |||
| Stun Timer | ? | |||
| Chain Cancel | No | |||
| Special Cancel | No | |||
| Frame Advantage | ? | |||
| Frame Count | ? | ? | ? | |
- Crouching Forward:
| Damage | ? |  |
 |
 |

|
| Stun | ?~? | ||||
| Stun Timer | ? | ||||
| Chain Cancel | No | ||||
| Special Cancel | No | ||||
| Frame Advantage | ? | ||||
| Frame Count | ? | ? | ? | ? | |
| Simplified | ? | ? | ? | ||
Catches some moves that go under Crouching Strong (like Vega's slide). Links into cr.Strong and the Super. Your move of choice to tick / combo in throw mixups. Quick recovery and great for hitting limbs in footsies (like Guile's d. Forward).
- Close Standing Roundhouse:
| Damage | ? |  |
 |

|
| Stun | ?~? | |||
| Stun Timer | ? | |||
| Chain Cancel | No | |||
| Special Cancel | No | |||
| Frame Advantage | ? | |||
| Frame Count | ? | ? | ? | |
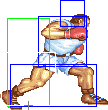
- Far Standing Roundhouse:
| Damage | ? |  |
 |
 |
 |

|
| Stun | ?~? | |||||
| Stun Timer | ? | |||||
| Chain Cancel | No | |||||
| Special Cancel | No | |||||
| Frame Advantage | ? | |||||
| Frame Count | ? | ? | ? | ? | ? | |
| Simplified | ? | ? | ? | |||
- Crouching Roundhouse:
| Damage | ? |  |
 |
 |
 |

|
| Stun | ?~? | |||||
| Stun Timer | ? | |||||
| Chain Cancel | No | |||||
| Special Cancel | No | |||||
| Frame Advantage | ? | |||||
| Frame Count | ? | ? | ? | ? | ? | |
| Simplified | ? | ? | ? | |||
Best horizontal range out of his ducking moves and knocks down. Useful for footsies when a crouching Forward won't reach. Long recovery so be careful.
Aerial Normals
- Neutral Jumping Jab:
| Damage | ? |  |
 |
 |

|
| Stun | ?~? | ||||
| Stun Timer | ? | ||||
| Frame Count | ? | ? | ? | ∞ | |
| Simplified | ? | ? | ∞ | ||
Same as Neutral Jumping Short.
- Diagonal Jumping Jab:
| Damage | ? |  |
 |
 |
 |
 |

|
| Stun | ?~? | ||||||
| Stun Timer | ? | ||||||
| Frame Count | ? | ? | ? | ? | ? | ∞ | |
| Simplified | ? | ? | ∞ | ||||
Lasts long with a slightly higher hitbox than the Jumping Strong but shitty priority.
- Neutral Jumping Strong:
| Damage | ? |  |
 |
 |
 |
 |

|
| Stun | ?~? | ||||||
| Stun Timer | ? | ||||||
| Frame Count | ? | ? | ? | ? | ? | ∞ | |
| Simplified | ? | ? | ∞ | ||||
- Diagonal Jumping Strong:
| Damage | ? |  |
 |
 |
 |
 |

|
| Stun | ?~? | ||||||
| Stun Timer | ? | ||||||
| Frame Count | ? | ? | ? | ? | ? | ∞ | |
| Simplified | ? | ? | ∞ | ||||
Good horizontal range on this makes it useful for hitting fireballers when a jumping Roundhouse/Fierce won't reach.
- Neutral Jumping Fierce:
| Damage | ? |  |
 |
 |
 |
 |

|
| Stun | ?~? | ||||||
| Stun Timer | ? | ||||||
| Frame Count | ? | ? | ? | ? | ? | ∞ | |
| Simplified | ? | ? | ∞ | ||||
Only N.Balrog can control this move in air.
- Diagonal Jumping Fierce:
| Damage | ? |  |
 |
 |
 |

|
| Stun | ?~? | |||||
| Stun Timer | ? | |||||
| Frame Count | ? | ? | ? | ? | ∞ | |
| Simplified | ? | ? | ∞ | |||
Best air to ground priority available. Can crossup some characters.
- Neutral/Diagonal Jumping Short:
| Damage | ? |  |
 |
 |

|
| Stun | ?~? | ||||
| Stun Timer | ? | ||||
| Frame Count | ? | ? | ? | ∞ | |
| Simplified | ? | ? | ∞ | ||
Good jump-in for getting in close to start Boxer's combos and mixup strings since it doesn't push the opponent back too far. Also can be used as an instant overhead.
- Neutral/Diagonal Jumping Forward:
| Damage | ? |  |
 |
 |

|
| Stun | ?~? | ||||
| Stun Timer | ? | ||||
| Frame Count | ? | ? | ? | ∞ | |
| Simplified | ? | ? | ∞ | ||
- Neutral Jumping Roundhouse:
| Damage | ? |  |
 |
 |
 |

|
| Stun | ?~? | |||||
| Stun Timer | ? | |||||
| Frame Count | ? | ? | ? | ? | ∞ | |
| Simplified | ? | ? | ∞ | |||
Slightly better priority as air to air than the Diagonal version.
- Diagonal Jumping Roundhouse:
| Damage | ? |  |
 |
 |
 |

|
| Stun | ?~? | |||||
| Stun Timer | ? | |||||
| Frame Count | ? | ? | ? | ? | ∞ | |
| Simplified | ? | ? | ∞ | |||
Same as Diagonal Jumping Fierce.
--Graham, Shag, Tataki and Janus Gemini
Throws
To grab your opponent, hold towards or back and press Strong or Fierce punch. Boxer will hold the opponent in place for a few seconds and repeatedly headbutt them.
The first hit of the grab deals about 19.5% damage. Subsequent hits add almost 3% more each. If Boxer wiggles the joystick and/or mashes buttons while the grab is taking place, it will extend the duration. Similarly, his opponent may do the same to reduce the grab's duration. Sometimes people playing charge characters will elect to do this only for a moment before opting to charge during the grab's animation instead.
Weirdly, the Strong grab has more range than the Fierce grab even though they seem identical. You should favor using the Strong grab in situations where range is an issue.
Its known that O.Balrog have a higher default quantity of hits, which sounds great on paper but unless that the opponent does not mashes it will not be of much difference.
- Head Bomber: (←/→ + Strong/Fierce)
| Damage | ?+?*n |  |
File:OBalrog throw strng.png | File:OBalrog throw frc.png |
| Stun | 0 | |||
| Stun Timer | 0 | |||
| Range (from axis) | ||||
| (from throwable box) |
NOTE: Balrog's Grab is the only throw/grab in the game that actually has range restriction (i.e like the close normals). The first throw range values/image represent how his throw range actually is (but it has range restriction, so you cant activate it from that max range). The other values/images are edits of the original that represent how the Strong and Fierce grabs actually are in practice.
--Raisin (March 12, 2007)
--Some info courtesy T.Akiba
