| Line 823: | Line 823: | ||
===Super Move=== | ===Super Move=== | ||
Ground Shave: Charge Back for 2 secs, F, B, F + Punch | Ground Shave: Charge Back for 2 secs, F, B, F + Punch<br> | ||
[If you hold down punch, Blanka will hop but not move forward until you release or about 3-4 seconds pass. If during this time the opponent jumps over you, the super will autocorrect and you'll still go towards them) | [If you hold down punch, Blanka will hop but not move forward until you release or about 3-4 seconds pass. If during this time the opponent jumps over you, the super will autocorrect and you'll still go towards them) | ||
Blanka gets into a ball, does a little hop, then rolls forward. The hop is invincible and passes through fireballs. It does great damage but rarely connects since the hop is slow and gives plenty of time for opponents to block. The super chips for 4 hits but is not safe on block, many opponents can punish you with their own supers. | Blanka gets into a ball, does a little hop, then rolls forward. The hop is invincible and passes through fireballs. It does great damage but rarely connects since the hop is slow and gives plenty of time for opponents to block. The super chips for 4 hits but is not safe on block, many opponents can punish you with their own supers. | ||
While bad normally, Blanka's super can be used as anti-air with good timing. You can hit them out of the air with the super hop, hold down punch very briefly as they fall, then juggle them just before they land for 4 solid hits. | While bad normally, Blanka's super can be used as anti-air with good timing. You can hit them out of the air with the super hop, hold down punch very briefly as they fall, then juggle them just before they land for 4 solid hits.<br> | ||
-MDV | -MDV | ||
Revision as of 12:39, 6 September 2011
Introduction
Background Story
http://img105.imageshack.us/img105/1876/blanka6pc4.gif http://img105.imageshack.us/img105/6531/sfblankano1.gif
One day long ago, a young boy named Jimmy was aboard a plane, along with some government officials, on his way to visit his uncle. Unfortunately these officials were the targets of an assaination attempt by the Shadoloo, and the plane was crashed into the Brazilian Jungle. However Jimmy survived the crash, and began to live amongst the animals in the jungle. One day, he unwittingly hitched a ride on a poacher's car. Curious and excited, Blanka began to venture into the outside world. It was probably during this time that he met Dan as well as Dan's 'student', Sakura, before he went back to the jungle. He later resurfaced again to compete in the World Warrior tounament, where his mother happened to be a spectator. There is a tearful reunion as mother and son were finally reunited. Blanka probably now lives a happy (ad)normal life with his mother.
--DarksydePhil
Competitive Overview
Blanka is one of the most underused characters in Super Street Fighter II Turbo. Some would even say he gets a bad rep as one of the worst characters in the game. However, Blanka is not without his share of combos, cross-overs, tricks, ticks, and tactics that can get you lots of wins, even in a competitive tournament situation. Blanka has one of the best throws in the game, one of the fastest special moves in the game, and some of the best links leading into dizzies.
The drawback of all this, is that Blanka has a lot of bad matchups. Although at first you will undoubtedly get some wins, after someone plays you a few times, they will get used to your gimmicks and start to find ways around them. There are several characters in ST that straight-up counter most of the things that Blanka can use effectively, if they know it's coming. However, except at the very highest competitive levels of play, you will probably not ever run into someone who knows how to stop some of the tactics I will list below.
Please keep in mind, I will be adding to the work of R3ko, RWD and Crayfish, who have already laid out the groundwork for this guide. I'll be adding my own personal strategies and the combos/links I've found most effective in competitive play.
--DarksydePhil
New & Old Versions Comparison
To select O.Blanka, choose Blanka and then press → ← ← ← Jab/Fierce, pressing Short simultaneously with the punch button for the alternate color.
Here is the list of differences:
- Obvious stuff: O.Blanka can not tech throws, does not have the hops, slide and Super;
- O.Blanka has some differences in some of his normals:
- Close Standing Jab can not be special canceled;
- Far Standing Jab can not be special canceled;
- Crouching Short can not be special canceled;
- Crouching Forward can not be special canceled;
- Diagonal Jumping Short has outstanding air to ground priority but does not has crossup properties, all in all a huge loss;
- Diagonal Jumping Roundhouse has less range and priority;
- O.Blanka's vertical Beast Rolls have a different arc and recovery animation: it tends to go more vertically and then pull horizontally back, whereas N.Blanka's travels farther horizontally and then drops straight down. It may be more safe but it is worse as a projectile avoiding tool.
O.Blanka is a waste of time really, he losses so much for a different vertical roll and a dj.Short that may have its uses but without having a crossup a lot of matchups that already were hard are now almost impossible.
Color Options
| Jab | Strong | Fierce | Start | Old |
 |
 |
 |
 |

|
 |
 |
 |
 |

|
| Short | Forward | Roundhouse | Hold | Old Alternative |
--Born2SPD
Moves Analysis
Normal Moves
Ground Normals
- Close Standing Jab:
| Damage | ? |  |
 |
 |
 |
 |
 |

|
| Stun | ?-? | |||||||
| Stun Timer | ? | |||||||
| Chain Cancel | No | |||||||
| Special Cancel | Yes | |||||||
| Super Cancel | Yes | |||||||
| Frame Count | ? | ? | ? | ? | ? | ? | ? | |
| Simplified | ? | ? | ? | |||||
- Far Standing Jab:
| Damage | ? |  |
 |
 |
 |
 |
 |

|
| Stun | ?-? | |||||||
| Stun Timer | ? | |||||||
| Chain Cancel | No | |||||||
| Special Cancel | Yes | |||||||
| Super Cancel | Yes | |||||||
| Frame Count | ? | ? | ? | ? | ? | ? | ? | |
| Simplified | ? | ? | ? | |||||
- Crouching Jab:
| Damage | ? |  |
 |
 |
 |
 |
 |

|
| Stun | ?-? | |||||||
| Stun Timer | ? | |||||||
| Chain Cancel | No | |||||||
| Special Cancel | No | |||||||
| Super Cancel | No | |||||||
| Frame Count | ? | ? | ? | ? | ? | ? | ? | |
| Simplified | ? | ? | ? | |||||
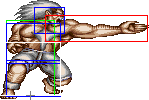
- Close Standing Strong:
| Damage | ? |  |
 |
 |

|
| Stun | ?-? | ||||
| Stun Timer | ? | ||||
| Chain Cancel | No | ||||
| Special Cancel | Yes | ||||
| Super Cancel | Yes | ||||
| Frame Count | ? | ? | ? | ? | |
| Simplified | ? | ? | ? | ||
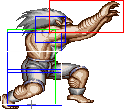
- Far Standing Strong:
| Damage | ? |  |
 |
 |
 |
 |

|
| Stun | ?-? | ||||||
| Stun Timer | ? | ||||||
| Chain Cancel | No | ||||||
| Special Cancel | No | ||||||
| Super Cancel | Yes | ||||||
| Frame Count | ? | ? | ? | ? | ? | ? | |
| Simplified | ? | ? | ? | ||||
- Crouching Strong:
| Damage | ? |  |
 |

|
| Stun | ?-? | |||
| Stun Timer | ? | |||
| Chain Cancel | No | |||
| Special Cancel | No | |||
| Super Cancel | No | |||
| Frame Count | ? | ? | ? | |
| Simplified | ? | |||
 |
 |
 |
 |

| |
| Frame Count | ? | ? | ? | ? | ? |
| Simplified | ? | ||||
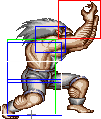
- Close/Far Standing Fierce:
| Damage | ? |  |
 |
 |
 |
 |
 |

|
| Stun | ?-? | |||||||
| Stun Timer | ? | |||||||
| Chain Cancel | No | |||||||
| Special Cancel | No | |||||||
| Super Cancel | No | |||||||
| Frame Count | ? | ? | ? | ? | ? | ? | ? | |
| Simplified | ? | ? | ? | |||||
- Crouching Fierce:
| Damage | ? |  |
 |
 |
 |
 |

|
| Stun | ?-? | ||||||
| Stun Timer | ? | ||||||
| Chain Cancel | No | ||||||
| Special Cancel | No | ||||||
| Super Cancel | No | ||||||
| Frame Count | ? | ? | ? | ? | ? | ? | |
| Simplified | ? | ? | ? | ||||
- Close Standing Short:
| Damage | ? |  |
 |
 |
 |
 |

|
| Stun | ?-? | ||||||
| Stun Timer | ? | ||||||
| Chain Cancel | No | ||||||
| Special Cancel | No | ||||||
| Super Cancel | No | ||||||
| Frame Count | ? | ? | ? | ? | ? | ? | |
| Simplified | ? | ? | |||||
 |
 |
 |
 |

| |
| Frame Count | ? | ? | ? | ? | ? |
| Simplified | ? | ||||
- Far Standing Short:
| Damage | ? |  |
 |
 |
 |
 |
 |

|
| Stun | ?-? | |||||||
| Stun Timer | ? | |||||||
| Chain Cancel | No | |||||||
| Special Cancel | No | |||||||
| Super Cancel | No | |||||||
| Frame Count | ? | ? | ? | ? | ? | ? | ? | |
| Simplified | ? | ? | ? | |||||
- Crouching Short:
| Damage | ? |  |
 |
 |
 |
 |

|
| Stun | ?-? | ||||||
| Stun Timer | ? | ||||||
| Chain Cancel | No | ||||||
| Special Cancel | Yes | ||||||
| Super Cancel | Yes | ||||||
| Frame Count | ? | ? | ? | ? | ? | ? | |
| Simplified | ? | ? | ? | ||||
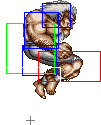
- Close Standing Forward:
| Damage | ? |  |
 |
 |
 |
 |
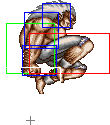
|
| Stun | ?-? | ||||||
| Stun Timer | ? | ||||||
| Chain Cancel | No | ||||||
| Special Cancel | No | ||||||
| Super Cancel | No | ||||||
| Frame Count | ? | ? | ? | ? | ? | ? | |
| Simplified | ? | ? | ? | ||||
 |
 |
 |
 |

| |
| Frame Count | ? | ? | ? | ? | ? |
| Simplified | ? | ||||
- Far Standing Forward:
| Damage | ? |  |
 |
 |
 |
 |
 |

|
| Stun | ?-? | |||||||
| Stun Timer | ? | |||||||
| Chain Cancel | No | |||||||
| Special Cancel | No | |||||||
| Super Cancel | No | |||||||
| Frame Count | ? | ? | ? | ? | ? | ? | ? | |
| Simplified | ? | ? | ? | |||||
- Crouching Forward:
| Damage | ? |  |
 |
 |
 |
 |

|
| Stun | ?-? | ||||||
| Stun Timer | ? | ||||||
| Chain Cancel | No | ||||||
| Special Cancel | Yes | ||||||
| Super Cancel | Yes | ||||||
| Frame Count | ? | ? | ? | ? | ? | ? | |
| Simplified | ? | ? | ? | ||||
- Close/Far Standing Roundhouse:
| Damage | ? |  |
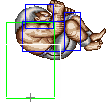 |
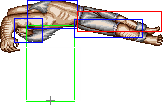 |
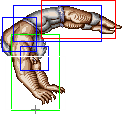
|
| Stun | ?-? | ||||
| Stun Timer | ? | ||||
| Chain Cancel | No | ||||
| Special Cancel | No | ||||
| Super Cancel | No | ||||
| Frame Count | ? | ? | ? | ? | |
| Simplified | ? | ? | |||
 |
 |
 |
 |

| |
| Frame Count | ? | ? | ? | ? | ? |
| Simplified | ? | ||||
- Crouching Roundhouse:
| Damage | ? |  |
 |
 |
 |
 |
 |

|
| Stun | ?-? | |||||||
| Stun Timer | ? | |||||||
| Chain Cancel | No | |||||||
| Special Cancel | No | |||||||
| Super Cancel | No | |||||||
| Frame Count | ? | ? | ? | ? | ? | ? | ? | |
| Simplified | ? | ? | ? | |||||
Aerial Normals
- Neutral/Diagonal Jumping Jab:
| Damage | ? |  |
 |
 |
 |

|
| Stun | ?-? | |||||
| Stun Timer | ? | |||||
| Frame Count | ? | ? | ? | ? | ∞ | |
| Simplified | ? | ? | ∞ | |||
- Neutral Jumping Strong:
| Damage | ? |  |
 |
 |
 |

|
| Stun | ?-? | |||||
| Stun Timer | ? | |||||
| Frame Count | ? | ? | ? | ? | ∞ | |
| Simplified | ? | ? | ∞ | |||
- Diagonal Jumping Strong:
| Damage | ? |  |
 |
 |
 |

|
| Stun | ?-? | |||||
| Stun Timer | ? | |||||
| Frame Count | ? | ? | ? | ? | ∞ | |
| Simplified | ? | ? | ∞ | |||
- Neutral Jumping Fierce:
| Damage | ? |  |
 |
 |
 |
 |
 |

|
| Stun | ?-? | |||||||
| Stun Timer | ? | |||||||
| Frame Count | ? | ? | ? | ? | ? | ? | ∞ | |
| Simplified | ? | ? | ∞ | |||||
- Diagonal Jumping Fierce:
| Damage | ? |  |
 |
 |

|
| Stun | ?-? | ||||
| Stun Timer | ? | ||||
| Frame Count | ? | ? | ? | ∞ | |
| Simplified | ? | ? | ∞ | ||
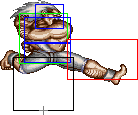
- Neutral Jumping Short:
| Damage | ? |  |
 |
 |
 |

|
| Stun | ?-? | |||||
| Stun Timer | ? | |||||
| Frame Count | ? | ? | ? | ? | ∞ | |
| Simplified | ? | ? | ∞ | |||
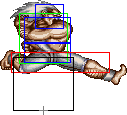
- Diagonal Jumping Short:
| Damage | ? |  |
 |
 |
 |

|
| Stun | ?-? | |||||
| Stun Timer | ? | |||||
| Frame Count | ? | ? | ? | ? | ∞ | |
| Simplified | ? | ? | ∞ | |||
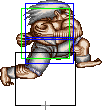
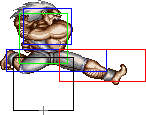
- Neutral Jumping Forward:
| Damage | ? |  |
 |
 |
 |

|
| Stun | ?-? | |||||
| Stun Timer | ? | |||||
| Frame Count | ? | ? | ? | ? | ∞ | |
| Simplified | ? | ? | ∞ | |||
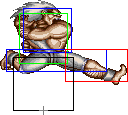
- Diagonal Jumping Forward:
| Damage | ? |  |
 |
 |
 |

|
| Stun | ?-? | |||||
| Stun Timer | ? | |||||
| Frame Count | ? | ? | ? | ? | ∞ | |
| Simplified | ? | ? | ∞ | |||
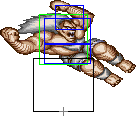
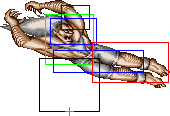
- Neutral Jumping Roundhouse:
| Damage | ? |  |
 |
 |
 |

|
| Stun | ?-? | |||||
| Stun Timer | ? | |||||
| Frame Count | ? | ? | ? | ? | ∞ | |
| Simplified | ? | ? | ∞ | |||
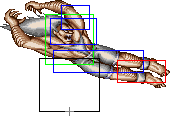
- Diagonal Jumping Roundhouse:
| Damage | ? |  |
 |
 |
 |

|
| Stun | ?-? | |||||
| Stun Timer | ? | |||||
| Frame Count | ? | ? | ? | ? | ∞ | |
| Simplified | ? | ? | ∞ | |||
Command Normals
- Rock Crush a.k.a. Headbutt: (On ground and close, ←/→ + Strong)
| Damage | ?+? |  |
 |
 |
 |

|
| Stun | ?-? | |||||
| Stun Timer | ? | |||||
| Special Cancel | Yes | |||||
| Frame Count | ? | ? | ? | ? | ? | |
| Simplified | ? | ? | ? | |||
 |
 |
 |

| |
| Frame Count | ? | ? | ? | ? |
| Simplified | ? | |||
- Amazon River Run a.k.a. Slide: (On ground, ↘ + Fierce)
| Damage | ?+? |  |
 |
 |
 |
 |

|
| Stun | ?-? | ||||||
| Stun Timer | ? | ||||||
| Frame Count | ? | ? | ? | ? | ? | 1? | |
| Simplified | ? | ? | ? | ||||
Throws
- Wild Fang a.k.a. Bite: (←/→ + Fierce)
| Damage | ?+?*n |  |
 |

|
| Stun | 0 | |||
| Stun Timer | 0 | |||
| Range (from axis) | 64 | |||
| Range advantage | 34 |
Special Moves
All motions are listed under the assumption that Blanka is facing right.
- Horizontal Beast Roll: (Charge ←, →, P)
| Damage (Jab) | ? | File:Blanka hroll1anm.png | File:Blanka lands1&5.png | File:Blanka lands2&4.png |  |
File:Blanka lands2&4.png | File:Blanka lands1&5.png |
| Damage (Strng) | ? | ||||||
| Damage (Frc) | ? | ||||||
| Stun | ?-? | ||||||
| Stun Timer | ? | ||||||
| Super Meter | ? | ||||||
| Frame Count (Jab) | ? | ? | ? | ? | ? | ? | |
| Simplified (Jab) | ? | ? | |||||
| Frame Count (Strng) | ? | ? | ? | ? | ? | ? | |
| Simplified (Strng) | ? | ? | |||||
| Frame Count (Frc) | ∞ | ? | ? | ? | ? | ? | |
| Simplified (Frc) | ∞ | ? | |||||
- Knockback:
| File:Blanka hroll1anm.png | File:Blanka lands1&5.png | File:Blanka lands2&4.png |  |
File:Blanka lands2&4.png | File:Blanka lands1&5.png | |
| Frame Count | ? | ? | ? | ? | ? | ? |
| Simplified | ? | ? | ||||
- Vertical Beast Roll: (Charge ↓, ↑, K)
| Damage (Shrt) | ? | File:Blanka vroll1.png | File:Blanka vroll2anm.png | File:Blanka vroll3anm.png |  |
 |
|
| Damage (Frwrd) | ? | ||||||
| Damage (Rh) | ? | ||||||
| Stun | ?-? | ||||||
| Stun Timer | ? | ||||||
| Super Meter | ? | ||||||
| Frame Count (Shrt) | 1 | ? | ? | ? | ? | ? | |
| Simplified (Shrt) | 1 | ? | ? | ? | |||
| Frame Count (Frwrd) | 1 | ? | ? | ? | ? | ? | |
| Simplified (Frwrd) | 1 | ? | ? | ? | |||
| Frame Count (Rh) | 1 | ? | ? | ? | ? | ? | |
| Simplified (Rh) | 1 | ? | ? | ? | |||
 |
 |
 |
 |
File:Blanka lands1&5.png | File:Blanka lands2&4.png |  |
File:Blanka lands2&4.png | File:Blanka lands1&5.png | |
| Frame Count (Shrt) | ? | ? | ? | 0 | ? | ? | ? | ? | ? |
| Simplified (Shrt) | ? | ? | |||||||
| Frame Count (Frwrd) | ? | ? | ? | 0 | ? | ? | ? | ? | ? |
| Simplified (Frwrd) | ? | ? | |||||||
| Frame Count (Rh) | ? | ? | ? | ? | ? | ? | ? | ? | ? |
| Simplified (Rh) | ? | ? | |||||||
- Knockback:
| File:Blanka vroll2anm.png | File:Blanka lands1&5.png | File:Blanka lands2&4.png |  |
File:Blanka lands2&4.png | File:Blanka lands1&5.png | |
| Frame Count | ? | ? | ? | ? | ? | ? |
| Simplified | ? | ? | ||||
- Backstep Beast Roll: (Charge ←, →, K)
 |
 |
 |
 |
 |
 |
| |
| Frame Count (Shrt) | ? | ? | ? | ? | ? | ? | ? |
| Simplified (Shrt) | ? | ? | |||||
| Frame Count (Frwrd) | ? | ? | ? | ? | ? | ? | ? |
| Simplified (Frwrd) | ? | ? | |||||
| Frame Count (Rh) | ? | ? | ? | ? | ? | ? | ? |
| Simplified (Rh) | ? | ? | |||||
 |
 |
 |
 |
 |

| |
| Frame Count (Shrt) | ? | ? | ? | ? | ? | ? |
| Simplified (Shrt) | ? | ? | ||||
| Frame Count (Frwrd) | ? | ? | ? | ? | ? | ? |
| Simplified (Frwrd) | ? | ? | ||||
| Frame Count (Rh) | ? | ? | ? | ? | ? | ? |
| Simplified (Rh) | ? | ? | ||||
| Damage (Shrt) | ? |  |
 |
 |
File:Blanka broll17anm.png | File:Blanka lands1&5.png | File:Blanka lands2&4.png |  |
File:Blanka lands2&4.png | File:Blanka lands1&5.png |
| Damage (Frwrd) | ? | |||||||||
| Damage (Rh) | ? | |||||||||
| Stun | ?-? | |||||||||
| Stun Timer | ? | |||||||||
| Super Meter | ? | |||||||||
| Frame Count (Shrt) | ? | ? | ? | ? | ? | ? | ? | ? | ? | |
| Simplified (Shrt) | ? | ? | ? | ? | ? | |||||
| Frame Count (Frwrd) | ? | ? | ? | ? | ? | ? | ? | ? | ? | |
| Simplified (Frwrd) | ? | ? | ||||||||
| Frame Count (Rh) | ? | ? | ? | ? | ? | ? | ? | ? | ? | |
| Simplified (Rh) | ? | ? | ||||||||
- Knockback:
| File:Blanka broll17anm.png | File:Blanka lands1&5.png | File:Blanka lands2&4.png |  |
File:Blanka lands2&4.png | File:Blanka lands1&5.png | |
| Frame Count | ? | ? | ? | ? | ? | ? |
| Simplified | ? | ? | ||||
- Hop: (←/→ + Short + Forward + Roundhouse)
- Forward:
| Super Meter | ? |  |
 |
 |
 |
 |
 |
 |

|
| Frame Count | ? | ? | ? | ? | ? | ? | ? | ? | |
| Simplified | ? | ? | |||||||
 |
 |
 |

| |
| Frame Count | ? | ? | ? | ? |
| Simplified | ? | |||
- Backward:
| Super Meter | ? |  |
 |
 |
 |
 |
 |
 |

|
| Frame Count | ? | ? | ? | ? | ? | ? | ? | ? | |
| Simplified | ? | ? | |||||||
 |
 |
 |

| |
| Frame Count | ? | ? | ? | ? |
| Simplified | ? | |||
Super Move
Ground Shave: Charge Back for 2 secs, F, B, F + Punch
[If you hold down punch, Blanka will hop but not move forward until you release or about 3-4 seconds pass. If during this time the opponent jumps over you, the super will autocorrect and you'll still go towards them)
Blanka gets into a ball, does a little hop, then rolls forward. The hop is invincible and passes through fireballs. It does great damage but rarely connects since the hop is slow and gives plenty of time for opponents to block. The super chips for 4 hits but is not safe on block, many opponents can punish you with their own supers.
While bad normally, Blanka's super can be used as anti-air with good timing. You can hit them out of the air with the super hop, hold down punch very briefly as they fall, then juggle them just before they land for 4 solid hits.
-MDV
The Basics
Air Attacks and Anti-airs
Blanka's jumping attacks are quick, have long reach, and can be used in several different situations.
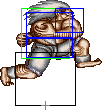
His jumping light kick is an excellent crossover, and has excellent priority, sometimes beating other fighter's jumping attacks. It is used primarily as Blanka's crossup move, and can be linked into several different strings of attacks.
Blanka's j.HK is a HUGE dropkick that has extremely good reach. Use this move to quickly jump over fireballs/projectiles and punish your opponents from a seemingly too far distance.
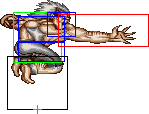
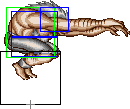
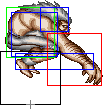
Jumping HP is an awsome high priority air attack. It is a downward-aiming swipe with both of Blanka's claws, that has strange hitbox priorities. Instead of just hitting ahead of Blanka like most other jumping moves, the jumping HP can be used to hit directly BELOW Blanka as well. This makes it an excellent tactic to use when you have your opponent in the corner, or if you are facing someone like Dhalsim, who's standing medium punch anti-air pretty much beats everything else you can dish out, including your crossup j.LK. The jumping HP, when used at the right angle/deepness, can either beat or trade most anti-air normals in the game, and is one of the reasons Blanka can actually dominate a match when given the right positioning.
Blanka has several anti-airs that can all be used in different situations:
-Vertical ball attack can be used in two situations. If your opponent is in front of you, use the HK version (which is VERY fast) to surprise them. Remember, there's no airblocking! If you are getting crossed up, the LK version of the vertical ball will stop or trade about 80% of the crossups in the game, which will definitely frustrate your opponents. However, if your opponent is deep enough with the crossup attack, the LK vertical ball will not work, and you will eat their attack.
-Standing HP can be used in some situations, most notably if an opponent is jumping in for a crossup but is not really deep enough to get it properly. Also, if you are ahead on life in the match, use standing HP to trade with most jump-in attacks. Remember, this is a HP so it will pretty much do the same, or more damage, than most of the jump-ins people use.
-Electricity can also be used as an anti-air, but be wary of trying to use it too much. Unlike a lot of the other multiple button tap moves (like Honda's Hundred Hand Slap or Chun's lighting legs), it doesn't come out as consistently as you'd like. Use this move sparingly, and only if you have enough time to get the right amount of button taps out to activate the electricity in time.
-Jump straight up HP is an EXCELLENT anti-air for anybody jumping at you. It is a quick, upwards smack with Blanka's palm, that most people have now begun to call "the pimp slap" because it looks exactly like a huge palm slap. Use this move to surprise jumping attackers, and also to hit people who are almost directly above you, going for crossups - it is surprisingly fast.
-Standing medium punch is a standing claw swipe downwards. VERY fast, and this move can actually neutralize a lot of jumping attacks completely. Use this in certain matchups to give Blanka the complete advantage - especially against Zangief.
-Jump forward MP is awsome air to air, the hitbox and his jump arc is high, so it hits most other airmoves from above.
Footsies
c.HP is awsome. Huge range and quick recovery, great for punishing whiffed sweeps and especialy good against Fireballers, work at its max range (this is a good jump in range too) and try to trade hits with/ snuff fireball throwing frames. c.HP can beat flat air attacks like Guile's j.HK and Dictators 'Swallow Dive' (the backflip puch that follows Head Stomp)
Against Shotos you can also use his s.HK (backflip kick). At the right range, you will flip over any crouching kicks they throw, but your feet will hit thier hands snuffing thier fireball throwing frames! It works like Sagat's far s.HP in this respect.
c.MK and c.LK are great against other low kicks, they can beat moves like Guile's c.MK clean. This really undermines the opponents comfort ranges and helps you put pressure on.
s.LK has incredible priority, with good enough timing it can beat almost anything. s.LP is great too, experiment...
Whenever attempting a Slide, always charge back in case it connects since it will start his wake-up options.
DSP EDIT: Here are the footsies I find most useful:
-Crouching FP has excellent range, but average damage. It can surprise an opponent who isn't expecting Blanka to have that kind of reach with his attacks. You can also use it for spacing: if your opponent is close enough to block the punch, you know you will be able to do a jab Blanka Ball and it will stop JUST in front of them - this leads into one of Blanka's best tactics, but we'll get to that later.
-Down-toward+FP "The Slide" - this move is GREAT in certain situations, for example against anybody with a fireball. If you are in range to hit with the slide, and your opponent is about to throw a fireball, your slide will completely cancel out their fireball animation and trip them. Also, the slide goes COMPLETELY underneath Guile's sonic booms, pretty much rendering them useless against Blanka. And let's face it, Guile throws a LOT of sonic booms. The downfall of the slide is that it is pretty slow, and if blocked, you can be left wide open. Also, the slide can be used as an anti-air in certain situations, but if you do not hit with it you will pretty much be screwed.
-Crouching MK - great footsie attack, can be comboed into itself when you are close enough, or into a Blanka ball for quick, MASSIVE damage. Also sets up one of Blanka's dashing-game advanced tactics when buffered into the Dash move.
Misc
Blanka’s ball if great for closing the gap, you can even roll up and throw and from certain ranges, using LP and MP balls.
Blanka is one of the best throwers in the game, and is extremely good at countering tick throws with his own.
Alot of people worry about other characters body torpedo moves when playing with Blanka. j.LK beats them clean. Jump back LK, repeat is a safe, easy deterant against the threat of psychocrushers and Honda headbutts. Especially good when your ahead on energy.
DSP EDIT: Here's a few miscellaneous things from me: -Blanka's jab ball is GREAT for spacing and advancing. It's quick, it's safe as long as it's not close enough to be blocked (in the respect that if your opponent tries to do something, they will probably trade with a special move and lose the trade), and it leads into a lot of throw/footsie setups.
-Blanka has a ridiculously damaging throw. Use it at every opportunity.
-Blanka's HP ball is RIDICULOUSLY fast. You can use it as a counter-hit move in a surprising amount of situations, most notably when somebody is trying to walk up and sweep you, or sometimes even right at the start of the match (it will hit if the opponent does anything BUT just block).
-Jumping LK will beat most advancing moves, including the sumo headbutt, leg scissors, etc. However, it will sometimes randomly trade with the flaming torpedo (And you will definitely be the loser in that trade).
--r3ko and DarksydePhil
Advanced Strategy
Fast Meter Building + Super
This is obvious, backwards beast leap charges meter retardedly fast, unfortunatly, Blanka probably has one of the worst supers in the game, or at least it's tied with Honda's "random hits of doom" but, just like Honda's, it does have a some uses.
Super is a great anti-air move in certain situations, huge damage, almost totaly invunerable, can change direction for crossovers and landing it as an anti-air is also the only way to guarantee safety after the fact and secure all 5 hits. Peform the motion and hold down the button, so that you contact the opponent on the height of the vertical motion of the ball (this juggles the opponent higher and gives you more time to guage thier falling trajectory), then release so that you roll under their falling body JUST before they hit the ground. This will secure maximum hits and damage.
The super, however, is not a great way to chip anyone. If blocked, you are left wide open afterwards. However, if your opponent is pretty low on life, they will probably try to jump or dodge around the super...which will usually turn out badly, since it beats most jumping attacks!
The super DOES NOT roll under projectiles as previously stated. The super is only invulnerable on startup (while you are in the upward-vertical motion). As soon as you land from this, you will start spinning in place, and you will become vulnerable. If you release at this point, you will beat out most normal attacks, except for maybe a quick crouching short or jab. However, most projectiles WILL hit you out of the super, so don't make a habit of being predictable and holding down the button forever.
Another odd little trick about the super is on knockdown near the corner, with proper timing this can be used as, I think at least, a crossover which then leads into a free combo attempt - this has been highlighted in the TZW combo videos. I say I think it is a crossover as (when done right) Blanka hits the opponent from behind, but like CE Bison's psycho crusher, it is probably random how it hits when done this way, and is even comboable which you can find details on in the combo section.
Using the leap
The leap is a valuble tool which is often over looked, most people would attribute it to only really setting up throw and combo setups (which will explained in later sections.). The leap also makes Blanka a very nimble character, able to move back and forth across the screen more easily than most other characters, while building super meter the entire time.
Don't forget that there is little bit of invincibility at the start of the leap which will help you to avoid low attacks and even get out of SPDs since when you leap, you're off the ground. So if Zangief lands a meaty c.LK, you can leap backwards out of it making his SPD whiff. CHEAP!
You can bait attacks with it, by leaping backwards at close range, and countering with a slide or c.HP or c.HK or even ball (if you were charging during the backdash).
You can use it effectively to close the gap after knockdowns if you don’t have a charge ready, so you can start a meaty or cross up.
Leaping forward in to throw range out of blue or off a c.MK can take your opponent by suspise, giving you a throw/headbutt/tick/combo.
DSP EDIT: Let me give you an example of some of the best times to use the leap, and the setups it leads to:
-You walk up to your opponent, do a blocked low medium kick, and buffer it into the leap. Your opponent has a SLIGHT frame advantage here - if they were expecting the leap, they can usually do a quick jab or short before the leap finishes, knocking you away. But if you don't use this too much, and they're not expecting it, you have several options. Primarily you can throw them instantly after the leap ends, for MASSIVE damage. Or, you can go for another crouching MK, possibly comboed into another one, or a Blanka ball. The safest option is the kick, but chances are you will probably be successful with the throw if they weren't expecting the leap.
-Another great opportunity for the leap is during a blocked crossup string. Let's say, for example, you cross up the opponent with j.LK, standing MP, crouching MK. Since they blocked the string, you're probably stuck. Not so! Buffer a leap off of that crouching MK and then either throw or do another crouching MK. For variety, the next time you face a blocked crossup string, buffer the leap off of the MP instead of doing the crouching MK. By not doing the same leap tactics over and over, you can mix it up and surprise your opponent for big damage.
When Downed
I have to disagree with what it said here previously, Blanka CAN be crossed up once he is downed. However, his LK vertical ball makes it VERY difficult for your opponents to do so, and will probably frustrate the hell out of them. The only time Blanka can be crossed up is if the crossup attack is VERY DEEP into your body - so deep that the attack would interrupt your attempt to do the ball. In this case, you WILL eat whatever combo they were planning, so if your opponent is attempting a really deep crossup, you are better off just blocking.
Don't attempt a reversal horizontal ball against normal jump-ins. You'd be surprised how many attacks will beat it clean which sort of defeats the whole point of a reversal really. However, if you only use the vertical ball every once in a while, it will usually hit. Also, the vertical ball is a GREAT strategy against Vega's wall-jumps.
Reversal backwards leap is good to get out of jams mid-screen... just don't use it to avoid something in the corner unless you like being hit afterwards.
Using Blanka Balls with Caution
Using Blanka’s horizontal ball is extremely risky against certain characters. If blocked, the following characters can punish you. Warning: some can even punish you when you hit as well (Ryu, for example, can hit you with a FP fireball!). Only use the horizontal ball in two instances: When you know it will hit (in a combo), when you THINK it will hit (as a wake-up counterhit), or when you're just trying to advance and you know you're far away enough that the ball won't be blocked.
Here is a list of attacks that can hit you AFTER your opponent blocks a Blanka Ball:
Dictator Bison can do a feirce psycho crusher
Dee Jay can do a fierce fire ball
Cammy can walk forward and press roundhouse
Blanka can do a feirce blanka ball
Honda can do a FP headbutt
Boxer can use his rush moves
Claw can walk > fierce
Dhalsim can pretty much press any button
O.Sagat can low roundhouse tiger
Ryu/Ken can throw FP fireballs
Chun can walk forward and press FP
....and many, MANY more.
Bite Loops, buffers, and follow-ups'
Basic, retarded, fun - like Dhalsim's bullshit only a bit easier to escape.
Blanka's bite range is simply sick, I think its actually larger than Sim's, but anyway... generally j.LK or early j.HP tick into bite does wonders if not abused too much.
Once you land throw you can do the following:
- j.LK > throw again xx repeat - this is obvious to get out of, but its one of those things that works because Blanka is so fast, even if you only get a second set of bites, damage is damage. BE CAREFUL, depending on where you are and where your opponent lands, you want to be sure that your j.LK is MEATY and the opponent does not have an opportunity to use a Shoryuken or other anti-air.
-j.LK > MP > throw – MP ticks nicely into throw, but you have to be close enough.....if not, you'll get standing HP. Still safe, but you wanted that throw!
-j.LK > MP > leap > throw - You can even add a leap in here which if you're close enough, will cross up. You don’t necessarily have to go into a throw, a combo or a tick could be a better option.
-j.LK > x-over j.LK > combo attempt - the second c.LK should crossover when your at mid-screen so make them feel the rage (rawh!)... you also have the option of repeated j.LK's if the first crossover attempt doesn't hit.
-Slide - hilarious, but it works, people get so paranoid over the j.LK and trying to stop it they forget Blanka can just low knockdown them and start crossover ball fun again. You can also mix this up with c.HK since it is a bit faster.
-Leap forward twice to crossup > throw/combo – this can be quite useful against characters which don’t have reversals.
DSP EDIT: One of the most effective strategies, I have found, is what to do AFTER a successful throw. Basically, if you finish the bite, you land before your opponent does. When your opponent is landing, try to do a meaty crouching FP. Depending on where you were when you landed (in the corner, midscreen, etc) the FP will either whiff, or they will block it. If it whiffs, oh well, you were too far away to do the setup so just chill out. If they block it but their body does not move at all, you are probably too close to do the throw setup I am about to explain. BUT, in about 50% of the time, the opponent will be pushed just slightly back from the blocked crouching FP. THAT is your opportunity: immediately do a jab horizontal ball when you recover from the FP. It will advance you forward JUST ENOUGH to land perfectly in front of your opponent WITHOUT having them block the ball. They will undoubtedly try to block the ball, because they fear eating it, and this leaves them WIDE OPEN for you to land in front of them and get a second bite! CONGRATULATIONS, you've just done about 50% damage in only 2 moves! In addition, after the second throw you can try to do the same thing again, or you can walk forward and try to buffer into leap setups, or you can try to crossup. It's your ballgame.
Crossover Balls , Knockdown and Electricity Fun
These strats go hand in hand:
Whenever a slide, c.HK or vertical ball connects - you get a free attempt to do crossover horizontal balls... unfortunatly, your going to have to work out yourself which balls to use as the whole thing is dependant on where you are on the screen and how deep the attack you used connected - this is something you get a feel for in time and isn't too hard to work out in a heated battle.
Before we go into the crossover fun, remember Blanka can also do the following on a fallen opponent:
Forward Beast Leap > meaty f.MP (the headbutt) - the headbutt hits twice and people seem to forget the second hit is low and eat it everytime... ghetto!
Forward Beast Leap > j.LK > Bite Loop - oh bite loops, how I love thee...
Forward Beast Leap > j.LK > x-over j.LK > combo attempt or repeat j.LK's until it hits or your hit - more crossover j.LK fun... told you it was a good attack ^_^
Slide - funny how the most basic of meatys does a fantastic job, gotta love the paranoia of air Blanka people have that they forget about the lows.
Anyway, back to the crossover balls - once you get the feel for it, you can start doing the following:
Crossover ball > combo attempt - It should dizzy all the cast (except maybe Gief) since you alright got a hit in prior, but ST hates people so this won't be the case all the time
Crossover Ball > forward/back MP - for times when you simply can't be bothered to combo, say hello to that headbutt again
Crossover Ball > MP or HP Electricity - what? you think those CvS2 whores made this famous? Bah, Blanka is too ghetto for that game, anyway, Electricity overall sucks but at least you can get some chip damage this way, don't use the LP version, learn how to mash like a man and use MP or HP only. Always be charging for another horizontal ball when doing this, if the electricity hits the opponent, you can do MP vertical ball to crossover then electricity again... repeat until the opponent blocks it
DSP EDIT: I rarely go for crossover balls, just because if I screw up and the opponent blocks it, you are now wide open for a variety of damaging attacks.
Electricity Chip/Bite psyche out
When an opponent is getting up its fairly safe to chip with meaty Electricity. But it is also possible to time the early electricity so it finishes JUST before the opponent gets to thier feet, you can then simply puch towards + HP for a bite. Because electricity has almost 0 recovery this is really hard for the opponent to judge, and never fails to provoke a smile or sigh from the recipient :)
DSP EDIT: NOTE: The only time I ever use electricity just to CHIP, is when I knock down an opponent, and quickly do a ball to get behind them, and THEN activate electricity. However, this usually isn't a good idea since you can mess up the spacing of the ball/elec and end up getting swept. Also, blocked electricity only hits 1-2 times and doesn't do much chip in ST.
Whiffed Ball psyche outs
Whiffing LP Ball for close range and MP Ball for medium range, you can stop directly infront of a high/low blocking opponent and seemlesly switch into a Bite or c.HK before the opponent has time to respond. Great tactic, really underused.
DSP NOTE: This is exactly what I described above in the bite loop section, because the whiffed horizontal ball leads into a bite loop strategy.
Combos
DSP EDIT: Since I've played Blanka in many major tournaments, including nationals, I'll first list the combos I've found most useful, then I'll let my colleage go along with his unedited list:
-Jump RH, c.MK, FP ball
-Crossover J.LK, c.MK, c.MK, FP ball
-Crossover J.Lk, stand MP, Crouch MK, buffer into leap and then try to throw or another c.MK
-Crossover J.LK, stand MP, cancel into throw
Now for the rest, I can't confirm all of these work since I usually only use the ones listed above:
j.HP > MP > HP
j.MP xx mp electric
j.HP/HK > c.HK
j.HP/HK > c.MK/Heabutt(1-hit) xx Ball
j.MK > c.MK > c.MK xx Ball
X-over LK > MP > Headbutt - this one gets alot of dizzies and is very easy
X-over LK > c.MK > MP > Headbutt
X-over LK > c.MK > c.MK xx Ball
c.HK knockdown in corner > Super > c.MK xx Ball
j.HP,s.MP,c.HK. This is the bread and butter for Blanka in ST because it gives him a the vital knockdown at the finish and also because in ST (unlinke CPS1 versions) your not guarenteed a dizzy from the HP finish variant of this combo.
Killer 4 hit (works on surprising amount of charas): Deep Crossover HP,s.MP.s.MP,c.HP
Long range 2 hit (especialy useful against Low Tiger Sagat): Max range Jump in late HK,c.HP
--r3ko and DarksydePhil
Match-ups
Matchups classified with this diagram in mind. For the old characters i guessed the positions.
--Born2SPD
Serious Advantage Match-ups
Vs. T. Hawk:
- 7 - 3
Advantage Match-ups
Vs. M. Bison (dictator):
- 6.5 - 3.5
Vs. O. T. Hawk:
Vs. Zangief:
- 6 - 4
RAPE! One of the few matchups Blanka wins cleanly.
Gief can barely do ANYTHING to Blanka. Blanka's crouching FP out-zones Gief's usually-dominating crouching RH. Gief can't do random lariats because Blanka's slide goes right under them and trips him. And Blanka's c.RH beats pretty much all of Gief's normals on the ground, and is safe if blocked.
The best part, Gief can NEVER, EVER, under ANY circumstance jump on Blanka. Blanka has two standing normals that negate all aerial attacks: stand MP and stand RH. Depending on the height and distance, either one will cleanly beat anything the grappler can throw at you from midair.
This leaves Gief's options pretty much shot....he can't play footsie with you, he can't try to advance with lariats, and he can't even jump. All he can try to do is maybe time a banishing fist (glowing green glove move for the lay person) to make you block and then go for an SPD. Besides this, Gief should not be able to attack in any fashion at all.
As an added bonus, you can purposely taunt Gief by just doing repeated FP balls. All Gief can do is 1. block (he can't punish you afterwards, and if he tries you can do another FP ball and smack him in the face) or 2. do a crouching jab. If the jab hits, big deal, Gief did pretty much no damage to you. But most people wont' figure this out until they block a few FP balls and are extremely frustrated, trying to discover what the hell they can do to your repetitive strategy. Pretty cheap, and pretty one-sided.
Khiempossible says:
I find s.roundhouse to be pretty ineffective vs. gief, but I've had amazing luck with s.fierce for anti air, straight jump fierce also works great. and basically nothing beats s.strong for anti air.
Fair Match-ups
Vs. Blanka (self):
Good strategies to use:
If you ever block a horizontal ball, you can immediately reply with your own FP ball for a free hit.
Since Blanka players tend to jump a lot, don't be afraid to use a few vertical balls to knock him out of the air.
Remember, you're hard to cross up because of your wakeup LK vertical ball, but if Blanka is crossing you up deep enough with his jumping LK your ball will get snuffed, so be careful.
The name of the game here is wait for your opponent to make mistakes....wait for him to do a ball, block, and retaliate. Wait for him to start jumping stupidly, and whack him out of the air. Most importantly, DON'T PLAY SLOPPY! For some reason, a lot of people play sloppy in mirror-matches and end up choking....just be patient and you will win the match.
Khiempossible says:
- watch out when trying to counter hit Blanka balls with your own Blanka ball, since unless you do a reversal or near reversal (there's a small window) you will not counterhit Blanka in the air. This means if you botch your reversal the opposing Blanka can reversal Blanka ball and hit you with a knockdown. Then you're stuck dealing with Blanka's stupid wakeup games. NB: you can punish horizontal ball on hit with your own Blanka ball.
- I personally like anti air electricity, anti air ball is probably going to trade with most of Blanka's jump ins, but so will anti air electricity, and electricity happens to give you the godliest knockdown ever.
- I spam a lot of s.jabs and s.forwards and s.shorts in this matchup, these moves will all beat Blanka balls, dashes, and jumpins if the angle is right. s.jab doubles as an electricity buffer.
- if you see the opposing Blanka try to electricty to counter your stuff, sweep and slide will both beat it clean from the right range.
- jump back short is a pretty safe turtle strategy.
- try and stay just outside of max range slide range. from here you can mash short and wait, if your opponent jumps you can straight jump fierce (bitch slap him) and win by waiting.
Vs. Ken:
- 5 - 5
Disadvantage Match-ups
Vs. Cammy:
- 4 - 6
This is actually a tough match for Blanka, and was considered one of the original "counters" for Blanka in ST.
Why? Because the Cannon Spike (or Thrust Kick, whatever you want to call it depending on the version of ST you're playing) beats, oh, about 99% of the jump attacks you'll throw at her. She can also hit you after a blocked ball (walk forward stand RH or crouch RH) and her Cannon Drill is unpunishable if she does it at a certain range, even if you block.
The name of the game here is BE CAREFUL. Be sure you don't accidentally let her block a Blanka ball. If you can knock her down, stay on top of her with the crossup LK and keep attacking. Your best bet is to be very patient, and then when you get that random throw, or knockdown, to keep attacking until she's done.
DO NOT let Cammy control the match!
Vs. Fei Long:
- 3.5 - 6.5
Vs. Guile:
- 4 - 6
Against most Guiles, Blanka can win easily. Most Guiles end up throwing repeated sonic booms, and Blanka's slide goes cleanly under them when timed correctly. The key is to stay within range to slide under any booms and sweep Guile....from there, the world is your oyster, with a free opportunity to crossup with j.LK and dominate the match.
Just be CAREFUL, because good Guile's won't throw booms out all day. Instead, they'll use crouch MK/hop MK or other footsies to try to control the match, then use flash kick when you try to jump over it. In this case, try to zone with c.mk/c.fp/jab ball/leap buffers. J.LK actually does cross up the flash kick and goes clean through it as long as you are high/deep enough, so once you're in, you're golden.
Vs. Vega (claw):
- 3.5 - 6.5
In my opinion, ties with Honda for Blanka's worst match.
Vega doesn't have to do anything in this match. All he has to do is crouch. If you walk forward, he will do c.MP. If you do Blanka ball, he will do c.MP (it beats it!). If you jump, he will do flip kick anti-air. If you make him block a fast FP ball, he can walk forward and hit you with stand HP for free. Although Vega is played primarily in an offensive manner, this is one of his only matchups where just sitting still and hitting one button, can give him an almost free victory.
The key to winning here is crossing him up and controlling the match, like usual. The problem is, his c.MP has SO much range that you can only cross him up if you jump WITHIN THE RANGE OF HIS c.MP. So, if you are playing a competent player, you will NEVER cross up Vega.
The only real advantage Blanka has on Vega, is that Blanka's vertical ball will beat Vega's wall fives 8 times out of 10. The problem is, any competent Vega player won't be doing wall dives, they'll just be doing c.MP.
Good luck with this one!
Khiempossible says:
- at max range you can trade Blanka's low fierce with Vega's crouching strong
- blanka's low strong will counter hit vega's low strong clean.
- you can also counter someone who's mashing low strong with blanka ball. takes timing.
- you blanka ball both vega's roll and sweep.
Serious Disadvantage Match-ups
Vs. Balrog (boxer):
- 2.5 - 7.5
Tough! Blanka has a tough time here because he has trouble moving around.
First, if Balrog EVER blocks your ball, he can stand FP or do a low dash attack for big damage.
If you try to use jab balls for spacing, and Rog eats the ball, HE CAN STILL DO STAND FP AND HIT YOU!
The only low attacks Blanka can really use against Rog are c.MK and c.FP. Using a lot of c.MKs to interrupt Rog's dashes can be a good strategy, until he catches on and stops dashing, and instead uses his super-fast crouching FK. It not only beats your c.MK at many ranges, but does massive damage as well.
Jumping on Rog? Not likely. He's extremely hard to cross up since his headbutt hits backwards, plus he has TWO anti-air normals that hit you pretty high in the air: stand MP and crouching FP.
In the end, Rog ends up neutralizing most of your game. You can't ever jump as long as Rog has charge, and even when he doesn't, he still might knock you out of the air with normals. You really can't ever use balls to advance due to the high risk, and your normals are also greatly limited. Rog-Blanka matches can literally turn into Blanka spamming c.MK since it is one of the few moves he can do safely, and even then, Rog comes out on top.
Khiempossible's says:
- s.roundhouse while completely punishable on whiff is great vs. Balrog, it will stuff the later frames of Balrog's headbutt, while going over most of his low moves like Balrog's low roundhouse and low dash punch. I usually spam low forward and bait reactions from my opponent, once I get a read I'll press s.roundhouse.
- slide is also very effective. don't do it from too close or too predictably since Balrog can counter hit it (and basically all your other moves) with low forward, but if you see balrog super, high dash punch, kick dash, or s.fierce you can slide and punish it.
- be careful with grab tricks, since Balrog's grab is basically just as long as yours (Blanka has a 7 pixel advantage).
Vs. Chun-Li:
- 3 - 7
Ouch. This is one of Blanka's worst matches, just because Chun's jumping LK and MK beat ALL of his jumping attacks clean.....including vertical ball.
Chun's fireball can neutralize any attempts to advance with a ball, and a blocked ball means you'll be eating a stand FP or crouching RH.
Also, Chun can pretty easily keep walking forward and doing stand MP, and once she gets started, there's very little Blanka can do to interrupt her.
You can't even stop Chun from crossing you up, since her jump LK (what she'll probably use to cross you up) beats your vertical ball clean!
My best advice is to try to get on top of her BEFORE she has the chance to either start jumping at you, or start walking forward spamming standing MP. Once you get on top of her, it can be hard to get Blanka off. However, I really strongly believe this match goes to Chun.
Khiempossible says:
- repeated j.lk abuse is your safest best once you're on top, make sure if you land one you land it deep, cause chun's grab range is pretty long, and you don't want to be reversalled. then when yuo do go to tick, you want it to be as close to max range as possible you only have 11 pixel advantage over chun's grab.
- if you can get chun to block/hit a j.heavy attack, this is the ideal grab setup. the walk forward and grab as soon as blockstun ends.
- HK vertical ball is surprisingly effective, since j.short doesn't cross up, chun will need to cross up with j.forward, and since forward has a shorter active hit box, she'll need to do it deep and late. this means if she jumps predictably, HK vertical ball will take her out clean.
- j.jab for air to air is unbelievably effective. It's also good for cleaning beating her standard anti air options. this includes her low roundhouse and upkicks. experiment, there's timing and spacing involved, but some combination of j.jab and j.fierce and occasionally j.roundhouse will beat most of chun's anti air's.
Vs. Dee Jay:
- 2.5 - 7.5
Another tough match. Blanka can't slide under the Max Out cleanly, unless he is close enough to actually trip Dee Jay in the process. So undoubtedly it will be tough to get through the barrage of Max Outs.
One thing you can do is wait for a Max Out, jump over it and use jumping RH. Jump RH has great range and you will probably surprise Dee Jay, because he won't expect that you can hit him from that far away.
Be careful of too many jump-ins, Dee Jay's crouching RH will sweep you out of most of them. However, once you cross up with j.LK it will be hard for Dee Jay to escape your mixups. You will have to be sure that either Dee Jay doesn't have charge, or that you are deep enough that his Sobat Kick won't be able to anti-air you.
Like most other characters, if Dee Jay blocks your ball, you are screwed (stand RH hits you). It iwll also be hard to advance since the Max Out will stop you from doing most balls. The key is getting close enough to either jump over the Max Out and hit him, or to cross him up.
Khiempossible says:
- sliding under max out isn't really all that useful, you can't do it preemptive or early, the timing for the slide under max out is basically right before the max out hits you. at this point, DJ is almost always fully recovered by the time your slide gets to him, and he has probably jumped and will punish you on the way down.
- a better technique is to run away, j.jab straight up over max outs and then dash back to full screen. your opponent must now actually do something like move forward or not throw max outs, either way this gives you the opportunity to see what's going on and bait and punish dj.
- you're trying to make dj lose his charge so you can jump at him. watch if he's standing or moving forward, these are opportunities where it's safer to jump.
- you can counter hit dj's whiff low strong with your low forward, and you can counter hit dj's low roundhouse startup with low strong or horizontal ball.
Vs. Dhalsim:
- 2 - 8
I hate to keep saying TOUGH but once again, this can be really bad for Blanka.
The good thing about this match is, if you are about 1/2 screen away from Sim, you can control the match. You're too close for him to do a Yoga Fire - you can jump over and hit him - and he really has nothing he can effectively do against you besides try one of his drill cancels. Control the match by waiting for a Yoga Fire/Flame and jmping right over it with RH. If he's being patient, try to advance with a jab Blanka ball, or else just walk right up to him (careful to block anything he throws out) and use a few c.MKs or c.FPs.
One thing it's really difficult to do to Sim is JUMP. Sim has about 10 different ways to knock you out of the air...whether it be a slide if you're far away, a jump back HP if you're mid-range, or a stand MP if you're directly overhead...he has an answer for almost every jump attack.
The best strategy here is to, again, be patient. Don't EVER let yourself get pushed back to fullscreen range, or you are fucked....he can completely zone you with Yoga Flames/stretchy limbs and make it so you will never get close to him. Try to stay at least 1/2 screen distance from him, waiting for the moment to capitalize...which will either be a Yoga Fire/Flame you can jump over, or an opportunity to buffer into a leap and get close for a throw. If you happen to knock him down (not likely) you can go for a crossup string, but BE CAREFUL because Sim's crouching jab actually beats out most of the throw/leap strings that Blanka has.
And, of course, don't let Sim block a ball or you will be eating stretchy feet.
Khiempossible says:
- if you ever see sim going for a drill, electricity beats them all clean.
- j.fierce, j.roundhouse and j.jab are your best friend for beating predictable anti air options. some combination of those will work vs. sim.
j.fierce will beat sim's s.MP and anti air slide j.roundhouse will beat or trade sim's s.MK j.jab will beat almost everything he does in the air, as well as early limbs
I still can't figure out how to beat sim's anti air low jab though.
Vs. E. Honda:
- 2.5 - 7.5
This ties for Blanka's hardest match, along with Vega (spanish ninja).
Honda literally does not ever have to advance. All he has to do is sit still. If he sees you try to jump, he can do a headbutt. If he sees you walk forward, he can do a headbutt. If he sees you jump back, he can try to time a headbutt to hit you on the way down. The worst part is, if you block a headbutt you can't hit Honda, but if Honda blocks a ball, he CAN hit you with a HEADBUTT. HEADBUTT HEADBUTT HEADBUTT!
It's pretty damned annoying, and if Honda ends up getting a lead in health, you are pretty much done. The only way to really win the match is one of two ways:
1. You jump backwards, Honda does a headbutt but doesn't time it correctly, so you do a j.LK and knock him out of it. Now, you have the advantage: you have the leeway to walk forward, jump at Honda, and cross him up with LK, since he has to recover from the headbutt you just knocked him out of.
2. You walk forward at the beginning of the match and jump at Honda, and are able to cross him up with j.LK.
Once Honda is crossed up, he is SCREWED. He can't do anything, you can literally be free to do crossup strings, leap traps (be careful he isn't predicting it or he can do things to escape), throw traps, and more crossups. Blanka can literally jump back and forth doing jumping LKs for the rest of the match, and if you time it right, Honda can't do anything to escape...pretty funny.
The problem is, you need to have that initial 1 or 2 to get you in that lead position. If Honda hits you first, or makes you block first, he absolutely has no reason to move at all. He can just sit blocking down-back and he is completely safe...if you try to walk forward and cross him up, he will just do a FP headbutt to escape.
It's not that Blanka can't win, but that Blanka has to get lucky and get the first hit in...THEN he can control the match.
Khiempossible says:
- jumping straight up and down right outside of Honda's jab headbutt range is pretty effective for baiting stuff.
- s.short beats headbutt clean
- j.jab beats Honda anti time he's in the air
- just watch honda, any time he loses his charge you can j.short him. don't try and tick trap too much, cause reversal oochio creams you (no whiff animation, greater grab range than yours) and even if you land a grab, honda will get his charge back for jab headbutt, and put you back to turtling waiting for a mistake.
- I usually mix up between anti air j.jab and crossup j.short and crossup j.short comboed into s.strong. I wouldn't do much more than those 3 things against a good honda.
Vs. O. Ken:
Vs. Ryu:
- 2.5 - 7.5
Against Ryu, Blanka desperately wants to get a knockdown that he can, in turn, convert into a dizzy combo (standing strong -> headbutt or low forward x2 -> horizontal ball) or a tick. I'd break things down into four different ranges:
Range A is the BEST range for Blanka. It's about half a step outside to just barely within his low RH range. We're looking to catch Ryu flinching and tag him with that low RH or a slide punch. Also standing short (beats low kicks), standing rh (makes low kicks whiff), regular low fierce and the hail mary jump in (->dizzy.)
Range B is the WORST range. One more step outside range A. Jump in and get DP'ed. Fucking nightmare. When I'm losing to a Ryu player I spend the whole match here. At the back end of this one you have jab ball -> bite but hell if I ever have the charge for that shit.
From range C (3/4 screen) Ryu can't hit you with a DP on the jump in but he has other stuff. That other stuff can be beaten:
- Ryu air defense / Blanka option
- Low rh / jump fierce
- Standing fierce straight punch [1] / jump rh
- Climbing jump RH / jump jab
[1] = most Ryu players don't know how good this is, which is nice Otherwise, keep on walking/hopping/balling forward.
Range D is full screen. Jump over a fierce fireball relatively safely and then see what happens. Also strong ball -> bite or jab ball -> low rh. Oh, heh, if you're in the corner back hop through fierce fireballs.
--Nohoho
Vs. Sagat:
- 2 - 8
