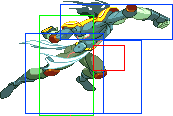
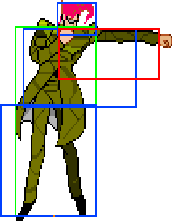
No edit summary |
No edit summary |
||
| Line 152: | Line 152: | ||
<br> | <br> | ||
{{MoveData | {{MoveData | ||
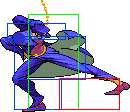
|image= | |image=HFTF-boingo-623X.png | ||
|name=Glass Shower | |name=Glass Shower | ||
|input=623A/B/C | |input=623A/B/C | ||
| Line 182: | Line 182: | ||
|cancel= | |cancel= | ||
|noheader=y | |noheader=y | ||
|description=Fires an upwards shot, which creates a shower of falling glass upon hitting the ceiling. <br><br> | |description=Fires an upwards shot, which creates a shower of falling glass upon hitting the ceiling. <br> | ||
A version fires straight up, B fires just in front of Boingo, C fires around half a screen away.<br> | |||
Core setup tool. Finds occasional use as an antiair or techchase option. Strong when combined with your other projectiles, as Boingo recovers shortly after the glass spawns. The glass hits overhead, making it a key part of your best setups and okizeme.<br> | |||
'''623B''' is the easiest to use in setups. '''623C''' is a good way to cover a large part of the screen, and the glass falls at the perfect spot to setup unblockables by combining it with '''236C''' / '''236AC'''. <br> | |||
The glass shards do a lot of chip and Stand Gauge damage, build lots of meter, and have a notoriously weird preblock activation range, causing opponents to get stuck while trying to walk while the glass is out. | |||
|ips=No (Bullet) Yes (Glass) | |ips=No (Bullet) Yes (Glass) | ||
|scaling=No (Bullet) Yes (Glass) | |scaling=No (Bullet) Yes (Glass) | ||
|meterwhiff = 0 | |meterwhiff = 0 | ||
|meterhit=0 (Bullet) 4 per hit (Glass) | |meterhit=0 (Bullet) 4 per hit (Glass) | ||
}} | }} | ||
}} | }} | ||
Revision as of 16:54, 21 January 2025
Placeholder examples.
| 214A | Startup | Active | Recovery | Base Damage | Stand Damage | Guard | Hit Adv. | Block Adv. | Pushblock Adv. | ||||||||||||
|---|---|---|---|---|---|---|---|---|---|---|---|---|---|---|---|---|---|---|---|---|---|
| 14-18 | 2 | 15 Total [0] | 10 | - | Mid | +30-34 | +18-22 | +17-21 | |||||||||||||
| 214B | |||||||||||||||||||||
| 14-18 | 2 | 15 Total [0] | 10 | - | Mid | +30-34 | +18-22 | +17-21 | |||||||||||||
| 214C | |||||||||||||||||||||
| 14-18 | 2 | 15 Total [0] | 10 | - | Mid | +30-34 | +18-22 | +17-21 | |||||||||||||
|
Star Platinum rushes forward before delivering a punch. A very useful special both in combos and pressure, as well as a rare neutral tool when used as a makeshift fireball. 214B will be the version you'll use the most and is the basis of your Stand OFF combos.
| |||||||||||||||||||||
| Startup | Active | Recovery | Base Damage | Stand Damage | Guard | Hit Adv. | Block Adv. | Pushblock Adv. | ||||||||||||
|---|---|---|---|---|---|---|---|---|---|---|---|---|---|---|---|---|---|---|---|---|
| 3 | 2 | 2 | 4 | 1 | Mid | +5 | +7 | +4 | ||||||||||||
|
Quick jab that can combo into most of your other normals. Can combo into s+j.B on airborne opponents. Somewhat alright as a close anti-air.
| ||||||||||||||||||||
| Startup | Active | Recovery | Base Damage | Stand Damage | Guard | Hit Adv. | Block Adv. | Pushblock Adv. | ||||||||||||||||||
|---|---|---|---|---|---|---|---|---|---|---|---|---|---|---|---|---|---|---|---|---|---|---|---|---|---|---|
| 5 | 5 | 13 | 9 | 4 | Low | -1 | -2 | -10 | ||||||||||||||||||
|
Your main Stand Off hitconfirm. Excellent counterpoke.
| ||||||||||||||||||||||||||
| 623A | Startup | Active | Recovery | Base Damage | Stand Damage | Guard | Hit Adv. | Block Adv. | Pushblock Adv. | ||||||||||||
|---|---|---|---|---|---|---|---|---|---|---|---|---|---|---|---|---|---|---|---|---|---|
| 10 | Until ceiling (Bullet) Until ground (Glass) | 32 Total | 12 (Bullet) 3 (Glass) | 0 (Bullet) 6 (Glass) | Mid (Bullet) High (Glass) | varies | varies | varies | |||||||||||||
| 623B/C | |||||||||||||||||||||
| 12 | Until ceiling (Bullet) Until ground (Glass) | 33 Total | 12 (Bullet) 3 per hit (Glass) | 0 (Bullet) 6 per hit (Glass) | Mid (Bullet) High (Glass) | varies | varies | varies | |||||||||||||
|
Fires an upwards shot, which creates a shower of falling glass upon hitting the ceiling.
| |||||||||||||||||||||


