m (→Special Moves) |
|||
| Line 520: | Line 520: | ||
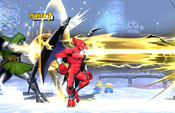
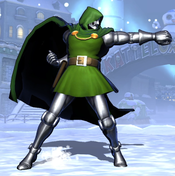
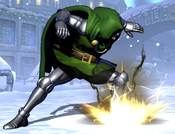
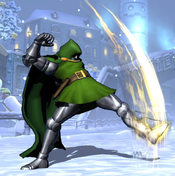
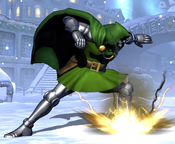
Although Plasma Beam reaches fullscreen, it has limited vertical range and is easily evaded by jumping. It pins Doom in place for a full second and is dangerous to use as a keepaway tool. It is primarily used to score some additional chip damage in situations where it is guaranteed to connect, such as while the opponent is locked down by an assist. If an opponent blocks Photon Array (214XX) from far enough away, Doom will recover in time to force them to block a Plasma Beam as well. | Although Plasma Beam reaches fullscreen, it has limited vertical range and is easily evaded by jumping. It pins Doom in place for a full second and is dangerous to use as a keepaway tool. It is primarily used to score some additional chip damage in situations where it is guaranteed to connect, such as while the opponent is locked down by an assist. If an opponent blocks Photon Array (214XX) from far enough away, Doom will recover in time to force them to block a Plasma Beam as well. | ||
All versions of Plasma Beam are not subject to hitstun deterioration. | |||
}} | }} | ||
}} | }} | ||
| Line 568: | Line 570: | ||
Air Plasma Beam is mainly notable for being able to hit OTG. It is typically used as a combo ender, since many of Doom's combo routes lead to him floating above a knocked down opponent. Doom can OTG with Air Plasma Beam and then cancel into a shotgunned Air Photon Array to get great damage for 1 bar. If spaced correctly, it's possible to get the opponent to bounce on the beam, and only get hit twice. Similar to Dormammu's flame carpet, if you get this bouncing hit, there's a massive amount of hitstun. This is primarily used in air to air conversions, and TAC infinites. | Air Plasma Beam is mainly notable for being able to hit OTG. It is typically used as a combo ender, since many of Doom's combo routes lead to him floating above a knocked down opponent. Doom can OTG with Air Plasma Beam and then cancel into a shotgunned Air Photon Array to get great damage for 1 bar. If spaced correctly, it's possible to get the opponent to bounce on the beam, and only get hit twice. Similar to Dormammu's flame carpet, if you get this bouncing hit, there's a massive amount of hitstun. This is primarily used in air to air conversions, and TAC infinites. | ||
All versions of Air Plasma Beam are not subject to hitstun deterioration. | |||
}} | }} | ||
}} | }} | ||
Revision as of 09:33, 29 September 2023
Introduction
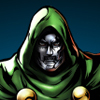
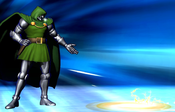
Victor Von Doom, better known as "Doctor Doom", is a villain originating from the Fantastic Four comics. He rules the fictional nation of Latveria, and is a master of both science and magic. The armor he wears gives him access to a variety of abilities, allows him to fly, and lets him fight toe-to-toe with superpowered characters.
In UMvC3, Dr. Doom is a strong all-rounder, but his high mobility and variety of useful projectile attacks slant him more towards being played in a keepaway style. Doom prefers to flee to superjump height, where few characters can effectively catch him thanks to aerial specials like 214X, and his infamous j.5S "Foot dive!" attack. Doom may not be as fast or aggressive as other 8-way airdashers like Magneto or Nova, but he deals high damage and has very strong mixup potential when he needs to use it.
| Strengths | Weaknesses |
|---|---|
|
|
Unique Mechanics
All of Doom's grounded normals and command normals - except for 5S and Hidden Missiles (4H) - can be dash-canceled on hit or block. Similarly, Doom can cancel all of his aerial normals and command normals, except for his j.5H "Butter Gun" into an airdash.
Doom's grounded dashes (both forward dash and backdash) are fixed duration "hop" dashes. Unlike most characters, he can not cancel his ground dashes into crouching, or into attacks. However, Doom can still cancel his ground dashes by jumping. This gives Doom a rather unique method for traveling across the stage, called Triangle Jumping. To Triangle Jump forward, input a forward dash, then input a forwards jump with the desired timing. Lastly, as soon as Doom reaches the minimum airdash height on his jump, perform a down-forward airdash to return back to the ground. In terms of raw speed, it is fastest to jump-cancel roughly halfway through Doom's dash animation, but jumping earlier takes less overall time per repetition and is thus less risky to do in neutral.
Doom can combine his ability to dash-cancel normals with his ability to Triangle Jump in order to effectively cancel normals directly into a Triangle Jump. This allows Doom to maintain very strong pressure on a defending opponent, and continue to be aggressive even through pushblock. An example input sequence for this technique is shown below:
(on block) 2H > 9M+H > j.3M+H > 6H > 9M+H etc.
If done correctly, Doom will dash-cancel his blocked sweep, then instantly cancel that dash into a jump, giving the appearance he directly jump-canceled his 2H. He will then airdash back down, remaining close to the opponent. If this sequence was done quickly enough that the opponent is still in blockstun, or tried to jump out of pressure, Doom will then attack with a 6H High Kick, which can itself be Triangle Jump canceled to continue the offensive. If the sequence is delayed slightly, the 6H input will instead throw the opponent.
| Doctor Doom | |
|---|---|
| Character Data | |
| Health | 1,000,000 |
| Ground Magic Series | Stronger+ |
| Air Chain Combo Limit | Three |
| Forward Dash Duration | 35 frames |
| Backdash Duration | 33 frames |
| Jump Duration | 44 frames |
| Superjump Duration | 81 frames |
| Walljump? | No |
| Doublejump? | No |
| Airdash? | 8-Way |
| X-Factor Damage Boost (1/2/3) | 30% / 50% / 70% |
| X-Factor Speed Boost (1/2/3) | 10% / 20% / 30% |
| Minimum Damage Scaling (Normals, Specials) | 20% |
| Minimum Damage Scaling (Hypers) | 25% |
| Minimum Damage Scaling (X-Factor) | 35% |
Move List
Assists
| Damage | Startup | Active | Recovery |
|---|---|---|---|
| 20,000 x8 | 46 | 20 | 108, 78 |
| On Hit | On Block | Guard | Properties |
| - | - | Mid | |
|
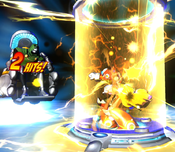
THC Hyper: Photon Array. Recommended Assist. The gold standard against which many other assists - especially projectile assists - are compared. Doom charges up for a moment, and then unleashes a horizontal beam that covers the entire screen in front of him. The beam is elevated slightly above the ground, and although most characters can't crouch under it, many characters do have at least one low-profile attack that can go underneath it. Plasma Beam provides a very respectable amount of lockdown, and can be used by rushdown characters to cover their approach, or keep the opponent in place while they set up their offense. It has respectable durability at 8 total points, and will can usually at least negate other common assists or projectiles, if not beat them outright. Since it has decent startup and instantly reaches fullscreen when active, it is commonly used as a counter-call to an opponent's assist. Many players will choose to save Plasma Beam until they see one of the opponent's assist icons dim (indicating an assist has been called), and then send out Doom in response. By using Plasma Beam in this way, you can prevent your opponent's own Doom from ever successfully using their Hidden Missiles. Plasma Beam's lengthy active duration also makes it fairly useful as a combo extension tool. One weakness of Plasma Beam is that - although it does do solid damage - it also adds eight hits to the combo counter. A confirm off Doom Beam will start already heavily impacted by Damage Scaling, hurting the damage potential of the entire rest of the combo. | |||
| Damage | Startup | Active | Recovery |
|---|---|---|---|
| 20,000 x6 | 50 | 37 | 147, 117 |
| On Hit | On Block | Guard | Properties |
| - | - | Mid | |
|
THC Hyper: Photon Array. Recommended assist, and possibly the best assist in the entire game. Doom gestures, and six missiles appear from the ground behind him, flying straight up. The missiles rise all the way to superjump height, and then turn towards the opponent. Missiles track the opponent once they have turned, although it is possible to evade them with fast enough movement. The missiles are OTG-capable, and with precise spacing it is even possible for them to hit OTG on the way up, as they are initially fired by Doom. Hidden Missiles has several properties which make it uniquely strong. It provides a huge amount of lockdown once an opponent has made contact with the first missile, as they will be trapped while the remaining five all rain down on them. It is one of very few assists in the game that can threaten an opponent even at superjump height. Although many characters have keepaway tools that can allow them to overpower an opponent's projectile assists, very few of those characters can aim those tools upwards, and so they are often helpless against missiles attacking from directly above. Missiles are not destroyed if Doom or his point character are hit - although Doom being hit while deploying missiles will prevent any additional ones from firing. Oftentimes, a player will land a hit while their opponent's Doom is active, and be forced to greatly modify or even abandon their combo, lest any lingering missiles knock them out of their attack. Conversely, newer players often have their own combos interrupted when the Hidden Missiles they called earlier suddenly falls back down, juggling the opponent in a way they were not prepared for. The gap between when Missiles are initially called and when they are no longer active on stage is the longest of any assist in the game. This can be taken advantage of to perform extensions that are not possible with any other assist. Many characters can call Doom Missiles just before ending their combo with a Hyper - the missiles will fall back down on the opponent just as the hyper ends, allowing the point character to follow-up with another Hyper or even possibly a longer extension. | |||
| Damage | Startup | Active | Recovery |
|---|---|---|---|
| 15,000 x5 + 25,000 x4 | 34 | 26 | 124, 94 |
| On Hit | On Block | Guard | Properties |
| - | - | Mid | |
|
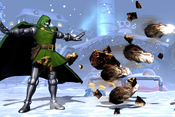
THC Hyper: Sphere Flame. Recommended assist. Doom creates a barrier of rocks around his body. While the rocks orbit Doom, they act as a beam projectile, with a significant amount of durability. After being active for 25 frames, Doom shoots the rocks directly forward. The rocks travel horizontally across the screen at a moderate pace, with each rock now acting as its own projectile. Molecular Shield is most commonly used with pure rushdown characters who have no projectiles of their own, such as Wolverine. The point character can move forward from inside the safety of the rocks, allowing them to advance through an enemy's zoning. | |||
Ground Normals
| Damage | Startup | Active | Recovery |
|---|---|---|---|
| 55,000 | 5 | 3 | 12 |
| On Hit | On Block | Guard | Properties |
| +1 | -1 | Mid | |
|
High-aimed jab attack. Will whiff against normal-sized characters if they are crouching, except at point-blank range. It also will not connect against small-body characters like Rocket Raccoon even if they are standing. 5L is ideal for catching airborne opponents, either by using it as a well-timed anti-air, or to help converting an air-to-air hit after landing on the ground. It is not a Rapid Fire normal, and does not link into itself, so try to buffer a 5S or 6H Launcher when using 5L in this way. | |||
| Damage | Startup | Active | Recovery |
|---|---|---|---|
| 40,000 x2 | 10 | 4 | 17 |
| On Hit | On Block | Guard | Properties |
| +4 | +2 | Mid | |
|
Hits twice. Doom stomps the ground in front of him. 5M's main use is to be one of Doom's primary OTG tools (along with 5H, below). On hit, it easily leads into 5S or 6H launchers, allowing Doom to easily relaunch from almost any Hard Knockdown. It can also be canceled directly into his 236XX Level 3 Hyper as a combo ender. | |||
| Damage | Startup | Active | Recovery |
|---|---|---|---|
| 55,000 x2 | 15 | 7 | 21 |
| On Hit | On Block | Guard | Properties |
| +2 | 0 | Mid | |
|
Hits twice. Similar to 5M, but Doom performs a sweeping axe kick instead of a simple stomp. It has roughly the same uses as 5M, but is slower, more damaging, and reaches slightly farther forward. | |||
| Damage | Startup | Active | Recovery |
|---|---|---|---|
| 53,000 | 6 | 3 | 16 |
| On Hit | On Block | Guard | Properties |
| -3 | -5 | Low | |
|
Solid range for a light attack, but slower than 5L and also slower than the average character's light normals. It is an important mixup tool, as it is a fast low that can be thrown into Doom's tri-dash offense, or staggered in order to bait mashed pushblock. | |||
| Damage | Startup | Active | Recovery |
|---|---|---|---|
| 70,000 | 9 | 4 | 21 |
| On Hit | On Block | Guard | Properties |
| -2 | -4 | Mid | |
|
Note: Does not hit low. 2M is a fairly niche normal. It has worse range than 2L while also being slower and blockable standing. In fact, it's often better to chain directly from 2L into 2H during hit confirms. 2M's primary use is to help in converting air-to-air hits, or in specific relaunch combo routes. Its hitbox is aimed noticeably higher than Doom's other crouching normals, which lets him connect 2M on an airborne opponent earlier than he could with other normals. | |||
| Damage | Startup | Active | Recovery |
|---|---|---|---|
| 80,000 | 13 | 4 | 21 |
| On Hit | On Block | Guard | Properties |
| - | -1 | Low | |
|
Standard sweep attack. This is one of Doom's best options to dash cancel while pressuring an opponent, as it causes a very large amount of blockstun. | |||
| Damage | Startup | Active | Recovery |
|---|---|---|---|
| 100,000 | 11 | 4 | 21 |
| On Hit | On Block | Guard | Properties |
| Launch | -1 | Mid | |
|
Doom spikes the ground, creating a shockwave around himself. The hitbox on this attack is very large, completely surrounds Doom, and can hit as a cross-under. | |||
Aerial Normals
| Damage | Startup | Active | Recovery |
|---|---|---|---|
| 55,000 | 6 | 3 | 20 |
| On Hit | On Block | Guard | Properties |
| +14 | +12 | OH | |
|
Fast, low-commitment aerial poke. It is primarily used to adjust the opponent's height in more advanced air combos, and as air combo filler if you have plenty of hitstun. It is also a serviceable air-to-air. Although this attack is technically an Overhead, it is nearly impossible for this attack to connect on a normal-sized crouching opponent, as Doom will land-cancel the move once he is low enough for it to actually reach them. This can be used by intentionally whiffing your jump-in and then throwing your opponent as you land. Notably, it has an extremely large cross up hitbox, allowing for a very funny corner incoming achieved by walking over the body, jumping forward out of the corner, then airdashing backwards and meatying with jump L. | |||
| Damage | Startup | Active | Recovery |
|---|---|---|---|
| 45,000 x2 | 10 | 7 | 19 |
| On Hit | On Block | Guard | Properties |
| +21 | +19 | OH | |
|
Hits twice. Doom creates a small burst of energy below himself. It's a solid pressure tool that supports Doom's goal of staying above the opponent. Since it can hit twice or be canceled early, and chains into itself, j.5M gives Doom a lot of leverage to adjust the timing on his Air Combos when necessary. Despite how it may look, this move also has coverage above Doom, which can catch air teleports. It also has a slight backwards hitbox, which can be used after a boxdash for crossups. | |||
| Damage | Startup | Active | Recovery |
|---|---|---|---|
| 35,000 x5 | 21 | 20 | 22 |
| On Hit | On Block | Guard | Properties |
| +24 | +12 | Mid | |
|
You messed up your footdive input, didn't you? Doom draws a gun and shoots a laser beam. The beam slowly travels across the screen. Once the beam has reached full-screen, it gradually fades out of existence. The beam can hit an opponent crouching on the ground, but only if it reaches them before it starts to fade away. Otherwise, it does not reach low enough. Buttergun can be used to supplement Doom's keepaway game, since it is aimed directly ahead. Doom's other aerial projectiles are aimed downwards, and can be evaded by opponents who reach the same aerial height as him. It is fairly safe to use during regular jumps, as Doom will land-cancel the recovery. If the beam makes contact with the opponent, Doom can chain into j.5S. Otherwise, it is uncancelable except by X-Factor Activation. For use in combos, Buttergun is very slow, hits at an awkward height, and has almost no useful cancel options. In aircombos, it rendered mostly useles by j.6H Footdive. j.5H is notable for having a huge amount of untech time on hit. Even from nearly full-screen, it is possible for Doom to connect a stray Buttergun hit, rejump, and then confirm into a real combo before the opponent can recover. This is also very helpful for TAC infinites. Unlike most normals, the initial startup of j.5H can not be canceled into a dash. The primary consequence of this is that Doom can not perform an air Plink Dash (only relevant in Flight Mode) using H inputs, and has to plink L~M exclusively. It is also a good idea to perform general airdashes with L+M to avoid getting accidental Butterguns from sloppy inputs. | |||
| Damage | Startup | Active | Recovery |
|---|---|---|---|
| 90,000 | 14 | Until grounded/Until contact | 1/Until grounded |
| On Hit | On Block | Guard | Properties |
| - | +18 | Mid | |
|
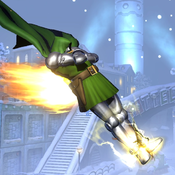
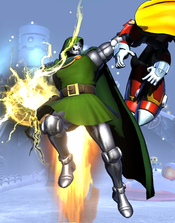
Doom straightens out his body, then dives downwards at a slight angle. The is one of the most iconic and impactful attacks in UMvC3, and is a core part of Doom's kit. Footdive has a large hitbox that completely covers Doom from the waist down, making it extremely difficult to challenge when the opponent is below Doom. Footdive stands out from most other j.5S attacks because it still causes a Hard Knockdown even when used outside of a launcher combo, and even on hitting a standing or crouching opponent rather than an airborne one. The Hard Knockdown caused by Footdive is extremely lengthy. Even if an opponent manages to trade with j.5S, Doom is infamous for being able to recover from the opponent's hit, maneuver himself down towards the opponent, and then still convert with an OTG 5M before the opponent can stand back up. The dominant hitbox of Footdive, combined with Doom's excellent ability to convert it into a huge combo, is enough to discourage opponents from trying to pursue an airborne Doom, and keeps him relatively safe from airthrow attempts. When Footdive makes contact with an opponent - hit or block - Doom will bounce off the opponent slightly upwards, and then enter a very lengthy recovery. This is disastrously unsafe on block, and just about every character in the game can punish by mashing their own 5S to start a launcher combo. This recovery animation can be circumvented by using the Airdash Cancel property of Footdive. Airdash-canceling Footdive on block prevents Doom from being punished, and even allows him to maintain his pressure and continue attacking the opponent. This only works if Doom has not already used his airdash in that jump state. Doom should avoid using j.5S offensively if he does not have access to his airdash, and should work on returning to the ground and regaining access to his airdash when possible. Airdash-canceling is also important when using Footdive in combos, as it allows Doom to return to the ground and connect his OTG as quickly as possible, minimizing the effect of Hitstun Deterioration. This is usually done by canceling j.5S into a down or down-forward airdash as soon as it connects, then immediately canceling the airdash into a whiffed air normal (j.5H is recommended). This sequence sends Doom back down towards the ground at a higher speed, since Doom's airdash naturally slows down at the end of its animation. If Footdive comes into contact with the edge of the stage - either the actual corner or just the edge of the current camera placement - it will be abruptly canceled. Doom is placed into a short recovery state when this happens, which can not be airdash-canceled. | |||
Command Normals
| Damage | Startup | Active | Recovery |
|---|---|---|---|
| 90,000 | 8 | 4 | 24 |
| On Hit | On Block | Guard | Properties |
| Launch | -4 | Mid | |
|
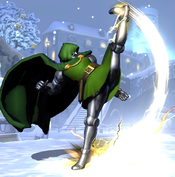
Doom swings one leg upwards in an arcing kick. 6H acts as a launcher, comparable to his 5S. It deals less damage than 5S but is faster and reaches higher, allowing it to connect at times when 5S would drop, such as late in a combo or after an anti-air 5L. 6H is also Doom's forward throw OS, and it is much, much better than his backthrow OS (Hidden Missiles). As a bonus, the upward-aimed kick will also catch opponents who try to chicken guard or jump out of your throw attempt, allowing you con maintain pressure on them. Hard Kick is an excellent choice for Doom to Dash Cancel when pressuring the opponent, due to its lengthy blockstun. Doom has ample time to complete a tri-dash and resume attacking or throwing the opponent while they remained locked down by the kick. Sometimes, inconsistently, jump-canceling 6H on hit will cause Doom to perform a regular jump, instead of the automatic superjump that launchers usually cause. This can be circumvented by manually inputting the superjump each time. | |||
| Damage | Startup | Active | Recovery |
|---|---|---|---|
| 20,000 x1 ~ x8 | 25 | - | 30 |
| On Hit | On Block | Guard | Properties |
| - | - | Mid | |
|
Doom gestures, and missiles are launched from the ground immediately behind him. By default, only one missile is launched, but continuing to press H can fire additional missiles in succession, up to a total of eight. The missiles are initially fired directly upwards. Upon reaching superjump height, they suddenly change direction to track the opponent. Although Hidden Missiles is an incredible assist, it is not particularly strong when Doom is on point. Doom is vulnerable while launching the missiles, which do not offer any real protection to Doom until they begin to fall back down on the opponent. If Doom is using missiles and an opponent decides to rush him down, Doom cannot cancel the attack to protect himself, except into a THC. When Doom is the only remaining character on the team, Hidden Missiles canceled into a Team Hyper Photon Array is a decent way to convert meter into safe chip damage, but if Doom has other teammates alive, this strategy becomes very expensive. Doom can call one or two missiles after a kill or Snapback to act as a sort of psuedo-assist and support his oncoming mixup. Hidden Missiles can hit OTG, both on the way up and on the way down. It is not really practical for Doom to use missiles as an OTG on the way down due to the amount of time they take to return to the ground. However, it is possible for Doom to position himself so that Missiles will hit an opponent OTG on the way up, which can be used in an advanced extension at the end of his combos. Hidden Missiles are not subject to hitstun deterioration. | |||
| Damage | Startup | Active | Recovery |
|---|---|---|---|
| 90,000 | 12 | Until Grounded/Until Contact | 1 |
| On Hit | On Block | Guard | Properties |
| +21 | +19 | Mid | |
|
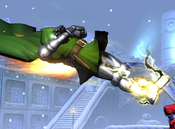
Command normal partner of Doom's j.5S Footdive. It works mainly the same way as j.5S, but Doom travels at a much shallower, more horizontal angle. It retains the incredible hitbox of j.5S. On contact with an opponent (on hit or on block), Doom bounces away from the opponent, similarly to the bounce that occurs on j.5S contact. However, this version is significantly safer to use. Doom recovers almost immediately, and can act while recoiling away from the opponent rather than being vulnerable. Moreover, j.6H Footdive is much more cancelable than j.5S. Even on whiff, it can be canceled into flight, as well as any of Doom's air specials or air hypers. On contact, it can also be chained into j.5S itself. j.6H is Doom's forward airthrow OS, and it is much, much better than his backthrow OS (j.5H Buttergun). Due to it's solid horizontal movement, j.6H Footdive can be useful for crossup setups when paired with assists or Doom's own Hidden Missiles. Call another attack and Footdive with Doom to pass above/underneath the opponent, forcing them to block the assist ambiguously. If Doom reaches the edge of the screen while performing this move, it will be abruptly canceled, and Doom will drop straight down towards the ground. j.6H has a hard limit of one use per jump. This limit can be circumvented by entering flight mode, but not by canceling Footdive into Airdash or X-Factor. This limit is unrelated to his j.5S Footdive, Doom can freely use both attacks in the same jump. | |||
Special Moves
| L |
Damage | Startup | Active | Recovery |
|---|---|---|---|---|
| 20,000 x4 ~ x5 | 22 | 15 | 14 | |
| On Hit | On Block | Guard | Properties | |
| - | +3 | Mid | ||
| M |
Damage | Startup | Active | Recovery |
| 20,000 x6 ~ x8 | 22 | 20 | 17 | |
| On Hit | On Block | Guard | Properties | |
| - | +1 | Mid | ||
| H |
Damage | Startup | Active | Recovery |
| 20,000 x9 ~ x12 | 22 | 25 | 19 | |
| On Hit | On Block | Guard | Properties | |
| - | +2 | Mid | ||
|
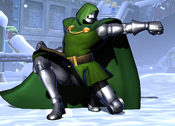
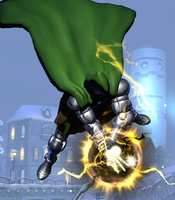
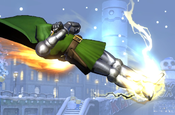
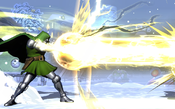
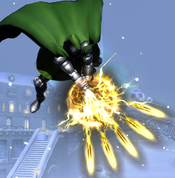
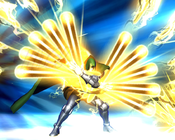
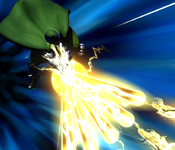
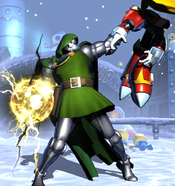
Doom channels a beam of energy that fires directly ahead. Once active, it takes a small amount of time to reach fullscreen. As a consequence, it will not reach its full hit count against fullscreen opponents. The beam is slightly above the ground - certain small-body characters can crouch underneath it, and some characters also have low-profile moves that can be used to evade it. Although Plasma Beam reaches fullscreen, it has limited vertical range and is easily evaded by jumping. It pins Doom in place for a full second and is dangerous to use as a keepaway tool. It is primarily used to score some additional chip damage in situations where it is guaranteed to connect, such as while the opponent is locked down by an assist. If an opponent blocks Photon Array (214XX) from far enough away, Doom will recover in time to force them to block a Plasma Beam as well. All versions of Plasma Beam are not subject to hitstun deterioration. | ||||
| L |
Damage | Startup | Active | Recovery |
|---|---|---|---|---|
| 20,000 x4 ~ x5 | 25 | 20 | 7 | |
| On Hit | On Block | Guard | Properties | |
| - | +4 | Mid | ||
| M |
Damage | Startup | Active | Recovery |
| 20,000 x6 ~ x8 | 25 | 20 | 16 | |
| On Hit | On Block | Guard | Properties | |
| - | 0 | Mid | ||
| H |
Damage | Startup | Active | Recovery |
| 20,000 x9 ~ x12 | 25 | 25 | 21 | |
| On Hit | On Block | Guard | Properties | |
| - | -2 | Mid | ||
|
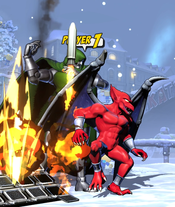
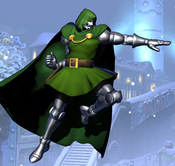
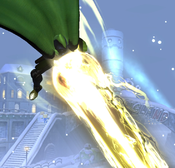
Air version of Plasma Beam. Functions mainly the same way as the grounded version, but Doom floats in the air while firing the beam downwards at a diagonal angle. The angle of the air beam makes it slightly harder to dodge, but it still lacks coverage compared to Photon Shot. Air Plasma Beam is mainly notable for being able to hit OTG. It is typically used as a combo ender, since many of Doom's combo routes lead to him floating above a knocked down opponent. Doom can OTG with Air Plasma Beam and then cancel into a shotgunned Air Photon Array to get great damage for 1 bar. If spaced correctly, it's possible to get the opponent to bounce on the beam, and only get hit twice. Similar to Dormammu's flame carpet, if you get this bouncing hit, there's a massive amount of hitstun. This is primarily used in air to air conversions, and TAC infinites. All versions of Air Plasma Beam are not subject to hitstun deterioration. | ||||
| Damage | Startup | Active | Recovery |
|---|---|---|---|
| 30,000 per hit | 27 | - | 33 |
| On Hit | On Block | Guard | Properties |
| -8 | -10 | Mid | |
|
Doom shoots an array of lasers - ten total with five being fired in front of Doom, and five behind Doom. The lasers fan outwards, covering almost every angle around Doom except for the space directly above him. Button strength only affects the speed of the projectiles. L version's lasers move the slowest, while H version's are fastest. Photon Shot is basically the opposite of Plasma Beam in terms of use. It deals poor damage/chip, but has incredible coverage and is very difficult to avoid, let alone punish. Whenever Doom has some distance from the opponent, he can throw out Photon Shots in relative safety to limit the opponent's movement options. | |||
| L |
Damage | Startup | Active | Recovery |
|---|---|---|---|---|
| 30,000 per shot | 27 | - | 23 | |
| On Hit | On Block | Guard | Properties | |
| +19 | +15 | Mid | Priority: Low, Durability: 2 per shot | |
| M |
Damage | Startup | Active | Recovery |
| 30,000 per shot | 24 | - | 26 | |
| On Hit | On Block | Guard | Properties | |
| +14 | +12 | Mid | Priority: Low, Durability: 2 per shot | |
| H |
Damage | Startup | Active | Recovery |
| 30,000 per shot | 21 | - | 29 | |
| On Hit | On Block | Guard | Properties | |
| +11 | +9 | Mid | Priority: Low, Durability: 2 per shot | |
|
Air version of Photon Shot. Doom floats in the air and fires five lasers, which fan out below and in front of Doom. It provides great coverage and is very safe. Doom can repeatedly use Photon Shot at superjump height to stall in the air if necessary, which is even more effective when used alongside Flight Mode. | ||||
| L |
Damage | Startup | Active | Recovery |
|---|---|---|---|---|
| 15,000 x3 + 25,000 x4 | 7 | 15(1)1 | 37 | |
| On Hit | On Block | Guard | Properties | |
| -13 | -11 | Mid | ||
| M |
Damage | Startup | Active | Recovery |
| 15,000 x5 + 25,000 x4 | 10 | 26 | 33 | |
| On Hit | On Block | Guard | Properties | |
| -8 | -8 | Mid | ||
| H |
Damage | Startup | Active | Recovery |
| 15,000 x6 + 25,000 x5 | 13 | 36 | 27 | |
| On Hit | On Block | Guard | Properties | |
| -1 | -1 | Mid | ||
|
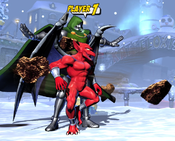
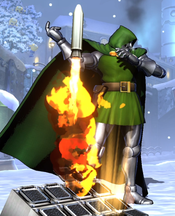
Doom surrounds himself with rocks. The rocks form a sort of barrier around Doom, clashing with projectiles and (ideally) stuffing physical attacks as well. At the end of the active frame duration, the rocks are launched directly forward from Doom, acting as regular projectiles. Molecular Shield is decently fast to start up and can be thought of as Doom's "reversal", although it has no invuln or armor. It may be thrown out on wakeup or in a similar defensive situation in hopes of stuffing the opponent's attacks. Molecular Shield has some use as a combo ending tool. Since the L and M versions are faster than Doom's 5S, there are times when an OTG 5H will not combo into 5S, but will combo into Molecular Shield. From there, Doom can hyper cancel into Sphere Flame to finish the combo. | ||||
| Damage | Startup | Active | Recovery |
|---|---|---|---|
| - | 15 | 106 | - |
| On Hit | On Block | Guard | Properties |
| - | - | - | 106 frame flight mode |
|
Doom enters a standard flight mode. For the duration, he floats in place and can use his aerial specials and/or airdashes an unlimited number of times. Flight greatly enhances the amount of time that Doom can stall or maneuver at superjump height, and also is helpful in his TAC combos, but is rarely used in normal Doom combos. Keep in mind that if Doom activates Flight from the ground, he will be floating below his minimum airdash height, and thus unable to airdash unless he (slowly) flies upwards first. Also keep in mind that Doom can not plink airdashes using an H input, due to the uniquely uncancelable nature of his j.5H. | |||
Hyper Combos
| Damage | Startup | Active | Recovery |
|---|---|---|---|
| 20,000 x25 ~ x50 (each side) | 10+1 | 40 | 34 |
| On Hit | On Block | Guard | Properties |
| +4 | +2 | Mid | |
|
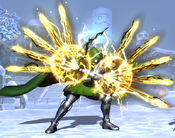
Hyper version of Photon Shot. Doom fires lasers in a fan shape on both sides. The lasers fan out with the same spread as Photon Shot, and travel at the same speed as H Photon Shot. However, Photon Array sends out several consecutive waves of projectiles, rather than just one wave like the regular special move. A total of five waves are fired. Mashing causes each shot to hit twice, rather than causing additional projectiles to be fired. Like with Photon Shot, Photon Array is very safe and has excellent coverage. It is a tool for Doom to forcefully retake momentum while dealing moderate chip damage, since it is advantageous on block. It can be used as a safe DHC to evacuate to/from another point character, or as an emergency cancel option if Doom whiffs another attack and is in danger of being punished. Photon Array is notable for being one of very few projectile attacks in the game that can fire behind the character using it. As a result, it can be used to protect Doom from an Astral Vision Morrigan's fireball patterns, something very few characters can do. Photon Shot also includes projectiles fired backwards, but does not have enough durability to negate Soul Fists, whereas Photon Array is High priority and will blow through them. Typically in combos most of Photon Array's backwards projectiles will not hit(because they're fired behind you while the other char is in front), however it is possible to get almost all of them to hit on big body characters(eg Hulk), causing massive damage. | |||
| Damage | Startup | Active | Recovery |
|---|---|---|---|
| 20,000 x25 ~ x50 | 10+1 | 40 | 59 |
| On Hit | On Block | Guard | Properties |
| -34 | -35 | Mid | |
|
Air version of Photon Array. Paralleling the air version of Photon Shot, it shoots a spread of projectiles that fan out below and in front of Doom. Unlike grounded Photon Array, the air version does not have great recovery and is very negative on block if done too close. It is primarily used to end Doom's combos. Since it hits OTG, Doom can position in the air above a knocked down opponent and "shotgun" this hyper for very high damage, especially when canceled from an OTG Air Plasma Beam. | |||
| Damage | Startup | Active | Recovery |
|---|---|---|---|
| 20,000 x17 + 10,000 x40 | 8+1 | 40/26 | 47 |
| On Hit | On Block | Guard | Properties |
| +17 | +35 | Mid | |
|
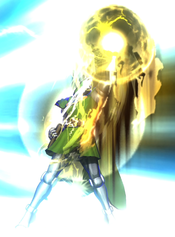
Doom produces a sphere of energy and sendings it flying directly upwards. Once the sphere reaches superjump height (takes 40 frames), it explodes, causing an arc of projectiles to rain back downwards toward the ground. The projectiles reach the ground after roughly 26 frames. If the initial sphere hits an opponent, it will carry them upwards alongside itself, and the opponent will also be hit by every projectile from the explosion. This deals very high damage - comparable to a point-blank fully mashed Photon Array - but it is much worse for enabling DHCs due to how high it juggles the opponent. Conversely, Sphere Flame is much better to DHC into than Photon Array in most cases, since it will deal very close to full damage regardless of spacing, as long as it connects at all. The frame data for Sphere Flame is deceptive, although it is technically safe if an opponent on the ground blocks the projectile rain at the end, there is a very large gap between when the Sphere rises into the air and when the projectiles return to the ground. You should always assume that Doom will be punished if this attack is blocked (or whiffs) low to the ground. | |||
| Damage | Startup | Active | Recovery |
|---|---|---|---|
| 440,000 ~ 483,000 | 4+0 | 1 | 49 |
| On Hit | On Block | Guard | Properties |
| - | -27 | Mid | Invuln until frame 9, |
|
Cinematic level 3 hyper. Doom gestures, and a containment cell appears that will trap the opponent's character if it hits. The cinematic deals heavy unscaled damage and ends in a Hard Knockdown. Doom's Time is primarily used to secure a kill in situations where a 1-bar combo ender will not suffice. Doom can fairly easily tack a Level 3 onto any normal BnB combo by ending with an OTG 5H canceled direclt into Level 3. Level 3 is also Doom's only reversal, and it is serviceable when used this way. It has full invul through its active frame, and is very fast to start up. It also has zero frames of post-flash startup, meaning if an opponent in range is not already blocking when the superflash begins, the hyper can not be blocked (and it also can not be reacted to with DHCs or X-Factor). Level 3's weakness as a reversal is its extremely poor vertical range. The hitbox consists only of a small crackling of electricity on the ground, and it is basically impossible for this hyper to connect on an airborne opponent. | |||
Universal Mechanics
| Damage | Startup | Active | Recovery |
|---|---|---|---|
| 80,000 | 1 | 1 | - |
| On Hit | On Block | Guard | Properties |
| - | - | Throw | |
|
Doom grips the opponent in one hand, but the follow-up action depends on whether the throw is a Forward Throw or Back Throw. A Forward Throw will cause Doom to blast the opponent with energy, sending them flying across the screen. In a Back Throw, Doom slams the opponent into the ground directly behind him, causing them to bounch high into the air before landing for a Hard Knockdown. Note that despite the animation, Back Throw does not use or consume a Ground Bounce. Back Throw is very easy to confirm from any screen position. In fact, it actually gives Doom so much time to convert that Doom can reposition to the opposite side of the opponent if preferred, or if your timing is good, pick up a 5L. After they hit the ground, a simple OTG 5M or 5H chained into launcher starts the combo. Forward Throw can also be consistently converted into a combo from any screen position, but doing so is more advanced due to the distance Doom needs to cover to reach the opponent. The standard way to convert a Forward Throw with Doom is by using a Triangle Dash. To start, input a regular forward dash as soon as Doom recovers from the throw animation. Approximately halfway through Doom's forward dash, cancel the dash into a forward jump. Then, as soon as Doom reaches his minimum airdash height, perform a down-forward airdash. This should place Doom back on the ground, close enough to the opponent to connect an OTG 5M. Video Guide. Doom's 6H Throw OS (Hard Kick) is extremely good, while Doom's 4H Throw OS (Hidden Missiles) is very dangerous to whiff. Therefore, it is strongly recommended to learn Doom's Forward Throw conversion, and prioritize using Forward Throws over Back Throws whenever possible. | |||
| Damage | Startup | Active | Recovery |
|---|---|---|---|
| 80,000 | 1 | 1 | - |
| On Hit | On Block | Guard | Properties |
| - | - | Airthrow | |
|
Doom's Airthrow mirrors Doom's Ground Throw, with the Back Throw sending the opponent straight down towards the ground behind Doom, while Forward Throw sends the opponent flying a good distance away. As with the grounded throws, Air Back Throw is easy to convert but option selects a very weak attack (j.5H Buttergun), while Air Forward Throw is difficult to convert but option selects a strong attack (j.6H Footdive). Converting a Forward Air Throw depends on the height that the throw connects:
| |||
| Damage | Startup | Active | Recovery |
|---|---|---|---|
| 50,000 | 2 | 4 | 24 |
| On Hit | On Block | Guard | Properties |
| - | -4 | Mid | Snapback |
|
Animation and hitbox based on 6H. | |||
| Damage | Startup | Active | Recovery |
|---|---|---|---|
| 30,000 | - | 24 | 34 |
| On Hit | On Block | Guard | Properties |
| - | -15 | OH | |
|
- | |||
Team Position
Doom's biggest asset is his selection of assists. All three of Doom's assists are among the best in the game, and at least one is sure to be a strong pick for just about any team composition. He is most commonly placed in the Second position on the team, so his assist can be utilized while a more dedicated anchor character fills the third position. Doom's aerial mobility gives him a decent chance to escape many oncoming mixups, which is another point in favor of putting him in the second slot. That said, some teams do run Doom in the Anchor position, as his Level 3 X-Factor scaling is quite strong. Although Doom can fend for himself quite well, he is almost never picked as a point character. It is a waste of his potential as an assist to run him up front, and he matches poorly against some of the most common point characters.
Notable Synergies
Just about every character in the game would love to have one of Doom's assists backing them up, and he is a safe pick to support almost any team. That said, a handful of characters particularly like to be paired with Doom (or Doom particularly likes to be paired with them).
Morrigan: The infamous "Morridoom" shell that swept every major tournament for over a year. Doom's "hidden missiles" assist perfectly covers the superjump height that is otherwise a weak point in Morrigan's fireball game. If Doom happens to find himself tagged in, his playstyle aligns exactly with what Morrigan wants. Doom can run away and build meter using Flight and projectile specials, then throw out one of his safe Level 1 Hypers to DHC back to Morrigan with Astral Vision. A well-executed Morrigan/Doom team is borderline impenetrable.
Players to Watch: ChrisG (Morrigan/Doom/Vergil), JRosa (Morrigan/Doom/Strider), Escalante (Magneto/Morrigan/Doom)
Amaterasu: Dr. Doom's level 1 hypers have extremely short duration. Meanwhile, Ammy's level 1 "Okami Shuffle" hyper is one of the longest in the game. This leads to a uniquely powerful synergy when both characters are used in a Team Hyper Combo. When Doom calls a THC with Ammy behind him, he recovers from his hyper very quickly, and can freely act while the opponent remains locked down by Ammy's hyper for several more seconds. In this time, Doom can cross-up the opponent, go for high/low mixups, or even throw them. If Doom opens up the opponent during this time, he can easily build enough meter to THC again.
Players to Watch: MarlinPie (Viper/Doom/Ammy), Zak Bennet (Firebrand/Doom/Ammy), FullSchedule (Viper/Doom/Ammy)
Strider Hiryu: Hiryu's "Vajra" assist causes a hard knockdown if it hits an airborne opponent. Its great tracking and nearly infinite vertical range make it a scary assist to face in neutral, but not many characters can efficiently capitalize on the knockdown it causes. Doom has no shortage of strong OTG-capable attacks, so nearly any Strider hit can be consistently confirmed into a full combo. In addition, Strider usually does not want to be on point unless he is the last character alive and has lots of meter. Having Doom on the team means that Strider has access to easy DHC options to use as an escape if he gets snapped in.
Players to Watch: JRosa (Morrigan/Doom/Strider), Clockwork (Vergil/Doom/Strider), DeadXPride (Vergil/Doom/Strider)
Other Players to Watch: RayRay (Magneto/Doom/Sentinel), Coach Steve/Insayyane (Nova/Spencer/Doom), FChamp (Magneto/Doom/Phoenix, Magneto/Doom/Dormammu), Miniboss (Spencer/Doom/Strange), ApologyMan (Firebrand/Skrull/Doom, Skrull/Frank/Doom), DiosX (Doom/Storm/Sentinel), Winrich (Wolverine/Doom/Vergil), Paradigm (Haggar/Dormammu/Doom), Joey D (Zero/Doom/Vergil), Romora (Zero/Doom/Vergil), Prodigy (Magneto/Doom/Phoenix), MameSpider (Spider-Man/Doom/Vergil)
Note: This list is deliberately incomplete. Doom is likely the single most played character in UMvC3, and his versatility and naturaly team synergy mean that the overwhelming majority of tournament players have at least dabbled in learning Doom.
Combos
Solo Combos
2L > 2H > 5S sjc. j.5M > j.5M > j.6H > j.5S xx Airdash Down-forward xx j.5H (whiff), land, 5H > 5S sjc. j.5M > j.5M > j.6H > j.5S xx Airdash Down-forward xx j.5H (whiff), land, 5H > 5S sjc. j.5M > j.5M > j.6H > j.5S xx Airdash Down-forward, j.236H xx j.214XX (758,000 damage for 1 bar, builds 1.5 bars of meter.)
Video Timestamp (Midscreen). Basic Footdive loop. Deals great damage for a 1 bar solo combo and is very meter-positive. The basic Footdive loop works both Midscreen and in the Corner, but requires some small modifications to work Midscreen:
- When performing the Air Combo sequence, connect the first j.5M as early as possible, then delay the second j.5M slightly, this will position the opponent at the correct height for the j.6H > j.5S sequence to connect.
- After landing on the ground at the end of each Air Combo, you will need to perform a Triangle Dash to reach the opponent with your OTG. Jump forward and then airdash Down-forward once you reach minimum airdash height.
2L > 2M > 2H > 5S sjc. j.5L > j.6H xx Airdash Down-forward, land, 2M > 2H > 5S sjc. j.5L > j.6H xx Airdash Down-forward, land, 2M > 2H > 5S sjc. j.5L > j.5L > j.5M > j.6H > j.5S xx Airdash Downforward xx j.5H (whiff), land, 5H > 5S sjc. j.5M > j.5M > j.6H > j.5S xx Airdash Down-forward xx j.5H (whiff), j.236H xx j.214XX (786,000 for 1 bar, builds 1.8 bars of meter.)
Video Timestamp (Midscreen). Intermediate Footdive loop. Like the previous combo, it works both Midscreen and in the corner. The midscreen version does not require any particular modifications, but the timing is more strict. If you are having trouble connecting the 2M > 2H relaunch sequence, you can use 2L > 2M instead, which is easier for slightly less damage.
2L > 2M > 2H > 5S sjc. j.5M > j.6H > j.5S xx Airdash Down xx j.5H (whiff), land, 5H > 5S sjc. j.5M > j.6H > j.5S xx Airdash Down xx j.5H (whiff), land, 5H > 5S sjc. j.5M > j.6H > j.5S xx Airdash Down xx j.5H (whiff), land, 5H > 5S sjc. j.5M > j.5M > j.6H > j.5S xx Airdash Down, j.236H xx j.214XX (849,000 for 1 bar, builds 1.9 bars of meter.)
Video Timestamp. Corner only. This is an optimization of the basic Footdive loop, taking advantage of the fact that you can perform each rep faster in the corner, to complete four (shorter) loops instead of the usual three.
2L > 2M > 2H > 5S sjc. j.5L > j.6H xx Airdash Down, land, 5S sjc. j.5L > j.6H xx Airdash Down, land, 5S sjc. j.5L > j.6H xx Airdash Down, land, 5S sjc. j.5L > j.6H xx Airdash Down, land, 5S sjc. j.5L > j.5M > j.6H > j.5S xx Airdash Down xx j.5H (whiff), land, 5H > 5S sjc. j.5M > j.5M > j.6H > j.5S xx Airdash Down, j.236H xx j.214XX (908,000 for 1 bar, builds 1.95 bars of meter.)
Video Timestamp. Corner only. Like the above combo, this is an optimization of the intermediate loop, getting additional reps for slightly more damage.
2L > 2M > 2H > 5S sjc. j.5M xx Airdash Down-forward xx j.5M, rejump, j.5M > j.6H xx Airdash Down-forward, land, 2L > 2M > 2H > 5S sjc. j.5L > j.5L > j.5M > j.5M > j.6H > j.5S xx Airdash Down xx j.5H (whiff), land, 5H > 5S sjc. j.5M > j.5M > j.6H > j.5S xx Airdash Down, j.236H xx j.214XX (777,000 damage for 1 bar, builds ~1.7 bars of meter)
Video Timestamp. Sideswitch combo. Useful if Doom lands a hit while cornered, to instead place the opponent into the corner for better damage and mixup potential.
2L > 2M > 2H > 5S sjc. j.5L > j.6H xx Airdash Down, land, 2H > 5S sjc. j.5L > j.6H xx Airdash Down, land, 2H > 5S sjc. j.5L > j.6H xx Airdash Down, land, 2M > 2H > 5S sjc. j.5M > j.6H > j.5S xx Airdash Down xx j.5H (whiff), land, 5H > 5S sjc. j.5M > j.6H > j.5S xx Airdash Down xx j.5H (whiff), land, 5H xx 623L xx 214XX (972,000 for 1 bar.)
Video Timestamp. Corner-only optimized Footdive loop. Also demonstates an altenrate ender where Doom lands and uses an OTG 5H canceled into L Molecular Shield to place an opponent at the correct height for a grounded Photon Array. If timed incorrectly, this does much less damage than the standard ender, so consider taking the safe route.
Sample Team Combos
Doom/Vergil #1, Doom/Vergil #2, Doom/Vergil #3, Doom/Vergil #4
Thor/Doom #1, Thor/Doom #2, Thor/Doom #3
TAC Infinites
Full Tutorial
Example TACs
Midscreen-to-Corner
All sides
Alternate Tutorial
Swag TAC
