Leot buddy (talk | contribs) m (→Weak Spot) |
(Fixed grammar. Noted that Hellfire can be done during Ducking in Summary. Included up-back, up, & up-forward for HP command normals in st.HP's description. f.HP & f.LK pros/cons added to their descriptions. Mentioned Hellfire can be used as reversal in its description. Mentioned that sweep can be cancelled into LK Step Back against Mars/Ryoko in Step Back's description. Removed mention of Zazie's crossup vulnerability in his Advanced section since it's already mentioned in his Basics section.) |
||
| Line 11: | Line 11: | ||
HELLFIREE, DERSHH | HELLFIREE, DERSHH | ||
Zazie is karateka from Kenya. He is a founder of the African Nature Protection Society and decided to participate in the Great Grapple Tournament to raise some money for his organisation. The question is: | Zazie is karateka from Kenya. He is a founder of the African Nature Protection Society and decided to participate in the Great Grapple Tournament to raise some money for his organisation. The question is: can he overcome his opponents and achieve victory? Well, he has a ''really'' good chance at this... | ||
Zazie is one of "The Four Gods" of the game and debatably the Top-1 character. He is a great rushdown character with long pokes due to his | Zazie is one of "The Four Gods" of the game and debatably the Top-1 character. He is a great rushdown character with long pokes due to his size. His Vulcan Hook (Tap {{neogeoa}}{{neogeob}}{{neogeoc}}{{neogeod}}) can deal massive damage in combos as well as chip damage, while also being used for his keepaway game if necessary. His Ducking move ({{f}}{{f}}+{{k}}) lets him disrespect fireballs (but leaves him vulnerable to sweeps). Hellfire uppercut ({{qcd}}+{{p}}) can demolish all types of weak spots and can even be done during Ducking. All in all, Zazie is a scary force that should be taken seriously in every fight. | ||
===Weak Spot=== | ===Weak Spot=== | ||
| Line 28: | Line 28: | ||
<td align="center">-</td></tr> | <td align="center">-</td></tr> | ||
</table> | </table> | ||
Having a weak spot on | Having a weak spot on the head is usually a bad thing by default, but Zazie's saving grace is that he's the tallest character in the game. Just use stance shift to change your stance to standing while being comboed. Not many grounded moves can hit your standing weak spot, but some characters still have high kicks and axe kicks to use against you. And of course, watch out for jump-ins and crossups. | ||
Also, as you can see, Zazie | Also, as you can see, Zazie has a misplaced weak spot on his second squat animation. This ''may'' help/harm you somehow, but not really. | ||
===Color Options=== | ===Color Options=== | ||
| Line 96: | Line 96: | ||
<td align="center">3</td></tr> | <td align="center">3</td></tr> | ||
</table> | </table> | ||
Usual jab that whiffs all crouching characters. Due to Zazie's height may be used as far anti-air. | Usual jab that whiffs on all crouching characters. Due to Zazie's height it may be used as a far anti-air. | ||
*'''Crouching LP:''' | *'''Crouching LP:''' | ||
| Line 118: | Line 118: | ||
<td align="center">3</td></tr> | <td align="center">3</td></tr> | ||
</table> | </table> | ||
Same as st.LP but obviously doesn't whiff crouching characters. | Same as st.LP but obviously doesn't whiff on crouching characters. | ||
*'''Jumping LP (Diagonal/Neutral):''' | *'''Jumping LP (Diagonal/Neutral):''' | ||
| Line 159: | Line 159: | ||
<td align="center">18</td></tr> | <td align="center">18</td></tr> | ||
</table> | </table> | ||
Zazie throws an uppercut with his back arm. Great anti-air alternative to Hellfire. | Zazie throws an uppercut with his back arm. Great anti-air alternative to Hellfire. Something worth mentioning is that this attack is actually listed as a command normal in the dev menu of the game. Actual HP normals can be used if you hold {{b}} / {{ub}} / {{u}} / {{uf}} / {{f}} while attacking. Further info about them is listed in the "Special Normals" section. | ||
*'''Crouching HP:''' | *'''Crouching HP:''' | ||
| Line 182: | Line 182: | ||
<td align="center" colspan="2">(16) 21</td></tr> | <td align="center" colspan="2">(16) 21</td></tr> | ||
</table> | </table> | ||
Crouching uppercut with okay priority. It's still useful but priority is not that great | Crouching uppercut with okay priority. It's still useful but the priority is not that great compared to other cr.HP anti-airs. | ||
*'''Jumping HP (Diagonal):''' | *'''Jumping HP (Diagonal):''' | ||
| Line 200: | Line 200: | ||
<td align="center">∞</td></tr> | <td align="center">∞</td></tr> | ||
</table> | </table> | ||
Typical aerial heavy punch | Typical aerial heavy punch. Looks like j.LP but has worse priority and higher damage. | ||
*'''Jumping HP (Neutral):''' | *'''Jumping HP (Neutral):''' | ||
| Line 218: | Line 218: | ||
<td align="center">∞</td></tr> | <td align="center">∞</td></tr> | ||
</table> | </table> | ||
Identical to | Identical to its diagonal jump counterpart but its hitbox is stretched downwards a bit. | ||
===Light Kick [[File:Snkc.gif]]=== | ===Light Kick [[File:Snkc.gif]]=== | ||
| Line 241: | Line 241: | ||
<td align="center">4</td></tr> | <td align="center">4</td></tr> | ||
</table> | </table> | ||
This one is ''the'' real bane to | This one is ''the'' real bane to most weak spots. | ||
*'''Standing LK (Far):''' | *'''Standing LK (Far):''' | ||
| Line 264: | Line 264: | ||
<td align="center" colspan="2">(3) 9</td></tr> | <td align="center" colspan="2">(3) 9</td></tr> | ||
</table> | </table> | ||
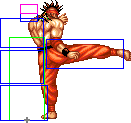
Incredible poke, Zazie use his leg to kick in the medium zone. | Incredible poke, Zazie use his leg to kick in the medium zone. Its high speed and outstanding range means that you're going to be using this a lot. Compared to f.HP, this move hits Jean's and Yungmie's weak spots, but misses Matlok's, Mizoguchi's, Clown's, and Karnov's weak spots. This move also hits all crouchers, unlike f.HP. | ||
*'''Crouching LK:''' | *'''Crouching LK:''' | ||
| Line 286: | Line 286: | ||
<td align="center">3</td></tr> | <td align="center">3</td></tr> | ||
</table> | </table> | ||
Your best option for doing chain strings, | Your best option for doing chain strings, since LPs will trigger your Vulcan Hook instead. | ||
*'''Jumping LK (Diagonal):''' | *'''Jumping LK (Diagonal):''' | ||
| Line 302: | Line 302: | ||
<td align="center" bgcolor="#00007D">∞</td></tr> | <td align="center" bgcolor="#00007D">∞</td></tr> | ||
</table> | </table> | ||
Good option to interrupt stuff like Mars' Lariats and hit head weak spots from afar. | Good option to interrupt stuff like Mars' Lariats and to hit head weak spots from afar. | ||
*'''Jumping LK (Neutral):''' | *'''Jumping LK (Neutral):''' | ||
| Line 340: | Line 340: | ||
<td align="center">16</td></tr> | <td align="center">16</td></tr> | ||
</table> | </table> | ||
Another ridiculous hitbox, but this time it has long startup for a close attack. | Another ridiculous hitbox, but this time it has a long startup for a close attack. It's pretty good as a meaty. | ||
*'''Standing HK (Far):''' | *'''Standing HK (Far):''' | ||
| Line 448: | Line 448: | ||
<td align="center" colspan="2">(6) 10</td></tr> | <td align="center" colspan="2">(6) 10</td></tr> | ||
</table> | </table> | ||
'''The actual f.HP:''' | '''The actual f.HP:''' A fast, straight punch. Your best poke due to it being plus on hit and block. Arm becomes vulnerable after active part at 6 frames. Whiffs on all crouchers except Samchay and Marstorius. Compared to f.LK, this move hits Matlok's, Mizoguchi's, Clown's, and Karnov's weak spots, but misses Jean's and Yungmie's weak spots. | ||
*'''Close''' [[File:B.png]]/[[File:Ub.png]]/[[File:U.png]]/[[File:Uf.png]]/[[File:F.png]] + [[File:Snkb.gif]] ''activation range = 63'' | *'''Close''' [[File:B.png]]/[[File:Ub.png]]/[[File:U.png]]/[[File:Uf.png]]/[[File:F.png]] + [[File:Snkb.gif]] ''activation range = 63'' | ||
| Line 474: | Line 474: | ||
<td align="center">20</td></tr> | <td align="center">20</td></tr> | ||
</table> | </table> | ||
'''The actual cl.HP:''' | '''The actual cl.HP:''' A high damage, 2-hit hook punch. It's quirky to use because you may trigger a throw instead. To make it come out you can combo it from a light normal or activate it with {{U}}+{{neogeob}}. Hitboxes of both hits are identical, so opponent may fall from second hit. | ||
== Throws == | == Throws == | ||
| Line 485: | Line 485: | ||
</table> | </table> | ||
*'''Helldriver:''' [[File:B.png]]/[[File:F.png]] + [[File:Snkb.gif]] | *'''Helldriver:''' [[File:B.png]]/[[File:F.png]] + [[File:Snkb.gif]] | ||
HELLDRIVER!! Zazie performs a suplex | HELLDRIVER!! Zazie performs a suplex that leaves an opponent near enough to walk in and keep the pressure. One con... low damage, especially compared to other characters' usual throws. | ||
== Special Moves == | == Special Moves == | ||
| Line 559: | Line 559: | ||
''*Frame advantage is measured relatively '''if only the first hit connects''''' | ''*Frame advantage is measured relatively '''if only the first hit connects''''' | ||
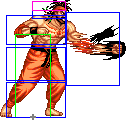
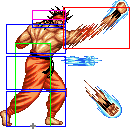
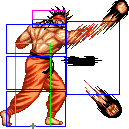
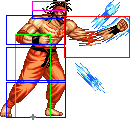
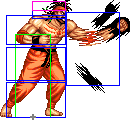
Hundred Hand Slap with a ton of possible uses. It's one of your main keepaway tools, nice damage dealer | Hundred Hand Slap with a ton of possible uses. It's one of your main keepaway tools, a nice damage dealer, and it deals great chip damage. It also wipes out weak spots with ease. You're going to use this a lot. The ABCD version has less gaps between hits and comes out '''instantly''', so there's no reason to use the P version at all. Keep in mind that Zazie's arms are actually vulnerable between active frames. | ||
This move is not supposed to be steerable but | This move is not supposed to be steerable but it can actually move by one pixel between loop cycles, so whatever. | ||
*'''Hellfire:''' [[File:Qcd.png]] + [[File:P.png]] | *'''Hellfire:''' [[File:Qcd.png]] + [[File:P.png]] | ||
| Line 590: | Line 590: | ||
<td align="center">19</td></tr> | <td align="center">19</td></tr> | ||
</table> | </table> | ||
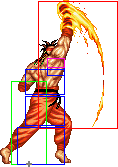
Your main anti-air | Your main anti-air and combo ender. Useful as a reversal too due to its first 6 frames being completely invulnerable. Both hits deals knockdown on both versions. Yet another attack that demolishes weak spots, except this one can also do this against jump-ins due to jumping weak spots typically being located in the front part of the hurtbox. | ||
*'''Ducking:''' [[File:F.png]][[File:F.png]] + [[File:K.png]] | *'''Ducking:''' [[File:F.png]][[File:F.png]] + [[File:K.png]] | ||
| Line 608: | Line 608: | ||
<td align="center">3</td></tr> | <td align="center">3</td></tr> | ||
</table> | </table> | ||
Zazie dashes forward while being invincible. | Zazie dashes forward while being invincible. Your main answer for all fireball wars. This move forces opponents to throw their projectiles wisely, since even one mindlessly thrown fireball will result in a free punish. Be careful not to spam this move however, as your opponent will have 6 whole frames to sweep you. Throws also work against Ducking, even during invincible frames (because in FHD only pushbox is needed to perform a throw). Especially be aware of command throws - for Mars and Ryoko this move might be free damage. Unless... | ||
The most important quirk about Ducking is that it can be cancelled into Hellfire, thus creating | The most important quirk about Ducking is that it can be cancelled into Hellfire, thus creating the '''"Dashing Hellfire"''' technique! It's a staple move in Zazie's toolkit that opens up even more opportunities to punish from afar and extend combos. It can be done in several ways: | ||
1) {{f}}, {{hcf}} + {{k}} ~ {{p}} | 1) {{f}}, {{hcf}} + {{k}} ~ {{p}} | ||
| Line 618: | Line 618: | ||
3) {{f}}{{f}}, {{b}} + {{k}}, {{db}}{{d}} + {{p}} | 3) {{f}}{{f}}, {{b}} + {{k}}, {{db}}{{d}} + {{p}} | ||
Choose the most comfortable for you. | Choose the most comfortable method for you. | ||
*'''Step Back:''' [[File:F.png]][[File:B.png]] + [[File:K.png]] | *'''Step Back:''' [[File:F.png]][[File:B.png]] + [[File:K.png]] | ||
| Line 643: | Line 643: | ||
<td align="center">2</td></tr> | <td align="center">2</td></tr> | ||
</table> | </table> | ||
Zazie performs two slight hops. HK version is hop back → hop forward, and LK version is hop back → hop | Zazie performs two slight hops. HK version is hop back → hop forward, and LK version is hop back → hop in place. Zazie is invincible from very start to the moment between hops. This move can possibly help to avoid attacks as it was intended, but in practice it rarely sees use. The LK version can be cancelled into from a sweep (cr.HK) to create space in the Mars/Ryoko matchups. | ||
== Hidden Move == | == Hidden Move == | ||
| Line 694: | Line 694: | ||
<td align="center">13</td></tr> | <td align="center">13</td></tr> | ||
</table> | </table> | ||
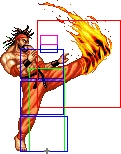
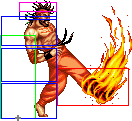
Zazie's high | Zazie's high damage flame kicks. The input is quirky and this move is usually canceled from normals, but if your hands are quick enough you can perform it without a cancel. LK and HK versions are tweaked cl.HK and f.HK attacks respectively. Both of them deal knockdowns on hit and are safe on block. The LK version is a nice tool for safe pressure and the HK version is a great combo ender. | ||
= The Basics = | = The Basics = | ||
Ducking into Hellfire is a staple. The timing is tricky, but you're unstoppable to most opponents when doing this. You can also do a chain like s.lk → Ducking → Hellfire. | Ducking into Hellfire is a staple. The timing is tricky, but you're unstoppable to most opponents when doing this. You can also do a chain like s.lk → Ducking → Hellfire. | ||
Zazie is a big hitbox character | Zazie is a hard hitting, big hitbox rushdown character with great pokes and decent zoning potential. His main con is that he's a good crossup punching bag due to his high weak point. | ||
= Combos = | = Combos = | ||
| Line 713: | Line 713: | ||
= Advanced Strategy = | = Advanced Strategy = | ||
Your main objective | Your main objective with Ducking will vary depending on the projectile (or lack thereof) along with height and speed. He is considered one of the Top 4 in the game because his matchups can be thought of as a basic programming flowchart. | ||
= Match-ups = | = Match-ups = | ||
| Line 749: | Line 749: | ||
=== Vs. Clown: === | === Vs. Clown: === | ||
A | A bad matchup. Clown can stun you with Head Stomp and his projectile, even if bad, can hit you after a Ducking. Try to jumping kick him and corner him with Mash Fists. Hellfire and Flame Kick are both good answers for a Roll. | ||
=== Vs. Jean: === | === Vs. Jean: === | ||
One of | One of Zazie's easiest matchups. Ducking Hellfire is great against Jean's projectiles and slides. Mash fists are the best and also try to stay on the ground. | ||
=== Vs. Ryoko: === | === Vs. Ryoko: === | ||
Revision as of 01:38, 9 August 2023
Introduction
HELLFIREE, DERSHH
Zazie is karateka from Kenya. He is a founder of the African Nature Protection Society and decided to participate in the Great Grapple Tournament to raise some money for his organisation. The question is: can he overcome his opponents and achieve victory? Well, he has a really good chance at this...
Zazie is one of "The Four Gods" of the game and debatably the Top-1 character. He is a great rushdown character with long pokes due to his size. His Vulcan Hook (Tap ![]()
![]()
![]()
![]() ) can deal massive damage in combos as well as chip damage, while also being used for his keepaway game if necessary. His Ducking move (
) can deal massive damage in combos as well as chip damage, while also being used for his keepaway game if necessary. His Ducking move (![]()
![]() +
+![]() ) lets him disrespect fireballs (but leaves him vulnerable to sweeps). Hellfire uppercut (
) lets him disrespect fireballs (but leaves him vulnerable to sweeps). Hellfire uppercut (![]() +
+![]() ) can demolish all types of weak spots and can even be done during Ducking. All in all, Zazie is a scary force that should be taken seriously in every fight.
) can demolish all types of weak spots and can even be done during Ducking. All in all, Zazie is a scary force that should be taken seriously in every fight.
Weak Spot
 |
 |
 |
 | |
| Frame count | - | 2 | 2 | - |
Having a weak spot on the head is usually a bad thing by default, but Zazie's saving grace is that he's the tallest character in the game. Just use stance shift to change your stance to standing while being comboed. Not many grounded moves can hit your standing weak spot, but some characters still have high kicks and axe kicks to use against you. And of course, watch out for jump-ins and crossups.
Also, as you can see, Zazie has a misplaced weak spot on his second squat animation. This may help/harm you somehow, but not really.
Color Options
| Punch | Kick |
 |
 |
Moves List
Quick Reference
Normal Moves
Light Punch 
- Standing LP (Close/Far):
| Damage | 7 | Startup | 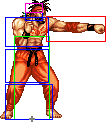 |
Recovery |
| Chain cancel | no | |||
| Special cancel | yes | |||
| On hit | +6 | |||
| On block | +7 | |||
| Frame count | 2 | 3 | 3 | |
Usual jab that whiffs on all crouching characters. Due to Zazie's height it may be used as a far anti-air.
- Crouching LP:
| Damage | 7 | Startup |  |
Recovery |
| Chain cancel | yes | |||
| Special cancel | yes | |||
| On hit | +6 | |||
| On block | +7 | |||
| Frame count | 2 | 3 | 3 | |
Same as st.LP but obviously doesn't whiff on crouching characters.
- Jumping LP (Diagonal/Neutral):
| Damage | 12 | Startup | 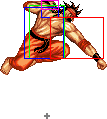 |
| Chain cancel | no | ||
| Special cancel | no | ||
| Frame count | 4 | ∞ | |
Great jump-in and air-to-air tool with solid priority.
Heavy Punch 
- Standing HP (Close/Far):
| Damage | 28 | Startup | 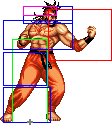 |
 |
Recovery |
| Chain cancel | no | ||||
| Special cancel | yes | ||||
| On hit | -3 | ||||
| On block | -8 | ||||
| Frame count | 4 | 3 | 3 | 18 | |
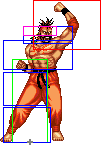
Zazie throws an uppercut with his back arm. Great anti-air alternative to Hellfire. Something worth mentioning is that this attack is actually listed as a command normal in the dev menu of the game. Actual HP normals can be used if you hold ![]() /
/ ![]() /
/ ![]() /
/ ![]() /
/ ![]() while attacking. Further info about them is listed in the "Special Normals" section.
while attacking. Further info about them is listed in the "Special Normals" section.
- Crouching HP:
| Damage | 28 | Startup | 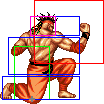 |
 |
Recovery |
| Chain cancel | no | ||||
| Special cancel | yes | ||||
| On hit | -4 | ||||
| On block | -9 | ||||
| Frame count | 3 | 4 | (16) 21 | ||
Crouching uppercut with okay priority. It's still useful but the priority is not that great compared to other cr.HP anti-airs.
- Jumping HP (Diagonal):
| Damage | 28 | Startup | 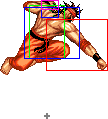 |
Recovery |
| Chain cancel | no | |||
| Special cancel | no | |||
| Frame count | 4 | 6 | ∞ | |
Typical aerial heavy punch. Looks like j.LP but has worse priority and higher damage.
- Jumping HP (Neutral):
| Damage | 28 | Startup | 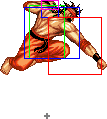 |
Recovery |
| Chain cancel | no | |||
| Special cancel | no | |||
| Frame count | 4 | 6 | ∞ | |
Identical to its diagonal jump counterpart but its hitbox is stretched downwards a bit.
Light Kick 
- Standing LK (Close): activation range = 47
| Damage | 12 | Startup | 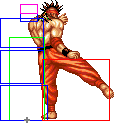 |
Recovery |
| Chain cancel | no | |||
| Special cancel | yes | |||
| On hit | +5 | |||
| On block | +6 | |||
| Frame count | 2 | 3 | 4 | |
This one is the real bane to most weak spots.
- Standing LK (Far):
| Damage | 10 | Startup | 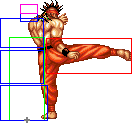 |
 |
Recovery |
| Chain cancel | no | ||||
| Special cancel | yes | ||||
| On hit | 0 | ||||
| On block | +1 | ||||
| Frame count | 4 | 3 | (3) 9 | ||
Incredible poke, Zazie use his leg to kick in the medium zone. Its high speed and outstanding range means that you're going to be using this a lot. Compared to f.HP, this move hits Jean's and Yungmie's weak spots, but misses Matlok's, Mizoguchi's, Clown's, and Karnov's weak spots. This move also hits all crouchers, unlike f.HP.
- Crouching LK:
| Damage | 7 | Startup |  |
Recovery |
| Chain cancel | yes | |||
| Special cancel | yes | |||
| On hit | +6 | |||
| On block | +7 | |||
| Frame count | 2 | 3 | 3 | |
Your best option for doing chain strings, since LPs will trigger your Vulcan Hook instead.
- Jumping LK (Diagonal):
| Damage | 12 | Startup | 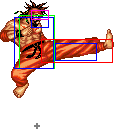 |
| Chain cancel | no | ||
| Special cancel | no | ||
| Frame count | 6 | ∞ | |
Good option to interrupt stuff like Mars' Lariats and to hit head weak spots from afar.
- Jumping LK (Neutral):
| Damage | 12 | Startup |  |
| Chain cancel | no | ||
| Special cancel | no | ||
| Frame count | 4 | ∞ | |
Heavy Kick 
- Standing HK (Close): activation range = 47
| Damage | 26 | Startup | 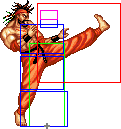 |
Recovery |
| Chain cancel | no | |||
| Special cancel | no | |||
| On hit | +1 | |||
| On block | -4 | |||
| Frame count | 11 | 4 | 16 | |
Another ridiculous hitbox, but this time it has a long startup for a close attack. It's pretty good as a meaty.
- Standing HK (Far):
| Damage | 30 | Startup | 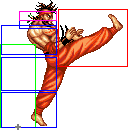 |
 |
 |
Recovery |
| Chain cancel | no | |||||
| Special cancel | no | |||||
| On hit | -3 | |||||
| On block | -8 | |||||
| Frame count | 9 | 3 | 3 | (6) 18 | ||
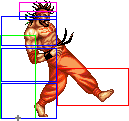
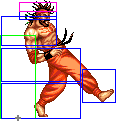
An axe kick that hits once. Leg becomes vulnerable after second hitbox on 6 frames.
- Crouching HK:
| Damage | 28 | Startup |  |
 |
Recovery |
| Chain cancel | no | ||||
| Special cancel | yes | ||||
| On hit | kd | ||||
| On block | -8 | ||||
| Frame count | 4 | 6 | (6) 18 | ||
A basic sweep that turns out to be nice because of the fact that you can cancel it into stuff. Cancel it into LK Step Back against Mars/Ryoko and into Ducking against everyone else.
- Jumping HK (Diagonal):
| Damage | 28 | Startup | 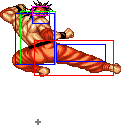 |
Recovery |
| Chain cancel | no | |||
| Special cancel | no | |||
| Frame count | 4 | 6 | ∞ | |
Your main crossup.
- Jumping HK (Neutral):
| Damage | 28 | Startup |  |
Recovery |
| Chain cancel | no | |||
| Special cancel | no | |||
| Frame count | 4 | 5 | ∞ | |
Useless...
Special Normals
| Damage | 28 | Startup | 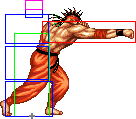 |
 |
Recovery |
| Chain cancel | no | ||||
| Special cancel | yes | ||||
| On hit | +8 | ||||
| On block | +3 | ||||
| Frame count | 4 | 3 | (6) 10 | ||
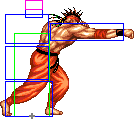
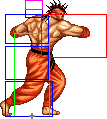
The actual f.HP: A fast, straight punch. Your best poke due to it being plus on hit and block. Arm becomes vulnerable after active part at 6 frames. Whiffs on all crouchers except Samchay and Marstorius. Compared to f.LK, this move hits Matlok's, Mizoguchi's, Clown's, and Karnov's weak spots, but misses Jean's and Yungmie's weak spots.
| Damage | 52 total | Startup | 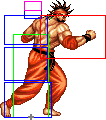 |
 |
Recovery | |
| Chain cancel | no/no | |||||
| Special cancel | yes/yes | |||||
| On hit | -3/0 | |||||
| On block | -8/-5 | |||||
| Frame count | 4 | 2 | 1 | 1 | 20 | |
The actual cl.HP: A high damage, 2-hit hook punch. It's quirky to use because you may trigger a throw instead. To make it come out you can combo it from a light normal or activate it with ![]() +
+![]() . Hitboxes of both hits are identical, so opponent may fall from second hit.
. Hitboxes of both hits are identical, so opponent may fall from second hit.
Throws
| Damage | 20 |  |
| Range (From pushbox) |
31 |
HELLDRIVER!! Zazie performs a suplex that leaves an opponent near enough to walk in and keep the pressure. One con... low damage, especially compared to other characters' usual throws.
Special Moves
First cycle:
| Damage | 12 per hit | 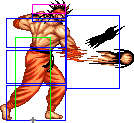 |
 |
 |
 |
 |
 |
 |
| On hit | ABCD +3* LP/HP +8* | |||||||
| On block | ABCD -2* LP/HP +4* | |||||||
| Frame count | ABCD | 1 | 2 | 1 | 2 | 1 | 2 | 1 |
| LP/HP | 1 | 1 | 1 | 1 | 1 | 1 | 1 | |
| Loop cycle | ABCD | 10 | ||||||
| LP/HP | 7 | |||||||
Second cycle:
| Damage | 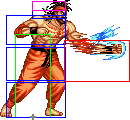 |
 |
 |
 |
 |
 | ||
| Frame count | ABCD | 2 | 1 | 2 | 1 | 2 | 1 | |
| LP/HP | 1 | 1 | 1 | 1 | 1 | 1 | ||
| Loop cycle | ABCD | 9 | ||||||
| LP/HP | 6 | |||||||
*Frame advantage is measured relatively if only the first hit connects
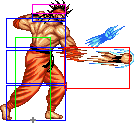
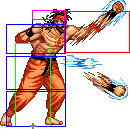
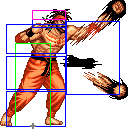
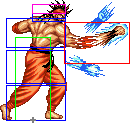
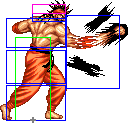
Hundred Hand Slap with a ton of possible uses. It's one of your main keepaway tools, a nice damage dealer, and it deals great chip damage. It also wipes out weak spots with ease. You're going to use this a lot. The ABCD version has less gaps between hits and comes out instantly, so there's no reason to use the P version at all. Keep in mind that Zazie's arms are actually vulnerable between active frames.
This move is not supposed to be steerable but it can actually move by one pixel between loop cycles, so whatever.
| Damage | 32 |  |
 |
 |
 |
Recovery |
| On hit | kd/kd | |||||
| On block | -9/-4 | |||||
| Frame count | Light | 2 | 4 | 1 | 1 | 19 |
| Heavy | 4 | 4 | 1 | 1 | 19 |
Your main anti-air and combo ender. Useful as a reversal too due to its first 6 frames being completely invulnerable. Both hits deals knockdown on both versions. Yet another attack that demolishes weak spots, except this one can also do this against jump-ins due to jumping weak spots typically being located in the front part of the hurtbox.
 |
 |
 | ||
| Frame count | Light | 13 | 3 | 3 |
| Heavy | 17 | 3 | 3 | |
Zazie dashes forward while being invincible. Your main answer for all fireball wars. This move forces opponents to throw their projectiles wisely, since even one mindlessly thrown fireball will result in a free punish. Be careful not to spam this move however, as your opponent will have 6 whole frames to sweep you. Throws also work against Ducking, even during invincible frames (because in FHD only pushbox is needed to perform a throw). Especially be aware of command throws - for Mars and Ryoko this move might be free damage. Unless...
The most important quirk about Ducking is that it can be cancelled into Hellfire, thus creating the "Dashing Hellfire" technique! It's a staple move in Zazie's toolkit that opens up even more opportunities to punish from afar and extend combos. It can be done in several ways:
1) ![]() ,
, ![]() +
+ ![]() ~
~ ![]()
2) ![]()
![]() ,
, ![]() +
+ ![]() ~
~ ![]()
3) ![]()
![]() ,
, ![]() +
+ ![]() ,
, ![]()
![]() +
+ ![]()
Choose the most comfortable method for you.
| Grounded | 1st Hop | Landing | 2nd Hop, full body becomes vulnerable |
Recovery, landing | ||
 | ||||||
| Frame count | Light | 2 | 7 | 10 | 7 | 2 |
| Heavy | 2 | 7 | 14 | 7 | 2 | |
Zazie performs two slight hops. HK version is hop back → hop forward, and LK version is hop back → hop in place. Zazie is invincible from very start to the moment between hops. This move can possibly help to avoid attacks as it was intended, but in practice it rarely sees use. The LK version can be cancelled into from a sweep (cr.HK) to create space in the Mars/Ryoko matchups.
Hidden Move
LK version:
| Damage | 40 | Startup |  |
 |
Recovery | |
| Chain cancel | no/no | |||||
| Special cancel | no/no | |||||
| On hit | kd/kd | |||||
| On block | -/+1 | |||||
| Frame count | 4 | 1 | 1 | 2 | 13 | |
HK version:
| Damage | 32 | Startup | 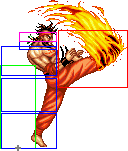 |
 |
Recovery |
| Chain cancel | no | ||||
| Special cancel | no | ||||
| On hit | kd | ||||
| On block | 0 | ||||
| Frame count | 14 | 2 | 1 | 13 | |
Zazie's high damage flame kicks. The input is quirky and this move is usually canceled from normals, but if your hands are quick enough you can perform it without a cancel. LK and HK versions are tweaked cl.HK and f.HK attacks respectively. Both of them deal knockdowns on hit and are safe on block. The LK version is a nice tool for safe pressure and the HK version is a great combo ender.
The Basics
Ducking into Hellfire is a staple. The timing is tricky, but you're unstoppable to most opponents when doing this. You can also do a chain like s.lk → Ducking → Hellfire.
Zazie is a hard hitting, big hitbox rushdown character with great pokes and decent zoning potential. His main con is that he's a good crossup punching bag due to his high weak point.
Combos
- cr.LP x N xx Vulcan Punch
- j.LK, cl.HP xx HK flame kick or Hellfire
- j.HK, cl.HP xx ABCD
- (Corner only, hold →) point-blank st.LP, cl.HP xx HK flame kick
- cr.LK, Chojaku Vulkan Punch, cr.LK Chokaju Vulkan Punch (STUN!) (While in stun) cr.LK st.HP HK flame kick
- cr.LK st.HP HK flame kick
- cr.Lk cr.LP LK flame kick
- cr.LK st.HP Dashing hell fire, HK flame kick, Or just hellfire
- On a certain amount of characters: cr.LK st.HP LK flame kick
Advanced Strategy
Your main objective with Ducking will vary depending on the projectile (or lack thereof) along with height and speed. He is considered one of the Top 4 in the game because his matchups can be thought of as a basic programming flowchart.
Match-ups
| Ray | Lee | Zaz | Kar | Jea | Miz | Sam | Yun | Mat | Clo | Fei | Mar | Ryo | |
| Zazie | 5 | 5 | - | 5 | 6 | 6 | 6 | 4 | 6 | 6 | 5 | 7 | 6 |
Vs. Clown:
A bad matchup. Clown can stun you with Head Stomp and his projectile, even if bad, can hit you after a Ducking. Try to jumping kick him and corner him with Mash Fists. Hellfire and Flame Kick are both good answers for a Roll.
Vs. Jean:
One of Zazie's easiest matchups. Ducking Hellfire is great against Jean's projectiles and slides. Mash fists are the best and also try to stay on the ground.


