Biglightning (talk | contribs) mNo edit summary |
Biglightning (talk | contribs) mNo edit summary |
||
| Line 32: | Line 32: | ||
*'''Zoning:''' Very effective zoning game with repeated instant airdash Voomerangs. Charged Voomerangs home in on the opponent and can keep them locked down for quite a while, giving you ample time to continuously charge them until your opponent makes a move. | *'''Zoning:''' Very effective zoning game with repeated instant airdash Voomerangs. Charged Voomerangs home in on the opponent and can keep them locked down for quite a while, giving you ample time to continuously charge them until your opponent makes a move. | ||
*'''Defense:''' Has access to several defensive and reversal tools to escape pressure. V-Dodge (ATK+S) gives a good amount of invincibility and can be special cancelled at any point. Additionally, Mach Speed (623XX) is one of the most invincible hypers in the game, and can blow through almost anything while initiating a combo on hit. | *'''Defense:''' Has access to several defensive and reversal tools to escape pressure. V-Dodge (ATK+S) gives a good amount of invincibility and can be special cancelled at any point. Additionally, Mach Speed (623XX) is one of the most invincible hypers in the game, and can blow through almost anything while initiating a combo on hit. | ||
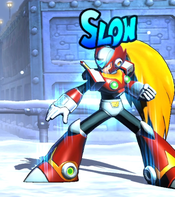
*'''Slowjob:''' Viewtiful God Hand (214XX) inflicts a unique effect on hit, slowing down a character by 25%. This makes all their moves slower | *'''Slowjob:''' Viewtiful God Hand (214XX) inflicts a unique effect on hit, slowing down a character by 25%. This makes all their moves slower and causes them to take longer hitstun, enabling unique combos and making it hell for your opponent to try and play while its active. Opponents are either forced to tag/DHC out, or deal with the slowdown live, risking taking more damage than usual thanks to Joe's new combos. | ||
| cons = | | cons = | ||
*'''Awful Normals:''' Unlike Arthur who has a sword and Rocket who uses guns and traps, Joe uses his stubby limbs for all of his normals attacks, making up some of the smallest hitboxes in the game. While some notable normals are effective up close, (j.S, j.H, f.M) Joe has to actually get close to use them, and his normals do no help at all in this regard. | *'''Awful Normals:''' Unlike Arthur who has a sword and Rocket who uses guns and traps, Joe uses his stubby limbs for all of his normals attacks, making up some of the smallest hitboxes in the game. While some notable normals are effective up close, (j.S, j.H, f.M) Joe has to actually get close to use them, and his normals do no help at all in this regard. | ||
Revision as of 14:36, 26 February 2023
Introduction
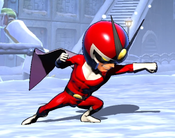
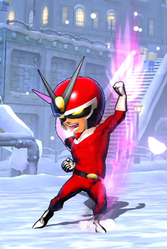
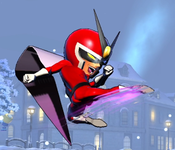
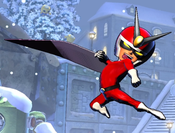
Joe was a relatively average human and a big fan of superhero movies, who was sucked into the "movieverse" alongside his girlfriend Sylvia. There, the spirit of his favorite hero - Captain Blue - trained him to become a hero of his own, and gifted him the V-Watch which lets him transform. As Viewtiful Joe, he uses "VFX" powers themed after his favorite movies, including the ability to speed up or slow down time.
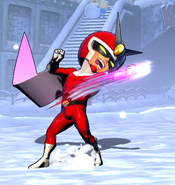
In UMvC3, Viewtiful Joe is a keepaway character who tries to keep opponents locked down with both the charged and uncharged versions of his Voomerang projectile. Although he doesn't have the flight or 8-way airdash capabilities of some other zoners, Joe has several unique tricks to stay evasive, including a command dodge and a special "triple jump".
| Strengths | Weaknesses |
|---|---|
|
|
Unique Mechanics
Joe is one of two characters in the game with a "Triple Jump", alongside Chun-Li. This allows Joe to perform his doublejump twice in one air sequence, for a total of three jumps. It would be more accurate to describe this mechanic as having two aerial movement points, since Joe also has an airdash he can spend them on. In total, Joe can:
- Doublejump and then doublejump a second time
- Airdash and then airdash a second time
- Doublejump and then airdash
- Airdash and then doublejump
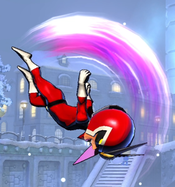
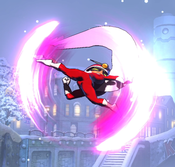
When combining this additional mobility with his divekick and Air Joe specials, Viewtiful Joe is extremely evasive. He rarely has to commit to any particular jump arc for very long.
| Viewtiful Joe | |
|---|---|
| Character Data | |
| Health | 950,000 |
| Ground Magic Series | Zig-Zag |
| Air Chain Combo Limit | None |
| Forward Dash Duration | 26 frames |
| Backdash Duration | 26 frames |
| Jump Duration | 50 frames |
| Superjump Duration | 81 frames |
| Walljump? | No |
| Doublejump? | Yes |
| Airdash? | Yes |
| X-Factor Damage Boost (1/2/3) | 20% / 40% / 60% |
| X-Factor Speed Boost (1/2/3) | 20% / 30% / 40% |
| Minimum Damage Scaling (Normals, Specials) | 10%, 20% |
| Minimum Damage Scaling (Hypers) | 60% |
| Minimum Damage Scaling (X-Factor) | 35% |
Move List
Assists
| Damage | Startup | Active | Recovery |
|---|---|---|---|
| 70,000 | 39 | - | 125, 95 |
| On Hit | On Block | Guard | Properties |
| - | - | Mid | Priority: Low, Durability: 5 |
|
THC Hyper: Desperado. Shoots a single projectile on a straight horizontal trajectory. Compared to many other projectile assists, this has very low total durability and provides very little lockdown. | |||
| Damage | Startup | Active | Recovery |
|---|---|---|---|
| 80,000 | 30 | 13 | 121, 91 |
| On Hit | On Block | Guard | Properties |
| - | - | Low | |
|
THC Hyper: Mach Speed. | |||
| Damage | Startup | Active | Recovery |
|---|---|---|---|
| 80,000 | 50 | - | 114, 84 |
| On Hit | On Block | Guard | Properties |
| - | - | Mid | |
|
THC Hyper: Desperado. Joe deploys a bomb that detonates after 66 frames. The bomb can be moved around by both you and the opponent by hitting it with any attack. Similarly, when it explodes, it can hit both the opponent and your own characters. This assist is associated with a glitch, due to the fact that it is the only assist in the game that can deal self-damage. This glitch only works for player 1 (determined by inputs, not screen side). If player 1's point character blocks the damage from this assist mid-combo, the game considers the combo to be over for certain purposes, even if the character is able to continue comboing afterwards. Namely, blocking Shocking Pink resets your assist call cooldowns, allowing you to use multiple calls of the same assist in the same combo. Many characters can set up simple loops or even infinites through repeated use of this assist to reset itself. Video Example with Nemesis | |||
Ground Normals
| Damage | Startup | Active | Recovery |
|---|---|---|---|
| 38,000 | 4 | 3 | 11 |
| On Hit | On Block | Guard | Properties |
| -2 | -3 | Mid | |
|
- | |||
| Damage | Startup | Active | Recovery |
|---|---|---|---|
| 50,000 | 7 | 3 | 17 |
| On Hit | On Block | Guard | Properties |
| -3 | -4 | Mid | - |
|
- | |||
| Damage | Startup | Active | Recovery |
|---|---|---|---|
| 65,000 | 9 | 3 | 21 |
| On Hit | On Block | Guard | Properties |
| -1 | -3 | Mid | - |
|
Causes Joe to advance forward while striking. | |||
| Damage | Startup | Active | Recovery |
|---|---|---|---|
| 35,000 | 5 | 3 | 10 |
| On Hit | On Block | Guard | Properties |
| -1 | -2 | Low | |
|
- | |||
| Damage | Startup | Active | Recovery |
|---|---|---|---|
| 48,000 | 8 | 3 | 17 |
| On Hit | On Block | Guard | Properties |
| -3 | -4 | Low | - |
|
- | |||
| Damage | Startup | Active | Recovery |
|---|---|---|---|
| 60,000 | 9 | 13 | 21 |
| On Hit | On Block | Guard | Properties |
| - | -13 | Low | |
|
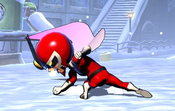
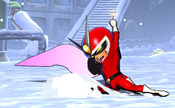
Joe slides forward while kicking, covering approximately 25% of the screen in total. This makes 2H one of his only normals with actually decent range. This also works as a low-profile button, allowing Joe to slide underneath beams and other projectiles (if 2H does not last long enough to completely juke an attack, it can be canceled into V-Dodge). | |||
| Damage | Startup | Active | Recovery |
|---|---|---|---|
| 70,000 | 8 | 3 | 23 |
| On Hit | On Block | Guard | Properties |
| Launch | -5 | Mid | |
|
- | |||
Aerial Normals
| Damage | Startup | Active | Recovery |
|---|---|---|---|
| 38,000 | 5 | 3 | 15 |
| On Hit | On Block | Guard | Properties |
| +8 | +7 | OH | |
|
- | |||
| Damage | Startup | Active | Recovery |
|---|---|---|---|
| 50,000 | 7 | 3 | 20 |
| On Hit | On Block | Guard | Properties |
| +12 | +11 | OH | |
|
- | |||
| Damage | Startup | Active | Recovery |
|---|---|---|---|
| 65,000 | 8 | 4 | 24 |
| On Hit | On Block | Guard | Properties |
| +15 | +13 | OH | |
|
Works naturally as an instant overhead even against normal-sized characters. Timed correctly, it's actually faster than Joe's standing 6M overhead attack, although it has poor range and is difficult to combo after when used this way. Instant overhead j.5H is a good option after landing Joe's slowdown hyper (214XX), as it leaves Joe at the exact range to land this move, and the slowdown makes meterless/assistless conversions possible. | |||
| Damage | Startup | Active | Recovery |
|---|---|---|---|
| 25,000 x3 | 9 | 8 | 24 |
| On Hit | On Block | Guard | Properties |
| +14 | +12 | OH | |
|
Joe's best normal by far. Completely surrounds Joe in a hitbox that can connect from any direction. Can be used to cover a retreat or used offensively, as it can very easily be made to hit crossup. If you land this attack while rising, a cancel into Red Hot Kick (214X) can allow you to convert into a combo. | |||
Command Normals
| Damage | Startup | Active | Recovery |
|---|---|---|---|
| 50,000 | 13 | 3 | 23 |
| On Hit | On Block | Guard | Properties |
| -9 | -10 | OH | - |
|
Very fast overhead attack with a very difficult-to-see animation. It is basically unreactable, and can be canceled into 5S or 623M to start a combo afterwards. 6M is only limited by its awful range, especially since Joe likes to be farther away from his opponents in the first place. Like with j.5H, this is a solid mixup option to use after landing Joe's slowdown hyper, as it the hyper always leaves you slightly plus and in range to connect with it. | |||
Special Moves
| L |
Damage | Startup | Active | Recovery |
|---|---|---|---|---|
| 70,000 | 10 | - | 34 | |
| On Hit | On Block | Guard | Properties | |
| -12 | -14 | Mid | Can be held/charged, Priority: Low, Durability: 5 | |
| M |
Damage | Startup | Active | Recovery |
| 70,000 | 10 | - | 37 | |
| On Hit | On Block | Guard | Properties | |
| -15 | -17 | Mid | Can be held/charged, Priority: Low, Durability: 5 | |
| H |
Damage | Startup | Active | Recovery |
| 70,000 | 10 | - | 40 | |
| On Hit | On Block | Guard | Properties | |
| -18 | -20 | Mid | Can be held/charged, Priority: Low, Durability: 5 | |
|
Joe's standard grounded projectile. It is rarely used compared to the air version, which allows Joe to stay mobile and land-cancel the otherwise lengthy recovery. Button strength also affects the Voomerang's trajectory:
Holding down the button allows Joe to "charge" his Voomerang, although holding for fewer than 66 frames does nothing except allow you to delay the special. Sufficiently charging any voomerang toss replaces it with its "Charged" version (see below). | ||||
| L j. |
Damage | Startup | Active | Recovery |
|---|---|---|---|---|
| 70,000 | 15 | - | 37 | |
| On Hit | On Block | Guard | Properties | |
| +20 | +17 | Mid | Can be held/charged, Priority: Low, Durability: 5 | |
| M j. |
Damage | Startup | Active | Recovery |
| 70,000 | 17 | - | 35 | |
| On Hit | On Block | Guard | Properties | |
| +20 | +17 | Mid | Can be held/charged, Priority: Low, Durability: 5 | |
| H j. |
Damage | Startup | Active | Recovery |
| 70,000 | 19 | - | 33 | |
| On Hit | On Block | Guard | Properties | |
| +20 | +19 | Mid | Can be held/charged, Priority: Low, Durability: 5 | |
|
Air version of Voomerang. Instant Airdash Voomerang (especially the L version) is Joe's primary keepaway tool. It allows Joe to continue to advance or retreat during the projectile's startup. More importantly, this times the projectile so that Joe lands back on the ground just after it was fired, canceling the recovery with his landing animation. Joe can use this to fire Air Voomerangs very rapidly, and even combo them into each other, for a powerful zoning game. Like the grounded version, button strength alters the Voomerang's path:
Joe can also hold down the button to charge his Voomerange, similarly to the grounded version. If Joe lands on the ground while charging an air Voomerang, he will transition automatically to charging a grounded one. However, if Joe releases his charge but lands before the projectile is fired, he will land-cancel the startup and throw nothing, wasting the charge. It is very difficult for Joe to fully-charge an air voomerang, as the charge time is usually longer than his airtime. However, a tiger-knee Voomerang input (2369[L]) does give Joe just enough time to charge and fire before returning to the ground. | ||||
| Damage | Startup | Active | Recovery |
|---|---|---|---|
| 50,000 x3 | 66 - 73+ | - | 33 - 40 |
| On Hit | On Block | Guard | Properties |
| - | - | Mid | Can be held, Priority: Low, Beam Durability: 3 per frame for 3 frames |
|
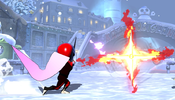
If Joe holds a Voomerang for roughly 66 frames, it will glow bright orange and become a charged version. Charged Voomerangs deal three staggered hits instead of one single hit (the three hits do not combo into each other). They also have enhanced durability compared to normal Voomerangs. A charged Voomerang will begin by following the flight path of whatever button was used to charge it (so an M Voomerang will fly straight up/down). Afterwards, the Voomerang will home in on the opponent's point character, chasing them across the stage and eventually hovering on top of them. Charged Voomerang can be quite challenging to set up, usually requiring protection from an assist or a very passive opponent. However, if Joe does manage to deploy one, he gets a significant amount of free time to do anything he wants while the opponent is stuck dealing with the repeated staggered attacks. This includes charging another Voomerang, creating a pressure sequence that some characters struggle to escape from. | |||
| Damage | Startup | Active | Recovery |
|---|---|---|---|
| 120,000 | 24 | - | 4 |
| On Hit | On Block | Guard | Properties |
| - | - | Mid | |
|
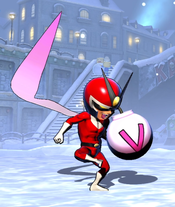
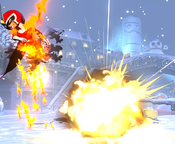
Joe produces a bomb. Holding down the button causes Joe to keep the bomb with him, and the bomb will be deployed once the button is released. Once deployed, the bomb's fuse begins to count down (L - 66 frames, M - 130 frames, H - 194 frames). During this time, the bomb can be knocked around by being attacked by either player. Similarly, the final explosion can not only hurt the opponent, but Joe and his teammates as well. Because of the bomb's mechanic of being knocked around by any attack, and because poor placement could cause Joe to be hit by it as well as (or instead of) the opponent, this move is difficult to utilize effectively. A minor glitch allows this move to be slightly more consistent by controlling exactly when the bomb detonates. To perform the glitch, delay Shocking Pink by holding the button, then hold a different button, and finally release the original button (236[L] > [M] > ]L[). The bomb's fuse will count down as usual, but the bomb will not explode until all held buttons are released, or until Joe gets hit, at which point it will detonate instantly. Glitch: Like with the assist version, Shocking Pink has some strange properties due to being a rare example of an attack which can deal friendly fire damage. If Joe is comboing an opponent, and blocks his own Bomb detonation mid-combo, the game will consider his combo to have ended, even if the opponent has not had a chance to recover. This resets the combo counter, Damage Scaling, and Hitstun Deterioration. However, the glitch is very finicky, and can easily be accidentally disabled for the remainder of the match:
If the glitch is disabled, Joe blocking his own bomb will still reset the combo counter, but it will not reset Damage Scaling or Hitstun Deterioration, making it functionally useless. | |||
| L |
Damage | Startup | Active | Recovery |
|---|---|---|---|---|
| 80,000 | 8 | 13 | 14 | |
| On Hit | On Block | Guard | Properties | |
| +7 | -6 | Mid | ||
| M |
Damage | Startup | Active | Recovery |
| 80,000 | 6 | 13 | 13 | |
| On Hit | On Block | Guard | Properties | |
| +8 | -5 | Mid | ||
| H |
Damage | Startup | Active | Recovery |
| 50,000 + 60,000 | 10 | 11(19)14 | 7 | |
| On Hit | On Block | Guard | Properties | |
| +20 | 0 | Mid | ||
|
Dragon punch-style uppercut attack. Unfortunately, it does not have any invulnerability, but it is quite fast (especially the M version). The M version is the best in general, and an important combo tool as it is advantageous enough on hit for Joe to link a j.M afterwards. The H version is even better on hit and on block, but it hits twice, with the second hit pushing the opponent further away and also causing noticeable amounts of extra hitstun deterioration. | ||||
| L j. |
Damage | Startup | Active | Recovery |
|---|---|---|---|---|
| 80,000 | 12 | Until grounded | 23* | |
| On Hit | On Block | Guard | Properties | |
| +9 | +7 | OH | On contact, Joe bounces slightly away from the opponent, and only has 13 frames of recovery. | |
| M j. |
Damage | Startup | Active | Recovery |
| 80,000 | 12 | Until grounded | 23 | |
| On Hit | On Block | Guard | Properties | |
| +9 | +7 | OH | On contact, Joe bounces slightly away from the opponent, and only has 13 frames of recovery. | |
| H j. |
Damage | Startup | Active | Recovery |
| 35,000 x3 | 18 | Until Grounded | 19 | |
| On Hit | On Block | Guard | Properties | |
| +2 | 0 | Mid | - | |
|
Divekick special that is useful as an offensive tool and combo extension. j.214L is aimed straight down, while M and H versions shoot diagonally down-forward. L and M Red Hot Kicks bounce off the opponent on contact with faster recovery. If Joe bounces off at the correct angle, it is possible to link other attacks afterwards, including another Red Hot Kick. This is easiest to do with the M version. j.214H version behaves differently from the others. On contact, Joe passes through the opponent and continues down towards the ground. This means that H divekick cannot get the bounce links that the other versions can get, but it can instead be used to bring Joe and his opponent lower down toward the ground for a potential follow-up. H Divekick is also useful for running away, as Joe can use it from superjump height to quickly reach the ground on the opposite side of the screen, and on whiff it has faster recovery than the other versions. | ||||
| L Mash |
Damage | Startup | Active | Recovery |
|---|---|---|---|---|
| 25,000 x3 + 40,000 per loop | 3 | Lmao | 6 | |
| On Hit | On Block | Guard | Properties | |
| - | - | Mid | Mashable | |
| M Mash |
Damage | Startup | Active | Recovery |
| 25,000 x3 + 40,000 + 35,000 per loop | 3 | Lmao | 8 | |
| On Hit | On Block | Guard | Properties | |
| - | - | Mid | Mashable | |
| H Mash |
Damage | Startup | Active | Recovery |
| 25,000 x3 + 40,000 + 35,000 + 45,000 per loop | 3 | Lmao | 21 | |
| On Hit | On Block | Guard | Properties | |
| - | - | Mid | Mashable | |
|
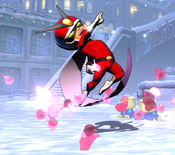
Joe flashes repeatedly, dealing repeated attacks primarily a short range in front of him but occasionally also behind him. Every instance of this move is a "loop" of 4/5/6 attacks, and Joe can mash buttons to repeatedly loop the move. However, Joe cannot stop attacking mid-loop (except with a hyper or X-Factor cancel). This move is primarily useful for filler at the end of an air combo, or to stall a superjump height since it causes Joe to fall slower than normal. | ||||
| Damage | Startup | Active | Recovery |
|---|---|---|---|
| - | 1 | 32 | 13 |
| On Hit | On Block | Guard | Properties |
| - | - | - | Invuln frames 1-32, special-cancelable |
|
Joe performs an action pose and becomes invulnerable to physical attacks and projectiles for 32 frames. However, he can still be thrown during this time. Although this dodge move does have a recovery period, it can be canceled into other special moves. M Groovy Uppercut (623M) is a good choice for a cancel, as it is very fast and can punish the recovery of whatever attack Joe just dodged through. | |||
Hyper Combos
| Damage | Startup | Active | Recovery |
|---|---|---|---|
| 250,000 | 18+1 | - | 72 |
| On Hit | On Block | Guard | Properties |
| - | -52 | Mid | Invuln frames 1-15, |
|
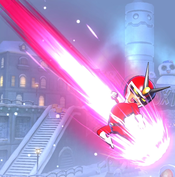
Joe fires a single, massive projectile. The cannon will track the opponent's point character slightly, but only within a limited range, so he cannot fire it straight up or down. This hyper is mainly useful as a combo ender, especially the air version which can be used after Red Hot Kick or as an OTG at the end of an air combo. It also can be used to punish assist calls, although keep in mind it is not a beam hyper and does take time to travel across the stage. Although this hyper has some invuln starting from frame 1, it is much worse as a reversal than Mach Speed, and thus should only be considered for this purpose when airborne. | |||
| Damage | Startup | Active | Recovery |
|---|---|---|---|
| 145,000 | 10+2 | 4 | 34 |
| On Hit | On Block | Guard | Properties |
| +3 | -17 | Mid | Applies 25% slowdown to opponent for 600 frames |
|
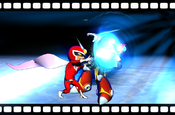
This hyper has poor range and very low damage. However, it applies a very strong debuff to the opponent's character on hit. Not only does the slowdown effect reduce the speed of the character's movement and attacks, it causes them to take longer to recover from blockstun and hitstun. Characters who have been slowed by Joe are much more susceptible to combos than normal, besides having a harder time defending themselves. On a successful hit, this hyper leaves the opponent standing right next to Joe, with Joe at minor frame advantage, which he can use to attempt a mixup. Its also possible to snap out a slowed opponent, causing the slow timer to not count down until they return to the stage. However, keep in mind that many character's assists become much stronger when slowed, due to having an effectively increased duration. | |||
| Damage | Startup | Active | Recovery |
|---|---|---|---|
| 30,000 + 15,000 x13 - x26 + 70,000 | 8+4 | 3(7)80(9)4 | 49 |
| On Hit | On Block | Guard | Properties |
| Launch | -32 | Mid | Invuln until frame 32, mashable, |
|
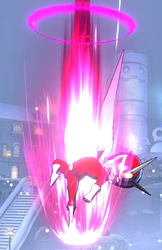
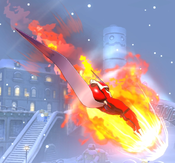
An extremely invincible reversal hyper. Can be activated on reaction to other hypers or other slow attacks in order to blow through them. This hyper finishes with a Launcher similar to 5S attacks, which allows Joe to start an air combo on hit. | |||
Universal Mechanics
| Damage | Startup | Active | Recovery |
|---|---|---|---|
| 80,000 | 1 | 1 | - |
| On Hit | On Block | Guard | Properties |
| - | - | Throw | |
|
If a Shocking Pink bomb happens to be in the right place before Joe performs his throw, the explosion can allow Joe to pick up afterwards and start a combo. This is easier to pull off if using the held button trick to manually time the explosion (see Shocking Pink's description). Otherwise, no follow-up is possible | |||
| Damage | Startup | Active | Recovery |
|---|---|---|---|
| 80,000 | 1 | 1 | - |
| On Hit | On Block | Guard | Properties |
| - | - | Airthrow | |
|
Joe can follow up with air Desperado hyper in most cases, although throwing into the corner may make this impossible at certain ranges. A miraculous Shocking Pink explosion may also allow a follow-up, similar to the ground throw. | |||
| Damage | Startup | Active | Recovery |
|---|---|---|---|
| 50,000 | 2 | 3 | 22 |
| On Hit | On Block | Guard | Properties |
| - | +5 | Mid | Snapback |
|
Animation and hitbox based on 5H. | |||
| Damage | Startup | Active | Recovery |
|---|---|---|---|
| 27,000 | - | 20 | 33 |
| On Hit | On Block | Guard | Properties |
| - | -15 | OH | |
|
- | |||
Team Position
Joe is most commonly played as a Point character. Like many zoning-focused characters, he benefits from having multiple assists to call and cover the holes in his projectile pattern. Assist calls can keep and opponent busy while he runs away and charges Voomerang, or offer extensions to beef up his poor solo damage.
Although very unconventional, Joe has some value as an Assist character. While his assists are not great neutral tools, Joe's Shocking Pink assist has a unique bug that can enable infinite combos with the proper setup. Shocking Pink can damage your own point character, and doing so (even on block) is considered as ending the current combo. Some point characters can intentionally block Joe's bomb midcombo, resetting damage scaling, hitstun deterioration, and even Joe's assist call. Note that this glitch only works on P1 side, and can be very inconsistent.
Notable Synergies
Rocket Raccoon: Rocket's Log Trap assist quickly covers a large portion of the screen, making it a good tool for keepaway characters like Joe. Opponents have to be careful with how they approach a zoner backed up by Log Trap, lest they suddenly get hit and find themselves in a combo. Because Log Trap causes a wall bounce on hit, it can be inefficient when used with some characters, as it may "waste" the wallbounce which could be better used by the point character. However, Joe has no moves of his own which cause a wall bounce, so he can use Log Trap with no penalty or alteration to his combo routes.
Players to Watch: Kusoru Ageojoe (Joe/Frank/Rocket), Punisher (Joe/MODOK/Rocket) , Wero (VJoe/Raccoon/Morrigan, active)
Doctor Strange: Strange has two separate assists that both have a very high total duration, "Bolts of Balthakk" and "Eye of Agomotto". Joe can hide behind either of these assists to safely charge up a Voomerang 236[L]. Doing this is one of Joe's main goals in neutral, and Strange makes it relatively easy to pull off.
Players to Watch: Di3minion (Joe/Strange/Morrigan)
Doctor Doom/Dante: Joe is strongest at regular jump height, where he can do repeated Box Dash Voomerangs to rapidly fire projectiles while advancing or retreating. Although he still has options at superjump height, Joe is considerably less strong there. Doctor Doom (Hidden Missiles) and Dante (Jam Session) both of assists that reach up to superjump height, and can help to discourage an opponent from trying to escape Joe's Voomerang pressure in the air.
Players to Watch: Lythero (Joe/Phoenix Wright/Dante)
Beam Assists: While Joe can stack large amounts of projectiles to prevent the opponent's projectile game from getting started, Joe has trouble interrupting assists due to Voomerangs having a travel time. To make up for this, a beam assist is extremely important for maintaining control of the opponents assist calls so Joe doesn't get interrupted by neutral assists like Vajra, Hidden Missiles or the opponent's beam. Characters that have beam assists which work great with Joe are Doctor Strange, Doctor Doom, MODOK, and Magneto
Players to Watch: IReidYou (Joe/Dormammu/Doom) Dieminion (VJoe/Strange/Morrigan, inactive),
Morrigan/Phoenix: One of the most powerful cores in the game, based around calling Morrigan's Dark Harmonizer assist as much as possible to build 5 bars for Dark Phoenix without even landing a combo. Joe is extremely strong with this core, as Joe's triple jump and small size allows him to call Dark Harmonizer in spots where the opponent has tons of trouble hitting him. On top of this, Joe can cover Morrigan with Voomerangs and is fantastic at setting up TAC infinites, which Morrigan can perform as yet another way to build the meter needed for a Dark Phoenix sweep.
Players to Watch: SnakeTits (Joe/Morrigan/Phoenix)
Other Players to Watch: Royal Flush (MODOK/Joe/Thor), HowtoRead (Joe/X23/Strider)
Combos
Solo Combos
2M > 5H > 2H xx 623M, j.5H jc. j.5H xx 214M, 214H, land, 5H > 5S sjc. j.5M > j.5M > j.5H jc. j.5M > j.5H jc. j.5M > j.5H > j.5S, land, j.2369XX (560,000 damage for 1 bar, builds 1 bar).
Joe's standard combo route, works off just about anything that confirms into 623M, including doing it raw. The j.5H link after 623M is quite tight, as is the 5H link after 214H. You can make the combo slightly easier at the cost of damage by substituting j.5M and 5M for those attacks, respectively.
6M xx 623XX, sjc. j.5L > j.5H xx j.214M, j.214M, j.214H xx 623XX sjc. j.5H jc. j.5H jc. j.5H > j.5S (574,000 for 2 bar)
Use Mach Speed to confirm off an overhead. Can also be used off any early Mach Speed hit (including using it as a reversal), although the double Red Hot Kick extension only works in the corner. Delay each Red Hot Kick as long as possible to give the opponent time to drop and set up a relaunch.
X-Factor Combos
-
Sample Team Combos
-
Alternate Colors
Videos and External Resources
Team Lythero combos
2 combos by xBLACKJAGUAR13
Team Joe/RR/Arthur CMV
slow down ideas with Rocket Raccoon and Amaterasu


