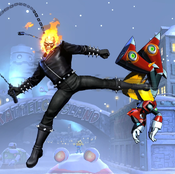
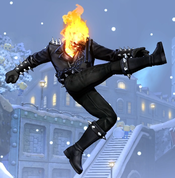
Biglightning (talk | contribs) mNo edit summary |
(Images to movelist & small cleanup) |
||
| Line 50: | Line 50: | ||
{{MoveData | {{MoveData | ||
|image= | |image=UMVC3_GhostRider_AssistA.png | ||
|caption= | |caption= | ||
|name=Chain Rebuttal | |name=Chain Rebuttal | ||
| Line 65: | Line 65: | ||
|properties={{wallbounce}} | |properties={{wallbounce}} | ||
|description= | |description= | ||
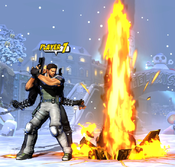
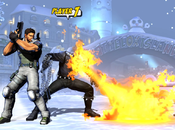
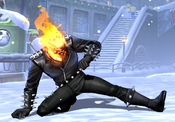
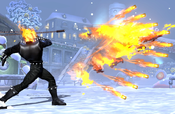
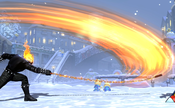
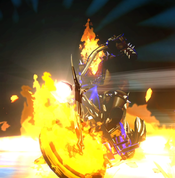
THC Hyper: Hellfire Maelstrom. Chain Rebuttal is a horizontal coverage assist with decent range. It has faster startup than many common beam assists, and can be used as a counter-call to punish assists such as Plasma Beam or Sentinel Force. As a | THC Hyper: Hellfire Maelstrom. Chain Rebuttal is a horizontal coverage assist with decent range. It has faster startup than many common beam assists, and can be used as a counter-call to punish assists such as Plasma Beam or Sentinel Force. As a Wallbounce assist, it has useful application as a combo extension tool, and can also be used to more reliably convert instant overheads or other awkward hits. | ||
}} | }} | ||
}} | }} | ||
{{MoveData | {{MoveData | ||
|image= | |image=UMVC3_GhostRider_AssistB.png | ||
|caption= | |caption= | ||
|name=Heartless Spire | |name=Heartless Spire | ||
| Line 85: | Line 85: | ||
|properties={{otg}}, {{strk}}, Priority: Low, Beam Durability: 5 per frame for 3 frames | |properties={{otg}}, {{strk}}, Priority: Low, Beam Durability: 5 per frame for 3 frames | ||
|description= | |description= | ||
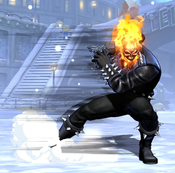
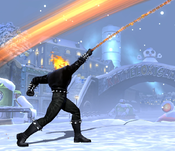
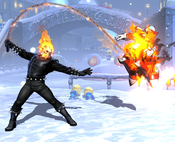
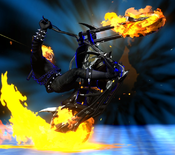
THC Hyper: Hellfire Maelstrom. Creates a stationary beam projectile that can be used defensively to negate incoming projectiles from the opponent, as it has a pretty significant amount of total durability. Although it hits | THC Hyper: Hellfire Maelstrom. Creates a stationary beam projectile that can be used defensively to negate incoming projectiles from the opponent, as it has a pretty significant amount of total durability. Although it hits OTG, Spire tends to knock opponents quite high into the air, which makes it harder to use for combos than his Y assist, Hellfire. | ||
}} | }} | ||
}} | }} | ||
{{MoveData | {{MoveData | ||
|image= | |image=UMVC3_GhostRider_AssistY.png | ||
|caption= | |caption= | ||
|name=Hellfire (L) | |name=Hellfire (L) | ||
| Line 112: | Line 112: | ||
{{MoveData | {{MoveData | ||
|image= | |image=UMVC3_GhostRider_5L.png | ||
|caption= | |caption= | ||
|name=Stand Light | |name=Stand Light | ||
| Line 127: | Line 127: | ||
|properties=- | |properties=- | ||
|description= | |description= | ||
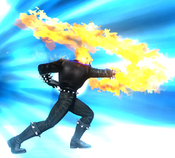
Unremarkable jab. It is a little slower than most other character's {{Clr|1|5L}} attacks, so Ghost Rider struggles in up-close scramble situations. | |||
}} | }} | ||
}} | }} | ||
{{MoveData | {{MoveData | ||
|image= | |image=UMVC3_GhostRider_5M.png | ||
|caption= | |caption= | ||
|name=Stand Medium | |name=Stand Medium | ||
| Line 147: | Line 147: | ||
|properties=- | |properties=- | ||
|description= | |description= | ||
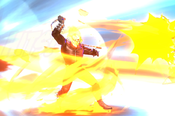
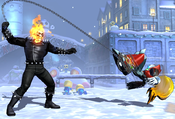
5M moves Ghost Rider a significant distance forward during its startup. Ghost Rider can kara-cancel this attack (or 2M) into specials or hypers in order to effectively extend their range. This is mainly useful for his Penance Stare level 3 command grab, but could also be used to hit characters who are standing just out of range of Chain of Rebuttal (623L), for example. Note that due to Ghost Rider's magic series type, he cannot chain this attack into H normals, and most go directly into a launcher or special attack. | {{Clr|2|5M}} moves Ghost Rider a significant distance forward during its startup. Ghost Rider can kara-cancel this attack (or {{Clr|2|2M}}) into specials or hypers in order to effectively extend their range. This is mainly useful for his Penance Stare level 3 command grab, but could also be used to hit characters who are standing just out of range of Chain of Rebuttal ({{Clr|1|623L}}), for example. Note that due to Ghost Rider's magic series type, he cannot chain this attack into {{Clr|3|H}} normals, and most go directly into a launcher or special attack. | ||
}} | }} | ||
}} | }} | ||
{{MoveData | {{MoveData | ||
|image= | |image=UMVC3_GhostRider_5H.png | ||
|caption= | |caption= | ||
|name=Stand Heavy | |name=Stand Heavy | ||
| Line 167: | Line 167: | ||
|properties=- | |properties=- | ||
|description= | |description= | ||
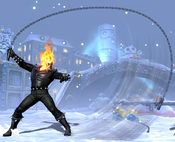
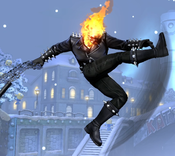
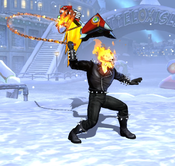
5H is a massive range poke and general keepaway tool, which covers up to 75% of the way across the screen. Although it is slightly minus on hit or block, 5H has several cancel options that are significantly more advantageous, including its dedicated Rage Whip followup (5H > H). Thus, 5H provides a lot of potential reward for low risk, and is a good option almost any time that both Ghost Rider and his opponent are on the ground. | {{Clr|3|5H}} is a massive range poke and general keepaway tool, which covers up to 75% of the way across the screen. Although it is slightly minus on hit or block, {{Clr|3|5H}} has several cancel options that are significantly more advantageous, including its dedicated Rage Whip followup ({{Clr|3|5H}} > {{Clr|3|H}}). Thus, {{Clr|3|5H}} provides a lot of potential reward for low risk, and is a good option almost any time that both Ghost Rider and his opponent are on the ground. | ||
This attack can whiff inconsistently against certain characters during their reeling hitstun animation, especially smaller bodies like Zero and Wolverine. | |||
}} | }} | ||
}} | }} | ||
| Line 173: | Line 175: | ||
{{MoveData | {{MoveData | ||
|image= | |image=UMVC3_GhostRider_2L.png | ||
|caption= | |caption= | ||
|name=Crouching Light | |name=Crouching Light | ||
| Line 188: | Line 190: | ||
|properties=- | |properties=- | ||
|description= | |description= | ||
Similar to Ghost Rider's 5L, 2L is a standard light normal that is noticeably slower than average. | Similar to Ghost Rider's {{Clr|1|5L}}, {{Clr|1|2L}} is a standard light normal that is noticeably slower than average. | ||
}} | }} | ||
}} | }} | ||
{{MoveData | {{MoveData | ||
|image= | |image=UMVC3_GhostRider_2M.png | ||
|caption= | |caption= | ||
|name=Crouching Medium | |name=Crouching Medium | ||
| Line 208: | Line 210: | ||
|properties= | |properties= | ||
|description= | |description= | ||
Advancing shoulder check attack. This move advances Ghost Rider forward during the startup, similar to 5M. In fact, this move actually travels even further than 5M, making it an excellent kara-cancel tool. Note that due to Ghost Rider's magic series type, he cannot chain this attack into H normals, and most go directly into a launcher or special attack. | Advancing shoulder check attack. This move advances Ghost Rider forward during the startup, similar to {{Clr|2|5M}}. In fact, this move actually travels even further than {{Clr|2|5M}}, making it an excellent kara-cancel tool. Note that due to Ghost Rider's magic series type, he cannot chain this attack into {{Clr|3|H}} normals, and most go directly into a launcher or special attack. | ||
}} | }} | ||
}} | }} | ||
{{MoveData | {{MoveData | ||
|image= | |image=UMVC3_GhostRider_2H.png | ||
|caption= | |caption= | ||
|name=Crouching Heavy | |name=Crouching Heavy | ||
| Line 228: | Line 230: | ||
|properties={{strk}}, {{softknockdown}} | |properties={{strk}}, {{softknockdown}} | ||
|description= | |description= | ||
Long range poke attack comparable to 5H in range. It is a little slower and loses the Rage Whip follow-up in exchange for hitting | Long range poke attack comparable to {{Clr|3|5H}} in range. It is a little slower and loses the Rage Whip follow-up in exchange for hitting :ow. Because Ghost Rider has access to both this move and his long-reaching overhead {{Clr|4|j.5S}}, he can run a moderately effective high/low game even at long range. | ||
}} | }} | ||
}} | }} | ||
| Line 234: | Line 236: | ||
{{MoveData | {{MoveData | ||
|image= | |image=UMVC3_GhostRider_5S.png | ||
|caption= | |caption= | ||
|name=Launcher/Special | |name=Launcher/Special | ||
| Line 249: | Line 251: | ||
|properties={{launch}}, {{nocancel}} | |properties={{launch}}, {{nocancel}} | ||
|description= | |description= | ||
As with Ghost Rider's other H and S attacks, 5S has exceptional range. It hits a significant distance ahead of him, as well as above him. Unfortunately, Ghost Rider's aerial options are very poor, so he gets significantly less reward off landing this than most characters would. | As with Ghost Rider's other {{Clr|3|H}} and {{Clr|4|S}} attacks, {{Clr|4|5S}} has exceptional range. It hits a significant distance ahead of him, as well as above him. Unfortunately, Ghost Rider's aerial options are very poor, so he gets significantly less reward off landing this than most characters would. | ||
}} | }} | ||
}} | }} | ||
| Line 256: | Line 258: | ||
{{MoveData | {{MoveData | ||
|image= | |image=UMVC3_GhostRider_jL.png | ||
|caption= | |caption= | ||
|name=Jumping Light | |name=Jumping Light | ||
| Line 276: | Line 278: | ||
{{MoveData | {{MoveData | ||
|image= | |image=UMVC3_GhostRider_jM.png | ||
|caption= | |caption= | ||
|name=Jumping Medium | |name=Jumping Medium | ||
| Line 291: | Line 293: | ||
|properties= | |properties= | ||
|description= | |description= | ||
Can be used as a fuzzy-guard instant overhead against normal-sized characters, and works naturally as an instant overhead against big body characters. Also against large bodies, Ghost Rider can solo convert this instant overhead with j.5M > j.5S, land, 5L. Against normal-sized characters, the j.5S will whiff, and Ghost Rider needs assists or X-Factor to confirm this hit. Besides this use, j.5M is mostly air combo filler. | Can be used as a fuzzy-guard instant overhead against normal-sized characters, and works naturally as an instant overhead against big body characters. Also against large bodies, Ghost Rider can solo convert this instant overhead with {{Clr|2|j.5M}} > {{Clr|4|j.5S}}, land, {{Clr|1|5L}}. Against normal-sized characters, the {{Clr|4|j.5S}} will whiff, and Ghost Rider needs assists or X-Factor to confirm this hit. Besides this use, {{Clr|2|j.5M}} is mostly air combo filler. | ||
}} | }} | ||
}} | }} | ||
{{MoveData | {{MoveData | ||
|image= | |image=UMVC3_GhostRider_jH.png | ||
|caption= | |caption= | ||
|name=Jumping Heavy | |name=Jumping Heavy | ||
| Line 311: | Line 313: | ||
|properties={{nocancel}}, except for TACs | |properties={{nocancel}}, except for TACs | ||
|description= | |description= | ||
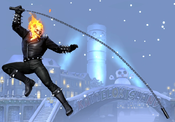
Ghost Rider swings his chain, covering a large area in front of him, as well as above him. This is a solid air-to-air option, since opponents will often try to approach Ghost Rider from above. Unfortunately, j.5H does not chain into j.5S, and thus this move has no cancel options at all except for TACs. This move should be omitted from air combos and generally avoided, for this reason. | Ghost Rider swings his chain, covering a large area in front of him, as well as above him. This is a solid air-to-air option, since opponents will often try to approach Ghost Rider from above. Unfortunately, {{Clr|3|j.5H}} does not chain into {{Clr|4|j.5S}}, and thus this move has no cancel options at all except for TACs. This move should be omitted from air combos and generally avoided, for this reason. | ||
}} | }} | ||
}} | }} | ||
{{MoveData | {{MoveData | ||
|image= | |image=UMVC3_GhostRider_jS.png | ||
|caption= | |caption= | ||
|name=Jumping Special | |name=Jumping Special | ||
| Line 331: | Line 333: | ||
|properties={{aircombofinisher}} | |properties={{aircombofinisher}} | ||
|description= | |description= | ||
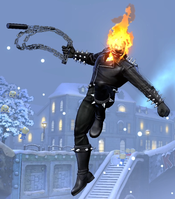
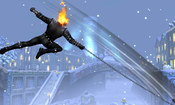
One of Ghost Rider's best keepaway tools. A downward-angled chain attack with similar range and speed to 5H. Hits three times, each with a significant amount of hitstop, which makes confirming very easy. This move can be used at the start of a jump as a fairly fast overhead even from range, or used while falling in order to follow up with other attacks upon landing. j.5S has a blind spot immediately below Ghost Rider which normal-sized opponents can use to evade it. | One of Ghost Rider's best keepaway tools. A downward-angled chain attack with similar range and speed to {{Clr|3|5H}}. Hits three times, each with a significant amount of hitstop, which makes confirming very easy. This move can be used at the start of a jump as a fairly fast overhead even from range, or used while falling in order to follow up with other attacks upon landing. {{Clr|4|j.5S}} has a blind spot immediately below Ghost Rider which normal-sized opponents can use to evade it. | ||
}} | }} | ||
}} | }} | ||
| Line 338: | Line 340: | ||
{{MoveData | {{MoveData | ||
|image= | |image=UMVC3_GhostRider_5HH.png | ||
|caption= | |caption= | ||
|name=Rage Whip | |name=Rage Whip | ||
| Line 353: | Line 355: | ||
|properties=- | |properties=- | ||
|description= | |description= | ||
Follow-up attack for Ghost Rider's 5H, which is significantly more advantageous on block. Pulls opponents slightly closer on contact, which can be useful to ensure that special moves such as 623L or 214L connect properly. In particular, 5H > H xx 623X is a relatively safe sequence that Ghost Rider can throw out to get a little free chip damage on block, or start a combo on hit. | Follow-up attack for Ghost Rider's {{Clr|3|5H}}, which is significantly more advantageous on block. Pulls opponents slightly closer on contact, which can be useful to ensure that special moves such as {{Clr|1|623L}} or {{Clr|1|214L}} connect properly. In particular, {{Clr|3|5H}} > {{Clr|3|H}} xx 623X is a relatively safe sequence that Ghost Rider can throw out to get a little free chip damage on block, or start a combo on hit. | ||
}} | }} | ||
}} | }} | ||
| Line 359: | Line 361: | ||
{{MoveData | {{MoveData | ||
|image= | |image=UMVC3_GhostRider_4H.png | ||
|caption= | |caption= | ||
|name=Heartless Spire | |name=Heartless Spire | ||
| Line 374: | Line 376: | ||
|properties={{otg}}, {{chipdamage}}, {{nocancel}} Priority: Low, Beam Durability: 5 per frame for 3 frames | |properties={{otg}}, {{chipdamage}}, {{nocancel}} Priority: Low, Beam Durability: 5 per frame for 3 frames | ||
|description= | |description= | ||
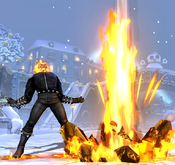
Creates an eruption in front of Ghost Rider, acting as a sort of defensive wall. Spire has enough durability to destroy most non-hyper projectiles that enter its range, and so it can be used to cover him against fireball pressure for a time. Hits | Creates an eruption in front of Ghost Rider, acting as a sort of defensive wall. Spire has enough durability to destroy most non-hyper projectiles that enter its range, and so it can be used to cover him against fireball pressure for a time. Hits OTG, but Ghost Rider needs assists in order to convert further. | ||
}} | }} | ||
}} | }} | ||
| Line 381: | Line 383: | ||
{{MoveData | {{MoveData | ||
|image= | |image=UMVC3_GhostRider_236L.png | ||
|image2=UMVC3_GhostRider_236M.png | |||
|image3=UMVC3_GhostRider_236H.png | |||
|caption= | |caption= | ||
|name=Hellfire | |name=Hellfire | ||
| Line 422: | Line 426: | ||
|properties=Priority: Low, Beam Durability: 5 per frame for 10 frames | |properties=Priority: Low, Beam Durability: 5 per frame for 10 frames | ||
|description= | |description= | ||
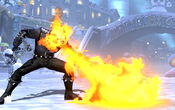
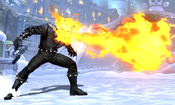
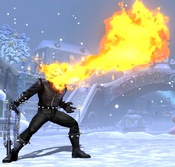
Ghost Rider spews flame from his mouth, creating a ball of flame directly in front of him. H version is angled upwards, M appears directly in front of him, and L is aimed down towards the ground. Deals pretty significant chip, but opponents can pushblock early to avoid the vast majority of it. Hellfire is primarily used for the {{ | Ghost Rider spews flame from his mouth, creating a ball of flame directly in front of him. {{Clr|3|H}} version is angled upwards, {{Clr|2|M}} appears directly in front of him, and {{Clr|1|L}} is aimed down towards the ground. Deals pretty significant chip, but opponents can pushblock early to avoid the vast majority of it. Hellfire is primarily used for the OTG property on the {{Clr|1|L}} version, in order to end combos with a pickup into Hellfire Maelstrom. | ||
}} | }} | ||
}} | }} | ||
| Line 428: | Line 432: | ||
{{MoveData | {{MoveData | ||
|image= | |image=UMVC3_GhostRider_623L.png | ||
|caption= | |caption= | ||
|name=Chain of Rebuttal | |name=Chain of Rebuttal | ||
| Line 444: | Line 448: | ||
|properties={{wallbounce}} | |properties={{wallbounce}} | ||
|description= | |description= | ||
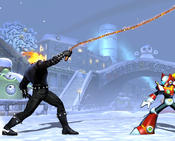
Important combo tool for Ghost Rider. Usually, you want to hitconfirm his keepaway normals into this special in order to start a combo. Ghost Rider can always pick up the | Important combo tool for Ghost Rider. Usually, you want to hitconfirm his keepaway normals into this special in order to start a combo. Ghost Rider can always pick up the Wallbounce from any screen position with {{Clr|3|5H}} > {{Clr|3|H}} into another special move. | ||
}} | }} | ||
}} | }} | ||
{{MoveData | {{MoveData | ||
|image= | |image=UMVC3_GhostRider_623M.png | ||
|caption= | |caption= | ||
|name=Chain of Punishment | |name=Chain of Punishment | ||
| Line 465: | Line 469: | ||
|properties={{wallbounce}} | |properties={{wallbounce}} | ||
|description= | |description= | ||
Almost identical to 623L, except aimed diagonally upwards instead of straight ahead. This move is mainly useful if the opponent has already been knocked in the air by assist hits. As a raw anti-air, it is quite slow, and difficult to connect. | Almost identical to {{Clr|1|623L}}, except aimed diagonally upwards instead of straight ahead. This move is mainly useful if the opponent has already been knocked in the air by assist hits. As a raw anti-air, it is quite slow, and difficult to connect. | ||
}} | }} | ||
}} | }} | ||
{{MoveData | {{MoveData | ||
|image= | |image=UMVC3_GhostRider_623H.png | ||
|caption= | |caption= | ||
|name=Judgement Strike | |name=Judgement Strike | ||
| Line 486: | Line 490: | ||
|properties=Priority: Low, Durability: 5 per projectile | |properties=Priority: Low, Durability: 5 per projectile | ||
|description= | |description= | ||
Unlike the L and M versions, 623H fires a shotgun blast of projectiles which travel almost fullscreen before dissipating. This move does not combo from 5H > H like the other Chain specials, and in general has limited combo use. Instead, Judgement Strike is primarily a keepaway and chip damage tool. | Unlike the {{Clr|1|L}} and {{Clr|2|M}} versions, {{Clr|3|623H}} fires a shotgun blast of projectiles which travel almost fullscreen before dissipating. This move does not combo from {{Clr|3|5H}} > {{Clr|3|H}} like the other Chain specials, and in general has limited combo use. Instead, Judgement Strike is primarily a keepaway and chip damage tool. | ||
}} | }} | ||
}} | }} | ||
| Line 492: | Line 496: | ||
{{MoveData | {{MoveData | ||
|image= | |image=UMVC3_GhostRider_214L.png | ||
|caption= | |caption=L (and H) version | ||
|image2=UMVC3_GhostRider_214M.png | |||
|caption2=M Version | |||
|image3=UMVC3_GhostRider_214L_Grab.png | |||
|caption3=Grabbing with L or M version | |||
|image4=UMVC3_GhostRider_214H.png | |||
|caption4=Grabbing with H Version | |||
|name=Chaos Bringer | |name=Chaos Bringer | ||
|input=214X | |input=214X | ||
| Line 533: | Line 543: | ||
|properties={{hardknockdown}} | |properties={{hardknockdown}} | ||
|description= | |description= | ||
Although not a throw, this move starts a throw-like animation on hit where both Ghost Rider and his opponent are invulnerable to outside effects. This can be utilized to evade assist attacks from the opponent if you manage to catch the point character. L version pulls the opponent immediately in front of Ghost Rider, where he can follow up with any of his OTG attacks. H version deals a significant amount of damage but ends with the opponent on the ground a significant distance away. However, Ghost Rider can still combo after 214H with Spirit of Vengeance (623XX). | Although not a throw, this move starts a throw-like animation on hit where both Ghost Rider and his opponent are invulnerable to outside effects. This can be utilized to evade assist attacks from the opponent if you manage to catch the point character. {{Clr|1|L}} version pulls the opponent immediately in front of Ghost Rider, where he can follow up with any of his OTG attacks. {{Clr|3|H}} version deals a significant amount of damage but ends with the opponent on the ground a significant distance away. However, Ghost Rider can still combo after {{Clr|3|214H}} with Spirit of Vengeance (623XX). | ||
}} | }} | ||
}} | }} | ||
| Line 541: | Line 551: | ||
{{MoveData | {{MoveData | ||
|image= | |image=UMVC3_GhostRider_236XX.png | ||
|caption= | |caption= | ||
|name=Hellfire Maelstrom | |name=Hellfire Maelstrom | ||
| Line 557: | Line 567: | ||
|properties=mashable, raising total hits to 42. {{hardknockdown}}, Priority: High, Durability: 5 | |properties=mashable, raising total hits to 42. {{hardknockdown}}, Priority: High, Durability: 5 | ||
|description= | |description= | ||
Standard combo-ending hyper, typically as a followup to OTG 4H or 236L. | Standard combo-ending hyper, typically as a followup to OTG {{Clr|3|4H}} or {{Clr|1|236L}}. | ||
}} | }} | ||
}} | }} | ||
| Line 563: | Line 573: | ||
{{MoveData | {{MoveData | ||
|image= | |image=UMVC3_GhostRider_623XX.png | ||
|caption= | |caption= | ||
|name=Spirit of Vengeance | |name=Spirit of Vengeance | ||
| Line 578: | Line 588: | ||
|properties={{otg}}, Hyper Armored frames 21-79, has different follow-up attacks (see below) | |properties={{otg}}, Hyper Armored frames 21-79, has different follow-up attacks (see below) | ||
|description= | |description= | ||
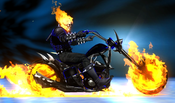
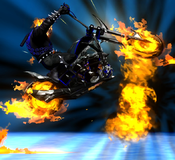
Ghost Rider drives his motorcycle across the stage. Pressing {{ | Ghost Rider drives his motorcycle across the stage. Pressing {{Clr|1|L}}, {{Clr|2|M}}, {{Clr|3|H}}, {{Clr|4|S}} or no button causes different enders to this hyper, changing its recovery and properties. Ghost Rider can extend after this hyper when pairing the correct ender with certain assists. This move can not be X-Factor canceled while Ghost Rider is on the motorcycle, only after he hops off. | ||
}} | }} | ||
}} | }} | ||
{{MoveData | {{MoveData | ||
|image= | |image=UMVC3_GhostRider_623XXL.png | ||
|caption= | |image2=UMVC3_GhostRider_623XXM.png | ||
|image3=UMVC3_GhostRider_623XXH.png | |||
|image4=UMVC3_GhostRider_623XXS.png | |||
|caption=L Follow-up | |||
|caption2=M Follow-up | |||
|caption3=H Follow-up | |||
|caption4=S Follow-up | |||
|name=Spirit of Vengeance (followups) | |name=Spirit of Vengeance (followups) | ||
|input={{atk}} (during Spirit of Vengeance) | |input={{atk}} (during Spirit of Vengeance) | ||
| Line 648: | Line 664: | ||
|properties={{hardknockdown}}, Hyper Armored frames 1-85 (!!) | |properties={{hardknockdown}}, Hyper Armored frames 1-85 (!!) | ||
|description= | |description= | ||
S ender is typically the most damaging, although other enders may be useful if you intend to follow-up using assists or DHCs. The no-input ender is basically useless and should be avoided. | {{Clr|4|S}} ender is typically the most damaging, although other enders may be useful if you intend to follow-up using assists or DHCs. The no-input ender is basically useless and should be avoided. | ||
}} | }} | ||
}} | }} | ||
| Line 654: | Line 670: | ||
{{MoveData | {{MoveData | ||
|image= | |image=UMVC3_GhostRider_63214XX.png | ||
| | |image2=UMVC3_GhostRider_63214XX_Grab.png | ||
|caption2="Look into my eyes..." | |||
|name=Penance Stare | |name=Penance Stare | ||
|input=63214XX (3 bars) | |input=63214XX (3 bars) | ||
| Line 669: | Line 686: | ||
|properties=Invuln until frame 10, {{crumple}} | |properties=Invuln until frame 10, {{crumple}} | ||
|description= | |description= | ||
Highly damaging command grab. It can also be used as a reversal due to its invulnerability and fast startup, or used to punish otherwise safe attacks as a X-Factor Guard Cancel. 5M or 2M can be kara-canceled into this hyper in order to extend its range. In particular, a dash > 5M > 63214XX sequence allows Ghost Rider to suddenly grab opponents from about 3/4s screen distance, making it a serious threat on the ground. This move leaves the opponent in a crumple state afterwards, allowing Ghost Rider a full combo afterwards. Despite being a command grab, this hyper does not apply throw scaling, so the following combo can hit for full damage. | Highly damaging command grab. It can also be used as a reversal due to its invulnerability and fast startup, or used to punish otherwise safe attacks as a X-Factor Guard Cancel. {{Clr|2|5M}} or {{Clr|2|2M}} can be kara-canceled into this hyper in order to extend its range. In particular, a dash > {{Clr|2|5M}} > 63214XX sequence allows Ghost Rider to suddenly grab opponents from about 3/4s screen distance, making it a serious threat on the ground. This move leaves the opponent in a crumple state afterwards, allowing Ghost Rider a full combo afterwards. Despite being a command grab, this hyper does not apply throw scaling, so the following combo can hit for full damage. | ||
}} | }} | ||
}} | }} | ||
| Line 676: | Line 693: | ||
{{MoveData | {{MoveData | ||
|image= | |image=UMVC3_GhostRider_GroundThrow.png | ||
|caption= | |caption= | ||
|name=Ground Throw | |name=Ground Throw | ||
| Line 696: | Line 713: | ||
{{MoveData | {{MoveData | ||
|image= | |image=UMVC3_GhostRider_AirThrow.png | ||
|caption= | |caption= | ||
|name=Air Throw | |name=Air Throw | ||
| Line 717: | Line 734: | ||
{{MoveData | {{MoveData | ||
|image= | |image=UMVC3_GhostRider_5H.png | ||
|caption= | |caption= | ||
|name=Snap Back | |name=Snap Back | ||
| Line 732: | Line 749: | ||
|properties=Snapback | |properties=Snapback | ||
|description= | |description= | ||
Animation and hitbox based on 5H (although it has very slightly lower range). Considering its 2f startup, this makes it a pretty powerful button outside of its meter cost. | Animation and hitbox based on {{Clr|3|5H}} (although it has very slightly lower range). Considering its 2f startup, this makes it a pretty powerful button outside of its meter cost. | ||
}} | }} | ||
}} | }} | ||
| Line 738: | Line 755: | ||
{{MoveData | {{MoveData | ||
|image= | |image=UMVC3_GhostRider_HardTag.png | ||
|caption= | |caption= | ||
|name=Hard Tag | |name=Hard Tag | ||
Revision as of 20:38, 13 November 2022
Introduction
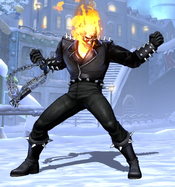
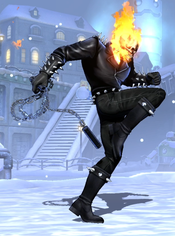
Johnny Blaze was a stunt motorcyclist who forfeited his soul in a deal with demons from the underworld. As Ghost Rider, he channels the powers of Zarathos to spew hellfire and fly around on his cool motorcycle.
In UMvC3, Ghost Rider is a keepaway-focused character. Rather than relying heavily on projectiles like most other zoning characters, Ghost Rider zones out opponents with the incredible range on most of his H and S attacks. Although he is very immobile, Ghost Rider can force enemies to come to him (literally, using 214L), and can convert stray hits from long-range pokes into big damage.
| Strengths | Weaknesses |
|---|---|
|
|
| Ghost Rider | |
|---|---|
| Character Data | |
| Health | 1,000,000 |
| Ground Magic Series | Light Start |
| Air Chain Combo Limit | Three |
| Forward Dash Duration | 20 frames |
| Backdash Duration | 25 frames |
| Jump Duration | 40 frames |
| Superjump Duration | 81 frames |
| Walljump? | No |
| Doublejump? | No |
| Airdash? | No |
| X-Factor Damage Boost (1/2/3) | 35% / 60% / 85% |
| X-Factor Speed Boost (1/2/3) | 5% / 10% / 15% |
| Minimum Damage Scaling (Normals, Specials) | 15% |
| Minimum Damage Scaling (Hypers) | 35% |
| Minimum Damage Scaling (X-Factor) | 35% |
Move List
Assists
| Damage | Startup | Active | Recovery |
|---|---|---|---|
| 50,000 x3 | 39 | 7 | 120, 90 |
| On Hit | On Block | Guard | Properties |
| - | - | Mid | |
|
THC Hyper: Hellfire Maelstrom. Chain Rebuttal is a horizontal coverage assist with decent range. It has faster startup than many common beam assists, and can be used as a counter-call to punish assists such as Plasma Beam or Sentinel Force. As a Wallbounce assist, it has useful application as a combo extension tool, and can also be used to more reliably convert instant overheads or other awkward hits. | |||
| Damage | Startup | Active | Recovery |
|---|---|---|---|
| 35,000 x3 | 39 | 32 | 117, 87 |
| On Hit | On Block | Guard | Properties |
| - | - | Mid | |
|
THC Hyper: Hellfire Maelstrom. Creates a stationary beam projectile that can be used defensively to negate incoming projectiles from the opponent, as it has a pretty significant amount of total durability. Although it hits OTG, Spire tends to knock opponents quite high into the air, which makes it harder to use for combos than his Y assist, Hellfire. | |||
| Damage | Startup | Active | Recovery |
|---|---|---|---|
| 20,000 x10 | 44 | 28 | 109, 79 |
| On Hit | On Block | Guard | Properties |
| - | - | Mid | |
|
THC Hyper: Hellfire Maelstrom. Standard OTG assist for relaunches comparable to Wesker's Samurai Edge or Deadpool's Katana-Rama. Causes a significant amount of total hitstun or blockstun, but scales combos heavily due to its high hit count. | |||
Ground Normals
| Damage | Startup | Active | Recovery |
|---|---|---|---|
| 55,000 | 7 | 3 | 12 |
| On Hit | On Block | Guard | Properties |
| +1 | -1 | Mid | - |
|
Unremarkable jab. It is a little slower than most other character's 5L attacks, so Ghost Rider struggles in up-close scramble situations. | |||
| Damage | Startup | Active | Recovery |
|---|---|---|---|
| 75,000 | 10 | 3 | 16 |
| On Hit | On Block | Guard | Properties |
| +2 | 0 | Mid | - |
|
5M moves Ghost Rider a significant distance forward during its startup. Ghost Rider can kara-cancel this attack (or 2M) into specials or hypers in order to effectively extend their range. This is mainly useful for his Penance Stare level 3 command grab, but could also be used to hit characters who are standing just out of range of Chain of Rebuttal (623L), for example. Note that due to Ghost Rider's magic series type, he cannot chain this attack into H normals, and most go directly into a launcher or special attack. | |||
| Damage | Startup | Active | Recovery |
|---|---|---|---|
| 90,000 | 15 | 4 | 27 |
| On Hit | On Block | Guard | Properties |
| -5 | -7 | Mid | - |
|
5H is a massive range poke and general keepaway tool, which covers up to 75% of the way across the screen. Although it is slightly minus on hit or block, 5H has several cancel options that are significantly more advantageous, including its dedicated Rage Whip followup (5H > H). Thus, 5H provides a lot of potential reward for low risk, and is a good option almost any time that both Ghost Rider and his opponent are on the ground. This attack can whiff inconsistently against certain characters during their reeling hitstun animation, especially smaller bodies like Zero and Wolverine. | |||
| Damage | Startup | Active | Recovery |
|---|---|---|---|
| 45,000 | 7 | 3 | 13 |
| On Hit | On Block | Guard | Properties |
| 0 | -2 | Low | - |
|
Similar to Ghost Rider's 5L, 2L is a standard light normal that is noticeably slower than average. | |||
| Damage | Startup | Active | Recovery |
|---|---|---|---|
| 80,000 | 12 | 4 | 15 |
| On Hit | On Block | Guard | Properties |
| +2 | 0 | Mid | - |
|
Advancing shoulder check attack. This move advances Ghost Rider forward during the startup, similar to 5M. In fact, this move actually travels even further than 5M, making it an excellent kara-cancel tool. Note that due to Ghost Rider's magic series type, he cannot chain this attack into H normals, and most go directly into a launcher or special attack. | |||
| Damage | Startup | Active | Recovery |
|---|---|---|---|
| 80,000 | 17 | 4 | 28 |
| On Hit | On Block | Guard | Properties |
| - | -8 | Low | |
|
Long range poke attack comparable to 5H in range. It is a little slower and loses the Rage Whip follow-up in exchange for hitting :ow. Because Ghost Rider has access to both this move and his long-reaching overhead j.5S, he can run a moderately effective high/low game even at long range. | |||
| Damage | Startup | Active | Recovery |
|---|---|---|---|
| 100,000 | 15 | 6 | 25 |
| On Hit | On Block | Guard | Properties |
| Launch | -7 | Mid | |
|
As with Ghost Rider's other H and S attacks, 5S has exceptional range. It hits a significant distance ahead of him, as well as above him. Unfortunately, Ghost Rider's aerial options are very poor, so he gets significantly less reward off landing this than most characters would. | |||
Aerial Normals
| Damage | Startup | Active | Recovery |
|---|---|---|---|
| 55,000 | 7 | 3 | 16 |
| On Hit | On Block | Guard | Properties |
| +14 | +12 | OH | - |
|
Is too slow and has too small of a hitbox to have any notable use. | |||
| Damage | Startup | Active | Recovery |
|---|---|---|---|
| 78,000 | 10 | 5 | 23 |
| On Hit | On Block | Guard | Properties |
| +18 | +16 | OH | - |
|
Can be used as a fuzzy-guard instant overhead against normal-sized characters, and works naturally as an instant overhead against big body characters. Also against large bodies, Ghost Rider can solo convert this instant overhead with j.5M > j.5S, land, 5L. Against normal-sized characters, the j.5S will whiff, and Ghost Rider needs assists or X-Factor to confirm this hit. Besides this use, j.5M is mostly air combo filler. | |||
| Damage | Startup | Active | Recovery |
|---|---|---|---|
| 90,000 | 17 | 3 | 31 |
| On Hit | On Block | Guard | Properties |
| +21 | +19 | OH | |
|
Ghost Rider swings his chain, covering a large area in front of him, as well as above him. This is a solid air-to-air option, since opponents will often try to approach Ghost Rider from above. Unfortunately, j.5H does not chain into j.5S, and thus this move has no cancel options at all except for TACs. This move should be omitted from air combos and generally avoided, for this reason. | |||
| Damage | Startup | Active | Recovery |
|---|---|---|---|
| 50,000 x3 | 15 | 10 | 36 |
| On Hit | On Block | Guard | Properties |
| +21 | +18 | OH | |
|
One of Ghost Rider's best keepaway tools. A downward-angled chain attack with similar range and speed to 5H. Hits three times, each with a significant amount of hitstop, which makes confirming very easy. This move can be used at the start of a jump as a fairly fast overhead even from range, or used while falling in order to follow up with other attacks upon landing. j.5S has a blind spot immediately below Ghost Rider which normal-sized opponents can use to evade it. | |||
Command Normals
| Damage | Startup | Active | Recovery |
|---|---|---|---|
| 95,000 | 5 | 3 | 18 |
| On Hit | On Block | Guard | Properties |
| +5 | +3 | Mid | - |
|
Follow-up attack for Ghost Rider's 5H, which is significantly more advantageous on block. Pulls opponents slightly closer on contact, which can be useful to ensure that special moves such as 623L or 214L connect properly. In particular, 5H > H xx 623X is a relatively safe sequence that Ghost Rider can throw out to get a little free chip damage on block, or start a combo on hit. | |||
| Damage | Startup | Active | Recovery |
|---|---|---|---|
| 35,000 x3 | 15 | 32 | 25 |
| On Hit | On Block | Guard | Properties |
| +6 | +4 | Mid | |
|
Creates an eruption in front of Ghost Rider, acting as a sort of defensive wall. Spire has enough durability to destroy most non-hyper projectiles that enter its range, and so it can be used to cover him against fireball pressure for a time. Hits OTG, but Ghost Rider needs assists in order to convert further. | |||
Special Moves
| L |
Damage | Startup | Active | Recovery |
|---|---|---|---|---|
| 20,000 x10 | 20 | 28 | 18 | |
| On Hit | On Block | Guard | Properties | |
| -2 | -4 | Mid | ||
| M |
Damage | Startup | Active | Recovery |
| 20,000 x10 | 21 | 27 | 18 | |
| On Hit | On Block | Guard | Properties | |
| -1 | -3 | Mid | Priority: Low, Beam Durability: 5 per frame for 10 frames | |
| H |
Damage | Startup | Active | Recovery |
| 20,000 x10 | 21 | 27 | 18 | |
| On Hit | On Block | Guard | Properties | |
| -1 | -3 | Mid | Priority: Low, Beam Durability: 5 per frame for 10 frames | |
|
Ghost Rider spews flame from his mouth, creating a ball of flame directly in front of him. H version is angled upwards, M appears directly in front of him, and L is aimed down towards the ground. Deals pretty significant chip, but opponents can pushblock early to avoid the vast majority of it. Hellfire is primarily used for the OTG property on the L version, in order to end combos with a pickup into Hellfire Maelstrom. | ||||
| Damage | Startup | Active | Recovery |
|---|---|---|---|
| 50,000 x3 | 15 | 7 | 29 |
| On Hit | On Block | Guard | Properties |
| - | -8 | Mid | |
|
Important combo tool for Ghost Rider. Usually, you want to hitconfirm his keepaway normals into this special in order to start a combo. Ghost Rider can always pick up the Wallbounce from any screen position with 5H > H into another special move. | |||
| Damage | Startup | Active | Recovery |
|---|---|---|---|
| 50,000 x3 | 15 | 7 | 29 |
| On Hit | On Block | Guard | Properties |
| - | -8 | Mid | |
|
Almost identical to 623L, except aimed diagonally upwards instead of straight ahead. This move is mainly useful if the opponent has already been knocked in the air by assist hits. As a raw anti-air, it is quite slow, and difficult to connect. | |||
| Damage | Startup | Active | Recovery |
|---|---|---|---|
| 25,000 x10 | 25 | - | 30 |
| On Hit | On Block | Guard | Properties |
| -5 | -7 | Mid | Priority: Low, Durability: 5 per projectile |
|
Unlike the L and M versions, 623H fires a shotgun blast of projectiles which travel almost fullscreen before dissipating. This move does not combo from 5H > H like the other Chain specials, and in general has limited combo use. Instead, Judgement Strike is primarily a keepaway and chip damage tool. | |||
| Chaos Bringer |
Damage | Startup | Active | Recovery |
|---|---|---|---|---|
| 60,000 x2 | 15 | 3 | 43 | |
| On Hit | On Block | Guard | Properties | |
| - | -22 | Mid | ||
| M |
Damage | Startup | Active | Recovery |
| 60,000 + 17,500 x5 + 35,000 | 15 | 3 | 43 | |
| On Hit | On Block | Guard | Properties | |
| - | -22 | Mid | ||
| H |
Damage | Startup | Active | Recovery |
| 60,000 + 105,000 | 15 | 3 | 43 | |
| On Hit | On Block | Guard | Properties | |
| - | -22 | Mid | ||
|
Although not a throw, this move starts a throw-like animation on hit where both Ghost Rider and his opponent are invulnerable to outside effects. This can be utilized to evade assist attacks from the opponent if you manage to catch the point character. L version pulls the opponent immediately in front of Ghost Rider, where he can follow up with any of his OTG attacks. H version deals a significant amount of damage but ends with the opponent on the ground a significant distance away. However, Ghost Rider can still combo after 214H with Spirit of Vengeance (623XX). | ||||
Hyper Combos
| Damage | Startup | Active | Recovery |
|---|---|---|---|
| 20,000 x18 + 80,000 | 13+1 | 85(12)32 | 50 |
| On Hit | On Block | Guard | Properties |
| - | -42 | Mid | mashable, raising total hits to 42. |
|
Standard combo-ending hyper, typically as a followup to OTG 4H or 236L. | |||
| Damage | Startup | Active | Recovery |
|---|---|---|---|
| 20,000 x11 | 20+1 | 56 | - |
| On Hit | On Block | Guard | Properties |
| - | - | Mid | |
|
Ghost Rider drives his motorcycle across the stage. Pressing L, M, H, S or no button causes different enders to this hyper, changing its recovery and properties. Ghost Rider can extend after this hyper when pairing the correct ender with certain assists. This move can not be X-Factor canceled while Ghost Rider is on the motorcycle, only after he hops off. | |||
| No followup - |
Damage | Startup | Active | Recovery |
|---|---|---|---|---|
| 30,000 | - | - | 52 | |
| On Hit | On Block | Guard | Properties | |
| - | -42 | Mid | ||
| L |
Damage | Startup | Active | Recovery |
| 150,000 | 1 | 30 | 50 | |
| On Hit | On Block | Guard | Properties | |
| - | -56 | Mid | ||
| M |
Damage | Startup | Active | Recovery |
| 160,000 | 15 | 26 | 65 | |
| On Hit | On Block | Guard | Properties | |
| - | -62 | Mid | ||
| H |
Damage | Startup | Active | Recovery |
| 200,000 | 8 | 12 | 81 | |
| On Hit | On Block | Guard | Properties | |
| - | -57 | Mid | ||
| S |
Damage | Startup | Active | Recovery |
| 35,000 x9 | 15 | 25 | 46 | |
| On Hit | On Block | Guard | Properties | |
| - | -73 | Mid | ||
|
S ender is typically the most damaging, although other enders may be useful if you intend to follow-up using assists or DHCs. The no-input ender is basically useless and should be avoided. | ||||
| Damage | Startup | Active | Recovery |
|---|---|---|---|
| 450,000 | 3+0 | 2 | 28 |
| On Hit | On Block | Guard | Properties |
| - | - | Throw | Invuln until frame 10, |
|
Highly damaging command grab. It can also be used as a reversal due to its invulnerability and fast startup, or used to punish otherwise safe attacks as a X-Factor Guard Cancel. 5M or 2M can be kara-canceled into this hyper in order to extend its range. In particular, a dash > 5M > 63214XX sequence allows Ghost Rider to suddenly grab opponents from about 3/4s screen distance, making it a serious threat on the ground. This move leaves the opponent in a crumple state afterwards, allowing Ghost Rider a full combo afterwards. Despite being a command grab, this hyper does not apply throw scaling, so the following combo can hit for full damage. | |||
Universal Mechanics
| Damage | Startup | Active | Recovery |
|---|---|---|---|
| 80,000 | 1 | 1 | - |
| On Hit | On Block | Guard | Properties |
| - | - | Throw | |
|
Kicks opponent a significant distance away from Ghost Rider. A follow-up with Spirit of Vengeance is possible with good timing (easier if the opponent is thrown into the corner) but otherwise combo potential is very limited. | |||
| Damage | Startup | Active | Recovery |
|---|---|---|---|
| 80,000 | 1 | 1 | - |
| On Hit | On Block | Guard | Properties |
| - | - | Airthrow | |
|
Can only be followed up if the opponent is thrown into the corner. | |||
| Damage | Startup | Active | Recovery |
|---|---|---|---|
| 50,000 | 2 | 4 | 27 |
| On Hit | On Block | Guard | Properties |
| - | --7 | Mid | Snapback |
|
Animation and hitbox based on 5H (although it has very slightly lower range). Considering its 2f startup, this makes it a pretty powerful button outside of its meter cost. | |||
| Damage | Startup | Active | Recovery |
|---|---|---|---|
| 27,000 | - | 19 | 33 |
| On Hit | On Block | Guard | Properties |
| - | -13 | OH | |
|
- | |||
Team Position
Ghost Rider is usually picked as a Point character. As a zoning character, he is very reliant on assists to cover the holes in his defense, to convert off hits from range, and to extend his otherwise short combos. His effectiveness declines rapidly if he only has access to one or no assists. He also makes a very poor anchor, as although he can zone enemies out for a long time, he does not deal a threatening amount of chip, and has almost no mixup game.
Notable Synergies
Arthur: Despite being a keepaway character himself, Ghost Rider struggles against the projectiles of other zoning-heavy characters, since his chain won't clash with them. Arthur's assist represents a great way to deal with that problem. This is especially true if you can upgrade Arthur to Golden Armor, which improves the durability on his Dagger Toss assist.
Players to Watch: Sacktap (Ghost Rider/Arthur/Haggar)
Doctor Doom: As one would expect, Doom provides a lot of support potential with either Plasma Beam or Hidden Missiles assist. With Hidden Missiles, Ghost Rider can be covered from above, protecting the large deadzone in his keepaway game. He can also call it before a 623XX hyper and then continue to combo afterwards, an extension unique to this shell. With Plasma Beam, Ghost Rider can call Doom during many of his keepaway options, such as a retreating j.5S, and either keep pressure on block or convert into a combo on hit.
Players to Watch: IGT (Ghost Rider/Skrull/Doom)
Haggar: Haggar's Lariat is one of the few properly invincible assists in the game, and serves as an excellent "get off me" assist for someone like Ghost Rider, whose up-close attacks are very slow. Lariat can also be used to extend combos after OTG 4H, making it doubly useful. Additionally, while Ghost Rider's DHC options are usually quite poor, Spirit of Vengence > Giant Haggar Press connects in the corner for very big damage.
Players to Watch: Sacktap (Ghost Rider/Arthur/Haggar)
Other Players to Watch: JakoMan (Ghost Rider/Felicia/Nemesis)
Combos
Solo Combos
5H > H xx 623L, 5H > H xx 214L, 236L xx 236XX (623,000 damage for 1 bar, builds ~0.5 bar)
Basic solo confirm off 5H. Without assists or X-Factor support, this is close to the best he can do.
63214XX, reposition, 2H xx 623L, jump, j.5M > j.5M > j.5S, land, 5H > 5S sjc. j.5M > j.5M > j.5S, land, 236L xx 236XX(967,000 damage for 4 bars, builds ~0.5 bar)
Ghost Rider has a simple jump loop extension he can perform after a 623L near the corner, but getting the spacing correct for it to work can be tough. The crumple state caused by Penance Stare gives you time to set up the proper spacing.
X-Factor Combos
-
Sample Team Combos
5H > H xx 623L, 5H > H xx 214L, 4H+A (Haggar Assist - Lariat), 5H xx 214L, 236L xx 236XX (673,000 for 1 bar, builds about 0.8 bars of meter)
Ghost Rider can not solo pickup after OTG 4H, and many assists hit too low to connect properly here. Haggar's lariat assist hits high enough and juggles long enough for Ghost Rider to get this minor extension on his basic combo.
5H > H xx 623L, 5H > H xx 214H, Assist (Doom - Hidden Missiles) + 623XX > M, assist hits, 214L, 236L xx 236XX (796,000 for 2 bars, builds ~0.9 bars of meter)
Spirit of Vengeance hyper can be followed up afterwards using certain assists that hit late, with Hidden Missiles likely being the easiest. This allows Ghost Rider to double-super for a pretty significant increase in damage.
5H > H xx 623L, 5H > H (Call Assist - Sentinel Force) xx 214L, (assist hits twice), 623M (assist hits again), 214L, 236L xx 236XX (700,000 for 1 bar, builds ~0.9 bars of meter)
Alternate extension using another common assist. This only works properly close to the corner, otherwise the 623M will knock the opponent too far away to do anything useful.
Alternate Colors
Videos and External Resources
