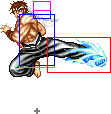
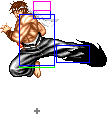
Leot buddy (talk | contribs) |
mNo edit summary |
||
| Line 10: | Line 10: | ||
= Introduction = | = Introduction = | ||
Mizoguchi is the 28 year old (Or whatever the current story decides to change his age to) high school student | Mizoguchi is the 28 year old (Or whatever the current story decides to change his age to) high school student. He prefers partying to studying and is just the loudest guy you'll ever meet. Mizoguchi is NOT the main character of the game and plays the role of the reluctant "hero", as he keeps getting kidnapped and made to fight instead of moving on with his life. Despite this, he's appeared in others games like <i>Suiko Enbu</i> and [https://wiki.supercombo.gg/w/The_King_of_Fighters_MIRA KOF: Maximum Impact Regulation A] | ||
In the game Mizoguchi is a mid-tier character with devastating combos. Despite looking like a Ryu clone, his fireball is kinda weak and his poking game is only okay, but his light Avalance Punch can be safe on block. Get good at linking off his Scissor Kicks if you want to keep up with the top tiers - if he stuns you it can often mean death. | |||
===Weak Spot=== | ===Weak Spot=== | ||
| Line 30: | Line 28: | ||
<td align="center">-</td></tr> | <td align="center">-</td></tr> | ||
</table> | </table> | ||
Mizoguchi's weak point is his headband, and as an average height character it's vulnerable to some standing pokes as well as any jump-ins and crossups. Stance shifting can help him a lot. | |||
===Color Options=== | ===Color Options=== | ||
| Line 71: | Line 70: | ||
== Normal Moves == | == Normal Moves == | ||
===Light Punch [[File:Snka.gif]]=== | ===Light Punch [[File:Snka.gif]]=== | ||
*'''Standing (Close):''' | *'''Standing LP (Close):''' | ||
<table border="1em" cellspacing="0" style="border: 1px solid #999;"> | <table border="1em" cellspacing="0" style="border: 1px solid #999;"> | ||
<tr> <td align="center" width="91">Damage</td> | <tr> <td align="center" width="91">Damage</td> | ||
| Line 83: | Line 82: | ||
<td align="center" bgcolor="#1E90FF">yes</td></tr> | <td align="center" bgcolor="#1E90FF">yes</td></tr> | ||
<tr> <td align="center">On hit</td> | <tr> <td align="center">On hit</td> | ||
<td align="center" bgcolor="# | <td align="center" bgcolor="#007D00">+6</td></tr> | ||
<tr> <td align="center">On block</td> | <tr> <td align="center">On block</td> | ||
<td align="center" bgcolor="# | <td align="center" bgcolor="#007D00">+7</td></tr> | ||
<tr> <td align="center" colspan="2">Frame count</td> | <tr> <td align="center" colspan="2">Frame count</td> | ||
<td align="center">2</td> | <td align="center">2</td> | ||
<td align="center" bgcolor="# | <td align="center" bgcolor="#00007D">3</td> | ||
<td align="center">3</td></tr> | <td align="center">3</td></tr> | ||
</table> | </table> | ||
Great move to demolish dizzy spots due to thick hitbox. | Great move to demolish dizzy spots due to thick hitbox. | ||
*'''Standing (Far):''' | *'''Standing LP (Far):''' | ||
<table border="1em" cellspacing="0" style="border: 1px solid #999;"> | <table border="1em" cellspacing="0" style="border: 1px solid #999;"> | ||
<tr> <td align="center" width="91">Damage</td> | <tr> <td align="center" width="91">Damage</td> | ||
| Line 105: | Line 104: | ||
<td align="center" bgcolor="#1E90FF">yes</td></tr> | <td align="center" bgcolor="#1E90FF">yes</td></tr> | ||
<tr> <td align="center">On hit</td> | <tr> <td align="center">On hit</td> | ||
<td align="center" bgcolor="# | <td align="center" bgcolor="#007D00">+6</td></tr> | ||
<tr> <td align="center">On block</td> | <tr> <td align="center">On block</td> | ||
<td align="center" bgcolor="# | <td align="center" bgcolor="#007D00">+7</td></tr> | ||
<tr> <td align="center" colspan="2">Frame count</td> | <tr> <td align="center" colspan="2">Frame count</td> | ||
<td align="center">2</td> | <td align="center">2</td> | ||
<td align="center" bgcolor="# | <td align="center" bgcolor="#00007D">3</td> | ||
<td align="center">3</td></tr> | <td align="center">3</td></tr> | ||
</table> | </table> | ||
Might be the fattest far jab in the entire game. Good for keeping the opponent far from you. | Might be the fattest far jab in the entire game. Good for keeping the opponent far from you. | ||
*'''Crouching:''' | *'''Crouching LP:''' | ||
<table border="1em" cellspacing="0" style="border: 1px solid #999;"> | <table border="1em" cellspacing="0" style="border: 1px solid #999;"> | ||
<tr> <td align="center" width="91">Damage</td> | <tr> <td align="center" width="91">Damage</td> | ||
| Line 127: | Line 126: | ||
<td align="center" bgcolor="#1E90FF">yes</td></tr> | <td align="center" bgcolor="#1E90FF">yes</td></tr> | ||
<tr> <td align="center">On hit</td> | <tr> <td align="center">On hit</td> | ||
<td align="center" bgcolor="# | <td align="center" bgcolor="#007D00">+6</td></tr> | ||
<tr> <td align="center">On block</td> | <tr> <td align="center">On block</td> | ||
<td align="center" bgcolor="# | <td align="center" bgcolor="#007D00">+7</td></tr> | ||
<tr> <td align="center" colspan="2">Frame count</td> | <tr> <td align="center" colspan="2">Frame count</td> | ||
<td align="center">2</td> | <td align="center">2</td> | ||
<td align="center" bgcolor="# | <td align="center" bgcolor="#00007D">3</td> | ||
<td align="center">3</td></tr> | <td align="center">3</td></tr> | ||
</table> | </table> | ||
Same as st.far but crouching and a bit less range. | Same as st.far but crouching and a bit less range. | ||
*'''Jumping (Diagonal/Neutral):''' | *'''Jumping LP (Diagonal/Neutral):''' | ||
<table border="1em" cellspacing="0" style="border: 1px solid #999;"> | <table border="1em" cellspacing="0" style="border: 1px solid #999;"> | ||
<tr> <td align="center" width="91">Damage</td> | <tr> <td align="center" width="91">Damage</td> | ||
| Line 149: | Line 148: | ||
<tr> <td align="center" colspan="2">Frame count</td> | <tr> <td align="center" colspan="2">Frame count</td> | ||
<td align="center">4</td> | <td align="center">4</td> | ||
<td align="center" bgcolor="# | <td align="center" bgcolor="#00007D">∞</td></tr> | ||
</table> | </table> | ||
This one has an incredible priority. Use it a lot, it will beat a lot of air-to-air attacks. Stays out 'till you land. | This one has an incredible priority. Use it a lot, it will beat a lot of air-to-air attacks. Stays out 'till you land. | ||
=== | ===Heavy Punch [[File:Snkb.gif]]=== | ||
*'''Standing (Close):''' | *'''Standing HP (Close):''' | ||
<table border="1em" cellspacing="0" style="border: 1px solid #999;"> | <table border="1em" cellspacing="0" style="border: 1px solid #999;"> | ||
<tr> <td align="center" width="91">Damage</td> | <tr> <td align="center" width="91">Damage</td> | ||
| Line 167: | Line 166: | ||
<td align="center" bgcolor="#1E90FF">yes</td></tr> | <td align="center" bgcolor="#1E90FF">yes</td></tr> | ||
<tr> <td align="center">On hit</td> | <tr> <td align="center">On hit</td> | ||
<td align="center" bgcolor="# | <td align="center" bgcolor="#7D0000">-3</td></tr> | ||
<tr> <td align="center">On block</td> | <tr> <td align="center">On block</td> | ||
<td align="center" bgcolor="# | <td align="center" bgcolor="#7D0000">-8</td></tr> | ||
<tr> <td align="center" colspan="2">Frame count</td> | <tr> <td align="center" colspan="2">Frame count</td> | ||
<td align="center">4</td> | <td align="center">4</td> | ||
<td align="center" bgcolor="# | <td align="center" bgcolor="#00007D">3</td> | ||
<td align="center" bgcolor="# | <td align="center" bgcolor="#00007D">3</td> | ||
<td align="center">18</td></tr> | <td align="center">18</td></tr> | ||
</table> | </table> | ||
A headbutt. Important for combos. However Ray, Lee, Feilin and Clown can duck the first hurtbox and realistically fall out of the combo. Comes out faster then stand HK. | A headbutt. Important for combos. However Ray, Lee, Feilin and Clown can duck the first hurtbox and realistically fall out of the combo. Comes out faster then stand HK. | ||
*'''Standing (Far):''' | *'''Standing HP (Far):''' | ||
<table border="1em" cellspacing="0" style="border: 1px solid #999;"> | <table border="1em" cellspacing="0" style="border: 1px solid #999;"> | ||
<tr> <td align="center" width="91">Damage</td> | <tr> <td align="center" width="91">Damage</td> | ||
| Line 191: | Line 190: | ||
<td align="center" bgcolor="#1E90FF">yes</td></tr> | <td align="center" bgcolor="#1E90FF">yes</td></tr> | ||
<tr> <td align="center">On hit</td> | <tr> <td align="center">On hit</td> | ||
<td align="center" bgcolor="# | <td align="center" bgcolor="#7D0000">-3</td></tr> | ||
<tr> <td align="center">On block</td> | <tr> <td align="center">On block</td> | ||
<td align="center" bgcolor="# | <td align="center" bgcolor="#7D0000">-8</td></tr> | ||
<tr> <td align="center" colspan="2">Frame count</td> | <tr> <td align="center" colspan="2">Frame count</td> | ||
<td align="center">4</td> | <td align="center">4</td> | ||
<td align="center" bgcolor="# | <td align="center" bgcolor="#00007D">6</td> | ||
<td align="center" colspan="2">(6) 18</td></tr> | <td align="center" colspan="2">(6) 18</td></tr> | ||
</table> | </table> | ||
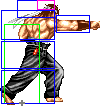
Great poke, great far anti-air. Arm becomes | Great poke, great far anti-air. Arm becomes vulnerable only <u>after</u> the active frames. Think of it in terms of Ryu's stand MP/HP in old SF, or just stand fierce in Alpha 1. Differences being that in FHD normals tend to have a lot of priority compared to other fighters. | ||
*'''Crouching:''' | *'''Crouching HP:''' | ||
<table border="1em" cellspacing="0" style="border: 1px solid #999;"> | <table border="1em" cellspacing="0" style="border: 1px solid #999;"> | ||
<tr> <td align="center" width="91">Damage</td> | <tr> <td align="center" width="91">Damage</td> | ||
| Line 215: | Line 214: | ||
<td align="center" bgcolor="#1E90FF">yes</td></tr> | <td align="center" bgcolor="#1E90FF">yes</td></tr> | ||
<tr> <td align="center">On hit</td> | <tr> <td align="center">On hit</td> | ||
<td align="center" bgcolor="# | <td align="center" bgcolor="#7D0000">-3</td></tr> | ||
<tr> <td align="center">On block</td> | <tr> <td align="center">On block</td> | ||
<td align="center" bgcolor="# | <td align="center" bgcolor="#7D0000">-8</td></tr> | ||
<tr> <td align="center" colspan="2">Frame count</td> | <tr> <td align="center" colspan="2">Frame count</td> | ||
<td align="center">4</td> | <td align="center">4</td> | ||
<td align="center" bgcolor="# | <td align="center" bgcolor="#00007D">3</td> | ||
<td align="center" bgcolor="# | <td align="center" bgcolor="#00007D">3</td> | ||
<td align="center" colspan="2">(14) 18</td></tr> | <td align="center" colspan="2">(14) 18</td></tr> | ||
</table> | </table> | ||
Your best anti-air by far. But if you'll mess up, opponent will 100% hit your dizzy spot. | Your best anti-air by far. But if you'll mess up, opponent will 100% hit your dizzy spot. | ||
*'''Jumping (Diagonal/Neutral):''' | *'''Jumping HP (Diagonal/Neutral):''' | ||
<table border="1em" cellspacing="0" style="border: 1px solid #999;"> | <table border="1em" cellspacing="0" style="border: 1px solid #999;"> | ||
<tr> <td align="center" width="91">Damage</td> | <tr> <td align="center" width="91">Damage</td> | ||
| Line 239: | Line 238: | ||
<tr> <td align="center" colspan="2">Frame count</td> | <tr> <td align="center" colspan="2">Frame count</td> | ||
<td align="center">4</td> | <td align="center">4</td> | ||
<td align="center" bgcolor="# | <td align="center" bgcolor="#00007D">6</td> | ||
<td align="center">∞</td></tr> | <td align="center">∞</td></tr> | ||
</table> | </table> | ||
| Line 245: | Line 244: | ||
===Light Kick [[File:Snkc.gif]]=== | ===Light Kick [[File:Snkc.gif]]=== | ||
*'''Standing (Close):''' | *'''Standing LK (Close):''' | ||
<table border="1em" cellspacing="0" style="border: 1px solid #999;"> | <table border="1em" cellspacing="0" style="border: 1px solid #999;"> | ||
<tr> <td align="center" width="91">Damage</td> | <tr> <td align="center" width="91">Damage</td> | ||
| Line 257: | Line 256: | ||
<td align="center" bgcolor="#1E90FF">yes</td></tr> | <td align="center" bgcolor="#1E90FF">yes</td></tr> | ||
<tr> <td align="center">On hit</td> | <tr> <td align="center">On hit</td> | ||
<td align="center" bgcolor="# | <td align="center" bgcolor="#007D00">+6</td></tr> | ||
<tr> <td align="center">On block</td> | <tr> <td align="center">On block</td> | ||
<td align="center" bgcolor="# | <td align="center" bgcolor="#007D00">+7</td></tr> | ||
<tr> <td align="center" colspan="2">Frame count</td> | <tr> <td align="center" colspan="2">Frame count</td> | ||
<td align="center">2</td> | <td align="center">2</td> | ||
<td align="center" bgcolor="# | <td align="center" bgcolor="#00007D">3</td> | ||
<td align="center">3</td></tr> | <td align="center">3</td></tr> | ||
</table> | </table> | ||
Good for combos, and aiming for mid to thigh range dizzy spots. | Good for combos, and aiming for mid to thigh range dizzy spots. | ||
*'''Standing (Far):''' | *'''Standing LK (Far):''' | ||
<table border="1em" cellspacing="0" style="border: 1px solid #999;"> | <table border="1em" cellspacing="0" style="border: 1px solid #999;"> | ||
<tr> <td align="center" width="91">Damage</td> | <tr> <td align="center" width="91">Damage</td> | ||
| Line 279: | Line 278: | ||
<td align="center" bgcolor="#1E90FF">yes</td></tr> | <td align="center" bgcolor="#1E90FF">yes</td></tr> | ||
<tr> <td align="center">On hit</td> | <tr> <td align="center">On hit</td> | ||
<td align="center" bgcolor="# | <td align="center" bgcolor="#007D00">+5</td></tr> | ||
<tr> <td align="center">On block</td> | <tr> <td align="center">On block</td> | ||
<td align="center" bgcolor="# | <td align="center" bgcolor="#007D00">+6</td></tr> | ||
<tr> <td align="center" colspan="2">Frame count</td> | <tr> <td align="center" colspan="2">Frame count</td> | ||
<td align="center">2</td> | <td align="center">2</td> | ||
<td align="center" bgcolor="# | <td align="center" bgcolor="#00007D">3</td> | ||
<td align="center">4</td></tr> | <td align="center">4</td></tr> | ||
</table> | </table> | ||
Another decent anti-air. Good for combos, and aiming for mid dizzy spots. | Another decent anti-air. Good for combos, and aiming for mid dizzy spots. | ||
*'''Crouching:''' | *'''Crouching LK:''' | ||
<table border="1em" cellspacing="0" style="border: 1px solid #999;"> | <table border="1em" cellspacing="0" style="border: 1px solid #999;"> | ||
<tr> <td align="center" width="91">Damage</td> | <tr> <td align="center" width="91">Damage</td> | ||
| Line 301: | Line 300: | ||
<td align="center" bgcolor="#1E90FF">yes</td></tr> | <td align="center" bgcolor="#1E90FF">yes</td></tr> | ||
<tr> <td align="center">On hit</td> | <tr> <td align="center">On hit</td> | ||
<td align="center" bgcolor="# | <td align="center" bgcolor="#007D00">+6</td></tr> | ||
<tr> <td align="center">On block</td> | <tr> <td align="center">On block</td> | ||
<td align="center" bgcolor="# | <td align="center" bgcolor="#007D00">+7</td></tr> | ||
<tr> <td align="center" colspan="2">Frame count</td> | <tr> <td align="center" colspan="2">Frame count</td> | ||
<td align="center">2</td> | <td align="center">2</td> | ||
<td align="center" bgcolor="# | <td align="center" bgcolor="#00007D">3</td> | ||
<td align="center">3</td></tr> | <td align="center">3</td></tr> | ||
</table> | </table> | ||
Mizo's leg is invincible, only his body can be hit. Used in the general rock scissors paper game that FHD normals go by. | Mizo's leg is invincible, only his body can be hit. Used in the general rock scissors paper game that FHD normals go by. | ||
*'''Jumping (Diagonal):''' | *'''Jumping LK (Diagonal):''' | ||
<table border="1em" cellspacing="0" style="border: 1px solid #999;"> | <table border="1em" cellspacing="0" style="border: 1px solid #999;"> | ||
<tr> <td align="center" width="91">Damage</td> | <tr> <td align="center" width="91">Damage</td> | ||
| Line 323: | Line 322: | ||
<tr> <td align="center" colspan="2">Frame count</td> | <tr> <td align="center" colspan="2">Frame count</td> | ||
<td align="center">4</td> | <td align="center">4</td> | ||
<td align="center" bgcolor="# | <td align="center" bgcolor="#00007D">∞</td></tr> | ||
</table> | </table> | ||
A crossup. Priority is similar to jump punch, comes out faster then lp, but at a lower angle then it. Thus it loses the air to air battle use that the jump punch also doubles as. | A crossup. Priority is similar to jump punch, comes out faster then lp, but at a lower angle then it. Thus it loses the air to air battle use that the jump punch also doubles as. | ||
*'''Jumping (Neutral):''' | *'''Jumping LK (Neutral):''' | ||
<table border="1em" cellspacing="0" style="border: 1px solid #999;"> | <table border="1em" cellspacing="0" style="border: 1px solid #999;"> | ||
<tr> <td align="center" width="91">Damage</td> | <tr> <td align="center" width="91">Damage</td> | ||
| Line 339: | Line 338: | ||
<tr> <td align="center" colspan="2">Frame count</td> | <tr> <td align="center" colspan="2">Frame count</td> | ||
<td align="center">4</td> | <td align="center">4</td> | ||
<td align="center" bgcolor="# | <td align="center" bgcolor="#00007D">∞</td></tr> | ||
</table> | </table> | ||
Long standing air to air attack. Deceptive hitbox. | Long standing air to air attack. Deceptive hitbox. | ||
=== | ===Heavy Kick [[File:Snkd.gif]]=== | ||
*'''Standing (Close):''' | *'''Standing HK (Close):''' | ||
<table border="1em" cellspacing="0" style="border: 1px solid #999;"> | <table border="1em" cellspacing="0" style="border: 1px solid #999;"> | ||
<tr> <td align="center" width="91">Damage</td> | <tr> <td align="center" width="91">Damage</td> | ||
| Line 358: | Line 357: | ||
<td align="center" bgcolor="#1E90FF">yes/yes</td></tr> | <td align="center" bgcolor="#1E90FF">yes/yes</td></tr> | ||
<tr> <td align="center">On hit</td> | <tr> <td align="center">On hit</td> | ||
<td align="center" bgcolor="# | <td align="center" bgcolor="#A58700">-/0</td></tr> | ||
<tr> <td align="center">On block</td> | <tr> <td align="center">On block</td> | ||
<td align="center" bgcolor="# | <td align="center" bgcolor="#7D0000">-/-5</td></tr> | ||
<tr> <td align="center" colspan="2">Frame count</td> | <tr> <td align="center" colspan="2">Frame count</td> | ||
<td align="center">4</td> | <td align="center">4</td> | ||
<td align="center" bgcolor="# | <td align="center" bgcolor="#00007D">2</td> | ||
<td align="center">1</td> | <td align="center">1</td> | ||
<td align="center" bgcolor="# | <td align="center" bgcolor="#00007D">3</td> | ||
<td align="center">18</td></tr> | <td align="center">18</td></tr> | ||
</table> | </table> | ||
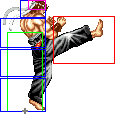
A 2-hit axe kick. Starts closer then close stand HP distance wise. Thus the same combos do not work, or require greater timing if going for a close attack. Very important for combos. It can anti-air, however in general not as realistic as other attacks for the same circumstance. | A 2-hit axe kick. Starts closer then close stand HP distance wise. Thus the same combos do not work, or require greater timing if going for a close attack. Very important for combos. It can anti-air, however in general not as realistic as other attacks for the same circumstance. | ||
*'''Standing (Far):''' | *'''Standing HK (Far):''' | ||
<table border="1em" cellspacing="0" style="border: 1px solid #999;"> | <table border="1em" cellspacing="0" style="border: 1px solid #999;"> | ||
<tr> <td align="center" width="91">Damage</td> | <tr> <td align="center" width="91">Damage</td> | ||
| Line 383: | Line 382: | ||
<td align="center" bgcolor="#1E90FF">yes</td></tr> | <td align="center" bgcolor="#1E90FF">yes</td></tr> | ||
<tr> <td align="center">On hit</td> | <tr> <td align="center">On hit</td> | ||
<td align="center" bgcolor="# | <td align="center" bgcolor="#7D0000">-1</td></tr> | ||
<tr> <td align="center">On block</td> | <tr> <td align="center">On block</td> | ||
<td align="center" bgcolor="# | <td align="center" bgcolor="#7D0000">-6</td></tr> | ||
<tr> <td align="center" colspan="2">Frame count</td> | <tr> <td align="center" colspan="2">Frame count</td> | ||
<td align="center">6</td> | <td align="center">6</td> | ||
<td align="center" bgcolor="# | <td align="center" bgcolor="#00007D">5</td> | ||
<td align="center" colspan="2">(6) 17</td></tr> | <td align="center" colspan="2">(6) 17</td></tr> | ||
</table> | </table> | ||
An anti-air. Unfortunately stand HP actually works better then it in most realistic situations where you would use it. So it's use is a more minimal/specific counter. | An anti-air. Unfortunately stand HP actually works better then it in most realistic situations where you would use it. So it's use is a more minimal/specific counter. | ||
*'''Crouching:''' | *'''Crouching HK:''' | ||
<table border="1em" cellspacing="0" style="border: 1px solid #999;"> | <table border="1em" cellspacing="0" style="border: 1px solid #999;"> | ||
<tr> <td align="center" width="91">Damage</td> | <tr> <td align="center" width="91">Damage</td> | ||
| Line 405: | Line 404: | ||
<td align="center" bgcolor="#1E90FF">yes</td></tr> | <td align="center" bgcolor="#1E90FF">yes</td></tr> | ||
<tr> <td align="center">On hit</td> | <tr> <td align="center">On hit</td> | ||
<td align="center" bgcolor="# | <td align="center" bgcolor="#007D00">kd</td></tr> | ||
<tr> <td align="center">On block</td> | <tr> <td align="center">On block</td> | ||
<td align="center" bgcolor="# | <td align="center" bgcolor="#7D0000">-8</td></tr> | ||
<tr> <td align="center" colspan="2">Frame count</td> | <tr> <td align="center" colspan="2">Frame count</td> | ||
<td align="center">4</td> | <td align="center">4</td> | ||
<td align="center" bgcolor="# | <td align="center" bgcolor="#00007D">6</td> | ||
<td align="center">18</td></tr> | <td align="center">18</td></tr> | ||
</table> | </table> | ||
A sweep. Deceptively long range. Remember that in FHD as long as the move is out, it can be canceled. | A sweep. Deceptively long range. Remember that in FHD as long as the move is out, it can be canceled. | ||
*'''Jumping (Diagonal):''' | *'''Jumping HK (Diagonal):''' | ||
<table border="1em" cellspacing="0" style="border: 1px solid #999;"> | <table border="1em" cellspacing="0" style="border: 1px solid #999;"> | ||
<tr> <td align="center" width="91">Damage</td> | <tr> <td align="center" width="91">Damage</td> | ||
| Line 428: | Line 427: | ||
<tr> <td align="center" colspan="2">Frame count</td> | <tr> <td align="center" colspan="2">Frame count</td> | ||
<td align="center">4</td> | <td align="center">4</td> | ||
<td align="center" bgcolor="# | <td align="center" bgcolor="#00007D">6</td> | ||
<td align="center">∞</td></tr> | <td align="center">∞</td></tr> | ||
</table> | </table> | ||
It may cross up. However jump LK in general does the job better. Main use for crossing up would be to throw the opponent off with the diff stun times between the 2 attacks, and when going for ambiguous cross up. Where as doing the HK will cross up but keep you in the front, and the lk will cross up, and cross up. | It may cross up. However jump LK in general does the job better. Main use for crossing up would be to throw the opponent off with the diff stun times between the 2 attacks, and when going for ambiguous cross up. Where as doing the HK will cross up but keep you in the front, and the lk will cross up, and cross up. | ||
*'''Jumping (Neutral):''' | *'''Jumping HK (Neutral):''' | ||
<table border="1em" cellspacing="0" style="border: 1px solid #999;"> | <table border="1em" cellspacing="0" style="border: 1px solid #999;"> | ||
<tr> <td align="center" width="91">Damage</td> | <tr> <td align="center" width="91">Damage</td> | ||
| Line 448: | Line 447: | ||
<tr> <td align="center" colspan="2">Frame count</td> | <tr> <td align="center" colspan="2">Frame count</td> | ||
<td align="center">4</td> | <td align="center">4</td> | ||
<td align="center" bgcolor="# | <td align="center" bgcolor="#00007D">2</td> | ||
<td align="center">1</td> | <td align="center">1</td> | ||
<td align="center" bgcolor="# | <td align="center" bgcolor="#00007D">3</td> | ||
<td align="center">∞</td></tr> | <td align="center">∞</td></tr> | ||
</table> | </table> | ||
| Line 465: | Line 464: | ||
</table> | </table> | ||
*'''Tsukami Nage:''' [[File:B.png]]/[[File:F.png]] + [[File:Snkb.gif]] | *'''Tsukami Nage:''' [[File:B.png]]/[[File:F.png]] + [[File:Snkb.gif]] | ||
Mizoguchi choke slams the opponent into the ground. It leaves him at a good distance for many ambiguous mixups with crossups and hops with his Scissor Kicks. Unfortunately many DPs in the game are instant, so this is not as abusable as it would seem. | |||
*'''Ashi Nage:''' [[File:B.png]]/[[File:F.png]] + [[File:Snkd.gif]] | *'''Ashi Nage:''' [[File:B.png]]/[[File:F.png]] + [[File:Snkd.gif]] | ||
Mizoguchi tosses the opponent across the screen. Mizoguchi wants to stay close to the opponent most of the time, but go for it if you want to make space. | |||
Here's an interesting bug: if | Here's an interesting bug: if Player 2 Mizoguchi kick throws Zazie to the left, Zazie will end up flying into Mizoguchi from the right side and fall at point-blank range. Zazie will push Mizoguchi to the left while in the air. | ||
== Special Moves == | == Special Moves == | ||
| Line 481: | Line 480: | ||
<td align="center" width="75" rowspan="3">Recovery</td></tr> | <td align="center" width="75" rowspan="3">Recovery</td></tr> | ||
<tr> <td align="center">On hit</td> | <tr> <td align="center">On hit</td> | ||
<td align="center" bgcolor="# | <td align="center" bgcolor="#007D00">+3</td></tr> | ||
<tr> <td align="center">On block</td> | <tr> <td align="center">On block</td> | ||
<td align="center" bgcolor="# | <td align="center" bgcolor="#7D0000">-2</td></tr> | ||
<tr> <td align="center" colspan="2">Frame count</td> | <tr> <td align="center" colspan="2">Frame count</td> | ||
<td align="center">21</td> | <td align="center">21</td> | ||
<td align="center" bgcolor="# | <td align="center" bgcolor="#00007D">1</td> | ||
<td align="center">30</td></tr> | <td align="center">30</td></tr> | ||
</table> | </table> | ||
A slow start up/recovery/projectile. Mizoguchi does take a low stance during the attack which is it's biggest saving grace. | A slow start up/recovery/projectile. Mizoguchi does take a low stance during the attack which is it's biggest saving grace. | ||
*'''KoRyuuSai''' a.k.a. '''Avalanche Punch:''' [[File: | *'''KoRyuuSai''' a.k.a. '''Avalanche Punch:''' [[File:Qcd.png]] + [[File:P.png]] | ||
<table border="1em" cellspacing="0" style="border: 1px solid #999;"> | <table border="1em" cellspacing="0" style="border: 1px solid #999;"> | ||
<tr> <td align="center" width="91">Damage</td> | <tr> <td align="center" width="91">Damage</td> | ||
| Line 504: | Line 503: | ||
<td align="center" width="75" rowspan="3">Recovery</td></tr> | <td align="center" width="75" rowspan="3">Recovery</td></tr> | ||
<tr> <td align="center">On hit</td> | <tr> <td align="center">On hit</td> | ||
<td align="center" bgcolor="# | <td align="center" bgcolor="#A58700">'''Light'''<br>kd/kd/kd<br>'''Hard'''<br>-/-/kd</td></tr> | ||
<tr> <td align="center">On block</td> | <tr> <td align="center">On block</td> | ||
<td align="center" bgcolor="# | <td align="center" bgcolor="#A58700">'''Light'''<br>-7/-3/+1<br>'''Hard'''<br>-/-14/-10</td></tr> | ||
<tr> <td align="center" rowspan="2">Frame count</td> | <tr> <td align="center" rowspan="2">Frame count</td> | ||
<td align="center">Light</td> | <td align="center">Light</td> | ||
<td align="center" bgcolor="# | <td align="center" bgcolor="#007D00">2</td> | ||
<td align="center" bgcolor="# | <td align="center" bgcolor="#007D00">3</td> | ||
<td align="center" bgcolor="# | <td align="center" bgcolor="#007D00">1</td> | ||
<td align="center" bgcolor="# | <td align="center" bgcolor="#007D00">1</td> | ||
<td align="center" bgcolor="# | <td align="center" bgcolor="#00007D">2</td> | ||
<td align="center">1</td> | <td align="center">1</td> | ||
<td align="center" bgcolor="# | <td align="center" bgcolor="#00007D">4</td> | ||
<td align="center">11</td></tr> | <td align="center">11</td></tr> | ||
<tr> <td align="center">Hard</td> | <tr> <td align="center">Hard</td> | ||
<td align="center" bgcolor="# | <td align="center" bgcolor="#007D00">2</td> | ||
<td align="center" bgcolor="# | <td align="center" bgcolor="#007D00">3</td> | ||
<td align="center" bgcolor="# | <td align="center" bgcolor="#007D00">1</td> | ||
<td align="center" bgcolor="# | <td align="center" bgcolor="#007D00">1</td> | ||
<td align="center" bgcolor="# | <td align="center" bgcolor="#00007D">2</td> | ||
<td align="center">1</td> | <td align="center">1</td> | ||
<td align="center" bgcolor="# | <td align="center" bgcolor="#00007D">5</td> | ||
<td align="center">21</td></tr> | <td align="center">21</td></tr> | ||
</table> | </table> | ||
| Line 541: | Line 540: | ||
<td align="center" width="227" rowspan="3" colspan="3">Recovery:<br>(17) - LK version<br>(12) - HK version<br>(varies) - cancelled from air normal<br>Last 4 frames are landing</td></tr> | <td align="center" width="227" rowspan="3" colspan="3">Recovery:<br>(17) - LK version<br>(12) - HK version<br>(varies) - cancelled from air normal<br>Last 4 frames are landing</td></tr> | ||
<tr> <td align="center">On hit</td> | <tr> <td align="center">On hit</td> | ||
<td align="center" bgcolor="# | <td align="center" bgcolor="#A58700">'''Light'''<br>0<br>'''Hard'''<br>+3</td></tr> | ||
<tr> <td align="center">On block</td> | <tr> <td align="center">On block</td> | ||
<td align="center" bgcolor="# | <td align="center" bgcolor="#7D0000">'''Light'''<br>-5<br>'''Hard'''<br>-1</td></tr> | ||
<tr> <td align="center" colspan="2">Frame count</td> | <tr> <td align="center" colspan="2">Frame count</td> | ||
<td align="center">2</td> | <td align="center">2</td> | ||
<td align="center">6</td> | <td align="center">6</td> | ||
<td align="center">4</td> | <td align="center">4</td> | ||
<td align="center" bgcolor="# | <td align="center" bgcolor="#00007D">2</td> | ||
<td align="center">2</td> | <td align="center">2</td> | ||
<td align="center">17</td> | <td align="center">17</td> | ||
| Line 568: | Line 567: | ||
<td align="center" width="227" rowspan="3" colspan="3">Recovery:<br>(21) - LK version<br>(17) - HK version<br>(varies) - cancelled from air normal<br>Last 4 frames are landing</td></tr> | <td align="center" width="227" rowspan="3" colspan="3">Recovery:<br>(21) - LK version<br>(17) - HK version<br>(varies) - cancelled from air normal<br>Last 4 frames are landing</td></tr> | ||
<tr> <td align="center">On hit</td> | <tr> <td align="center">On hit</td> | ||
<td align="center" bgcolor="# | <td align="center" bgcolor="#007D00">'''Light'''<br>kd<br>'''Hard'''<br>kd</td></tr> | ||
<tr> <td align="center">On block</td> | <tr> <td align="center">On block</td> | ||
<td align="center" bgcolor="# | <td align="center" bgcolor="#7D0000">'''Light'''<br>-9<br>'''Hard'''<br>-5</td></tr> | ||
<tr> <td align="center" colspan="2">Frame count</td> | <tr> <td align="center" colspan="2">Frame count</td> | ||
<td align="center">8</td> | <td align="center">8</td> | ||
<td align="center" bgcolor="# | <td align="center" bgcolor="#00007D">2</td> | ||
<td align="center">2</td> | <td align="center">2</td> | ||
<td align="center">21</td> | <td align="center">21</td> | ||
| Line 591: | Line 590: | ||
<td align="center" width="75" rowspan="3">Recovery</td></tr> | <td align="center" width="75" rowspan="3">Recovery</td></tr> | ||
<tr> <td align="center">On hit</td> | <tr> <td align="center">On hit</td> | ||
<td align="center" bgcolor="# | <td align="center" bgcolor="#007D00">+14</td></tr> | ||
<tr> <td align="center">On block</td> | <tr> <td align="center">On block</td> | ||
<td align="center" bgcolor="# | <td align="center" bgcolor="#007D00">+9</td></tr> | ||
<tr> <td align="center" colspan="2">Frame count</td> | <tr> <td align="center" colspan="2">Frame count</td> | ||
<td align="center">91</td> | <td align="center">91</td> | ||
<td align="center" bgcolor="# | <td align="center" bgcolor="#00007D">1</td> | ||
<td align="center">19</td></tr> | <td align="center">19</td></tr> | ||
</table> | </table> | ||
| Line 604: | Line 603: | ||
== Hidden Move == | == Hidden Move == | ||
*'''TsuuTenSai''' a.k.a. '''"The Big Blue":''' [[File: | *'''TsuuTenSai''' a.k.a. '''"The Big Blue":''' [[File:Qcd.png]] + [[File:Snka.gif]][[File:Snkb.gif]][[File:Snkc.gif]][[File:Snkd.gif]] | ||
'''1st Part (the initial spin):''' | '''1st Part (the initial spin):''' | ||
<table border="1em" cellspacing="0" style="border: 1px solid #999;"> | <table border="1em" cellspacing="0" style="border: 1px solid #999;"> | ||
| Line 615: | Line 614: | ||
<td align="center">12</td></tr> | <td align="center">12</td></tr> | ||
<tr> <td align="center" colspan="2">Frame count</td> | <tr> <td align="center" colspan="2">Frame count</td> | ||
<td align="center" bgcolor="# | <td align="center" bgcolor="#007D00">2</td> | ||
<td align="center" bgcolor="# | <td align="center" bgcolor="#007D00">2</td> | ||
<td align="center" bgcolor="# | <td align="center" bgcolor="#007D00">3</td></tr> | ||
</table> | </table> | ||
| Line 636: | Line 635: | ||
<td align="center" width="75" rowspan="3" colspan="2">Landing</td></tr> | <td align="center" width="75" rowspan="3" colspan="2">Landing</td></tr> | ||
<tr> <td align="center">On hit</td> | <tr> <td align="center">On hit</td> | ||
<td align="center" bgcolor="# | <td align="center" bgcolor="#007D00">kd*</td></tr> | ||
<tr> <td align="center">On block</td> | <tr> <td align="center">On block</td> | ||
<td align="center" bgcolor="# | <td align="center" bgcolor="#7D0000">-30*</td></tr> | ||
<tr> <td align="center" colspan="2">Frame count</td> | <tr> <td align="center" colspan="2">Frame count</td> | ||
<td align="center" bgcolor="# | <td align="center" bgcolor="#007D00">6</td> | ||
<td align="center" bgcolor="# | <td align="center" bgcolor="#007D00">2</td> | ||
<td align="center" bgcolor="# | <td align="center" bgcolor="#007D00">1</td> | ||
<td align="center" bgcolor="# | <td align="center" bgcolor="#007D00">2</td> | ||
<td align="center" bgcolor="# | <td align="center" bgcolor="#007D00">2</td> | ||
<td align="center" bgcolor="# | <td align="center" bgcolor="#007D00">2</td> | ||
<td align="center" bgcolor="# | <td align="center" bgcolor="#007D00">1</td> | ||
<td align="center" bgcolor="# | <td align="center" bgcolor="#007D00">2</td> | ||
<td align="center" bgcolor="# | <td align="center" bgcolor="#007D00">4</td> | ||
<td align="center">31</td> | <td align="center">31</td> | ||
<td align="center">6</td></tr> | <td align="center">6</td></tr> | ||
| Line 662: | Line 661: | ||
= Combos = | = Combos = | ||
*j. | *j.HK, cr.HP xx b,db,d+HP or qcf+HK (x5) | ||
* | *cl.HP/HK xx qcf+HK (x4), b,db,d+HP or ABCD | ||
* | *cl.HP/HK xx qcf+HK (x4), cr.LK st.HP xx b,db,d+HP | ||
*qcf+ABCD, cl.HK, qcf+HK x4, etc. | |||
= Advanced Strategy = | = Advanced Strategy = | ||
| Line 705: | Line 705: | ||
*<u>7 - 3</u> | *<u>7 - 3</u> | ||
One of | One of Mizoguchi's clear cut winning matchs. Clowns only saving grace is the fact mizoguchis regular combos do not work vs him. | ||
=== Vs. Jean: === | === Vs. Jean: === | ||
| Line 711: | Line 711: | ||
*<u>3 - 7</u> | *<u>3 - 7</u> | ||
On paper the match appears quite | On paper the match appears quite lopsided. However the general idea of Mizoguchi having some situational yet damaging combos help keep him in the match. | ||
=== Vs. Ryoko: === | === Vs. Ryoko: === | ||
| Line 717: | Line 717: | ||
*<u>7 - 3</u> | *<u>7 - 3</u> | ||
Although a generally bad match for Ryoko, having some of the most realistic counters to | Although a generally bad match for Ryoko, having some of the most realistic counters to Mizoguchi's spammable moves help keep her and her player from leaving the machine before the match starts. | ||
=== Vs. Karnov: === | === Vs. Karnov: === | ||
| Line 723: | Line 723: | ||
*<u>4.5 - 5.5</u> | *<u>4.5 - 5.5</u> | ||
Ease of use is probably what keeps this match from being even. Mizoguchi has a lot of counters that if done will instantly win you the ground, however what | Ease of use is probably what keeps this match from being even. Mizoguchi has a lot of counters that if done will instantly win you the ground, however what Karnov does is easier then what you have to do to win. | ||
=== Vs. Lee: === | === Vs. Lee: === | ||
*<u>4 - 6</u> | *<u>4 - 6</u> | ||
Mizoguchi has a lot of answers to | Mizoguchi has a lot of answers to Lee. But again ease of use comes into play. Lee is also one of the characters that Mizoguchi's normal combos do not work on. | ||
=== Vs. Feilin: === | === Vs. Feilin: === | ||
| Line 735: | Line 735: | ||
=== Vs. Yungmie: === | === Vs. Yungmie: === | ||
=== Vs. Marstorius: === | === Vs. Marstorius: === | ||
*<u>7 - 3</u> | *<u>7 - 3</u> | ||
Another easy match but beware | Another easy match but beware the Power Slam. Mars has a hard time getting around you fireballs, especially the LP version. | ||
=== Vs. Matlok: === | === Vs. Matlok: === | ||
| Line 750: | Line 749: | ||
=== Vs. Mizoguchi (self): === | === Vs. Mizoguchi (self): === | ||
Most people pick | Most people pick Ray. | ||
=== Vs. Ray: === | === Vs. Ray: === | ||
Revision as of 20:25, 25 November 2021
Introduction
Mizoguchi is the 28 year old (Or whatever the current story decides to change his age to) high school student. He prefers partying to studying and is just the loudest guy you'll ever meet. Mizoguchi is NOT the main character of the game and plays the role of the reluctant "hero", as he keeps getting kidnapped and made to fight instead of moving on with his life. Despite this, he's appeared in others games like Suiko Enbu and KOF: Maximum Impact Regulation A
In the game Mizoguchi is a mid-tier character with devastating combos. Despite looking like a Ryu clone, his fireball is kinda weak and his poking game is only okay, but his light Avalance Punch can be safe on block. Get good at linking off his Scissor Kicks if you want to keep up with the top tiers - if he stuns you it can often mean death.
Weak Spot
 |
 |
 |
 | |
| Frame count | - | 2 | 2 | - |
Mizoguchi's weak point is his headband, and as an average height character it's vulnerable to some standing pokes as well as any jump-ins and crossups. Stance shifting can help him a lot.
Color Options
| Punch | Kick |
 |
 |
Moves List
Quick Reference
Normal Moves
Light Punch 
- Standing LP (Close):
| Damage | 7 | Startup |  |
Recovery |
| Chain cancel | yes | |||
| Special cancel | yes | |||
| On hit | +6 | |||
| On block | +7 | |||
| Frame count | 2 | 3 | 3 | |
Great move to demolish dizzy spots due to thick hitbox.
- Standing LP (Far):
| Damage | 7 | Startup |  |
Recovery |
| Chain cancel | yes | |||
| Special cancel | yes | |||
| On hit | +6 | |||
| On block | +7 | |||
| Frame count | 2 | 3 | 3 | |
Might be the fattest far jab in the entire game. Good for keeping the opponent far from you.
- Crouching LP:
| Damage | 7 | Startup |  |
Recovery |
| Chain cancel | yes | |||
| Special cancel | yes | |||
| On hit | +6 | |||
| On block | +7 | |||
| Frame count | 2 | 3 | 3 | |
Same as st.far but crouching and a bit less range.
- Jumping LP (Diagonal/Neutral):
| Damage | 12 | Startup |  |
| Chain cancel | no | ||
| Special cancel | yes | ||
| Frame count | 4 | ∞ | |
This one has an incredible priority. Use it a lot, it will beat a lot of air-to-air attacks. Stays out 'till you land.
Heavy Punch 
- Standing HP (Close):
| Damage | 28 | Startup |  |
 |
Recovery |
| Chain cancel | no | ||||
| Special cancel | yes | ||||
| On hit | -3 | ||||
| On block | -8 | ||||
| Frame count | 4 | 3 | 3 | 18 | |
A headbutt. Important for combos. However Ray, Lee, Feilin and Clown can duck the first hurtbox and realistically fall out of the combo. Comes out faster then stand HK.
- Standing HP (Far):
| Damage | 30 | Startup | 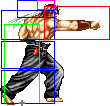 |
 |
Recovery |
| Chain cancel | no | ||||
| Special cancel | yes | ||||
| On hit | -3 | ||||
| On block | -8 | ||||
| Frame count | 4 | 6 | (6) 18 | ||
Great poke, great far anti-air. Arm becomes vulnerable only after the active frames. Think of it in terms of Ryu's stand MP/HP in old SF, or just stand fierce in Alpha 1. Differences being that in FHD normals tend to have a lot of priority compared to other fighters.
- Crouching HP:
| Damage | 30 | Startup |  |
 |
 |
Recovery |
| Chain cancel | no | |||||
| Special cancel | yes | |||||
| On hit | -3 | |||||
| On block | -8 | |||||
| Frame count | 4 | 3 | 3 | (14) 18 | ||
Your best anti-air by far. But if you'll mess up, opponent will 100% hit your dizzy spot.
- Jumping HP (Diagonal/Neutral):
| Damage | 28 | Startup | 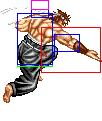 |
Recovery |
| Chain cancel | no | |||
| Special cancel | yes | |||
| Frame count | 4 | 6 | ∞ | |
Not much use compared to his other air normals, other then a specific counter to certain normals, or to hit slightly lower when aiming for a dizzy spot.
Light Kick 
- Standing LK (Close):
| Damage | 7 | Startup |  |
Recovery |
| Chain cancel | yes | |||
| Special cancel | yes | |||
| On hit | +6 | |||
| On block | +7 | |||
| Frame count | 2 | 3 | 3 | |
Good for combos, and aiming for mid to thigh range dizzy spots.
- Standing LK (Far):
| Damage | 7 | Startup | 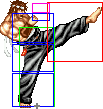 |
Recovery |
| Chain cancel | no | |||
| Special cancel | yes | |||
| On hit | +5 | |||
| On block | +6 | |||
| Frame count | 2 | 3 | 4 | |
Another decent anti-air. Good for combos, and aiming for mid dizzy spots.
- Crouching LK:
| Damage | 7 | Startup |  |
Recovery |
| Chain cancel | yes | |||
| Special cancel | yes | |||
| On hit | +6 | |||
| On block | +7 | |||
| Frame count | 2 | 3 | 3 | |
Mizo's leg is invincible, only his body can be hit. Used in the general rock scissors paper game that FHD normals go by.
- Jumping LK (Diagonal):
| Damage | 12 | Startup |  |
| Chain cancel | no | ||
| Special cancel | yes | ||
| Frame count | 4 | ∞ | |
A crossup. Priority is similar to jump punch, comes out faster then lp, but at a lower angle then it. Thus it loses the air to air battle use that the jump punch also doubles as.
- Jumping LK (Neutral):
| Damage | 12 | Startup |  |
| Chain cancel | no | ||
| Special cancel | yes | ||
| Frame count | 4 | ∞ | |
Long standing air to air attack. Deceptive hitbox.
Heavy Kick 
- Standing HK (Close):
| Damage | 28 total | Startup |  |
 |
Recovery | |
| Chain cancel | no/no | |||||
| Special cancel | yes/yes | |||||
| On hit | -/0 | |||||
| On block | -/-5 | |||||
| Frame count | 4 | 2 | 1 | 3 | 18 | |
A 2-hit axe kick. Starts closer then close stand HP distance wise. Thus the same combos do not work, or require greater timing if going for a close attack. Very important for combos. It can anti-air, however in general not as realistic as other attacks for the same circumstance.
- Standing HK (Far):
| Damage | 28 | Startup | 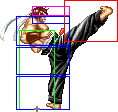 |
 |
Recovery |
| Chain cancel | no | ||||
| Special cancel | yes | ||||
| On hit | -1 | ||||
| On block | -6 | ||||
| Frame count | 6 | 5 | (6) 17 | ||
An anti-air. Unfortunately stand HP actually works better then it in most realistic situations where you would use it. So it's use is a more minimal/specific counter.
- Crouching HK:
| Damage | 28 | Startup |  |
Recovery |
| Chain cancel | no | |||
| Special cancel | yes | |||
| On hit | kd | |||
| On block | -8 | |||
| Frame count | 4 | 6 | 18 | |
A sweep. Deceptively long range. Remember that in FHD as long as the move is out, it can be canceled.
- Jumping HK (Diagonal):
| Damage | 28 | Startup | 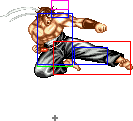 |
Recovery |
| Chain cancel | no | |||
| Special cancel | yes | |||
| Frame count | 4 | 6 | ∞ | |
It may cross up. However jump LK in general does the job better. Main use for crossing up would be to throw the opponent off with the diff stun times between the 2 attacks, and when going for ambiguous cross up. Where as doing the HK will cross up but keep you in the front, and the lk will cross up, and cross up.
- Jumping HK (Neutral):
| Damage | 28 total | Startup |  |
 |
Recovery | |
| Chain cancel | no/no | |||||
| Special cancel | yes/yes | |||||
| Frame count | 4 | 2 | 1 | 3 | ∞ | |
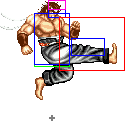
Aerial axe kick. Can't really say anything about it.
Throws
| Damage | 32 |  |
| 28 | ||
| Range (From pushbox) |
32 |
Mizoguchi choke slams the opponent into the ground. It leaves him at a good distance for many ambiguous mixups with crossups and hops with his Scissor Kicks. Unfortunately many DPs in the game are instant, so this is not as abusable as it would seem.
Mizoguchi tosses the opponent across the screen. Mizoguchi wants to stay close to the opponent most of the time, but go for it if you want to make space.
Here's an interesting bug: if Player 2 Mizoguchi kick throws Zazie to the left, Zazie will end up flying into Mizoguchi from the right side and fall at point-blank range. Zazie will push Mizoguchi to the left while in the air.
Special Moves
| Damage | 16 | Startup |  |
Recovery |
| On hit | +3 | |||
| On block | -2 | |||
| Frame count | 21 | 1 | 30 | |
A slow start up/recovery/projectile. Mizoguchi does take a low stance during the attack which is it's biggest saving grace.
| Damage | Light 24 Hard 48 total |
 |
 |
 |
 |
 |
 |
Recovery | |
| On hit | Light kd/kd/kd Hard -/-/kd | ||||||||
| On block | Light -7/-3/+1 Hard -/-14/-10 | ||||||||
| Frame count | Light | 2 | 3 | 1 | 1 | 2 | 1 | 4 | 11 |
| Hard | 2 | 3 | 1 | 1 | 2 | 1 | 5 | 21 |
A 3-hit quick rushing elbow, your main reversal and optional anti-air. 1,5 out of 3 hits are invincible. The 1st hit always connects with the 2nd, but the 2nd not connects with the 3rd if opponent is far enough. However it is fast, and the LP version is awkward to punish and spammable. But it doesn't have enough invincibility to beat any other said DP-ish attack if done at the same time. The HP version is good for combos.
1st Part (initial kicks):
2nd Part (final kick):
| Damage | 24* | 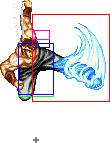 |
 |
Recovery: (21) - LK version (17) - HK version (varies) - cancelled from air normal Last 4 frames are landing | |||
| On hit | Light kd Hard kd | ||||||
| On block | Light -9 Hard -5 | ||||||
| Frame count | 8 | 2 | 2 | 21 | 17 | varies | |
*If comboed from the previous hit
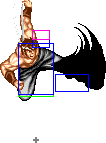
Mizo performs a flurry of flying kicks while advancing forward. On hit you can combo into them, but better use HK version for it. On block the first four hits leave you at a slight disadvantage though in general not enough for you to actually be punished. Which then lends it self to rock paper scissors type mixups. The last hit has more recovery and is punishable more realistically. Good for chipping damage. Useful for ambiguous cross ups as a stand alone move after a knock down. LK version goes over fireballs and can be used to try to slowly gain distance, or to hop over an opponent. The air version can only be done if an air attack has hit the opponent and is still in stun, and your still in the attack animation of said attack. Comparing it to how most every other special attack in FHD works, its priority is negligible, however it does go over lows. Though even that is a bit slower than it "looks".
| Damage | 80 | Startup |  |
Recovery |
| On hit | +14 | |||
| On block | +9 | |||
| Frame count | 91 | 1 | 19 | |
Beefed-up version of Tiger Bazooka. If you thought startup of the normal fireball was long, so this one charges up for roughly 1,5 seconds. That's abysmal. And if you somehow manage to at least unleash it, opponent will be ready to block it. What a trash.
The only real way to land it is to cancel into it right after you dizzied an opponent. But do you really want to use it if you can do one of your powerful combos that may deal greater damage? Maybe, if projectile will hit an exposed weak spot for additional damage.
Hidden Move
1st Part (the initial spin):
| Damage | Grab version 86 total |
 |
 |
 |
| Range (from pushbox to hitbox end) |
12 | |||
| Frame count | 2 | 2 | 3 | |
2nd Part (the uppercut):
| Damage | Normal version (first 3 hits) 39 total |
 |
 |
 |
 |
 |
 |
 |
 |
 |
Recovery | Landing | |
| On hit | kd* | ||||||||||||
| On block | -30* | ||||||||||||
| Frame count | 6 | 2 | 1 | 2 | 2 | 2 | 1 | 2 | 4 | 31 | 6 | ||
*Frame advantage is measured from the third hit
The almighty elbow uppercut also known as "The Big Blue". In general there are 2 versions of the move. If the first spin hits, Mizoguchi rises into the air with a Shinryuken-ish attack that deals around 35%-40% damage. If the first hit misses, Mizo does a small rush forward with an elbow DP for 3 hits. This version of the move is completely invincible (besides throws) 'till Mizoguchi starts to fall. Unfortunately it's duckable by everyone in the game except Jean, Zazie and Mastourious.
However I said IN GENERAL. There are also a couple of other versions you can get. One is a four hit version of the same move. And another is a spin, that will then "teleport" next to the opponent and then go into the Shinryuken-ish version of said move.
The Basics
Makoto Mizoguchi its a basic shoto balanced special character focused in low rushdown, his powered up specials are useful in resets and post stun stuff but can be countered easily.
Combos
- j.HK, cr.HP xx b,db,d+HP or qcf+HK (x5)
- cl.HP/HK xx qcf+HK (x4), b,db,d+HP or ABCD
- cl.HP/HK xx qcf+HK (x4), cr.LK st.HP xx b,db,d+HP
- qcf+ABCD, cl.HK, qcf+HK x4, etc.
Advanced Strategy
Match-ups
| Ray | Lee | Zaz | Kar | Jea | Miz | Sam | Yun | Mat | Clo | Fei | Mar | Ryo | |
| Mizoguchi | 4 | 4 | 3 | 4.5 | 3 | - | 5 | - | 7 | 7 | - | 7 | 7 |
Vs. Clown:
- 7 - 3
One of Mizoguchi's clear cut winning matchs. Clowns only saving grace is the fact mizoguchis regular combos do not work vs him.
Vs. Jean:
- 3 - 7
On paper the match appears quite lopsided. However the general idea of Mizoguchi having some situational yet damaging combos help keep him in the match.
Vs. Ryoko:
- 7 - 3
Although a generally bad match for Ryoko, having some of the most realistic counters to Mizoguchi's spammable moves help keep her and her player from leaving the machine before the match starts.
Vs. Karnov:
- 4.5 - 5.5
Ease of use is probably what keeps this match from being even. Mizoguchi has a lot of counters that if done will instantly win you the ground, however what Karnov does is easier then what you have to do to win.
Vs. Lee:
- 4 - 6
Mizoguchi has a lot of answers to Lee. But again ease of use comes into play. Lee is also one of the characters that Mizoguchi's normal combos do not work on.
Vs. Feilin:
Another balanced match, she is better than Mizoguchi in air to air
Vs. Yungmie:
Vs. Marstorius:
- 7 - 3
Another easy match but beware the Power Slam. Mars has a hard time getting around you fireballs, especially the LP version.
Vs. Matlok:
- 7 - 3
Another easy match of a shotokan vs a turtler, but Overhead Kick can be a good counter agaisnt your Tiger Shot
Vs. Mizoguchi (self):
Most people pick Ray.
Vs. Ray:
- 4 - 6
A bit unfair matchup, use your SRK instead of your Tiger Fire.
Vs. Samchay:
- 5 - 5
Fair matchup, try to counter Knees with your kicks series or wait if he whips a tikakou
Vs. Zazie:
- 3 - 7
A bad match. A lot of your counters to his patters are high risk and low reward.

