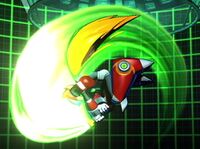
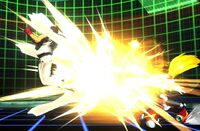
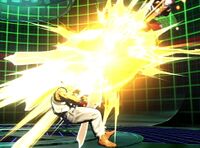
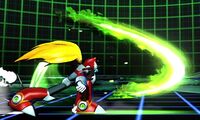
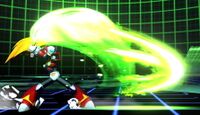
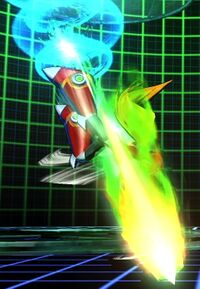
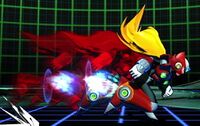
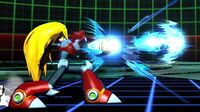
(Added pictures to all normals and throws and gave basic descriptions for normals. Also fixed some small errors.) |
(→Special Moves: Added pictures and notes for all specials) |
||
| Line 286: | Line 286: | ||
{{UMvC3MoveListRow2.1 | {{UMvC3MoveListRow2.1 | ||
|photo= | |photo=[[File:UMvC3Zero236LM.jpg|200px]]<br>{{l}} / {{m}} | ||
[[File:UMvC3Zero236H.jpg|200px]]<br>{{h}} | |||
|name=Hadangeki | |name=Hadangeki | ||
|command=qcf + atk | |command={{qcf}} + {{atk}} | ||
|ldamage=70,000 | |ldamage=70,000 | ||
|lguard=- | |lguard=- | ||
| Line 310: | Line 311: | ||
|hhit=-7 | |hhit=-7 | ||
|hblock=-8 | |hblock=-8 | ||
|properties= Each projectile has 2 {{low}} priority durability points | |properties= {{proj}} <br> Each projectile has 2 {{low}} priority durability points | ||
|notes= | |notes=Zero's projectile. The {{l}} and {{m}} versions are have very similar animations, but the {{m}} projectile travels much faster. While the {{l}} version technically has less recovery than {{m}}, it also has more startup, so they end up being about the same speed. The {{h}} version instead has higher startup ''and'' recovery, as well as a slower projectile than {{m}}, but in return it gains higher damage, an additional hit, and higher priority. | ||
}} | }} | ||
{{UMvC3MoveListRow2.1 | {{UMvC3MoveListRow2.1 | ||
|photo= | |photo=[[File:UMvC3Zero623X.jpg|200px]] | ||
|name= | |name=Ryuenjin | ||
|command=dp + atk | |command={{dp}} + {{atk}} | ||
|ldamage=70,000 | |ldamage=70,000 | ||
|lguard=- | |lguard=- | ||
| Line 341: | Line 342: | ||
|hblock=-16 | |hblock=-16 | ||
|properties= {{strk}} | |properties= {{strk}} | ||
|notes= | |notes= Zero's DP. | ||
}} | }} | ||
{{UMvC3MoveListRow2.1 | {{UMvC3MoveListRow2.1 | ||
|photo= | |photo=[[File:UMvC3Zeroj623X.jpg|200px]] | ||
|name=Raikousen | |name=Raikousen | ||
|command= air {{dp}} + atk | |command= In air, {{dp}} + {{atk}} | ||
|ldamage=25,000 X 5 | |ldamage=25,000 X 5 | ||
(102,300) | (102,300) | ||
| Line 374: | Line 375: | ||
|hblock=-15 | |hblock=-15 | ||
|properties={{stagger}} [[File:truesoftknockdown.png]] against <br> airborne opponents | |properties={{stagger}} [[File:truesoftknockdown.png]] against <br> airborne opponents | ||
|notes= | |notes= Zero's legendary lightning attack. Zero pauses for a moment, then charges in a direction, followed by a trail of lightning completely covering the distance he traveled. {{l}} version goes diagonally downwards, {{m}} version goes straight forward, and {{h}} version goes diagonally upwards. | ||
}} | }} | ||
{{UMvC3MoveListRow2.1 | {{UMvC3MoveListRow2.1 | ||
|photo= | |photo=[[File:UMvC3Zeroj236X.jpg|200px]] | ||
|name=Sentsuizan | |name=Sentsuizan | ||
|command=air {{qcf}} + atk | |command= In air, {{qcf}} + {{atk}} | ||
|ldamage=- | |ldamage=- | ||
|lguard=- | |lguard=- | ||
| Line 397: | Line 398: | ||
|hguard=- | |hguard=- | ||
|hstartup=18 | |hstartup=18 | ||
|hactive= | |hactive=until grounded | ||
|hrecovery=10 | |hrecovery=10 | ||
|hhit=+9 | |hhit=+9 | ||
|hblock=+8 | |hblock=+8 | ||
|properties= | |properties={{otg}} {{aircombofinisher}} | ||
|notes= Zero's divekick. The {{l}} version is just a fake out, and the {{m}} and {{h}} versions make for a fairly standard divekick, with {{m}} going at a steeper angle, while {{h}} has a wider angle and a bit more delay. An important part of this move is its {{otg}} property, which, when combined with level 3 buster, makes up a big part of Zero's combo game, allowing him to pick up an opponent after an {{aircombofinisher}} or {{hardknockdown}} without any help and go into his most devastating combos. | |||
}} | }} | ||
{{UMvC3MoveListRow2.1 | {{UMvC3MoveListRow2.1 | ||
|photo= | |photo=[[File:UMvC3Zero214X.jpg|200px]] | ||
|name=Hienkyaku | |name=Hienkyaku | ||
|command= {{qcb}} + atk | |command= {{qcb}} + {{atk}} | ||
|ldamage=- | |ldamage=- | ||
|lguard=- | |lguard=- | ||
| Line 429: | Line 430: | ||
|hhit= | |hhit= | ||
|hblock= | |hblock= | ||
|properties= | |properties= | ||
|notes= The grounded version of Zero's pseudo teleport dash. The {{l}} and {{m}} versions both travel along the ground, but the {{l}} version is much shorter. The {{h}} version goes upwards, but very slightly diagonally, just enough to cross over the opponent, followed by him dropping straight down. Zero can do any attack during this fall and can even air dash or call assists. All versions can steal the corner from the opponent, but no version has any invulnerablity whatsoever. | |||
}} | }} | ||
{{UMvC3MoveListRow2.1 | {{UMvC3MoveListRow2.1 | ||
|photo= | |photo=[[File:UMvC3Zeroj214X.jpg|200px]] | ||
|name= | |name=Air Hienkyaku | ||
|command= air {{qcb}} + atk | |command= In air, {{qcb}} + {{atk}} | ||
|ldamage=- | |ldamage=- | ||
|lguard=- | |lguard=- | ||
| Line 457: | Line 458: | ||
|hhit= | |hhit= | ||
|hblock= | |hblock= | ||
|properties= | |properties= | ||
|notes= The aerial version of Zero's pseudo teleport dash. The {{l}} version goes straight down giving Zero what is basically a fast fall. The {{m}} version goes straight forward and can steal the corner from the opponent. The {{h}} version goes diagonally upwards at the same angle as the grounded {{h}} version, and can also steal the corner from the opponent. Zero can also act after completing the {{m}} or {{h}} version dashes. | |||
}} | }} | ||
{{UMvC3MoveListRow2.1 | {{UMvC3MoveListRow2.1 | ||
|photo= | |photo=[[File:UMvC3ZeroBusterLevel1.jpg|200px]]<br>Level 1 | ||
[[File:UMvC3ZeroBusterLevel2.jpg|200px]]<br>Level 2 | |||
[[File:UMvC3ZeroBusterLevel3.jpg|200px]]<br>Level 3 | |||
|name=Hyper Zero Blaster | |name=Hyper Zero Blaster | ||
|command= | |command= Hold {{atk}} | ||
|ldamage=40,000 | |ldamage=40,000 | ||
|lguard=- | |lguard=- | ||
| Line 487: | Line 490: | ||
|properties= Level 1 Requires 30 frames of charging, 2 {{low}} priority durability points. | |properties= Level 1 Requires 30 frames of charging, 2 {{low}} priority durability points. | ||
Level 2 requires 70 frames, 4 {{low}} priority durability points. <br> Level 3 requires 150 frames, [[File:truesoftknockdown.png]], can {{cancel}} from any special move, beam durability | Level 2 requires 70 frames, 4 {{low}} priority durability points. <br> Level 3 requires 150 frames, [[File:truesoftknockdown.png]], can {{cancel}} from any special move, beam durability | ||
|notes= | |notes= Zero's Buster shot. Holding down any button (except {{s}}) will start charging the Buster and has three levels (see properties for exact times for each level). To use it, release all held buttons. You can switch the button being held and keep your charge - for example, if you start your charge by holding {{l}}, but switch to holding {{h}}, Zero won't fire the Buster. You can also attack while charging. Level 3 is the star of the show, as Zero can cancel into it from any special for free, so long as he has the level 3 shot available. | ||
}} | }} | ||
Revision as of 04:09, 7 January 2021


Zero
Zero is a Maverick Hunter from the future, tasked with hunting down rebel robots and defending those around him. Armed with his Z-Saber and Buster arm, he is renowned as one of the finest robot soldiers ever produced.
Interestingly enough, however, he was originally created by one of the greatest villains his world had ever seen - Dr. Wily - after accidentally creating a strong, but unruly, prototype robot named Bass.
In a nutshell
Zero is a character for any given situation - other than survival. He has an excellent rushdown game with large, multi-hitting normals, a strong zoning game, incredible agility, and extremely long combos that can deal massive damage. Best played with an assist (either for keeping him safe, or extending combos), you should always play Zero either first or second on a team, to build meter and weaken the opponent until your next character can clean up any mess Zero leaves behind. Just keep in mind his ![]() health, and all tools available to him, and Zero is a robotic force to be reckoned with.
health, and all tools available to him, and Zero is a robotic force to be reckoned with.
Alternate Colors
Players to Watch
EMP|Flocker, Cloud805, Killer Kai, Flux, Windzero, Mihe, Marn, Bubblan
Character Vitals
Video Walkthrough
rehab guide by finger cramp -- old
Technology
Zero Throw conversions with Bolts and Jam Session
Hard Tag from Doom to Lightning Loop
Strider hard tag to Lightning Loop
Combos
BnB with Missiles and Jam Session
anchor zero
Team Concepts
Move List
Assist Types
Normal Moves
| Standing |
Damage | Guard | Startup | Active | Recovery | On Hit | On Block | Properties |
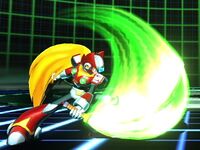
|
35,000 | - | 5 | 3 | 12 | -1 | -3 | |
| Zero does a quick swipe with his saber. | ||||||||
| Standing |
Damage | Guard | Startup | Active | Recovery | On Hit | On Block | Properties |
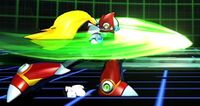
|
53,000 | - | 7 | 3 | 19 | -4 | -5 | |
| Zero does a horizontal slice. Moves him forward slightly. | ||||||||
| Standing |
Damage | Guard | Startup | Active | Recovery | On Hit | On Block | Properties |
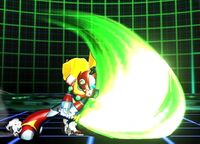
|
64,200 | - | 11 | 10 | 16 | +1 | 0 | |
| Zero grabs his saber with both hands and slashes down. Moves forward some just before the attack. | ||||||||
| Shippuga |
Damage | Guard | Startup | Active | Recovery | On Hit | On Block | Properties |
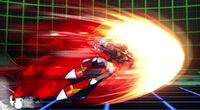
|
77,100 | - | 14 | 7 | 17 | +5 | +4 | |
| Zero dashes forward while swinging his saber. | ||||||||
| Crouching |
Damage | Guard | Startup | Active | Recovery | On Hit | On Block | Properties |
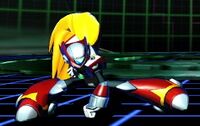
|
30,000 | 4 | 2 | 11 | 0 | -1 | ||
| Zero does a low kick. | ||||||||
| Crouching |
Damage | Guard | Startup | Active | Recovery | On Hit | On Block | Properties |
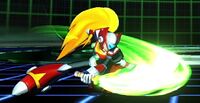
|
56,000 | 8 | 3 | 20 | -5 | -6 | ||
| Zero slashes low to the ground. | ||||||||
| Crouching |
Damage | Guard | Startup | Active | Recovery | On Hit | On Block | Properties |
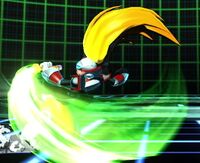
|
70,000 | - | 13 | 5 | 18 | - | -1 | |
| Zero spins forward with his saber. | ||||||||
| Standing |
Damage | Guard | Startup | Active | Recovery | On Hit | On Block | Properties |
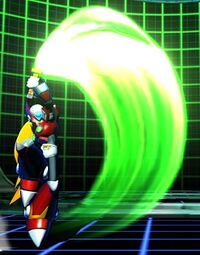
|
80,000 | - | 9 | 5 | 22 | - | -5 | |
| Zero slashes upward. Fairly standard launcher. | ||||||||
| Jumping In air, |
Damage | Guard | Startup | Active | Recovery | On Hit | On Block | Properties |
|
33,000 | 5 | 3 | 12 | - | - | ||
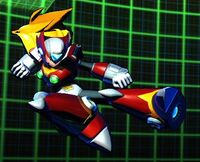
| Zero kicks out into the air. | ||||||||
| Jumping In air, |
Damage | Guard | Startup | Active | Recovery | On Hit | On Block | Properties |
|
55,000 | 8 | 3 | 19 | - | - | ||
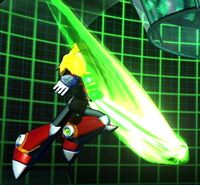
| Zero slashes diagonally downwards in front of him. | ||||||||
| Jumping In air, |
Damage | Guard | Startup | Active | Recovery | On Hit | On Block | Properties |
|
64,200 | 10 | 18 | 15 | - | - | ||
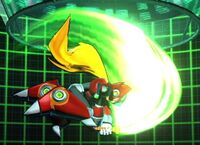
| Zero spins clockwise with his saber. | ||||||||
| Jumping In air, |
Damage | Guard | Startup | Active | Recovery | On Hit | On Block | Properties |
|
75,000 | 13 | 9 | 17 | - | - | ||
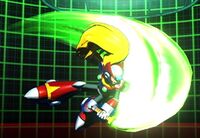
| Zero slashes forward in air. Standard air combo finisher. | ||||||||
Throws
| Ground Throw (near opponent) |
Damage | Guard | Startup | Active | Recovery | On Hit | On Block | Properties |
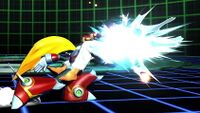
|
80,000 | 1 | 1 | - | - | - | ||
| Air Throw (near opponent) In air, |
Damage | Guard | Startup | Active | Recovery | On Hit | On Block | Properties |
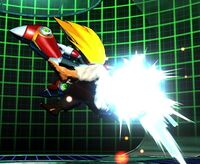
|
80,000 | 1 | 1 | - | - | - | ||
Special Moves
| Ryuenjin |
Version | Damage | Guard | Startup | Active | Recovery | On Hit | On Block | Properties |
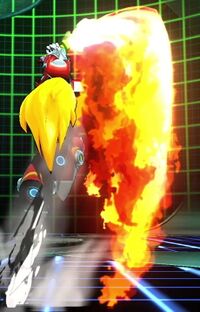
|
70,000 | - | 5 | 9 | 24 | -10 | -11 | ||
| 30,000 X 3
(81,200)0 |
- | 5 | 25 | 21 | -7 | -6 | |||
| 25,000 X 5
(102,300) |
- | 5 | 25 | 21 | -7 | -16 | |||
| Zero's DP. | |||||||||
Hyper Moves
| rekkoha qcf + |
Damage | Guard | Startup | Active | Recovery | On Hit | On Block | Properties |
| 15,000 X 30 (269,300) | - | 16+10 | 80 | 29 | +1 | -14 | Template:OTG | |
| Sougenmu qcb + |
Damage | Guard | Startup | Active | Recovery | On Hit | On Block | Properties |
| - | 10+1 | 1 | - | |||||
| Creates a shadow clone Zero that duplicates all actions after zero, hitting 16 frames later. Lasts 300 frames/5 seconds. Zero does not gain meter while active. Using any hyper combo causes it to disappear | ||||||||
| Genmu Zero dp + |
Damage | Guard | Startup | Active | Recovery | On Hit | On Block | Properties |
| 350,000 | - | 10+1 | 57 | - | ||||
| level 3 hyper. Invincible frames 1-24. 100 | ||||||||
Mission Mode
Strategy
Tips and Tricks
- Zero can cancel any of his special moves into a release Mega Buster Shot (level 3). Use this to make several moves safe, to greatly extend combos, deal massive damage, or even set up some terrifying mixups. One of the best moves for this is Raikousen, as the lightning bolt trail activates either way, allowing you to combine both moves for heavy damage and soft knockdowns, or as a mixup / chip damage tool by using the Raikousen M, release Mega Buster Shot, and then immediately using Raikousen L, covering all escape routes, and allowing a combo on hit!
- Air
 is one of Zero's best tools. Its speed and massive hitbox make it virutally impossible to throw, its hitstun makes it very difficult to punish, and with it being a multi-hitting overhead, it makes for excellent mixups. Most of your approaches will probably involve the use of this move.
 - Keep in mind that Zero's air
 has the
  property. This means that during an air combo, if you use air
  , you have to link your special move, you can't just do it after a hit or two. This means that spacing and timing Zero's basic air combos is slightly more strict than other characters.
- The exception to this
 is
is  - this still chains as usual.
- The exception to this
- Rekkoha has a lot of startup time. Keep this in mind when using it as an OTG Hyper after an air combo, as without proper timing, the opponent will roll out of it, and be able to punish you.
- Due to Rekkoha's startup time, never use it outside of a combo or DHC - it can easily be punished before the rainbow lasers come out, even with a simple throw.
Combos
Basic Strategy
Advanced Strategy
Strategy vs. Zero
Other Useful Zero Links
Zero Crossover Counter usage:
http://shoryuken.com/2011/12/21/umvc3-new-zero-technology/
