m (→Throws) |
m (fix motion tags) |
||
| Line 6: | Line 6: | ||
==Normal Moves== | ==Normal Moves== | ||
{{PJMoveListHeader}} | {{PJMoveListHeader}} | ||
{{PJMoveListRow | Standing Light Punch | n lp | 8 | 15 | +2 | +9 | 7 | All | }} | {{PJMoveListRow | Standing Light Punch | {{n}} {{lp}} | 8 | 15 | +2 | +9 | 7 | All | }} | ||
{{PJMoveListRow | Standing Strong Punch | n hp | 11 | 29 | +7 | -4 | 13 | All | }} | {{PJMoveListRow | Standing Strong Punch | {{n}} {{hp}} | 11 | 29 | +7 | -4 | 13 | All | }} | ||
{{PJMoveListRow | Crouching Light Punch | d lp | 8 | 21 | -2 | +1 | 7 | Crouching | }} | {{PJMoveListRow | Crouching Light Punch | {{d}} {{lp}} | 8 | 21 | -2 | +1 | 7 | Crouching | }} | ||
{{PJMoveListRow | Crouching Strong Punch | d hp | 13 | 37 | - | -15 | 17 | Crouching | Mini launcher | }} | {{PJMoveListRow | Crouching Strong Punch | {{d}} {{hp}} | 13 | 37 | - | -15 | 17 | Crouching | Mini launcher | }} | ||
{{PJMoveListRow | Standing Light Kick | n lk | 11 | 25 | -7 | -4 | 4 | All | }} | {{PJMoveListRow | Standing Light Kick | {{n}} {{lk}} | 11 | 25 | -7 | -4 | 4 | All | }} | ||
{{PJMoveListRow | Standing Strong Kick | n hk | 16 | 49 | -6 | -25 | 11 | All | }} | {{PJMoveListRow | Standing Strong Kick | {{n}} {{hk}} | 16 | 49 | -6 | -25 | 11 | All | }} | ||
{{PJMoveListRow | Crouching Light Kick | d lk | 9 | 18 | +7 | +4 | 5 | Crouching | }} | {{PJMoveListRow | Crouching Light Kick | {{d}} {{lk}} | 9 | 18 | +7 | +4 | 5 | Crouching | }} | ||
{{PJMoveListRow | Crouching Strong Kick | d hk | 14 | 29 | +2 | -7 | 13 | Crouching | }} | {{PJMoveListRow | Crouching Strong Kick | {{d}} {{hk}} | 14 | 29 | +2 | -7 | 13 | Crouching | }} | ||
{{PJMoveListRow | Jumping Light Punch | u lp | 9 | 1 | - | - | 5 | Standing | Recovery on landing | }} | {{PJMoveListRow | Jumping Light Punch | {{u}} {{lp}} | 9 | 1 | - | - | 5 | Standing | Recovery on landing | }} | ||
{{PJMoveListRow | Jumping Strong Punch | u hp | 12 | 1 | - | - | 13 | Standing | Recovery on landing | }} | {{PJMoveListRow | Jumping Strong Punch | {{u}} {{hp}} | 12 | 1 | - | - | 13 | Standing | Recovery on landing | }} | ||
{{PJMoveListRow | Jumping Light Kick | u lk | 13 | 1 | - | - | 5 | Standing | Recovery on landing | }} | {{PJMoveListRow | Jumping Light Kick | {{u}} {{lk}} | 13 | 1 | - | - | 5 | Standing | Recovery on landing | }} | ||
{{PJMoveListRow | Jumping Strong Kick | u hk | 17 | 1 | - | - | 13 | Standing | Recovery on landing | }} | {{PJMoveListRow | Jumping Strong Kick | {{u}} {{hk}} | 17 | 1 | - | - | 13 | Standing | Recovery on landing | }} | ||
{{MoveListFooter}} | {{MoveListFooter}} | ||
==Command Normals== | ==Command Normals== | ||
{{PJMoveListHeader}} | {{PJMoveListHeader}} | ||
{{PJMoveListRow | Roy Straight | lp lp lp | 12 | 38 | +2 | -14 | 10 | All | }} | {{PJMoveListRow | Roy Straight | {{lp}} lp {{lp}} | 12 | 38 | +2 | -14 | 10 | All | }} | ||
{{PJMoveListRow | Boomerang Hook | f hp | 13 | 30 | +2 | - | 14 | All | }} | {{PJMoveListRow | Boomerang Hook | {{f}} {{hp}} | 13 | 30 | +2 | - | 14 | All | }} | ||
{{PJMoveListRow | Body Upper | --- f hp | 17 | 34 | - | -10 | 19 | All | Blowback | }} | {{PJMoveListRow | Body Upper | {{---}} {{f}} {{hp}} | 17 | 34 | - | -10 | 19 | All | Blowback | }} | ||
{{PJMoveListRow | Spinning Back Knuckle | --- b hp | 17 | 34 | - | -10 | 19 | All | Blowback | }} | {{PJMoveListRow | Spinning Back Knuckle | {{---}} {{b}} {{hp}} | 17 | 34 | - | -10 | 19 | All | Blowback | }} | ||
{{PJMoveListRow | Foot Blade | f hk | 20 | 38 | - | -14 | 19 | All | Blowback | }} | {{PJMoveListRow | Foot Blade | {{f}} {{hk}} | 20 | 38 | - | -14 | 19 | All | Blowback | }} | ||
{{PJMoveListRow | Head Crush | b hp | 21 | 38 | - | -14 | 19 | Standing | Overhead, blowback | }} | {{PJMoveListRow | Head Crush | {{b}} {{hp}} | 21 | 38 | - | -14 | 19 | Standing | Overhead, blowback | }} | ||
{{PJMoveListRow | Backflip Kick | b hk | 15 | 24 | - | 0 | 14 | All | Blowback | }} | {{PJMoveListRow | Backflip Kick | {{b}} {{hk}} | 15 | 24 | - | 0 | 14 | All | Blowback | }} | ||
{{PJMoveListRow | Lift Upper | df hp | 17 | 39 | - | -15 | 13 | All | Rival Launcher | }} | {{PJMoveListRow | Lift Upper | {{df}} {{hp}} | 17 | 39 | - | -15 | 13 | All | Rival Launcher | }} | ||
{{PJMoveListRow | Jumping Back Knuckle | (air) f hp | 15 | 1 | - | - | 11 | Standing | Spike, recovery on landing | }} | {{PJMoveListRow | Jumping Back Knuckle | (air) {{f}} {{hp}} | 15 | 1 | - | - | 11 | Standing | Spike, recovery on landing | }} | ||
{{PJMoveListRow | Reverse Foot Blade | (air) f hk | 15 | 1 | - | - | 14 | Standing | Blowback, recovery on landing | }} | {{PJMoveListRow | Reverse Foot Blade | (air) {{f}} {{hk}} | 15 | 1 | - | - | 14 | Standing | Blowback, recovery on landing | }} | ||
{{MoveListFooter}} | {{MoveListFooter}} | ||
==Throws== | ==Throws== | ||
{{PJMoveListHeader}} | {{PJMoveListHeader}} | ||
{{PJMoveListRow | Knuckle Rush | n lp + hp | 7 | 38 | - | - | 34 | - | }} | {{PJMoveListRow | Knuckle Rush | {{n}} {{lp}} + {{hp}} | 7 | 38 | - | - | 34 | - | }} | ||
{{PJMoveListRow | American Suplex | d lp + hp | 7 | 38 | - | - | 39 | - | }} | {{PJMoveListRow | American Suplex | {{d}} {{lp}} + {{hp}} | 7 | 38 | - | - | 39 | - | }} | ||
{{PJMoveListRow | Air Launcher | n lp + hp | 8 | 51 | - | - | 32 | - | Available when behind opponent | }} | {{PJMoveListRow | Air Launcher | {{n}} {{lp}} + {{hp}} | 8 | 51 | - | - | 32 | - | Available when behind opponent | }} | ||
{{PJMoveListRow | Aerial Suplex | (air) n lp + hp | 1 | - | - | - | 42 | - | }} | {{PJMoveListRow | Aerial Suplex | (air) {{n}} {{lp}} + {{hp}} | 1 | - | - | - | 42 | - | }} | ||
{{MoveListFooter}} | {{MoveListFooter}} | ||
==Special Moves== | ==Special Moves== | ||
{{PJMoveListHeader}} | {{PJMoveListHeader}} | ||
{{PJMoveListRow | Dynamite Straight (weak) | qcf lp | 12 | 30 | - | -5 | 20 | All | Blowback | }} | {{PJMoveListRow | Dynamite Straight (weak) | {{qcf}} {{lp}} | 12 | 30 | - | -5 | 20 | All | Blowback | }} | ||
{{PJMoveListRow | Dynamite Straight (strong) | qcf hp | 16 | 29 | - | -5 | 28 | All | Blowback | }} | {{PJMoveListRow | Dynamite Straight (strong) | {{qcf}} {{hp}} | 16 | 29 | - | -5 | 28 | All | Blowback | }} | ||
{{PJMoveListRow | Twister Upper (weak) | dp lp | 9 | 15 | - | -27 | 23 | All | Blowback, recovery on landing | }} | {{PJMoveListRow | Twister Upper (weak) | {{dp}} {{lp}} | 9 | 15 | - | -27 | 23 | All | Blowback, recovery on landing | }} | ||
{{PJMoveListRow | Twister Upper (strong) | dp hp | 18 | 15 | - | -35 | 28 | All | Blowback, recovery on landing | }} | {{PJMoveListRow | Twister Upper (strong) | {{dp}} {{hp}} | 18 | 15 | - | -35 | 28 | All | Blowback, recovery on landing | }} | ||
{{PJMoveListRow | Touchdown Wave (weak) | qcb lp | 16 | 26 | - | -2 | 17 | All | Blowback | }} | {{PJMoveListRow | Touchdown Wave (weak) | {{qcb}} {{lp}} | 16 | 26 | - | -2 | 17 | All | Blowback | }} | ||
{{PJMoveListRow | Touchdown Wave (strong) | qcb hp | 23 | 26 | - | -2 | 20 | All | Blowback | }} | {{PJMoveListRow | Touchdown Wave (strong) | {{qcb}} {{hp}} | 23 | 26 | - | -2 | 20 | All | Blowback | }} | ||
{{PJMoveListRow | Air Dynamite (weak) | (air) qcf lp | 14 | 13 | - | -14 | 29 | Standing | Spike | }} | {{PJMoveListRow | Air Dynamite (weak) | (air) {{qcf}} {{lp}} | 14 | 13 | - | -14 | 29 | Standing | Spike | }} | ||
{{PJMoveListRow | Air Dynamite (strong) | (air) qcf hp | 14 | 13 | - | -12 | 32 | Standing | Blowback | }} | {{PJMoveListRow | Air Dynamite (strong) | (air) {{qcf}} {{hp}} | 14 | 13 | - | -12 | 32 | Standing | Blowback | }} | ||
{{MoveListFooter}} | {{MoveListFooter}} | ||
==Super Moves== | ==Super Moves== | ||
{{PJMoveListHeader}} | {{PJMoveListHeader}} | ||
{{PJMoveListRow | Triple Twister | qcf qcf p | 17 | 15 | - | -36 | 46~75 | All | Blowback, mash punches to increase damage, recovery on landing | }} | {{PJMoveListRow | Triple Twister | {{qcf}} qcf {{p}} | 17 | 15 | - | -36 | 46~75 | All | Blowback, mash punches to increase damage, recovery on landing | }} | ||
{{PJMoveListRow | Super Touchdown | qcb qcb p | 24 | 34 | - | -10 | 39 | All | Blowback | }} | {{PJMoveListRow | Super Touchdown | {{qcb}} qcb {{p}} | 24 | 34 | - | -10 | 39 | All | Blowback | }} | ||
{{PJMoveListRow | Dynamite Justice | qcf qcf k | 13 | 36 | - | -12 | 53 | All | Blowback | }} | {{PJMoveListRow | Dynamite Justice | {{qcf}} qcf {{k}} | 13 | 36 | - | -12 | 53 | All | Blowback | }} | ||
{{MoveListFooter}} | {{MoveListFooter}} | ||
==Team Up Techniques== | ==Team Up Techniques== | ||
{{PJMoveListHeader}} | {{PJMoveListHeader}} | ||
{{PJMoveListRow | Double Rising Twister | lp + lk or hp + hk | 16 | 29 | - | -3 | 54 | All | Team Up Technique, damage type | }} | {{PJMoveListRow | Double Rising Twister | {{lp}} + {{lk}} or {{hp}} + {{hk}} | 16 | 29 | - | -3 | 54 | All | Team Up Technique, damage type | }} | ||
{{PJMoveListRow | Triple Heavens Cross | p + p + k | 21 | 43 | - | -19 | 100 | All | Party Up Technique | }} | {{PJMoveListRow | Triple Heavens Cross | {{p}} + {{p}} + {{k}} | 21 | 43 | - | -19 | 100 | All | Party Up Technique | }} | ||
{{MoveListFooter}} | {{MoveListFooter}} | ||
| Line 82: | Line 82: | ||
}} | }} | ||
==External | ==External links== | ||
*[https://gamefaqs.gamespot.com/dreamcast/377885-project-justice/faqs/14390 Roy guide at GameFAQs] | *[https://gamefaqs.gamespot.com/dreamcast/377885-project-justice/faqs/14390 Roy guide at GameFAQs] | ||
Revision as of 01:15, 9 December 2020
Introduction
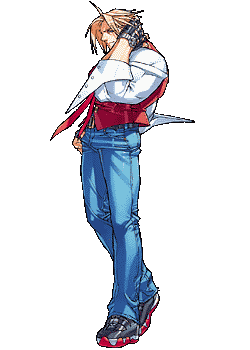
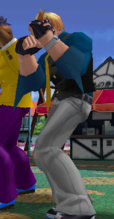
Roy a red-blooded American who is definitely not Terry Bogard. With incredible combo damage and fantastic normals, including one of the best jabs in the game, Roy is a very threatening pressure character who can make his opponents explode the instant they lose their patience.
Normal Moves
Name
Command
Startup
Recovery
Hit Adv
Block Adv
Damage
Guard
Notes
Standing Light Punch
8
15
+2
+9
7
All
Standing Strong Punch
11
29
+7
-4
13
All
Crouching Light Punch
8
21
-2
+1
7
Crouching
Crouching Strong Punch
13
37
-
-15
17
Crouching
Mini launcher
Standing Light Kick
11
25
-7
-4
4
All
Standing Strong Kick
16
49
-6
-25
11
All
Crouching Light Kick
9
18
+7
+4
5
Crouching
Crouching Strong Kick
14
29
+2
-7
13
Crouching
Jumping Light Punch
9
1
-
-
5
Standing
Recovery on landing
Jumping Strong Punch
12
1
-
-
13
Standing
Recovery on landing
Jumping Light Kick
13
1
-
-
5
Standing
Recovery on landing
Jumping Strong Kick
17
1
-
-
13
Standing
Recovery on landing
Command Normals
Name
Command
Startup
Recovery
Hit Adv
Block Adv
Damage
Guard
Notes
Roy Straight
12
38
+2
-14
10
All
Boomerang Hook
13
30
+2
-
14
All
Body Upper
17
34
-
-10
19
All
Blowback
Spinning Back Knuckle
17
34
-
-10
19
All
Blowback
Foot Blade
20
38
-
-14
19
All
Blowback
Head Crush
21
38
-
-14
19
Standing
Overhead, blowback
Backflip Kick
15
24
-
0
14
All
Blowback
Lift Upper
17
39
-
-15
13
All
Rival Launcher
Jumping Back Knuckle
(air) 

15
1
-
-
11
Standing
Spike, recovery on landing
Reverse Foot Blade
(air) 

15
1
-
-
14
Standing
Blowback, recovery on landing
Throws
Name
Command
Startup
Recovery
Hit Adv
Block Adv
Damage
Guard
Notes
Knuckle Rush
7
38
-
-
34
-
American Suplex
7
38
-
-
39
-
Air Launcher
8
51
-
-
32
-
Available when behind opponent
Aerial Suplex
(air) 
 +
+ 
1
-
-
-
42
-
Special Moves
Name
Command
Startup
Recovery
Hit Adv
Block Adv
Damage
Guard
Notes
Dynamite Straight (weak)
12
30
-
-5
20
All
Blowback
Dynamite Straight (strong)
16
29
-
-5
28
All
Blowback
Twister Upper (weak)
9
15
-
-27
23
All
Blowback, recovery on landing
Twister Upper (strong)
18
15
-
-35
28
All
Blowback, recovery on landing
Touchdown Wave (weak)
16
26
-
-2
17
All
Blowback
Touchdown Wave (strong)
23
26
-
-2
20
All
Blowback
Air Dynamite (weak)
(air) 

14
13
-
-14
29
Standing
Spike
Air Dynamite (strong)
(air) 

14
13
-
-12
32
Standing
Blowback
Super Moves
Name
Command
Startup
Recovery
Hit Adv
Block Adv
Damage
Guard
Notes
Triple Twister
17
15
-
-36
46~75
All
Blowback, mash punches to increase damage, recovery on landing
Super Touchdown
24
34
-
-10
39
All
Blowback
Dynamite Justice
13
36
-
-12
53
All
Blowback
Team Up Techniques
Name
Command
Startup
Recovery
Hit Adv
Block Adv
Damage
Guard
Notes
Double Rising Twister
16
29
-
-3
54
All
Team Up Technique, damage type
Triple Heavens Cross
21
43
-
-19
100
All
Party Up Technique
Combos
- st.LP,LP > st.HP > b+HK xx Dynamite Straight
- st.LP,LP > st.HP > f+HP xx Dynamite Justice
- df+HP, {j.LP,LP > j.HP}x2, j.LP,LP > j.HP xx Air Dynamite
- st.LP,LP > cr.HP, j.LK > (delay) j.f+HP, st.LP > cr.HP, st.LP > st.LK > cr.HP, dash OTG b+HK > Triple Twister
Videos
Skip to 0:53
