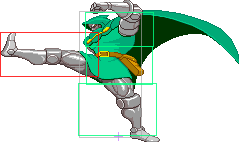
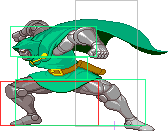
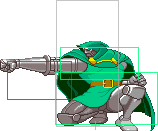
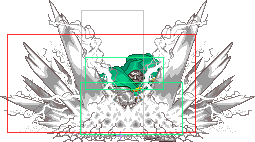
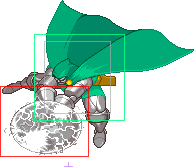
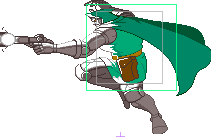
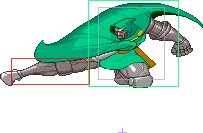
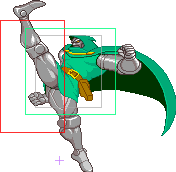
| Line 34: | Line 34: | ||
|align="center"| C | |align="center"| C | ||
|align="center"| HL | |align="center"| HL | ||
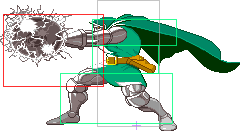
|colspan="3" | [[File: | |colspan="3" | [[File:Doom_s.lp.png|center]] | ||
|align="left"| | |align="left"| | ||
|- | |- | ||
| Line 42: | Line 42: | ||
|align="center"| | |align="center"| | ||
|align="center"| HL | |align="center"| HL | ||
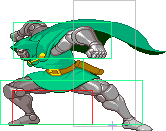
|colspan="3" | [[File: | |colspan="3" | [[File:Doom_s.mp.png|center]] | ||
|align="left"| | |align="left"| | ||
|- | |- | ||
| Line 50: | Line 50: | ||
|align="center"| C | |align="center"| C | ||
|align="center"| HL | |align="center"| HL | ||
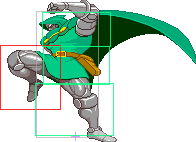
|colspan="3" | [[File: | |colspan="3" | [[File:Doom_s.hp.png|center]] | ||
|align="left"| | |align="left"| | ||
|- | |- | ||
| Line 58: | Line 58: | ||
|align="center"| C | |align="center"| C | ||
|align="center"| HL | |align="center"| HL | ||
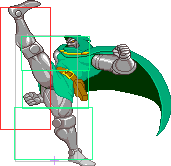
|colspan="3" | [[File: | |colspan="3" | [[File:Doom_s.lk.png|center]] | ||
| | | | ||
|- | |- | ||
| Line 66: | Line 66: | ||
|align="center"| C | |align="center"| C | ||
|align="center"| HL | |align="center"| HL | ||
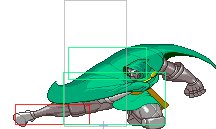
| | |valign="bottom" style="border-right:0px;"| [[File:Doom_s.forward(1).png|center]] | ||
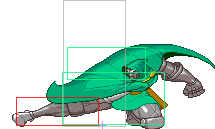
| | |valign="bottom" style="border-right:0px; border-left:0px;"| [[File:Doom_s.forward(2).png|center]] | ||
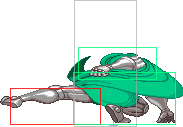
|valign="bottom" style="border-left:0px;"| | |||
| [[File:Launch.png]] | |||
|- | |- | ||
! [[File:Hk.png]] | ! [[File:Hk.png]] | ||
| Line 74: | Line 76: | ||
|align="center"| C | |align="center"| C | ||
|align="center"| HL | |align="center"| HL | ||
| | |valign="bottom" style="border-right:0px;"| [[File:Doom_s.hk(1).png|center]] | ||
|valign="bottom" style="border-right:0px; border-left:0px;"| [[File:Doom_s.hk(2).png|center]] | |||
|valign="bottom" style="border-left:0px;"| | |||
| | | | ||
|- | |- | ||
| Line 84: | Line 88: | ||
|align="center"| C | |align="center"| C | ||
|align="center"| HL | |align="center"| HL | ||
|colspan="3" | [[File: | |colspan="3" | [[File:Doom_c.lp.png|center]] | ||
|align="left"| | |align="left"| | ||
|- | |- | ||
| Line 92: | Line 96: | ||
|align="center"| C | |align="center"| C | ||
|align="center"| HL | |align="center"| HL | ||
|colspan="3" | [[File: | |colspan="3" | [[File:Doom_c.mp.png|center]] | ||
| | | | ||
|- | |- | ||
| Line 100: | Line 104: | ||
|align="center"| - | |align="center"| - | ||
|align="center"| HL | |align="center"| HL | ||
| | |colspan="3" | [[File:Doom_c.hp.png|center]] | ||
| [[File:Launch.png]] | | [[File:Launch.png]] | ||
|- | |- | ||
| Line 110: | Line 112: | ||
|align="center"| C | |align="center"| C | ||
|align="center"| [[File:Low.png]] | |align="center"| [[File:Low.png]] | ||
|colspan="3" | [[File: | |colspan="3" | [[File:Doom_c.lk.png|center]] | ||
| [[File:Otg.png]] | | [[File:Otg.png]] | ||
|- | |- | ||
| Line 118: | Line 120: | ||
|align="center"| C | |align="center"| C | ||
|align="center"| [[File:Low.png]] | |align="center"| [[File:Low.png]] | ||
| | |colspan="3" | [[File:Doom_c.forward.png|center]] | ||
| [[File:Otg.png]] | | [[File:Otg.png]] | ||
|- | |- | ||
| Line 128: | Line 128: | ||
|align="center"| - | |align="center"| - | ||
|align="center"| [[File:Low.png]] | |align="center"| [[File:Low.png]] | ||
|colspan="3" | [[File: | |colspan="3" | [[File:Doom_c.hk.png|center]] | ||
|[[File:Otg.png]] | |[[File:Otg.png]] | ||
|- | |- | ||
| Line 146: | Line 138: | ||
|align="center"| - | |align="center"| - | ||
|align="center"| [[File:High.png]] | |align="center"| [[File:High.png]] | ||
|colspan="3" | [[File: | |colspan="3" | [[File:Doom_j.lp.png|center]] | ||
| | | | ||
|- | |- | ||
| Line 154: | Line 146: | ||
|align="center"| - | |align="center"| - | ||
|align="center"| [[File:High.png]] | |align="center"| [[File:High.png]] | ||
|colspan="3" | [[File: | |colspan="3" | [[File:Doom_j.mp.png|center]] | ||
| | | | ||
|- | |- | ||
| Line 162: | Line 154: | ||
|align="center"| - | |align="center"| - | ||
|align="center"| [[File:High.png]] | |align="center"| [[File:High.png]] | ||
|colspan="3" | [[File: | |colspan="3" | [[File:Doom_j.hp.png|center]] | ||
| [[File:Aircombofinisher.png]] | | [[File:Aircombofinisher.png]] | ||
|- | |- | ||
| Line 170: | Line 162: | ||
|align="center"| - | |align="center"| - | ||
|align="center"| [[File:High.png]] | |align="center"| [[File:High.png]] | ||
|colspan="3" | [[File: | |colspan="3" | [[File:Doom_j.lk.png|center]] | ||
| | | | ||
|- | |- | ||
| Line 178: | Line 170: | ||
|align="center"| - | |align="center"| - | ||
|align="center"| [[File:High.png]] | |align="center"| [[File:High.png]] | ||
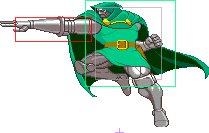
|colspan="3"| [[File: | |colspan="3"| [[File:Doom_j.forward.png|center]] | ||
| | | | ||
|- | |- | ||
| Line 186: | Line 178: | ||
|align="center"| - | |align="center"| - | ||
|align="center"| [[File:High.png]] | |align="center"| [[File:High.png]] | ||
|colspan="3"| [[File: | |colspan="3"| [[File:Doom_jd.hk.png|center]] | ||
| | |||
|- | |||
! [[File:D.png]][[File:Hk.png]] | |||
|align="center"| | |||
|align="center"| -/- | |||
|align="center"| - | |||
|align="center"| [[File:High.png]] | |||
|colspan="3"| [[File:Doom_j.hk.png|center]] | |||
| | | | ||
|- | |- | ||
Revision as of 03:13, 4 April 2019


Introduction
Doom was top tier for the first couple years after the game was out. Once people figured out how to wave dash and punish him, he moved to just be solidly high tier. Doom still has tools that are still very useful. Some people will say he's only useful for his Anti Air Assist, which is a top assist, but he is much better than that.
Doom's main game is going to be zoning and keep away. You can rushdown with Doom, but lets face it, he's got a slow metal ass. You can mix it up to great effect, however.
Zoning with Pink Photons in the air is one of Doom's top tools. His gun (j.hp) is useful as well, his air Super Photons is a great super to use randomly, and if you get a lucky launcher, you can use it in a air series, a slow dialed LK, LK, XX super is probably your best bet.
He's also used for his amazing assist, his AAA rocks, and they go everywhere, and pin, and chip. This is used in the Strider/Doom trap. The hitbox on his cHP is amazing and a solid choice as an antiair option.
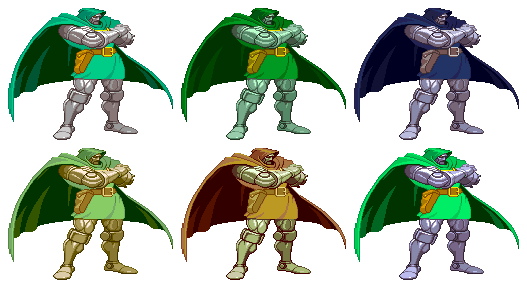
Colors
First row: LP, HP, A1. Second row: LK, HK, A2.
Moves List
Normal Moves
| Frames | Advantage | Cancel | Block | Hitbox | Notes | |||
|---|---|---|---|---|---|---|---|---|
| Standing | ||||||||
| C | HL | |||||||
| HL | ||||||||
| C | HL | |||||||
| C | HL | |||||||
| C | HL | |||||||
| C | HL | |||||||
| Crouching | ||||||||
| C | HL | |||||||
| C | HL | |||||||
| - | HL | |||||||
| C | ||||||||
| C | ||||||||
| KD | - | |||||||
| Jump | ||||||||
| -/- | - | |||||||
| -/- | - | |||||||
| -/- | - | |||||||
| -/- | - | |||||||
| -/- | - | |||||||
| -/- | - | |||||||
| -/- | - | |||||||
Command normals
Eight way air dash (aironly): Direction + lp + hp
Laser shot (aironly): hp
Foot Dive (aironly): d + hk
Special Moves
Super Moves
Assist Moves
The Basics
Combos
-d.s.HK XX qcf + P
-d.s.HK XX qcf + P XX hcb + PP
-Jump LK > LP \/ /\ Jump LK > LP XX hcb + PP
-Corner Jump LK > LK \/ d.s.LK > s.LK /\ sj.LP > sj.LK > sj.LK, f + HP, hcb + PP
-d.c.LK > c.LK > c.HK XX hcb + K
-Jump LK > LP \/ d.s.LK > s.LP > s.HK XX qcf + P
-Jump LK > LK \/ d.s.LK > c.LK > c.HK XX hcb + P
-Jump LK > LK \/ d.s.LP > c.LK > c.HK XX hcb + K
-Jump LK > LK \/ d.s.LP > s.LK /\ sj.LP > sj.LK > sj.LP > sj.LK > sj.HK
-Jump LK > LK \/ d.s.LP > c.LK > c.HP /\ sj.LP > sj.LK > sj.LK, f + HP
-Jump LK > LK \/ d.c.LP > c.LK > c.HP /\ sj.LP > sj.LK > sj.LP > sj.LK, (uf + PP) ad.LK > ad.LP > ad.LK
-Jump LK > LK \/ d.s.LK > s.LK XX qcf + KK
-Corner Jump LK > LK \/ d.s.LP > s.LP > c.HP /\ sj.LP > sj.LK > sj.LP > sj.LK > sj.HK XX hcb + P/qcf + P
-Jump LK > LK \/ d.s.LP > s.LP XX qcf + KK
-Corner When close, f + HP, d.s.LK > s.LK /\ sj.LP > sj.LK > sj.LP > sj.LK > sj.HK XX qcf + P
-Corner d.c.LP > c.LP > c.HP XX qcf + KK
-Corner When close, f + HP, d.c.LP XX qcf + PP
-Corner d.s.HK XX qcf + P XX qcf + PP
-Corner d.c.LK > c.LK > c.HK XX hcb + P XX hcb + PP
-Jump LK > LP \/ d.s.LP > c.LP > c.HP /\ sj.LP > sj.LK > sj.LP > sj.LK XX hcb + PP
-Jump LK > LK \/ d.c.LK > c.LK > c.HP /\ sj.LP > sj.LK > sj.LP > sj.d + HK XX hcb + PP
-Corner Jump LK > LK \/ d.s.LP > s.LP > c.HK XX hcb + P XX qcf + KK
Strategies
As stated above, Doom is best used on point as a keepaway character because he is too slow to really rushdown. The j.hp is useful to down Storm from a hailstorm and every now and then to take out Sentinel in the air, if you couple a j.hp with Sentinels drone assist, you get a mini trap that builds meter.
Also, Doom has a very good wavedash that can close the gap on his opponents very quickly. Doom's normal dash covers a lot of space, but his wavedash (df+pp) is leap after leap, covering full screen rather fast.
His top priority moves are his standing and crouching hp, and his df RH (launcher). One of Doom's guardbreaks is j.lp, land, df RH ^ AC of choice. Use his df RH on opponents who are jumping in on you due to its high priority, i'm not entirely sure if it has the same priority as Cyclops' df RH but I can't imagine it having more.
As an assist, Doom's rocks cover space and provide good chip, but as an AA it is not really as useful in the AA sense as Clops or Commando, I think of it as a pseudo drones assist. Also, it counters Commando but loses to higher priority assists like Psy AA, Clops AA etc., and beam assists like Cable proj or IM proj.
Also, his Photon Array Super (HCB PP) has instant start up in the air and does great chip damage. His other supers should be disregarded because they have no practical use and leave Doom open for retaliation.
Doom also has an unblockable, two guard breaks, and an infinite but that should be covered in the appropriate section (the advanced section). So curse Richards and enjoy playing Doom!
