m (Ariasvil moved page Ash Crimson (KoF 03) to Ash '03) |
|||
| Line 286: | Line 286: | ||
|- ''hop D crossups on crouching Tizoc only.'' | |- ''hop D crossups on crouching Tizoc only.'' | ||
===''b~f+A | ===''b~f+A Ventôse set up''=== | ||
'''I''' - Throw | '''I''' - Throw | ||
Revision as of 22:46, 14 September 2018
Introduction
「 Ash Crimson 」
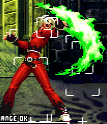
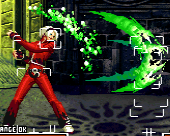
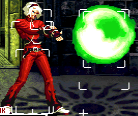
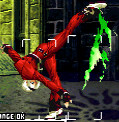
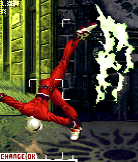
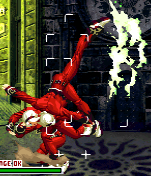
Ash is a cross-range character that specializes in long to mid-range zoning with his [b~f+A] Pluviôse, and his [b+B] Floréal, while baiting the opponent into a roll or jump for punishment.
He lacks reliable source of damage, since his BnB does about 8%, and his only reliable stock combo does about 20%.
Ash also lacks teamwork tools, as he can properly setup only for air MSCs, and his 2 methods for doing so, [hcf+C Vendemiaire(anywhere)] and [qcfx2+P Thermidor(corner, usually from a frame trap)] are not reliable either. When summoned to finish the MSC himself, Ash can only do decent damage at corner[qcfx2+P Thermidor x1~5 loop], but the cost may be a bit too high for the possible resulting damage.
As a leader, Ash cannot get advantage of his LDM Sans-Culotte, since activation does not allows juggles, and he gains more weaknesses than advantages. Refer to its section in this guide for more information.
Data
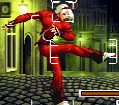
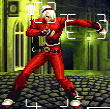
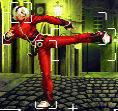
Crouch Height: Low
Multi-Shift Attack Juggle: Normal
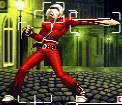
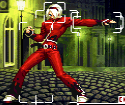
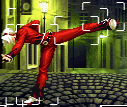
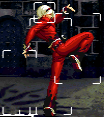
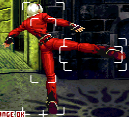
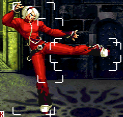
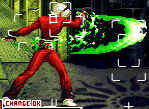
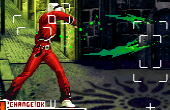
| Stand | Crouch | Run |
|---|---|---|

|

|

|
Colors
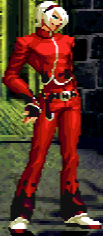
|
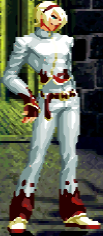
|
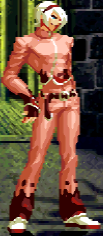
|
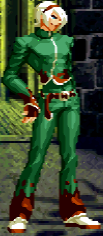
|
Movelist
Battle
Attack Strings
I - Dw.B, Dw.A
    - Dw.D[Low]
    - hop D[High]
    - ,b+B -> b~f+A|[Corner]Throw/qcfx2+P
    - Run throw
II - b~f+A -> Run
   - Dw.D[Low]
   - S.hop D[High]
   - dw.C[Anti-air]
   ☆ qcfx2+P before running, then run into a mix-up.
III - qcfx2+P -> Run
   - Dw.D[Low]
   - S.hop D[High]
   - dw.C[Anti-air]
   - Crossup s.hop D[Crouching Tizoc only]
IV - Dw.C, b+D
- Ready charge; punish anti-air attempts with d~u+D Nivose; rolls with a combo and projectiles with b~f+C Pluviôse. In case nothing happens, you can throw a b~f+A Pluviôse.
V - Air D
   - Dw.D[Low]
   - Hop D[High]
   - Run throw
Combos
I - Dw.B, dw.A, d~u+B/qcfx2+K
II - [Dw.B,]Dw.A, b+B -> [close]qcfx2+K
III - [Cl.st.A,]hcf+C, d~u+B/MSA/[Midscreen, SC]qcfx2+P/[Corner]d~u+D,[SC]qcfx2+P
IV - [Corner/Ground MSC]qcfx2+P x1~5 juggle
Strategy
|- Throw is not recovery rollable.
|- b+B goes over most lows from afar.
|- Considered airborne during b+B and b+D.
|- hop D crossups on crouching Tizoc only.
b~f+A Ventôse set up
I - Throw
II - [...]d~u+B
III - [...]b+D string
Frame Traps
I - [Midscreen][...]b+B -> qcfx2+K
II - [Corner]Wake up b~f+C -> Throw/dw.C
III - [Corner][...]b+B -> Throw/qcfx2+P
Match Up
| - Ash: b~f+C Ventôse can nullify his b~f+A, but if he runs after his b~f+A, doing this might leave you open for an air attack or roll. qcfx2+P can nullify not only his b~f+A and b~f+C, but also his own qcfx2+P.
| - Duolon: Using projectiles might get you punished by this rdp+D in case he's in range. Also, note Duolon can hop over all of Ash's projectiles, including qcfx2+P.
| - Shen: His qcfx2+C can go through Ash's projectiles, although a few observations must be done regarding this issue. Shen can only get a clean hit if he throws his qcfx2+C by the same time Ash starts inputing his projectiles, meaning a hit during its activation, or by the time the projectiles are already active, and Ash has already recovered, meaning Ash will only be hit if he runs after the projectile; otherwise he will be able to successfully guard Shen's qcfx2+C. Otherwise, if Shen tries a qcfx2+P just after Ash throws it, which would certainly be the best option, his invincibility will end short and he will be hit by the projectile.
| - Terry: Be careful of his qcb+B, since it is a long range overhead that might catch you when holding db to charge. Despite his qcf+P being a ground projectile, Ash's projectiles will still clash with it. Also, careful of running after qcfx2+P Thermidor, since Terry's qcb,hcf+P can destroy it, taking Ash along.
| - Joe: Although Joe can nullify Ash's b~f+A Ventôse with his hcf+C double projectile, it takes too long for each of these projectiles to come out, and he might get hit instead, so be aware Joe players might be wary of using it. Also, although it could clash against Ash's b~f+C Ventôse, it is not actually fast enough to consistently do so, getting Joe punished by Ventôse's second wave. Joe's qcfx2+P can nullify qcfx2+P Thermidor, so be careful when running after it. Regarding the case of Joe's sliding, it will defeat Ash's b+B Floréal if the sliding is already active, but in case it is already active, b+D Floréal will beat it.
| - Tizoc/Griffon: He can go through all of Ash's projectiles with a well-timed dw+AB. He can also hop over b~f+A Ventôse with hop D, which might end up Ash if running after it; he can't hop over b~f+C Ventôse and qcfx2+P Thermidor, though. Ash is considered airborne during b+B and b+D Floréal, and since the recovery is so fast, it may be tough for Tizoc to actually grab in time.
| - Ryo: He can go over all of Ash's projectiles with qcf+D, although it might be tough to go over qcfx2+P Thermidor, making it difficult to run after the projectiles; although you can actually use this as a trap to punish him with d~u+D instead. It is also possible to auto-guard and counter normal projectiles with qcb+P. He can also auto-guard normal projectiles with f+B, and since his f+B is cancelable, he might cancel it into a dp+A or hcb+B to punish Ash when running after it. Lastly, he can go through any projectile with his active qcf,hcb+C and qcfx2+AC.
| - Robert: Be careful of his f+A, since it is a long range overhead that might catch you when holding db to charge; on the other hand, b+B can hit it before it actually gets active. His f,hcb+P DM can nullify Ash's projectiles and trade with qcfx2+P Thermidor, but it comes out too slow to be a threat.
| - Yuri: There is a very short period during her dp+C which gives her invincibility, allowing her to go through Ash's projectiles, so be careful when running after the projectiles. She can also revert normal projectiles with qcb+P. Also, her charged qcf+P nullifies Ash's projectiles.
| - Kim: Dw.D goes under his st.A poke from afar. d~u+D Nivôse proves useful against his jump-ins. His dw.D gets priority against Ash's b+B.
| - Chang: His b~f+A can auto-guard and counter Ash's normal projectiles, while b~f+C can auto-guard and counter Ash's qcfx2+P Thermidor. It is possible to escape his hcb,f+P loop pressure with a qcfx2+P on wake up.
| - Jhun: Beware of his f+A; in case it hits or trades with Ash's b+B, it will both counterwire and counterhit, giving Jhun chance for big damage. He can nullify Ash's b~f+A Ventôse and qcfx2+P Thermidor with his qcb+P, but surprisingly it won't stop b~f+C Ventôse.
| - Leona: She can go under Ash's projectiles with b~f+D, but Ash will always be able to recover first, so Leona's b~f+D never works and leaves her open for a punish. What you must be warry of, is Leona's [hop D, V-Slasher], which can punish Ash's normal projectiles upon activation.
| - Ralf: Dw.D goes under all of his standing pokes. b+B Floréal often goes over his dw.D. His qcf,hcb+P goes through Ash's projectiles, but b~f+A Ventôse and qcfx2+P Thermidor usually recover before it can actually hit; however, b~f+C Ventôse may not be able to recover in time.
| - Clark: Dw.D goes under all of his standing pokes. b+B Floréal often goes over his dw.D. It is possible to escape his hcf+K loop pressure with a qcfx2+P on wake up.
| - Gato: Beware his qcb+P,C grab can still grab Ash during Ash's d~u+D Nivôse if close. Despite this, you will most likely still need d~u+D Nivôse to deal with his qcb+K,C. Gato's qcb+A,C(grab) and qcb+B,C(kick) come from a hop, making it difficult to react. The grab will often come from qcb+A,C instead of qcb+C,C, which would be a bit too long and obvious, so stay out of qcb+A range, leaving him only the option to qcb+D,C kick, so you can safely punish with d~u+D Nivôse.
| - Billy: From afar, you can use b+D Floréal to punish his dw.A. Beware of his hcf+P, since it can hit Ash while throwing projectiles.
| - Yamazaki: Beware of his qcb+B, since it can hit Ash during b~f+A/C Ventôse activation. He can also revert normal projectiles with qcf+C(except for qcfx2+P Thermidor), and absorb qcfx2+P Thermidor with qcf+A.It is possible to escape his grab loop pressure with a qcfx2+P on wake up.
| - King: Despite her qcf+K being a ground projectile(and a low, on top of it), Ash's flying projectiles will still clash with it. Her qcfx2+AC LDM will destroy all of Ash's normal projectiles, and the first of her quadruple projectiles will trade with qcfx2+P Thermidor, making way for the remaining 3.
| - Mai: Since her jumps are so long, it might be tricky to hit her with d~u+D Nivôse; she get past Ash instead, getting a free combo. In this situation, it is advised that you rely on dw.C. She can easily hop the projectiles as well. Also, her qcb+P can nullify Ash's normal projectiles.
| - Mary: She can dodge Ash's projectiles with qcb+P, but be aware that it has vulnerability during recovery, meaning you can always run in and punish with a b+B. It is possible to escape her qcb+P,hcf+P loop pressure with a qcfx2+P on wake up.
| - Benimaru: Since his jumps are so long, it might be tricky to hit him with d~u+D Nivôse; he get past Ash instead, getting a free combo. In this situation, it is advised that you rely on dw.C. He can easily hop the projectiles as well.
| - Shingo: He can auto-guard and counter projectiles(even qcfx2+P Thermidor) with his qcb,hcf+P, although its range is very short so you must only be careful of using projectiles during strings.
| - Daimon: He can roll through projectiles with qcb+B, but this makes him vulnerable to b+B Floréal punishment. b+B Floréal will also beat his dw.D from afar. Dw.D will go under his standing pokes. It is possible to escape his hcb,f+P loop pressure with a qcfx2+P on wake up.
| - Athena: It might be a bit difficult to stop her jumps with d~u+D Nivôse due to her jump being long, but since Athena's speed has been reduced, you can actually confirm if either a dw.C or d~u+D Nivôse will do better. Despite the looks, qcfx2+P Thermidor cannot defeat her hcbx2+P,qcb+P projectile; both will be destroyed.
| - Hinako: b+B Floréal gets an advantage over her hcb,f+A grab since Ash will be airborne, but you must be careful of trying to anti-air her with d~u+D Nivôse, and ending up grabbed instead.
| - Malin: Since her jumps are so long, it might be tricky to hit her with d~u+D Nivôse; she get past Ash instead, getting a free combo. In this situation, it is advised that you rely on dw.C. She can easily hop the projectiles as well. Although b~f+C Ventôse can get rid of her yo-yos, it will give her a chance to punish Ash with her air qcfx2+P instead. Ash's qcfx2+P Thermidor can get rid of all her yo-yos at once while also granting some safety, but this may be a waste of stock.
| - K': His qcf+P works as a shield against b+B Floréal, but it takes some time to actually be active, these often end up trading. His normal projectile can be countered by Ash's b~f+C, while charging also protects Ash from his long range qcb+K. Beware of his qcf,hcb+AC LDM, since it can nullify all of Ash's projectiles(including qcfx2+P Thermidor).
| - Maxima: hcbx2+K DM can grab opponents from poke range. If close enough, his hcbx2+K DM can grab Ash even if there is a projectile between them, so be careful when running after projectiles. Also, he can auto-guard and punish the projectiles with st.C and dw.C.
| - Whip: Usually it is not possible to punish her air C with dw.C, making it a bit troublesome in case she tries to crossup with it, since d~u+D Nivôse will not be able to hit it in this case, so you must prevent her from getting into crossup range.
| - Kyo: b+B Floréal will cleanly beat his dw.D. b+B Floréal can also deal with his rekkas, but there is a small chance of qcf+A auto-guarding it. A well timed d~u+D Nivôse can cleanly hit his rdp+D.
| - Iori: His air b+B crossup often defeats Ash's dw.C, making it very risky to let Iori into crossup range. Despite his qcf+P being a ground projectile, Ash's flying projectiles will still clash with it. qcfx2+K Pluviôse can always punish Iori between his qcb+P rekkas.
| - Chizuru: Her clones retain a hurtbox, meaning you can always punish those with dw.D or b+B Floréal. She can revert normal projectiles with qcf+P, so be careful when running after it. If she seals Ash, it deactivates Sans-Culotte.
| - KUSANAGI: Despite his qcf+P being a ground projectile, Ash's flying projectiles will still clash with it. b+B Floréal will cleanly beat his dw.D.
| - Maki: Most of her clone's hitboxes are full body, making it useless to try punishing it with b+B or dw.D, unlike Chizuru. Although, her possibly BEST clone move, qcb+C that goes fullscreen, actually has vulnerability just like Chizuru's clones(although this one moves very fast). If you stay fullscreen away from her, this move will be her only way of hitting you without walking or running in. Also, her qcb+A which includes fullbody hitbox and can't be punished by b+B can be "deactivated" by a projectile, and by this time Maki stays open for a combo for some time. If she seals Ash, it deactivates Sans-Culotte.
| - Adelheid: b~f+A and b~f+C Ventôse will still clash with his qcf+K, but be careful since Adelheid also has a shield that works as a reflector. His dp+D goes under Ash's projectiles. His air B crossup often defeats Ash's dw.C, making it very risky to let Adelheid into crossup range, but this might be difficult due to his speed. His qcf+A LDM has a very long invincibility period and can go through Ash's projectiles(including qcfx2+P Thermidor) so be careful when running after it in case Adel is a leader.
| - Mukai: Beware of his st.D when using b+B Floréal, since it can auto-guard and punish. In case he is picked as a leader, beware of his qcb,hcf+AC LDM since it can instantly nullify and punish Ash's projectiles before they even come out.
