| Line 25: | Line 25: | ||
*<b>Close/Far Standing Jab:</b> | *<b>Close/Far Standing Jab:</b> | ||
{| border="1em" cellspacing="0" style="border: 1px solid #999;" | {| border="1em" cellspacing="0" style="border: 1px solid #999;" | ||
| align="center" | Damage || align="center" | ? || align="center" rowspan="5" | [[File:OEHonda_stcljab1&5_stfarjab1&5_stclstrng1&7_stfarstrng1&7_stclfrc1&9_stfarfrc1&9_stclshrt1&5_stfarshrt1&7_stfarfrwrd1&7_stclfrwrd1&5_stclrh1&9_stfarrh1&7.png]] || align="center" rowspan="5" | [[File:OEHonda_stcljab2&4_stfarjab2&4.png]] || align="center" rowspan="5" | [[File:OEHonda_stcljab3_stfarjab3.png]] || align="center" rowspan="5" | [[File:OEHonda_stcljab2&4_stfarjab2&4.png]] || align="center" rowspan="5" | | | align="center" | Damage || align="center" | ? || align="center" rowspan="5" | [[File:OEHonda_stcljab1&5_stfarjab1&5_stclstrng1&7_stfarstrng1&7_stclfrc1&9_stfarfrc1&9_stclshrt1&5_stfarshrt1&7_stfarfrwrd1&7_stclfrwrd1&5_stclrh1&9_stfarrh1&7.png]] || align="center" rowspan="5" | [[File:OEHonda_stcljab2&4_stfarjab2&4.png]] || align="center" rowspan="5" | [[File:OEHonda_stcljab3_stfarjab3.png]] || align="center" rowspan="5" | [[File:OEHonda_stcljab2&4_stfarjab2&4.png]] || align="center" rowspan="5" | [File:OEHonda_stcljab1&5_stfarjab1&5_stclstrng1&7_stfarstrng1&7_stclfrc1&9_stfarfrc1&9_stclshrt1&5_stfarshrt1&7_stfarfrwrd1&7_stclfrwrd1&5_stclrh1&9_stfarrh1&7.png]] | ||
|- | |- | ||
| align="center" | Stun || align="center" | ?-? | | align="center" | Stun || align="center" | ?-? | ||
| Line 543: | Line 543: | ||
| align="center" colspan="2" | Simplified || align="center" colspan="2" | ? || align="center" | ∞ | | align="center" colspan="2" | Simplified || align="center" colspan="2" | ? || align="center" | ∞ | ||
|} | |} | ||
===Throws=== | |||
E.Honda can throw using Strong, Fierce and Roundhouse. All his throws have the same range, which happens to be the best normal throw range in the game. | |||
*<b>Tawara Nage:</b> (←/→ + Strong) | |||
{| border="1em" cellspacing="0" style="border: 1px solid #999;" | |||
| align="center" | Damage || align="center" | ?(+?) || align="center" rowspan="5" | [[File:OEHonda_throwbf.png]] || align="center" rowspan="5" | [[File:OEHonda_throw.png]] || align="center" rowspan="5" | [[File:OEHonda_throwbf.png]] | |||
|- | |||
| align="center" | Stun || align="center" | ?-? | |||
|- | |||
| align="center" | Stun Timer || align="center" | 100 | |||
|- | |||
| align="center" | Range (from axis) || align="center" | 64 | |||
|- | |||
| align="center" | Range advantage || align="center" | 36 | |||
|} | |||
E.Honda tosses the opponent. The direction of the joystick determines the direction the enemy gets thrown at. Better used in the rare cases where you find yourself cornered and want to corner the opponent. | |||
*<b>Saba Ori:</b> (←/→ + Fierce) | |||
{| border="1em" cellspacing="0" style="border: 1px solid #999;" | |||
| align="center" | Damage || align="center" | ? + ?*n || align="center" rowspan="5" | [[File:OEHonda_throwbf.png]] || align="center" rowspan="5" | [[File:OEHonda_throw.png]] || align="center" rowspan="5" | [[File:OEHonda_throwbf.png]] | |||
|- | |||
| align="center" | Stun || align="center" | ?-? | |||
|- | |||
| align="center" | Stun Timer || align="center" | 0 | |||
|- | |||
| align="center" | Range (from axis) || align="center" | 64 | |||
|- | |||
| align="center" | Range advantage || align="center" | 36 | |||
|} | |||
This is the throw you will be using the most. It's untechable, does nice damage, and sets up crossup / walk under / tick shenanigans. You can even crossup / walk under when in the corner after a fierce grab (you can walk under, cr. RH for a crossup, or go for a crossup d + Forward, cr.Jab, Oicho, etc). | |||
Note that some characters (Balrog, Cammy, DeeJay, Vega, Fei Long) cannot be walked under outside of the corner. | |||
*<b>Sekkan Kyaku:</b> (←/→ + Roundhouse) | |||
{| border="1em" cellspacing="0" style="border: 1px solid #999;" | |||
| align="center" | Damage || align="center" | ? + ?*n || align="center" rowspan="5" | [[File:OEHonda_throwbf.png]] || align="center" rowspan="5" | [[File:OEHonda_throw.png]] || align="center" rowspan="5" | [[File:OEHonda_throwbf.png]] | |||
|- | |||
| align="center" | Stun || align="center" | ?-? | |||
|- | |||
| align="center" | Stun Timer || align="center" | 0 | |||
|- | |||
| align="center" | Range (from axis) || align="center" | 64 | |||
|- | |||
| align="center" | Range advantage || align="center" | 36 | |||
|} | |||
E.Honda's knee bash. The only use I see in this throw is for throw mashing (so an HHS will not come out) because the Fierce throw gives you a better positioning when the opponent releases himself from the grab. | |||
===Special Moves=== | ===Special Moves=== | ||
Revision as of 07:48, 24 December 2011
Introduction
http://img124.imageshack.us/img124/120/ehonda6lj4.gif http://img110.imageshack.us/img110/3165/ehondastanceow0.gif
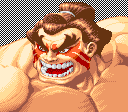
While growing up in Japan he always admired the art of sumo wrestling and he hoped to one day become the greatest sumo wrestler of all time. He spent the rest of his life dedicated to sumo, and eventually received the second-highest title of Ōzeki (the highest title is Yokozuna). He also acquires his own dojo where he teaches his students about discipline and respect for your opponent, which Honda believes are the marks of a true sumo wrestler. At some point, he went searching for worthy opponents of other fighting disciplines to prove that sumo wrestlers are the greatest fighters in the world. During this quest he was challenged by Sodom to join Mad Gear. Honda fought Sodom, won, and declined his invitation. He also fought Ryu at least once, and told Sakura (and maybe Juni found out from him, too) where to find Ryu. It is rumored that he teamed-up with Zangief to help take down the Shadaloo. He found some of the Dolls in the wake of Shadaloo's destruction that had amnesia due to the explosion and couldn't even remember their own names. He took pity on them, and brought them to his dojo, where they could be taken care of. He told them that they could leave if they wished once they regained their memory. Some time later he resumed his quest to prove the superiority of sumo in the fighting arts. It was at this time that he began actively competing in the World Warrior tournament. His star pupils at the time were Hatonoyama, Marunoumi, Yasuhanada, and Nishinofuji. He's still a sumo wrestler, as always. And training his students, of course.
Picking Old E.Honda
To select O.E.Honda, choose E.Honda and then press ↑ ↑ ↑ ↓ Jab/Fierce, pressing Short simultaneously with the punch button for the alternate color.
| Normal | Secondary |
 |

|
--Born2SPD
Moves Analysis
Normal Moves
Ground Normals
- Close/Far Standing Jab:
- Crouching Jab:
| Damage | ? |  |
 |
 |
 |

|
| Stun | ?-? | |||||
| Stun Timer | ? | |||||
| Chain Cancel | No | |||||
| Special Cancel | Yes | |||||
| Frame Count | ? | ? | ? | ? | ? | |
| Simplified | ? | ? | ? | |||
- Close/Far Standing Strong:
| Damage | ? |  |
 |
 |
 |
 |
 |

|
| Stun | ?-? | |||||||
| Stun Timer | ? | |||||||
| Chain Cancel | No | |||||||
| Special Cancel | No | |||||||
| Frame Count | ? | ? | ? | ? | ? | ? | ? | |
| Simplified | ? | ? | ? | |||||
- Crouching Strong:
| Damage | ? |  |
 |
 |
 |
 |
 |

|
| Stun | ?-? | |||||||
| Stun Timer | ? | |||||||
| Chain Cancel | No | |||||||
| Special Cancel | No | |||||||
| Frame Count | ? | ? | ? | ? | ? | ? | ? | |
| Simplified | ? | ? | ? | |||||
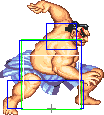
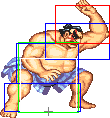
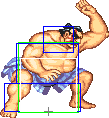
- Close/Far Standing Fierce:
| Damage | ? |  |
 |
 |

|
| Stun | ?-? | ||||
| Stun Timer | ? | ||||
| Chain Cancel | No | ||||
| Special Cancel | No | ||||
| Frame Count | ? | ? | ? | ? | |
| Simplified | ? | ? | |||
 |
 |
 |
 |

| |
| Frame Count | ? | ? | ? | ? | ? |
| Simplified | ? | ||||
- Crouching Fierce:
| Damage | ? |  |
 |

|
| Stun | ?-? | |||
| Stun Timer | ? | |||
| Chain Cancel | No | |||
| Special Cancel | Yes | |||
| Frame Count | ? | ? | ? | |
| Simplified | ? | ? | ||
 |
 |
 |
 |
 |

| |
| Frame Count | ? | ? | ? | ? | ? | ? |
| Simplified | ? | |||||
- Close Standing Short:
| Damage | ? |  |
 |
 |
 |

|
| Stun | ?-? | |||||
| Stun Timer | ? | |||||
| Chain Cancel | No | |||||
| Special Cancel | Yes | |||||
| Frame Count | ? | ? | ? | ? | ? | |
| Simplified | ? | ? | ? | |||
- Far Standing Short:
| Damage | ? |  |
 |
 |
 |
 |
 |

|
| Stun | ?-? | |||||||
| Stun Timer | ? | |||||||
| Chain Cancel | No | |||||||
| Special Cancel | No | |||||||
| Frame Count | ? | ? | ? | ? | ? | ? | ? | |
| Simplified | ? | ? | ? | |||||
- Crouching Short:
| Damage | ? |  |
 |
 |
 |
 |
 |

|
| Stun | ?-? | |||||||
| Stun Timer | ? | |||||||
| Chain Cancel | No | |||||||
| Special Cancel | No | |||||||
| Frame Count | ? | ? | ? | ? | ? | ? | ? | |
| Simplified | ? | ? | ? | |||||
- Close Standing Forward:
| Damage | ? |  |
 |
 |
 |

|
| Stun | ?-? | |||||
| Stun Timer | ? | |||||
| Chain Cancel | No | |||||
| Special Cancel | No | |||||
| Frame Count | ? | ? | ? | ? | ? | |
| Simplified | ? | ? | ? | |||
- Far Standing Forward:
| Damage | ? |  |
 |
 |
 |
 |
 |

|
| Stun | ?-? | |||||||
| Stun Timer | ? | |||||||
| Chain Cancel | No | |||||||
| Special Cancel | No | |||||||
| Frame Count | ? | ? | ? | ? | ? | ? | ? | |
| Simplified | ? | ? | ? | |||||
- Crouching Forward:
| Damage | ? |  |
 |
 |
 |
 |
 |

|
| Stun | ?-? | |||||||
| Stun Timer | ? | |||||||
| Chain Cancel | No | |||||||
| Special Cancel | No | |||||||
| Frame Count | ? | ? | ? | ? | ? | ? | ? | |
| Simplified | ? | ? | ? | ? | ||||
- Close Standing Roundhouse:
| Damage | ? |  |
 |
 |
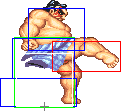 |
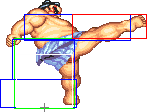
|
| Stun | ?-? | |||||
| Stun Timer | ? | |||||
| Chain Cancel | No | |||||
| Special Cancel | No | |||||
| Frame Count | ? | ? | ? | ? | ? | |
| Simplified | ? | ? | ? | |||
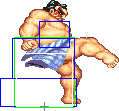 |
 |
 |

| |
| Frame Count | ? | ? | ? | ? |
| Simplified | ? | |||
- Far Standing Roundhouse:
| Damage | ? |  |
 |
 |
 |
 |
 |

|
| Stun | ?-? | |||||||
| Stun Timer | ? | |||||||
| Chain Cancel | No | |||||||
| Special Cancel | No | |||||||
| Frame Count | ? | ? | ? | ? | ? | ? | ? | |
| Simplified | ? | ? | ? | |||||
- Crouching Roundhouse:
| Damage | ? |  |
 |
 |
 |
 |
 |

|
| Stun | ?-? | |||||||
| Stun Timer | ? | |||||||
| Chain Cancel | No | |||||||
| Special Cancel | No | |||||||
| Frame Count | ? | ? | ? | ? | ? | ? | ? | |
| Simplified | ? | ? | ? | ? | ? | |||
Aerial Normals
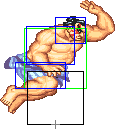
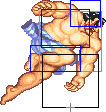
- Neutral Jumping Jab:
| Damage | ? |  |
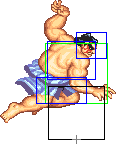 |
 |
 |
|
| Stun | ?-? | |||||
| Stun Timer | ? | |||||
| Frame Count | ? | ? | ? | ? | ∞ | |
| Simplified | ? | ? | ∞ | |||
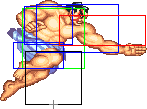
- Diagonal Jumping Jab:
| Damage | ? |  |
 |
 |
 |

|
| Stun | ?-? | |||||
| Stun Timer | ? | |||||
| Frame Count | ? | ? | ? | ? | ∞ | |
| Simplified | ? | ? | ∞ | |||
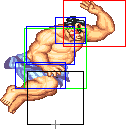
- Neutral Jumping Strong:
| Damage | ? |  |
 |
 |
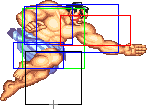
|
| Stun | ?-? | ||||
| Stun Timer | ? | ||||
| Frame Count | ? | ? | ? | ? | |
| Simplified | ? | ? | |||
 |
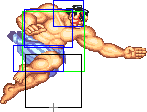 |
 |

| |
| Frame Count | ? | ? | ? | ∞ |
| Simplified | ∞ | |||
- Diagonal Jumping Strong:
| Damage | ? |  |
 |
 |
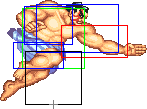
|
| Stun | ?-? | ||||
| Stun Timer | ? | ||||
| Frame Count | ? | ? | ? | ? | |
| Simplified | ? | ? | ? | ||
 |
 |
 |

| |
| Frame Count | ? | ? | ? | ∞ |
| Simplified | ∞ | |||
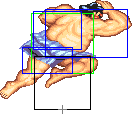
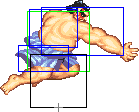
- Neutral/Diagonal Jumping Fierce:
| Damage | ? |  |
 |
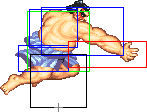 |
 |
 |
 |

|
| Stun | ?-? | |||||||
| Stun Timer | ? | |||||||
| Frame Count | ? | ? | ? | ? | ? | ? | ∞ | |
| Simplified | ? | ? | ∞ | |||||
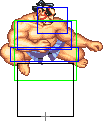
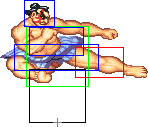
- Neutral Jumping Short:
| Damage | ? |  |
 |
 |
 |

|
| Stun | ?-? | |||||
| Stun Timer | ? | |||||
| Frame Count | ? | ? | ? | ? | ∞ | |
| Simplified | ? | ? | ∞ | |||
- Diagonal Jumping Short:
| Damage | ? | 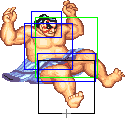 |
 |

|
| Stun | ?-? | |||
| Stun Timer | ? | |||
| Frame Count | ? | ? | ∞ | |
| Simplified | ? | ∞ | ||
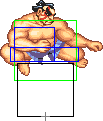
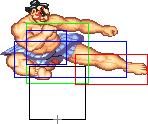
- Neutral Jumping Forward:
| Damage | ? |  |
 |
 |
 |
 |
 |
 |
 |

|
| Stun | ?-? | |||||||||
| Stun Timer | ? | |||||||||
| Frame Count | ? | ? | ? | ? | ? | ? | ? | ? | ∞ | |
| Simplified | ? | ? | ∞ | |||||||
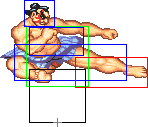
- Diagonal Jumping Forward:
| Damage | ? |  |
 |
 |
 |
 |
 |
 |
 |

|
| Stun | ?-? | |||||||||
| Stun Timer | ? | |||||||||
| Frame Count | ? | ? | ? | ? | ? | ? | ? | ? | ∞ | |
| Simplified | ? | ? | ∞ | |||||||
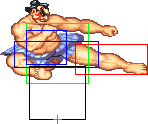
- Neutral Jumping Roundhouse:
| Damage | ? |  |
 |
 |
 |
 |
 |
 |
 |

|
| Stun | ?-? | |||||||||
| Stun Timer | ? | |||||||||
| Frame Count | ? | ? | ? | ? | ? | ? | ? | ? | ∞ | |
| Simplified | ? | ? | ∞ | |||||||
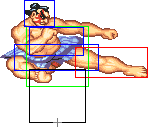
- Diagonal Jumping Roundhouse:
| Damage | ? |  |
 |
 |
 |
 |
 |
 |
 |

|
| Stun | ?-? | |||||||||
| Stun Timer | ? | |||||||||
| Frame Count | ? | ? | ? | ? | ? | ? | ? | ? | ∞ | |
| Simplified | ? | ? | ∞ | |||||||
Command Normals
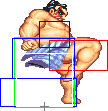
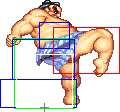
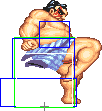
- Double Knee Attack: (On ground and close, ←/→ + Forward)
| Damage | ? |  |
 |
 |
 |
|
| Stun | ?-? | |||||
| Stun Timer | ? | |||||
| Chain Cancel | No | |||||
| Special Cancel | No | |||||
| Frame Count | ? | ? | ? | ? | ? | |
| Simplified | ? | ? | ? | |||
 |
 |
 |

| |
| Frame Count | ? | ? | ? | ? |
| Simplified | ? | |||
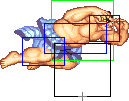
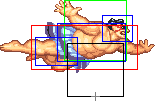
- Flying Sumo Press: (Jump diagonally, ↙/↓/↘ + Forward)
| Damage | ? | 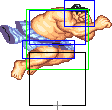 |
 |
|
| Stun | ?-? | |||
| Stun Timer | ? | |||
| Frame Count | ? | ? | ∞ | |
| Simplified | ? | ∞ | ||
Throws
E.Honda can throw using Strong, Fierce and Roundhouse. All his throws have the same range, which happens to be the best normal throw range in the game.
- Tawara Nage: (←/→ + Strong)
| Damage | ?(+?) |  |
 |

|
| Stun | ?-? | |||
| Stun Timer | 100 | |||
| Range (from axis) | 64 | |||
| Range advantage | 36 |
E.Honda tosses the opponent. The direction of the joystick determines the direction the enemy gets thrown at. Better used in the rare cases where you find yourself cornered and want to corner the opponent.
- Saba Ori: (←/→ + Fierce)
| Damage | ? + ?*n |  |
 |

|
| Stun | ?-? | |||
| Stun Timer | 0 | |||
| Range (from axis) | 64 | |||
| Range advantage | 36 |
This is the throw you will be using the most. It's untechable, does nice damage, and sets up crossup / walk under / tick shenanigans. You can even crossup / walk under when in the corner after a fierce grab (you can walk under, cr. RH for a crossup, or go for a crossup d + Forward, cr.Jab, Oicho, etc). Note that some characters (Balrog, Cammy, DeeJay, Vega, Fei Long) cannot be walked under outside of the corner.
- Sekkan Kyaku: (←/→ + Roundhouse)
| Damage | ? + ?*n |  |
 |

|
| Stun | ?-? | |||
| Stun Timer | 0 | |||
| Range (from axis) | 64 | |||
| Range advantage | 36 |
E.Honda's knee bash. The only use I see in this throw is for throw mashing (so an HHS will not come out) because the Fierce throw gives you a better positioning when the opponent releases himself from the grab.
Special Moves
- Headbutt - Charge back, forward + Punch. Same as usual.
- Buttdrop - Charge down, up + Kick. Same as usual.
- Hundred Handslap - tap punch repeatedly. Can move and change speed during move.
The Basics
Why pick Old Honda? Old Honda loses ST Honda's 360 grab mixups, but gains important things as well:
- Regains his standing sweep kicks
- Has better ground fierce attacks
- Retains moving handslap
So the basics are HF-style grabby-into-slappy mixups.
