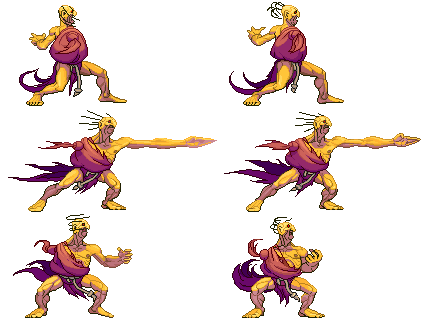
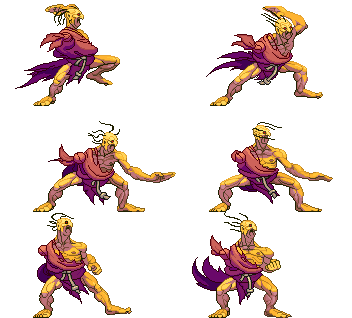
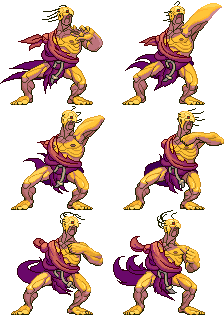
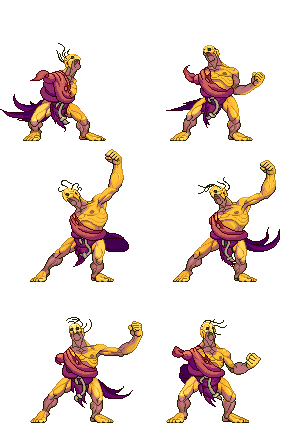
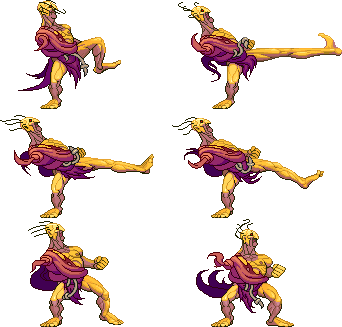
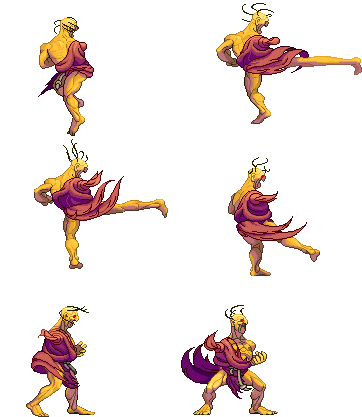
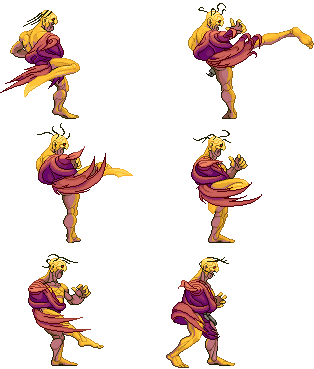
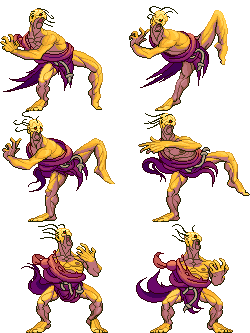
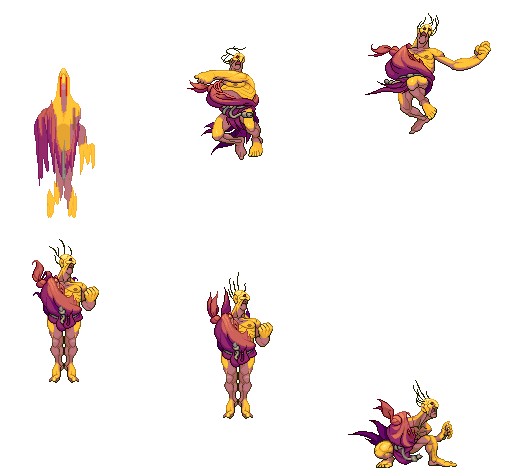
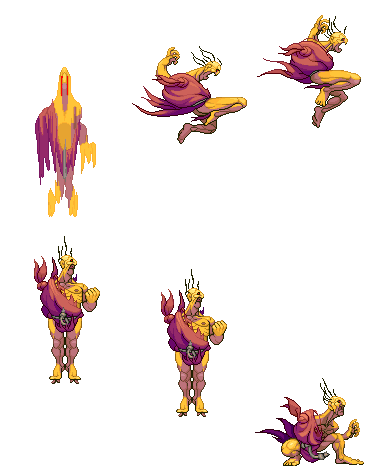
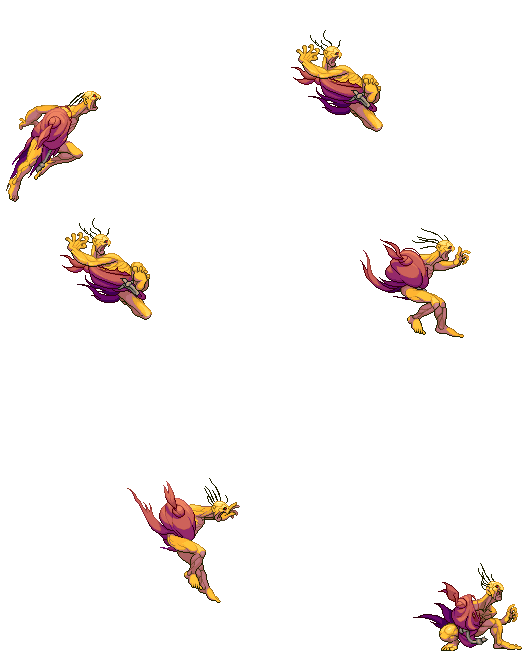
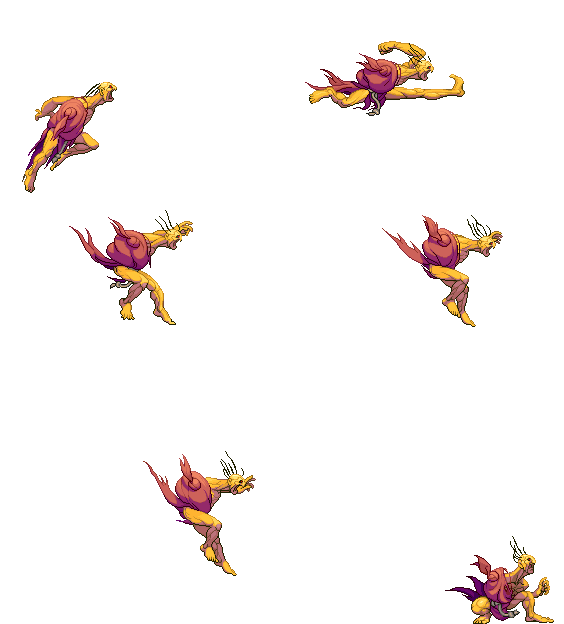
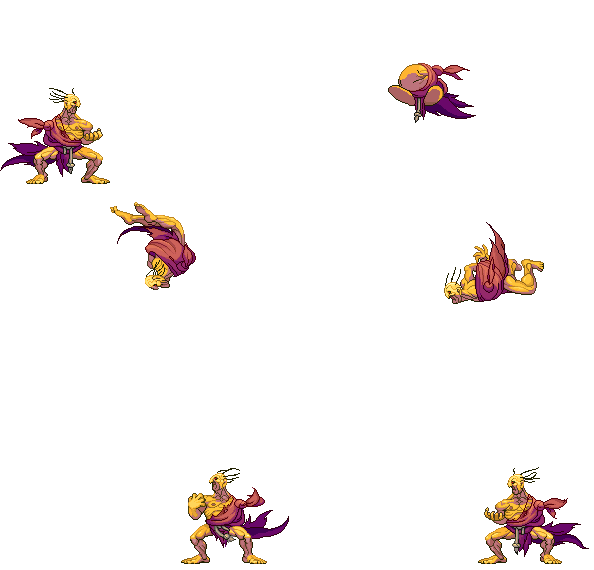
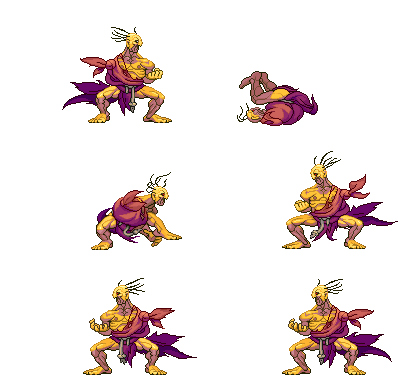
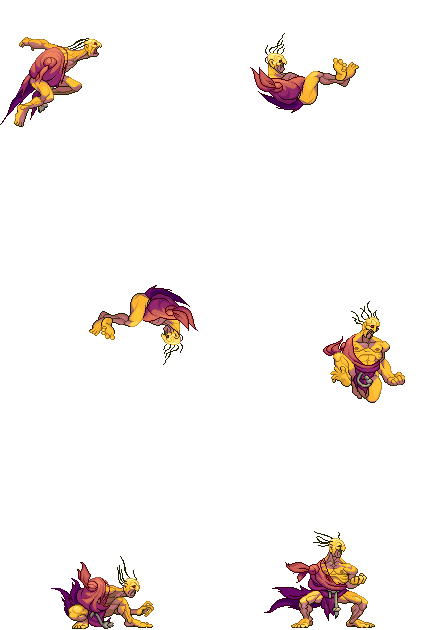
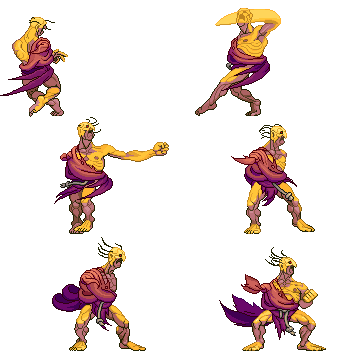
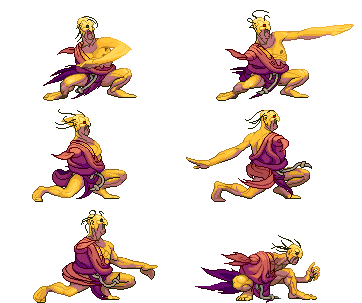
(→Throws) |
m (A little grammar here, a little formatting there... props to User:Jordi Olivares for some nice work so far.) |
||
| Line 11: | Line 11: | ||
*Best Kara-Throw: Far S. MK | *Best Kara-Throw: Far S. MK | ||
=== Character Colors === | ===Character Colors=== | ||
[[Image:(ocolor).gif|center]] | [[Image:(ocolor).gif|center]] | ||
== Moves List | ==Moves List== | ||
===Basic Moves=== | |||
{| border="1em" cellspacing="0" width="45%" style="border: 1px solid #999; background: #F2F2F2;" | {| border="1em" cellspacing="0" width="45%" style="border: 1px solid #999; background: #F2F2F2;" | ||
|- | |- | ||
| Line 93: | Line 92: | ||
| Universal Overhead || UOH | | Universal Overhead || UOH | ||
|} | |} | ||
===Normal Moves=== | |||
=== Normal Moves === | |||
{| border="1em" cellspacing="0" width="50%" style="border: 1px solid #999; background: #F2F2F2;" | {| border="1em" cellspacing="0" width="50%" style="border: 1px solid #999; background: #F2F2F2;" | ||
| Line 148: | Line 146: | ||
| Taunt || HP+HK | | Taunt || HP+HK | ||
|} | |} | ||
====Throws==== | |||
==== Throws ==== | |||
{| border="1em" cellspacing="0" width="40%" style="border: 1px solid #999; background: #F2F2F2;" | {| border="1em" cellspacing="0" width="40%" style="border: 1px solid #999; background: #F2F2F2;" | ||
|- | |- | ||
| Line 161: | Line 157: | ||
| Kuuchuu Jigoku Guruma || '''(Air)''' LP+LK | | Kuuchuu Jigoku Guruma || '''(Air)''' LP+LK | ||
|} | |} | ||
====Command Normals==== | |||
==== Command Normals ==== | |||
{| border="1em" cellspacing="0" width="50%" style="border: 1px solid #999; background: #F2F2F2;" | {| border="1em" cellspacing="0" width="50%" style="border: 1px solid #999; background: #F2F2F2;" | ||
|- | |- | ||
| Line 184: | Line 178: | ||
| 2 Dan Tobi || Up Up / Up Up-Forward / Up Up-Backwards | | 2 Dan Tobi || Up Up / Up Up-Forward / Up Up-Backwards | ||
|} | |} | ||
====Target Combos==== | |||
==== Target Combos ==== | |||
* close LK -> MK | * close LK -> MK | ||
=== Special Moves === | ===Special Moves=== | ||
{| border="1em" cellspacing="0" width="55%" style="border: 1px solid #999; background: #F2F2F2;" | {| border="1em" cellspacing="0" width="55%" style="border: 1px solid #999; background: #F2F2F2;" | ||
|- | |- | ||
| Line 205: | Line 196: | ||
| Hitobashira Nobiri || '''(Air)''' QCF+K (Tap K rapidly) | | Hitobashira Nobiri || '''(Air)''' QCF+K (Tap K rapidly) | ||
|} | |} | ||
===EX Moves=== | |||
=== EX Moves === | |||
{| border="1em" cellspacing="0" width="55%" style="border: 1px solid #999; background: #F2F2F2;" | {| border="1em" cellspacing="0" width="55%" style="border: 1px solid #999; background: #F2F2F2;" | ||
|- | |- | ||
| Line 220: | Line 209: | ||
| Hitobashira Nobiri || '''(Air)''' QCF+KK (Tap K rapidly) | | Hitobashira Nobiri || '''(Air)''' QCF+KK (Tap K rapidly) | ||
|} | |} | ||
===Super Arts=== | |||
=== Super Arts === | |||
{| border="1em" cellspacing="0" width="60%" style="border: 1px solid #999; background: #F2F2F2;" | {| border="1em" cellspacing="0" width="60%" style="border: 1px solid #999; background: #F2F2F2;" | ||
|- | |- | ||
| Line 239: | Line 226: | ||
| III || Tengu-Midareishi || QCF QCF+PP || 1 stock | | III || Tengu-Midareishi || QCF QCF+PP || 1 stock | ||
|} | |} | ||
==Move Analysis== | |||
== Move | *All sprites are taken from this site: http://www.zweifuss.com/index.htm | ||
*All Framedata in the "Move Analysis" section is taken from [http://home.att.ne.jp/star/GR/3rd/ Game Restaurant], this means the Framedata is from the Arcade version, unlike Karathrow, which uses the Dreamcast port. | |||
*All | |||
*All | |||
General | General | ||
| Line 256: | Line 241: | ||
*'''Num.''': Super Art number | *'''Num.''': Super Art number | ||
*'''Super Art''': Super Art name | *'''Super Art''': Super Art name | ||
*'''Super Art Stock''': Number of Gauge Bars the Super Art have, also the | *'''Super Art Stock''': Number of Gauge Bars the Super Art have, also the length of each bar (in pixels) | ||
Frame Data | Frame Data | ||
*'''Startup''': Number of frames it takes to start the move | *'''Startup''': Number of frames it takes to start the move | ||
*'''Hit''': Number of frames that can hit the opponent | *'''Hit''': Number of frames that can hit the opponent | ||
*'''Recovery''': Number of frames it takes to recover from the move | *'''Recovery''': Number of frames it takes to recover from the move | ||
*'''Blocked Advantage''': Number of frames you are in advantage/ | *'''Blocked Advantage''': Number of frames you are in advantage/disadvantage after opponent blocks the hit | ||
*'''Hit Advantage''': Number of frames you are in advantage/ | *'''Hit Advantage''': Number of frames you are in advantage/disadvantage after opponent takes the hit | ||
*'''Crouching Hit Advantage''': Number of frames you are in advantage/ | *'''Crouching Hit Advantage''': Number of frames you are in advantage/disadvantage after opponent takes the hit while crouching | ||
* + # : You have # frames of advantage | * + # : You have # frames of advantage | ||
* - # : You have # frames of | * - # : You have # frames of disadvantage | ||
* # ~ # : Advantage/disvantage can vary from # to # | * # ~ # : Advantage/disvantage can vary from # to # | ||
*Down: Enemy gets knocked down | *Down: Enemy gets knocked down | ||
| Line 275: | Line 260: | ||
*'''Hit''': Gauge you gain if you hit the opponent with the move (in pixels) | *'''Hit''': Gauge you gain if you hit the opponent with the move (in pixels) | ||
*'''Parry''': Gauge opponent gains when he parry the move (in pixels) | *'''Parry''': Gauge opponent gains when he parry the move (in pixels) | ||
===Basic Moves=== | |||
=== Basic Moves === | |||
[[Image:(orodf).gif|none]] | [[Image:(orodf).gif|none]] | ||
{| border="1em" cellspacing="0" width="25%" style="border: 1px solid #999; background: #F2F2F2;" | {| border="1em" cellspacing="0" width="25%" style="border: 1px solid #999; background: #F2F2F2;" | ||
| Line 288: | Line 271: | ||
|} | |} | ||
''Comments here'' | ''Comments here'' | ||
[[Image:(orodb).gif|none]] | [[Image:(orodb).gif|none]] | ||
| Line 300: | Line 282: | ||
|} | |} | ||
''Comments here'' | ''Comments here'' | ||
[[Image:(orojump).gif|none]] | [[Image:(orojump).gif|none]] | ||
| Line 310: | Line 291: | ||
|} | |} | ||
''Comments here'' | ''Comments here'' | ||
[[Image:(orojump).gif|none]] | [[Image:(orojump).gif|none]] | ||
| Line 320: | Line 300: | ||
|} | |} | ||
''Comments here'' | ''Comments here'' | ||
[[Image:(orow).gif|none]] | [[Image:(orow).gif|none]] | ||
| Line 330: | Line 309: | ||
|} | |} | ||
''Comments here'' | ''Comments here'' | ||
[[Image:(orotw).gif|none]] | [[Image:(orotw).gif|none]] | ||
| Line 340: | Line 318: | ||
|} | |} | ||
''Comments here'' | ''Comments here'' | ||
[[Image:(orot).gif|none]] | [[Image:(orot).gif|none]] | ||
| Line 350: | Line 327: | ||
|} | |} | ||
''Comments here'' | ''Comments here'' | ||
[[Image:(oroparry).gif|none]] | [[Image:(oroparry).gif|none]] | ||
| Line 393: | Line 369: | ||
{| border="1em" cellspacing="0" width="57%" style="border: 1px solid #999; background: #F2F2F2;" | {| border="1em" cellspacing="0" width="57%" style="border: 1px solid #999; background: #F2F2F2;" | ||
|- | |- | ||
|*** (You gain 4 of gauge for whatever attack parried, and for whatever hit you parry during | |*** (You gain 4 of gauge for whatever attack parried, and for whatever hit you parry during multi-hit attack) | ||
|} | |} | ||
You can buffer any motion during High or Low parry, but NOT during Air parry, also parry resets the juggle count (and thus resets all scaling). | You can buffer any motion during High or Low parry, but NOT during Air parry, also parry resets the juggle count (and thus resets all scaling). | ||
*'''Parry information is taken from Shoryuken Forums, | *'''Parry information is taken from Shoryuken Forums, specifically from user JinraiPVC. Thanks for this information dude''' | ||
=== Normal Moves === | === Normal Moves === | ||
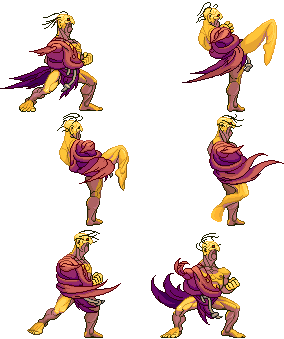
Please note that the images | Please note that the images shown in this section are for the first frame it hits, so this means the opponent is taking the hit in the image shown on the move. The first frame of every move (except 2nd throw image sprites) is used to illustrate the maximum range of every attack. Note also that those images are ACCURATE, they are exactly the first frame it hits, so the opponent takes damage but doesn't enter the "pain" frame until a frame later. | ||
[[Image:(orolp).gif|none]] | [[Image:(orolp).gif|none]] | ||
| Line 423: | Line 399: | ||
|} | |} | ||
''Comments here'' | ''Comments here'' | ||
[[Image:(oromp).gif|none]] | [[Image:(oromp).gif|none]] | ||
| Line 447: | Line 422: | ||
|} | |} | ||
''Comments here'' | ''Comments here'' | ||
[[Image:(orohp).gif|none]] | [[Image:(orohp).gif|none]] | ||
| Line 471: | Line 445: | ||
|} | |} | ||
''Comments here'' | ''Comments here'' | ||
[[Image:(orocloselp).gif|none]] | [[Image:(orocloselp).gif|none]] | ||
| Line 495: | Line 468: | ||
|} | |} | ||
''Comments here'' | ''Comments here'' | ||
[[Image:(oroclosemp).gif|none]] | [[Image:(oroclosemp).gif|none]] | ||
| Line 519: | Line 491: | ||
|} | |} | ||
''Comments here'' | ''Comments here'' | ||
[[Image:(orolk).gif|none]] | [[Image:(orolk).gif|none]] | ||
| Line 543: | Line 514: | ||
|} | |} | ||
''Comments here'' | ''Comments here'' | ||
[[Image:(oromk).gif|none]] | [[Image:(oromk).gif|none]] | ||
| Line 567: | Line 537: | ||
|} | |} | ||
''Comments here'' | ''Comments here'' | ||
[[Image:(orohk).gif|none]] | [[Image:(orohk).gif|none]] | ||
| Line 591: | Line 560: | ||
|} | |} | ||
''Comments here'' | ''Comments here'' | ||
[[Image:(orocloselk).gif|none]] | [[Image:(orocloselk).gif|none]] | ||
| Line 615: | Line 583: | ||
|} | |} | ||
''Comments here'' | ''Comments here'' | ||
[[Image:(oroclosemk).gif|none]] | [[Image:(oroclosemk).gif|none]] | ||
| Line 639: | Line 606: | ||
|} | |} | ||
''Comments here'' | ''Comments here'' | ||
[[Image:(orojlp).gif|none]] | [[Image:(orojlp).gif|none]] | ||
| Line 663: | Line 629: | ||
|} | |} | ||
''Comments here'' | ''Comments here'' | ||
[[Image:(oronjlp).gif|none]] | [[Image:(oronjlp).gif|none]] | ||
| Line 687: | Line 652: | ||
|} | |} | ||
''Comments here'' | ''Comments here'' | ||
[[Image:(orojlp).gif|none]] | [[Image:(orojlp).gif|none]] | ||
| Line 711: | Line 675: | ||
|} | |} | ||
''Comments here'' | ''Comments here'' | ||
[[Image:(oronjlp).gif|none]] | [[Image:(oronjlp).gif|none]] | ||
| Line 735: | Line 698: | ||
|} | |} | ||
''Comments here'' | ''Comments here'' | ||
[[Image:(orojhp).gif|none]] | [[Image:(orojhp).gif|none]] | ||
| Line 759: | Line 721: | ||
|} | |} | ||
''Comments here'' | ''Comments here'' | ||
[[Image:(oronjhp).gif|none]] | [[Image:(oronjhp).gif|none]] | ||
| Line 783: | Line 744: | ||
|} | |} | ||
''Comments here'' | ''Comments here'' | ||
[[Image:(orojlk).gif|none]] | [[Image:(orojlk).gif|none]] | ||
| Line 807: | Line 767: | ||
|} | |} | ||
''Comments here'' | ''Comments here'' | ||
[[Image:(oronjlk).gif|none]] | [[Image:(oronjlk).gif|none]] | ||
| Line 831: | Line 790: | ||
|} | |} | ||
''Comments here'' | ''Comments here'' | ||
[[Image:(orojlk).gif|none]] | [[Image:(orojlk).gif|none]] | ||
| Line 855: | Line 813: | ||
|} | |} | ||
''Comments here'' | ''Comments here'' | ||
[[Image:(oronjlk).gif|none]] | [[Image:(oronjlk).gif|none]] | ||
| Line 879: | Line 836: | ||
|} | |} | ||
''Comments here'' | ''Comments here'' | ||
[[Image:(orojhk).gif|none]] | [[Image:(orojhk).gif|none]] | ||
| Line 903: | Line 859: | ||
|} | |} | ||
''Comments here'' | ''Comments here'' | ||
[[Image:(oronjhk).gif|none]] | [[Image:(oronjhk).gif|none]] | ||
| Line 927: | Line 882: | ||
|} | |} | ||
''Comments here'' | ''Comments here'' | ||
[[Image:(oronjlk).gif|none]] | [[Image:(oronjlk).gif|none]] | ||
| Line 952: | Line 906: | ||
''Comments here'' | ''Comments here'' | ||
====Throws==== | |||
==== Throws ==== | |||
[[Image:(orokjk).gif|none]] | [[Image:(orokjk).gif|none]] | ||
{| border="1em" cellspacing="0" width="85%" style="border: 1px solid #999; background: #F2F2F2;" | {| border="1em" cellspacing="0" width="85%" style="border: 1px solid #999; background: #F2F2F2;" | ||
| Line 977: | Line 929: | ||
|} | |} | ||
''Comments here'' | ''Comments here'' | ||
[[Image:(orotn).gif|none]] | [[Image:(orotn).gif|none]] | ||
| Line 1,026: | Line 977: | ||
''Comments here'' | ''Comments here'' | ||
==== Command Normals ==== | ====Command Normals==== | ||
[[Image:(orofmp).gif|none]] | [[Image:(orofmp).gif|none]] | ||
{| border="1em" cellspacing="0" width="60%" style="border: 1px solid #999; background: #F2F2F2;" | {| border="1em" cellspacing="0" width="60%" style="border: 1px solid #999; background: #F2F2F2;" | ||
| Line 1,050: | Line 1,000: | ||
|} | |} | ||
''Comments here'' | ''Comments here'' | ||
[[Image:(oroclp).gif|none]] | [[Image:(oroclp).gif|none]] | ||
| Line 1,074: | Line 1,023: | ||
|} | |} | ||
''Comments here'' | ''Comments here'' | ||
[[Image:(orocmp).gif|none]] | [[Image:(orocmp).gif|none]] | ||
| Line 1,098: | Line 1,046: | ||
|} | |} | ||
''Comments here'' | ''Comments here'' | ||
[[Image:(orochp).gif|none]] | [[Image:(orochp).gif|none]] | ||
| Line 1,122: | Line 1,069: | ||
|} | |} | ||
''Comments here'' | ''Comments here'' | ||
[[Image:(oroclk).gif|none]] | [[Image:(oroclk).gif|none]] | ||
| Line 1,146: | Line 1,092: | ||
|} | |} | ||
''Comments here'' | ''Comments here'' | ||
[[Image:(orocmk).gif|none]] | [[Image:(orocmk).gif|none]] | ||
| Line 1,170: | Line 1,115: | ||
|} | |} | ||
''Comments here'' | ''Comments here'' | ||
[[Image:(orochk).gif|none]] | [[Image:(orochk).gif|none]] | ||
| Line 1,194: | Line 1,138: | ||
|} | |} | ||
''Comments here'' | ''Comments here'' | ||
[[Image:(orocjj).gif|none]] | [[Image:(orocjj).gif|none]] | ||
| Line 1,219: | Line 1,162: | ||
''Comments here'' | ''Comments here'' | ||
=== Target Combo === | ===Target Combo=== | ||
==Combos== | ==Combos== | ||
| Line 1,247: | Line 1,190: | ||
*Personal Action: Recovers stun meter. | *Personal Action: Recovers stun meter. | ||
{{Template:3rd Strike}} | {{Template:3rd Strike}} | ||
Revision as of 14:35, 29 October 2008
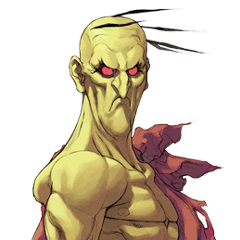
Introduction
Specific Character Information
- Stamina: 1120
- Stun Bar Length (in pixels): 72 (Long)
- Stun Bar Recovery (frames it takes to recover 1 pixel): 24
- Taunt: Recovers stun by 600-800% as the taunt is held longer.
- Best Kara-Throw: Far S. MK
Character Colors
Moves List
Basic Moves
| Move | Convention |
| Forward | F |
| Back | B |
| Crouch | C / D |
| Up | U |
| Jump | J |
| Jump Forward | JF |
| Jump Backwards | JB |
| Super Jump | D-U |
| Super Jump Forward | D-UF |
| Super Jump Backwards | D-UB |
| Dash Forward | FF |
| Dash Backwards | BB |
| Quarter Circle Forward | QCF |
| Half Circle Backwards | HCB |
| Charge Back, then Forward | (B)F |
| Charge Down, then Up | (D)U |
| Guard (High) | B when enemy is attacking |
| Guard (Low) | DB when enemy is attacking |
| Parry (High) | Tap F when about to take a hit |
| Parry (Low) | Tap D when about to take a hit |
| Parry (Air) | Tap F in air when about to take a hit |
| Red Parry | Execute parry after blocking a hit in a combo |
| Punch (Any) | P |
| Kick (Any) | K |
| 2 Punches | PP |
| 2 Kicks | KK |
| 3 Punches | PPP |
| 3 Kicks | KKK |
| Jab | LP |
| Strong | MP |
| Fierce | HP |
| Short | LK |
| Forward | MK |
| Roundhouse | HK |
| Universal Overhead | UOH |
Normal Moves
| Move | Motion |
| Jab | LP |
| Strong | MP |
| Fierce | HP |
| Close Jab | (Close to opponent) LP |
| Close Strong | (Close to opponent) MP |
| Short | LK |
| Forward | MK |
| Roundhouse | HK |
| Close Short | (Close to opponent) LK |
| Close Forward | (Close to opponent) MK |
| Jumping Jab | (Air) LP |
| Jumping Strong | (Air) MP |
| Jumping Fierce | (Air) HP |
| Neutral Jumping Jab | (Air) LP |
| Neutral Jumping Strong | (Air) MP |
| Neutral Jumping Fierce | (Air) HP |
| Jumping Short | (Air) LK |
| Jumping Forward | (Air) MK |
| Jumping Roundhouse | (Air) HK |
| Neutral Jumping Short | (Air) LK |
| Neutral Jumping Forward | (Air) MK |
| Neutral Jumping Roundhouse | (Air) HK |
| Overhead | MP+MK |
| Taunt | HP+HK |
Throws
| Move Name | Motion |
| Kubi-jime Kataguruma | LP+LK or F+LP+LK |
| Tomoe Nage | B+LP+LK |
| Kuuchuu Jigoku Guruma | (Air) LP+LK |
Command Normals
| Move Name | Motion |
| Mawashi Hiji | F+MP |
| Crouching Jab | D+LP |
| Crouching Strong | D+MP |
| Crouching Fierce | D+HP |
| Crouching Short | D+LK |
| Crouching Forward | D+MK |
| Crouching Roundhouse | D+HK |
| 2 Dan Tobi | Up Up / Up Up-Forward / Up Up-Backwards |
Target Combos
- close LK -> MK
Special Moves
| Move Name | Motion |
| Nichiirin Shyou | (B)F+P |
| Oni Yanma | (D)U+P |
| Niou Riki | HCB+P |
| Jinchuu Watari | QCF+K |
| Hitobashira Nobiri | (Air) QCF+K (Tap K rapidly) |
EX Moves
| Move Name | Motion |
| Nichiirin Shyou | (B)F+PP |
| Oni Yanma | (D)U+PP |
| Jinchuu Watari | QCF+KK |
| Hitobashira Nobiri | (Air) QCF+KK (Tap K rapidly) |
Super Arts
| Num. | Super Art Name | Motion | Super Bars |
| I | Kishin-Riki | QCF QCF+P (Aproach opponent, then P) | 1 stock |
| I | Kishin-Tsui | QCF QCF+PP | 1 stock |
| II | Yagyou-Dama | QCF QCF+P | 3 stocks |
| II | Yagyou-Oodama | QCF QCF+PP | MAX required |
| III | Tengu-Stone | QCF QCF+P | 1 stock |
| III | Tengu-Midareishi | QCF QCF+PP | 1 stock |
Move Analysis
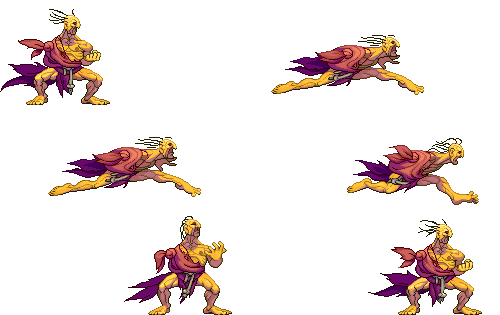
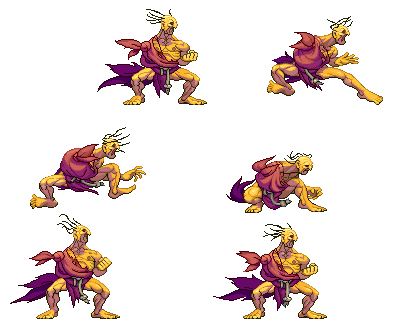
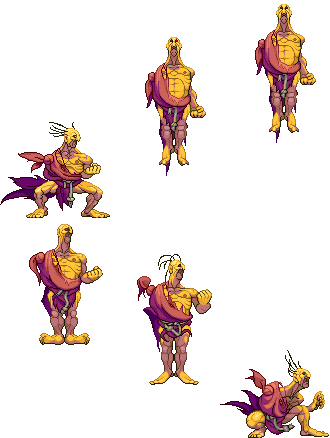
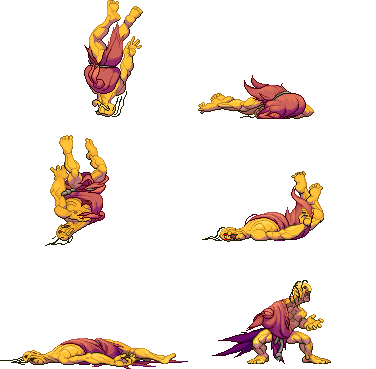
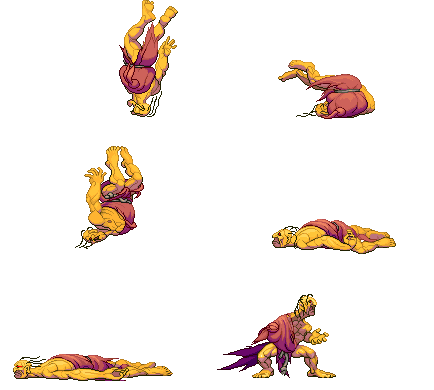
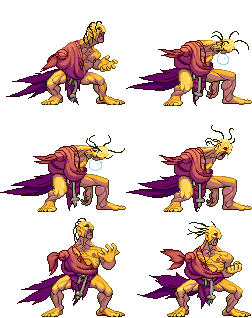
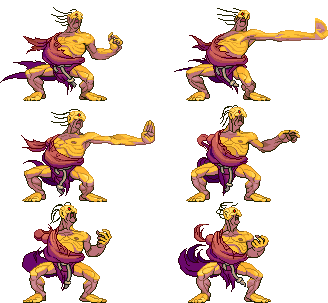
- All sprites are taken from this site: http://www.zweifuss.com/index.htm
- All Framedata in the "Move Analysis" section is taken from Game Restaurant, this means the Framedata is from the Arcade version, unlike Karathrow, which uses the Dreamcast port.
General
- Move: Move name
- Motion: What you must do to execute the move
- Damage: Damage it does (in pixels)
- Stun Damage: Stun Damage it does (in pixels)
- Chains into itself: If you can combo into the same movement
- Special Cancel: If you can cancel the move into a Special Move
- Super Cancel: If you can cancel the move into a Super Art
- Throw Range: Range of the throw (in pixels)
- Num.: Super Art number
- Super Art: Super Art name
- Super Art Stock: Number of Gauge Bars the Super Art have, also the length of each bar (in pixels)
Frame Data
- Startup: Number of frames it takes to start the move
- Hit: Number of frames that can hit the opponent
- Recovery: Number of frames it takes to recover from the move
- Blocked Advantage: Number of frames you are in advantage/disadvantage after opponent blocks the hit
- Hit Advantage: Number of frames you are in advantage/disadvantage after opponent takes the hit
- Crouching Hit Advantage: Number of frames you are in advantage/disadvantage after opponent takes the hit while crouching
- + # : You have # frames of advantage
- - # : You have # frames of disadvantage
- # ~ # : Advantage/disvantage can vary from # to #
- Down: Enemy gets knocked down
- Guard: How opponent must guard the move, High (H), Low (L) or both (HL)
- Parry: How opponent must parry the move, High (H), Low (L) or both (HL)
Gauge Increase
- Miss: Gauge you gain if you miss the move (in pixels)
- Blocked: Gauge you gain if the move gets blocked (in pixels)
- Hit: Gauge you gain if you hit the opponent with the move (in pixels)
- Parry: Gauge opponent gains when he parry the move (in pixels)
Basic Moves
| Move | Total frames |
|---|---|
| Dash Forward | 17 |
Comments here
| Move | Total frames |
|---|---|
| Dash Backwards | 11 |
Comments here
| Move | Motion | Startup Frames |
| Jump | BU or U or FU | 4 |
Comments here
| Move | Motion | Startup Frames |
| Super Jump | DBU or DU or DFU | 5 |
Comments here
| Move | Motion | Frames |
| Normal Wakeup | - | 71 |
Comments here
| Move | Motion | Frames |
| Quick Stand | Tap D when hitting the ground | 52 |
Comments here
| Move | Motion | Frames | Gauge Increase |
| Taunt | HP+HK | ?? | ? |
Comments here
| Move | Motion |
| Parry (High) | Tap F when about taking a hit |
| Parry (Low) | Tap D when about taking a hit |
| Parry (Air) | Tap F in air when about taking a hit |
Frame Data
| Move | Frames you're frozen | Frames opponent is frozen | Frame Advantage when parry is successful | Frames before you can try another parry |
| Parry (High) | 16 | 16 | +4(LP/LK) +3(MP/MK) +2(HP/HK) 0(Special/Super) -16(Fireball) | 24(19 when attack comes from the air)*,** |
| Parry (Low) | 16 | 16 | +4(LP/LK) +3(MP/MK) +2(HP/HK) 0(Special/Super) -16(Fireball) | 24(19 when attack comes from the air)*,** |
| Parry (Air) | 16 | 16 | +4(LP/LK) +3(MP/MK) +2(HP/HK) 0(Special/Super) -16(Fireball) | 21(19 when attack comes from the air)*,** |
| * (If a parry attempt is successful, the 19/21/24 frame restriction is taken away and you can attempt another parry immediately) |
| ** (If another attack connects within 2 frames of your parry, it will automatically be parried) |
Gauge Increase
| Move | Gauge Increase |
| Parry (High) | 4*** |
| Parry (Low) | 4*** |
| Parry (Air) | 4*** |
| *** (You gain 4 of gauge for whatever attack parried, and for whatever hit you parry during multi-hit attack) |
You can buffer any motion during High or Low parry, but NOT during Air parry, also parry resets the juggle count (and thus resets all scaling).
- Parry information is taken from Shoryuken Forums, specifically from user JinraiPVC. Thanks for this information dude
Normal Moves
Please note that the images shown in this section are for the first frame it hits, so this means the opponent is taking the hit in the image shown on the move. The first frame of every move (except 2nd throw image sprites) is used to illustrate the maximum range of every attack. Note also that those images are ACCURATE, they are exactly the first frame it hits, so the opponent takes damage but doesn't enter the "pain" frame until a frame later.
| Move | Motion | Damage | Stun Damage | Chains into itself | Special Cancel | Super Cancel |
| Far Jab | LP | 30 | 3 | No | Yes | Yes |
Frame Data
| Startup | Hit | Recovery | Blocked Advantage | Hit Advantage | Crouching Hit Advantage | Guard | Parry |
| 4 | 1 | 10 | 0 | 0 | 0 | HL | HL |
Gauge Increase
| Miss | Blocked | Hit | Parry (Gauge for opponent) |
| 0 | 1 | 2 | 4 |
Comments here
| Move | Motion | Damage | Stun Damage | Chains into itself | Special Cancel | Super Cancel |
| Far Strong | MP | 80 | 11 | No | No | No |
Frame Data
| Startup | Hit | Recovery | Blocked Advantage | Hit Advantage | Crouching Hit Advantage | Guard | Parry |
| 8 | 4 | 12 | -2 | -1 | 0 | HL | H |
Gauge Increase
| Miss | Blocked | Hit | Parry (Gauge for opponent) |
| 1 | 5 | 9 | 4 |
Comments here
| Move | Motion | Damage | Stun Damage | Chains into itself | Special Cancel | Super Cancel |
| Fierce | HP | 140(60+80) | 14(7+7) | No | No | No |
Frame Data
| Startup | Hit | Recovery | Blocked Advantage | Hit Advantage | Crouching Hit Advantage | Guard | Parry |
| 17 | 1 | 19 | -5 | -3 | -1 | H | H |
Gauge Increase
| Miss | Blocked | Hit | Parry (Gauge for opponent) |
| 2 | 6(1+4+1) | 17 | 8(4+4) |
Comments here
| Move | Motion | Damage | Stun Damage | Chains into itself | Special Cancel | Super Cancel |
| Close Jab | (Close to opponent) LP | 35 | 3 | No | Yes | Yes |
Frame Data
| Startup | Hit | Recovery | Blocked Advantage | Hit Advantage | Crouching Hit Advantage | Guard | Parry |
| 2 | 1 | 5 | +5 | +5 | +5 | HL | HL |
Gauge Increase
| Miss | Blocked | Hit | Parry (Gauge for opponent) |
| 0 | 1 | 2 | 4 |
Comments here
| Move | Motion | Damage | Stun Damage | Chains into itself | Special Cancel | Super Cancel |
| Close Strong | (Close to opponent) MP | 70(40+30) | 8(4+4) | Yes | Yes/Yes | Yes/Yes |
Frame Data
| Startup | Hit | Recovery | Blocked Advantage | Hit Advantage | Crouching Hit Advantage | Guard | Parry |
| 5 | 2 | 16 | -4 | 0 | 0 | HL | H |
Gauge Increase
| Miss | Blocked | Hit | Parry (Gauge for opponent) |
| 1 | 6(5+1) | 11 | 8(4+4) |
Comments here
| Move | Motion | Damage | Stun Damage | Chains into itself | Special Cancel | Super Cancel |
| Far Short | LK | 35 | 3 | No | Yes | Yes |
Frame Data
| Startup | Hit | Recovery | Blocked Advantage | Hit Advantage | Crouching Hit Advantage | Guard | Parry |
| 3 | 1 | 8 | +2 | +2 | +2 | HL | HL |
Gauge Increase
| Miss | Blocked | Hit | Parry (Gauge for opponent) |
| 0 | 1 | 2 | 4 |
Comments here
| Move | Motion | Damage | Stun Damage | Chains into itself | Special Cancel | Super Cancel |
| Far Forward | MK | 100 | 13 | No | No | No |
Frame Data
| Startup | Hit | Recovery | Blocked Advantage | Hit Advantage | Crouching Hit Advantage | Guard | Parry |
| 8 | 6 | 12 | -5 | -4 | -3 | HL | H |
Gauge Increase
| Miss | Blocked | Hit | Parry (Gauge for opponent) |
| 1 | 5 | 9 | 4 |
Comments here
| Move | Motion | Damage | Stun Damage | Chains into itself | Special Cancel | Super Cancel |
| Roundhouse | HK | 120 | 19 | No | No | No |
Frame Data
| Startup | Hit | Recovery | Blocked Advantage | Hit Advantage | Crouching Hit Advantage | Guard | Parry |
| 7 | 4 | 17 | -5 | -3 | -1 | HL | H |
Gauge Increase
| Miss | Blocked | Hit | Parry (Gauge for opponent) |
| 2 | 7 | 15 | 4 |
Comments here
| Move | Motion | Damage | Stun Damage | Chains into itself | Special Cancel | Super Cancel |
| Close Short | (Close to opponent) LK | 40 | 3 | No | Yes | Yes |
Frame Data
| Startup | Hit | Recovery | Blocked Advantage | Hit Advantage | Crouching Hit Advantage | Guard | Parry |
| 2 | 2 | 4 | +4 | +4 | +4 | HL | HL |
Gauge Increase
| Miss | Blocked | Hit | Parry (Gauge for opponent) |
| 0 | 1 | 2 | 4 |
Comments here
| Move | Motion | Damage | Stun Damage | Chains into itself | Special Cancel | Super Cancel |
| Close Forward | (Close to opponent) MK | 110 | 11 | No | Yes | Yes |
Frame Data
| Startup | Hit | Recovery | Blocked Advantage | Hit Advantage | Crouching Hit Advantage | Guard | Parry |
| 4 | 3 | 15 | -5 | -4 | -3 | HL | H |
Gauge Increase
| Miss | Blocked | Hit | Parry (Gauge for opponent) |
| 1 | 5 | 9 | 4 |
Comments here
| Move | Motion | Damage | Stun Damage | Chains into itself | Special Cancel | Super Cancel |
| Jump Jab | (Air) LP | 60 | 7 | No | No | No |
Frame Data
| Startup | Hit | Recovery | Blocked Advantage | Hit Advantage | Crouching Hit Advantage | Guard | Parry |
| 7 | 17 | - | - | - | - | H | H |
Gauge Increase
| Miss | Blocked | Hit | Parry (Gauge for opponent) |
| 0 | 1 | 2 | 4 |
Comments here
| Move | Motion | Damage | Stun Damage | Chains into itself | Special Cancel | Super Cancel |
| Neutral Jump Jab | (Air) LP | 60 | 5 | No | No | No |
Frame Data
| Startup | Hit | Recovery | Blocked Advantage | Hit Advantage | Crouching Hit Advantage | Guard | Parry |
| 3 | 12 | - | - | - | - | H | H |
Gauge Increase
| Miss | Blocked | Hit | Parry (Gauge for opponent) |
| 0 | 1 | 2 | 4 |
Comments here
| Move | Motion | Damage | Stun Damage | Chains into itself | Special Cancel | Super Cancel |
| Jump Strong | (Air) MP | 100 | 11 | No | No | No |
Frame Data
| Startup | Hit | Recovery | Blocked Advantage | Hit Advantage | Crouching Hit Advantage | Guard | Parry |
| 10 | 8 | - | - | - | - | H | H |
Gauge Increase
| Miss | Blocked | Hit | Parry (Gauge for opponent) |
| 1 | 5 | 9 | 4 |
Comments here
| Move | Motion | Damage | Stun Damage | Chains into itself | Special Cancel | Super Cancel |
| Neutral Jump Strong | (Air) MP | 110 | 9 | No | No | No |
Frame Data
| Startup | Hit | Recovery | Blocked Advantage | Hit Advantage | Crouching Hit Advantage | Guard | Parry |
| 5 | 6 | - | - | - | - | H | H |
Gauge Increase
| Miss | Blocked | Hit | Parry (Gauge for opponent) |
| 1 | 5 | 9 | 4 |
Comments here
| Move | Motion | Damage | Stun Damage | Chains into itself | Special Cancel | Super Cancel |
| Jump Fierce | (Air) HP | 140(100+40) | 18(9+9) | No | No | No |
Frame Data
| Startup | Hit | Recovery | Blocked Advantage | Hit Advantage | Crouching Hit Advantage | Guard | Parry |
| 9 | 2 | - | - | - | - | H | H |
Gauge Increase
| Miss | Blocked | Hit | Parry (Gauge for opponent) |
| 2 | 8 | 17 | 8(4+4) |
Comments here
| Move | Motion | Damage | Stun Damage | Chains into itself | Special Cancel | Super Cancel |
| Neutral Jump Fierce | (Air) HP | 140 | 13 | No | No | No |
Frame Data
| Startup | Hit | Recovery | Blocked Advantage | Hit Advantage | Crouching Hit Advantage | Guard | Parry |
| 7 | 4 | - | - | - | - | H | H |
Gauge Increase
| Miss | Blocked | Hit | Parry (Gauge for opponent) |
| 2 | 7 | 15 | 4 |
Comments here
| Move | Motion | Damage | Stun Damage | Chains into itself | Special Cancel | Super Cancel |
| Jump Short | (Air) LK | 60 | 5 | No | No | No |
Frame Data
| Startup | Hit | Recovery | Blocked Advantage | Hit Advantage | Crouching Hit Advantage | Guard | Parry |
| 3 | 13 | - | - | - | - | H | H |
Gauge Increase
| Miss | Blocked | Hit | Parry (Gauge for opponent) |
| 0 | 1 | 2 | 4 |
Comments here
| Move | Motion | Damage | Stun Damage | Chains into itself | Special Cancel | Super Cancel |
| Neutral Jump Short | (Air) LK | 60 | 7 | No | No | No |
Frame Data
| Startup | Hit | Recovery | Blocked Advantage | Hit Advantage | Crouching Hit Advantage | Guard | Parry |
| 2 | 10 | - | - | - | - | H | H |
Gauge Increase
| Miss | Blocked | Hit | Parry (Gauge for opponent) |
| 0 | 1 | 2 | 4 |
Comments here
| Move | Motion | Damage | Stun Damage | Chains into itself | Special Cancel | Super Cancel |
| Jump Forward | (Air) MK | 100 | 9 | No | No | No |
Frame Data
| Startup | Hit | Recovery | Blocked Advantage | Hit Advantage | Crouching Hit Advantage | Guard | Parry |
| 3 | 6 | - | - | - | - | H | H |
Gauge Increase
| Miss | Blocked | Hit | Parry (Gauge for opponent) |
| 1 | 5 | 9 | 4 |
Comments here
| Move | Motion | Damage | Stun Damage | Chains into itself | Special Cancel | Super Cancel |
| Neutral Jump Forward | (Air) MK | 110 | 11 | No | No | No |
Frame Data
| Startup | Hit | Recovery | Blocked Advantage | Hit Advantage | Crouching Hit Advantage | Guard | Parry |
| 4 | 8 | - | - | - | - | H | H |
Gauge Increase
| Miss | Blocked | Hit | Parry (Gauge for opponent) |
| 1 | 5 | 9 | 4 |
Comments here
| Move | Motion | Damage | Stun Damage | Chains into itself | Special Cancel | Super Cancel |
| Jump Roundhouse | (Air) HK | 120 | 13 | No | No | No |
Frame Data
| Startup | Hit | Recovery | Blocked Advantage | Hit Advantage | Crouching Hit Advantage | Guard | Parry |
| 5 | 3 | - | - | - | - | H | H |
Gauge Increase
| Miss | Blocked | Hit | Parry (Gauge for opponent) |
| 2 | 7 | 15 | 4 |
Comments here
| Move | Motion | Damage | Stun Damage | Chains into itself | Special Cancel | Super Cancel |
| Neutral Jump Roundhouse | (Air) HK | 140 | 15 | No | No | No |
Frame Data
| Startup | Hit | Recovery | Blocked Advantage | Hit Advantage | Crouching Hit Advantage | Guard | Parry |
| 5 | 5 | - | - | - | - | H | H |
Gauge Increase
| Miss | Blocked | Hit | Parry (Gauge for opponent) |
| 2 | 7 | 15 | 4 |
Comments here
| Move | Motion | Damage | Stun Damage | Chains into itself | Special Cancel | Super Cancel |
| Tobi Hiza | MP+MK | 40 | 3 | No | No | No |
Frame Data
| Startup | Hit | Recovery | Blocked Advantage | Hit Advantage | Crouching Hit Advantage | Guard | Parry |
| 15 | 10 | 5 | -5~+7 | 0~+8 | +1~+9 | H | H |
Gauge Increase
| Miss | Blocked | Hit | Parry (Gauge for opponent) |
| 0 | 1 | 2 | 4 |
Comments here
Throws
| Move | Motion | Damage | Stun Damage | Throw Range | Kara-Throw | Kara-Throw Range |
| Kubi-jime Kataguruma | LP+LK or F+LP+LK | 115(6x30) | 20(6x5) | 25 | Far S.MK/S.HK/Close S.MP/Close S.MK | 53/39/35/35 |
Frame Data
| Startup | Hit | Recovery | Blocked Advantage | Hit Advantage | Crouching Hit Advantage | Guard | Parry |
| 2 | 1 | 21 | - | - | - | LP+LK | - |
Gauge Increase
| Miss | Blocked | Hit |
| 0 | 7 (for the player who blocked) | 12 |
Comments here
| Move | Motion | Damage | Stun Damage | Throw Range | Kara-Throw | Kara-Throw Range |
| Tomoe Nage | B+LP+LK | 120 | 15 | 25 | Far S.MK/S.HK/Close S.MP/Close S.MK | 53/39/35/35 |
Frame Data
| Startup | Hit | Recovery | Blocked Advantage | Hit Advantage | Crouching Hit Advantage | Guard | Parry |
| 2 | 1 | 21 | - | - | - | LP+LK | - |
Gauge Increase
| Miss | Blocked | Hit |
| 0 | 7 (for the player who blocked) | 7 |
Comments here
| Move | Motion | Damage | Stun Damage | Throw Range (Front) | Throw Range (Up & Down) |
| Kuuchuu Jigoku Guruma | (Air) LP+LK | 180 | 15 | 19 | 62~91 |
Frame Data
| Startup | Hit | Recovery | Blocked Advantage | Hit Advantage | Crouching Hit Advantage | Guard | Parry |
| 6 | 1 | - | - | - | - | LP+LK | - |
Gauge Increase
| Miss | Blocked | Hit |
| 0 | - | 7 |
Comments here
Command Normals
| Move | Motion | Damage | Stun Damage | Chains into itself | Special Cancel | Super Cancel |
| Mawashi Hiji | F+MP | 90 | 13 | No | Yes | Yes |
Frame Data
| Startup | Hit | Recovery | Blocked Advantage | Hit Advantage | Crouching Hit Advantage | Guard | Parry |
| 8 | 2 | 18 | -5 | -4 | -3 | HL | H |
Gauge Increase
| Miss | Blocked | Hit | Parry (Gauge for opponent) |
| 1 | 5 | 9 | 4 |
Comments here
| Move | Motion | Damage | Stun Damage | Chains into itself | Special Cancel | Super Cancel |
| Crouch Jab | D+LP | 30 | 3 | Yes | Yes | Yes |
Frame Data
| Startup | Hit | Recovery | Blocked Advantage | Hit Advantage | Crouching Hit Advantage | Guard | Parry |
| 4 | 2 | 9 | +1 | +1 | +1 | HL | HL |
Gauge Increase
| Miss | Blocked | Hit | Parry (Gauge for opponent) |
| 0 | 1 | 2 | 4 |
Comments here
| Move | Motion | Damage | Stun Damage | Chains into itself | Special Cancel | Super Cancel |
| Crouch Strong | D+MP | 65 | 3 | No | Yes | Yes |
Frame Data
| Startup | Hit | Recovery | Blocked Advantage | Hit Advantage | Crouching Hit Advantage | Guard | Parry |
| 7 | 6 | 12 | -5 | -4 | -3 | HL | HL |
Gauge Increase
| Miss | Blocked | Hit | Parry (Gauge for opponent) |
| 1 | 5 | 9 | 4 |
Comments here
| Move | Motion | Damage | Stun Damage | Chains into itself | Special Cancel | Super Cancel |
| Crouch Fierce | D+HP | 120 | 11 | No | No | Yes |
Frame Data
| Startup | Hit | Recovery | Blocked Advantage | Hit Advantage | Crouching Hit Advantage | Guard | Parry |
| 6 | 4 | 18 | -2 | 0 | 0 | HL | HL |
Gauge Increase
| Miss | Blocked | Hit | Parry (Gauge for opponent) |
| 2 | 7 | 15 | 4 |
Comments here
| Move | Motion | Damage | Stun Damage | Chains into itself | Special Cancel | Super Cancel |
| Crouch Short | D+LK | 20 | 3 | No | Yes | Yes |
Frame Data
| Startup | Hit | Recovery | Blocked Advantage | Hit Advantage | Crouching Hit Advantage | Guard | Parry |
| 4 | 2 | 9 | +1 | +1 | +1 | L | L |
Gauge Increase
| Miss | Blocked | Hit | Parry (Gauge for opponent) |
| 0 | 1 | 2 | 4 |
Comments here
| Move | Motion | Damage | Stun Damage | Chains into itself | Special Cancel | Super Cancel |
| Crouch Forward | D+MK | 80 | 3 | No | Yes | Yes |
Frame Data
| Startup | Hit | Recovery | Blocked Advantage | Hit Advantage | Crouching Hit Advantage | Guard | Parry |
| 6 | 4 | 11 | 0 | +1 | +2 | L | L |
Gauge Increase
| Miss | Blocked | Hit | Parry (Gauge for opponent) |
| 1 | 5 | 9 | 4 |
Comments here
| Move | Motion | Damage | Stun Damage | Chains into itself | Special Cancel | Super Cancel |
| Crouch Roundhouse | D+HK | 100 | 3 | No | No | No |
Frame Data
| Startup | Hit | Recovery | Blocked Advantage | Hit Advantage | Crouching Hit Advantage | Guard | Parry |
| 10 | 2 | 20 | -6 | Down | Down | L | L |
Gauge Increase
| Miss | Blocked | Hit | Parry (Gauge for opponent) |
| 2 | 7 | 15 | 4 |
Comments here
| Move | Motion | Damage | Stun Damage | Chains into itself | Special Cancel | Super Cancel |
| 2 Dan Tobi | UU/U-UF/U-UB | - | - | No | No | No |
Frame Data
| Startup | Hit | Recovery | Blocked Advantage | Hit Advantage | Crouching Hit Advantage | Guard | Parry |
| - | - | - | - | - | - | - | - |
Gauge Increase
| Miss | Blocked | Hit | Parry (Gauge for opponent) |
| - | - | - | - |
Comments here
Target Combo
Combos
Crouch >R1> QCF x 2 + 2 Punches (EX Kishin Riki) ...........2 rd hit
Stand MP (hit rd 1) >Jinchu Nobori MK stand MP (2 rd hit) While the opponent in air you should make>QCF x 2 + Punch (Kishin Riki) ............
Frame Data
Normals
Throws
Command Normals
Special Moves
Super Arts
Additional Frame Data
Strategies
Overview
Basics
Super Art Selection
Kara-Techniques
Zoning
Mixups
Additional Notes
- Personal Action: Recovers stun meter.
