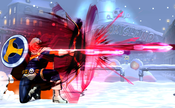
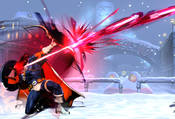
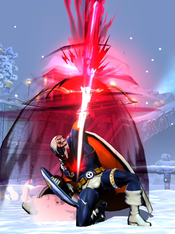
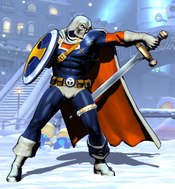
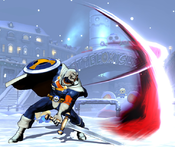
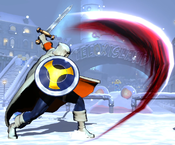
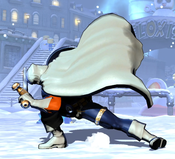
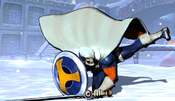
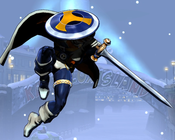
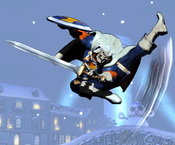
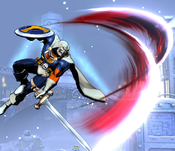
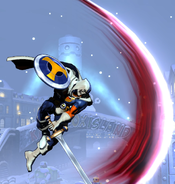
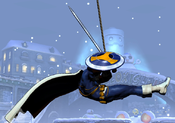
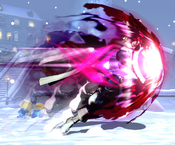
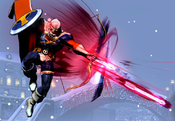
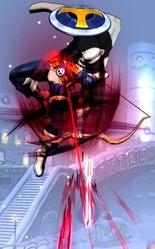
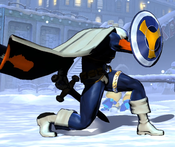
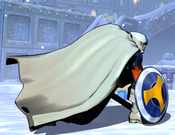
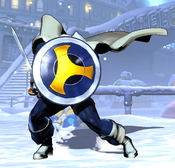
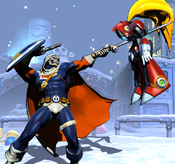
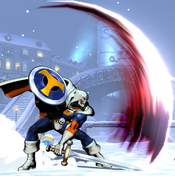
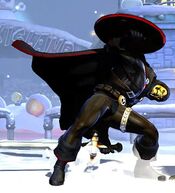
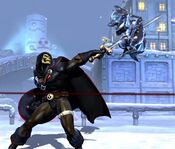
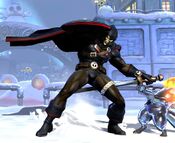
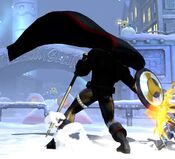
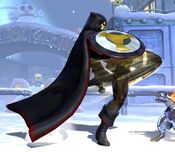
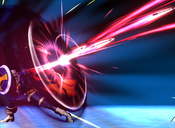
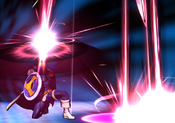
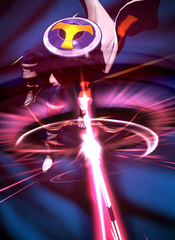
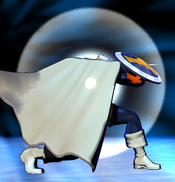
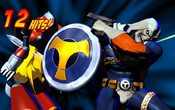
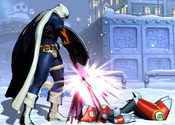
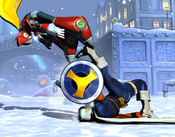
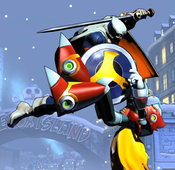
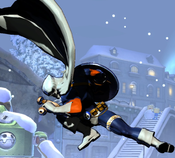
Doctor Doom is probably Taskmaster's single best friend, and you will generally never be wrong putting him behind Tony Masters in either 2nd or Anchor position. Doctor Doom is a capable damage engine via TAC or DHC, and Taskmaster can use all three of Doctor Doom's assists extremely well. Plasma Beam is useful for full-screen coverage and late-combo extensions, as well as giving Taskmaster the ability to convert off his air back throw. Those same extensions can come off Molecular Shield, which also enables Task to convert off his front grounded and air throws, and give him a slow, meaty assist to cover an approach. Finally, Hidden Missiles can help him fight airborne characters like Magneto or M.O.D.O.K. who desire to hang out in the corner and zone you. Additionally, Missiles enables Taskmaster to do unique combo extensions that pump his already impressive damage into the stratosphere. All three assists enable unblockables with good timing, though in terms of ease it goes Missiles > Shield > Beam. However, none compare to the ease of use of Taskmaster's other best friend, Dante.
| Line 828: | Line 828: | ||
}} | }} | ||
===== Sword Master H Follow-ups ===== | =====Sword Master H Follow-ups===== | ||
{{MoveData | {{MoveData | ||
|image=Taskmaster's_HeadButt.jpg | |image=Taskmaster's_HeadButt.jpg | ||
|caption= | |caption=Headbutt (universal) | ||
| | |input={{clr|H|Headbutt}}, {{clr|M|Below the Belt}}, {{clr|H|Low Kick}}, {{clr|H|Shield Bash}}, {{clr|M|Knee Kick}}, {{clr|H|Light's Out}} | ||
| | |image2=Taskmaster's_BelowTheBelt.jpg | ||
| | |caption2=Below the Belt | ||
|image3=Taskmaster's_LowKick.jpg | |||
|caption3=Low Kick | |||
|image4=Taskamster's_ShieldBash.jpg | |||
|caption4=Shield Bash | |||
|image5=Taskmaster's_KneeKick.jpg | |||
|caption5=Knee Kick | |||
|image6=Taskmaster's_Light'sOut.jpg | |||
|caption6=Light's Out | |||
|data= | |data= | ||
{{AttackData-UMVC3 | {{AttackData-UMVC3 | ||
|version={{clr| | |version=after blocked {{clr|L|623L}} | ||
|subtitle={{h}} | |subtitle= {{h}} | ||
|damage=30,000 | |damage=30,000 | ||
|guard={{unblockable}} | |guard={{unblockable}} | ||
| Line 851: | Line 859: | ||
|properties= | |properties= | ||
|description= | |description= | ||
Unblockable attack. If Taskmaster gets an opponent to block the initial swing but not pushblock it, he can open them up with this short-range attack, then finish the sequence for | Unblockable attack. If Taskmaster gets an opponent to block the initial swing ({{clr|L|623L}}) but not pushblock it, he can open them up with this short-range attack ({{clr|H|H}}), then finish the sequence with {{clr|H|Light's Out (236H)}} with the opportunity for follow-ups. At +4 on hit, his follow-up options are rather limited. Light's Out will force the opponent into a {{hardknockdown}}, which Taskmaster struggles to convert from on his own. Thus, a full combo off an unblockable usually requires X-factor, an assist, or meter. The headbutt can be canceled into Legion Arrow, which when combined with a DHC such as to Vergil's Spiral Swords, can net huge damage even without blowing X. | ||
}} | }} | ||
{{AttackData-UMVC3 | |||
|version=after successful {{clr|H|Headbutt}}, | |||
|subtitle= {{m}} | |||
{{AttackData-UMVC3 | |||
|version={{clr| | |||
|subtitle={{m}} | |||
|damage=28,000 | |damage=28,000 | ||
|guard={{mid}} | |guard={{mid}} | ||
| Line 874: | Line 873: | ||
|onhit=-1 | |onhit=-1 | ||
|onblock=-3 | |onblock=-3 | ||
|properties= | |properties=- | ||
|description= | |description=filler | ||
}} | }} | ||
{{AttackData-UMVC3 | |||
|version=after successful {{clr|M|Below the Belt}}, | |||
|subtitle= {{h}} | |||
{{AttackData-UMVC3 | |||
|version={{clr| | |||
|subtitle={{h}} | |||
|damage=30,000 | |damage=30,000 | ||
|guard={{low}} | |guard={{low}} | ||
| Line 899: | Line 888: | ||
|onhit=+4 | |onhit=+4 | ||
|onblock=+2 | |onblock=+2 | ||
|properties= | |properties=- | ||
|description= | |description=filler | ||
}} | }} | ||
{{AttackData-UMVC3 | |||
|version=after successful {{clr|H|Low Kick}}, | |||
|subtitle= {{h}} | |||
{{AttackData-UMVC3 | |||
|version={{clr|H| | |||
|subtitle={{h}} | |||
|damage=25,000 | |damage=25,000 | ||
|guard={{mid}} | |guard={{mid}} | ||
| Line 924: | Line 903: | ||
|onhit=0 | |onhit=0 | ||
|onblock=-2 | |onblock=-2 | ||
|properties= | |properties=- | ||
|description= | |description=filler | ||
}} | }} | ||
{{AttackData-UMVC3 | |||
|version=after successful {{clr|H|Shield Bash}}, | |||
|subtitle= {{m}} | |||
{{AttackData-UMVC3 | |||
|version={{clr| | |||
|subtitle={{m}} | |||
|damage=31,000 | |damage=31,000 | ||
|guard={{mid}} | |guard={{mid}} | ||
| Line 949: | Line 918: | ||
|onhit=+4 | |onhit=+4 | ||
|onblock=+2 | |onblock=+2 | ||
|properties= | |properties=- | ||
|description= | |description=filler | ||
}} | }} | ||
{{AttackData-UMVC3 | |||
|version=after successful {{clr|M|Knee Kick}} | |||
{{AttackData-UMVC3 | |||
|version={{clr| | |||
|subtitle={{qcf}} + {{h}} | |subtitle={{qcf}} + {{h}} | ||
|damage=10,000 + | |damage=10,000 + 50,000 | ||
|guard={{unblockable}} | |guard={{unblockable}} | ||
|startup=15 | |startup=15 | ||
| Line 971: | Line 930: | ||
|hits=x2 | |hits=x2 | ||
|recovery=1 | |recovery=1 | ||
|meter=+ | |meter=+450 | ||
|onhit=- | |onhit=- | ||
|onblock=- | |onblock=- | ||
|properties={{hardknockdown}}, second hit does not scale. | |properties={{hardknockdown}}, second hit does not scale. | ||
|description= | |description= | ||
Sequence ender that functions almost the same as Taskmaster's regular Sting Master ({{clr|S|236S}}) special. Ends in a Hard Knockdown that Taskmaster can follow up with an OTG Air Legion Arrow. | Sequence ender that functions almost the same as Taskmaster's regular Sting Master ({{clr|S|236S}}) special. Ends in a Hard Knockdown that Taskmaster can follow up with an OTG Air Legion Arrow. Note that there is a short window in which you can follow up before the opponent hits the ground. The only thing that can link here is Snapback, except against exceptional hurtboxes. | ||
}} | }} | ||
}} | }} | ||
Revision as of 10:04, 3 July 2024
Introduction
Although he does not have any actual superpowers, Tony Masters was seemingly born with an enhanced form of photographic memory called "photographic reflexes". After witnessing a person performing any physical movement, Tony is able to replicate it perfectly. He eventually created the persona of Taskmaster, working as a mercenary and using his unique ability to mimic the combat styles of superheroes and other notable fighters. While he is primarily depicted as a villain, Taskmaster is motivated mainly by money and has been shown to fight alongside heroes when it is in his interest to do so.
In UMvC3, Taskmaster is an all-arounder who has moves thematically borrowed from Hawkeye, Captain America, and Spider-Man, paired with a handful of original abilities. Taskmaster is slow - both his mobility and his attacks have poor speed, but he has solid range on his sword attacks and a versatile moveset. He uses Aim Master (236X) to fight from a distance, and can blow through his opponent's own projectiles with Charging Star (4H). Although they are difficult to use effectively, Taskmaster also has several Counter skills, as well as an Unblockable via the followups to his Sword Master (623X) special.
| Strengths | Weaknesses |
|---|---|
|
|
Unique Mechanics
His dashing animation is somewhat unique in that he spends the first 5 frames stationary, then starts to accelerate. After the first few frames, he lowers his body (and hurtbox) while moving meaning he can potentially dodge aerial attacks, dash under opponents during incoming or aerial opponent in blockstun from assists.
As a result, plink-dashing slower than usual compared to other characters is optimal (because he accelerates later in its animation).
Move List
Assists
| Assist |
Damage | Startup | Active | Hits | Recovery | |
|---|---|---|---|---|---|---|
| 50,000 (per arrow) | 45 | 9 | x3 | 113 (as a crossover assist) 83 (as a assist) | ||
| Meter | On Hit | On Block | Guard | Properties | ||
| +400 (per arrow) | - | - | Priority: Low, Durability: 3 per projectile | |||
|
THC Hyper: Legion Arrow L+M (Horizontal). Taskmaster is unique in that all three of his assists are different versions of the same move. Regardless of the assist choice, Taskmaster's assist will be a variant of his Aim Master special, firing three arrows. The assist choice only changes the trajectory of the arrows. Additionally, Taskmaster's THC Hyper is always Legion Arrow, but the assist choice will alter the trajectory of the hyper's arrows to match that of the assist. L Assist fires the arrows directly, horizontally forward. It is the most traditional and straightforward to use. It also recovers the fastest of the three. This assist is notable because its total durability across all three arrows is 9, which is slightly higher than many similar-coverage assists like Doom's Plasma Beam or Iron Man's Unibeam. If called at roughly the same time as one of these assists from the opponent, Taskmaster's arrows will completely nullify the beam, with one surviving arrow still able to hit the opponent. | ||||||
| Assist |
Damage | Startup | Active | Hits | Recovery | |
|---|---|---|---|---|---|---|
| 50,000 (per arrow) | 45 | 9 | x3 | 118 (as a crossover assist) 88 (as a assist) | ||
| Meter | On Hit | On Block | Guard | Properties | ||
| +400 (per arrow) | - | - | Priority: Low, Durability: 3 per projectile | |||
|
THC Hyper: Legion Arrow M+H (Parabolic). In this version, Taskmaster fires the arrows at a slight upwards angle. They travel through the air at roughly jump height and then start to arc back towards the ground. | ||||||
| Assist |
Damage | Startup | Active | Hits | Recovery | |
|---|---|---|---|---|---|---|
| 50,000 (per arrow) | 45 | 9 | x3 | 118 (as a crossover assist) 88 (as a assist) | ||
| Meter | On Hit | On Block | Guard | Properties | ||
| +400 (per arrow) | - | - | Priority: Low, Durability: 3 per projectile | |||
|
THC Hyper: Legion Arrow L+H (Upward). Taskmaster fires his arrows almost directly upwards. The arrows reach roughly superjump height, then arc and spread out, falling back down towards the ground. The farthest reaching arrow will land a little farther than halfscreen distance. This assist stands out from the other variants in that it can hit OTG on the way down, although it is typically too slow to use this way in combos. It is also a rare example of an assist that can (technically) hit opponents at superjump height. | ||||||
Ground Normals
| L |
Damage | Startup | Active | Hits | Recovery | |
|---|---|---|---|---|---|---|
| 48,000 | 5 | 3 | 1 | 10 | ||
| Meter | On Hit | On Block | Guard | Properties | ||
| +384 | +2 | +1 | - | |||
|
5L has minimal uses other than being a situational anti air.
| ||||||
| M |
Damage | Startup | Active | Hits | Recovery | |
|---|---|---|---|---|---|---|
| 40,000 (per hit) | 8 | 2(1)3 | x2 | 17 | ||
| Meter | On Hit | On Block | Guard | Properties | ||
| +320 (per swing) | 0 | -2 | - | |||
|
5M is a double-hitting attack making it great against armored attacks and has a large amount of hit-stun making it the best for hit confirming into combos but 2M is better for damage due to extra hit scaling damage worse.
| ||||||
| H |
Damage | Startup | Active | Hits | Recovery | |
|---|---|---|---|---|---|---|
| 90,000 | 11 | 3 | 1 | 20 | ||
| Meter | On Hit | On Block | Guard | Properties | ||
| +720 | +2 | 0 | - | |||
|
Taskmaster steps forward slightly giving 5H more range compared to 5M allowing for easy pickups from assists.
| ||||||
| L |
Damage | Startup | Active | Hits | Recovery | |
|---|---|---|---|---|---|---|
| 45,000 | 5 | 3 | 1 | 14 | ||
| Meter | On Hit | On Block | Guard | Properties | ||
| +360 | -2 | -3 | - | |||
|
2L has great range for a light normal, and is very fast at 5 frame startup.
| ||||||
| M |
Damage | Startup | Active | Hits | Recovery | |
|---|---|---|---|---|---|---|
| 65,000 | 8 | 3 | 1 | 19 | ||
| Meter | On Hit | On Block | Guard | Properties | ||
| +520 | -2 | -4 | - | |||
|
2M is Taskmaster's longest low attack. 2M is also a low-profile attack allowing Taskmaster to evade underneath many attacks that he cannot normally avoid by crouching or using other normals.
| ||||||
| H |
Damage | Startup | Active | Hits | Recovery | |
|---|---|---|---|---|---|---|
| 80,000 | 10 | 3 | 1 | 23 | ||
| Meter | On Hit | On Block | Guard | Properties | ||
| +640 | -2 | -3 | ||||
|
2H launches them perfectly into Web Swing, Web Swing can miss if 5H is used because the opponent has a low profile crouch like Zero or Morrigan.
| ||||||
Aerial Normals
| L j. |
Damage | Startup | Active | Hits | Recovery | |
|---|---|---|---|---|---|---|
| 50,000 | 5 | 3 | 1 | 15 | ||
| Meter | On Hit | On Block | Guard | Properties | ||
| +400 | +13 | +12 | - | |||
|
j.L is used in many combo extensions. | ||||||
| M j. |
Damage | Startup | Active | Hits | Recovery | |
|---|---|---|---|---|---|---|
| 68,000 | 7 | 4 | 1 | 17 | ||
| Meter | On Hit | On Block | Guard | Properties | ||
| +544 | +16 | +14 | - | |||
|
j.M is used in many combo extensions and as combo filler. When comboing with this move, keep the opponent slightly below as j.M has a large hit box under his leg. j.M's animation is based on Spider-Man's j.M. | ||||||
| H j. |
Damage | Startup | Active | Hits | Recovery | |
|---|---|---|---|---|---|---|
| 50,000 (per hit) | 11 | 4 | x2 | 21 | ||
| Meter | On Hit | On Block | Guard | Properties | ||
| +400 (per swing) | +20 | +18 | - | |||
|
j.H is double-hitting attack using as combo filler and landing against armored attacks. | ||||||
| S j. |
Damage | Startup | Active | Hits | Recovery | |
|---|---|---|---|---|---|---|
| 90,000 | 11 | 3 | 1 | 27 | ||
| Meter | On Hit | On Block | Guard | Properties | ||
| +720 | +17 | +15 | ||||
|
j.S is a downward slash with a large hitbox in front of Taskmaster. It lacks the ability to option-select compared to j.H, but is potentially the best aerial to land with as it is a single hit while doing high damage. | ||||||
Command Normals
| H |
Damage | Startup | Active | Hits | Recovery | |
|---|---|---|---|---|---|---|
| 80,000 | 11 | 13 | 1 | 16 | ||
| Meter | On Hit | On Block | Guard | Properties | ||
| +640 | +7 | -6 | ||||
|
Taskmaster swings from a grappling rope, advancing forward while kicking. This is the closest thing Taskmaster has to real aerial mobility, and allows him to maintain pressure or extend combos. Web Swing (6H) can be performed on the grounded or airborne. The grounded version puts Taskmaster airborne, and he will recover from the move in a normal jump state.
Charged Aim Master (236X) can cancel a grounded Web Swing (6H) early leading to a overhead fake out into 2L or 2M, or a safer throw attempt, or different combos extensions. Super Jumping (29) before using Web Swing (6H) > Aim Master (236H) can be used to escape corners while attacking below you. Aim Master cancel can also be use to shift momentum (if Taskmaster is swinging away from the opponent, the Aim Master input with turn him around mid-air effectively shifting his momentum).
| ||||||
| H |
Damage | Startup | Active | Hits | Recovery | |
|---|---|---|---|---|---|---|
| 95,000 | 6 | 9 | 1 | 29 | ||
| Meter | On Hit | On Block | Guard | Properties | ||
| +760 | - | -15 | ||||
|
Taskmaster charges forward a short distance forward while nullifying projectiles, and is a great mobility, and burst option. It’s amazing at catching landings as it fairly good hitbox and has a fairly good chance of beating or trading with an opponent's physical attacks as well.
| ||||||
Special Moves
| S |
Damage | Startup | Active | Hits | Recovery | |
|---|---|---|---|---|---|---|
| 50,000 + 70,000 | 15 | 3 | x2 | 28 | ||
| Meter | On Hit | On Block | Guard | Properties | ||
| +1130 | - | -3 | ||||
|
Sting Master (236S) is a hitgrab (blockable) in which Taskmaster stabs directly ahead with his sword. If it hits, he and the opponent are pulled into an animation in which Taskmaster deals one additional hit, ending with the opponent in a Hard Knockdown next to him (this animation is invincible and ignores projectiles and assists). Sting Master also applies upward knockback to assists. Sting Master can be canceled from Charging Star (4H), and is safe on block making Charging Star (4H) safer to use in neutral. This cancel is vulnerable to opponents push-blocking Charging Star (meaty) leaving you wide open and in the animation of the Sting Master. This move is useful as a combo ender for Taskmaster, as he can capitalize on the Assist Extensions or Snapback. | ||||||
| L |
Damage | Startup | Active | Hits | Recovery | |
|---|---|---|---|---|---|---|
| 50,000 | 31 | 5 | 1 | 22 | ||
| Meter | On Hit | On Block | Guard | Properties | ||
| +400 | - | -4 | ||||
| M |
Damage | Startup | Active | Hits | Recovery | |
| 50,000 | 47 | 5 | 1 | 22 | ||
| Meter | On Hit | On Block | Guard | Properties | ||
| +400 | - | -4 | ||||
| H |
Damage | Startup | Active | Hits | Recovery | |
| 50,000 | 57 | 5 | 1 | 22 | ||
| Meter | On Hit | On Block | Guard | Properties | ||
| +400 | - | -4 | ||||
|
Taskmaster readies himself, then delivers a large arcing swing with his sword. Despite the animation, this move is not an overhead, and can be blocked standing or crouching. Sword Master is mainly notable because each version has a special follow-up sequence available when the initial Sword Master hit is blocked. These follow-up chains include Unblockable attacks. Unfortunately, it is not possible to access these follow-ups on hit or on whiff, and an opponent can always Pushblock the initial hit to escape the follow-up sequence, so these attacks are very rarely useful. The button strength determines the distance traveled before the downward swing:
The follow-up sequences for each move are detailed below. | ||||||
Sword Master Follow-ups
Sword Master L Follow-ups
| after blocked 623L |
Damage | Startup | Active | Recovery |
|---|---|---|---|---|
| 30,000 | 24 | 5 | 16 | |
| On Hit | On Block | Guard | Properties | |
| +4 | - | - | ||
|
Unblockable attack. If Taskmaster gets an opponent to block the initial swing (623L) but not pushblock it, he can open them up with this short-range attack (H), then finish the sequence with Light's Out (236H) with the opportunity for follow-ups. At +4 on hit, his follow-up options are rather limited. Light's Out will force the opponent into a | ||||
| after successful headbutt |
Damage | Startup | Active | Recovery |
| 10,000 + 50,000 | 15 | 5 | 1 | |
| On Hit | On Block | Guard | Properties | |
| - | - | |||
|
Sequence ender that functions almost the same as Taskmaster's regular Sting Master (236S) special. Ends in a Hard Knockdown that Taskmaster can follow up with an OTG Air Legion Arrow. Note that there is a short window in which you can follow up before the opponent hits the ground. The only thing that can link here is Snapback, except against exceptional hurtboxes. | ||||
Sword Master M Follow-ups
| after blocked 623L |
Damage | Startup | Active | Recovery |
|---|---|---|---|---|
| 30,000 | 24 | 5 | 16 | |
| On Hit | On Block | Guard | Properties | |
| +4 | - | - | ||
|
Unblockable attack. If Taskmaster gets an opponent to block the initial swing (623L) but not pushblock it, he can open them up with this short-range attack (H), then finish the sequence with the opportunity for follow-ups. At +4 on hit, his follow-up options are rather limited. Light's Out will force the opponent into a | ||||
| after successful Headbutt, |
Damage | Startup | Active | Recovery |
| 28,000 | 13 | 5 | 21 | |
| On Hit | On Block | Guard | Properties | |
| -1 | -3 | - | ||
|
filler | ||||
| after successful Below the Belt, |
Damage | Startup | Active | Recovery |
| 30,000 | 20 | 5 | 16 | |
| On Hit | On Block | Guard | Properties | |
| +4 | +2 | - | ||
|
filler | ||||
| after successful Low Kick, |
Damage | Startup | Active | Recovery |
| 10,000 + 60,000 | 15 | 5 | 1 | |
| On Hit | On Block | Guard | Properties | |
| - | - | |||
|
Sequence ender that functions almost the same as Taskmaster's regular Sting Master (236S) special. Ends in a Hard Knockdown that Taskmaster can follow up with an OTG Air Legion Arrow. Note that there is a short window in which you can follow up before the opponent hits the ground. The only thing that can link here is Snapback, except against exceptional hurtboxes. | ||||
Sword Master H Follow-ups
| after blocked 623L |
Damage | Startup | Active | Recovery |
|---|---|---|---|---|
| 30,000 | 24 | 5 | 16 | |
| On Hit | On Block | Guard | Properties | |
| +4 | - | - | ||
|
Unblockable attack. If Taskmaster gets an opponent to block the initial swing (623L) but not pushblock it, he can open them up with this short-range attack (H), then finish the sequence with Light's Out (236H) with the opportunity for follow-ups. At +4 on hit, his follow-up options are rather limited. Light's Out will force the opponent into a | ||||
| after successful Headbutt, |
Damage | Startup | Active | Recovery |
| 28,000 | 13 | 5 | 21 | |
| On Hit | On Block | Guard | Properties | |
| -1 | -3 | - | ||
|
filler | ||||
| after successful Below the Belt, |
Damage | Startup | Active | Recovery |
| 30,000 | 20 | 5 | 16 | |
| On Hit | On Block | Guard | Properties | |
| +4 | +2 | - | ||
|
filler | ||||
| after successful Low Kick, |
Damage | Startup | Active | Recovery |
| 25,000 | 21 | 3 | 22 | |
| On Hit | On Block | Guard | Properties | |
| 0 | -2 | - | ||
|
filler | ||||
| after successful Shield Bash, |
Damage | Startup | Active | Recovery |
| 31,000 | 18 | 4 | 17 | |
| On Hit | On Block | Guard | Properties | |
| +4 | +2 | - | ||
|
filler | ||||
| after successful Knee Kick |
Damage | Startup | Active | Recovery |
| 10,000 + 50,000 | 15 | 5 | 1 | |
| On Hit | On Block | Guard | Properties | |
| - | - | |||
|
Sequence ender that functions almost the same as Taskmaster's regular Sting Master (236S) special. Ends in a Hard Knockdown that Taskmaster can follow up with an OTG Air Legion Arrow. Note that there is a short window in which you can follow up before the opponent hits the ground. The only thing that can link here is Snapback, except against exceptional hurtboxes. | ||||
Hyper Combos
| Damage | Startup | Active | Hits | Recovery | ||
|---|---|---|---|---|---|---|
| 250,000 | 5+0 | 25 | x13 | 19 | ||
| Meter | On Hit | On Block | Guard | Properties | ||
| -10,000 | - | - | ||||
|
Counterattack hyper. After the hyper flash, Taskmaster is in a counter state for 25 frames. Any physical hit (hyper or otherwise) in this state will activate a cinematic where Taskmaster deals significant damage to the opponent, ending in a Hard Knockdown that he can follow up with Legion Arrow OTG. Aegis Counter is useful as a counter-call to an opponent's physical hypers, including otherwise invincible ones like Spencer's Bionic Lancer. This is also useful as DHC tech, since Taskmaster can be brought in to protect a character who would otherwise be hit.
| ||||||
Universal Mechanics
| H or |
Damage | Startup | Active | Hits | Recovery | |
|---|---|---|---|---|---|---|
| 80,000 | 1 | 1 | x2 | - | ||
| Meter | On Hit | On Block | Guard | Properties | ||
| +800 | - | - | ||||
|
Forward Throw leads to the opponent directly front of him in a Hard Knockdown.
| ||||||
| H j. or j. |
Damage | Startup | Active | Hits | Recovery | |
|---|---|---|---|---|---|---|
| 80,000 | 1 | 1 | 1 | - | ||
| Meter | On Hit | On Block | Guard | Properties | ||
| +800 | - | - | ||||
|
Both airthrows spikes the opponent straight down to the ground, while Taskmaster briefly floats above them.
| ||||||
| Assist |
Damage | Startup | Active | Hits | Recovery | |
|---|---|---|---|---|---|---|
| 50,000 | 2 | 3 | 1 | 20 | ||
| Meter | On Hit | On Block | Guard | Properties | ||
| +500 (-10,000) | - | 0 | Snapback | |||
|
Combos into Snapback:
| ||||||
| Assist Hold Hold |
Damage | Startup | Active | Hits | Recovery | |
|---|---|---|---|---|---|---|
| 30,000 | - | 20 | 1 | 34 | ||
| Meter | On Hit | On Block | Guard | Properties | ||
| - | - | -15 | ||||
|
- | ||||||
Team Position
Taskmaster is a versatile character that could reasonably be placed in any team position. Although is is most commonly placed in the Point position, Second and Anchor Taskmasters have also seen success. Taskmaster's assist is solid, although rarely the best assist on a team, and he can provide support for his teammates in the backline via that assist or by utilizing his solid DHC options. Taskmaster is a solid choice for activating X-Factor, as it can augment his already hefty damage output (especially after throws), and also makes his projectile game into a legitimate chip damage threat.
Point Taskmaster is his strongest position, benefiting from assists more than most other characters gaining better mix-ups and combo potential after knockdown.
Second Taskmaster can pile on the hurt via Semi-Safe/Semi-Damaging DHC, and a decent projectile.
Anchor Taskmaster is his weakest position, lacking proper combos from air throws, and has a hard time making timely solo 1 vs 3 comeback since his mix up game isn't fantastic.
Notable Supports
Dante is the 2nd best support character in the game, and this is just as true for Taskmaster. Jam Session is the unblockable-enabling assist. If building your strategy around unblockables, pick Dante. A simple Jam Session call to lock the opponent down and keep them from pushblocking away enables Taskmaster to easily land a (blocked) L Sword Master (623L) and follow up with an H headbutt. From there, he can follow up with either Lights Out (236H) if in the corner and with appropriate assists, or with X-factor to secure the kill. This is all in addition Jam's fantastic defensive utility, which can and will bail you out when the opponent is rushing in while it secures you hits when you have them backed into the corner. S+ tier assist, and Taskmaster makes great use of it. Devil Trigger is a safe DHC, and Million Dollars is an excellent bit of cleanup to kill anyone who isn't finished off by your looped supers. Finally, Dante's TAC infinite allows for Timer-Scam strategies, which can be very powerful on a team with a bulky point who can either bully or zone as required.
Vergil is the best or 2nd-best Damage Engine in the game and his utility for Taskmaster in particular is surprisingly strong. Taskmaster can protect Rapid Slash even full screen by using his arrows (236X) or Legion Arrow (236XX), and Rapid Slash enables certain extremely damaging combo extensions which can then lead flawlessly into Spiral Sword loops, netting one-touch kills on the entire cast without the need for a TAC. Vergil is very meter-hungry and Taskmaster can be an able battery for him with his 1.1 million hp and ample chip damage. Spiral Swords and Devil Trigger are both safe DHCs off either Legion Arrow or Aegis Counter, and Vergil can even use Taskmaster's arrows to do teleport shenanigans. Amazing pair.
Spencer is a uniquely utilitarian pick for Taskmaster. His ability as a damage engine and strong mid rivals that of Vergil, though his anchor capabilities pale a bit before the Son of Sparda. Spencer's Slant Shot assist restands the opponent, allowing for certain unique extensions that Taskmaster cannot get off any other assist in the game, such as following up after Lights Out after an unblockable, or following up after his Front Throws. Spencer's ability to loop Bionic Maneuvers hypers combined with Taskmaster's complete lack of Wallbounces means that he can secure a kill against the whole cast off a single hit. What's more, Spencer actually quite likes having Taskmaster 2nd, being able to utilize Taskmaster's lateral arrows assist in his incoming mixups and to get an additional up-grapple off a team hyper combo juggle into a full combo. Taskmaster and Spencer have uniquely strong two-way synergy and the pair is absolutely worth your time.
Dormammu is an excellent 2nd behind Taskmaster on point, the pair covering for one another's weaknesses splendidly. Taskmaster serves as a superior point character with his ability to hang with the faster rushdown who would maul Dormammu at 99. He also serves as a battery, chipping the opponent down or even securing kills while accruing meter which Dormammu can then use to cash out for either Chaotic Flame or Stalking Flare, two of the highest-return hypers in the entire game. Chaotic Flame as a DHC after Legion Arrow secures many kills which other hypers would fail to manage, and Stalking Flare is an unconventional - but effective - way to set up Taskmaster's unblockable - though it is surprisingly difficult on incoming. Furthermore, Dormammu quite likes either taskmaster's up arrows or (more commonly) lateral arrows assists. Finally, Taskmaster is one of the best characters in the game at using Dark Hole, being able to use it both for late-combo extensions and also for easy unblockable setups in neutral or on incoming.
Everything Doctor Doom does for Taskmaster, Iron Man can also do - if he has to work a bit harder to get there. Iron Man serves as a damage engine off DHC or TAC, as well as his Unibeam assist doing many of the same things that Plasma Beam does, and being slightly better for random unblockables.
Sentinel Drones is another excellent choice for Taskmaster, giving him a slow meaty assist to dash in after and an outstanding vehicle to deliver unblockables. Ronan Healy has proven the effectiveness of Taskmaster with drones. Taskmaster can protect Sentinel fairly well between Shield Skills and his various Arrow specials and hypers, and Sentinel provides decent DHC synergy to Taskmaster as well, with Plasma Storm in particular being a good cleanup hyper if Sentinel is on 2nd.
Taskmaster works quite well with his fellow mercenary Rocket. Either Spitfire or Pendulum are excellent choices to back up Tony Masters, and Spitfire in particular enables several fun and unique juggles, such as a linked triple Charging Star; while Pendulum is also a fantastic assist full stop which Taskmaster can use to either convert into a full combo or extend at high hitstun. The DHC synergy is nothing short of excellent, with Rock and Roll being an excellent damaging DHC that can do many of the same things that Chaotic Flame or Million Dollars do. Mad Hopper is an excellent and safe DHC on a blocked Hyper or to if you desire to get Taskmaster out, and Rocket can use Taskmaster's assist better than many characters thanks to his unique mobility and teleport mixups.
The Sorcerer Supreme is another great choice for Taskmaster, with Bolts of Balthakk being a good vehicle for instant overhead M off Web Swing in addition to its stellar lateral coverage and its power as a high-hitstun extension. Alternatively, Eye of Agamatto assist forfeits this neutral presence for a near-inescapable incoming unblockable setup. Spell of Vishanti provides Taskmaster with an excellent DHC or Team Hyper Combo to clean up kills which he might fall short on, and Strange is a strong anchor in all the ways that Taskmaster is not, capable of cleaning up in the same was as a Dormammu or Vergil.
Taskmaster and the dog work quite well together, and he is one of the best characters at abusing cold star for easy unblockable setups, especially on incoming against characters with no air mobility. When paired with another reliable partner like Doctor Doom, Amaterasu can be amazing backline support and has a good safe DHC in Slow and a good damaging one in Okami Shuffle. Taskmaster doesn't help Amaterasu as much in return, but most of the time you want to be playing with the dog behind Tony Masters.
Littlest but certainly not least, Dagger Toss assist is incredibly powerful with Taskmaster, especially when empowered with King's Armor. Placing Arthur 2nd at round start enables Taskmaster to act as a battery, build up to 2 meters, and then safely DHC into King's Armor before immediately dry tagging back in, now with perhaps the best lateral coverage assist in the game. Dagger Toss enables Taskmaster to convert off full-screen arrows (236L) by plinking up 3-4 times and linking with Charging Star into a full combo. Combined with his 9 points of projectile durability from a fully charged arrows, Arthur's dagger toss either doubles it (unpowered) to 18 points or nearly triples it (empowered) to 24. All in all, the pair works quite well together, and what King doesn't have a few mercenaries under his command?
Hawkeye is another excellent choice behind Taskmaster, as Greyhound is a premier assist for Tony Masters. Greyhound gives Taskmaster throw and unblockable pickups without needing to spend meter or x-factor. Taskmaster/Vergil/Hawkeye and Taskmaster/Dante/Hawkeye are both standouts in this regard, and both teams are extremely powerful behind Tony Masters.
Magneto serves many of the same purposes as Hawkeye behind Taskmaster. Disruptor is an incredible assist in neutral and in combos, and enables throw pickups and unblockable pickups in addition to its other uses. Magneto is best placed in third position, and the best mid for this pairing is probably Dante or Dormammu.
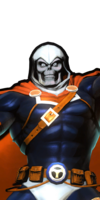
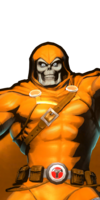
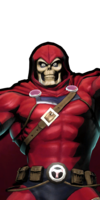
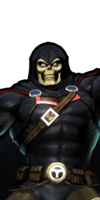
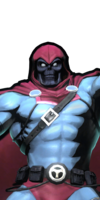
Alternate Colors
| Color 1 | Color 2 | Color 3 | Color 4 | Color 5 | Color 6 | Alt Color |
|---|---|---|---|---|---|---|

|
|
|
|
|
|

|
