mNo edit summary |
No edit summary |
||
| Line 1: | Line 1: | ||
[[Image:Ken3sport.gif|frame|right|Ken's Character Select Portrait]] | |||
[[Image:Ken3s-stance.gif|frame|right|Ken's Neutral Stance]] | [[Image:Ken3s-stance.gif|frame|right|Ken's Neutral Stance]] | ||
==Introduction== | ==Introduction== | ||
| Line 135: | Line 135: | ||
| Neutral Jumping Roundhouse || '''(Air)''' HK | | Neutral Jumping Roundhouse || '''(Air)''' HK | ||
|- | |- | ||
| Overhead || MP MK | | Overhead || MP+MK | ||
|- | |- | ||
| Taunt || HP HK | | Taunt || HP+HK | ||
|} | |} | ||
| Line 144: | Line 144: | ||
{| border="1em" cellspacing="0" width="40%" style="border: 1px solid #999; background: #F2F2F2;" | {| border="1em" cellspacing="0" width="40%" style="border: 1px solid #999; background: #F2F2F2;" | ||
|- | |- | ||
| Hiza Geri || LP LK | | Hiza Geri || LP+LK | ||
|- | |- | ||
| Seoi Nage || F LP LK | | Seoi Nage || F+LP+LK | ||
|- | |- | ||
| Jigoku Guruma || B LP LK | | Jigoku Guruma || B+LP+LK | ||
|} | |} | ||
| Line 155: | Line 155: | ||
{| border="1em" cellspacing="0" width="50%" style="border: 1px solid #999; background: #F2F2F2;" | {| border="1em" cellspacing="0" width="50%" style="border: 1px solid #999; background: #F2F2F2;" | ||
|- | |- | ||
| Crouching Jab || D LP | | Crouching Jab || D+LP | ||
|- | |- | ||
| Crouching Strong || D MP | | Crouching Strong || D+MP | ||
|- | |- | ||
| Crouching Fierce || D HP | | Crouching Fierce || D+HP | ||
|- | |- | ||
| Crouching Short || D LK | | Crouching Short || D+LK | ||
|- | |- | ||
| Crouching Foward || D MK | | Crouching Foward || D+MK | ||
|- | |- | ||
| Crouching Roundhouse || D HK | | Crouching Roundhouse || D+HK | ||
|- | |- | ||
| Fumikomi Mae Geria || F MK | | Fumikomi Mae Geria || F+MK | ||
|- | |- | ||
| Inazuma Kakato Wari || B MK, or hold MK | | Inazuma Kakato Wari || B+MK, or hold MK | ||
|- | |- | ||
| Shiden Kakato Otoshi || F HK (hold HK to cancel attack) | | Shiden Kakato Otoshi || F+HK (hold HK to cancel attack) | ||
|} | |} | ||
| Line 184: | Line 184: | ||
| '''Move Name''' || '''Motion''' | | '''Move Name''' || '''Motion''' | ||
|- | |- | ||
| Hadouken || QCF P | | Hadouken || QCF+P | ||
|- | |- | ||
| Shoryuken || F, D, DF P | | Shoryuken || F, D, DF+P | ||
|- | |- | ||
| Tatsumaki Senpuu Kyaku || QCB K | | Tatsumaki Senpuu Kyaku || QCB+K | ||
|- | |- | ||
| Tatsumaki Senpuu Kyaku (Air) || '''(Air)'''QCB K | | Tatsumaki Senpuu Kyaku (Air) || '''(Air)'''QCB+K | ||
|} | |} | ||
| Line 199: | Line 199: | ||
| '''Move Name''' || '''Motion''' | | '''Move Name''' || '''Motion''' | ||
|- | |- | ||
| Hadouken || QCF PP | | Hadouken || QCF+PP | ||
|- | |- | ||
| Shoryuken || F, D, DF PP | | Shoryuken || F, D, DF+PP | ||
|- | |- | ||
| Tatsumaki Senpuu Kyaku || QCB KK | | Tatsumaki Senpuu Kyaku || QCB+KK | ||
|- | |- | ||
| Tatsumaki Senpuu Kyaku (Air) || '''(Air)'''QCB KK | | Tatsumaki Senpuu Kyaku (Air) || '''(Air)'''QCB+KK | ||
|} | |} | ||
| Line 214: | Line 214: | ||
| '''Num.''' || '''Super Art Name''' || '''Motion''' || '''Super Bars''' | | '''Num.''' || '''Super Art Name''' || '''Motion''' || '''Super Bars''' | ||
|- | |- | ||
| I || Shoryu-Reppa || QCF QCF P || 2 stocks | | I || Shoryu-Reppa || QCF QCF+P || 2 stocks | ||
|- | |- | ||
| II || Shinryu-Ken || QCF QCF K (Tap K rapidly) || 1 stock | | II || Shinryu-Ken || QCF QCF+K (Tap K rapidly) || 1 stock | ||
|- | |- | ||
| III || Shippu-Jinrai-Kyaku || QCF QCF K || 3 stocks | | III || Shippu-Jinrai-Kyaku || QCF QCF+K || 3 stocks | ||
|} | |} | ||
| Line 246: | Line 246: | ||
*'''Hit Advantage''': Number of frames you are in advantage/disvantage after opponent have been take the hit | *'''Hit Advantage''': Number of frames you are in advantage/disvantage after opponent have been take the hit | ||
*'''Crouching Hit Advantage''': Number of frames you are in advantage/disvantage after opponent have been take the hit while he's crouching | *'''Crouching Hit Advantage''': Number of frames you are in advantage/disvantage after opponent have been take the hit while he's crouching | ||
* | * + # : You have # frames of advantage | ||
* - # : You have # frames of disvantage | * - # : You have # frames of disvantage | ||
* # ~ # : Advantage/disvantage can vary from # to # | * # ~ # : Advantage/disvantage can vary from # to # | ||
| Line 345: | Line 345: | ||
| align="center" | '''Move''' || align="center" | '''Motion''' || align="center" | '''Frames''' || align="center" | '''Gauge Increase''' | | align="center" | '''Move''' || align="center" | '''Motion''' || align="center" | '''Frames''' || align="center" | '''Gauge Increase''' | ||
|- | |- | ||
| align="center" | Taunt || align="center" | HP HK || align="center" | 53 || align="center" | 4(6) | | align="center" | Taunt || align="center" | HP+HK || align="center" | 53 || align="center" | 4(6) | ||
|} | |} | ||
''Comments here'' | ''Comments here'' | ||
| Line 366: | Line 366: | ||
| align="center" | '''Move''' || align="center" | '''Frames you're frozen''' || align="center" | '''Frames opponent is frozen''' || align="center" | '''Frame Advantage when parry is successful''' || align="center" | '''Frames before you can try another parry''' | | align="center" | '''Move''' || align="center" | '''Frames you're frozen''' || align="center" | '''Frames opponent is frozen''' || align="center" | '''Frame Advantage when parry is successful''' || align="center" | '''Frames before you can try another parry''' | ||
|- | |- | ||
| align="center" | Parry (High) || align="center" | 16 || align="center" | 20 || align="center" | | | align="center" | Parry (High) || align="center" | 16 || align="center" | 20 || align="center" | +4(LP/LK) +3(MP/MK) +2(HP/HK) 0(Special/Super) -16(Fireball) || align="center" | 24(19 when attack comes from the air)*,** | ||
|- | |- | ||
| align="center" | Parry (Low) || align="center" | 16 || align="center" | 20? || align="center" | | | align="center" | Parry (Low) || align="center" | 16 || align="center" | 20? || align="center" | +4(LP/LK) +3(MP/MK) +2(HP/HK) 0(Special/Super) -16(Fireball) || align="center" | 24(19 when attack comes from the air)*,** | ||
|- | |- | ||
| align="center" | Parry (Air) || align="center" | 16 || align="center" | 20? || align="center" | | | align="center" | Parry (Air) || align="center" | 16 || align="center" | 20? || align="center" | +4(LP/LK) +3(MP/MK) +2(HP/HK) 0(Special/Super) -16(Fireball) || align="center" | 21(19 when attack comes from the air)*,** | ||
|} | |} | ||
{| border="1em" cellspacing="0" width="70%" style="border: 1px solid #999; background: #F2F2F2;" | {| border="1em" cellspacing="0" width="70%" style="border: 1px solid #999; background: #F2F2F2;" | ||
| Line 410: | Line 410: | ||
| align="center" | '''Startup''' || align="center" | '''Hit''' || align="center" | '''Recovery''' || align="center" | '''Blocked Advantage''' || align="center" | '''Hit Advantage''' || align="center" | '''Crouching Hit Advantage''' || align="center" | '''Guard''' || align="center" | '''Parry''' | | align="center" | '''Startup''' || align="center" | '''Hit''' || align="center" | '''Recovery''' || align="center" | '''Blocked Advantage''' || align="center" | '''Hit Advantage''' || align="center" | '''Crouching Hit Advantage''' || align="center" | '''Guard''' || align="center" | '''Parry''' | ||
|- | |- | ||
| align="center" | 4 || align="center" | 3 || align="center" | 4 || align="center" | | | align="center" | 4 || align="center" | 3 || align="center" | 4 || align="center" | +4 || align="center" | +4 || align="center" | +4 || align="center" | HL || align="center" | HL | ||
|} | |} | ||
'''Gauge Increase''' | '''Gauge Increase''' | ||
| Line 434: | Line 434: | ||
| align="center" | '''Startup''' || align="center" | '''Hit''' || align="center" | '''Recovery''' || align="center" | '''Blocked Advantage''' || align="center" | '''Hit Advantage''' || align="center" | '''Crouching Hit Advantage''' || align="center" | '''Guard''' || align="center" | '''Parry''' | | align="center" | '''Startup''' || align="center" | '''Hit''' || align="center" | '''Recovery''' || align="center" | '''Blocked Advantage''' || align="center" | '''Hit Advantage''' || align="center" | '''Crouching Hit Advantage''' || align="center" | '''Guard''' || align="center" | '''Parry''' | ||
|- | |- | ||
| align="center" | 5 || align="center" | 4 || align="center" | 9 || align="center" | | | align="center" | 5 || align="center" | 4 || align="center" | 9 || align="center" | +4 || align="center" | +5 || align="center" | +5 || align="center" | HL || align="center" | H | ||
|} | |} | ||
'''Gauge Increase''' | '''Gauge Increase''' | ||
| Line 482: | Line 482: | ||
| align="center" | '''Startup''' || align="center" | '''Hit''' || align="center" | '''Recovery''' || align="center" | '''Blocked Advantage''' || align="center" | '''Hit Advantage''' || align="center" | '''Crouching Hit Advantage''' || align="center" | '''Guard''' || align="center" | '''Parry''' | | align="center" | '''Startup''' || align="center" | '''Hit''' || align="center" | '''Recovery''' || align="center" | '''Blocked Advantage''' || align="center" | '''Hit Advantage''' || align="center" | '''Crouching Hit Advantage''' || align="center" | '''Guard''' || align="center" | '''Parry''' | ||
|- | |- | ||
| align="center" | 3 || align="center" | 3 || align="center" | 5 || align="center" | | | align="center" | 3 || align="center" | 3 || align="center" | 5 || align="center" | +3 || align="center" | +3 || align="center" | +3 || align="center" | HL || align="center" | HL | ||
|} | |} | ||
'''Gauge Increase''' | '''Gauge Increase''' | ||
| Line 506: | Line 506: | ||
| align="center" | '''Startup''' || align="center" | '''Hit''' || align="center" | '''Recovery''' || align="center" | '''Blocked Advantage''' || align="center" | '''Hit Advantage''' || align="center" | '''Crouching Hit Advantage''' || align="center" | '''Guard''' || align="center" | '''Parry''' | | align="center" | '''Startup''' || align="center" | '''Hit''' || align="center" | '''Recovery''' || align="center" | '''Blocked Advantage''' || align="center" | '''Hit Advantage''' || align="center" | '''Crouching Hit Advantage''' || align="center" | '''Guard''' || align="center" | '''Parry''' | ||
|- | |- | ||
| align="center" | 5 || align="center" | 4 || align="center" | 10 || align="center" | | | align="center" | 5 || align="center" | 4 || align="center" | 10 || align="center" | +1 || align="center" | +2 || align="center" | +3 || align="center" | HL || align="center" | H | ||
|} | |} | ||
'''Gauge Increase''' | '''Gauge Increase''' | ||
| Line 554: | Line 554: | ||
| align="center" | '''Startup''' || align="center" | '''Hit''' || align="center" | '''Recovery''' || align="center" | '''Blocked Advantage''' || align="center" | '''Hit Advantage''' || align="center" | '''Crouching Hit Advantage''' || align="center" | '''Guard''' || align="center" | '''Parry''' | | align="center" | '''Startup''' || align="center" | '''Hit''' || align="center" | '''Recovery''' || align="center" | '''Blocked Advantage''' || align="center" | '''Hit Advantage''' || align="center" | '''Crouching Hit Advantage''' || align="center" | '''Guard''' || align="center" | '''Parry''' | ||
|- | |- | ||
| align="center" | 4 || align="center" | 4 || align="center" | 7 || align="center" | | | align="center" | 4 || align="center" | 4 || align="center" | 7 || align="center" | +2 || align="center" | +2 || align="center" | +2 || align="center" | HL || align="center" | HL | ||
|} | |} | ||
'''Gauge Increase''' | '''Gauge Increase''' | ||
| Line 835: | Line 835: | ||
| align="center" | '''Move''' || align="center" | '''Motion''' || align="center" | '''Damage''' || align="center" | '''Stun Damage''' || align="center" | '''Chains into itself''' || align="center" | '''Special Cancel''' || align="center" | '''Super Cancel''' | | align="center" | '''Move''' || align="center" | '''Motion''' || align="center" | '''Damage''' || align="center" | '''Stun Damage''' || align="center" | '''Chains into itself''' || align="center" | '''Special Cancel''' || align="center" | '''Super Cancel''' | ||
|- | |- | ||
| align="center" | Universal Overhead || align="center" | MP MK || align="center" | 40 || align="center" | 3 || align="center" | No || align="center" | No || align="center" | No | | align="center" | Universal Overhead || align="center" | MP+MK || align="center" | 40 || align="center" | 3 || align="center" | No || align="center" | No || align="center" | No | ||
|} | |} | ||
'''Frame Data''' | '''Frame Data''' | ||
| Line 842: | Line 842: | ||
| align="center" | '''Startup''' || align="center" | '''Hit''' || align="center" | '''Recovery''' || align="center" | '''Blocked Advantage''' || align="center" | '''Hit Advantage''' || align="center" | '''Crouching Hit Advantage''' || align="center" | '''Guard''' || align="center" | '''Parry''' | | align="center" | '''Startup''' || align="center" | '''Hit''' || align="center" | '''Recovery''' || align="center" | '''Blocked Advantage''' || align="center" | '''Hit Advantage''' || align="center" | '''Crouching Hit Advantage''' || align="center" | '''Guard''' || align="center" | '''Parry''' | ||
|- | |- | ||
| align="center" | 15 || align="center" | 8 || align="center" | 7 || align="center" | -5~ 7 || align="center" | 0~ 8 || align="center" | | | align="center" | 15 || align="center" | 8 || align="center" | 7 || align="center" | -5~+7 || align="center" | 0~+8 || align="center" | +1~+9 || align="center" | H || align="center" | H | ||
|} | |} | ||
'''Gauge Increase''' | '''Gauge Increase''' | ||
Revision as of 17:16, 26 December 2007
Introduction
Specific Character Information
- Stamina: 1150
- Stun Bar Length (dots): 64
- Stun Bar Recovery (frames it takes to recover 1 dot): 22
- Taunt: Increases damage for the next hit/combo by 31.3%. One taunt is the maximum.
- Best Kara-Throw: MK/HK
Character Colors
Moves List
Basic Moves
| Move | Convention |
| Forward | F |
| Back | B |
| Crouch | C / D |
| Up | U |
| Jump | J |
| Jump Forward | JF |
| Jump Backwards | JB |
| Super Jump | D-U |
| Super Jump Forward | D-UF |
| Super Jump Backwards | D-UB |
| Dash Forward | FF |
| Dash Backwards | BB |
| Quarter Circle Forward | QCF |
| Quarter Circle Backwards | QCB |
| Half Circle Backwards | HCB |
| Forward, Down, Down-Forward | F, D, DF / DP |
| Guard (High) | B when enemy is attacking |
| Guard (Low) | DB when enemy is attacking |
| Parry (High) | Tap F when about to take a hit |
| Parry (Low) | Tap D when about to take a hit |
| Parry (Air) | Tap F in air when about to take a hit |
| Red Parry | Execute parry after blocking a hit in a combo |
| Punch (Any) | P |
| Kick (Any) | K |
| 2 Punches | PP |
| 2 Kicks | KK |
| 3 Punches | PPP |
| 3 Kicks | KKK |
| Jab | LP |
| Strong | MP |
| Fierce | HP |
| Short | LK |
| Forward | MK |
| Roundhouse | HK |
| Universal Overhead | UOH |
Normal Moves
| Move | Motion |
| Jab | LP |
| Strong | MP |
| Fierce | HP |
| Close Jab | (Close to opponent) LP |
| Close Strong | (Close to opponent) MP |
| Close Fierce | (Close to opponent) HP |
| Short | LK |
| Foward | MK |
| Roundhouse | HK |
| Jumping Jab | (Air) LP |
| Jumping Strong | (Air) MP |
| Jumping Fierce | (Air) HP |
| Neutral Jumping Fierce | (Air) HP |
| Jumping Short | (Air) LK |
| Jumping Foward | (Air) MK |
| Neutral Jumping Foward | (Air) MK |
| Jumping Roundhouse | (Air) HK |
| Neutral Jumping Roundhouse | (Air) HK |
| Overhead | MP+MK |
| Taunt | HP+HK |
Throws
| Hiza Geri | LP+LK |
| Seoi Nage | F+LP+LK |
| Jigoku Guruma | B+LP+LK |
Command Normals
| Crouching Jab | D+LP |
| Crouching Strong | D+MP |
| Crouching Fierce | D+HP |
| Crouching Short | D+LK |
| Crouching Foward | D+MK |
| Crouching Roundhouse | D+HK |
| Fumikomi Mae Geria | F+MK |
| Inazuma Kakato Wari | B+MK, or hold MK |
| Shiden Kakato Otoshi | F+HK (hold HK to cancel attack) |
Target Combos
- close standing MP -> HP
Special Moves
| Move Name | Motion |
| Hadouken | QCF+P |
| Shoryuken | F, D, DF+P |
| Tatsumaki Senpuu Kyaku | QCB+K |
| Tatsumaki Senpuu Kyaku (Air) | (Air)QCB+K |
EX Moves
| Move Name | Motion |
| Hadouken | QCF+PP |
| Shoryuken | F, D, DF+PP |
| Tatsumaki Senpuu Kyaku | QCB+KK |
| Tatsumaki Senpuu Kyaku (Air) | (Air)QCB+KK |
Super Arts
| Num. | Super Art Name | Motion | Super Bars |
| I | Shoryu-Reppa | QCF QCF+P | 2 stocks |
| II | Shinryu-Ken | QCF QCF+K (Tap K rapidly) | 1 stock |
| III | Shippu-Jinrai-Kyaku | QCF QCF+K | 3 stocks |
Move Analisys
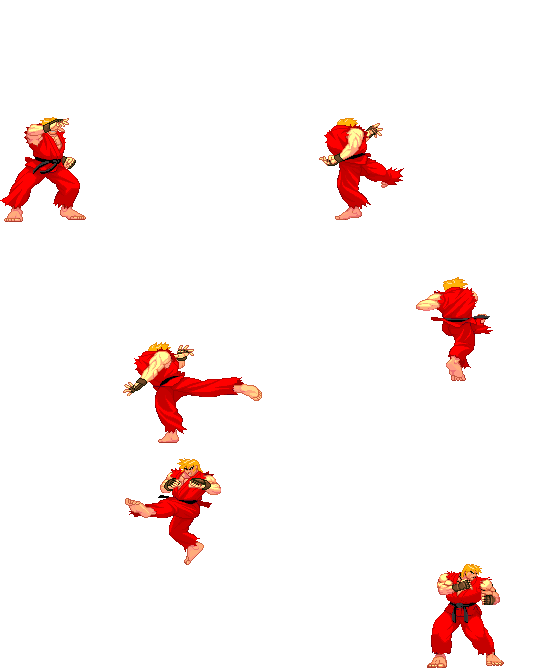
- All those sprites are taken from the site http://www.zweifuss.com/index.htm
- All Framedatas in "Move Analisys" section are taken from Game Restaurant
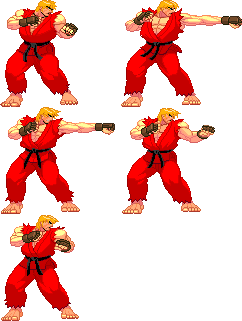
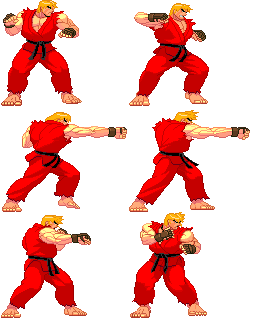
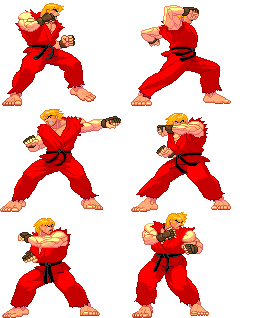
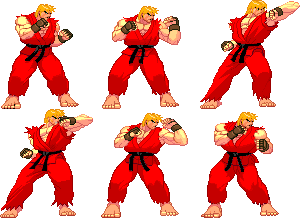
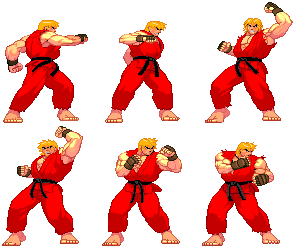
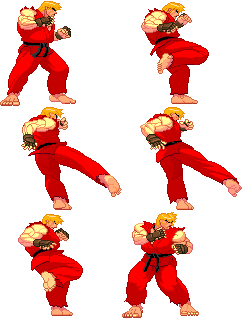
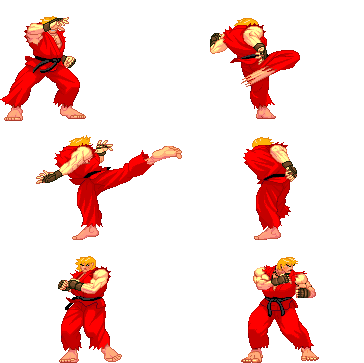
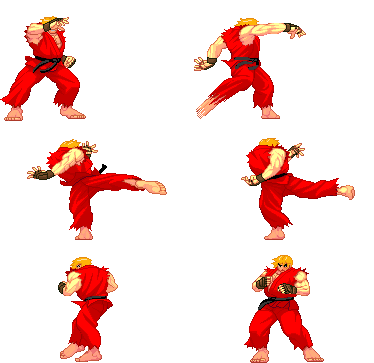
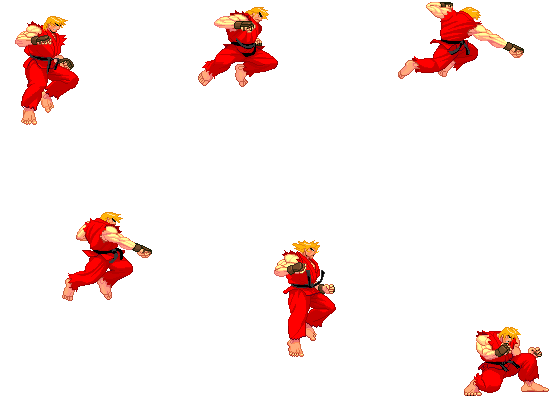
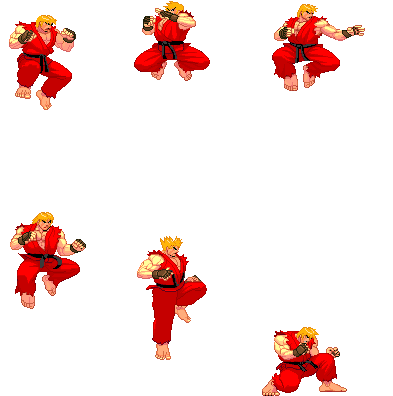
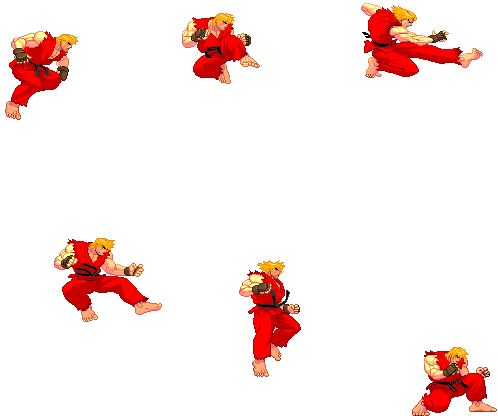
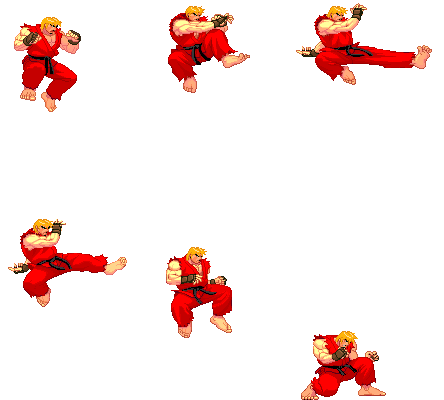
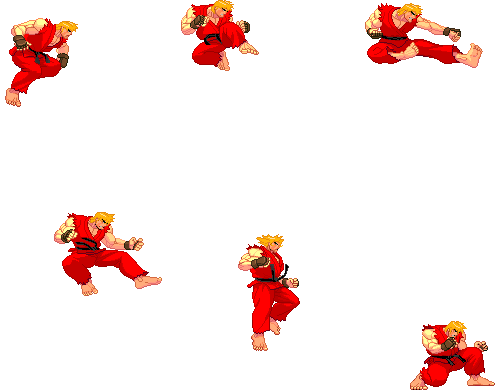
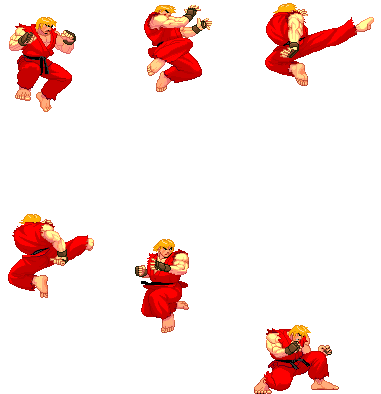
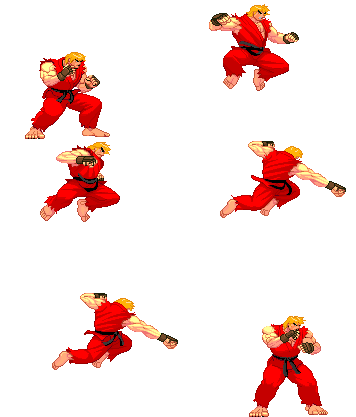
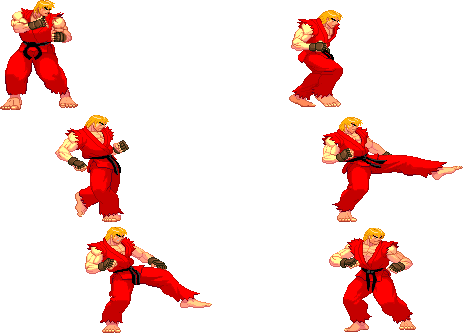
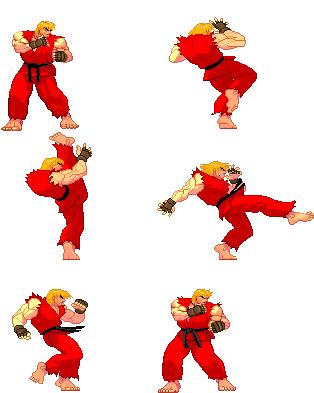
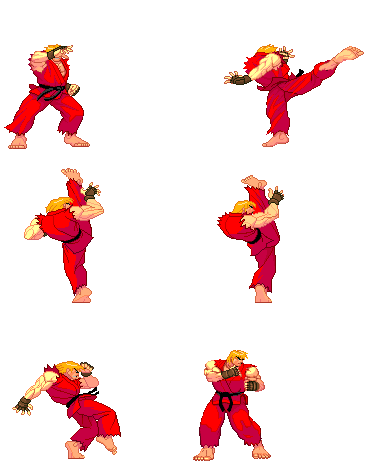
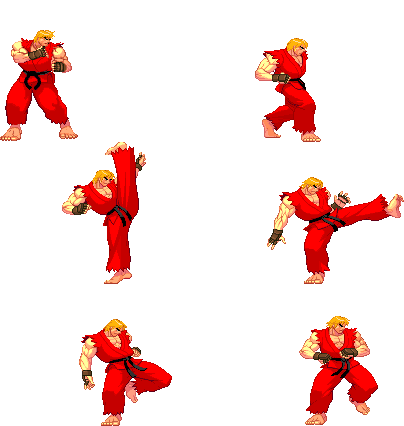
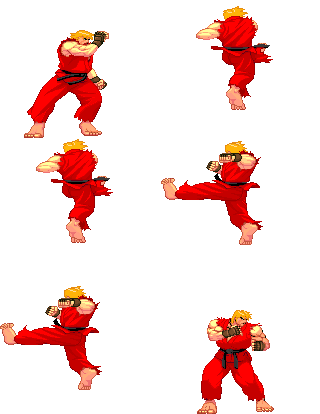
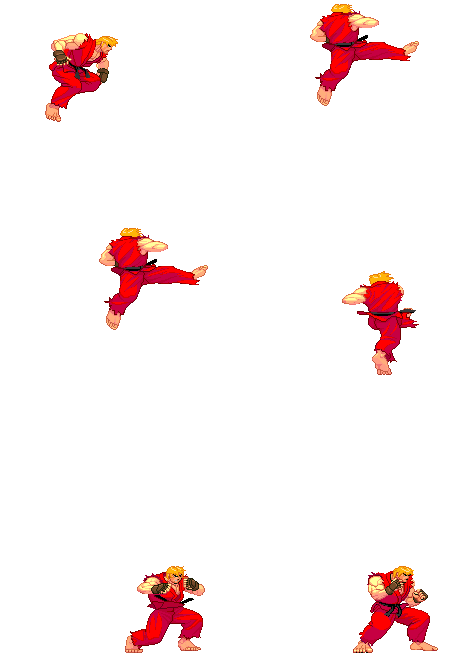
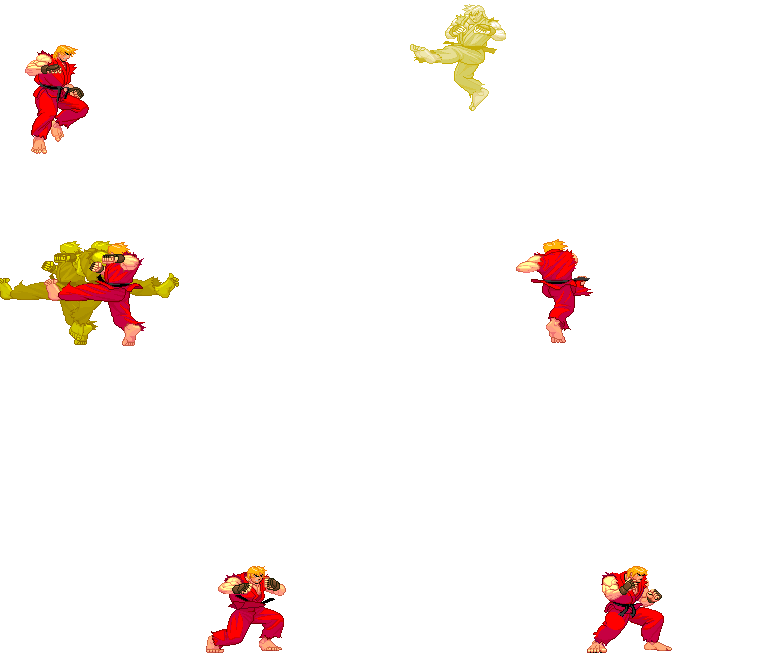
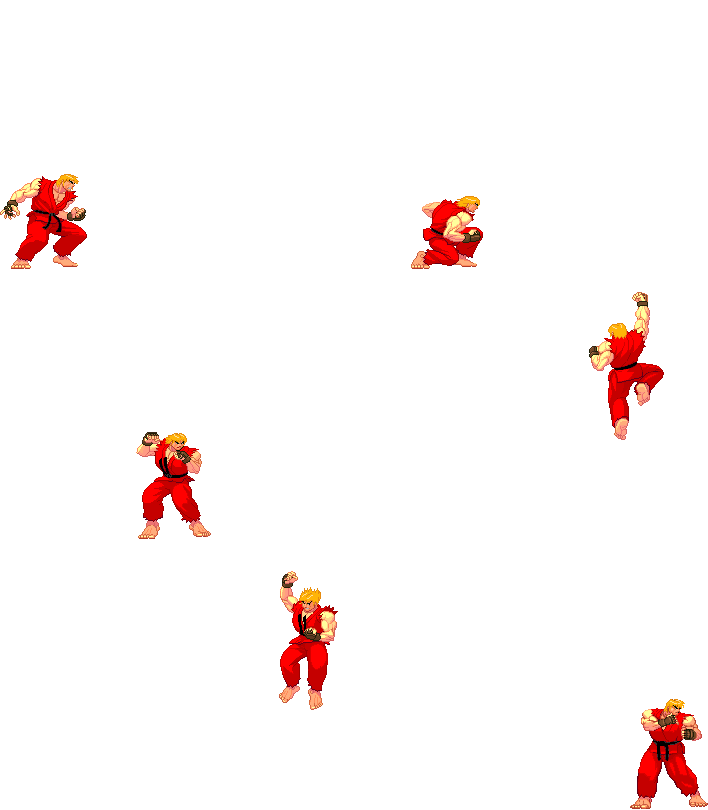
Please note that the images show in this section are for the 1st frame it hits, so this means the opponent is taking the hit in the image shown on the move. I use the 1st frame of every move (except taunt, dash, jump, wakeup and 2nd throw image sprites) because you will see the maximum range of every attack (mostly of the attacks). Note also that those images are ACCURATE, they are exactly the first frame it hits, so enemy takes damage but they still dont make the "pain" frame.
General
- Move: Move name
- Motion: What you must do to execute the move
- Damage: Damage it does (in pixels)
- Stun Damage: Stun Damage it does (in pixels)
- Chains into itself: If you can combo into the same movement
- Special Cancel: If you can cancel the move into a Special Move
- Super Cancel: If you can cancel the move into a Super Art
- Throw Range: Range of the throw (in pixels)
- Num.: Super Art number
- Super Art: Super Art name
- Super Art Stock: Number of Gauge Bars the Super Art have, also the lenght of each bar (in pixels)
Frame Data
- Startup: Number of frames it takes to start the move
- Hit: Number of frames that can hit the opponent
- Recovery: Number of frames it takes to recover from the move
- Blocked Advantage: Number of frames you are in advantage/disvantage after opponent have been blocked the hit
- Hit Advantage: Number of frames you are in advantage/disvantage after opponent have been take the hit
- Crouching Hit Advantage: Number of frames you are in advantage/disvantage after opponent have been take the hit while he's crouching
- + # : You have # frames of advantage
- - # : You have # frames of disvantage
- # ~ # : Advantage/disvantage can vary from # to #
- Down: Enemy gets knocked down
- Guard: How opponent must guard the move, High (H), Low (L) or both (HL)
- Parry: How opponent must parry the move, High (H), Low (L) or both (HL)
Gauge Increase
- Miss: Gauge you gain if you miss the move (in pixels)
- Blocked: Gauge you gain if the move gets blocked (in pixels)
- Hit: Gauge you gain if you hit the opponent with the move (in pixels)
- Parry: Gauge opponent gains when he parry the move (in pixels)
Basic Moves
| Move | Start-up frames | In ground frames | In air frames | Recovery frames | Total frames |
|---|---|---|---|---|---|
| Dash Forward | 2? | 8? | - | 6? | 16 |
Comments here
| Move | Start-up frames | In ground frames | In air frames | Recovery frames | Total frames |
|---|---|---|---|---|---|
| Dash Backwards | 4? | 4? | - | 6? | 13 |
Comments here
| Move | Motion | Startup Frames |
| Jump | BU or U or FU | 3 |
Comments here
| Move | Motion | Startup Frames |
| Super Jump | DBU or DU or DFU | 5 |
Comments here
| Move | Motion | Frames |
| Normal Wakeup | - | 75 |
Comments here
| Move | Motion | Frames |
| Tech Wakeup | Tap D when hitting the ground | 48 |
Comments here
| Move | Motion | Frames | Gauge Increase |
| Taunt | HP+HK | 53 | 4(6) |
Comments here
| Move | Motion |
| Parry (High) | Tap F when about taking a hit |
| Parry (Low) | Tap D when about taking a hit |
| Parry (Air) | Tap F in air when about taking a hit |
Frame Data
| Move | Frames you're frozen | Frames opponent is frozen | Frame Advantage when parry is successful | Frames before you can try another parry |
| Parry (High) | 16 | 20 | +4(LP/LK) +3(MP/MK) +2(HP/HK) 0(Special/Super) -16(Fireball) | 24(19 when attack comes from the air)*,** |
| Parry (Low) | 16 | 20? | +4(LP/LK) +3(MP/MK) +2(HP/HK) 0(Special/Super) -16(Fireball) | 24(19 when attack comes from the air)*,** |
| Parry (Air) | 16 | 20? | +4(LP/LK) +3(MP/MK) +2(HP/HK) 0(Special/Super) -16(Fireball) | 21(19 when attack comes from the air)*,** |
| * (If a parry attempt is successful, the 19/21/24 frame restriction is taken away and you can attempt another parry immediately) |
| ** (If another attack connects within 2 frames of your parry, it will automatically be parried) |
Gauge Increase
| Move | Gauge Increase |
| Parry (High) | 4*** |
| Parry (Low) | 4*** |
| Parry (Air) | 4*** |
| *** (You gain 4 of gauge for whatever attack parried, and for whatever hit you parry during multihit attack) |
You can buffer any motion during High or Low parry, but NOT during Air parry.
- Parry information is taken from Shoryuken Forums, more exactly, from user JinraiPVC. Thanks for this information dude
Normal Moves
| Move | Motion | Damage | Stun Damage | Chains into itself | Special Cancel | Super Cancel |
| Far Jab | LP | 20 | 3 | Yes | Yes | Yes |
Frame Data
| Startup | Hit | Recovery | Blocked Advantage | Hit Advantage | Crouching Hit Advantage | Guard | Parry |
| 4 | 3 | 4 | +4 | +4 | +4 | HL | HL |
Gauge Increase
| Miss | Blocked | Hit | Parry (Gauge for opponent) |
| 0 | 1 | 2 | 4 |
Comments here
| Move | Motion | Damage | Stun Damage | Chains into itself | Special Cancel | Super Cancel |
| Far Strong | MP | 105 | 11 | No | Yes | Yes |
Frame Data
| Startup | Hit | Recovery | Blocked Advantage | Hit Advantage | Crouching Hit Advantage | Guard | Parry |
| 5 | 4 | 9 | +4 | +5 | +5 | HL | H |
Gauge Increase
| Miss | Blocked | Hit | Parry (Gauge for opponent) |
| 2 | 4 | 8 | 4 |
Comments here
| Move | Motion | Damage | Stun Damage | Chains into itself | Special Cancel | Super Cancel |
| Far Fierce | HP | 140 | 15 | No | No | No |
Frame Data
| Startup | Hit | Recovery | Blocked Advantage | Hit Advantage | Crouching Hit Advantage | Guard | Parry |
| 8 | 5 | 22 | -6 | -4 | -2 | HL | H |
Gauge Increase
| Miss | Blocked | Hit | Parry (Gauge for opponent) |
| 3 | 6 | 14 | 4 |
Comments here
| Move | Motion | Damage | Stun Damage | Chains into itself | Special Cancel | Super Cancel |
| Close Jab | (Close to opponent) LP | 30 | 3 | No | Yes | Yes |
Frame Data
| Startup | Hit | Recovery | Blocked Advantage | Hit Advantage | Crouching Hit Advantage | Guard | Parry |
| 3 | 3 | 5 | +3 | +3 | +3 | HL | HL |
Gauge Increase
| Miss | Blocked | Hit | Parry (Gauge for opponent) |
| 0 | 1 | 2 | 4 |
Comments here
| Move | Motion | Damage | Stun Damage | Chains into itself | Special Cancel | Super Cancel |
| Close Strong | (Close to opponent) MP | 115 | 7 | No | Yes | Yes |
Frame Data
| Startup | Hit | Recovery | Blocked Advantage | Hit Advantage | Crouching Hit Advantage | Guard | Parry |
| 5 | 4 | 10 | +1 | +2 | +3 | HL | H |
Gauge Increase
| Miss | Blocked | Hit | Parry (Gauge for opponent) |
| 2 | 4 | 8 | 4 |
Comments here
| Move | Motion | Damage | Stun Damage | Chains into itself | Special Cancel | Super Cancel |
| Close Fierce | (Close to opponent) HP | 135 | 15 | No | Yes | Yes |
Frame Data
| Startup | Hit | Recovery | Blocked Advantage | Hit Advantage | Crouching Hit Advantage | Guard | Parry |
| 4 | 4 | 17 | -4 | -2 | 0 | HL | H |
Gauge Increase
| Miss | Blocked | Hit | Parry (Gauge for opponent) |
| 3 | 6 | 14 | 4 |
Comments here
| Move | Motion | Damage | Stun Damage | Chains into itself | Special Cancel | Super Cancel |
| Short | LK | 40 | 3 | No | No | No |
Frame Data
| Startup | Hit | Recovery | Blocked Advantage | Hit Advantage | Crouching Hit Advantage | Guard | Parry |
| 4 | 4 | 7 | +2 | +2 | +2 | HL | HL |
Gauge Increase
| Miss | Blocked | Hit | Parry (Gauge for opponent) |
| 0 | 1 | 2 | 4 |
Comments here
| Move | Motion | Damage | Stun Damage | Chains into itself | Special Cancel | Super Cancel |
| Forward | MK | 95 | 7 | No | No | No |
Frame Data
| Startup | Hit | Recovery | Blocked Advantage | Hit Advantage | Crouching Hit Advantage | Guard | Parry |
| 5 | 5 | 17 | -7 | -6 | -5 | HL | H |
Gauge Increase
| Miss | Blocked | Hit | Parry (Gauge for opponent) |
| 2 | 4 | 8 | 4 |
Comments here
| Move | Motion | Damage | Stun Damage | Chains into itself | Special Cancel | Super Cancel |
| Roundhouse | HK | 145 | 11 | No | No | No |
Frame Data
| Startup | Hit | Recovery | Blocked Advantage | Hit Advantage | Crouching Hit Advantage | Guard | Parry |
| 9 | 5 | 20 | -7 | -5 | -3 | HL | H |
Gauge Increase
| Miss | Blocked | Hit | Parry (Gauge for opponent) |
| 3 | 6 | 14 | 4 |
Comments here
| Move | Motion | Damage | Stun Damage | Chains into itself | Special Cancel | Super Cancel |
| Jump Jab | (Air) LP | 40(50 if neutral jump) | 7 | No | No | No |
Frame Data
| Startup | Hit | Recovery | Blocked Advantage | Hit Advantage | Crouching Hit Advantage | Guard | Parry |
| 4 | Until landing | - | - | - | - | H | H |
Gauge Increase
| Miss | Blocked | Hit | Parry (Gauge for opponent) |
| 0 | 1 | 2 | 4 |
Comments here
| Move | Motion | Damage | Stun Damage | Chains into itself | Special Cancel | Super Cancel |
| Jump Strong | (Air) MP | 90 | 9 | No | No | No |
Frame Data
| Startup | Hit | Recovery | Blocked Advantage | Hit Advantage | Crouching Hit Advantage | Guard | Parry |
| 5 | 5 | - | - | - | - | H | H |
Gauge Increase
| Miss | Blocked | Hit | Parry (Gauge for opponent) |
| 2 | 4 | 8 | 4 |
Comments here
| Move | Motion | Damage | Stun Damage | Chains into itself | Special Cancel | Super Cancel |
| Jump Fierce | (Air) HP | 130 | 13 | No | No | No |
Frame Data
| Startup | Hit | Recovery | Blocked Advantage | Hit Advantage | Crouching Hit Advantage | Guard | Parry |
| 6 | 4 | - | - | - | - | H | H |
Gauge Increase
| Miss | Blocked | Hit | Parry (Gauge for opponent) |
| 3 | 6 | 14 | 4 |
Comments here
| Move | Motion | Damage | Stun Damage | Chains into itself | Special Cancel | Super Cancel |
| Neutral Jump Fierce | (Air) HP | 130 | 13 | No | No | No |
Frame Data
| Startup | Hit | Recovery | Blocked Advantage | Hit Advantage | Crouching Hit Advantage | Guard | Parry |
| 6 | 3 | - | - | - | - | H | H |
Gauge Increase
| Miss | Blocked | Hit | Parry (Gauge for opponent) |
| 3 | 6 | 14 | 4 |
Comments here
| Move | Motion | Damage | Stun Damage | Chains into itself | Special Cancel | Super Cancel |
| Jump Short | (Air) LK | 40 | 5(7 if neutral jump) | No | No | No |
Frame Data
| Startup | Hit | Recovery | Blocked Advantage | Hit Advantage | Crouching Hit Advantage | Guard | Parry |
| 4 | 10(19 if neutral jump) | - | - | - | - | H | H |
Gauge Increase
| Miss | Blocked | Hit | Parry (Gauge for opponent) |
| 0 | 1 | 2 | 4 |
Comments here
| Move | Motion | Damage | Stun Damage | Chains into itself | Special Cancel | Super Cancel |
| Jump Forward | (Air) MK | 80 | 7 | No | No | No |
Frame Data
| Startup | Hit | Recovery | Blocked Advantage | Hit Advantage | Crouching Hit Advantage | Guard | Parry |
| 5 | 6 | - | - | - | - | H | H |
Gauge Increase
| Miss | Blocked | Hit | Parry (Gauge for opponent) |
| 2 | 4 | 8 | 4 |
Comments here
| Move | Motion | Damage | Stun Damage | Chains into itself | Special Cancel | Super Cancel |
| Neutral Jump Forward | (Air) MK | 80 | 7 | No | No | No |
Frame Data
| Startup | Hit | Recovery | Blocked Advantage | Hit Advantage | Crouching Hit Advantage | Guard | Parry |
| 5 | 6 | - | - | - | - | H | H |
Gauge Increase
| Miss | Blocked | Hit | Parry (Gauge for opponent) |
| 2 | 4 | 8 | 4 |
Comments here
| Move | Motion | Damage | Stun Damage | Chains into itself | Special Cancel | Super Cancel |
| Jump Roundhouse | (Air) HK | 120 | 11 | No | No | No |
Frame Data
| Startup | Hit | Recovery | Blocked Advantage | Hit Advantage | Crouching Hit Advantage | Guard | Parry |
| 6 | 4 | - | - | - | - | H | H |
Gauge Increase
| Miss | Blocked | Hit | Parry (Gauge for opponent) |
| 3 | 6 | 14 | 4 |
Comments here
| Move | Motion | Damage | Stun Damage | Chains into itself | Special Cancel | Super Cancel |
| Neutral Jump Roundhouse | (Air) HK | 120 | 11 | No | No | No |
Frame Data
| Startup | Hit | Recovery | Blocked Advantage | Hit Advantage | Crouching Hit Advantage | Guard | Parry |
| 6 | 5 | - | - | - | - | H | H |
Gauge Increase
| Miss | Blocked | Hit | Parry (Gauge for opponent) |
| 3 | 6 | 14 | 4 |
Comments here
| Move | Motion | Damage | Stun Damage | Chains into itself | Special Cancel | Super Cancel |
| Universal Overhead | MP+MK | 40 | 3 | No | No | No |
Frame Data
| Startup | Hit | Recovery | Blocked Advantage | Hit Advantage | Crouching Hit Advantage | Guard | Parry |
| 15 | 8 | 7 | -5~+7 | 0~+8 | +1~+9 | H | H |
Gauge Increase
| Miss | Blocked | Hit | Parry (Gauge for opponent) |
| 0 | 1 | 2 | 4 |
Comments here
| Move | Motion | Damage | Stun Damage |
| Taunt | HP HK | 5 | 3 |
| 2nd Hit | - | 5 | 3 |
Comments here
Throws
| Move | Motion | Damage | Stun Damage | Throw Range |
| Hiza Geri | LP LK | 80 | 3x6 | 24 |
Comments here
| Move | Motion | Damage | Stun Damage | Throw Range |
| Seoi Nage | F LP LK | 120 | 9 | 24 |
Comments here
| Move | Motion | Damage | Stun Damage | Throw Range |
| Jigoku Guruma | B LP LK | 110 | 15 | 24 |
Comments here
Command Normals
| Move | Motion | Damage | Stun Damage |
| Crouching Jab | D LP | 20 | 3 |
Comments here
| Move | Motion | Damage | Stun Damage |
| Crouching Strong | D MP | 90 | 7 |
Comments here
| Move | Motion | Damage | Stun Damage |
| Crouching Fierce | D HP | 130 | 13 |
Comments here
| Move | Motion | Damage | Stun Damage |
| Crouching Short | D LK | 20 | 3 |
Comments here
| Move | Motion | Damage | Stun Damage |
| Crouching Foward | D MK | 85 | 3 |
Comments here
| Move | Motion | Damage | Stun Damage |
| Crouching Roundhouse | D HK | 130 | 3 |
Comments here
| Move | Motion | Damage | Stun Damage |
| Fumikomi Mae Geri | F MK | 8 | 7 |
Comments here
| Move | Motion | Damage | Stun Damage |
| Inazuma Kakato Wari | B MK | 60 | 7 |
| 2nd Hit | - | 80 | 7 |
Comments here
| Move | Motion | Damage | Stun Damage |
| Inazuma Kakato Wari | Hold MK | 110? | 15? |
| 2nd Hit | - | 60 | 7 |
| 3rd Hit | - | 80 | 7 |
Comments here
| Move | Motion | Damage | Stun Damage |
| Shiden Kakato Otoshi | F HK | 120(80) | 11(9) |
Comments here
Special Moves
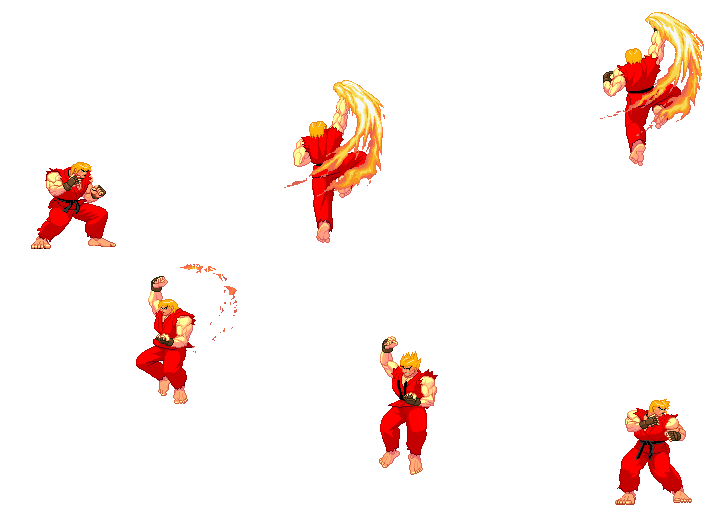
Please note that in this section you will see mainly 3 images for the special moves, this means the image on the left its done with LP (or LK), the image on the center its done with MP (or MK), and the image on the right its done with HP (or HK). Also its the same "rule" as the sections above, its the 1rst frame it hits for every of the moves.
| Move | Motion | Damage | Stun Damage | Fireball Speed |
| Hadouken (Jab) | QCF LP | 60 | 3 | Slow |
| Hadouken (Strong) | QCF MP | 60 | 3 | Medium |
| Hadouken (Fierce) | QCF HP | 60 | 3 | Fast |
Comments here
| Move | Motion | Damage | Stun Damage |
| Shoryuken (Jab) | F, D, DF LP | 150(100)(60) | 11 |
| Shoryuken (Strong) | F, D, DF MP | 110 | 11 |
| 2nd Hit | - | 55(50) | 5 |
| Shoryuken (Fierce) | F, D, DF HP | 80 | 11 |
| 2nd Hit | - | 60 | 3 |
| 3rd Hit | - | 50(50) | 3 |
Comments here
| Move | Motion | Damage | Stun Damage |
| Tatsumaki Senpuu Kyaku (Short) | QCB LK | 90 | 7 |
| 2nd Hit | - | 30 | 3 |
| Tatsumaki Senpuu Kyaku (Foward) | QCB MK | 60 | 7 |
| 2nd Hit | - | 30 | 3 |
| 3rd Hit | - | 30 | 3 |
| 4th Hit | - | 30 | 3 |
| Tatsumaki Senpuu Kyaku (Roundhouse) | QCB HK | 60 | 7 |
| 2nd Hit | - | 30 | 3 |
| 3rd Hit | - | 30 | 3 |
| 4th Hit | - | 30 | 3 |
| 5th Hit | - | 30 | 3 |
Comments here
| Move | Motion | Damage | Stun Damage |
| Air Tatsumaki Senpuu Kyaku (Short) | (Air) QCB LK | 80 | 5 |
| 2nd Hit | - | 80 | 5 |
| Air Tatsumaki Senpuu Kyaku (Foward) | (Air) QCB MK | 80 | 5 |
| 2nd Hit | - | 80 | 5 |
| 3rd Hit | - | 80 | 5 |
| Air Tatsumaki Senpuu Kyaku (Roundhouse) | (Air) QCB HK | 80 | 5 |
| 2nd Hit | - | 80 | 5 |
| 3rd Hit | - | 80 | 5 |
| 4th Hit | - | 80 | 5 |
Comments here
EX Moves
| Move | Motion | Damage | Stun Damage |
| Hadouken (EX) | QCF PP | 60 | 3 |
| 2nd Hit | - | 60 | 3 |
Comments here
| Move | Motion | Damage | Stun Damage |
| Shoryuken (EX) | F, D, DF PP | 80 | 11 |
| 2nd Hit | - | 50 | 3 |
| 3rd Hit | - | 40 | 3 |
| 4th Hit | - | 40 | 3 |
Comments here
| Move | Motion | Damage | Stun Damage |
| Tatsumaki Senpuu Kyaku (EX) | QCB KK | 60 | 7? |
| 2nd Hit | - | 35 | 3 |
| 3rd Hit | - | 35 | 3 |
| 4th Hit | - | 35 | 3 |
| 5th Hit | - | 35 | 3 |
| 6th Hit | - | 30 | 3 |
Comments here
| Move | Motion | Damage | Stun Damage |
| Air Tatsumaki Senpuu Kyaku (EX) | (Air) QCB KK | 80 | 5 |
| 2nd Hit | - | 80 | 5 |
| 3rd Hit | - | 80 | 5 |
| 4th Hit | - | 80 | 5 |
| 5th Hit | - | 80 | 5 |
Comments here
Super Arts
| Num. | Super Art Name | Motion | Damage | Stun Damage |
| I | Shoryureppa | QCF QCF P | 80 | 0 |
| - | 2nd Hit | - | 50 | 0 |
| - | 3rd Hit | - | 60 | 0 |
| - | 4th Hit | - | 70 | 0 |
| - | 5th Hit | - | 40 | 0 |
| - | 6th Hit | - | 40 | 0 |
| - | 7th Hit | - | 40 | 3 |
| - | 8th Hit | - | 40 | 3 |
| - | 9th Hit | - | 40 | 5 |
| - | 10th Hit | - | 40 | 5 |
| - | 11th Hit | - | 40 | 5 |
| - | 12th Hit | - | 40 | 3 |
- Total Damage if all hits connect: 400
Comments here
| Num. | Super Art Name | Motion | Damage | Stun Damage |
| II | Shinryuken | QCF QCF P | ? | 0 |
| - | 2nd Hit | - | ? | 0 |
| - | 3rd Hit | - | ? | 0 |
| - | 4th Hit | - | ? | 0 |
| - | 5th Hit | - | ? | 0 |
| - | 6th Hit | - | ? | 0 |
| - | 7th Hit | - | ? | 3 |
| - | 8th Hit | - | ? | 3 |
| - | 9th Hit | - | ? | 5 |
| - | 10th Hit | - | ? | 5 |
| - | 11th Hit | - | ? | 5 |
| - | 12th Hit | - | ? | 3 |
| - | 13th Hit | - | ? | 5 |
| - | 14th Hit | - | ? | 5 |
| - | 15th Hit | - | ? | 3 |
- Total Damage if all hits connect: 495
Comments here
| Num. | Super Art Name | Motion | Damage | Stun Damage |
| III | Shippu Jinrai Kyaku | QCF QCF K | 80 | 7 |
| - | 2nd Hit | - | 40 | 3 |
| - | 3rd Hit | - | 40 | 3 |
| - | 4th Hit | - | 50 | 3 |
| - | 5th Hit | - | 40 | 3 |
| - | 6th Hit | - | 30 | 0? |
| - | 7th Hit | - | 30 | 0? |
| - | 8th Hit | - | 30 | 0? |
| - | 9th Hit | - | 50 | 3 |
- Total Damage if all hits connect: 290
Comments here
Combos
SAI:
Cr. mk, SAI
Cr. lk x2, xx SAI
SAII:
Cr. mk, SAII
Cr. lk x2, xx SAII
Cl. mp, hp, lp shoryuken, SAII (only in corner)
SAIII:
Cr. mk, SAIII
Cr. lk x2, xx SAIII
Cl. mp, hp, (hadouken), xx SAIII
Cl. hp, mp shoryuken, xx SAIII
Cr. mp, SAIII
(Far) mp, SAIII
Note about performing combos: I do super cancels like this for ken.
QCF M kick QCF and kick button but here's the real trick
The special thing to keep in mind is to press down and mk at the same time then follow through with the rest of the combo.
You can practice even during matches. Instead of holding down and performing mk just press down and mk at the same time.
I also do something similar for canceling Hadouken into SAIII but instead, do not press down and punch at the same time. The notation should
QCF, P, QCF, K.
Some people might have problems going from shoryuken to SAIII. My method is
F, QCF, P, QCF, K.
Hope this helps out future players. -Velius
Frame Data
Normals
Throws
Command Normals
Special Moves
Super Arts
Additional Frame Data
Strategies
Overview
Super Art 3 is the super of choice, although SAI does more damage it has range. For example it will whiff at max range of cr. mk.
Ken has a fast dash and a good close up game with his MPxxHP chain and cr. LKx2 into shippu. Also his jumping mk is good for crossing up.
Basics
Learn how to use low forward because it is pretty safe, and can cancel into EX hadoken (use Ex hadoken cause it is safer that a regular hadoken). It can also cancel into SAIII.
Get a knockdown and do any of these:
- cr. short,cr. short xx Shippu.
- strong->fierce xx Shippu.
note:if you have trouble confirming the Shippu throw in a hadoken to buy some time, it only takes away 1 point of damage. So it wold be strong-> fierce xx hadoken xx Shippu)
- dashback, cr. forward xx Shippu.
- cr. strong -> Shippu.
- far strong -> Shippu.
- cr. short, walk up, throw.
If your beating him badly, chances are he'll do a shoryuken or super on wakeup so just block then punish it.
- Best punisher*
Close Fierce xx MP Shoryuken XX Shippu.
Super Art Selection
SAI (Shoryu-Reppa):
A decent super, would probably be his super of choice if SAIII didn't exist. Has numerous hit confirms, 2 stocks, and good damage. On the downside, doesn't have the incredible invincibility frames and lightning-fast startup of SAIII, and has significantly worse recovery.
SAII (Shinryu-Ken):
Not a very popular super, as it has very pronounced flaws and strengths. It is a fairly good anti-air (since you can mash unpredictably, and thus mess up the opponent's air-parry timings), and does the most damage out of his supers by a good amount. On the flip side, it has terrible range, even more terrible recovery, and doesn't have as many good hit-confirms and cancels as his other two supers. Probably his least used super.
SAIII (Shippu-Jinrai-Kyaku):
The universal choice of super for Ken, for good reason. Perhaps its biggest selling points are the 3 stocks (lots of EX meter for fireballs and air hurricane kicks) and its absurd number of hit confirms...it links off of just about anything you can possibly imagine. But less obvious (but equally important) properties include its lightning-quick startup - it can punish a whole bunch of moves that are otherwise usually safe, i.e. any shoto's cr. mk (yes, it can be reversal super punished, if blocked), Alex's EX shoulder, etc. It also has great invincibility properties - at point-blank, virtually nothing but a projectile can knock Ken out of the super. (I've heard Dudley's jab is also capable of this, but this needs to be confirmed.) The only downside to this super is the fairly low damage, but it's still perfectly respectable, especially for the length of meter, and the numerous upsides completely outweigh that one small negative.
Kara-Techniques
Zoning
Mixups
Additional Notes
- Personal Action: Increased damage for all moves except throws, this increase goes away after the next attack (blocked or not) and extends for an entire combo. Ken's personal action can actually hit twice.
Match-ups
Serious Advantage Match-ups
- Twelve
- Sean
Advantage Match-ups
- Yang
- Akuma
- Urien
- Oro
- Ibuki
- Elena
- Necro
- Alex
- Remy
- Q
- Hugo
Fair Match-ups
- Yun
- Makoto
- Dudley
- Ryu
Disadvantage Match-ups
- Chun-Li


