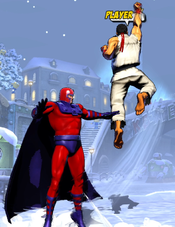
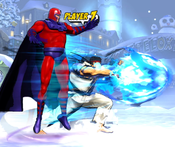
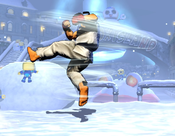
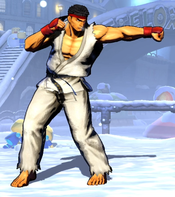
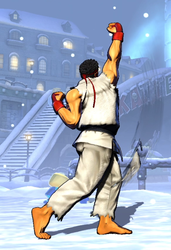
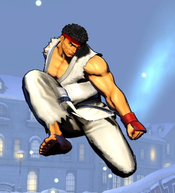
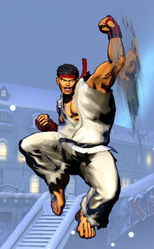
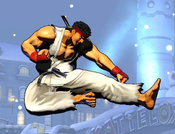
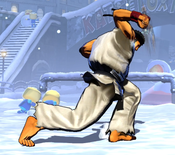
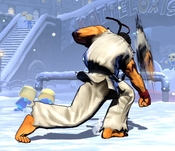
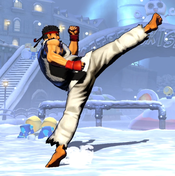
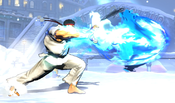
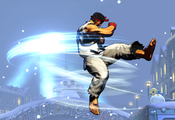
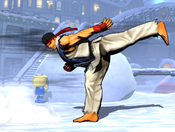
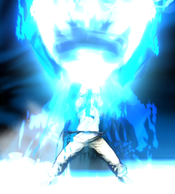
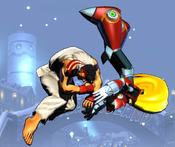
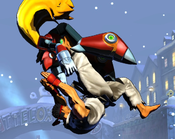
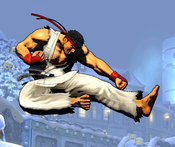
(Images to movelist) |
|||
| Line 48: | Line 48: | ||
{{MoveData | {{MoveData | ||
|image= | |image=UMVC3_Ryu_AssistA.png | ||
|caption= | |caption= | ||
|name=Shoryuken | |name=Shoryuken | ||
| Line 68: | Line 68: | ||
{{MoveData | {{MoveData | ||
|image= | |image=UMVC3_Ryu_AssistB.png | ||
|caption= | |caption= | ||
|name=Hadoken | |name=Hadoken | ||
| Line 88: | Line 88: | ||
{{MoveData | {{MoveData | ||
|image= | |image=UMVC3_Ryu_214X.png | ||
|caption= | |caption= | ||
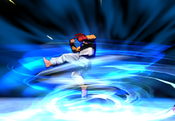
|name=Tatsumaki Senpukyaku | |name=Tatsumaki Senpukyaku | ||
| Line 110: | Line 110: | ||
{{MoveData | {{MoveData | ||
|image= | |image=UMVC3_Ryu_5L.png | ||
|caption= | |caption= | ||
|name=Stand Light | |name=Stand Light | ||
| Line 130: | Line 130: | ||
{{MoveData | {{MoveData | ||
|image= | |image=UMVC3_Ryu_5M.png | ||
|caption= | |caption= | ||
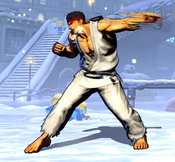
|name=Stand Medium | |name=Stand Medium | ||
| Line 150: | Line 150: | ||
{{MoveData | {{MoveData | ||
|image= | |image=UMVC3_Ryu_5H.png | ||
|caption= | |caption= | ||
|name=Stand Heavy | |name=Stand Heavy | ||
| Line 171: | Line 171: | ||
{{MoveData | {{MoveData | ||
|image= | |image=UMVC3_Ryu_2L.png | ||
|caption= | |caption= | ||
|name=Crouching Light | |name=Crouching Light | ||
| Line 186: | Line 186: | ||
|properties={{rpdfire}} | |properties={{rpdfire}} | ||
|description= | |description= | ||
Standard low attack for baiting pushblock and mixing up when combined with 6M overhead. | Standard low attack for baiting pushblock and mixing up when combined with {{Clr|2|6M}} overhead. | ||
}} | }} | ||
}} | }} | ||
{{MoveData | {{MoveData | ||
|image= | |image=UMVC3_Ryu_2M.png | ||
|caption= | |caption= | ||
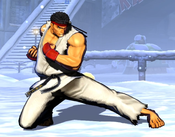
|name=Crouching Medium | |name=Crouching Medium | ||
| Line 206: | Line 206: | ||
|properties= | |properties= | ||
|description= | |description= | ||
Low-profile attack. 2M allows Ryu to evade underneath many attacks that he cannot normally avoid by crouching or using other normals. Unfortunately, the low amount of active frames makes this difficult to time properly and very dangerous to attempt. For reference, Ryu can use a very well-timed 2M to low-profile Dr. Doom's M Plasma Beam, but H Plasma Beam is too active, and Ryu will always get hit out of his recovery. | Low-profile attack. {{Clr|2|2M}} allows Ryu to evade underneath many attacks that he cannot normally avoid by crouching or using other normals. Unfortunately, the low amount of active frames makes this difficult to time properly and very dangerous to attempt. For reference, Ryu can use a very well-timed 2M to low-profile Dr. Doom's M Plasma Beam, but H Plasma Beam is too active, and Ryu will always get hit out of his recovery. | ||
}} | }} | ||
}} | }} | ||
{{MoveData | {{MoveData | ||
|image= | |image=UMVC3_Ryu_2H.png | ||
|caption= | |caption= | ||
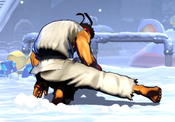
|name=Crouching Heavy | |name=Crouching Heavy | ||
| Line 226: | Line 226: | ||
|properties={{hardknockdown}} | |properties={{hardknockdown}} | ||
|description= | |description= | ||
Causes a | Causes a Hard Knockdown, which is unique among {{Clr|3|2H}} sweeps; most cause a Soft Knockdown or none at all. | ||
}} | }} | ||
}} | }} | ||
| Line 232: | Line 232: | ||
{{MoveData | {{MoveData | ||
|image= | |image=UMVC3_Ryu_5S.png | ||
|caption= | |caption= | ||
|name=Launcher/Special | |name=Launcher/Special | ||
| Line 247: | Line 247: | ||
|properties={{launch}}, {{nocancel}} | |properties={{launch}}, {{nocancel}} | ||
|description= | |description= | ||
Poor horizontal range - has a tendency to whiff if chained from grounded normals at the outer edge of their range, even 2L. For this reason, Ryu should try to confirm into 421X instead. | Poor horizontal range - has a tendency to whiff if chained from grounded normals at the outer edge of their range, even {{Clr|1|2L}}. For this reason, Ryu should try to confirm into 421X instead. | ||
}} | }} | ||
}} | }} | ||
| Line 254: | Line 254: | ||
{{MoveData | {{MoveData | ||
|image= | |image=UMVC3_Ryu_jL.png | ||
|caption= | |caption= | ||
|name=Jumping Light | |name=Jumping Light | ||
| Line 274: | Line 274: | ||
{{MoveData | {{MoveData | ||
|image= | |image=UMVC3_Ryu_jM.png | ||
|caption= | |caption= | ||
|name=Jumping Medium | |name=Jumping Medium | ||
| Line 294: | Line 294: | ||
{{MoveData | {{MoveData | ||
|image= | |image=UMVC3_Ryu_jH.png | ||
|caption= | |caption= | ||
|name=Jumping Heavy | |name=Jumping Heavy | ||
| Line 309: | Line 309: | ||
|properties= | |properties= | ||
|description= | |description= | ||
Airthrow OS attack. Buffering j.214X tatsu when attempting this can help Ryu on a failed throw attempt by allowing him to escape if j.5H whiffs, or possibly convert if it actually hits. Almost useless against grounded opponents due to the upward angle. | Airthrow OS attack. Buffering j.214X tatsu when attempting this can help Ryu on a failed throw attempt by allowing him to escape if {{Clr|3|j.5H}} whiffs, or possibly convert if it actually hits. Almost useless against grounded opponents due to the upward angle. | ||
}} | }} | ||
}} | }} | ||
{{MoveData | {{MoveData | ||
|image= | |image=UMVC3_Ryu_jS.png | ||
|caption= | |caption= | ||
|name=Jumping Special | |name=Jumping Special | ||
| Line 336: | Line 336: | ||
{{MoveData | {{MoveData | ||
|image= | |image=UMVC3_Ryu_6M_1st.png | ||
|image2=UMVC3_Ryu_6M_2nd.png | |||
|caption= | |caption= | ||
|name=Collarbone Breaker | |name=Collarbone Breaker | ||
| Line 351: | Line 352: | ||
|properties= | |properties= | ||
|description= | |description= | ||
Standing overhead attack. On hit, Ryu can follow up with 5S or any special, with 421X Donkey Kick being the most common picks. | Standing overhead attack. On hit, Ryu can follow up with {{Clr|4|5S}} or any special, with 421X Donkey Kick being the most common picks. | ||
}} | }} | ||
}} | }} | ||
| Line 358: | Line 359: | ||
{{MoveData | {{MoveData | ||
|image= | |image=UMVC3_Ryu_6H.png | ||
|caption= | |caption= | ||
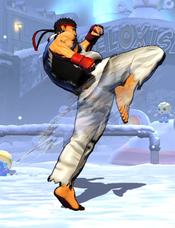
|name=Roundhouse Kick | |name=Roundhouse Kick | ||
| Line 381: | Line 382: | ||
{{MoveData | {{MoveData | ||
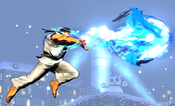
|image= | |image=UMVC3_Ryu_236X.png | ||
|caption= | |caption= | ||
|name=Hadoken | |name=Hadoken | ||
| Line 422: | Line 423: | ||
|properties=Priority: Low, Durability: 5 | |properties=Priority: Low, Durability: 5 | ||
|description= | |description= | ||
Standard horizontal projectile. {{ | Standard horizontal projectile. {{Clr|1|L}} version travels the slowest (and thus stays on-screen the longest), whereas {{Clr|3|H}} version travels the fastest. | ||
Risky to use because mobile characters can quickly maneuver over it and punish the recovery, or simply blow through it on reaction with their own | Risky to use because mobile characters can quickly maneuver over it and punish the recovery, or simply blow through it on reaction with their own - more durable - projectiles. | ||
}} | }} | ||
}} | }} | ||
| Line 430: | Line 431: | ||
{{MoveData | {{MoveData | ||
|image= | |image=UMVC3_Ryu_j236X.png | ||
|caption= | |caption= | ||
|name=Air Hadoken | |name=Air Hadoken | ||
| Line 445: | Line 446: | ||
|properties=Priority: Low, Durability: 5 | |properties=Priority: Low, Durability: 5 | ||
|description= | |description= | ||
Air version of the standard Hadoken. Has the same projectile speed different between button strengths ({{ | Air version of the standard Hadoken. Has the same projectile speed different between button strengths ({{Clr|1|L}} version is fastest), but does not have the difference in recovery. | ||
Air Hadoken instantly halts any aerial momentum that Ryu had, and causes him to float in place during the animation. This can be used intentionally to stall in the air in order to avoid dangerous threats on the ground. However, the Special Hadoken variants (detailed below) last longer and thus may be better for this purpose. | Air Hadoken instantly halts any aerial momentum that Ryu had, and causes him to float in place during the animation. This can be used intentionally to stall in the air in order to avoid dangerous threats on the ground. However, the Special Hadoken variants (detailed below) last longer and thus may be better for this purpose. | ||
| Line 453: | Line 454: | ||
{{MoveData | {{MoveData | ||
|image= | |image=UMVC3_Ryu_236SS.png | ||
|caption= | |caption= | ||
|name=Ren Hadoken | |name=Ren Hadoken | ||
| Line 468: | Line 469: | ||
|properties={{airok}} Priority: Low, Durability: 5 per projectile | |properties={{airok}} Priority: Low, Durability: 5 per projectile | ||
|description= | |description= | ||
Ryu fires a smaller, weaker hadoken that travels for 21 frames before dissipating. To compensate, Ryu can quickly fire off multiple projectiles - up to 5 per instance of the special - by rapidly pressing the S button. Difficult to use in zoning, as an opponent can pushblock the first fireball in order to cause the follow-ups to whiff. | Ryu fires a smaller, weaker hadoken that travels for 21 frames before dissipating. To compensate, Ryu can quickly fire off multiple projectiles - up to 5 per instance of the special - by rapidly pressing the {{Clr|4|S}} button. Difficult to use in zoning, as an opponent can pushblock the first fireball in order to cause the follow-ups to whiff. | ||
Using this move while airborne halts Ryu's aerial momentum, similar to a regular Hadoken. Because firing off 5 projectiles takes such a long time and only counts as a single special, Ryu can use this move up to three times to stall at superjump height for a very long time. However, doing this leaves him very vulnerable to opponents that can attack him from below or behind. | Using this move while airborne halts Ryu's aerial momentum, similar to a regular Hadoken. Because firing off 5 projectiles takes such a long time and only counts as a single special, Ryu can use this move up to three times to stall at superjump height for a very long time. However, doing this leaves him very vulnerable to opponents that can attack him from below or behind. | ||
| Line 476: | Line 477: | ||
{{MoveData | {{MoveData | ||
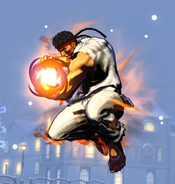
|image= | |image=UMVC3_Ryu_236-S-.png | ||
|image2=UMVC3_Ryu_236-S-_Explosion.png | |||
|caption= | |caption= | ||
|name=Baku Hadoken | |name=Baku Hadoken | ||
| Line 491: | Line 493: | ||
|properties={{airok}} {{wallbounce}} Priority: Low, Durability: 5 | |properties={{airok}} {{wallbounce}} Priority: Low, Durability: 5 | ||
|description= | |description= | ||
Ryu charges up, eventually flashing orange, and then unleashing an invisible projectile. The fireball launched by this attack travels very fast, but it is not quite instant and can be evaded. If the projectile makes contact with an opponent, it creates a large explosion. The explosion causes a | Ryu charges up, eventually flashing orange, and then unleashing an invisible projectile. The fireball launched by this attack travels very fast, but it is not quite instant and can be evaded. If the projectile makes contact with an opponent, it creates a large explosion. The explosion causes a Wall Bounce, although it is difficult for Ryu to convert this into anything. Note that while the explosion is quite large, the actual projectile has a very narrow vertical range and can easily miss against a mobile opponent. | ||
Once Ryu has held {{S}} long enough to trigger Baku instead of Ren Hadoken, he is committed to the full duration of the charge animation. Releasing S will not allow Ryu to abort and release a weaker Hadoken, and so this move is very committal and quite dangerous to use in neutral. | Once Ryu has held {{Clr|4|S}} long enough to trigger Baku instead of Ren Hadoken, he is committed to the full duration of the charge animation. Releasing {{Clr|4|S}} will not allow Ryu to abort and release a weaker Hadoken, and so this move is very committal and quite dangerous to use in neutral. | ||
}} | }} | ||
}} | }} | ||
| Line 500: | Line 502: | ||
{{MoveData | {{MoveData | ||
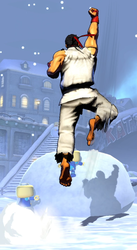
|image= | |image=UMVC3_Ryu_623X.png | ||
|caption= | |caption= | ||
|name=Shoryuken | |name=Shoryuken | ||
| Line 541: | Line 543: | ||
|properties=Invuln frames 1-9 | |properties=Invuln frames 1-9 | ||
|description= | |description= | ||
One of the few meterless invincible moves in the game. Can be used on reaction to hypers (buffer the input during the super flash) or even against standard predictable offense to beat it cleanly. However, it is almost impossible for Ryu to get any kind of follow-up off Shoryuken, as it launches the opponent very high and also puts Ryu into an airborne state almost immediately. Ryu can cancel 623M into his level 3 hyper Shin Shoryuken (623XX), which ''does'' allow for follow-ups, but otherwise has no good option. | One of the few meterless invincible moves in the game. Can be used on reaction to hypers (buffer the input during the super flash) or even against standard predictable offense to beat it cleanly. However, it is almost impossible for Ryu to get any kind of follow-up off Shoryuken, as it launches the opponent very high and also puts Ryu into an airborne state almost immediately. Ryu can cancel {{Clr|2|623M}} into his level 3 hyper Shin Shoryuken (623XX), which ''does'' allow for follow-ups, but otherwise has no good option. | ||
}} | }} | ||
}} | }} | ||
| Line 547: | Line 549: | ||
{{MoveData | {{MoveData | ||
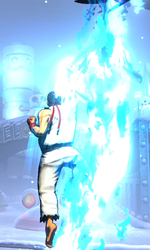
|image= | |image=UMVC3_Ryu_623S.png | ||
|caption= | |caption= | ||
|name=Hado Shoryuken | |name=Hado Shoryuken | ||
| Line 562: | Line 564: | ||
|properties=Invuln frames 1-30, Priority: Low, Durability: 1 | |properties=Invuln frames 1-30, Priority: Low, Durability: 1 | ||
|description= | |description= | ||
A very slow, but VERY invincible variant of the Shoryuken. Can be used on reaction to hypers, even ones that are fairly invincible themselves, to evade them or beat them cleanly. Like with regular Shoryukens, it launches the opponent high in the air and makes follow-ups very difficult. This variant | A very slow, but VERY invincible variant of the Shoryuken. Can be used on reaction to hypers, even ones that are fairly invincible themselves, to evade them or beat them cleanly. Like with regular Shoryukens, it launches the opponent high in the air and makes follow-ups very difficult. This variant includes an upwards projectile at the end of the attack, which makes the total damage quite large as compensation for not getting a follow-up combo. | ||
Because this attack is so slow, it is actually worse against very invulnerable hypers (such as X-23's Weapon X Prime) as it will not get airborne in time to evade them the way that H Shoryuken would. Also, the opponent can react to the Hado Shoryuken and cancel their attack with X-Factor or a fast DHC, which will leave Ryu very vulnerable to punishment. | Because this attack is so slow, it is actually worse against very invulnerable hypers (such as X-23's Weapon X Prime) as it will not get airborne in time to evade them the way that {{Clr|3|H}} Shoryuken would. Also, the opponent can react to the Hado Shoryuken and cancel their attack with X-Factor or a fast DHC, which will leave Ryu very vulnerable to punishment. | ||
}} | }} | ||
}} | }} | ||
| Line 571: | Line 573: | ||
{{MoveData | {{MoveData | ||
|image= | |image=UMVC3_Ryu_214X.png | ||
|caption= | |caption= | ||
|name=Tatsumaki Senpukyaku | |name=Tatsumaki Senpukyaku | ||
| Line 614: | Line 616: | ||
Ryu advances forward while kicking around him. Ryu is considered airborne during this move. Although all versions of this are technically throw-punishable, in practice the spacing will almost always protect him. | Ryu advances forward while kicking around him. Ryu is considered airborne during this move. Although all versions of this are technically throw-punishable, in practice the spacing will almost always protect him. | ||
This move juggles the opponent into the air, but during a normal hit, Ryu cannot follow up with anything. If the opponent is high enough in the air when tatsu connects, Ryu can link 5M afterwards and follow up, leading to extended combo routes. | This move juggles the opponent into the air, but during a normal hit, Ryu cannot follow up with anything. If the opponent is high enough in the air when tatsu connects, Ryu can link {{Clr|2|5M}} afterwards and follow up, leading to extended combo routes. | ||
}} | }} | ||
}} | }} | ||
{{MoveData | {{MoveData | ||
|image= | |image=UMVC3_Ryu_j214X.png | ||
|caption= | |caption= | ||
|name=Air Tatsumaki Senpukyaku | |name=Air Tatsumaki Senpukyaku | ||
| Line 662: | Line 664: | ||
Air version of Ryu's tatsu special, with some slight differences from the grounded version. When used, any aerial momentum Ryu currently had is overridden with the Tatsu's motion, which makes this special one of Ryu's only sources of mobility in the air. | Air version of Ryu's tatsu special, with some slight differences from the grounded version. When used, any aerial momentum Ryu currently had is overridden with the Tatsu's motion, which makes this special one of Ryu's only sources of mobility in the air. | ||
The {{ | The {{Clr|1|L}} version causes Ryu to shoot forward while falling in an arc, and is by far the most useful version. Its a good emergency escape after whiffing an air normal, and can be used as a mixup tool. Although it hits mid, the forward momentum gained from tatsu can cause Ryu to pass behind the opponent, taking advantage of its deep crossup hitbox. | ||
The {{ | The {{Clr|2|M}} and {{Clr|3|H}} versions cause Ryu to maintain a fixed height while advancing forward, then dropping straight down during the recovery. This makes these versions much more dangerous to use outside of combos, although {{Clr|3|H}} Air Tatsu is a great aerial combo ender. | ||
Note that air Tatsu does not | Note that air Tatsu does not knock airborne the way that ground tatsu does. Ryu can take advantage of this by using a tiger knee motion to Air Tatsu immediately off the ground and score a follow-up combo. | ||
}} | }} | ||
}} | }} | ||
| Line 672: | Line 674: | ||
{{MoveData | {{MoveData | ||
|image= | |image=UMVC3_Ryu_421X.png | ||
|caption= | |caption= | ||
|name=Jodan Sokuto Geri | |name=Jodan Sokuto Geri | ||
| Line 714: | Line 716: | ||
|properties={{wallbounce}} into {{softknockdown}} | |properties={{wallbounce}} into {{softknockdown}} | ||
|description= | |description= | ||
Ryu steps forward and delivers a slow, powerful kick. Advances Ryu forward about 1 character length. Heavier versions are slower but cause a higher/longer | Ryu steps forward and delivers a slow, powerful kick. Advances Ryu forward about 1 character length. Heavier versions are slower but cause a higher/longer Wall Bounce, giving Ryu more time to reposition and continue to combo. | ||
Ryu can easily combo 5H or 6H into any variant of this move (although {{ | Ryu can easily combo {{Clr|3|5H}} or {{Clr|3|6H}} into any variant of this move (although {{Clr|3|H}} version can drop after sufficient hitstun deterioration), so this is a relatively free combo extension. | ||
This move is a good target for cancelling using Hado Kakusei (22XX) due to its long recovery. Ryu can even pick up after the non-wallbounce version of this move if he uses his install hyper this way. | This move is a good target for cancelling using Hado Kakusei (22XX) due to its long recovery. Ryu can even pick up after the non-wallbounce version of this move if he uses his install hyper this way. | ||
| Line 725: | Line 727: | ||
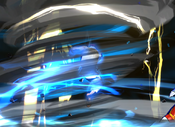
{{MoveData | {{MoveData | ||
|image= | |image=UMVC3_Ryu_236XX.png | ||
|caption= | |caption=Ground Standard | ||
|image2=UMVC3_Ryu_2368XX.png | |||
|caption2=Ground Aimed Up | |||
|image3=UMVC3_Ryu_j236XX.png | |||
|caption3=Air Standard | |||
|image4=UMVC3_Ryu_j2362XX.png | |||
|caption4=Air Aimed Down | |||
|name=Shinku Hadoken | |name=Shinku Hadoken | ||
|input=236XX (1 bar) when not in Hado Kakusei Mode | |input=236XX (1 bar) when not in Hado Kakusei Mode | ||
| Line 743: | Line 751: | ||
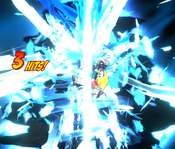
This hyper has the ability to be aimed, both during and after the hyper flash, in the following ways: | This hyper has the ability to be aimed, both during and after the hyper flash, in the following ways: | ||
*During the super flash of the ground version, hold {{u}} to aim the beam directly upwards above Ryu. Otherwise, he will fire the beam directly forward. | *During the super flash of the ground version, hold Up ({{u}}) to aim the beam directly upwards above Ryu. Otherwise, he will fire the beam directly forward. | ||
*During the super flash of the air version, hold {{d}} to aim the beam directly down below Ryu. This version works as an | *During the super flash of the air version, hold Down ({{d}}) to aim the beam directly down below Ryu. This version works as an OTG. Otherwise, he will fire the beam directly forwards. | ||
*While the beam is being fired, it can be angled slightly by holding {{f}}/{{b}} for vertical variants, or | *While the beam is being fired, it can be angled slightly by holding Forward/Backward ({{f}}/{{b}}) for vertical variants, or Up/Down for horizontal variants. | ||
If this hyper hits at the correct height, Ryu gains slightly more frame advantage than listed and can actually continue the combo. This is true for both the grounded and aerial versions. | If this hyper hits at the correct height, Ryu gains slightly more frame advantage than listed and can actually continue the combo. This is true for both the grounded and aerial versions. | ||
| Line 753: | Line 761: | ||
{{MoveData | {{MoveData | ||
|image= | |image=UMVC3_Ryu_214XX.png | ||
|caption= | |caption= | ||
|name=Shinku Tatsumaki Senpukyaku | |name=Shinku Tatsumaki Senpukyaku | ||
| Line 774: | Line 782: | ||
{{MoveData | {{MoveData | ||
|image= | |image=UMVC3_Ryu_22XX.png | ||
|image2=UMVC3_Ryu_22XX_Effect.png | |||
|caption= | |caption= | ||
|name=Hado Kakusei | |name=Hado Kakusei | ||
| Line 800: | Line 809: | ||
{{MoveData | {{MoveData | ||
|image= | |image=UMVC3_Ryu_Shin_236XX.png | ||
|image2=UMVC3_Ryu_Shin_j236XX.png | |||
|caption= | |caption= | ||
|name=Shin Hadoken | |name=Shin Hadoken | ||
| Line 823: | Line 833: | ||
{{MoveData | {{MoveData | ||
|image= | |image=UMVC3_Ryu_Shin_214XX.png | ||
|caption= | |caption= | ||
|name=Shin Tatsumaki Senpukyaku | |name=Shin Tatsumaki Senpukyaku | ||
| Line 844: | Line 854: | ||
{{MoveData | {{MoveData | ||
|image= | |image=UMVC3_Ryu_623XX.png | ||
|caption= | |caption= | ||
|name=Shin Shoryuken | |name=Shin Shoryuken | ||
| Line 866: | Line 876: | ||
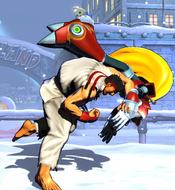
{{MoveData | {{MoveData | ||
|image= | |image=UMVC3_Ryu_GroundThrow.png | ||
|image2=UMVC3_Ryu_GroundBackThrow.png | |||
|caption= | |caption= | ||
|name=Ground Throw | |name=Ground Throw | ||
| Line 886: | Line 897: | ||
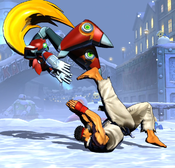
{{MoveData | {{MoveData | ||
|image= | |image=UMVC3_Ryu_AirThrow.png | ||
|image2=UMVC3_Ryu_AirBackThrow.png | |||
|caption= | |caption= | ||
|name=Air Throw | |name=Air Throw | ||
| Line 907: | Line 919: | ||
{{MoveData | {{MoveData | ||
|image= | |image=UMVC3_Ryu_5H.png | ||
|caption= | |caption= | ||
|name=Snap Back | |name=Snap Back | ||
| Line 928: | Line 940: | ||
{{MoveData | {{MoveData | ||
|image= | |image=UMVC3_Ryu_HardTag.png | ||
|caption= | |caption= | ||
|name=Hard Tag | |name=Hard Tag | ||
Revision as of 18:48, 30 August 2022
Introduction
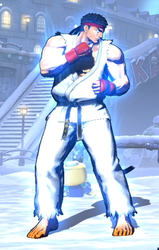
Training since childhood alongside his longtime rival Ken, Ryu is an expert in a form of martial arts known as Ansatsuken. He received international attention after defeating the Muay Thai champion Sagat in the first Street Fighter. Ryu lives a simple, ascetic life. He travels the world, hoping to test himself against strong opponents and further his training as a martial artist.
In UMvC3, Ryu is an all-rounder with a handful of tools to support both long-distance keepaway and rushdown offense. Ryu draws surface-level comparisons to Akuma, but this falls apart fairly quickly. Ryu is significantly less mobile than Akuma, especially in the air, which hampers Ryu's ability to perform keepaway for any extended amount of time. Ryu can also utilize a special Install hyper, "Hado Kakusei" (22XX) which grants him a speed boost and upgrades his other hypers.
| Strengths | Weaknesses |
|---|---|
|
|
| Ryu | |
|---|---|
| Character Data | |
| Health | 1,000,000 |
| Ground Magic Series | Stronger+ |
| Air Chain Combo Limit | Three |
| Forward Dash Duration | 20 frames |
| Backdash Duration | 25 frames |
| Jump Duration | 40 frames |
| Superjump Duration | 81 frames |
| Walljump? | No |
| Doublejump? | No |
| Airdash? | No |
| X-Factor Damage Boost (1/2/3) | 35% / 60% / 85% |
| X-Factor Speed Boost (1/2/3) | 5% / 10% / 15% |
| Minimum Damage Scaling (Normals, Specials) | 10% |
| Minimum Damage Scaling (Hypers) | 35% |
| Minimum Damage Scaling (X-Factor) | 35% |
Move List
Assists
| Damage | Startup | Active | Recovery |
|---|---|---|---|
| 150,000 | 27/25 | 14 | 132/125, 102/88 |
| On Hit | On Block | Guard | Properties |
| - | - | Mid | |
|
THC Hyper: Shinku Tatsumaki Senpukyaku. Lacks invincibility, and causes the opponent to be knocked very high in the air on hit, which makes following up with any combo difficult. Poor horizontal range and provides almost no blockstun. | |||
| Damage | Startup | Active | Recovery |
|---|---|---|---|
| 100,000 | 34/31 | - | 128/123, 98/86 |
| On Hit | On Block | Guard | Properties |
| - | - | Mid | Priority: Low, Durability: 5 |
|
THC Hyper: Shinku Hadoken. Extremely vanilla projectile assist. Although it comes out noticeably faster than common beam assists, this is usually negated by the fact that the projectile has to also physically travel to its target. It also loses on durability to many other projectile assists. Does stay on screen for a very long total time compared to many common assists, which can be useful. | |||
| Damage | Startup | Active | Recovery |
|---|---|---|---|
| 50,000 x2 + 60,000 | 37/34 | 17(6)6 / 15(6)6 | 115/108, 85/72 |
| On Hit | On Block | Guard | Properties |
| - | - | Mid | |
|
THC Hyper: Shinku Tatsumaki Senpukyaku. Horizontal lockdown assist. On hit, it bounces the opponent slightly into the air, but is fairly easy to confirm from. | |||
Ground Normals
| Damage | Startup | Active | Recovery |
|---|---|---|---|
| 50,000 | 5/5 | 3/3 | 10/8 |
| On Hit | On Block | Guard | Properties |
| +3/+5 | +1/+3 | Mid | |
|
- | |||
| Damage | Startup | Active | Recovery |
|---|---|---|---|
| 75,000 | 8/7 | 3/3 | 21/18 |
| On Hit | On Block | Guard | Properties |
| -3/-1 | -5/-3 | Mid | - |
|
- | |||
| Damage | Startup | Active | Recovery |
|---|---|---|---|
| 90,000 | 10/9 | 3/3 | 21/18 |
| On Hit | On Block | Guard | Properties |
| +4/+7 | +2/+5 | Mid | - |
|
- | |||
| Damage | Startup | Active | Recovery |
|---|---|---|---|
| 45,000 | 5/5 | 2/2 | 11/9 |
| On Hit | On Block | Guard | Properties |
| +3/+5 | +1/+3 | Low | |
|
Standard low attack for baiting pushblock and mixing up when combined with 6M overhead. | |||
| Damage | Startup | Active | Recovery |
|---|---|---|---|
| 68,000 | 8/7 | 3/3 | 19/17 |
| On Hit | On Block | Guard | Properties |
| -1/+1 | -3/=1 | Low | - |
|
Low-profile attack. 2M allows Ryu to evade underneath many attacks that he cannot normally avoid by crouching or using other normals. Unfortunately, the low amount of active frames makes this difficult to time properly and very dangerous to attempt. For reference, Ryu can use a very well-timed 2M to low-profile Dr. Doom's M Plasma Beam, but H Plasma Beam is too active, and Ryu will always get hit out of his recovery. | |||
| Damage | Startup | Active | Recovery |
|---|---|---|---|
| 80,000 | 10/9 | 4/4 | 26/23 |
| On Hit | On Block | Guard | Properties |
| - | -4/-1 | Low | |
|
Causes a Hard Knockdown, which is unique among 2H sweeps; most cause a Soft Knockdown or none at all. | |||
| Damage | Startup | Active | Recovery |
|---|---|---|---|
| 100,000 | 9/8 | 5/5 | 22/19 |
| On Hit | On Block | Guard | Properties |
| Launch | -1/+2 | Mid | |
|
Poor horizontal range - has a tendency to whiff if chained from grounded normals at the outer edge of their range, even 2L. For this reason, Ryu should try to confirm into 421X instead. | |||
Aerial Normals
| Damage | Startup | Active | Recovery |
|---|---|---|---|
| 55,000 | 6/6 | 13/13 | 5/4 |
| On Hit | On Block | Guard | Properties |
| +9/+11 | +7/+7 | OH | - |
|
Works as an instant overhead naturally against most characters. However, Ryu has difficulty converting off of this hit, even with assist coverage. | |||
| Damage | Startup | Active | Recovery |
|---|---|---|---|
| 60,000 x2 | 9/8 | 4/4 | 19/16 |
| On Hit | On Block | Guard | Properties |
| +19/+19 | +17/+14 | OH | - |
|
Hits twice, making it strong combo filler. | |||
| Damage | Startup | Active | Recovery |
|---|---|---|---|
| 90,000 | 9/8 | 4/4 | 23/20 |
| On Hit | On Block | Guard | Properties |
| +23/+22 | +21/+20 | OH | - |
|
Airthrow OS attack. Buffering j.214X tatsu when attempting this can help Ryu on a failed throw attempt by allowing him to escape if j.5H whiffs, or possibly convert if it actually hits. Almost useless against grounded opponents due to the upward angle. | |||
| Damage | Startup | Active | Recovery |
|---|---|---|---|
| 95,000 | 9/8 | 8/7 | 19/17 |
| On Hit | On Block | Guard | Properties |
| +20 | +18 | OH | |
|
Deep cross-up hitbox. | |||
Command Normals
| Damage | Startup | Active | Recovery |
|---|---|---|---|
| 35,000 x2 | 23/21 | 4/4 | 22/19 |
| On Hit | On Block | Guard | Properties |
| -3/-1 | -5/-1 | OH | - |
|
Standing overhead attack. On hit, Ryu can follow up with 5S or any special, with 421X Donkey Kick being the most common picks. | |||
| Damage | Startup | Active | Recovery |
|---|---|---|---|
| 95,000 | 13/12 | 3/3 | 21/18 |
| On Hit | On Block | Guard | Properties |
| +4/+7 | +2/+5 | Mid | - |
|
6H gives Ryu extra time to confirm hits in grounded chains and also tacks free extra damage onto any grounded chain. It also juggles opponents who are already airborne decently high, which is important for certain tatsu loop combo routes. | |||
Special Moves
| L |
Damage | Startup | Active | Recovery |
|---|---|---|---|---|
| 100,000 | 10/9 | - | 35/31 | |
| On Hit | On Block | Guard | Properties | |
| -2/+2 | -4/0 | Mid | Priority: Low, Durability: 5 | |
| M |
Damage | Startup | Active | Recovery |
| 100,000 | 10/9 | - | 38/34 | |
| On Hit | On Block | Guard | Properties | |
| -6/-1 | -8/-3 | Mid | Priority: Low, Durability: 5 | |
| H |
Damage | Startup | Active | Recovery |
| 100,000 | 10/9 | - | 43/38 | |
| On Hit | On Block | Guard | Properties | |
| -10/-5 | -12/-7 | Mid | Priority: Low, Durability: 5 | |
|
Standard horizontal projectile. L version travels the slowest (and thus stays on-screen the longest), whereas H version travels the fastest. Risky to use because mobile characters can quickly maneuver over it and punish the recovery, or simply blow through it on reaction with their own - more durable - projectiles. | ||||
| Damage | Startup | Active | Recovery |
|---|---|---|---|
| 100,000 | 14/13 | - | 38/33 |
| On Hit | On Block | Guard | Properties |
| -8/-2 | -9/-4 | Mid | Priority: Low, Durability: 5 |
|
Air version of the standard Hadoken. Has the same projectile speed different between button strengths (L version is fastest), but does not have the difference in recovery. Air Hadoken instantly halts any aerial momentum that Ryu had, and causes him to float in place during the animation. This can be used intentionally to stall in the air in order to avoid dangerous threats on the ground. However, the Special Hadoken variants (detailed below) last longer and thus may be better for this purpose. | |||
| Damage | Startup | Active | Recovery |
|---|---|---|---|
| 50,000 x1 - x5 | 21/19 | - | 42/36 |
| On Hit | On Block | Guard | Properties |
| -9/-3 | -11/-5 | Mid | |
|
Ryu fires a smaller, weaker hadoken that travels for 21 frames before dissipating. To compensate, Ryu can quickly fire off multiple projectiles - up to 5 per instance of the special - by rapidly pressing the S button. Difficult to use in zoning, as an opponent can pushblock the first fireball in order to cause the follow-ups to whiff. Using this move while airborne halts Ryu's aerial momentum, similar to a regular Hadoken. Because firing off 5 projectiles takes such a long time and only counts as a single special, Ryu can use this move up to three times to stall at superjump height for a very long time. However, doing this leaves him very vulnerable to opponents that can attack him from below or behind. | |||
| Damage | Startup | Active | Recovery |
|---|---|---|---|
| 150,000 | 53/48 | - | 37/33 |
| On Hit | On Block | Guard | Properties |
| - | -8/-4 | Mid | |
|
Ryu charges up, eventually flashing orange, and then unleashing an invisible projectile. The fireball launched by this attack travels very fast, but it is not quite instant and can be evaded. If the projectile makes contact with an opponent, it creates a large explosion. The explosion causes a Wall Bounce, although it is difficult for Ryu to convert this into anything. Note that while the explosion is quite large, the actual projectile has a very narrow vertical range and can easily miss against a mobile opponent. Once Ryu has held S long enough to trigger Baku instead of Ren Hadoken, he is committed to the full duration of the charge animation. Releasing S will not allow Ryu to abort and release a weaker Hadoken, and so this move is very committal and quite dangerous to use in neutral. | |||
| L |
Damage | Startup | Active | Recovery |
|---|---|---|---|---|
| 100,000 | 3/3 | 14/14 | 25/20 | |
| On Hit | On Block | Guard | Properties | |
| -7/-2 | -13/-8 | Mid | Invuln frames 1-2 | |
| M |
Damage | Startup | Active | Recovery |
| 120,000 | 3/3 | 14/14 | 33/27 | |
| On Hit | On Block | Guard | Properties | |
| -9/-4 | -21/-15 | Mid | Invuln frames 1-5 | |
| H |
Damage | Startup | Active | Recovery |
| 150,000 | 3/3 | 14/14 | 47/40 | |
| On Hit | On Block | Guard | Properties | |
| -19/-12 | -35/-28 | Mid | Invuln frames 1-9 | |
|
One of the few meterless invincible moves in the game. Can be used on reaction to hypers (buffer the input during the super flash) or even against standard predictable offense to beat it cleanly. However, it is almost impossible for Ryu to get any kind of follow-up off Shoryuken, as it launches the opponent very high and also puts Ryu into an airborne state almost immediately. Ryu can cancel 623M into his level 3 hyper Shin Shoryuken (623XX), which does allow for follow-ups, but otherwise has no good option. | ||||
| Damage | Startup | Active | Recovery |
|---|---|---|---|
| 130,000 + 30,000 x3 | 28/25 | 14/14 | 34/28 |
| On Hit | On Block | Guard | Properties |
| +16/+22 | -22/-16 | Mid | Invuln frames 1-30, Priority: Low, Durability: 1 |
|
A very slow, but VERY invincible variant of the Shoryuken. Can be used on reaction to hypers, even ones that are fairly invincible themselves, to evade them or beat them cleanly. Like with regular Shoryukens, it launches the opponent high in the air and makes follow-ups very difficult. This variant includes an upwards projectile at the end of the attack, which makes the total damage quite large as compensation for not getting a follow-up combo. Because this attack is so slow, it is actually worse against very invulnerable hypers (such as X-23's Weapon X Prime) as it will not get airborne in time to evade them the way that H Shoryuken would. Also, the opponent can react to the Hado Shoryuken and cancel their attack with X-Factor or a fast DHC, which will leave Ryu very vulnerable to punishment. | |||
| L |
Damage | Startup | Active | Recovery |
|---|---|---|---|---|
| 90,000 | 13/12 | 6 | 23/19 | |
| On Hit | On Block | Guard | Properties | |
| - | -3/+1 | Mid | ||
| M |
Damage | Startup | Active | Recovery |
| 60,000 x2 | 13/12 | 7(6)6/6(6)6 | 21/17 | |
| On Hit | On Block | Guard | Properties | |
| - | -1/+3 | Mid | ||
| H |
Damage | Startup | Active | Recovery |
| 50,000 x2 + 60,000 | 13/12 | 17(6)6/15(6)6 | 22/15 | |
| On Hit | On Block | Guard | Properties | |
| - | -2/+3 | Mid | ||
|
Ryu advances forward while kicking around him. Ryu is considered airborne during this move. Although all versions of this are technically throw-punishable, in practice the spacing will almost always protect him. This move juggles the opponent into the air, but during a normal hit, Ryu cannot follow up with anything. If the opponent is high enough in the air when tatsu connects, Ryu can link 5M afterwards and follow up, leading to extended combo routes. | ||||
| L Air |
Damage | Startup | Active | Recovery |
|---|---|---|---|---|
| 100,000 | 13/12 | 20/18 | Until grounded | |
| On Hit | On Block | Guard | Properties | |
| - | - | Mid | - | |
| M Air |
Damage | Startup | Active | Recovery |
| 30,000 x3 + 50,000 | 13/12 | 26(4)6/23(4)6 | Until grounded | |
| On Hit | On Block | Guard | Properties | |
| - | - | Mid | - | |
| H Air |
Damage | Startup | Active | Recovery |
| 30,000 x4 + 50,000 | 13/12 | 36(4)6/32(4)6 | Until grounded | |
| On Hit | On Block | Guard | Properties | |
| - | - | Mid | - | |
|
Air version of Ryu's tatsu special, with some slight differences from the grounded version. When used, any aerial momentum Ryu currently had is overridden with the Tatsu's motion, which makes this special one of Ryu's only sources of mobility in the air. The L version causes Ryu to shoot forward while falling in an arc, and is by far the most useful version. Its a good emergency escape after whiffing an air normal, and can be used as a mixup tool. Although it hits mid, the forward momentum gained from tatsu can cause Ryu to pass behind the opponent, taking advantage of its deep crossup hitbox. The M and H versions cause Ryu to maintain a fixed height while advancing forward, then dropping straight down during the recovery. This makes these versions much more dangerous to use outside of combos, although H Air Tatsu is a great aerial combo ender. Note that air Tatsu does not knock airborne the way that ground tatsu does. Ryu can take advantage of this by using a tiger knee motion to Air Tatsu immediately off the ground and score a follow-up combo. | ||||
| L |
Damage | Startup | Active | Recovery |
|---|---|---|---|---|
| 100,000 | 14/13 | 5/5 | 30/25 | |
| On Hit | On Block | Guard | Properties | |
| - | -9/-4 | Mid | ||
| M |
Damage | Startup | Active | Recovery |
| 100,000 | 16/14 | 5/5 | 32/28 | |
| On Hit | On Block | Guard | Properties | |
| - | -11/-7 | Mid | ||
| H |
Damage | Startup | Active | Recovery |
| 100,000 | 18/16 | 5/5 | 34/29 | |
| On Hit | On Block | Guard | Properties | |
| - | -13/-8 | Mid | ||
|
Ryu steps forward and delivers a slow, powerful kick. Advances Ryu forward about 1 character length. Heavier versions are slower but cause a higher/longer Wall Bounce, giving Ryu more time to reposition and continue to combo. Ryu can easily combo 5H or 6H into any variant of this move (although H version can drop after sufficient hitstun deterioration), so this is a relatively free combo extension. This move is a good target for cancelling using Hado Kakusei (22XX) due to its long recovery. Ryu can even pick up after the non-wallbounce version of this move if he uses his install hyper this way. | ||||
Hyper Combos
| Damage | Startup | Active | Recovery |
|---|---|---|---|
| 18,000 x25 - x50 | 18+1 | 80 | 23 |
| On Hit | On Block | Guard | Properties |
| +3 | -8 | Mid | |
|
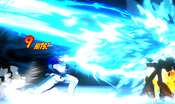
Standard but powerful and fast beam hyper. Useful for sniping assist calls and punishing slower projectiles or other attacks even from fullscreen. This hyper has the ability to be aimed, both during and after the hyper flash, in the following ways:
If this hyper hits at the correct height, Ryu gains slightly more frame advantage than listed and can actually continue the combo. This is true for both the grounded and aerial versions. | |||
| Damage | Startup | Active | Recovery |
|---|---|---|---|
| 12,000 x43 - x83 | 13+4 | 102 | 35 |
| On Hit | On Block | Guard | Properties |
| - | -12 | Mid | Invuln frames 1-17, |
|
Reversal hyper. Harder to land than beam hyper but deals slightly more damage. Ends with a lengthy hard knockdown - if the move is used in the corner, Ryu can recover and immediately perform a tiger knee Air Shinku Hadoken (down) to connect OTG for additional damage. | |||
| Damage | Startup | Active | Recovery |
|---|---|---|---|
| 450,000 | 18+7 | - | - |
| On Hit | On Block | Guard | Properties |
| - | - | Mid | 339 frame install hyper |
|
Ryu enters a power-up state for ~5.5 seconds, granting the following effects:
Because of the very short duration of this install hyper, it is difficult to use either of these benefits effectively. However, this hyper is useful just as a general purpose hyper cancel, allowing Ryu to recover quicker from grounded specials. | |||
| Damage | Startup | Active | Recovery |
|---|---|---|---|
| 20,000 x25 - x50 | 18+1 | 80 | 23 |
| On Hit | On Block | Guard | Properties |
| +3 | -8 | Mid | |
|
The Kakusei-enhanced beam hyper is slightly narrower than the regular version, but bounces off walls for an overall higher amount of screen coverage. It deals slightly more damage than the regular version, about 350,000 when fully mashed compared to the normal 319,000. As a downside, Shin Hadoken loses the aiming ability of the regular version - it is always fired straight ahead and cannot be altered to fire up or down. This makes it significantly less versatile than the normal variant, and completely unable to be used as an OTG. | |||
| Damage | Startup | Active | Recovery |
|---|---|---|---|
| 15,000 x43 - x83 | 13+4 | 102 | 35 |
| On Hit | On Block | Guard | Properties |
| - | -12 | Mid | Invuln frames 1-17, |
|
Almost identical to Shinku Tatsumaki, and a straight upgrade unlike the Hadoken variant. Shin Tatsu does more damage than the normal hyper (~395,000 compared to 315,000) and has a larger hitbox, allowing it to connect on opponents who are higher in the air. | |||
| Damage | Startup | Active | Recovery |
|---|---|---|---|
| 380,000 | 11+0 | 4 | 50 |
| On Hit | On Block | Guard | Properties |
| - | -28 | Mid | Invuln frames 1-22, |
|
Reversal hyper with great invincibility. Ryu can follow up this hyper with a combo from anywhere on the screen, making it very dangerous for the opponent to challenge. Not affected in any way by being in Kakusei Mode. | |||
Universal Mechanics
| Damage | Startup | Active | Recovery |
|---|---|---|---|
| 80,000 | 1 | 1 | - |
| On Hit | On Block | Guard | Properties |
| - | - | Throw | |
|
Standard ground throw. Follow-ups are basically impossible. | |||
| Damage | Startup | Active | Recovery |
|---|---|---|---|
| 80,000 | 1 | 1 | - |
| On Hit | On Block | Guard | Properties |
| - | - | Airthrow | |
|
Standard airthrow that results in a hard knockdown. Forward airthrow sends the opponent almost straight down, and can be followed up with a downwards Shinku Hadoken | |||
| Damage | Startup | Active | Recovery |
|---|---|---|---|
| 50,000 | 2 | 3 | 23 |
| On Hit | On Block | Guard | Properties |
| - | 0 | Mid | Snapback |
|
Animation and hitbox based on 5H. | |||
| Damage | Startup | Active | Recovery |
|---|---|---|---|
| 27,000 | - | 20 | 34 |
| On Hit | On Block | Guard | Properties |
| - | -13 | OH | |
|
- | |||
Team Position
Ryu is most commonly placed in the Second position on the team. Although he hits very hard and has powerful hypers, Ryu struggles in neutral due to having poor range on most attacks and limited mobility. Players have worked around this by using Ryu has a sort of damage engine: landing the initial hit with a character that has better neutral, then bringing in Ryu via DHC/Hard Tag/TAC to secure the kill. Ryu's assists, while below the level of strength found in more commonly chosen assists, are still serviceable and can be utilized effectively by some characters.
Notable Synergies
Sentinel: Sentinel Force (Charge) is a great assist for most characters, with Ryu being no exception. Sentinel Force has a very high total duration, giving Ryu plenty of time to approach with cross-up Tatsumakis, 6M overheads, or other offensive tricks. Sentinel sometimes struggle as an assist because he tends to be clipped by stray hits from the opponent's assist calls, but Ryu can use Shinku Hadoken (236XX) to snipe assists and discourage their use, making Sentinel safer. Ryu can also use Sentinel Force to relaunch by calling the assist before a launcher and then spiking the opponent back down towards the drones, which is important because Ryu himself has no OTG options outside of hypers. With the correct setup, Sentinel assist can also be used to pick up after Ryu's beam hyper, allowing for some additional follow-up damage.
Players to watch: RayRay (Magneto/Ryu/Sentinel)
Akuma: Similar to Sentinel Force, Akuma's Tatsu assist provides a significant amount of lockdown for Ryu to attempt to run his offensive gameplan. It's primary use is to be called before Ryu attempts an air j.214L tatsu, as it will cover both the startup and the recovery. Since Ryu and Akuma both have fast beam hypers, they both excel at sniping enemy assists, and can then DHC to each other for additional damage if they catch one.
Players to Watch: Brian Kasugano (Chun/Ryu/Akuma), Zenpool (Ryu/Deadpool/Akuma), oAcentric (Chun/Ryu/Akuma), Vortex (Ryu/Spencer/Akuma), Weeberman
Wesker: Because Ryu's OTG options are limited only to hypers, Ryu benefits from having an OTG assist, such as Wesker's Samurai Edge. Other OTG assists, such as Deadpool's Katana-Rama, could also be considered. Since many Wesker combo routes end in a THC, he benefits from having a character like Ryu whose level 1 hypers deal great damage.
Players to Watch: ChrisG (Wesker/Ryu/Hawkeye, briefly)
Other Players to Watch:
Combos
Alternate Colors
Videos and External Resources

