Cherry K.O. (talk | contribs) |
Cherry K.O. (talk | contribs) |
||
| Line 30: | Line 30: | ||
|header=yes | |header=yes | ||
|version=A | |version=A | ||
|damage = | |damage = 17 | ||
|dashing damage = | |dashing damage = 23 | ||
|startup=- | |startup=- | ||
|active=- | |active=- | ||
| Line 40: | Line 40: | ||
|header=no | |header=no | ||
|version=B | |version=B | ||
|damage = | |damage = 17 | ||
|dashing damage = | |dashing damage = 23 | ||
|startup=- | |startup=- | ||
|active=- | |active=- | ||
| Line 50: | Line 50: | ||
|header=no | |header=no | ||
|version=C | |version=C | ||
|damage = | |damage = 17 | ||
|dashing damage = | |dashing damage = 23 | ||
|startup=- | |startup=- | ||
|active=- | |active=- | ||
| Line 59: | Line 59: | ||
===== Info: ===== | ===== Info: ===== | ||
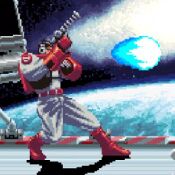
Rolf Shot can knock down the opponent when performed during a dash. | Rolf Shot can knock down the opponent when performed during a dash. | ||
}} | }} | ||
| Line 73: | Line 72: | ||
|header=yes | |header=yes | ||
|version=A | |version=A | ||
|damage = | |damage = 17 | ||
|dashing damage = | |dashing damage = 23 | ||
|startup=- | |startup=- | ||
|active=- | |active=- | ||
| Line 83: | Line 82: | ||
|header=no | |header=no | ||
|version=B | |version=B | ||
|damage = | |damage = 17 | ||
|dashing damage = | |dashing damage = 23 | ||
|startup=- | |startup=- | ||
|active=- | |active=- | ||
| Line 93: | Line 92: | ||
|header=no | |header=no | ||
|version=C | |version=C | ||
|damage = | |damage = 17 | ||
|dashing damage = | |dashing damage = 23 | ||
|startup=- | |startup=- | ||
|active=- | |active=- | ||
| Line 102: | Line 101: | ||
===== Info: ===== | ===== Info: ===== | ||
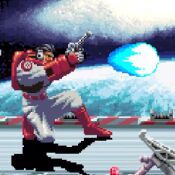
Rolf performs a roll and then fires a projectile. This move can also knock down the opponent when performed during a dash. | Rolf performs a roll and then fires a projectile. This move can also knock down the opponent when performed during a dash. | ||
}} | }} | ||
| Line 159: | Line 157: | ||
|header=yes | |header=yes | ||
|version=A | |version=A | ||
|damage = | |damage = 34 | ||
|dashing damage = | |dashing damage = 43 | ||
|startup=- | |startup=- | ||
|active=- | |active=- | ||
| Line 169: | Line 167: | ||
|header=no | |header=no | ||
|version=B | |version=B | ||
|damage = | |damage = 34 | ||
|dashing damage = | |dashing damage = 43 | ||
|startup=- | |startup=- | ||
|active=- | |active=- | ||
| Line 179: | Line 177: | ||
|header=no | |header=no | ||
|version=C | |version=C | ||
|damage = | |damage = 34 | ||
|dashing damage = | |dashing damage = 43 | ||
|startup=- | |startup=- | ||
|active=- | |active=- | ||
| Line 187: | Line 185: | ||
|description = | |description = | ||
===== Info: ===== | ===== Info: ===== | ||
}} | }} | ||
| Line 202: | Line 198: | ||
|header=yes | |header=yes | ||
|version=A | |version=A | ||
|damage = | |damage = 69 | ||
|dashing damage = | |dashing damage = | ||
|startup=- | |startup=- | ||
| Line 212: | Line 208: | ||
|header=no | |header=no | ||
|version=B | |version=B | ||
|damage = | |damage = 69 | ||
|dashing damage = | |dashing damage = | ||
|startup=- | |startup=- | ||
| Line 222: | Line 218: | ||
|header=no | |header=no | ||
|version=C | |version=C | ||
|damage = | |damage = 69 | ||
|dashing damage = | |dashing damage = | ||
|startup=- | |startup=- | ||
| Line 232: | Line 228: | ||
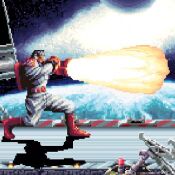
Striking Napalm has long reach and deals massive damage. It's great for catching back dashes and finishing juggles/combos. | Striking Napalm has long reach and deals massive damage. It's great for catching back dashes and finishing juggles/combos. | ||
=====Counter Play:===== | =====Counter Play:===== | ||
The move only hits twice. A consistent counter is to block, guard cancel a dash after the second hit, and then punish accordingly. | The move only hits twice on block. A consistent counter is to block, guard cancel a forward dash after the second hit, and then punish accordingly. | ||
}} | }} | ||
}} | }} | ||
Revision as of 11:55, 23 May 2022
Introduction
Move List
Normal Moves
Command Normals
Comet Tail: 3 + A
Stardust Arrow: 3 + B
Metro Launcher: 3 + C
Throws
Boost Overdrop: 4 or 6 + B
Boost Pressure: 4 or 6 + C
Special Moves
| A | Damage | Startup, Active, and Recovery | On Hit | On Block | ||||||||
|---|---|---|---|---|---|---|---|---|---|---|---|---|
| - | - | - | - | |||||||||
| Dash Damage | Dash Startup, Active, and Recovery | On Dash Hit | On Dash Block | |||||||||
| - | - | - | - | |||||||||
| B | Damage | Startup, Active, and Recovery | On Hit | On Block | ||||||||
| - | - | - | - | |||||||||
| Dash Damage | Dash Startup, Active, and Recovery | On Dash Hit | On Dash Block | |||||||||
| - | - | - | - | |||||||||
| C | Damage | Startup, Active, and Recovery | On Hit | On Block | ||||||||
| - | - | - | - | |||||||||
| Dash Damage | Dash Startup, Active, and Recovery | On Dash Hit | On Dash Block | |||||||||
| - | - | - | - | |||||||||
Info:Rolf Shot can knock down the opponent when performed during a dash. | ||||||||||||
| A | Damage | Startup, Active, and Recovery | On Hit | On Block | ||||||||
|---|---|---|---|---|---|---|---|---|---|---|---|---|
| - | - | - | - | |||||||||
| Dash Damage | Dash Startup, Active, and Recovery | On Dash Hit | On Dash Block | |||||||||
| - | - | - | - | |||||||||
| B | Damage | Startup, Active, and Recovery | On Hit | On Block | ||||||||
| - | - | - | - | |||||||||
| Dash Damage | Dash Startup, Active, and Recovery | On Dash Hit | On Dash Block | |||||||||
| - | - | - | - | |||||||||
| C | Damage | Startup, Active, and Recovery | On Hit | On Block | ||||||||
| - | - | - | - | |||||||||
| Dash Damage | Dash Startup, Active, and Recovery | On Dash Hit | On Dash Block | |||||||||
| - | - | - | - | |||||||||
Info:Rolf performs a roll and then fires a projectile. This move can also knock down the opponent when performed during a dash. | ||||||||||||
| A | Damage | Startup, Active, and Recovery | On Hit | On Block | ||||||||
|---|---|---|---|---|---|---|---|---|---|---|---|---|
| - | - | - | - | |||||||||
| Dash Damage | Dash Startup, Active, and Recovery | On Dash Hit | On Dash Block | |||||||||
| - | - | - | - | |||||||||
| B | Damage | Startup, Active, and Recovery | On Hit | On Block | ||||||||
| - | - | - | - | |||||||||
| Dash Damage | Dash Startup, Active, and Recovery | On Dash Hit | On Dash Block | |||||||||
| - | - | - | - | |||||||||
| C | Damage | Startup, Active, and Recovery | On Hit | On Block | ||||||||
| - | - | - | - | |||||||||
| Dash Damage | Dash Startup, Active, and Recovery | On Dash Hit | On Dash Block | |||||||||
| - | - | - | - | |||||||||
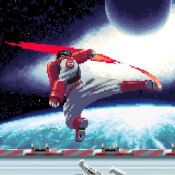
Info:Counter Play:Each version whiffs the second hit on Juri, Alvan, Kazuma, and Roomi when they're crouching. | ||||||||||||
| A | Damage | Startup, Active, and Recovery | On Hit | On Block | ||||||||
|---|---|---|---|---|---|---|---|---|---|---|---|---|
| - | - | - | - | |||||||||
| Dash Damage | Dash Startup, Active, and Recovery | On Dash Hit | On Dash Block | |||||||||
| - | - | - | - | |||||||||
| B | Damage | Startup, Active, and Recovery | On Hit | On Block | ||||||||
| - | - | - | - | |||||||||
| Dash Damage | Dash Startup, Active, and Recovery | On Dash Hit | On Dash Block | |||||||||
| - | - | - | - | |||||||||
| C | Damage | Startup, Active, and Recovery | On Hit | On Block | ||||||||
| - | - | - | - | |||||||||
| Dash Damage | Dash Startup, Active, and Recovery | On Dash Hit | On Dash Block | |||||||||
| - | - | - | - | |||||||||
Info: | ||||||||||||
| A | Damage | Startup, Active, and Recovery | On Hit | On Block | ||||||||
|---|---|---|---|---|---|---|---|---|---|---|---|---|
| - | - | - | - | |||||||||
| Dash Damage | Dash Startup, Active, and Recovery | On Dash Hit | On Dash Block | |||||||||
| - | - | - | - | |||||||||
| B | Damage | Startup, Active, and Recovery | On Hit | On Block | ||||||||
| - | - | - | - | |||||||||
| Dash Damage | Dash Startup, Active, and Recovery | On Dash Hit | On Dash Block | |||||||||
| - | - | - | - | |||||||||
| C | Damage | Startup, Active, and Recovery | On Hit | On Block | ||||||||
| - | - | - | - | |||||||||
| Dash Damage | Dash Startup, Active, and Recovery | On Dash Hit | On Dash Block | |||||||||
| - | - | - | - | |||||||||
Info:Striking Napalm has long reach and deals massive damage. It's great for catching back dashes and finishing juggles/combos. Counter Play:The move only hits twice on block. A consistent counter is to block, guard cancel a forward dash after the second hit, and then punish accordingly. | ||||||||||||
The Basics
Combos
- 66, 214+A, 2B xx 214+A
This combo instantly bubble stuns an opponent when fully connected. Another way of landing the combo is by crossing-up the opponent with the first 214+A.


