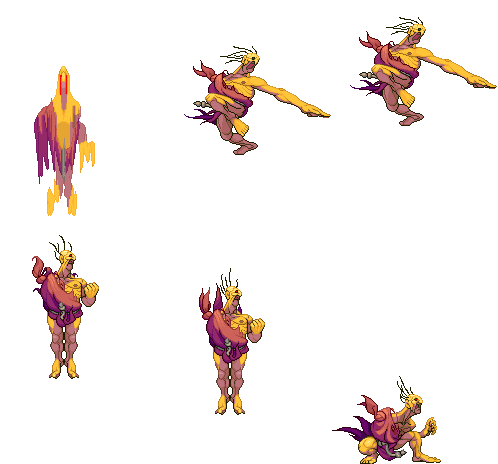
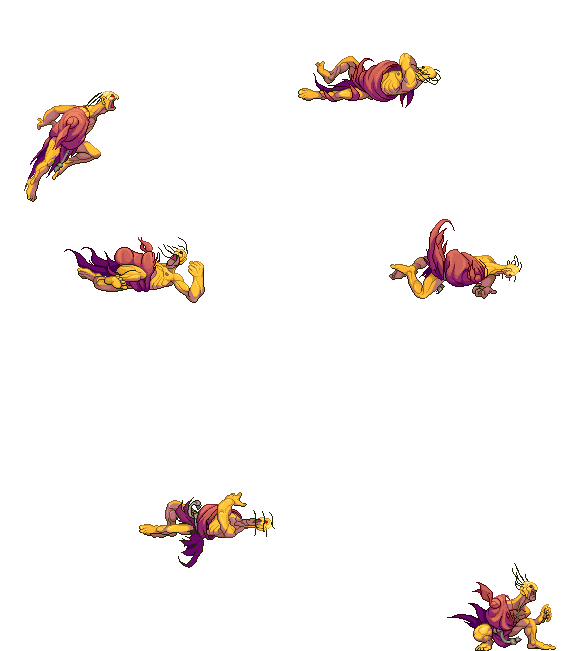
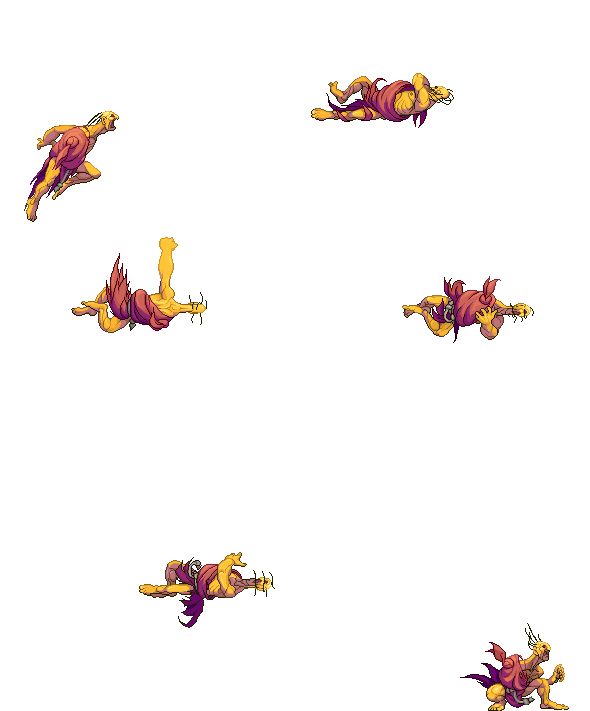
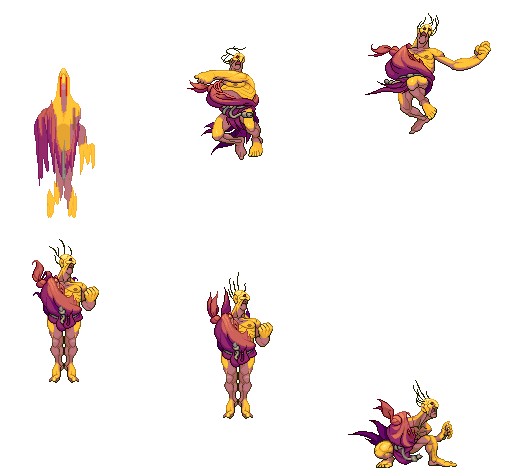
| Line 236: | Line 236: | ||
{| border="1em" cellspacing="0" width="60%" style="border: 1px solid #999; background: #F2F2F2;" | {| border="1em" cellspacing="0" width="60%" style="border: 1px solid #999; background: #F2F2F2;" | ||
|- | |- | ||
| align="center" | '''Move''' || align="center" | '''Motion''' || align="center" | '''Damage''' || align="center" | '''Stun Damage''' || align="center" | '''Chains into itself''' || align="center" | '''Special Cancel''' || align="center" | '''Super Cancel''' | | align="center" | '''Move''' || align="center" | '''Motion''' || align="center" | '''Damage''' || align="center" | '''Stun Damage''' || align="center" | '''Chains into itself''' || align="center" | '''Special Cancel''' || align="center" | '''Super Cancel''' || align="center" | '''Juggle Value''' | ||
|- | |- | ||
| align="center" | Far Jab || align="center" | LP || align="center" | 30(5 life points) || align="center" | 3 || align="center" | No || align="center" | Yes || align="center" | Yes | | align="center" | Far Jab || align="center" | LP || align="center" | 30(5 life points) || align="center" | 3 || align="center" | No || align="center" | Yes || align="center" | Yes | ||
| Line 259: | Line 259: | ||
{| border="1em" cellspacing="0" width="60%" style="border: 1px solid #999; background: #F2F2F2;" | {| border="1em" cellspacing="0" width="60%" style="border: 1px solid #999; background: #F2F2F2;" | ||
|- | |- | ||
| align="center" | '''Move''' || align="center" | '''Motion''' || align="center" | '''Damage''' || align="center" | '''Stun Damage''' || align="center" | '''Chains into itself''' || align="center" | '''Special Cancel''' || align="center" | '''Super Cancel''' | | align="center" | '''Move''' || align="center" | '''Motion''' || align="center" | '''Damage''' || align="center" | '''Stun Damage''' || align="center" | '''Chains into itself''' || align="center" | '''Special Cancel''' || align="center" | '''Super Cancel''' || align="center" | '''Juggle Value''' | ||
|- | |- | ||
| align="center" | Far Strong || align="center" | MP || align="center" | 80(14 life points) || align="center" | 11 || align="center" | No || align="center" | No || align="center" | No | | align="center" | Far Strong || align="center" | MP || align="center" | 80(14 life points) || align="center" | 11 || align="center" | No || align="center" | No || align="center" | No | ||
| Line 282: | Line 282: | ||
{| border="1em" cellspacing="0" width="60%" style="border: 1px solid #999; background: #F2F2F2;" | {| border="1em" cellspacing="0" width="60%" style="border: 1px solid #999; background: #F2F2F2;" | ||
|- | |- | ||
| align="center" | '''Move''' || align="center" | '''Motion''' || align="center" | '''Damage''' || align="center" | '''Stun Damage''' || align="center" | '''Chains into itself''' || align="center" | '''Special Cancel''' || align="center" | '''Super Cancel''' | | align="center" | '''Move''' || align="center" | '''Motion''' || align="center" | '''Damage''' || align="center" | '''Stun Damage''' || align="center" | '''Chains into itself''' || align="center" | '''Special Cancel''' || align="center" | '''Super Cancel''' || align="center" | '''Juggle Value''' | ||
|- | |- | ||
| align="center" | Fierce || align="center" | HP || align="center" | 140(60+80)(22 life points) || align="center" | 14(7+7) || align="center" | No || align="center" | No || align="center" | No | | align="center" | Fierce || align="center" | HP || align="center" | 140(60+80)(22 life points) || align="center" | 14(7+7) || align="center" | No || align="center" | No || align="center" | No | ||
| Line 305: | Line 305: | ||
{| border="1em" cellspacing="0" width="60%" style="border: 1px solid #999; background: #F2F2F2;" | {| border="1em" cellspacing="0" width="60%" style="border: 1px solid #999; background: #F2F2F2;" | ||
|- | |- | ||
| align="center" | '''Move''' || align="center" | '''Motion''' || align="center" | '''Damage''' || align="center" | '''Stun Damage''' || align="center" | '''Chains into itself''' || align="center" | '''Special Cancel''' || align="center" | '''Super Cancel''' | | align="center" | '''Move''' || align="center" | '''Motion''' || align="center" | '''Damage''' || align="center" | '''Stun Damage''' || align="center" | '''Chains into itself''' || align="center" | '''Special Cancel''' || align="center" | '''Super Cancel''' || align="center" | '''Juggle Value''' | ||
|- | |- | ||
| align="center" | Close Jab || align="center" | (Close to opponent) LP || align="center" | 35(6 life points) || align="center" | 3 || align="center" | No || align="center" | Yes || align="center" | Yes | | align="center" | Close Jab || align="center" | (Close to opponent) LP || align="center" | 35(6 life points) || align="center" | 3 || align="center" | No || align="center" | Yes || align="center" | Yes | ||
| Line 328: | Line 328: | ||
{| border="1em" cellspacing="0" width="65%" style="border: 1px solid #999; background: #F2F2F2;" | {| border="1em" cellspacing="0" width="65%" style="border: 1px solid #999; background: #F2F2F2;" | ||
|- | |- | ||
| align="center" | '''Move''' || align="center" | '''Motion''' || align="center" | '''Damage''' || align="center" | '''Stun Damage''' || align="center" | '''Chains into itself''' || align="center" | '''Special Cancel''' || align="center" | '''Super Cancel''' | | align="center" | '''Move''' || align="center" | '''Motion''' || align="center" | '''Damage''' || align="center" | '''Stun Damage''' || align="center" | '''Chains into itself''' || align="center" | '''Special Cancel''' || align="center" | '''Super Cancel''' || align="center" | '''Juggle Value''' | ||
|- | |- | ||
| align="center" | Close Strong || align="center" | (Close to opponent) MP || align="center" | 70(40+30)(14 life points) || align="center" | 8(4+4) || align="center" | Yes || align="center" | Yes/Yes || align="center" | Yes/Yes | | align="center" | Close Strong || align="center" | (Close to opponent) MP || align="center" | 70(40+30)(14 life points) || align="center" | 8(4+4) || align="center" | Yes || align="center" | Yes/Yes || align="center" | Yes/Yes | ||
| Line 351: | Line 351: | ||
{| border="1em" cellspacing="0" width="60%" style="border: 1px solid #999; background: #F2F2F2;" | {| border="1em" cellspacing="0" width="60%" style="border: 1px solid #999; background: #F2F2F2;" | ||
|- | |- | ||
| align="center" | '''Move''' || align="center" | '''Motion''' || align="center" | '''Damage''' || align="center" | '''Stun Damage''' || align="center" | '''Chains into itself''' || align="center" | '''Special Cancel''' || align="center" | '''Super Cancel''' | | align="center" | '''Move''' || align="center" | '''Motion''' || align="center" | '''Damage''' || align="center" | '''Stun Damage''' || align="center" | '''Chains into itself''' || align="center" | '''Special Cancel''' || align="center" | '''Super Cancel''' || align="center" | '''Juggle Value''' | ||
|- | |- | ||
| align="center" | Far Short || align="center" | LK || align="center" | 35(6 life points) || align="center" | 3 || align="center" | No || align="center" | Yes || align="center" | Yes | | align="center" | Far Short || align="center" | LK || align="center" | 35(6 life points) || align="center" | 3 || align="center" | No || align="center" | Yes || align="center" | Yes | ||
| Line 374: | Line 374: | ||
{| border="1em" cellspacing="0" width="60%" style="border: 1px solid #999; background: #F2F2F2;" | {| border="1em" cellspacing="0" width="60%" style="border: 1px solid #999; background: #F2F2F2;" | ||
|- | |- | ||
| align="center" | '''Move''' || align="center" | '''Motion''' || align="center" | '''Damage''' || align="center" | '''Stun Damage''' || align="center" | '''Chains into itself''' || align="center" | '''Special Cancel''' || align="center" | '''Super Cancel''' | | align="center" | '''Move''' || align="center" | '''Motion''' || align="center" | '''Damage''' || align="center" | '''Stun Damage''' || align="center" | '''Chains into itself''' || align="center" | '''Special Cancel''' || align="center" | '''Super Cancel''' || align="center" | '''Juggle Value''' | ||
|- | |- | ||
| align="center" | Far Forward || align="center" | MK || align="center" | 100(17 life points) || align="center" | 13 || align="center" | No || align="center" | No || align="center" | No | | align="center" | Far Forward || align="center" | MK || align="center" | 100(17 life points) || align="center" | 13 || align="center" | No || align="center" | No || align="center" | No | ||
| Line 397: | Line 397: | ||
{| border="1em" cellspacing="0" width="60%" style="border: 1px solid #999; background: #F2F2F2;" | {| border="1em" cellspacing="0" width="60%" style="border: 1px solid #999; background: #F2F2F2;" | ||
|- | |- | ||
| align="center" | '''Move''' || align="center" | '''Motion''' || align="center" | '''Damage''' || align="center" | '''Stun Damage''' || align="center" | '''Chains into itself''' || align="center" | '''Special Cancel''' || align="center" | '''Super Cancel''' | | align="center" | '''Move''' || align="center" | '''Motion''' || align="center" | '''Damage''' || align="center" | '''Stun Damage''' || align="center" | '''Chains into itself''' || align="center" | '''Special Cancel''' || align="center" | '''Super Cancel''' || align="center" | '''Juggle Value''' | ||
|- | |- | ||
| align="center" | Roundhouse || align="center" | HK || align="center" | 120(21 life points) || align="center" | 19 || align="center" | No || align="center" | No || align="center" | No | | align="center" | Roundhouse || align="center" | HK || align="center" | 120(21 life points) || align="center" | 19 || align="center" | No || align="center" | No || align="center" | No | ||
| Line 420: | Line 420: | ||
{| border="1em" cellspacing="0" width="65%" style="border: 1px solid #999; background: #F2F2F2;" | {| border="1em" cellspacing="0" width="65%" style="border: 1px solid #999; background: #F2F2F2;" | ||
|- | |- | ||
| align="center" | '''Move''' || align="center" | '''Motion''' || align="center" | '''Damage''' || align="center" | '''Stun Damage''' || align="center" | '''Chains into itself''' || align="center" | '''Special Cancel''' || align="center" | '''Super Cancel''' | | align="center" | '''Move''' || align="center" | '''Motion''' || align="center" | '''Damage''' || align="center" | '''Stun Damage''' || align="center" | '''Chains into itself''' || align="center" | '''Special Cancel''' || align="center" | '''Super Cancel''' || align="center" | '''Juggle Value''' | ||
|- | |- | ||
| align="center" | Close Short || align="center" | (Close to opponent) LK || align="center" | 40(7 life points) || align="center" | 3 || align="center" | No || align="center" | Yes || align="center" | Yes | | align="center" | Close Short || align="center" | (Close to opponent) LK || align="center" | 40(7 life points) || align="center" | 3 || align="center" | No || align="center" | Yes || align="center" | Yes | ||
| Line 443: | Line 443: | ||
{| border="1em" cellspacing="0" width="65%" style="border: 1px solid #999; background: #F2F2F2;" | {| border="1em" cellspacing="0" width="65%" style="border: 1px solid #999; background: #F2F2F2;" | ||
|- | |- | ||
| align="center" | '''Move''' || align="center" | '''Motion''' || align="center" | '''Damage''' || align="center" | '''Stun Damage''' || align="center" | '''Chains into itself''' || align="center" | '''Special Cancel''' || align="center" | '''Super Cancel''' | | align="center" | '''Move''' || align="center" | '''Motion''' || align="center" | '''Damage''' || align="center" | '''Stun Damage''' || align="center" | '''Chains into itself''' || align="center" | '''Special Cancel''' || align="center" | '''Super Cancel''' || align="center" | '''Juggle Value''' | ||
|- | |- | ||
| align="center" | Close Forward || align="center" | (Close to opponent) MK || align="center" | 110(19 life points) || align="center" | 11 || align="center" | No || align="center" | Yes || align="center" | Yes | | align="center" | Close Forward || align="center" | (Close to opponent) MK || align="center" | 110(19 life points) || align="center" | 11 || align="center" | No || align="center" | Yes || align="center" | Yes | ||
| Line 469: | Line 469: | ||
{| border="1em" cellspacing="0" width="60%" style="border: 1px solid #999; background: #F2F2F2;" | {| border="1em" cellspacing="0" width="60%" style="border: 1px solid #999; background: #F2F2F2;" | ||
|- | |- | ||
| align="center" | '''Move''' || align="center" | '''Motion''' || align="center" | '''Damage''' || align="center" | '''Stun Damage''' || align="center" | '''Chains into itself''' || align="center" | '''Special Cancel''' || align="center" | '''Super Cancel''' | | align="center" | '''Move''' || align="center" | '''Motion''' || align="center" | '''Damage''' || align="center" | '''Stun Damage''' || align="center" | '''Chains into itself''' || align="center" | '''Special Cancel''' || align="center" | '''Super Cancel''' || align="center" | '''Juggle Value''' | ||
|- | |- | ||
| align="center" | Jump Jab || align="center" | (Air) LP || align="center" | 60(10 life points) || align="center" | 7 || align="center" | No || align="center" | No || align="center" | No | | align="center" | Jump Jab || align="center" | (Air) LP || align="center" | 60(10 life points) || align="center" | 7 || align="center" | No || align="center" | No || align="center" | No | ||
| Line 492: | Line 492: | ||
{| border="1em" cellspacing="0" width="60%" style="border: 1px solid #999; background: #F2F2F2;" | {| border="1em" cellspacing="0" width="60%" style="border: 1px solid #999; background: #F2F2F2;" | ||
|- | |- | ||
| align="center" | '''Move''' || align="center" | '''Motion''' || align="center" | '''Damage''' || align="center" | '''Stun Damage''' || align="center" | '''Chains into itself''' || align="center" | '''Special Cancel''' || align="center" | '''Super Cancel''' | | align="center" | '''Move''' || align="center" | '''Motion''' || align="center" | '''Damage''' || align="center" | '''Stun Damage''' || align="center" | '''Chains into itself''' || align="center" | '''Special Cancel''' || align="center" | '''Super Cancel''' || align="center" | '''Juggle Value''' | ||
|- | |- | ||
| align="center" | Neutral Jump Jab || align="center" | (Air) LP || align="center" | 60(10 life points) || align="center" | 5 || align="center" | No || align="center" | No || align="center" | No | | align="center" | Neutral Jump Jab || align="center" | (Air) LP || align="center" | 60(10 life points) || align="center" | 5 || align="center" | No || align="center" | No || align="center" | No | ||
| Line 515: | Line 515: | ||
{| border="1em" cellspacing="0" width="60%" style="border: 1px solid #999; background: #F2F2F2;" | {| border="1em" cellspacing="0" width="60%" style="border: 1px solid #999; background: #F2F2F2;" | ||
|- | |- | ||
| align="center" | '''Move''' || align="center" | '''Motion''' || align="center" | '''Damage''' || align="center" | '''Stun Damage''' || align="center" | '''Chains into itself''' || align="center" | '''Special Cancel''' || align="center" | '''Super Cancel''' | | align="center" | '''Move''' || align="center" | '''Motion''' || align="center" | '''Damage''' || align="center" | '''Stun Damage''' || align="center" | '''Chains into itself''' || align="center" | '''Special Cancel''' || align="center" | '''Super Cancel''' || align="center" | '''Juggle Value''' | ||
|- | |- | ||
| align="center" | Jump Strong || align="center" | (Air) MP || align="center" | 100(17 life points) || align="center" | 11 || align="center" | No || align="center" | No || align="center" | No | | align="center" | Jump Strong || align="center" | (Air) MP || align="center" | 100(17 life points) || align="center" | 11 || align="center" | No || align="center" | No || align="center" | No | ||
| Line 538: | Line 538: | ||
{| border="1em" cellspacing="0" width="60%" style="border: 1px solid #999; background: #F2F2F2;" | {| border="1em" cellspacing="0" width="60%" style="border: 1px solid #999; background: #F2F2F2;" | ||
|- | |- | ||
| align="center" | '''Move''' || align="center" | '''Motion''' || align="center" | '''Damage''' || align="center" | '''Stun Damage''' || align="center" | '''Chains into itself''' || align="center" | '''Special Cancel''' || align="center" | '''Super Cancel''' | | align="center" | '''Move''' || align="center" | '''Motion''' || align="center" | '''Damage''' || align="center" | '''Stun Damage''' || align="center" | '''Chains into itself''' || align="center" | '''Special Cancel''' || align="center" | '''Super Cancel''' || align="center" | '''Juggle Value''' | ||
|- | |- | ||
| align="center" | Neutral Jump Strong || align="center" | (Air) MP || align="center" | 110(19 life points) || align="center" | 9 || align="center" | No || align="center" | No || align="center" | No | | align="center" | Neutral Jump Strong || align="center" | (Air) MP || align="center" | 110(19 life points) || align="center" | 9 || align="center" | No || align="center" | No || align="center" | No | ||
| Line 561: | Line 561: | ||
{| border="1em" cellspacing="0" width="60%" style="border: 1px solid #999; background: #F2F2F2;" | {| border="1em" cellspacing="0" width="60%" style="border: 1px solid #999; background: #F2F2F2;" | ||
|- | |- | ||
| align="center" | '''Move''' || align="center" | '''Motion''' || align="center" | '''Damage''' || align="center" | '''Stun Damage''' || align="center" | '''Chains into itself''' || align="center" | '''Special Cancel''' || align="center" | '''Super Cancel''' | | align="center" | '''Move''' || align="center" | '''Motion''' || align="center" | '''Damage''' || align="center" | '''Stun Damage''' || align="center" | '''Chains into itself''' || align="center" | '''Special Cancel''' || align="center" | '''Super Cancel''' || align="center" | '''Juggle Value''' | ||
|- | |- | ||
| align="center" | Jump Fierce || align="center" | (Air) HP || align="center" | 140(100+40)(23 life points) || align="center" | 18(9+9) || align="center" | No || align="center" | No || align="center" | No | | align="center" | Jump Fierce || align="center" | (Air) HP || align="center" | 140(100+40)(23 life points) || align="center" | 18(9+9) || align="center" | No || align="center" | No || align="center" | No | ||
| Line 584: | Line 584: | ||
{| border="1em" cellspacing="0" width="60%" style="border: 1px solid #999; background: #F2F2F2;" | {| border="1em" cellspacing="0" width="60%" style="border: 1px solid #999; background: #F2F2F2;" | ||
|- | |- | ||
| align="center" | '''Move''' || align="center" | '''Motion''' || align="center" | '''Damage''' || align="center" | '''Stun Damage''' || align="center" | '''Chains into itself''' || align="center" | '''Special Cancel''' || align="center" | '''Super Cancel''' | | align="center" | '''Move''' || align="center" | '''Motion''' || align="center" | '''Damage''' || align="center" | '''Stun Damage''' || align="center" | '''Chains into itself''' || align="center" | '''Special Cancel''' || align="center" | '''Super Cancel''' || align="center" | '''Juggle Value''' | ||
|- | |- | ||
| align="center" | Neutral Jump Fierce || align="center" | (Air) HP || align="center" | 140(24 life points) || align="center" | 13 || align="center" | No || align="center" | No || align="center" | No | | align="center" | Neutral Jump Fierce || align="center" | (Air) HP || align="center" | 140(24 life points) || align="center" | 13 || align="center" | No || align="center" | No || align="center" | No | ||
| Line 607: | Line 607: | ||
{| border="1em" cellspacing="0" width="60%" style="border: 1px solid #999; background: #F2F2F2;" | {| border="1em" cellspacing="0" width="60%" style="border: 1px solid #999; background: #F2F2F2;" | ||
|- | |- | ||
| align="center" | '''Move''' || align="center" | '''Motion''' || align="center" | '''Damage''' || align="center" | '''Stun Damage''' || align="center" | '''Chains into itself''' || align="center" | '''Special Cancel''' || align="center" | '''Super Cancel''' | | align="center" | '''Move''' || align="center" | '''Motion''' || align="center" | '''Damage''' || align="center" | '''Stun Damage''' || align="center" | '''Chains into itself''' || align="center" | '''Special Cancel''' || align="center" | '''Super Cancel''' || align="center" | '''Juggle Value''' | ||
|- | |- | ||
| align="center" | Jump Short || align="center" | (Air) LK || align="center" | 60(10 life points) || align="center" | 5 || align="center" | No || align="center" | No || align="center" | No | | align="center" | Jump Short || align="center" | (Air) LK || align="center" | 60(10 life points) || align="center" | 5 || align="center" | No || align="center" | No || align="center" | No | ||
| Line 630: | Line 630: | ||
{| border="1em" cellspacing="0" width="60%" style="border: 1px solid #999; background: #F2F2F2;" | {| border="1em" cellspacing="0" width="60%" style="border: 1px solid #999; background: #F2F2F2;" | ||
|- | |- | ||
| align="center" | '''Move''' || align="center" | '''Motion''' || align="center" | '''Damage''' || align="center" | '''Stun Damage''' || align="center" | '''Chains into itself''' || align="center" | '''Special Cancel''' || align="center" | '''Super Cancel''' | | align="center" | '''Move''' || align="center" | '''Motion''' || align="center" | '''Damage''' || align="center" | '''Stun Damage''' || align="center" | '''Chains into itself''' || align="center" | '''Special Cancel''' || align="center" | '''Super Cancel''' || align="center" | '''Juggle Value''' | ||
|- | |- | ||
| align="center" | Neutral Jump Short || align="center" | (Air) LK || align="center" | 60(10 life points) || align="center" | 7 || align="center" | No || align="center" | No || align="center" | No | | align="center" | Neutral Jump Short || align="center" | (Air) LK || align="center" | 60(10 life points) || align="center" | 7 || align="center" | No || align="center" | No || align="center" | No | ||
| Line 653: | Line 653: | ||
{| border="1em" cellspacing="0" width="60%" style="border: 1px solid #999; background: #F2F2F2;" | {| border="1em" cellspacing="0" width="60%" style="border: 1px solid #999; background: #F2F2F2;" | ||
|- | |- | ||
| align="center" | '''Move''' || align="center" | '''Motion''' || align="center" | '''Damage''' || align="center" | '''Stun Damage''' || align="center" | '''Chains into itself''' || align="center" | '''Special Cancel''' || align="center" | '''Super Cancel''' | | align="center" | '''Move''' || align="center" | '''Motion''' || align="center" | '''Damage''' || align="center" | '''Stun Damage''' || align="center" | '''Chains into itself''' || align="center" | '''Special Cancel''' || align="center" | '''Super Cancel''' || align="center" | '''Juggle Value''' | ||
|- | |- | ||
| align="center" | Jump Forward || align="center" | (Air) MK || align="center" | 100(17 life points) || align="center" | 9 || align="center" | No || align="center" | No || align="center" | No | | align="center" | Jump Forward || align="center" | (Air) MK || align="center" | 100(17 life points) || align="center" | 9 || align="center" | No || align="center" | No || align="center" | No | ||
| Line 676: | Line 676: | ||
{| border="1em" cellspacing="0" width="60%" style="border: 1px solid #999; background: #F2F2F2;" | {| border="1em" cellspacing="0" width="60%" style="border: 1px solid #999; background: #F2F2F2;" | ||
|- | |- | ||
| align="center" | '''Move''' || align="center" | '''Motion''' || align="center" | '''Damage''' || align="center" | '''Stun Damage''' || align="center" | '''Chains into itself''' || align="center" | '''Special Cancel''' || align="center" | '''Super Cancel''' | | align="center" | '''Move''' || align="center" | '''Motion''' || align="center" | '''Damage''' || align="center" | '''Stun Damage''' || align="center" | '''Chains into itself''' || align="center" | '''Special Cancel''' || align="center" | '''Super Cancel''' || align="center" | '''Juggle Value''' | ||
|- | |- | ||
| align="center" | Neutral Jump Forward || align="center" | (Air) MK || align="center" | 110(19 life points) || align="center" | 11 || align="center" | No || align="center" | No || align="center" | No | | align="center" | Neutral Jump Forward || align="center" | (Air) MK || align="center" | 110(19 life points) || align="center" | 11 || align="center" | No || align="center" | No || align="center" | No | ||
| Line 699: | Line 699: | ||
{| border="1em" cellspacing="0" width="60%" style="border: 1px solid #999; background: #F2F2F2;" | {| border="1em" cellspacing="0" width="60%" style="border: 1px solid #999; background: #F2F2F2;" | ||
|- | |- | ||
| align="center" | '''Move''' || align="center" | '''Motion''' || align="center" | '''Damage''' || align="center" | '''Stun Damage''' || align="center" | '''Chains into itself''' || align="center" | '''Special Cancel''' || align="center" | '''Super Cancel''' | | align="center" | '''Move''' || align="center" | '''Motion''' || align="center" | '''Damage''' || align="center" | '''Stun Damage''' || align="center" | '''Chains into itself''' || align="center" | '''Special Cancel''' || align="center" | '''Super Cancel''' || align="center" | '''Juggle Value''' | ||
|- | |- | ||
| align="center" | Jump Roundhouse || align="center" | (Air) HK || align="center" | 120(21 life points) || align="center" | 13 || align="center" | No || align="center" | No || align="center" | No | | align="center" | Jump Roundhouse || align="center" | (Air) HK || align="center" | 120(21 life points) || align="center" | 13 || align="center" | No || align="center" | No || align="center" | No | ||
| Line 722: | Line 722: | ||
{| border="1em" cellspacing="0" width="65%" style="border: 1px solid #999; background: #F2F2F2;" | {| border="1em" cellspacing="0" width="65%" style="border: 1px solid #999; background: #F2F2F2;" | ||
|- | |- | ||
| align="center" | '''Move''' || align="center" | '''Motion''' || align="center" | '''Damage''' || align="center" | '''Stun Damage''' || align="center" | '''Chains into itself''' || align="center" | '''Special Cancel''' || align="center" | '''Super Cancel''' | | align="center" | '''Move''' || align="center" | '''Motion''' || align="center" | '''Damage''' || align="center" | '''Stun Damage''' || align="center" | '''Chains into itself''' || align="center" | '''Special Cancel''' || align="center" | '''Super Cancel''' || align="center" | '''Juggle Value''' | ||
|- | |- | ||
| align="center" | Neutral Jump Roundhouse || align="center" | (Air) HK || align="center" | 140(24 life points) || align="center" | 15 || align="center" | No || align="center" | No || align="center" | No | | align="center" | Neutral Jump Roundhouse || align="center" | (Air) HK || align="center" | 140(24 life points) || align="center" | 15 || align="center" | No || align="center" | No || align="center" | No | ||
| Line 745: | Line 745: | ||
{| border="1em" cellspacing="0" width="65%" style="border: 1px solid #999; background: #F2F2F2;" | {| border="1em" cellspacing="0" width="65%" style="border: 1px solid #999; background: #F2F2F2;" | ||
|- | |- | ||
| align="center" | '''Move''' || align="center" | '''Motion''' || align="center" | '''Damage''' || align="center" | '''Stun Damage''' || align="center" | '''Chains into itself''' || align="center" | '''Special Cancel''' || align="center" | '''Super Cancel''' | | align="center" | '''Move''' || align="center" | '''Motion''' || align="center" | '''Damage''' || align="center" | '''Stun Damage''' || align="center" | '''Chains into itself''' || align="center" | '''Special Cancel''' || align="center" | '''Super Cancel''' || align="center" | '''Juggle Value''' | ||
|- | |- | ||
| align="center" | Tobi Hiza || align="center" | MP+MK || align="center" | 40(7 life points) || align="center" | 3 || align="center" | No || align="center" | No || align="center" | No | | align="center" | Tobi Hiza || align="center" | MP+MK || align="center" | 40(7 life points) || align="center" | 3 || align="center" | No || align="center" | No || align="center" | No | ||
| Line 841: | Line 841: | ||
{| border="1em" cellspacing="0" width="60%" style="border: 1px solid #999; background: #F2F2F2;" | {| border="1em" cellspacing="0" width="60%" style="border: 1px solid #999; background: #F2F2F2;" | ||
|- | |- | ||
| align="center" | '''Move''' || align="center" | '''Motion''' || align="center" | '''Damage''' || align="center" | '''Stun Damage''' || align="center" | '''Chains into itself''' || align="center" | '''Special Cancel''' || align="center" | '''Super Cancel''' | | align="center" | '''Move''' || align="center" | '''Motion''' || align="center" | '''Damage''' || align="center" | '''Stun Damage''' || align="center" | '''Chains into itself''' || align="center" | '''Special Cancel''' || align="center" | '''Super Cancel''' || align="center" | '''Juggle Value''' | ||
|- | |- | ||
| align="center" | Mawashi Hiji || align="center" | F+MP || align="center" | 90(16 life points) || align="center" | 13 || align="center" | No || align="center" | Yes || align="center" | Yes | | align="center" | Mawashi Hiji || align="center" | F+MP || align="center" | 90(16 life points) || align="center" | 13 || align="center" | No || align="center" | Yes || align="center" | Yes | ||
| Line 865: | Line 865: | ||
{| border="1em" cellspacing="0" width="60%" style="border: 1px solid #999; background: #F2F2F2;" | {| border="1em" cellspacing="0" width="60%" style="border: 1px solid #999; background: #F2F2F2;" | ||
|- | |- | ||
| align="center" | '''Move''' || align="center" | '''Motion''' || align="center" | '''Damage''' || align="center" | '''Stun Damage''' || align="center" | '''Chains into itself''' || align="center" | '''Special Cancel''' || align="center" | '''Super Cancel''' | | align="center" | '''Move''' || align="center" | '''Motion''' || align="center" | '''Damage''' || align="center" | '''Stun Damage''' || align="center" | '''Chains into itself''' || align="center" | '''Special Cancel''' || align="center" | '''Super Cancel''' || align="center" | '''Juggle Value''' | ||
|- | |- | ||
| align="center" | Crouch Jab || align="center" | D+LP || align="center" | 30(5 life points) || align="center" | 3 || align="center" | Yes || align="center" | Yes || align="center" | Yes | | align="center" | Crouch Jab || align="center" | D+LP || align="center" | 30(5 life points) || align="center" | 3 || align="center" | Yes || align="center" | Yes || align="center" | Yes | ||
| Line 888: | Line 888: | ||
{| border="1em" cellspacing="0" width="60%" style="border: 1px solid #999; background: #F2F2F2;" | {| border="1em" cellspacing="0" width="60%" style="border: 1px solid #999; background: #F2F2F2;" | ||
|- | |- | ||
| align="center" | '''Move''' || align="center" | '''Motion''' || align="center" | '''Damage''' || align="center" | '''Stun Damage''' || align="center" | '''Chains into itself''' || align="center" | '''Special Cancel''' || align="center" | '''Super Cancel''' | | align="center" | '''Move''' || align="center" | '''Motion''' || align="center" | '''Damage''' || align="center" | '''Stun Damage''' || align="center" | '''Chains into itself''' || align="center" | '''Special Cancel''' || align="center" | '''Super Cancel''' || align="center" | '''Juggle Value''' | ||
|- | |- | ||
| align="center" | Crouch Strong || align="center" | D+MP || align="center" | 65(11 life points) || align="center" | 3 || align="center" | No || align="center" | Yes || align="center" | Yes | | align="center" | Crouch Strong || align="center" | D+MP || align="center" | 65(11 life points) || align="center" | 3 || align="center" | No || align="center" | Yes || align="center" | Yes | ||
| Line 911: | Line 911: | ||
{| border="1em" cellspacing="0" width="60%" style="border: 1px solid #999; background: #F2F2F2;" | {| border="1em" cellspacing="0" width="60%" style="border: 1px solid #999; background: #F2F2F2;" | ||
|- | |- | ||
| align="center" | '''Move''' || align="center" | '''Motion''' || align="center" | '''Damage''' || align="center" | '''Stun Damage''' || align="center" | '''Chains into itself''' || align="center" | '''Special Cancel''' || align="center" | '''Super Cancel''' | | align="center" | '''Move''' || align="center" | '''Motion''' || align="center" | '''Damage''' || align="center" | '''Stun Damage''' || align="center" | '''Chains into itself''' || align="center" | '''Special Cancel''' || align="center" | '''Super Cancel''' || align="center" | '''Juggle Value''' | ||
|- | |- | ||
| align="center" | Crouch Fierce || align="center" | D+HP || align="center" | 120(21 life points) || align="center" | 11 || align="center" | No || align="center" | No || align="center" | Yes | | align="center" | Crouch Fierce || align="center" | D+HP || align="center" | 120(21 life points) || align="center" | 11 || align="center" | No || align="center" | No || align="center" | Yes | ||
| Line 934: | Line 934: | ||
{| border="1em" cellspacing="0" width="60%" style="border: 1px solid #999; background: #F2F2F2;" | {| border="1em" cellspacing="0" width="60%" style="border: 1px solid #999; background: #F2F2F2;" | ||
|- | |- | ||
| align="center" | '''Move''' || align="center" | '''Motion''' || align="center" | '''Damage''' || align="center" | '''Stun Damage''' || align="center" | '''Chains into itself''' || align="center" | '''Special Cancel''' || align="center" | '''Super Cancel''' | | align="center" | '''Move''' || align="center" | '''Motion''' || align="center" | '''Damage''' || align="center" | '''Stun Damage''' || align="center" | '''Chains into itself''' || align="center" | '''Special Cancel''' || align="center" | '''Super Cancel''' || align="center" | '''Juggle Value''' | ||
|- | |- | ||
| align="center" | Crouch Short || align="center" | D+LK || align="center" | 20(3 life points) || align="center" | 3 || align="center" | No || align="center" | Yes || align="center" | Yes | | align="center" | Crouch Short || align="center" | D+LK || align="center" | 20(3 life points) || align="center" | 3 || align="center" | No || align="center" | Yes || align="center" | Yes | ||
| Line 957: | Line 957: | ||
{| border="1em" cellspacing="0" width="60%" style="border: 1px solid #999; background: #F2F2F2;" | {| border="1em" cellspacing="0" width="60%" style="border: 1px solid #999; background: #F2F2F2;" | ||
|- | |- | ||
| align="center" | '''Move''' || align="center" | '''Motion''' || align="center" | '''Damage''' || align="center" | '''Stun Damage''' || align="center" | '''Chains into itself''' || align="center" | '''Special Cancel''' || align="center" | '''Super Cancel''' | | align="center" | '''Move''' || align="center" | '''Motion''' || align="center" | '''Damage''' || align="center" | '''Stun Damage''' || align="center" | '''Chains into itself''' || align="center" | '''Special Cancel''' || align="center" | '''Super Cancel''' || align="center" | '''Juggle Value''' | ||
|- | |- | ||
| align="center" | Crouch Forward || align="center" | D+MK || align="center" | 80(14 life points) || align="center" | 3 || align="center" | No || align="center" | Yes || align="center" | Yes | | align="center" | Crouch Forward || align="center" | D+MK || align="center" | 80(14 life points) || align="center" | 3 || align="center" | No || align="center" | Yes || align="center" | Yes | ||
| Line 980: | Line 980: | ||
{| border="1em" cellspacing="0" width="60%" style="border: 1px solid #999; background: #F2F2F2;" | {| border="1em" cellspacing="0" width="60%" style="border: 1px solid #999; background: #F2F2F2;" | ||
|- | |- | ||
| align="center" | '''Move''' || align="center" | '''Motion''' || align="center" | '''Damage''' || align="center" | '''Stun Damage''' || align="center" | '''Chains into itself''' || align="center" | '''Special Cancel''' || align="center" | '''Super Cancel''' | | align="center" | '''Move''' || align="center" | '''Motion''' || align="center" | '''Damage''' || align="center" | '''Stun Damage''' || align="center" | '''Chains into itself''' || align="center" | '''Special Cancel''' || align="center" | '''Super Cancel''' || align="center" | '''Juggle Value''' | ||
|- | |- | ||
| align="center" | Crouch Roundhouse || align="center" | D+HK || align="center" | 100(17 life points) || align="center" | 3 || align="center" | No || align="center" | No || align="center" | No | | align="center" | Crouch Roundhouse || align="center" | D+HK || align="center" | 100(17 life points) || align="center" | 3 || align="center" | No || align="center" | No || align="center" | No | ||
| Line 1,003: | Line 1,003: | ||
{| border="1em" cellspacing="0" width="65%" style="border: 1px solid #999; background: #F2F2F2;" | {| border="1em" cellspacing="0" width="65%" style="border: 1px solid #999; background: #F2F2F2;" | ||
|- | |- | ||
| align="center" | '''Move''' || align="center" | '''Motion''' || align="center" | '''Damage''' || align="center" | '''Stun Damage''' || align="center" | '''Chains into itself''' || align="center" | '''Special Cancel''' || align="center" | '''Super Cancel''' | | align="center" | '''Move''' || align="center" | '''Motion''' || align="center" | '''Damage''' || align="center" | '''Stun Damage''' || align="center" | '''Chains into itself''' || align="center" | '''Special Cancel''' || align="center" | '''Super Cancel''' || align="center" | '''Juggle Value''' | ||
|- | |- | ||
| align="center" | Target Combo || align="center" | Close LK -> MK || align="center" | 40+50 || align="center" | 3+5 || align="center" | No/No || align="center" | Yes/No || align="center" | Yes/No | | align="center" | Target Combo || align="center" | Close LK -> MK || align="center" | 40+50 || align="center" | 3+5 || align="center" | No/No || align="center" | Yes/No || align="center" | Yes/No | ||
| Line 1,028: | Line 1,028: | ||
{| border="1em" cellspacing="0" width="65%" style="border: 1px solid #999; background: #F2F2F2;" | {| border="1em" cellspacing="0" width="65%" style="border: 1px solid #999; background: #F2F2F2;" | ||
|- | |- | ||
| align="center" | '''Move''' || align="center" | '''Motion''' || align="center" | '''Damage''' || align="center" | '''Blocked Damage''' || align="center" | '''Stun Damage''' || align="center" | '''Super Cancel''' | | align="center" | '''Move''' || align="center" | '''Motion''' || align="center" | '''Damage''' || align="center" | '''Blocked Damage''' || align="center" | '''Stun Damage''' || align="center" | '''Super Cancel''' || align="center" | '''Juggle Value''' | ||
|- | |- | ||
| align="center" | Sun Disk Palm (Jab) || align="center" | Charge B,F+LP || align="center" | 50(8 life points) || align="center" | 3 || align="center" | 7 || align="center" | Yes | | align="center" | Sun Disk Palm (Jab) || align="center" | Charge B,F+LP || align="center" | 50(8 life points) || align="center" | 3 || align="center" | 7 || align="center" | Yes | ||
| Line 1,064: | Line 1,064: | ||
{| border="1em" cellspacing="0" width="65%" style="border: 1px solid #999; background: #F2F2F2;" | {| border="1em" cellspacing="0" width="65%" style="border: 1px solid #999; background: #F2F2F2;" | ||
|- | |- | ||
| align="center" | '''Move''' || align="center" | '''Motion''' || align="center" | '''Damage''' || align="center" | '''Blocked Damage''' || align="center" | '''Stun Damage''' || align="center" | '''Super Cancel''' | | align="center" | '''Move''' || align="center" | '''Motion''' || align="center" | '''Damage''' || align="center" | '''Blocked Damage''' || align="center" | '''Stun Damage''' || align="center" | '''Super Cancel''' || align="center" | '''Juggle Value''' | ||
|- | |- | ||
| align="center" | Oniyama (Jab) || align="center" | Charge D,U+LP || align="center" | 140(80(40))(24 life points) || align="center" | 9 || align="center" | 15 || align="center" | Yes | | align="center" | Oniyama (Jab) || align="center" | Charge D,U+LP || align="center" | 140(80(40))(24 life points) || align="center" | 9 || align="center" | 15 || align="center" | Yes | ||
| Line 1,100: | Line 1,100: | ||
{| border="1em" cellspacing="0" width="65%" style="border: 1px solid #999; background: #F2F2F2;" | {| border="1em" cellspacing="0" width="65%" style="border: 1px solid #999; background: #F2F2F2;" | ||
|- | |- | ||
| align="center" | '''Move''' || align="center" | '''Motion''' || align="center" | '''Damage''' || align="center" | '''Blocked Damage''' || align="center" | '''Stun Damage''' || align="center" | '''Super Cancel''' | | align="center" | '''Move''' || align="center" | '''Motion''' || align="center" | '''Damage''' || align="center" | '''Blocked Damage''' || align="center" | '''Stun Damage''' || align="center" | '''Super Cancel''' || align="center" | '''Juggle Value''' | ||
|- | |- | ||
| align="center" | Jinchu Nobori (Short) || align="center" | QCF+LK || align="center" | 100(50+50)(16 life points) || align="center" | 6(3+3) || align="center" | 10(5+5) || align="center" | No/No | | align="center" | Jinchu Nobori (Short) || align="center" | QCF+LK || align="center" | 100(50+50)(16 life points) || align="center" | 6(3+3) || align="center" | 10(5+5) || align="center" | No/No | ||
| Line 1,136: | Line 1,136: | ||
{| border="1em" cellspacing="0" width="70%" style="border: 1px solid #999; background: #F2F2F2;" | {| border="1em" cellspacing="0" width="70%" style="border: 1px solid #999; background: #F2F2F2;" | ||
|- | |- | ||
| align="center" | '''Move''' || align="center" | '''Motion''' || align="center" | '''Damage''' || align="center" | '''Blocked Damage''' || align="center" | '''Stun Damage''' || align="center" | '''Super Cancel''' | | align="center" | '''Move''' || align="center" | '''Motion''' || align="center" | '''Damage''' || align="center" | '''Blocked Damage''' || align="center" | '''Stun Damage''' || align="center" | '''Super Cancel''' || align="center" | '''Juggle Value''' | ||
|- | |- | ||
| align="center" | Air Jinchu Nobori (Short) || align="center" | (Air) QCF+LK || align="center" | 160(8 hits)(40+40+20×6)(19 life points) || align="center" | 6 || align="center" | 10(8 hits)(5+5+0×6) || align="center" | No/No | | align="center" | Air Jinchu Nobori (Short) || align="center" | (Air) QCF+LK || align="center" | 160(8 hits)(40+40+20×6)(19 life points) || align="center" | 6 || align="center" | 10(8 hits)(5+5+0×6) || align="center" | No/No | ||
| Line 1,172: | Line 1,172: | ||
{| border="1em" cellspacing="0" width="75%" style="border: 1px solid #999; background: #F2F2F2;" | {| border="1em" cellspacing="0" width="75%" style="border: 1px solid #999; background: #F2F2F2;" | ||
|- | |- | ||
| align="center" | '''Move''' || align="center" | '''Motion''' || align="center" | '''Damage''' || align="center" | '''Blocked Damage''' || align="center" | '''Stun Damage''' || align="center" | '''Throw Range''' || align="center" | '''Super Cancel''' | | align="center" | '''Move''' || align="center" | '''Motion''' || align="center" | '''Damage''' || align="center" | '''Blocked Damage''' || align="center" | '''Stun Damage''' || align="center" | '''Throw Range''' || align="center" | '''Super Cancel''' || align="center" | '''Juggle Value''' | ||
|- | |- | ||
| align="center" | Human Pillar Driver (Jab) || align="center" | HCB+LP || align="center" | 150(24 life points) || align="center" | - || align="center" | 11 || align="center" | 79 || align="center" | No | | align="center" | Human Pillar Driver (Jab) || align="center" | HCB+LP || align="center" | 150(24 life points) || align="center" | - || align="center" | 11 || align="center" | 79 || align="center" | No | ||
| Line 1,209: | Line 1,209: | ||
{| border="1em" cellspacing="0" width="65%" style="border: 1px solid #999; background: #F2F2F2;" | {| border="1em" cellspacing="0" width="65%" style="border: 1px solid #999; background: #F2F2F2;" | ||
|- | |- | ||
| align="center" | '''Move''' || align="center" | '''Motion''' || align="center" | '''Gauge Needed''' || align="center" | '''Damage''' || align="center" | '''Blocked Damage''' || align="center" | '''Stun Damage''' || align="center" | '''Super Cancel''' | | align="center" | '''Move''' || align="center" | '''Motion''' || align="center" | '''Gauge Needed''' || align="center" | '''Damage''' || align="center" | '''Blocked Damage''' || align="center" | '''Stun Damage''' || align="center" | '''Super Cancel''' || align="center" | '''Juggle Value''' | ||
|- | |- | ||
| align="center" | Sun Disk Palm (EX) || align="center" | Charge B,F+PP || align="center" | 40 || align="center" | 120(60+60)(16 life points) || align="center" | 8(4+4) || align="center" | 6(3+3) || align="center" | Yes | | align="center" | Sun Disk Palm (EX) || align="center" | Charge B,F+PP || align="center" | 40 || align="center" | 120(60+60)(16 life points) || align="center" | 8(4+4) || align="center" | 6(3+3) || align="center" | Yes | ||
| Line 1,233: | Line 1,233: | ||
{| border="1em" cellspacing="0" width="65%" style="border: 1px solid #999; background: #F2F2F2;" | {| border="1em" cellspacing="0" width="65%" style="border: 1px solid #999; background: #F2F2F2;" | ||
|- | |- | ||
| align="center" | '''Move''' || align="center" | '''Motion''' || align="center" | '''Gauge Needed''' || align="center" | '''Damage''' || align="center" | '''Blocked Damage''' || align="center" | '''Stun Damage''' || align="center" | '''Super Cancel''' | | align="center" | '''Move''' || align="center" | '''Motion''' || align="center" | '''Gauge Needed''' || align="center" | '''Damage''' || align="center" | '''Blocked Damage''' || align="center" | '''Stun Damage''' || align="center" | '''Super Cancel''' || align="center" | '''Juggle Value''' | ||
|- | |- | ||
| align="center" | Oniyama (EX) || align="center" | Charge D,U+PP || align="center" | 40 || align="center" | 220(4 hits)(70+60+60+30)(35 life points) || align="center" | 14(7+3+3+1) || align="center" | 224(15+3×3) || align="center" | Yes/Yes/No/No | | align="center" | Oniyama (EX) || align="center" | Charge D,U+PP || align="center" | 40 || align="center" | 220(4 hits)(70+60+60+30)(35 life points) || align="center" | 14(7+3+3+1) || align="center" | 224(15+3×3) || align="center" | Yes/Yes/No/No | ||
| Line 1,257: | Line 1,257: | ||
{| border="1em" cellspacing="0" width="70%" style="border: 1px solid #999; background: #F2F2F2;" | {| border="1em" cellspacing="0" width="70%" style="border: 1px solid #999; background: #F2F2F2;" | ||
|- | |- | ||
| align="center" | '''Move''' || align="center" | '''Motion''' || align="center" | '''Gauge Needed''' || align="center" | '''Damage''' || align="center" | '''Blocked Damage''' || align="center" | '''Stun Damage''' || align="center" | '''Super Cancel''' | | align="center" | '''Move''' || align="center" | '''Motion''' || align="center" | '''Gauge Needed''' || align="center" | '''Damage''' || align="center" | '''Blocked Damage''' || align="center" | '''Stun Damage''' || align="center" | '''Super Cancel''' || align="center" | '''Juggle Value''' | ||
|- | |- | ||
| align="center" | Jinchu Nobori (EX) || align="center" | QCF+KK || align="center" | 40 || align="center" | 205(65+65+75)(34 life points) || align="center" | 13(4+4+5) || align="center" | 15(5+5+5) || align="center" | No | | align="center" | Jinchu Nobori (EX) || align="center" | QCF+KK || align="center" | 40 || align="center" | 205(65+65+75)(34 life points) || align="center" | 13(4+4+5) || align="center" | 15(5+5+5) || align="center" | No | ||
| Line 1,281: | Line 1,281: | ||
{| border="1em" cellspacing="0" width="70%" style="border: 1px solid #999; background: #F2F2F2;" | {| border="1em" cellspacing="0" width="70%" style="border: 1px solid #999; background: #F2F2F2;" | ||
|- | |- | ||
| align="center" | '''Move''' || align="center" | '''Motion''' || align="center" | '''Gauge Needed''' || align="center" | '''Damage''' || align="center" | '''Blocked Damage''' || align="center" | '''Stun Damage''' || align="center" | '''Super Cancel''' | | align="center" | '''Move''' || align="center" | '''Motion''' || align="center" | '''Gauge Needed''' || align="center" | '''Damage''' || align="center" | '''Blocked Damage''' || align="center" | '''Stun Damage''' || align="center" | '''Super Cancel''' || align="center" | '''Juggle Value''' | ||
|- | |- | ||
| align="center" | Air Jinchu Nobori (EX) || align="center" | (Air) QCF+KK || align="center" | 40 || align="center" | 220(9 hits)(45+45+25x7)(22 life points) || align="center" | 6 || align="center" | 10(7+7+0×6) || align="center" | No | | align="center" | Air Jinchu Nobori (EX) || align="center" | (Air) QCF+KK || align="center" | 40 || align="center" | 220(9 hits)(45+45+25x7)(22 life points) || align="center" | 6 || align="center" | 10(7+7+0×6) || align="center" | No | ||
Revision as of 01:10, 26 January 2019
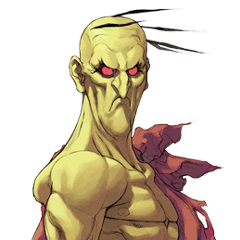
Introduction
Specific Character Information
- Stamina: 1120
- Stun Bar Length (in pixels): 72 (Long)
- Stun Bar Recovery (frames it takes to recover 1 pixel): 24
- Taunt: Recovers stun by 600-800% as the taunt is held longer.
- Best Kara-Throw: Far S. MK
- Standard Throw Range (pixels): 25
- Kara-Throw Range (pixels): 53
- Dash Forward (frames) / Moving Distance: 17 / 2
- Dash Backward (frames) / Moving Distance: 11 / 2
- Normal Wake up (frames): 71
- Quick Stand (frames): 52
Character Colors
Moves List
Throws
| Kubi-jime Kataguruma | |
| Tomoe Nage |
Air Throws
| Kuuchuu Jigoku Guruma | Air |
Command Moves
| Mawashi Hiji | |
| Double Jump | Air |
Special Moves
| Nichirin Shou | EX SC | |
| Oni Yanma | EX SC | |
| `SC on 1st/2nd hit | ||
| Niou Riki | Close | |
| Jinchuu Watari | EX | |
| Hitobashira Nobori | Air |
Super Arts
Target Combo
Move Analysis
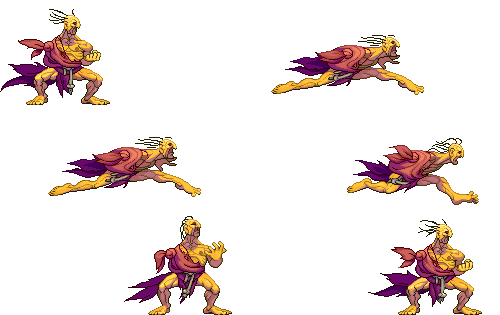
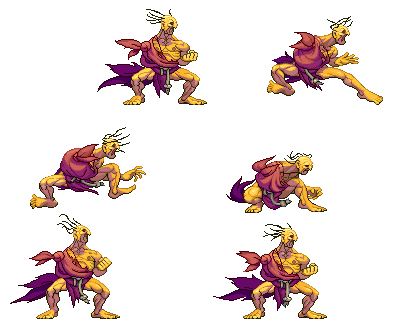
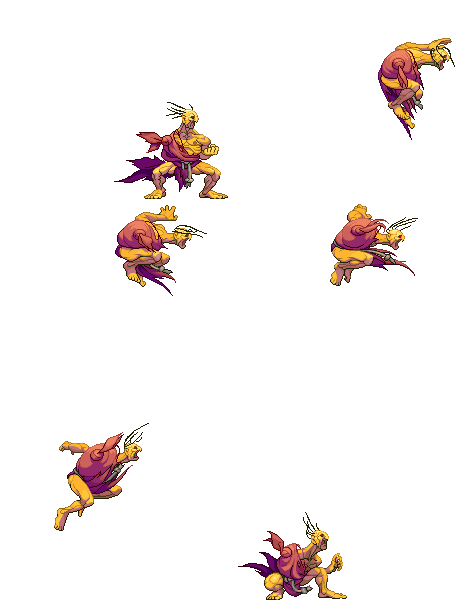
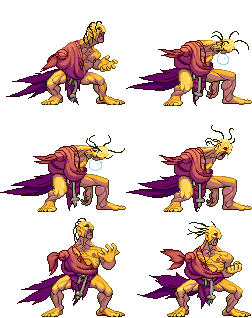
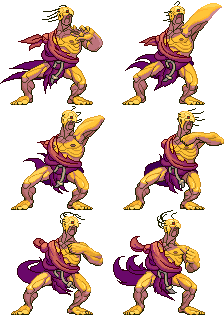
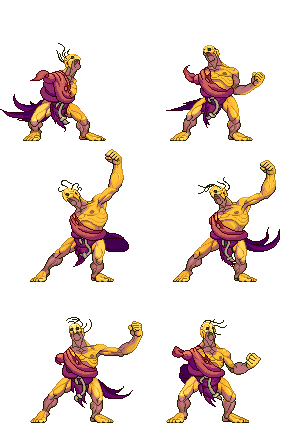
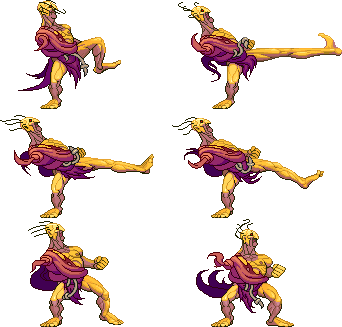
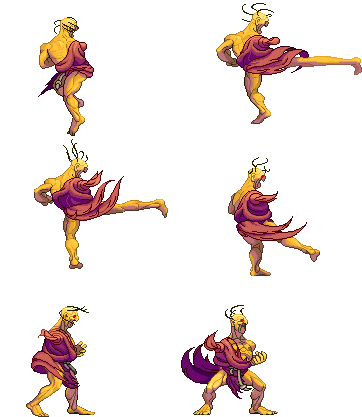
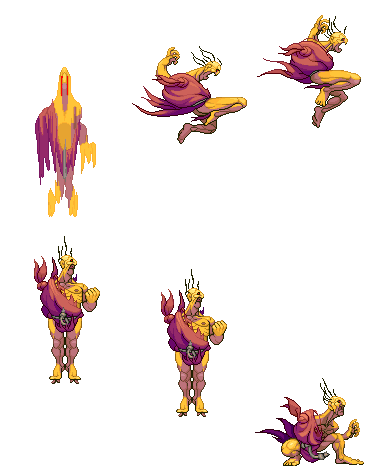
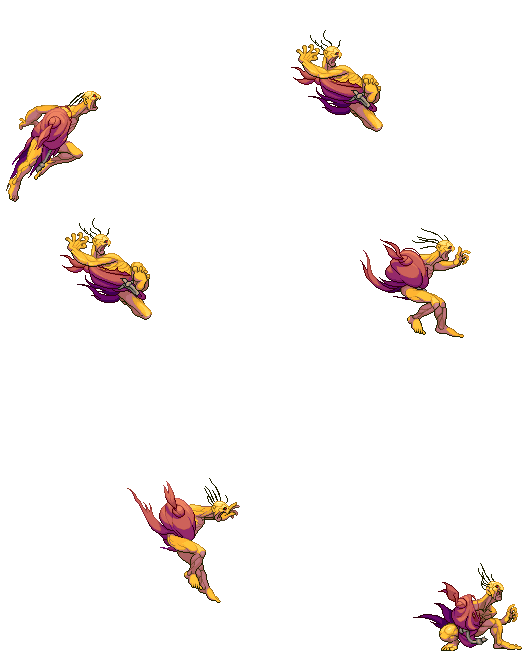
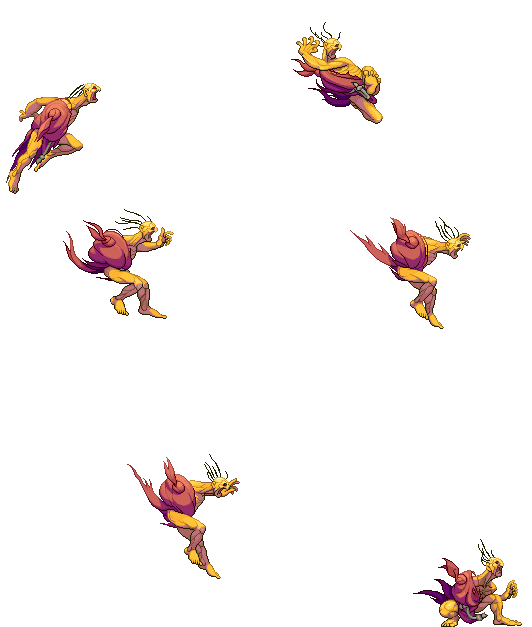
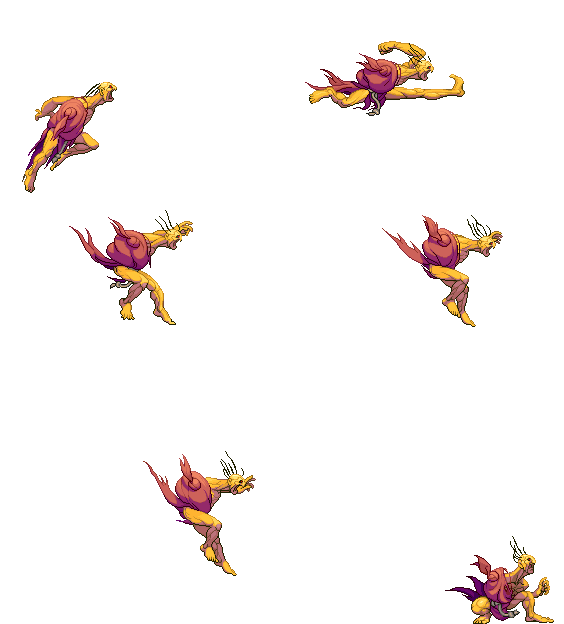
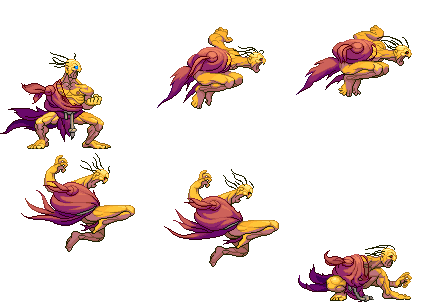
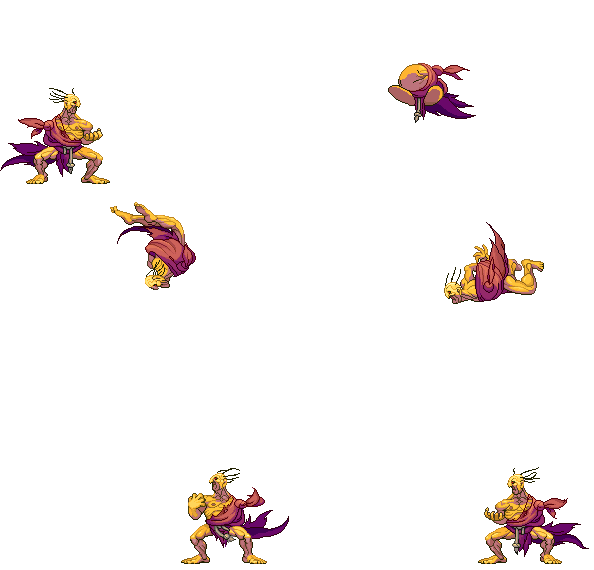
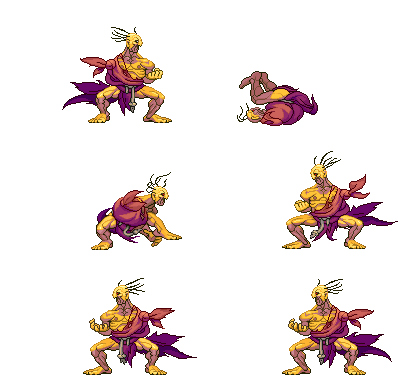
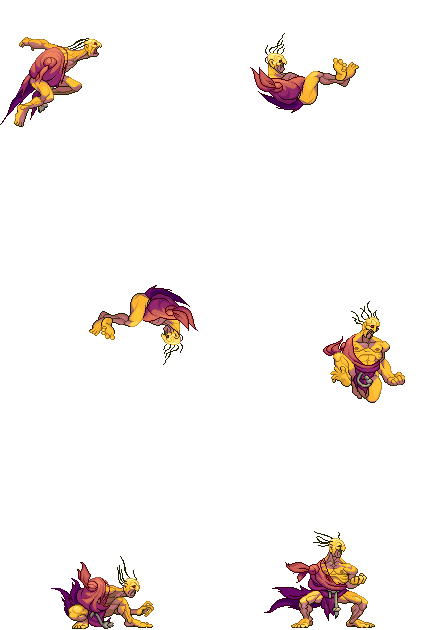
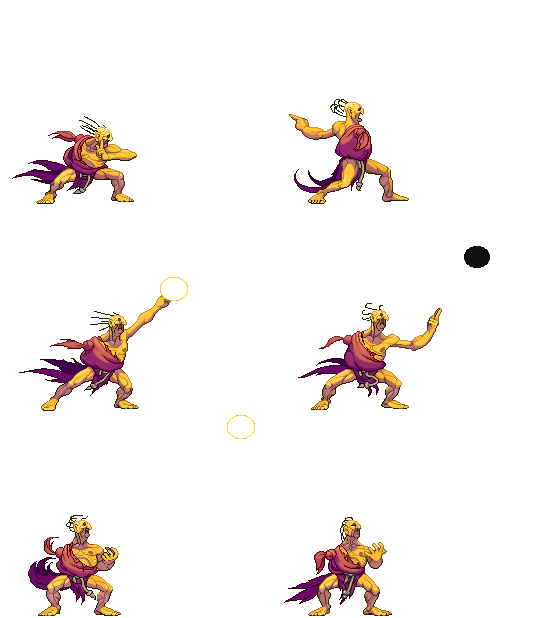
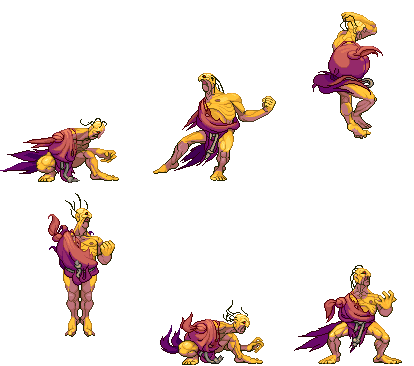
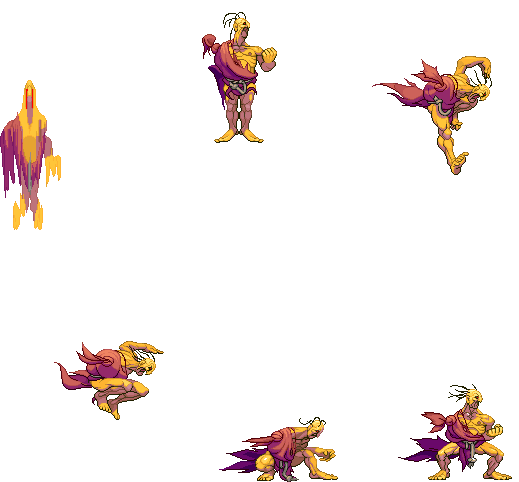
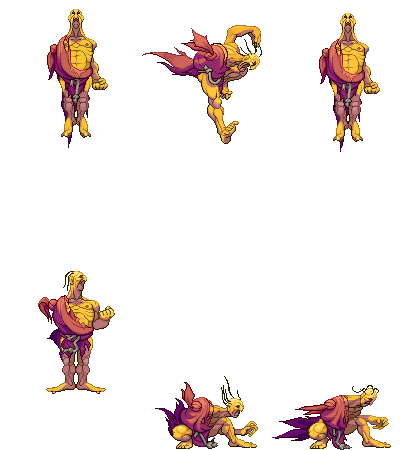
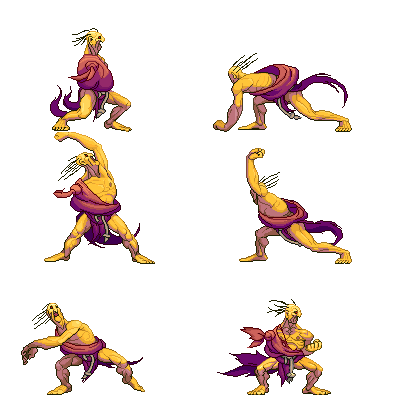
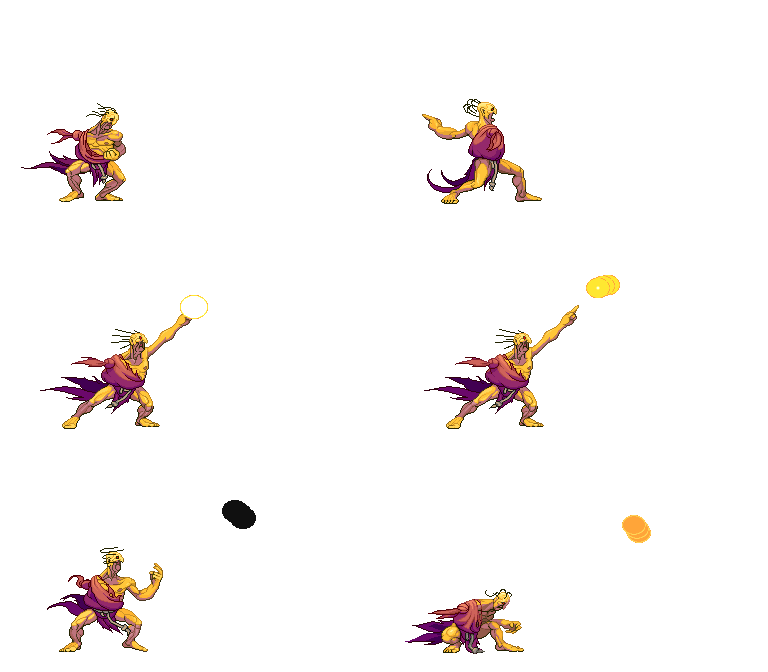
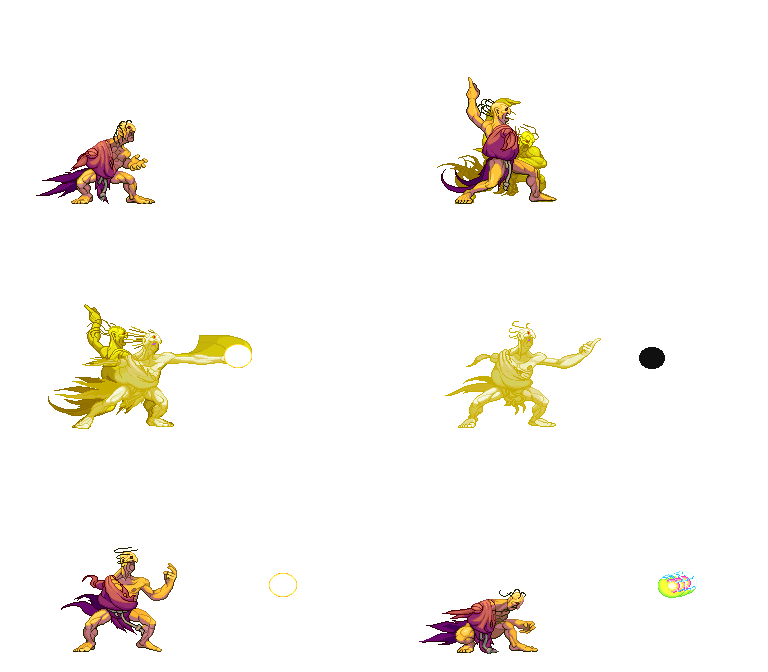
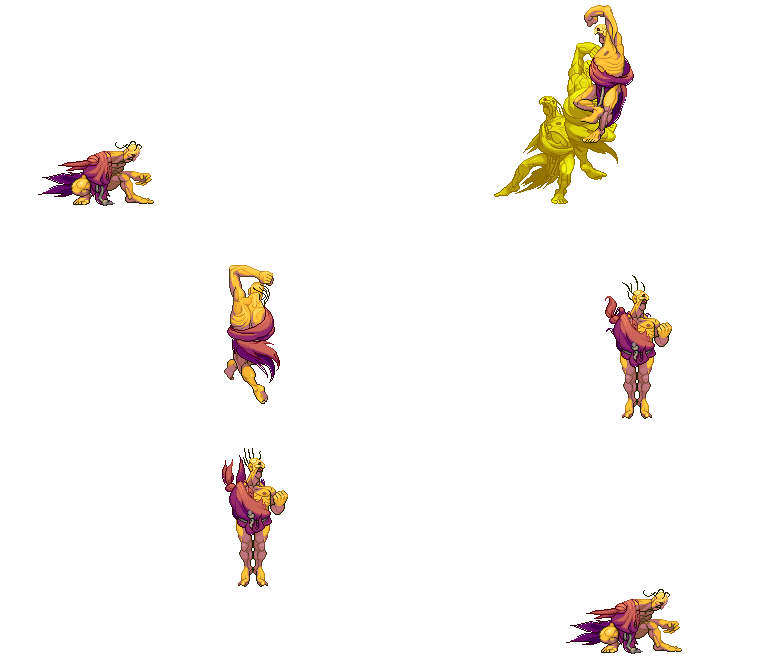
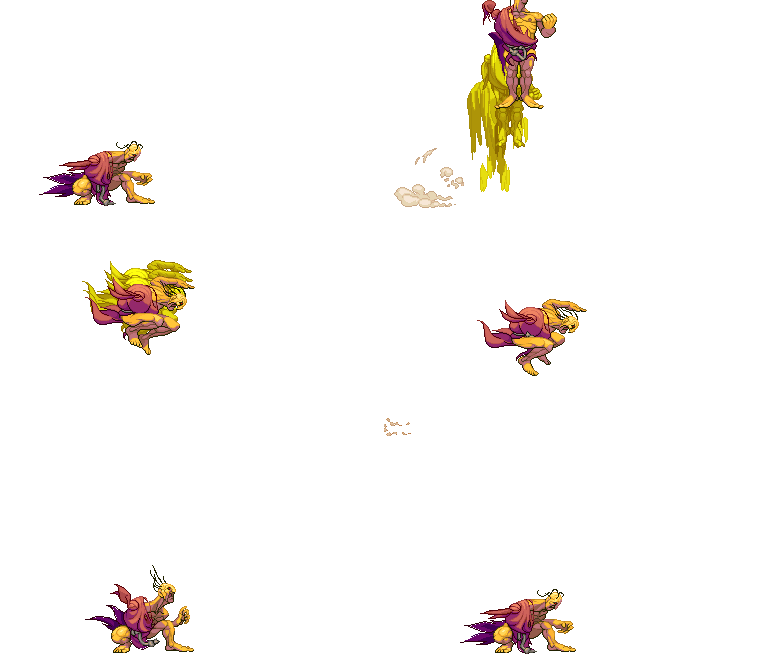
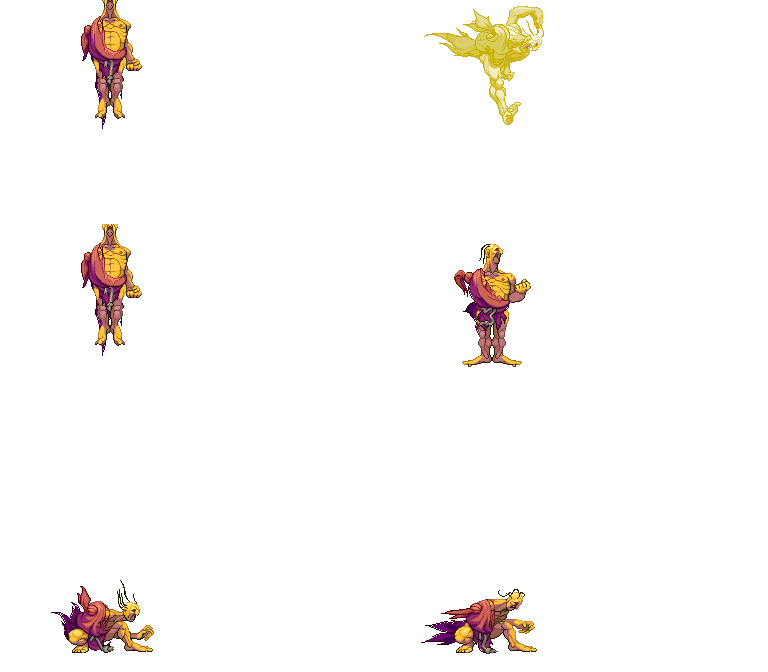
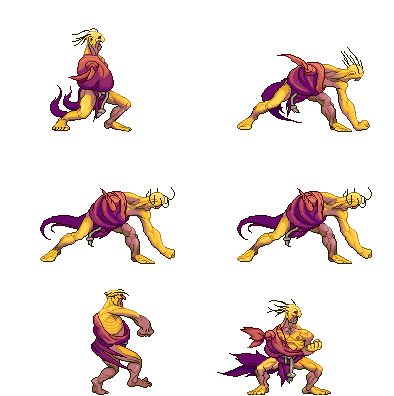
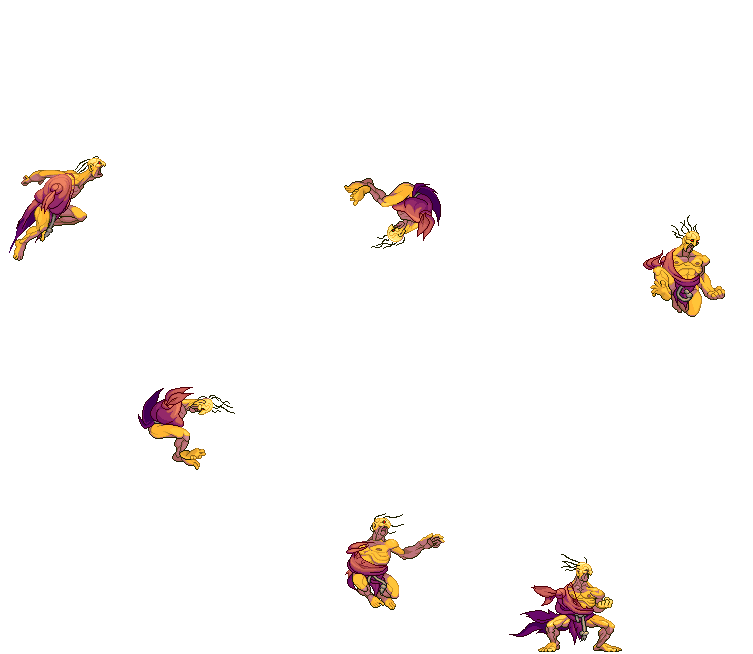
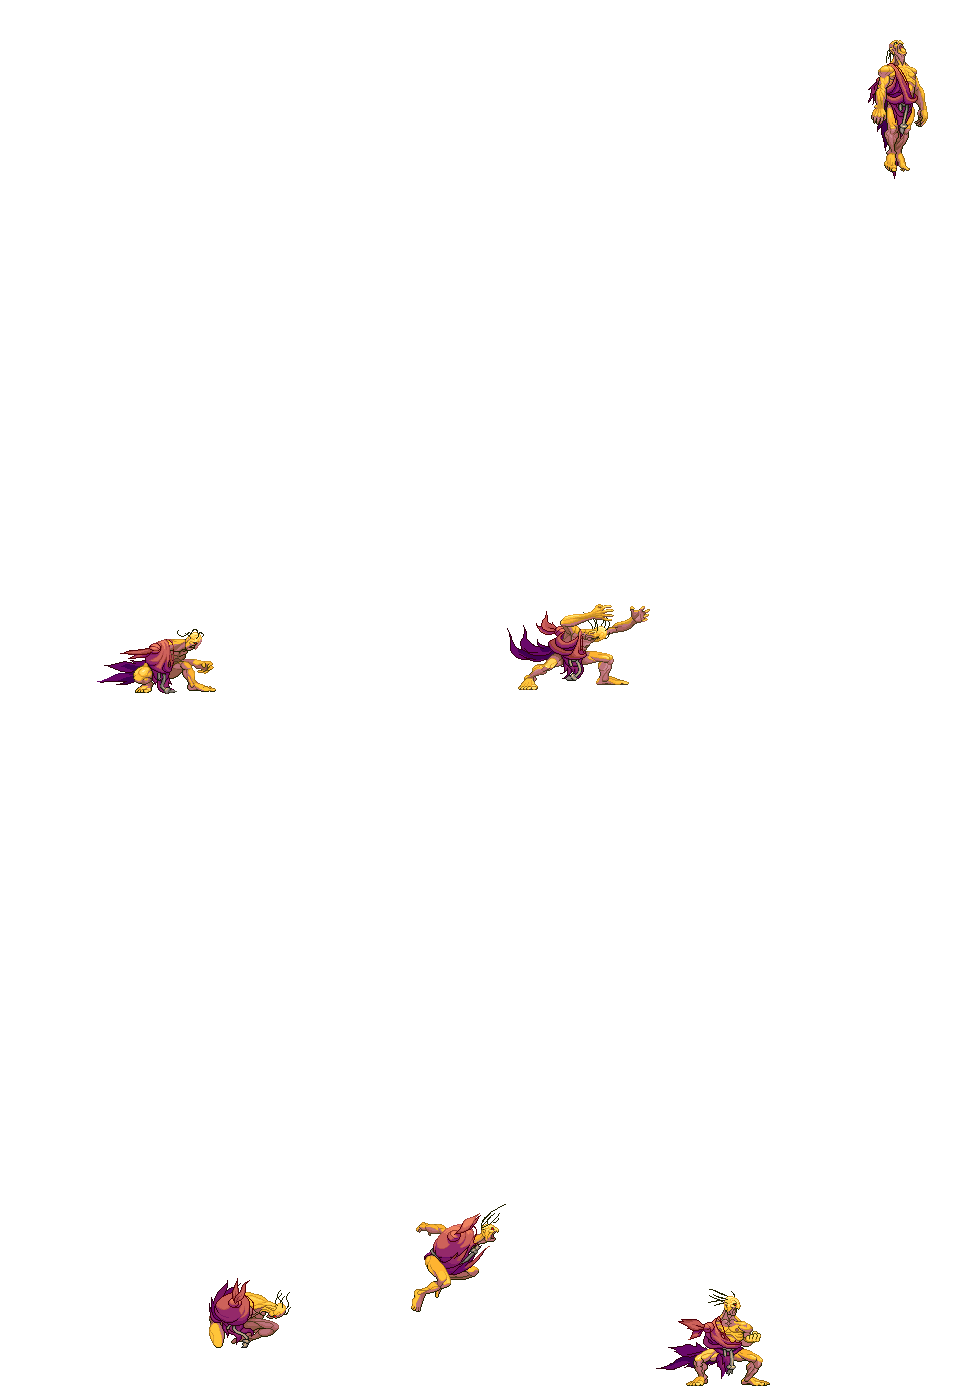
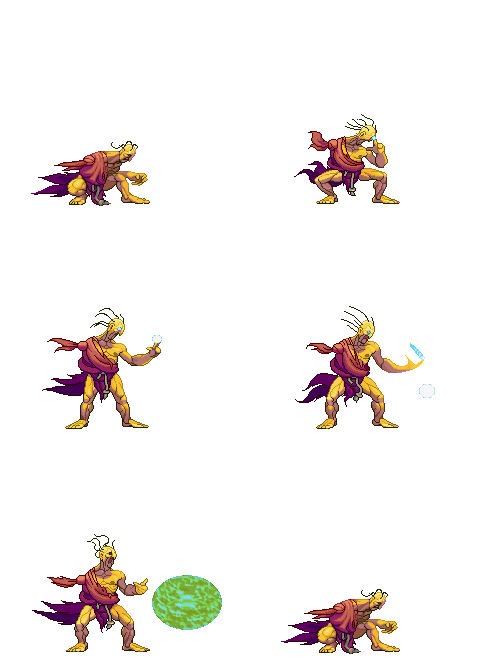
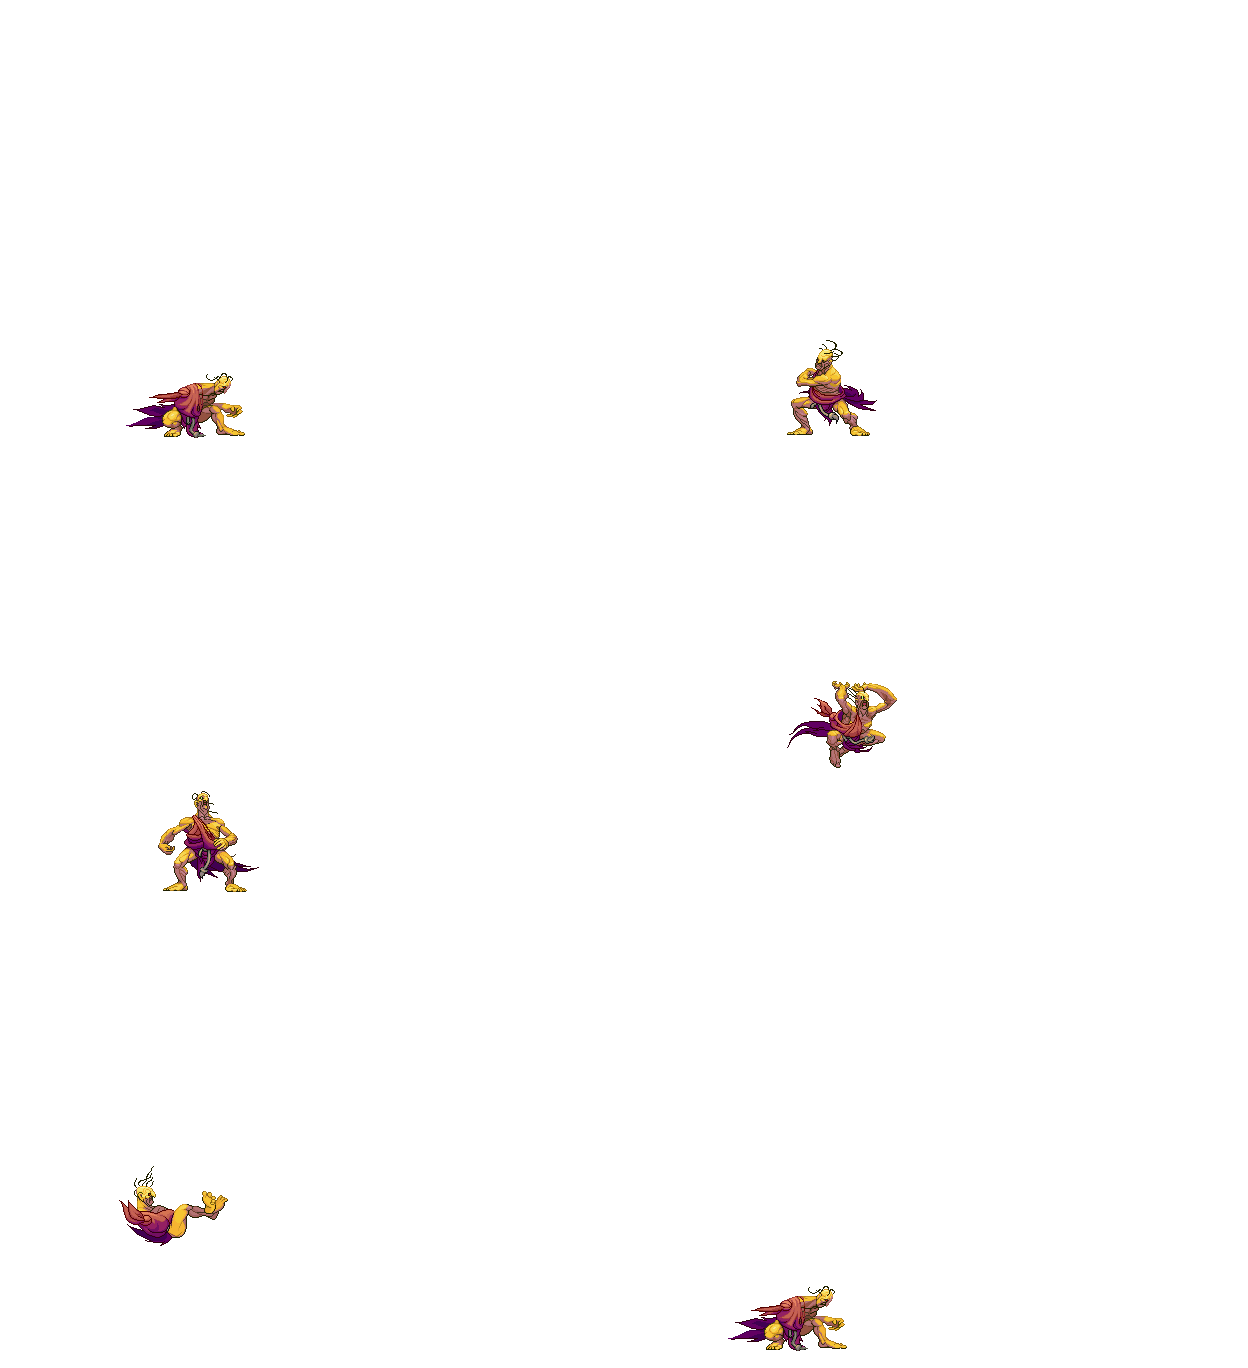
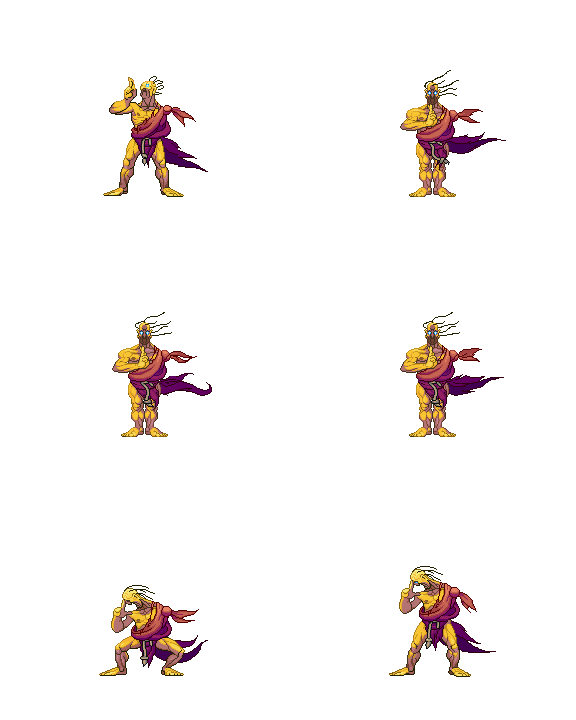
- All sprites are taken from this site: http://www.zweifuss.ca/
- All Framedata in the "Move Analysis" section is taken from Game Restaurant, this means the Framedata is from the Arcade version, unlike Karathrow, which uses the Dreamcast port.
General
- Move: Move name
- Motion: What you must do to execute the move
- Damage: Damage it does (in pixels)
- Stun Damage: Stun Damage it does (in pixels)
- Chains into itself: If you can combo into the same movement
- Special Cancel: If you can cancel the move into a Special Move
- Super Cancel: If you can cancel the move into a Super Art
- Throw Range: Range of the throw (in pixels)
- Num.: Super Art number
- Super Art: Super Art name
- Super Art Stock: Number of Gauge Bars the Super Art have, also the length of each bar (in pixels)
Frame Data
- Startup: Number of frames it takes to start the move
- Hit: Number of frames that can hit the opponent
- Recovery: Number of frames it takes to recover from the move
- Blocked Advantage: Number of frames you are in advantage/disadvantage after opponent blocks the hit
- Hit Advantage: Number of frames you are in advantage/disadvantage after opponent takes the hit
- Crouching Hit Advantage: Number of frames you are in advantage/disadvantage after opponent takes the hit while crouching
- + # : You have # frames of advantage
- - # : You have # frames of disadvantage
- # ~ # : Advantage/disvantage can vary from # to #
- Down: Enemy gets knocked down
- Guard: How opponent must guard the move, High (H), Low (L) or both (HL)
- Parry: How opponent must parry the move, High (H), Low (L) or both (HL)
Gauge Increase
- Miss: Gauge you gain if you miss the move (in pixels)
- Blocked: Gauge you gain if the move gets blocked (in pixels)
- Hit: Gauge you gain if you hit the opponent with the move (in pixels)
- Parry: Gauge opponent gains when he parry the move (in pixels)
Basic Moves
| Move | Total frames |
|---|---|
| Dash Forward | 17 |
Comments here
| Move | Total frames |
|---|---|
| Dash Backwards | 11 |
Comments here
| Move | Motion | Startup Frames |
| Jump | BU or U or FU | 4 |
Comments here
| Move | Motion | Startup Frames |
| Super Jump | DBU or DU or DFU | 5 |
Comments here
| Move | Motion | Frames |
| Normal Wakeup | - | 71 |
Comments here
| Move | Motion | Frames |
| Quick Stand | Tap D when hitting the ground | 52 |
Comments here
| Move | Motion | Frames | Gauge Increase |
| Taunt | HP+HK | ?? | ? |
Comments here
| Move | Motion |
| Parry (High) | Tap F when about taking a hit |
| Parry (Low) | Tap D when about taking a hit |
| Parry (Air) | Tap F in air when about taking a hit |
Frame Data
| Move | Frames you're frozen | Frames opponent is frozen | Frame Advantage when parry is successful | Frames before you can try another parry |
| Parry (High) | 16 | 16 | +4(LP/LK) +3(MP/MK) +2(HP/HK) 0(Special/Super) -16(Fireball) | 24(19 when attack comes from the air)*,** |
| Parry (Low) | 16 | 16 | +4(LP/LK) +3(MP/MK) +2(HP/HK) 0(Special/Super) -16(Fireball) | 24(19 when attack comes from the air)*,** |
| Parry (Air) | 16 | 16 | +4(LP/LK) +3(MP/MK) +2(HP/HK) 0(Special/Super) -16(Fireball) | 21(19 when attack comes from the air)*,** |
| * (If a parry attempt is successful, the 19/21/24 frame restriction is taken away and you can attempt another parry immediately) |
| ** (If another attack connects within 2 frames of your parry, it will automatically be parried) |
Gauge Increase
| Move | Gauge Increase |
| Parry (High) | 4*** |
| Parry (Low) | 4*** |
| Parry (Air) | 4*** |
| *** (You gain 4 of gauge for whatever attack parried, and for whatever hit you parry during multi-hit attack) |
You can buffer any motion during High or Low parry, but NOT during Air parry, also parry resets the juggle count (and thus resets all scaling).
- Parry information is taken from Shoryuken Forums, specifically from user JinraiPVC. Thanks for this information dude
Normal Moves
Standing Normals
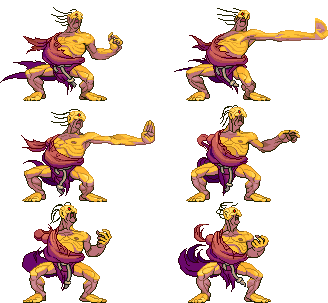
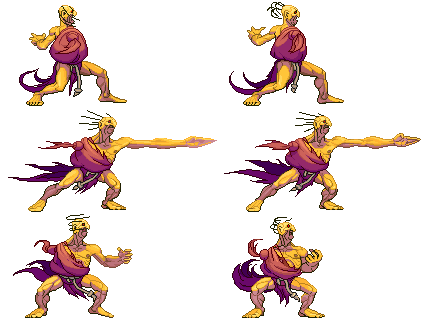
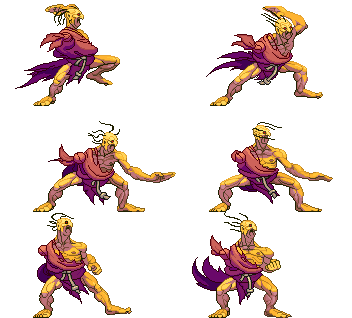
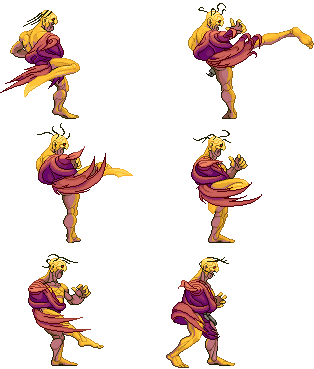
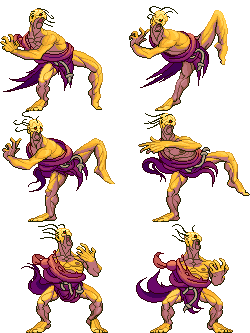
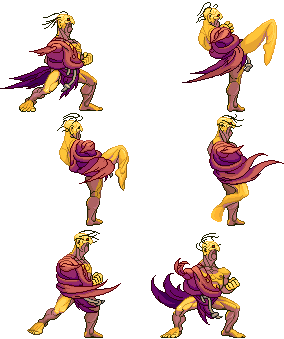
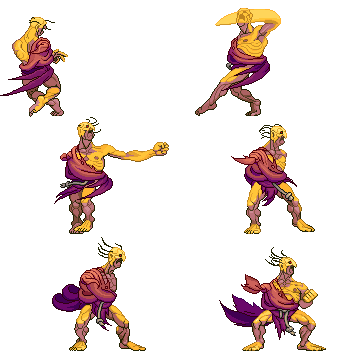
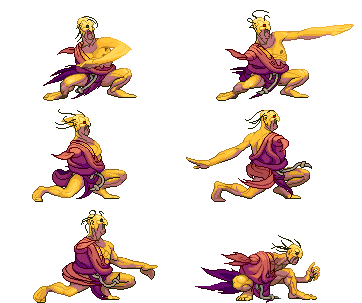
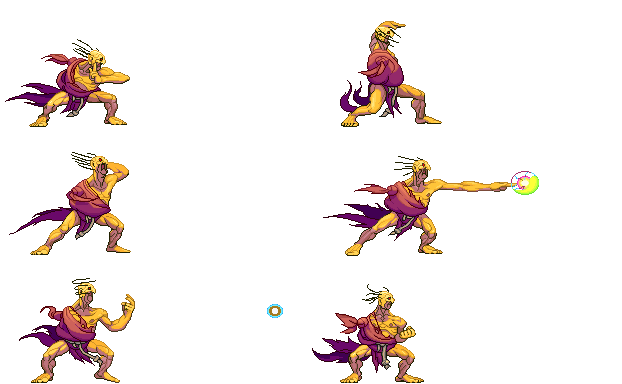
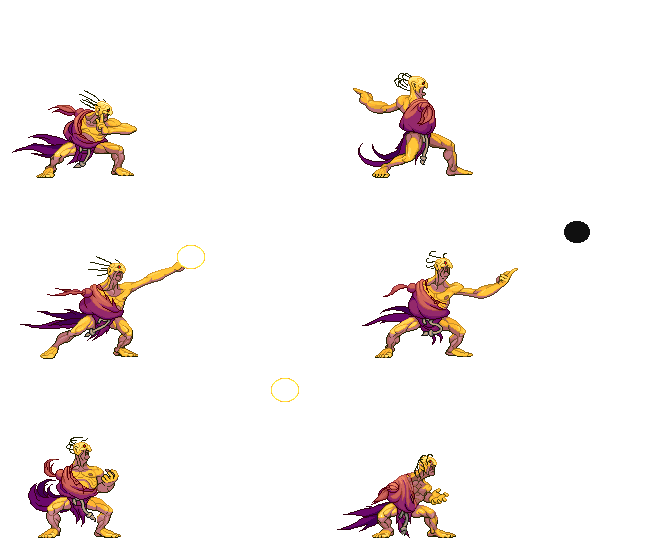
Please note that the images shown in this section are for the first frame it hits, so this means the opponent is taking the hit in the image shown on the move. The first frame of every move (except 2nd throw image sprites) is used to illustrate the maximum range of every attack. Note also that those images are ACCURATE, they are exactly the first frame it hits, so the opponent takes damage but doesn't enter the "pain" frame until a frame later.
| Move | Motion | Damage | Stun Damage | Chains into itself | Special Cancel | Super Cancel | Juggle Value |
| Far Jab | LP | 30(5 life points) | 3 | No | Yes | Yes |
Frame Data
| Startup | Hit | Recovery | Blocked Advantage | Hit Advantage | Crouching Hit Advantage | Guard | Parry |
| 4 | 1 | 10 | 0 | 0 | 0 | HL | HL |
Gauge Increase
| Miss | Blocked | Hit | Parry (Gauge for opponent) |
| 0 | 1 | 2 | 4 |
Comments here
| Move | Motion | Damage | Stun Damage | Chains into itself | Special Cancel | Super Cancel | Juggle Value |
| Far Strong | MP | 80(14 life points) | 11 | No | No | No |
Frame Data
| Startup | Hit | Recovery | Blocked Advantage | Hit Advantage | Crouching Hit Advantage | Guard | Parry |
| 8 | 4 | 12 | -2 | -1 | 0 | HL | H |
Gauge Increase
| Miss | Blocked | Hit | Parry (Gauge for opponent) |
| 1 | 5 | 9 | 4 |
Comments here
| Move | Motion | Damage | Stun Damage | Chains into itself | Special Cancel | Super Cancel | Juggle Value |
| Fierce | HP | 140(60+80)(22 life points) | 14(7+7) | No | No | No |
Frame Data
| Startup | Hit | Recovery | Blocked Advantage | Hit Advantage | Crouching Hit Advantage | Guard | Parry |
| 17 | 1 | 19 | -5 | -3 | -1 | H | H |
Gauge Increase
| Miss | Blocked | Hit | Parry (Gauge for opponent) |
| 2 | 6(1+4+1) | 17 | 8(4+4) |
Comments here
| Move | Motion | Damage | Stun Damage | Chains into itself | Special Cancel | Super Cancel | Juggle Value |
| Close Jab | (Close to opponent) LP | 35(6 life points) | 3 | No | Yes | Yes |
Frame Data
| Startup | Hit | Recovery | Blocked Advantage | Hit Advantage | Crouching Hit Advantage | Guard | Parry |
| 2 | 1 | 5 | +5 | +5 | +5 | HL | HL |
Gauge Increase
| Miss | Blocked | Hit | Parry (Gauge for opponent) |
| 0 | 1 | 2 | 4 |
Comments here
| Move | Motion | Damage | Stun Damage | Chains into itself | Special Cancel | Super Cancel | Juggle Value |
| Close Strong | (Close to opponent) MP | 70(40+30)(14 life points) | 8(4+4) | Yes | Yes/Yes | Yes/Yes |
Frame Data
| Startup | Hit | Recovery | Blocked Advantage | Hit Advantage | Crouching Hit Advantage | Guard | Parry |
| 5 | 2 | 16 | -4 | 0 | 0 | HL | H |
Gauge Increase
| Miss | Blocked | Hit | Parry (Gauge for opponent) |
| 1 | 6(5+1) | 11 | 8(4+4) |
Comments here
| Move | Motion | Damage | Stun Damage | Chains into itself | Special Cancel | Super Cancel | Juggle Value |
| Far Short | LK | 35(6 life points) | 3 | No | Yes | Yes |
Frame Data
| Startup | Hit | Recovery | Blocked Advantage | Hit Advantage | Crouching Hit Advantage | Guard | Parry |
| 3 | 1 | 8 | +2 | +2 | +2 | HL | HL |
Gauge Increase
| Miss | Blocked | Hit | Parry (Gauge for opponent) |
| 0 | 1 | 2 | 4 |
Comments here
| Move | Motion | Damage | Stun Damage | Chains into itself | Special Cancel | Super Cancel | Juggle Value |
| Far Forward | MK | 100(17 life points) | 13 | No | No | No |
Frame Data
| Startup | Hit | Recovery | Blocked Advantage | Hit Advantage | Crouching Hit Advantage | Guard | Parry |
| 8 | 6 | 12 | -5 | -4 | -3 | HL | H |
Gauge Increase
| Miss | Blocked | Hit | Parry (Gauge for opponent) |
| 1 | 5 | 9 | 4 |
Comments here
| Move | Motion | Damage | Stun Damage | Chains into itself | Special Cancel | Super Cancel | Juggle Value |
| Roundhouse | HK | 120(21 life points) | 19 | No | No | No |
Frame Data
| Startup | Hit | Recovery | Blocked Advantage | Hit Advantage | Crouching Hit Advantage | Guard | Parry |
| 7 | 4 | 17 | -5 | -3 | -1 | HL | H |
Gauge Increase
| Miss | Blocked | Hit | Parry (Gauge for opponent) |
| 2 | 7 | 15 | 4 |
Comments here
| Move | Motion | Damage | Stun Damage | Chains into itself | Special Cancel | Super Cancel | Juggle Value |
| Close Short | (Close to opponent) LK | 40(7 life points) | 3 | No | Yes | Yes |
Frame Data
| Startup | Hit | Recovery | Blocked Advantage | Hit Advantage | Crouching Hit Advantage | Guard | Parry |
| 2 | 2 | 4 | +4 | +4 | +4 | HL | HL |
Gauge Increase
| Miss | Blocked | Hit | Parry (Gauge for opponent) |
| 0 | 1 | 2 | 4 |
Comments here
| Move | Motion | Damage | Stun Damage | Chains into itself | Special Cancel | Super Cancel | Juggle Value |
| Close Forward | (Close to opponent) MK | 110(19 life points) | 11 | No | Yes | Yes |
Frame Data
| Startup | Hit | Recovery | Blocked Advantage | Hit Advantage | Crouching Hit Advantage | Guard | Parry |
| 4 | 3 | 15 | -5 | -4 | -3 | HL | H |
Gauge Increase
| Miss | Blocked | Hit | Parry (Gauge for opponent) |
| 1 | 5 | 9 | 4 |
Comments here
Jumping Normals
| Move | Motion | Damage | Stun Damage | Chains into itself | Special Cancel | Super Cancel | Juggle Value |
| Jump Jab | (Air) LP | 60(10 life points) | 7 | No | No | No |
Frame Data
| Startup | Hit | Recovery | Blocked Advantage | Hit Advantage | Crouching Hit Advantage | Guard | Parry |
| 7 | 17 | - | - | - | - | H | H |
Gauge Increase
| Miss | Blocked | Hit | Parry (Gauge for opponent) |
| 0 | 1 | 2 | 4 |
Comments here
| Move | Motion | Damage | Stun Damage | Chains into itself | Special Cancel | Super Cancel | Juggle Value |
| Neutral Jump Jab | (Air) LP | 60(10 life points) | 5 | No | No | No |
Frame Data
| Startup | Hit | Recovery | Blocked Advantage | Hit Advantage | Crouching Hit Advantage | Guard | Parry |
| 3 | 12 | - | - | - | - | H | H |
Gauge Increase
| Miss | Blocked | Hit | Parry (Gauge for opponent) |
| 0 | 1 | 2 | 4 |
Comments here
| Move | Motion | Damage | Stun Damage | Chains into itself | Special Cancel | Super Cancel | Juggle Value |
| Jump Strong | (Air) MP | 100(17 life points) | 11 | No | No | No |
Frame Data
| Startup | Hit | Recovery | Blocked Advantage | Hit Advantage | Crouching Hit Advantage | Guard | Parry |
| 10 | 8 | - | - | - | - | H | H |
Gauge Increase
| Miss | Blocked | Hit | Parry (Gauge for opponent) |
| 1 | 5 | 9 | 4 |
Comments here
| Move | Motion | Damage | Stun Damage | Chains into itself | Special Cancel | Super Cancel | Juggle Value |
| Neutral Jump Strong | (Air) MP | 110(19 life points) | 9 | No | No | No |
Frame Data
| Startup | Hit | Recovery | Blocked Advantage | Hit Advantage | Crouching Hit Advantage | Guard | Parry |
| 5 | 6 | - | - | - | - | H | H |
Gauge Increase
| Miss | Blocked | Hit | Parry (Gauge for opponent) |
| 1 | 5 | 9 | 4 |
Comments here
| Move | Motion | Damage | Stun Damage | Chains into itself | Special Cancel | Super Cancel | Juggle Value |
| Jump Fierce | (Air) HP | 140(100+40)(23 life points) | 18(9+9) | No | No | No |
Frame Data
| Startup | Hit | Recovery | Blocked Advantage | Hit Advantage | Crouching Hit Advantage | Guard | Parry |
| 9 | 2 | - | - | - | - | H | H |
Gauge Increase
| Miss | Blocked | Hit | Parry (Gauge for opponent) |
| 2 | 8 | 17 | 8(4+4) |
Comments here
| Move | Motion | Damage | Stun Damage | Chains into itself | Special Cancel | Super Cancel | Juggle Value |
| Neutral Jump Fierce | (Air) HP | 140(24 life points) | 13 | No | No | No |
Frame Data
| Startup | Hit | Recovery | Blocked Advantage | Hit Advantage | Crouching Hit Advantage | Guard | Parry |
| 7 | 4 | - | - | - | - | H | H |
Gauge Increase
| Miss | Blocked | Hit | Parry (Gauge for opponent) |
| 2 | 7 | 15 | 4 |
Comments here
| Move | Motion | Damage | Stun Damage | Chains into itself | Special Cancel | Super Cancel | Juggle Value |
| Jump Short | (Air) LK | 60(10 life points) | 5 | No | No | No |
Frame Data
| Startup | Hit | Recovery | Blocked Advantage | Hit Advantage | Crouching Hit Advantage | Guard | Parry |
| 3 | 13 | - | - | - | - | H | H |
Gauge Increase
| Miss | Blocked | Hit | Parry (Gauge for opponent) |
| 0 | 1 | 2 | 4 |
Comments here
| Move | Motion | Damage | Stun Damage | Chains into itself | Special Cancel | Super Cancel | Juggle Value |
| Neutral Jump Short | (Air) LK | 60(10 life points) | 7 | No | No | No |
Frame Data
| Startup | Hit | Recovery | Blocked Advantage | Hit Advantage | Crouching Hit Advantage | Guard | Parry |
| 2 | 10 | - | - | - | - | H | H |
Gauge Increase
| Miss | Blocked | Hit | Parry (Gauge for opponent) |
| 0 | 1 | 2 | 4 |
Comments here
| Move | Motion | Damage | Stun Damage | Chains into itself | Special Cancel | Super Cancel | Juggle Value |
| Jump Forward | (Air) MK | 100(17 life points) | 9 | No | No | No |
Frame Data
| Startup | Hit | Recovery | Blocked Advantage | Hit Advantage | Crouching Hit Advantage | Guard | Parry |
| 3 | 6 | - | - | - | - | H | H |
Gauge Increase
| Miss | Blocked | Hit | Parry (Gauge for opponent) |
| 1 | 5 | 9 | 4 |
Comments here
| Move | Motion | Damage | Stun Damage | Chains into itself | Special Cancel | Super Cancel | Juggle Value |
| Neutral Jump Forward | (Air) MK | 110(19 life points) | 11 | No | No | No |
Frame Data
| Startup | Hit | Recovery | Blocked Advantage | Hit Advantage | Crouching Hit Advantage | Guard | Parry |
| 4 | 8 | - | - | - | - | H | H |
Gauge Increase
| Miss | Blocked | Hit | Parry (Gauge for opponent) |
| 1 | 5 | 9 | 4 |
Comments here
| Move | Motion | Damage | Stun Damage | Chains into itself | Special Cancel | Super Cancel | Juggle Value |
| Jump Roundhouse | (Air) HK | 120(21 life points) | 13 | No | No | No |
Frame Data
| Startup | Hit | Recovery | Blocked Advantage | Hit Advantage | Crouching Hit Advantage | Guard | Parry |
| 5 | 3 | - | - | - | - | H | H |
Gauge Increase
| Miss | Blocked | Hit | Parry (Gauge for opponent) |
| 2 | 7 | 15 | 4 |
Comments here
| Move | Motion | Damage | Stun Damage | Chains into itself | Special Cancel | Super Cancel | Juggle Value |
| Neutral Jump Roundhouse | (Air) HK | 140(24 life points) | 15 | No | No | No |
Frame Data
| Startup | Hit | Recovery | Blocked Advantage | Hit Advantage | Crouching Hit Advantage | Guard | Parry |
| 5 | 5 | - | - | - | - | H | H |
Gauge Increase
| Miss | Blocked | Hit | Parry (Gauge for opponent) |
| 2 | 7 | 15 | 4 |
Comments here
| Move | Motion | Damage | Stun Damage | Chains into itself | Special Cancel | Super Cancel | Juggle Value |
| Tobi Hiza | MP+MK | 40(7 life points) | 3 | No | No | No |
Frame Data
| Startup | Hit | Recovery | Blocked Advantage | Hit Advantage | Crouching Hit Advantage | Guard | Parry |
| 15 | 10 | 5 | -5~+7 | 0~+8 | +1~+9 | H | H |
Gauge Increase
| Miss | Blocked | Hit | Parry (Gauge for opponent) |
| 0 | 1 | 2 | 4 |
Comments here
Throws
| Move | Motion | Damage | Stun Damage | Throw Range | Kara-Throw | Kara-Throw Range |
| Kubi-jime Kataguruma | LP+LK or F+LP+LK | 115(6x30)(19 life points) | 20(6x5) | 25 | Far S.MK/S.HK/Close S.MP/Close S.MK | 53/39/35/35 |
Frame Data
| Startup | Hit | Recovery | Blocked Advantage | Hit Advantage | Crouching Hit Advantage | Guard | Parry |
| 2 | 1 | 21 | - | - | - | LP+LK | - |
Gauge Increase
| Miss | Blocked | Hit |
| 0 | 7 (for the player who blocked) | 12 |
Comments here
| Move | Motion | Damage | Stun Damage | Throw Range | Kara-Throw | Kara-Throw Range |
| Tomoe Nage | B+LP+LK | 120(21 life points) | 15 | 25 | Far S.MK/S.HK/Close S.MP/Close S.MK | 53/39/35/35 |
Frame Data
| Startup | Hit | Recovery | Blocked Advantage | Hit Advantage | Crouching Hit Advantage | Guard | Parry |
| 2 | 1 | 21 | - | - | - | LP+LK | - |
Gauge Increase
| Miss | Blocked | Hit |
| 0 | 7 (for the player who blocked) | 7 |
Comments here
| Move | Motion | Damage | Stun Damage | Throw Range (Front) | Throw Range (Up & Down) |
| Kuuchuu Jigoku Guruma | (Air) LP+LK | 180(32 life points) | 15 | 19 | 62~91 |
Frame Data
| Startup | Hit | Recovery | Blocked Advantage | Hit Advantage | Crouching Hit Advantage | Guard | Parry |
| 6 | 1 | - | - | - | - | LP+LK | - |
Gauge Increase
| Miss | Blocked | Hit |
| 0 | - | 7 |
Comments here
Command Normals
| Move | Motion | Damage | Stun Damage | Chains into itself | Special Cancel | Super Cancel | Juggle Value |
| Mawashi Hiji | F+MP | 90(16 life points) | 13 | No | Yes | Yes |
Frame Data
| Startup | Hit | Recovery | Blocked Advantage | Hit Advantage | Crouching Hit Advantage | Guard | Parry |
| 8 | 2 | 18 | -5 | -4 | -3 | HL | H |
Gauge Increase
| Miss | Blocked | Hit | Parry (Gauge for opponent) |
| 1 | 5 | 9 | 4 |
Comments here
Crouching Normals
| Move | Motion | Damage | Stun Damage | Chains into itself | Special Cancel | Super Cancel | Juggle Value |
| Crouch Jab | D+LP | 30(5 life points) | 3 | Yes | Yes | Yes |
Frame Data
| Startup | Hit | Recovery | Blocked Advantage | Hit Advantage | Crouching Hit Advantage | Guard | Parry |
| 4 | 2 | 9 | +1 | +1 | +1 | HL | HL |
Gauge Increase
| Miss | Blocked | Hit | Parry (Gauge for opponent) |
| 0 | 1 | 2 | 4 |
Comments here
| Move | Motion | Damage | Stun Damage | Chains into itself | Special Cancel | Super Cancel | Juggle Value |
| Crouch Strong | D+MP | 65(11 life points) | 3 | No | Yes | Yes |
Frame Data
| Startup | Hit | Recovery | Blocked Advantage | Hit Advantage | Crouching Hit Advantage | Guard | Parry |
| 7 | 6 | 12 | -5 | -4 | -3 | HL | HL |
Gauge Increase
| Miss | Blocked | Hit | Parry (Gauge for opponent) |
| 1 | 5 | 9 | 4 |
Comments here
| Move | Motion | Damage | Stun Damage | Chains into itself | Special Cancel | Super Cancel | Juggle Value |
| Crouch Fierce | D+HP | 120(21 life points) | 11 | No | No | Yes |
Frame Data
| Startup | Hit | Recovery | Blocked Advantage | Hit Advantage | Crouching Hit Advantage | Guard | Parry |
| 6 | 4 | 18 | -2 | 0 | 0 | HL | HL |
Gauge Increase
| Miss | Blocked | Hit | Parry (Gauge for opponent) |
| 2 | 7 | 15 | 4 |
Comments here
| Move | Motion | Damage | Stun Damage | Chains into itself | Special Cancel | Super Cancel | Juggle Value |
| Crouch Short | D+LK | 20(3 life points) | 3 | No | Yes | Yes |
Frame Data
| Startup | Hit | Recovery | Blocked Advantage | Hit Advantage | Crouching Hit Advantage | Guard | Parry |
| 4 | 2 | 9 | +1 | +1 | +1 | L | L |
Gauge Increase
| Miss | Blocked | Hit | Parry (Gauge for opponent) |
| 0 | 1 | 2 | 4 |
Comments here
| Move | Motion | Damage | Stun Damage | Chains into itself | Special Cancel | Super Cancel | Juggle Value |
| Crouch Forward | D+MK | 80(14 life points) | 3 | No | Yes | Yes |
Frame Data
| Startup | Hit | Recovery | Blocked Advantage | Hit Advantage | Crouching Hit Advantage | Guard | Parry |
| 6 | 4 | 11 | 0 | +1 | +2 | L | L |
Gauge Increase
| Miss | Blocked | Hit | Parry (Gauge for opponent) |
| 1 | 5 | 9 | 4 |
Comments here
| Move | Motion | Damage | Stun Damage | Chains into itself | Special Cancel | Super Cancel | Juggle Value |
| Crouch Roundhouse | D+HK | 100(17 life points) | 3 | No | No | No |
Frame Data
| Startup | Hit | Recovery | Blocked Advantage | Hit Advantage | Crouching Hit Advantage | Guard | Parry |
| 10 | 2 | 20 | -6 | Down | Down | L | L |
Gauge Increase
| Miss | Blocked | Hit | Parry (Gauge for opponent) |
| 2 | 7 | 15 | 4 |
Comments here
Target Combo
| Move | Motion | Damage | Stun Damage | Chains into itself | Special Cancel | Super Cancel | Juggle Value |
| Target Combo | Close LK -> MK | 40+50 | 3+5 | No/No | Yes/No | Yes/No |
Frame Data
| Startup | Hit | Recovery | Blocked Advantage | Hit Advantage | Crouching Hit Advantage | Guard | Parry |
| 2 | - | - | -5 | -4 | -3 | HL | HL/H |
Gauge Increase
| Miss | Blocked | Hit | Parry (Gauge for opponent) |
| 0+? | 1+1 | 2+1 | 8(4+4) |
Comments here
Special Moves
| Move | Motion | Damage | Blocked Damage | Stun Damage | Super Cancel | Juggle Value |
| Sun Disk Palm (Jab) | Charge B,F+LP | 50(8 life points) | 3 | 7 | Yes | |
| Sun Disk Palm (Strong) | Charge B,F+MP | 50(8 life points) | 3 | 7 | Yes | |
| Sun Disk Palm (Fierce) | Charge B,F+HP | 60(10 life points) | 4 | 11 | Yes |
Frame Data
| Move | Startup | Hit | Recovery | Blocked Advantage | Hit Advantage | Crouching Hit Advantage | Guard | Parry |
| Sun Disk Palm (Jab) | 14 | 1 | 27 | -6 | -5 | -4 | HL | H |
| Sun Disk Palm (Strong) | 12 | 1 | 25 | -4 | -3 | -2 | HL | H |
| Sun Disk Palm (Fierce) | 14 | 1 | 23 | -2 | -1 | 0 | HL | H |
Gauge Increase
| Move | Miss | Blocked | Hit | Parry (Gauge for opponent) |
| Sun Disk Palm (Jab) | 0 | 1 | 2 | 4 |
| Sun Disk Palm (Strong) | 0 | 1 | 2 | 4 |
| Sun Disk Palm (Fierce) | 0 | 1 | 2 | 4 |
Comments here
| Move | Motion | Damage | Blocked Damage | Stun Damage | Super Cancel | Juggle Value |
| Oniyama (Jab) | Charge D,U+LP | 140(80(40))(24 life points) | 9 | 15 | Yes | |
| Oniyama (Strong) | Charge D,U+MP | 160(100(40))(28 life points) | 10 | 15 | Yes | |
| Oniyama (Fierce) | Charge D,U+HP | 180(2 hits)(120+60+60+40)(31 life points) | 11(5+2+2) | 20(19+3+3+3) | Yes/Yes |
Frame Data
| Move | Startup | Hit | Recovery | Blocked Advantage | Hit Advantage | Crouching Hit Advantage | Guard | Parry |
| Oniyama (Jab) | 6 | 10 | 29 | -22 | Down | Down | HL | HL |
| Oniyama (Strong) | 6 | 17 | 30 | -30 | Down | Down | HL/HL | HL/HL |
| Oniyama (Fierce) | 1 | 1・1・1・20 | 33 | -38 | Down | Down | HL/HL/HL | HL/HL/HL |
Gauge Increase
| Move | Miss | Blocked | Hit | Parry (Gauge for opponent) |
| Oniyama (Jab) | 3 | 15 | 21 | 4 |
| Oniyama (Strong) | 3 | 15 | 21 | 4 |
| Oniyama (Fierce) | 3 | 17 | 22 | 16(4x4) |
Comments here
| Move | Motion | Damage | Blocked Damage | Stun Damage | Super Cancel | Juggle Value |
| Jinchu Nobori (Short) | QCF+LK | 100(50+50)(16 life points) | 6(3+3) | 10(5+5) | No/No | |
| Jinchu Nobori (Forward) | QCF+MK | 115(60+60)(20 life points) | 8(4+4) | 10(5+5) | No/No | |
| Jinchu Nobori (Roundhouse) | QCF+HK | 130(70+60)(22 life points) | 9(5+4) | 10(5+5) | No/No |
Frame Data
| Move | Startup | Hit | Recovery | Blocked Advantage | Hit Advantage | Crouching Hit Advantage | Guard | Parry |
| Jinchu Nobori (Short) | 27・35 | 3・3 | 13 | -40~-35 | Down | Down | H/H | H/H |
| Jinchu Nobori (Forward) | 31・39 | 3・3 | 13 | -40~-35 | Down | Down | H/H | H/H |
| Jinchu Nobori (Roundhouse) | 34・42 | 3・3 | 13 | -40~-35 | Down | Down | H/H | H/H |
Gauge Increase
| Move | Miss | Blocked | Hit | Parry (Gauge for opponent) |
| Jinchu Nobori (Short) | 3 | 16(15+1) | 22(21+1) | 8(4+4) |
| Jinchu Nobori (Forward) | 3 | 16(15+1) | 22(21+1) | 8(4+4) |
| Jinchu Nobori (Roundhouse) | 3 | 16(15+1) | 22(21+1) | 8(4+4) |
Comments here
| Move | Motion | Damage | Blocked Damage | Stun Damage | Super Cancel | Juggle Value |
| Air Jinchu Nobori (Short) | (Air) QCF+LK | 160(8 hits)(40+40+20×6)(19 life points) | 6 | 10(8 hits)(5+5+0×6) | No/No | |
| Air Jinchu Nobori (Forward) | (Air) QCF+MK | 160(8 hits)(40+40+20×6)(19 life points) | 6 | 10(8 hits)(5+5+0×6) | No/No | |
| Air Jinchu Nobori (Roundhouse) | (Air) QCF+HK | 160(8 hits)(40+40+20×6)(19 life points) | 6 | 10(8 hits)(5+5+0×6) | No/No |
Frame Data
| Move | Startup | Hit | Recovery | Blocked Advantage | Hit Advantage | Crouching Hit Advantage | Guard | Parry |
| Air Jinchu Nobori (Short) | 8 | 3 | 13 | -40~+5 | Down | Down | H/H | H/H |
| Air Jinchu Nobori (Forward) | 8 | 3 | 13 | -40~+5 | Down | Down | H/H | H/H |
| Air Jinchu Nobori (Roundhouse) | 8 | 3 | 13 | -40~+5 | Down | Down | H/H | H/H |
Gauge Increase
| Move | Miss | Blocked | Hit | Parry (Gauge for opponent) |
| Air Jinchu Nobori (Short) | 6(3+3) | 10(5+5) | 31(13+12+[1×6]) | 32(4x8) |
| Air Jinchu Nobori (Forward) | 6(3+3) | 10(5+5) | 31(13+12+[1×6]) | 32(4x8) |
| Air Jinchu Nobori (Roundhouse) | 6(3+3) | 10(5+5) | 31(13+12+[1×6]) | 32(4x8) |
Comments here
| Move | Motion | Damage | Blocked Damage | Stun Damage | Throw Range | Super Cancel | Juggle Value |
| Human Pillar Driver (Jab) | HCB+LP | 150(24 life points) | - | 11 | 79 | No | |
| Human Pillar Driver (Strong) | HCB+MP | 170(27 life points) | - | 11 | 79 | No | |
| Human Pillar Driver (Fierce) | HCB+HP | 190(30 life points) | - | 11 | 79 | No |
Frame Data
| Move | Startup | Hit | Recovery | Blocked Advantage | Hit Advantage | Crouching Hit Advantage | Guard | Parry |
| Human Pillar Driver (Jab) | 9 | 2 | 29 | - | Down | Down | HL | Impossible |
| Human Pillar Driver (Strong) | 10 | 2 | 29 | - | Down | Down | HL | Impossible |
| Human Pillar Driver (Fierce) | 11 | 2 | 29 | - | Down | Down | HL | Impossible |
Gauge Increase
| Move | Miss | Blocked | Hit | Parry (Gauge for opponent) |
| Human Pillar Driver (Jab) | 1 | 7 | 11 | - |
| Human Pillar Driver (Strong) | 1 | 7 | 11 | - |
| Human Pillar Driver (Fierce) | 1 | 7 | 11 | - |
EX Moves
| Move | Motion | Gauge Needed | Damage | Blocked Damage | Stun Damage | Super Cancel | Juggle Value |
| Sun Disk Palm (EX) | Charge B,F+PP | 40 | 120(60+60)(16 life points) | 8(4+4) | 6(3+3) | Yes |
Frame Data
| Move | Startup | Hit | Recovery | Blocked Advantage | Hit Advantage | Crouching Hit Advantage | Guard | Parry |
| Sun Disk Palm (EX) | 14/20 | 120 | 27/37 | +1 | +2 | +3 | HL | H |
Gauge Increase
| Move | Miss | Blocked | Hit | Parry (Gauge for opponent) |
| Sun Disk Palm (EX) | - | - | - | 8(4+4) |
Comments here
| Move | Motion | Gauge Needed | Damage | Blocked Damage | Stun Damage | Super Cancel | Juggle Value |
| Oniyama (EX) | Charge D,U+PP | 40 | 220(4 hits)(70+60+60+30)(35 life points) | 14(7+3+3+1) | 224(15+3×3) | Yes/Yes/No/No |
Frame Data
| Move | Startup | Hit | Recovery | Blocked Advantage | Hit Advantage | Crouching Hit Advantage | Guard | Parry |
| Oniyama (EX) | 5 | 3・1・1・20 | 43 | -47 | Down | Down | HLx4 | HLx4 |
Gauge Increase
| Move | Miss | Blocked | Hit | Parry (Gauge for opponent) |
| Sun Disk Palm (EX) | - | - | - | 16(4+4+4+4) |
Comments here
| Move | Motion | Gauge Needed | Damage | Blocked Damage | Stun Damage | Super Cancel | Juggle Value |
| Jinchu Nobori (EX) | QCF+KK | 40 | 205(65+65+75)(34 life points) | 13(4+4+5) | 15(5+5+5) | No |
Frame Data
| Move | Startup | Hit | Recovery | Blocked Advantage | Hit Advantage | Crouching Hit Advantage | Guard | Parry |
| Jinchu Nobori (EX) | 31・41・45 | 6・3・3 | 13(2) | -40~-35 | Down | Down | Hx3 | Hx3 |
Gauge Increase
| Move | Miss | Blocked | Hit | Parry (Gauge for opponent) |
| Jinchu Nobori (EX) | - | - | - | 12(4+4+4+4) |
Comments here
| Move | Motion | Gauge Needed | Damage | Blocked Damage | Stun Damage | Super Cancel | Juggle Value |
| Air Jinchu Nobori (EX) | (Air) QCF+KK | 40 | 220(9 hits)(45+45+25x7)(22 life points) | 6 | 10(7+7+0×6) | No |
Frame Data
| Move | Startup | Hit | Recovery | Blocked Advantage | Hit Advantage | Crouching Hit Advantage | Guard | Parry |
| Air Jinchu Nobori (EX) | 8 | 3 | 13 | - | Down | Down | HL | H |
Gauge Increase
| Move | Miss | Blocked | Hit | Parry (Gauge for opponent) |
| Air Jinchu Nobori (EX) | - | - | - | 39(4x9) |
Comments here
Super Arts
| Super Art | Super Art Name | Super Art Stock | Motion | Damage | Blocked Damage | Stun Damage | Throw Range | Damage/Gauge |
| I | Kishin Riki (Activation) | 1 bar (104) | QCF QCF+P | - | - | - | - | - |
| - | Kishin Riki (Ground) | - | (After activation) P | 345(58 life points) | 44 | 25 | - | 3,31 |
| - | Kishin Riki (Air Grab) | - | (After activation) Air P | 310(52 life points) | - | 18 | 56 | 2,98 |
Frame Data
| Move | Startup | Hit | Recovery | Throw Range | Blocked Advantage | Hit Advantage | Crouching Hit Advantage | Guard | Parry |
| Kishin Riki (Activation) | 17 | - | - | - | - | - | - | - | - |
| Kishin Riki (Jab Ground) | 4 | 1 | 18 | 40 | - | Down | Down | - | - |
| Kishin Riki (Strong Ground) | 7 | 1 | 22 | 52 | - | Down | Down | - | - |
| Kishin Riki (Fierce Ground) | 10 | 1 | 25 | 66 | - | Down | Down | - | - |
| Kishin Riki (Air Grab) | 5 | 4 | - | 42 Horizontal x 72~94 Vertical | - | Down | Down | Impossible | Impossible |
Comments here
| Super Art | Super Art Name | Super Art Stock | Motion | Damage | Blocked Damage | Stun Damage | Damage/Gauge |
| I | Kishin Tisui | 1 bar (104) | QCF QCF+PP | 430*(71 life points) | - | - | 3,57(x2) |
Frame Data
| Startup | Hit | Recovery | Throw Range | Blocked Advantage | Hit Advantage | Crouching Hit Advantage | Guard | Parry |
| 12 | 1 | 25 | 66 | - | Down | Down | - | - |
Comments here
| Super Art | Super Art Name | Super Art Stock | Motion | Damage | Blocked Damage | Stun Damage | Damage/Gauge |
| II | Yagyou Dama | 3 bar (88 each bar) | QCF QCF+P | 210*(33 life points) | 32** | 10 | 2,38 (x3) |
| * 55x4 Damage is when all hits connect. |
| ** 8x4 Damage is when all hits connect. |
Frame Data
| Startup | Hit | Recovery | Blocked Advantage | Hit Advantage | Crouching Hit Advantage | Guard | Parry |
| 28 | 144 | 19 | +27 | +28 | Down | HLx1~4 | HLx1~4 |
| 28 | 141 | 19 | +27 | +28 | Down | HLx1~4 | HLx1~4 |
| 28 | 134 | 19 | +27 | +28 | Down | HLx1~4 | HLx1~4 |
Comments here
| Super Art | Super Art Name | Super Art Stock | Motion | Damage | Blocked Damage | Stun Damage | Damage/Gauge |
| II | Oodama | 3 bar (88 each bar) | QCF QCF+PP | 600*(96 life points) | 132** | 15 | 6,81 |
| * 70x12~13 Damage is when all hits connect. |
| ** 11x12~13 Damage is when all hits connect. |
Frame Data
| Startup | Hit | Recovery | Blocked Advantage | Hit Advantage | Crouching Hit Advantage | Guard | Parry |
| 26 | 1 | 3 | +73 | +74 | +75 | HLx1~13 | HLx1~13 |
Comments here
| Super Art | Super Art Name | Super Art Stock | Motion | Damage | Blocked Damage | Stun Damage | Damage/Gauge |
| III | Tengu Stone | 1 bar (120) | QCF QCF+P or PP | * | ** | - | - |
| * 40 Damage if Rock or Wall hits,20 for others |
| ** 8 Damage if Rock or Wall hits,4 for others |
Frame Data
| Startup | Hit | Recovery | Blocked Advantage | Hit Advantage | Crouching Hit Advantage | Guard | Parry |
| 17 | - | - | - | - | - | HLx1~6 | HLx1~6 |
564 frames for P version,283 for EX Version
Combos
Basics
Weird 2-in-1
cr. MK or cr.LK xxx uppercut
Can be a nice wake up reversal
(cl. MP (1 hit) xxx Chicken Dance [qcf+MK])- will be referred to as a "Chicken Rep[etition]" throughout the rest of my post.
Meterless: Oro's basic bnb used for punishing. I call it "The Chicken Dance Combo," which I will henceforth refer to as CD or CD combo (including variants of CD).
1) Chicken rep, land, juggle with chicken rep, land, juggle with LP Oni Yanma.
This combo does decent damage and builds a lot of meter. It drops vs Yang, Yun, and Hugo, but it works if you drop a chicken rep. Different characters have varying levels of difficulty to juggle and varied timing when doing this combo. Alex and Dudley are the easiest, then everyone with a wide hit-box, then shotos are the most difficult. This combo tends to be easier in the corner.
The CD combo can not be hit- confirmed, so it is for punishes and guessing games ONLY. You will be very vulnerable if it does not connect.
close MP combos
Here are some safer, un-metered combos.
1) cl. MP (2 hit), juggle w/ stand HK
This does good stun damage and is extremely easy to confirm. Hits the opponent somewhat far away.
2) cl. MP (2 hit), jump, j. HK
The HK resets the opponent in the air and there is a mix-up situation when the two of you land, which I will talk more about in the SETUPS section of this guide.
There are two ways of combo-ing into Oro's command grab, which scores an un-techable knockdown, and allows raw super activations and gimmicks.
3) Either cl MK or cr MK cancelled into command grab [hcb+P].
SA I
cl. MP (2 hits) xx Super Art I activation,jump P
This is the best and only way to active Normal Super Art and comboing
cr. HP xxx EX Super Art I
This is the only way to combo the Super Art
SA II Unblockable Setups
Oro can combo his Super Art II and also made setups with it
(cl. MP (2 hit) xxx MK Chicken Wing) x 2 ,cl.MP (1 hit) xx Super Art II
Each character can be trapped with an specific version of the Super Art and also
Chun, Makoto: Jab Yagyou, dash 3 times.
Shotos: Strong Yagyou, dash 2 times.
Dudley: Fierce Yagyou, dash 1 time.
Necro: Jab Yagyou, dash 2 times.
Ibuki/Remy: Fierce Yagyou, dash 1 time, walk up a few pixels.
Alex, Yun, and Yang are the same as Necro: Jab Yagyou, dash twice.
Based on [1]
EX SAIII Combo
This is Oro's big, easy way to deal damage; the EX Tengu Stones. Here's the biggest mid screen combo:
1) 1 hit cl MPxxx MK Chicken dance, land, juggle with 1 hit cl MPxxx MK chicken dance, land, juggle with 1 hit cl. MP xxx EX Tengu stones
NOTE: You can combo into EX Tengu after only one repetition of mpxxx chicken dance, or simply 2 hit MPxxx EX Tengu. I only go for the entire combo if I don't have a full meter, or I know it's going to kill them. It's much easier to just 2 hit mpxxx EX Tengu.
If the opponent is cornered and you want to activate EX Tengu, there's a reset opporotunity that is necessary for Oro's 100% combos:
1) 1 hit cl MPxxx MK Chicken dance, land, juggle with 1 hit cl MPxxx MK chicken dance, land, juggle with cr. HP xxx EX Tengu stones. (after this activation, hold towards and hit them with a jab as fast as possible. HK comes out slow and does not always connect vs small characters who fall quickly, then the combo is just HK HK HK HK.....)
After the EX Tengu activation in a combo (without the cr. HP reset), juggle with either;
1) jump HK, land, juggle w/ cl MK, repeat. (During this combo, you need to do toward + MP every once in a while if they get too far away. Go in training mode and you'll get a feel for this.)
2) juggle w/ st. HK, toward MP, toward MP, repeat. I use this one mainly vs shotos, twins, Hugo, and Chun Li, since it seems like they randomly go in the wrong direction during the other juggle.
IF YOU HAVE THEM IN THE CORNER WITH EX TENGU STONES ACTIVATED:
1) HK (repeat).
Yup! That's it! If you are performing a juggle and it takes the opponent all the way to the corner, just start pressing roundhouse instead of the other stuff. Keep in mind that you wanna hit with Oro's leg for max damage output.
Combo Enders after a super runs out: Pretty much any of the previously mentioned combos lead out of supers. If you are using SAII, the only combo ender you should really do is the full chicken dance combo to build back your meter for another unblockable.
The only combo I tend to use only as an ender was presented to me by Cali Oro player Red Venom:
1) EX SAIII ends, 2 hit MP, MP fireball, st. HK (or cl. LP for a reset)
It tends to work well vs shotos, since the full chicken dance combo can be hard to do on them, but this only really works in the corner, which is where many Tengu combos end up.
Strategies
Choosing which Tengu to use: This is highly based on player preference, and I see EX and regular stones activated in all sorts of ways. In general, I’d recommend using EX stones during a combo, or if you have full meter and Oro is punishing, simply 2 hit MP xxx Stones (then juggle appropriately). I opt to use non-ex stones out of combo a lot of the time unless it’s a situation where the enemy has a lot of life, the timer is going to run out, and I’m almost dead. I really just like having the option to juggle more. The EX stones don’t last very long, so they are the worse choice if Oro is trying to chip the opponent to death.
Regular SAIII (3 stones): This is good for chipping opponents and keeping presence on the fight for a while. The stones last a really long time. Usually you want to activated non-EX stones after a backthrow or sweep that leaves the opponent cornered. Try to activated just before they land to mess up their meaty timing. You can also cancel into stones after throwing a fireball to make them safe to use, since there is recovery. Don't just randomly use them. Stones make meaties very easy; all Oro needs to do is whiff a move and let the stones hit as the opponent gets up, and he can block. Make sure that when applying pressure, you don't just mash light kick and walk forwards. The stones don't hit as often as Genei Jin shadows, most of them attack every other move that Oro does. So you kind of stutter like... lk (walk forwards with stones), lk (walk forwards with stones), cr lk..... If Oro pushes himself out of block range, he can whiff a st. LK, then UOH while the stones are out to hop back into attacking range.
With non EX stones out, there is a way to deal decent damage that isn't from chip, and really keeps the opponent on the edge (which I covered in the video linked above); UOH, cr MKxxx command grab. This really makes your opponent not want to just block low the whole time because this easy combo causes a lot of damage and an untechable knockdown.
Usually for pressure, Oro uses far LK, close LK, cr LK, and UOH during Tengu since they are fast.
Another little note about regular Tengu is that I prefer it as a raw activation over EX very much in the Urien and Chun-Li match up. Urien doesn't really have fast reversals he can sneak in between attacks in case you mess up your timing, or the set of stones messes you up, so Oro can often times get max damage off of non-EX Tengu here. Against Chun, EX stones out of combo tend to be bad because most sets of stones do not allow Oro to activate, then UOH linked to MP for juggles, so I just go for chip and try to get her to burn meter for EX legs to make Oro go weeeeeeeeeee across the screen.
EX SAIII (5 stones): EX stones is the one that grants Oro his big combos. In the corner, all Oro has to do is continually roundhouse until the timer runs out, then combo into his bnb chicken dance to build back some meter. Mid screen there are a couple combos most Oro players use:
(Assuming the opponent is in air either from jumping or after being launched) jump HK, land, juggle w/ cl MK, repeat. If the opponent seems like the next jump HK is going to get hit too far away, use toward MP in place of jump HK. Just try it a few times in trianing mode to get the ranges down. It's kind of hard to describe because his combos are all stone specific and there are 3125 combinations of stones.
The other mid screen juggle is roundhouse, toward MP, roundhouse, toward MP.... Same thing where if the next roundhouse is going to miss, use a toward MP instead like the other mid screen juggle. I recommend this one for shotos, since sometimes the land, cl MK causes them to start being juggled in the wrong direction based on how close to them Oro is. But really, just use whichever combo you are comfortable with. Both of these combos work on the whole case.
If you do choose to or are forced to use EX Tengu Stones you of combo, you CAN lead to a big Oro juggle. Use UOH linked to cl MP to put the opponent in a juggle state, or use Oro's cr HK to start a juggle, then usually do one jab before the roundhouse for timing purposes; the start up of jab is much faster, so characters that fall quickly will not drop to the ground very often if the first attack is a jab. Again, this timing may be odd at first, so you gotta spend two quarters when no one else is at the arcade to get dat training in.... Or are you playing on 3so? What!!!!
Tics: Close LK is a great move for tic throws since it has a 2 frame start up, frame advantage, and is only parrable high. Close LP has better frame advantage, but it is parryable either high or low.
Overview
Basics
Super Art Selection
Kara-Techniques
Zoning
Mixups
Additional Notes
- Personal Action: Recovers stun meter.
