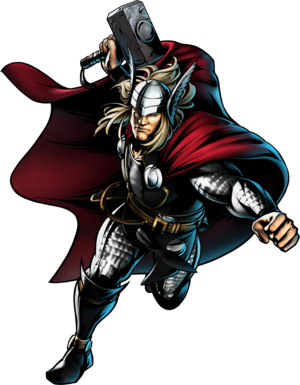
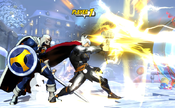
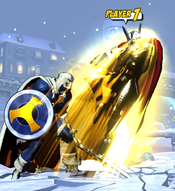
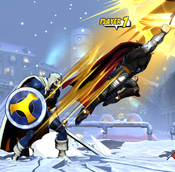
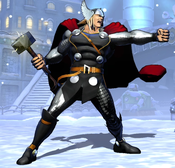
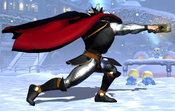
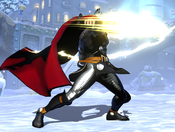
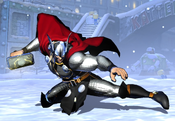
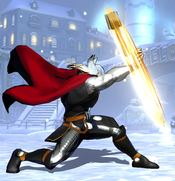
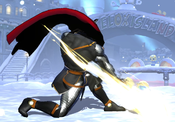
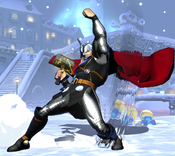
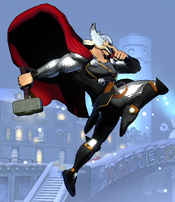
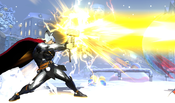
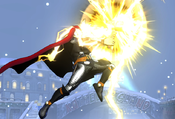
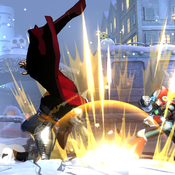
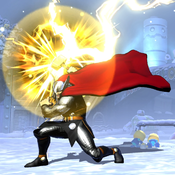
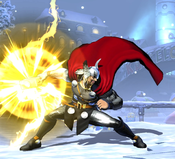
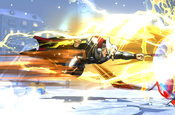
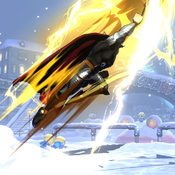
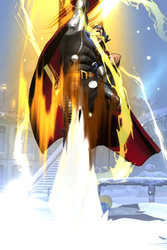
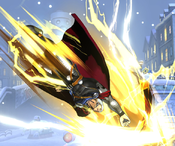
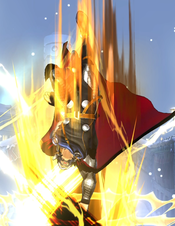
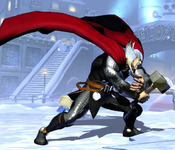
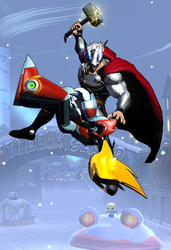
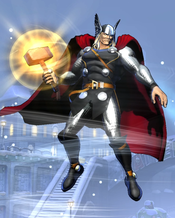
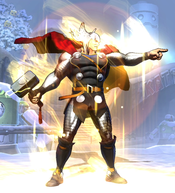
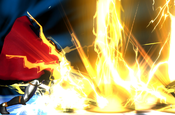
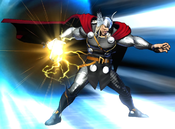
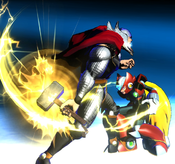
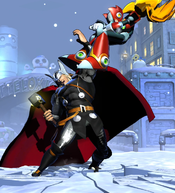
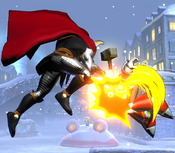
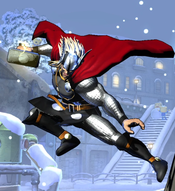
Thor and Doom work extremely well together, not least because of an extremely strong raw-tag game. Thor can tag to doom off a basic magic sequence in the corner, leading to huge damage and meter gain, as well as off any grounded grab anywhere on screen. Thor also uses both Plasma Beam and Hidden Missiles extremely well, and Doom's TACs add a potent weapon to Thor's arsenal. S tier pairing.
| (57 intermediate revisions by 11 users not shown) | |||
| Line 1: | Line 1: | ||
{{ | <div style="display: flex; flex-wrap:wrap-reverse;"> | ||
<div style="display: flex;flex-direction: column;flex:5;min-width:300px;padding: 10px;"> | |||
{{Character Subnav UMVC3|name=Thor}} | |||
==Introduction== | |||
"Behold, I am Thor! God of Thunder, Son of Odin, and Defender of Asgard! If thou art foolish enough to challenge Thor, you will find Mjolnir powerful enough to break your skull!" | |||
'''In UMvC3,''' Thor offers a unique take on the 8-way airdasher archetype. While his forward ground dash is quite slow, Thor is impressively speedy in the air. Thor has a slow - but powerful - beam, as well as specials with projectile nullification or even armor, which when paired with his huge health pool (the largest in the game), can be used to bully his way toward opponents. Once up close, Thor sports a great command grab both on the ground and in the air, which he can use to start damaging combos. | |||
Thor is | |||
=== | {{ProConTable | ||
| pros = | |||
*'''Tank Health:''' Highest health total in the game allows Thor to survive combos that would kill the rest of the cast, endure large amounts of chip damage, and play a "grind game" where he forces longer battles that whittle away health over time. | |||
*'''Damage:''' High damage potential, especially in the corner, with extremely damaging level 1 hypers and access to unscaled damage via Mighty Spark (236X). | |||
*'''Strong Aerial Mobility:''' Thor has a relatively fast 8-way airdash alongside Mighty Strike (421X), which allows Thor to advance forward while protected by a large hitbox. Mighty Strike also destroys projectiles and has armor when charged, allowing it to blow through an opponent's keepaway game. | |||
*'''Great Mixups:''' Thor has powerful strike/throw mixups and resets utilizing his Mighty Hurricane (63214X) command grab, on the ground or in the air. | |||
*'''TAC Infinites:''' Consistent TAC Infinites from every direction and screen position. | |||
| cons = | |||
*'''Grounded Attacks:''' Thor's grounded attacks are very underwhelming, with poor reach and slow speed. His grounded forward dash is also extremely slow (although his grounded backdash is decently fast). | |||
*'''Very Poor Normals:''' Stubby, awkward normals, and an inability to chain M grounded normals into H normals make for a bad normal game. | |||
*'''Bad X-Factor:''' Gains no speed boost in X-Factor and is a relatively nonthreatening anchor. | |||
*'''Dependent on Assists:''' Thor is constantly depending on assist calls to patch the holes in his neutral game. | |||
}} | |||
=== Unique Mechanic === | |||
Thor can cancel most of his grounded normals and all of his grounded specials into Mighty Speech (22H), a unique taunt that generates meter. However, Thor's speech has lengthy recovery is only useful in a few situations. Thor can also cancel all of his assists as Cross-over Counters into Mighty Speech. | |||
</div> | |||
<div style="display: flex;flex-direction: column;flex:2;min-width:350px;padding: 10px;">{{UMVC3_Character_Query|reversals=63214XX}}</div></div> | |||
== Move List == | |||
=== Assists === | |||
{{MoveData | |||
|image=UMVC3_Thor_AssistA.png | |||
|caption= | |||
|name=Mighty Spark | |||
|input=Assist A | |||
|data= | |||
{{AttackData-UMVC3 | |||
|damage=13,000 x4 (unscaled) + 35,000 x3 | |||
|guard=Mid | |||
|startup=47 | |||
|active=22~27 | |||
|recovery=124, 94 | |||
|onhit=- | |||
|onblock=- | |||
|properties=Priority: Low, Beam Durability: 5 per frame for 3 frames | |||
|description= | |||
THC Hyper: Mighty Thunder. Thor appears on stage and channels thunder from his hammer, creating a spark in front of him. After 20 additional frames, the spark shoots forward as a short-lived beam projectile. The spark hits up to four times and deals damage that ignores damage scaling, but has very short range. However, Thor appears in front of the point character, which can help mitigate the spark's short range, at the cost of leaving him more vulnerable than traditional beam assists. The hammer also reaches lower than the beam, allowing it to hit characters who would otherwise be able to crouch under this attack. | |||
The beam portion has very high total durability by assist standards, allowing it to easily destroy other common projectile assists such as Doom's Plasma Beam or Sentinel's drones. In practice, this can be very difficult to actually perform. Thor's beam assist is very slow, at 47 frames of startup plus an additional 20 frames for the beam to actually fire. During that time, either the assist you were trying to beat, or the opponent's point character may have already hit Thor. | |||
}} | |||
}} | |||
{{MoveData | |||
|image=UMVC3_Thor_AssistB.png | |||
|caption= | |||
|name=Mighty Smash | |||
|input=Assist B | |||
|data= | |||
{{AttackData-UMVC3 | |||
|damage=50,000 x2 | |||
|guard=Mid | |||
|startup=37 | |||
|active=5(16)10 | |||
|recovery=114, 84 | |||
|onhit=- | |||
|onblock=- | |||
|properties=Invuln (as Crossover Counter) frames 1 - ???, {{groundbounce}} (second hit) | |||
|description= | |||
THC Hyper: Mighty Tornado. Thor jumps upwards - which knocks opponents up on hit - then slams back down to the ground, causing a Ground Bounce. Can be useful as an Alpha Counter, because it starts a very damaging combo on hit. | |||
}} | |||
}} | |||
{{MoveData | |||
|image=UMVC3_Thor_AssistY.png | |||
|caption= | |||
|name=Mighty Strike | |||
|input=Assist Y | |||
|data= | |||
{{AttackData-UMVC3 | |||
|damage=70,000 x2 | |||
|guard=Mid | |||
|startup=44 | |||
|active=11 | |||
|recovery=126, 96 | |||
|onhit=- | |||
|onblock=- | |||
|properties={{projnull}}, {{strk}} | |||
|description= | |||
THC Hyper: Mighty Tornado. Thor leaps at an up-forward, anti-air angle. Mighty Strike destroys Low and Medium Priority projectiles on contact but is only near the ground for a short period of time. It has a hard time hitting grounded opponents, especially if they are crouching, and pops opponents into the air on hit. | |||
}} | |||
}} | |||
=== Ground Normals === | |||
{{MoveData | |||
|image=UMVC3_Thor_5L.png | |||
|caption= | |||
|name=Stand Light | |||
|input=5L | |||
|data= | |||
{{AttackData-UMVC3 | |||
|damage=65,000 | |||
|guard=Mid | |||
|startup=8 | |||
|active=3 | |||
|recovery=23 | |||
|onhit=-8 | |||
|onblock=-10 | |||
|properties=- | |||
|description= | |||
- | |||
}} | |||
}} | |||
{{ | {{MoveData | ||
|image=UMVC3_Thor_5M.png | |||
|caption= | |||
|name=Stand Medium | |||
|input=5M | |||
|data= | |||
{{AttackData-UMVC3 | |||
|damage=90,000 | |||
|guard=Mid | |||
|startup=13 | |||
|active=3 | |||
|recovery=30 | |||
|onhit=-10 | |||
|onblock=-13 | |||
|properties=- | |||
|description= | |||
- | |||
}} | |||
}} | }} | ||
{{MoveData | |||
|image=UMVC3_Thor_5H.png | |||
|caption= | |||
|name=Stand Heavy | |||
|input=5H | |||
|data= | |||
{{AttackData-UMVC3 | |||
|damage=110,000 | |||
|guard=Mid | |||
|startup=18 | |||
|active=2 | |||
|recovery=36 | |||
|onhit=-7 | |||
|onblock=-12 | |||
|properties={{strk}} | |||
|description= | |||
Thor performs a wide (by his standards) horizontal swing with his hammer, which knocks opponents into the air on hit. | |||
5H can be kara-canceled into Thor's command grab (63214X) to slightly increase the grab's range. <code><nowiki>2L > 5H~63214L</nowiki></code> is a simple tickthrow setup that will catch opponents holding down-back. | |||
}} | |||
}} | |||
=== | {{MoveData | ||
|image=UMVC3_Thor_2L.png | |||
|caption= | |||
|name=Crouching Light | |||
|input=2L | |||
|data= | |||
{{AttackData-UMVC3 | |||
|damage=63,000 | |||
|guard=Low | |||
|startup=7 | |||
|active=3 | |||
|recovery=24 | |||
|onhit=-9 | |||
|onblock=-11 | |||
|properties=- | |||
|description= | |||
- | |||
}} | |||
}} | |||
=== | {{MoveData | ||
|image=UMVC3_Thor_2M.png | |||
|caption= | |||
|name=Crouching Medium | |||
|input=2M | |||
|data= | |||
{{AttackData-UMVC3 | |||
|damage=40,000 x3 | |||
|guard=Low | |||
|startup=13 | |||
|active=12 | |||
|recovery=19 | |||
|onhit=-2 | |||
|onblock=-5 | |||
|properties= | |||
|description= | |||
Thor spins his hammer, creating a ring of electricity that can hit up to three times directly in front of himself, angled slightly upward. Has awful range. | |||
}} | |||
}} | |||
{{MoveData | |||
|image=UMVC3_Thor_2H.png | |||
|caption= | |||
|name=Crouching Heavy | |||
|input=2H | |||
|data= | |||
{{AttackData-UMVC3 | |||
|damage=105,000 | |||
|guard=Low | |||
|startup=16 | |||
|active=4 | |||
|recovery=36 | |||
|onhit=- | |||
|onblock=-14 | |||
|properties={{strk}}, {{softknockdown}} | |||
|description= | |||
Standard sweep attack. | |||
}} | |||
}} | |||
{{MoveData | |||
|image=UMVC3_Thor_5S.png | |||
|caption= | |||
|name=Launcher/Special | |||
|input=S | |||
|data= | |||
{{AttackData-UMVC3 | |||
|damage=110,000 | |||
|guard=Mid | |||
|startup=11 | |||
|active=4 | |||
|recovery=28 | |||
|onhit=Launch | |||
|onblock=-6 | |||
|properties={{launch}}, {{nocancel}} | |||
|description= | |||
- | |||
}} | |||
}} | |||
=== | === Aerial Normals === | ||
{{ | {{MoveData | ||
|image=UMVC3_Thor_jL.png | |||
|caption= | |||
|name=Jumping Light | |||
|input=j.5L | |||
|data= | |||
{{AttackData-UMVC3 | |||
|damage=68,000 | |||
|guard=OH | |||
|startup=6 | |||
|active=8 | |||
|recovery=17 | |||
|onhit=+16 | |||
|onblock=+14 | |||
|properties=- | |||
|description= | |||
Jumping knee attack. Mainly useful for tick throws and air resets into Thor's command grab due to its low hitstun/blockstun. Thor often wants to cancel his airdash into a normal, even a whiffed one, to avoid the slowdown near the end of his airdash animations, and j.5L is a low-commitment choice. | |||
}} | |||
}} | }} | ||
=== | {{MoveData | ||
|image=UMVC3_Thor_jM.png | |||
|caption= | |||
|name=Jumping Medium | |||
|input=j.5M | |||
|data= | |||
{{AttackData-UMVC3 | |||
|damage=85,000 | |||
|guard=OH | |||
|startup=13 | |||
|active=4 | |||
|recovery=27 | |||
|onhit=+21 | |||
|onblock=+18 | |||
|properties= | |||
|description= | |||
Thor performs a flying dropkick with solid reach. Strong neutral tool besides being air combo filler. | |||
If Thor performs a down-forward (or down/down-back) airdash at minimum airdash height and cancels the dash into j.5M, the kick will land-cancel just before becoming active and whiff. This can be useful as a fakeout and mixup option by intentionally whiffing a j.5M that looks like it should connect, then grabbing the opponent while they expect to be in blockstun. | |||
}} | |||
}} | |||
{{ | {{MoveData | ||
|image=UMVC3_Thor_jH.png | |||
|caption= | |||
{{ | |name=Jumping Heavy | ||
|input=j.5H | |||
|data= | |||
{{AttackData-UMVC3 | |||
|damage=100,000 | |||
|guard=OH | |||
|startup=16 | |||
|active=Until grounded/contact | |||
|recovery=1 | |||
|onhit=+23 | |||
|onblock=+21 | |||
|properties= | |||
|description= | |||
Falling elbow drop. Thor continues on his current jump arc while holding the attack pose, with active frames all the way down. If Thor performs j.5H while in Flight mode, it ends Flight, similarly to how j.5S does. | |||
j.5H is a good pressure tool and Throw OS with high reward on contact due to having almost no recovery. If Thor's travel arc seems dangerous or punishable, it can be whiff-canceled at any point into one of Thor's air specials (including Flight) in order to escape to safety. | |||
}} | |||
}} | |||
{{ | {{MoveData | ||
|image=UMVC3_Thor_jS.png | |||
{{ | |caption= | ||
|name=Jumping Special | |||
|input=j.5S | |||
|data= | |||
{{AttackData-UMVC3 | |||
|damage=110,000 | |||
|guard=OH | |||
|startup=14 | |||
|active=5 | |||
|recovery=37 | |||
|onhit=+21 | |||
|onblock=+18 | |||
|properties={{aircombofinisher}} | |||
|description= | |||
Aerial hammer swing. Can hit cross-up, but only just barely. Has very high hitstun and easily cancels into M Air Mighty Strike for a combo or continued pressure. | |||
}} | |||
}} | |||
=== Special Moves === | === Special Moves === | ||
{{ | {{MoveData | ||
{{ | |image=UMVC3_Thor_236X_Charge.png | ||
{{ | |caption=Thor's initial charge of Mighty Spark has a hitbox around the hammer | ||
{{ | |image2=UMVC3_Thor_236X_Beam.png | ||
{{ | |caption2="Mjolnir!" | ||
{{ | |name=Mighty Spark | ||
{{ | |input=236X | ||
{{ | |data= | ||
{{ | {{AttackData-UMVC3 | ||
{{ | |version=L | ||
{{ | |subtitle={{qcf}} + {{l}} | ||
{{ | |damage=13,000 x2 (unscaled) + 80,000 | ||
{{ | |guard=High | ||
{{ | |startup=15 + 10 | ||
|active=19 | |||
{{ | |recovery=12 | ||
|onhit=+8 | |||
|onblock=+5 | |||
|properties={{airok}}, Priority: Low, Beam Durability: 5 per frame for 1 frame | |||
}} | |||
{{AttackData-UMVC3 | |||
|version=M | |||
|subtitle={{qcf}} + {{m}} | |||
|damage=13,000 x4 (unscaled) + 40,000 x3 | |||
|guard=High | |||
|startup=23 + 20 | |||
|active=32 | |||
|recovery=3 | |||
|onhit=+16 | |||
|onblock=+12 | |||
|properties={{airok}}, Priority: Low, Beam Durability: 5 per frame for 3 frames | |||
}} | |||
{{AttackData-UMVC3 | |||
|version=H | |||
|subtitle={{qcf}} + {{h}} | |||
|damage=13,000 x6 (unscaled) + 35,000 x5 | |||
|guard=High | |||
|startup=30 + 30 | |||
|active=45 | |||
|recovery=0 (!!) | |||
|onhit=+18 | |||
|onblock=+14 | |||
|properties={{airok}}, Priority: Low, Beam Durability: 5 per frame for 5 frames | |||
|description= | |||
Thor's beam attack. Thor charges his hammer, causing a short-range spark to appear around it. After an additional duration, the spark fires forward as a beam. Higher button strength is slower to start up and lasts longer, but deals more damage, has higher duration, and lower recovery. Normal-sized characters can crouch underneath all versions of Mighty Spark's beam, limiting its potential as a sustained Chip Damage tool. | |||
Despite being a projectile and Thor's only long-range option, Mighty Spark has several properties that make it useful up-close. The initial "spark" around Thor's hammer notably deals fully unscaled damage. Although the 13,000 base damage per hit may not seem impressive, this can actually be very high damage output compared to heavily scaled hits deep into a combo. This is especially true if you manage to connect H Mighty Spark, which hits 6 times for 78,000 unscaled damage in addition to the high (but scaled) damage of the beam itself. The very fast recovery on Mighty Spark means that Thor is always plus afterwards, and Thor can even link a normal attack after a close-range Spark to continue the combo. | |||
}} | |||
}} | |||
{{MoveData | |||
|image=UMVC3_Thor_j236X_Charge.png | |||
|caption= | |||
|image2=UMVC3_Thor_j236X_Beam.png | |||
|name=Air Mighty Spark | |||
|input=j.236X | |||
|data= | |||
{{AttackData-UMVC3 | |||
|version=L | |||
|subtitle=(in air) <br> {{qcf}} + {{l}} | |||
|damage=13,000 x2 (unscaled) + 80,000 | |||
|guard=High | |||
|startup=13 + 10 | |||
|active=19 | |||
|recovery=9 | |||
|onhit=+4 | |||
|onblock=-4 | |||
|properties=Priority: Low, Beam Durability: 5 per frame for 1 frame | |||
}} | |||
{{AttackData-UMVC3 | |||
|version=M | |||
|subtitle=(in air) <br> {{qcf}} + {{m}} | |||
|damage=13,000 x4 (unscaled) + 40,000 x3 | |||
|guard=High | |||
|startup=21 + 20 | |||
|active=32 | |||
|recovery=4 | |||
|onhit=+8 | |||
|onblock=-2 | |||
|properties=Priority: Low, Beam Durability: 5 per frame for 3 frames | |||
}} | |||
{{AttackData-UMVC3 | |||
|version=H | |||
|subtitle=(in air) <br> {{qcf}} + {{h}} | |||
|damage=13,000 x6 (unscaled) + 35,000 x5 | |||
|guard=High | |||
|startup=28 + 30 | |||
|active=45 | |||
|recovery=0 (!!) | |||
|onhit=+13 | |||
|onblock=+1 | |||
|properties={{truesoftknockdown}} (only on last hit of the spark before beam), Priority: Low, Beam Durability: 5 per frame for 5 frames | |||
|description= | |||
Air version of Mighty Spark. Thor hovers in the air while performing the move. It is functionally identical to the grounded version, with all the same properties and uses, but starts up very slightly faster. TK L Mighty Spark (j.2369L) can be useful for controlling space against characters who like to fight at regular jump height, like Nova, Spencer, and Dante. | |||
The last hit of the "spark" part of Mighty Spark causes a True Soft Knockdown. It is possible to space Air Mighty Spark so that this hit connects and the following beam whiffs, by juggling the opponent sufficiently above or below Thor. If done properly, Thor can perform very long, extended combos by landing and relaunching after Mighty Spark, especially in the corner. | |||
}} | |||
}} | |||
{{MoveData | |||
|image=UMVC3_Thor_623X_First.png | |||
|image2=UMVC3_Thor_623X_Second.png | |||
|image3=UMVC3_Thor_623-H-.png | |||
|caption3=H Mighty Smash can be charged by holding the button. | |||
|name=Mighty Smash | |||
|input=623X | |||
|data= | |||
{{AttackData-UMVC3 | |||
|version=L | |||
|subtitle={{dp}} + {{l}} | |||
|damage=70,000 x2 | |||
|guard=Mid | |||
|startup=12 | |||
|active=6(17)3 | |||
|recovery=28 | |||
|onhit=- | |||
|onblock=-4 | |||
|properties={{strk}} (first hit), {{hardknockdown}} (second hit) | |||
}} | |||
{{AttackData-UMVC3 | |||
|version=M | |||
|subtitle={{dp}} + {{m}} | |||
|damage=70,000 + 100,000 | |||
|guard=Mid | |||
|startup=12 | |||
|active=6(17)3 | |||
|recovery=33 | |||
|onhit=- | |||
|onblock=-9 | |||
|properties={{strk}} (first hit), {{groundbounce}} into {{hardknockdown}} (second hit) | |||
}} | |||
{{AttackData-UMVC3 | |||
|version=H | |||
|subtitle={{dp}} + {{h}} | |||
|damage=70,000 + 100,000 + 20,000 x3 ~ x5 | |||
|guard=Mid | |||
|startup=13 ~ 33 | |||
|active=6(19)3(6)8 ~ 12 | |||
|recovery=13 ~ 9 | |||
|onhit=+20 | |||
|onblock=+9 ~ +8 | |||
|properties={{strk}} (first hit), {{otg}} (after second hit), armored frames 32-48 (when charged) | |||
|description= | |||
Thor hops into the air (knocking the opponent upwards along with him) then slams down with his hammer. Higher button strengths are slower but gain additional properties when Thor slams down. | |||
*L version only causes a basic Hard Knockdown, and is rarely used due to Thor's poor OTG options making it difficult for him to capitalize on. | |||
*M version causes a Ground Bounce, making it a staple combo tool. It is Thor's only Ground Bounce attack (other than Down TAC). | |||
*H version hits OTG, and is Thor's only non-hyper OTG. It allows him to relaunch opponents after a Hard Knockdown, but its slow speed can make this very difficult to connect. Additionally, it knocks opponents quite high into the air on a successful OTG hit, which can make following up difficult at higher levels of Hitstun Deterioration. The H version can also be charged by holding down the button. This further increases the startup, but a fully charged H Mighty Smash gains Super Armor and additional OTG hits. | |||
}} | |||
}} | |||
{{MoveData | |||
|image=UMVC3_Thor_421-X-.png | |||
|caption=Charging | |||
|image2=UMVC3_Thor_421L.png | |||
|caption2=L Version | |||
|image3=UMVC3_Thor_421M.png | |||
|caption3=M Version | |||
|image4=UMVC3_Thor_421H.png | |||
|caption4=H Version | |||
|name=Mighty Strike | |||
|input=421X (Can be charged) | |||
|data= | |||
{{AttackData-UMVC3 | |||
|version=L | |||
|subtitle={{rdp}} + {{l}} | |||
|damage=70,000 x2 (when charged: 50,000 x2 + 100,000) | |||
|guard=Mid | |||
|startup=20 ~ 31 | |||
|active=11 ~ 11(1)11 | |||
|recovery=23 ~ 12 | |||
|onhit=+13 | |||
|onblock=-18 ~ -7 | |||
|properties={{airok}}, {{strk}}, {{projnull}}, {{truesoftknockdown}} (when fully charged), armored frames 28-44 (when fully charged) | |||
}} | |||
{{AttackData-UMVC3 | |||
|version=M | |||
|subtitle={{rdp}} + {{m}} | |||
|damage=70,000 x2 (when charged: 50,000 x2 + 100,000) | |||
|guard=Mid | |||
|startup=20 ~ 31 | |||
|active=11 ~ 11(1)11 | |||
|recovery=23 ~ 10 | |||
|onhit=+4 | |||
|onblock=-6 ~ +5 | |||
|properties={{airok}}, {{strk}}, {{projnull}}, {{truesoftknockdown}} (when fully charged), armored frames 28-44 (when fully charged) | |||
}} | |||
{{AttackData-UMVC3 | |||
|version=H | |||
|subtitle={{rdp}} + {{h}} | |||
|damage=70,000 x2 (when charged: 50,000 x2 + 100,000) | |||
|guard=Mid | |||
|startup=20 ~ 31 | |||
|active=11 ~ 11(1)11 | |||
|recovery=23 ~ 10 | |||
|onhit=+4 | |||
|onblock=-8 ~ -7 | |||
|properties={{airok}}, {{strk}}, {{projnull}}, {{truesoftknockdown}} (when fully charged), armored frames 28-44 (when fully charged) | |||
|description= | |||
Thor charges forward, striking in front of himself, in a direction determined by button strength: | |||
*L version moves horizontally across the ground. | |||
*M version launches Thor at an up-forward angle. | |||
*H version launches Thor directly upwards into the air. | |||
Mighty Strike destroys Low and Medium Priority projectiles on contact and can be used by Thor to bully his way into close range against projectile-heavy zoning characters. It can also be charged, which improves the recovery and adds a hit of Super Armor, allowing it to beat many physical hits as well. | |||
Grounded Mighty Strike has poor recovery compared to its aerial version, especially the uncharged version, which hurts the risk/reward of using it. In general, it is better to use the air version of Mighty Strike as a mobility and approach tool. | |||
}} | |||
}} | |||
{{MoveData | |||
|image=UMVC3_Thor_j421L.png | |||
|caption=L Version | |||
|image2=UMVC3_Thor_j421M.png | |||
|caption2=M Version | |||
|image3=UMVC3_Thor_j421H.png | |||
|caption3=H Version | |||
|name=Air Mighty Strike | |||
|input=j.421X (Can be charged) | |||
|data= | |||
{{AttackData-UMVC3 | |||
|version=L | |||
|subtitle=(in air) <br> {{rdp}} + {{l}} | |||
|damage=70,000 x2 (when charged: 50,000 x2 + 100,000) | |||
|guard=Mid | |||
|startup=20 ~ 31 | |||
|active=11 ~ 11(1)11 | |||
|recovery=23 ~ 12 | |||
|onhit=+13 | |||
|onblock=-18 ~ -7 | |||
|properties={{strk}}, {{projnull}}, {{truesoftknockdown}} (when fully charged), armored frames 28-44 (when fully charged) | |||
}} | |||
{{AttackData-UMVC3 | |||
|version=M | |||
|subtitle=(in air) <br> {{rdp}} + {{m}} | |||
|damage=70,000 x2 (when charged: 50,000 x2 + 100,000) | |||
|guard=Mid | |||
|startup=20 ~ 31 | |||
|active=11 ~ 11(1)11 | |||
|recovery=15 ~ 1 / Until Grounded+11 | |||
|onhit=+4 | |||
|onblock=-6 ~ +5 | |||
|properties={{strk}}, {{projnull}}, {{truesoftknockdown}} (when fully charged), armored frames 28-44 (when fully charged) | |||
}} | |||
{{AttackData-UMVC3 | |||
|version=H | |||
|subtitle=(in air) <br> {{rdp}} + {{h}} | |||
|damage=70,000 x2 (when charged: 50,000 x2 + 100,000) | |||
|guard=Mid | |||
|startup=20 ~ 31 | |||
|active=11 ~ 11(1)11 | |||
|recovery=23 ~ 10 / Until Grounded+11 | |||
|onhit=+4 | |||
|onblock=-8 ~ -7 | |||
|properties={{strk}}, {{projnull}}, {{truesoftknockdown}} (when fully charged), armored frames 28-44 (when fully charged) | |||
|description= | |||
Air version of Mighty Strike. Almost identical but with superior recovery. The M and H versions can also be land-canceled. | |||
*L version travels horizontally forwards through the air. | |||
*M version travels at a down-forward angle. | |||
*H version travels straight down. | |||
Like the grounded version, Air Mighty Smash is a mobility and approach tool that Thor can use to force his way in through projectile attacks. It is especially useful against characters who regularly utilize projectile-based attack in neutral, like Zero, Morrigan, and Captain America. Using M or H Air Mighty Strike to attack a grounded opponent is very advantageous and starts a combo on hit even uncharged. The True Soft Knockdown on a charged hit makes it a high-damage option for certain combo routes if Thor can set up a way to land it. | |||
}} | |||
}} | |||
{{MoveData | |||
|image=UMVC3_Thor_63214X.png | |||
|image2=UMVC3_Thor_63214X_Grab.png | |||
|caption= | |||
|name=Mighty Hurricane | |||
|input=63214X | |||
|data= | |||
{{AttackData-UMVC3 | |||
|version=L | |||
|subtitle={{hcb}} + {{l}} | |||
|damage=130,000 | |||
|guard=Throw / Airthrow | |||
|startup=5 | |||
|active=1 | |||
|recovery=40 | |||
|onhit=- | |||
|onblock=- | |||
|properties={{airok}}, {{hardknockdown}} | |||
}} | |||
{{AttackData-UMVC3 | |||
|version=M | |||
|subtitle={{hcb}} + {{m}} | |||
|damage=150,000 | |||
|guard=Throw / Airthrow | |||
|startup=3 | |||
|active=1 | |||
|recovery=42 | |||
|onhit=- | |||
|onblock=- | |||
|properties={{airok}}, {{hardknockdown}} | |||
}} | |||
{{AttackData-UMVC3 | |||
|version=H | |||
|subtitle={{hcb}} + {{h}} | |||
|damage=180,000 | |||
|guard=Throw / Airthrow | |||
|startup=1 | |||
|active=2 | |||
|recovery=43 | |||
|onhit=- | |||
|onblock=- | |||
|properties={{airok}}, {{hardknockdown}} | |||
|description= | |||
Thor's command grab, and an important part of his offense. Can be done on the ground as a regular throw, or while airborne as an airthrow. Heavier button strengths are faster but have shorter range. | |||
On a successful grab - grounded or airborne - Thor lifts the opponent up and then slams them into the ground, bouncing them slightly upwards. Despite appearances, this is not considered a Ground Bounce and does not prevent Thor from using an actual bounce later in the combo. It allows Thor to connect a normal afterwards to start a combo - usually 2M or 5S. If Thor does not catch the opponent with an attack, they will fall back down for a Hard Knockdown. | |||
H version can option-select a throw tech, which is useful at round start. | |||
}} | |||
}} | |||
{{MoveData | |||
|image=UMVC3_Thor_214S.png | |||
|caption= | |||
|name=Flight | |||
|input=214S | |||
|data= | |||
{{AttackData-UMVC3 | |||
|damage=- | |||
|guard=- | |||
|startup=30 | |||
|active=90 | |||
|recovery=? | |||
|onhit=- | |||
|onblock=- | |||
|properties={{airok}}, 90 frame Flight mode. | |||
|description= | |||
Thor's Flight mode. Once activated, Thor floats in the air, and can use his airdashes and aerial specials an unlimited number of times. Note that activating Flight on the ground does not raise Thor above minimum airdash height, preventing him from airdashing unless he manually floats further up. | |||
At 30f startup, Thor's flight mode activation is extremely slow, and he does not gain any meaningful advantage from canceling attacks into it, nor does he have practical combos into Flight mode. He can still use it as a mobility tool to perform multiple airdashes in quick succession, or to cancel an aerial normal and halt his momentum. | |||
}} | |||
}} | |||
== | {{MoveData | ||
|image=UMVC3_Thor_22H.png | |||
|caption= | |||
|name=Mighty Speech | |||
|input=22H | |||
|data= | |||
{{AttackData-UMVC3 | |||
|damage=HEED MY WORDS | |||
|guard=NEVER SHALL THE | |||
|startup=EVILDOERS! IF THOU | |||
|active=DOST WISH TO CHALLENGE | |||
|recovery=THE ODINSON, THOU WILL | |||
|onhit=FACE THE DIVINE POWER | |||
|onblock=OF MIGHTY MJOLNIR | |||
|properties=GOD OF THUNDER RELENT | |||
|description= | |||
Thor stands in place, gains an aura, and begins talking. This move can be maintained indefinitely by holding down the H button. After 18 initial frames, Thor begins to generate hyper meter at a rate of 24% of a bar per second. Releasing H will cause Thor to stop talking and stop generating meter, but has 22 frames of additional recovery before Thor can act again. | |||
Mighty Speech can be used for a little free meter after a snap or kill while waiting for the oncoming character. Thor can also cancel his other grounded specials into Mighty Speech. This can situationally be used to save Thor from being punished in the event of a whiffed Mighty Spark or Mighty Hurricane. | |||
}} | |||
}} | |||
=== Combos === | === Hyper Combos === | ||
{{MoveData | |||
|image=UMVC3_Thor_236XX.png | |||
|caption= | |||
|name=Mighty Tornado | |||
|input=236XX (1 bar) | |||
|data= | |||
{{AttackData-UMVC3 | |||
|damage=30,000 x15 ~ x29 | |||
|guard=Mid | |||
|startup=20+2 | |||
|active=85 | |||
|recovery=58 (in air: 30 / Until Grounded) | |||
|onhit=- | |||
|onblock=-35 | |||
|properties={{airok}}, mashable, (True) {{softknockdown}}, Priority: High, Beam Durability: 1 per frame for 15 frames. | |||
|description= | |||
Thor causes a large tornado of thunder to appear around himself, hitting several times. This is Thor's standard combo ender. It has fairly slow startup, and so only a handful of Thor's attacks can reliably combo into it, but the hyper itself deals solid damage. | |||
For the air version of Mighty Tornado, every hit except for the final hit causes a True (forced) Soft Knockdown, while the final hit causes a Soft Knockdown that the opponent can air recover from. The grounded version of Mighty Tornado always causes a True Soft Knockdown. | |||
Mighty Tornado can be used in certain Guard Break setups, taking advantage of its two frames of post-flash startup. A fast aerial normal canceled into Air Mighty Tornado can be DHC'd into an airgrab hyper, from characters like She-Hulk, Spider-Man, or Frank West. The DHC can be performed after the flash (and after the opponent leaves blockstun from the normal you canceled) but before the Tornado actually connects, making the airgrab hyper either difficult or impossible to escape. | |||
}} | |||
}} | |||
{{MoveData | |||
|image=UMVC3_Thor_623XX.png | |||
|caption= | |||
|name=Mighty Thunder | |||
|input=623XX (1 bar) | |||
|data= | |||
{{AttackData-UMVC3 | |||
|damage=130,000 per hit, up to 4 hits | |||
|guard=Mid | |||
|startup=24+14 | |||
|active=40 | |||
|recovery=63 | |||
|onhit=- | |||
|onblock=-71 | |||
|properties={{otg}}, {{hardknockdown}}, Priority: High, Durability: 1 per strike, scales by 0.8. | |||
|description= | |||
<s>Store Brand Magnetic Shockwave</s> <br> | |||
Thor causes bolts of lightning to rain from the sky. The first bolt strikes immediately in front of Thor, and additional bolts strike successively farther away. It is an alternative OTG for situations where H Mighty Smash will not connect in time. It can also be used as a screen-clear against non-hyper projectiles, but has surprisingly poor durability when clashing with other hypers. | |||
Mighty Thunder deals very good damage if it hits as much as possible, but will deal significantly less damage if done close to the corner (most bolts will strike off screen) or from far away. | |||
}} | |||
}} | |||
== | {{MoveData | ||
|image=UMVC3_Thor_63214XX.png | |||
|image2=UMVC3_Thor_63214XX_Grab.png | |||
|caption= | |||
|name=Mighty Punish | |||
|input=63214XX (1 bar) | |||
|data= | |||
{{AttackData-UMVC3 | |||
|damage=90,000 + 220,000 | |||
|guard=Mid | |||
|startup=4+0 | |||
|active=2 | |||
|recovery=23 | |||
|onhit=- | |||
|onblock=- | |||
|properties=Invuln until frame 6, {{hardknockdown}} | |||
|description= | |||
Cinematic command grab hyper. Can be thought of as an enhanced version of Mighty Hurricane. However, it does not start a regular combo on a successful grab the way that Hurricane does (you can combo afterwards using a DHC, depending on the second character). | |||
It is quite fast, can't be reacted to post-flash and is invincible up through the actual grab, so it can be mashed as a reversal against close-range pressure. | |||
Because of this hyper's fast total duration, it can be used as a DHC whiff in order to combo into non-hyper attacks. This concept was popularized by Abegen who would DHC from a long, lingering hyper (like Tron's Servbot Takeout) into whiffed Mighty Punish, then perform several unscaled Mighty Sparks while the opponent was being hit for huge damage. | |||
Mighty Punish can also be used in gimmicky DHC setups where you perform an air hyper against a grounded opponent, then DHC to Thor's grab before the hyper actually hits. | |||
If you mistime your tickthrow Mighty Hurricane, you can cancel into this move as an emergency second chance. | |||
}} | |||
}} | |||
=== Universal Mechanics === | |||
{{MoveData | |||
|image=UMVC3_Thor_GroundThrow.png | |||
|caption= | |||
|name=Ground Throw | |||
|input=6H, 4H | |||
|data= | |||
{{AttackData-UMVC3 | |||
|damage=50,000 (initial throw) + 30,000 (landing) | |||
|guard=Throw | |||
|startup=1 | |||
|active=1 | |||
|recovery=- | |||
|onhit=- | |||
|onblock=- | |||
|properties={{hardknockdown}} | |||
|description= | |||
Thor grabs the opponent and chucks them directly upwards into the air, where they fall back down onto him. Fairly unique among normal throws because Thor can attack the opponent before they land for the Hard Knockdown, starting a full combo without having to use an OTG. If Thor does not attack them on the way down, the opponent will take 30,000 additional damage when they hit the ground, and could still technically be OTG'd upon landing. | |||
}} | |||
}} | |||
{{MoveData | |||
|image=UMVC3_Thor_AirThrow.png | |||
|caption= | |||
|name=Air Throw | |||
|input=j.6H, j.4H | |||
|data= | |||
{{AttackData-UMVC3 | |||
|damage=80,000 | |||
|guard=Airthrow | |||
|startup=1 | |||
|active=1 | |||
|recovery=- | |||
|onhit=- | |||
|onblock=- | |||
|properties={{hardknockdown}} | |||
|description= | |||
Thor spikes the opponent straight down to the ground. Unlike the ground throw, it causes an immediate Hard Knockdown, and Thor can not start a combo afterwards. Do not use this airthrow, use Air Mighty Hurricane instead. | |||
}} | |||
}} | |||
{{MoveData | |||
|image=UMVC3_Thor_5H.png | |||
|caption= | |||
|name=Snap Back | |||
|input={{qcf}}+[[File:A1.png]]/[[File:A2.png]] | |||
|data= | |||
{{AttackData-UMVC3 | |||
|damage=50,000 | |||
|guard=Mid | |||
|startup=2 | |||
|active=2 | |||
|recovery=36 | |||
|onhit=- | |||
|onblock=-12 | |||
|properties=Snapback | |||
|description= | |||
Animation and hitbox based on 5H. | |||
}} | |||
}} | |||
{{MoveData | |||
|image=UMVC3_Thor_HardTag.png | |||
|caption= | |||
|name=Hard Tag | |||
|input=Hold 14f [[File:A1.png]]/[[File:A2.png]] | |||
|data= | |||
{{AttackData-UMVC3 | |||
|damage=30,000 | |||
|guard=OH | |||
|startup=- | |||
|active=20 | |||
|recovery=34 | |||
|onhit=- | |||
|onblock=-15 | |||
|properties={{softknockdown}} | |||
|description= | |||
- | |||
}} | |||
}} | |||
== Team Position == | |||
Thor is usually played in either the '''Point''' or '''Second''' position. When played as a Point character, Thor's lack of solid long-range tools can be more easily compensated for with assists. He can use his strong aerial mobility to compete with other highly mobile Point characters. Although Thor's solo damage is not terrible, he becomes even stronger when he can utilize assists to easily combo into his slower special moves. | |||
Thor can be placed in the Second slot to serve as a damage engine for another lower-damage point character. His Mighty Spark assist can be exceptionally powerful if you are able to cover for its slow startup. However, Thor's support is generally suboptimal compared to his potential on point. | |||
== Notable Supports == | |||
<tabber> | |||
|-| Doctor Doom = | |||
[[File:UMVC3 Doctor Doom Icon.png|center|100px]] | |||
<center>[[File:Alpha.png|20px]][[File:Beta.png|20px]]</center> | |||
Thor and Doom work extremely well together, not least because of an extremely strong raw-tag game. Thor can tag to doom off a basic magic sequence in the corner, leading to huge damage and meter gain, as well as off any grounded grab anywhere on screen. Thor also uses both Plasma Beam and Hidden Missiles extremely well, and Doom's TACs add a potent weapon to Thor's arsenal. S tier pairing. | |||
|-| Rocket Raccoon = | |||
[[File:UMVC3 Rocket Raccoon Icon.png|center|100px]] | |||
<center>[[File:Alpha.png|20px]][[File:Gamma.png|20px]]</center> | |||
Thor can use Rocket's support extremely well, with Pendulum being one of his favorite assists and Mad Hopper an excellent DHC which he can use for stylish raw tag combos. Rocket also works very well with some of Thor's other favorite supports, such as Doom, or Strange. | |||
= | |-| Doctor Strange = | ||
[[File:UMVC3 Doctor Strange Icon.png|center|100px]] | |||
<center>[[File:Gamma.png|20px]]</center> | |||
Doctor Strange, meanwhile, possesses potentially Thor's best lateral assist in Bolts of Balthakk, and his overall support value really shines when placed behind the God of Thunder. Thor can DHC from S.Jump height Mighty Tornado into Seven Rings, leading into a full strange combo. Alternately, Thor/Strange THC is very strong and kills everything. Great pairing. | |||
|-| Dante = | |||
[[File:UMVC3 Dante Icon.png|center|100px]] | |||
<center>[[File:Alpha.png|20px]]</center> | |||
Dante's Jam Session assist is very strong for Thor, and enables his high-low game exceedingly well. He also has great ability to confirm off it at superjump height thanks to {{clr|S|j.S}}, Mighty Spark, and Mighty Strike. Furthermore, Thor can hard tag to Dante off any magic sequence, enabling Dante to do a full combo and build tons of meter. All in all, Thor and Dante work fairly well together, and Dante is one of his best partners. | |||
= | |-| Arthur = | ||
[[File:UMVC3 Arthur Icon.png|center|100px]] | |||
<center>[[File:Beta.png|20px]]</center> | |||
Arthur's Dagger Toss assist is a strong lateral assist, something Thor desperately needs. Additionally, Thor/Arthur DHC synergy is excellent, with Gold Armor into a full combo being a great way to finish off an opponent in Mighty Tornado at Superjump height. Gold Daggers are even stronger than base daggers, and enable a number of powerful combos and mixes. Great pairing. | |||
|-| M.O.D.O.K. = | |||
[[File:UMVC3 M.O.D.O.K. Icon.png|center|100px]] | |||
<center>[[File:Gamma.png|20px]]</center> | |||
MODOK's Psionic Blaster assist is extremely strong for Thor in both neutral and combos, and MODOK also offers strong TACs and Raw Tags in many of the same situations as Doctor Doom. Hyper Psionic Blaster DHC leads into a full follow up if you've saved an assist, and since thor doesn't use wallbounce, MODOK can be a strong damage engine for him. Great pairing. | |||
= | |-| Iron Man = | ||
[[File:UMVC3 Iron Man Icon.png|center|100px]] | |||
<center>[[File:Alpha.png|20px]]</center> | |||
As dollar store doom, Iron Man offers a strong beam assist, good TACs, and decent DHC synergy to Thor. He is a great partner for Thor overall, and you should feel good about playing them together. | |||
|-| Shuma-Gorath = | |||
[[File:UMVC3 Shuma-Gorath Icon.png|center|100px]] | |||
<center>[[File:Alpha.png|20px]]</center> | |||
Mystic Ray is one of thor's favorite assists. It is a full screen projectile assist and screen clear that also OTGs - what more could he want? Great assist, but outside of that the synergy is more limited. Still worth mentioning as one of his best partners, however. Shuma also enables the Thor/Dormammu pairing to actually function in a way that no other partner truly does, and is worth mentioning just for that. | |||
= | |-| Vergil = | ||
[[File:UMVC3 Vergil Icon.png|center|100px]] | |||
<center>[[File:Gamma.png|20px]]</center> | |||
Rapid Slash is an incredibly strong combo extender for Thor, who can link {{clr|H|623H}} mighty smash into {{clr|H|421[H]}} charged mighty strike. This allows him to deal huge damage and build oodles of meter off any magic series knockdown in the corner. Additionally, Thor can easily DHC into sword loops from almost any screen position, even from superjump height, thanks to the slow fall qualities of his Mighty Tornado super upon DHC. Round Trip throw into hard tag thor into command grab is an exceedingly strong incoming setup. Thor and Vergil work together very well. | |||
</tabber> | |||
</div> <br> | |||
== | == Alternate Colors == | ||
{{Chara-Colors-UMVC3}} | |||
{{Content Box|content= | |||
{{Navbox-UMVC3}} | |||
}} | |||
Latest revision as of 09:27, 4 June 2025
Introduction
"Behold, I am Thor! God of Thunder, Son of Odin, and Defender of Asgard! If thou art foolish enough to challenge Thor, you will find Mjolnir powerful enough to break your skull!"
In UMvC3, Thor offers a unique take on the 8-way airdasher archetype. While his forward ground dash is quite slow, Thor is impressively speedy in the air. Thor has a slow - but powerful - beam, as well as specials with projectile nullification or even armor, which when paired with his huge health pool (the largest in the game), can be used to bully his way toward opponents. Once up close, Thor sports a great command grab both on the ground and in the air, which he can use to start damaging combos.
| Strengths | Weaknesses |
|---|---|
|
|
Unique Mechanic
Thor can cancel most of his grounded normals and all of his grounded specials into Mighty Speech (22H), a unique taunt that generates meter. However, Thor's speech has lengthy recovery is only useful in a few situations. Thor can also cancel all of his assists as Cross-over Counters into Mighty Speech.
Move List
Assists
| Damage | Startup | Active | Recovery |
|---|---|---|---|
| 13,000 x4 (unscaled) + 35,000 x3 | 47 | 22~27 | 124, 94 |
| On Hit | On Block | Guard | Properties |
| - | - | Mid | Priority: Low, Beam Durability: 5 per frame for 3 frames |
|
THC Hyper: Mighty Thunder. Thor appears on stage and channels thunder from his hammer, creating a spark in front of him. After 20 additional frames, the spark shoots forward as a short-lived beam projectile. The spark hits up to four times and deals damage that ignores damage scaling, but has very short range. However, Thor appears in front of the point character, which can help mitigate the spark's short range, at the cost of leaving him more vulnerable than traditional beam assists. The hammer also reaches lower than the beam, allowing it to hit characters who would otherwise be able to crouch under this attack. The beam portion has very high total durability by assist standards, allowing it to easily destroy other common projectile assists such as Doom's Plasma Beam or Sentinel's drones. In practice, this can be very difficult to actually perform. Thor's beam assist is very slow, at 47 frames of startup plus an additional 20 frames for the beam to actually fire. During that time, either the assist you were trying to beat, or the opponent's point character may have already hit Thor. | |||
| Damage | Startup | Active | Recovery |
|---|---|---|---|
| 50,000 x2 | 37 | 5(16)10 | 114, 84 |
| On Hit | On Block | Guard | Properties |
| - | - | Mid | Invuln (as Crossover Counter) frames 1 - ???, |
|
THC Hyper: Mighty Tornado. Thor jumps upwards - which knocks opponents up on hit - then slams back down to the ground, causing a Ground Bounce. Can be useful as an Alpha Counter, because it starts a very damaging combo on hit. | |||
| Damage | Startup | Active | Recovery |
|---|---|---|---|
| 70,000 x2 | 44 | 11 | 126, 96 |
| On Hit | On Block | Guard | Properties |
| - | - | Mid | |
|
THC Hyper: Mighty Tornado. Thor leaps at an up-forward, anti-air angle. Mighty Strike destroys Low and Medium Priority projectiles on contact but is only near the ground for a short period of time. It has a hard time hitting grounded opponents, especially if they are crouching, and pops opponents into the air on hit. | |||
Ground Normals
| Damage | Startup | Active | Recovery |
|---|---|---|---|
| 65,000 | 8 | 3 | 23 |
| On Hit | On Block | Guard | Properties |
| -8 | -10 | Mid | - |
|
- | |||
| Damage | Startup | Active | Recovery |
|---|---|---|---|
| 90,000 | 13 | 3 | 30 |
| On Hit | On Block | Guard | Properties |
| -10 | -13 | Mid | - |
|
- | |||
| Damage | Startup | Active | Recovery |
|---|---|---|---|
| 110,000 | 18 | 2 | 36 |
| On Hit | On Block | Guard | Properties |
| -7 | -12 | Mid | |
|
Thor performs a wide (by his standards) horizontal swing with his hammer, which knocks opponents into the air on hit. 5H can be kara-canceled into Thor's command grab (63214X) to slightly increase the grab's range. | |||
| Damage | Startup | Active | Recovery |
|---|---|---|---|
| 63,000 | 7 | 3 | 24 |
| On Hit | On Block | Guard | Properties |
| -9 | -11 | Low | - |
|
- | |||
| Damage | Startup | Active | Recovery |
|---|---|---|---|
| 40,000 x3 | 13 | 12 | 19 |
| On Hit | On Block | Guard | Properties |
| -2 | -5 | Low | - |
|
Thor spins his hammer, creating a ring of electricity that can hit up to three times directly in front of himself, angled slightly upward. Has awful range. | |||
| Damage | Startup | Active | Recovery |
|---|---|---|---|
| 105,000 | 16 | 4 | 36 |
| On Hit | On Block | Guard | Properties |
| - | -14 | Low | |
|
Standard sweep attack. | |||
| Damage | Startup | Active | Recovery |
|---|---|---|---|
| 110,000 | 11 | 4 | 28 |
| On Hit | On Block | Guard | Properties |
| Launch | -6 | Mid | |
|
- | |||
Aerial Normals
| Damage | Startup | Active | Recovery |
|---|---|---|---|
| 68,000 | 6 | 8 | 17 |
| On Hit | On Block | Guard | Properties |
| +16 | +14 | OH | - |
|
Jumping knee attack. Mainly useful for tick throws and air resets into Thor's command grab due to its low hitstun/blockstun. Thor often wants to cancel his airdash into a normal, even a whiffed one, to avoid the slowdown near the end of his airdash animations, and j.5L is a low-commitment choice. | |||
| Damage | Startup | Active | Recovery |
|---|---|---|---|
| 85,000 | 13 | 4 | 27 |
| On Hit | On Block | Guard | Properties |
| +21 | +18 | OH | - |
|
Thor performs a flying dropkick with solid reach. Strong neutral tool besides being air combo filler. If Thor performs a down-forward (or down/down-back) airdash at minimum airdash height and cancels the dash into j.5M, the kick will land-cancel just before becoming active and whiff. This can be useful as a fakeout and mixup option by intentionally whiffing a j.5M that looks like it should connect, then grabbing the opponent while they expect to be in blockstun. | |||
| Damage | Startup | Active | Recovery |
|---|---|---|---|
| 100,000 | 16 | Until grounded/contact | 1 |
| On Hit | On Block | Guard | Properties |
| +23 | +21 | OH | - |
|
Falling elbow drop. Thor continues on his current jump arc while holding the attack pose, with active frames all the way down. If Thor performs j.5H while in Flight mode, it ends Flight, similarly to how j.5S does. j.5H is a good pressure tool and Throw OS with high reward on contact due to having almost no recovery. If Thor's travel arc seems dangerous or punishable, it can be whiff-canceled at any point into one of Thor's air specials (including Flight) in order to escape to safety. | |||
| Damage | Startup | Active | Recovery |
|---|---|---|---|
| 110,000 | 14 | 5 | 37 |
| On Hit | On Block | Guard | Properties |
| +21 | +18 | OH | |
|
Aerial hammer swing. Can hit cross-up, but only just barely. Has very high hitstun and easily cancels into M Air Mighty Strike for a combo or continued pressure. | |||
Special Moves
| L |
Damage | Startup | Active | Recovery |
|---|---|---|---|---|
| 13,000 x2 (unscaled) + 80,000 | 15 + 10 | 19 | 12 | |
| On Hit | On Block | Guard | Properties | |
| +8 | +5 | High | ||
| M |
Damage | Startup | Active | Recovery |
| 13,000 x4 (unscaled) + 40,000 x3 | 23 + 20 | 32 | 3 | |
| On Hit | On Block | Guard | Properties | |
| +16 | +12 | High | ||
| H |
Damage | Startup | Active | Recovery |
| 13,000 x6 (unscaled) + 35,000 x5 | 30 + 30 | 45 | 0 (!!) | |
| On Hit | On Block | Guard | Properties | |
| +18 | +14 | High | ||
|
Thor's beam attack. Thor charges his hammer, causing a short-range spark to appear around it. After an additional duration, the spark fires forward as a beam. Higher button strength is slower to start up and lasts longer, but deals more damage, has higher duration, and lower recovery. Normal-sized characters can crouch underneath all versions of Mighty Spark's beam, limiting its potential as a sustained Chip Damage tool. Despite being a projectile and Thor's only long-range option, Mighty Spark has several properties that make it useful up-close. The initial "spark" around Thor's hammer notably deals fully unscaled damage. Although the 13,000 base damage per hit may not seem impressive, this can actually be very high damage output compared to heavily scaled hits deep into a combo. This is especially true if you manage to connect H Mighty Spark, which hits 6 times for 78,000 unscaled damage in addition to the high (but scaled) damage of the beam itself. The very fast recovery on Mighty Spark means that Thor is always plus afterwards, and Thor can even link a normal attack after a close-range Spark to continue the combo. | ||||
| L |
Damage | Startup | Active | Recovery |
|---|---|---|---|---|
| 70,000 x2 | 12 | 6(17)3 | 28 | |
| On Hit | On Block | Guard | Properties | |
| - | -4 | Mid | ||
| M |
Damage | Startup | Active | Recovery |
| 70,000 + 100,000 | 12 | 6(17)3 | 33 | |
| On Hit | On Block | Guard | Properties | |
| - | -9 | Mid | ||
| H |
Damage | Startup | Active | Recovery |
| 70,000 + 100,000 + 20,000 x3 ~ x5 | 13 ~ 33 | 6(19)3(6)8 ~ 12 | 13 ~ 9 | |
| On Hit | On Block | Guard | Properties | |
| +20 | +9 ~ +8 | Mid | ||
|
Thor hops into the air (knocking the opponent upwards along with him) then slams down with his hammer. Higher button strengths are slower but gain additional properties when Thor slams down.
| ||||
| L |
Damage | Startup | Active | Recovery |
|---|---|---|---|---|
| 130,000 | 5 | 1 | 40 | |
| On Hit | On Block | Guard | Properties | |
| - | - | Throw / Airthrow | ||
| M |
Damage | Startup | Active | Recovery |
| 150,000 | 3 | 1 | 42 | |
| On Hit | On Block | Guard | Properties | |
| - | - | Throw / Airthrow | ||
| H |
Damage | Startup | Active | Recovery |
| 180,000 | 1 | 2 | 43 | |
| On Hit | On Block | Guard | Properties | |
| - | - | Throw / Airthrow | ||
|
Thor's command grab, and an important part of his offense. Can be done on the ground as a regular throw, or while airborne as an airthrow. Heavier button strengths are faster but have shorter range. On a successful grab - grounded or airborne - Thor lifts the opponent up and then slams them into the ground, bouncing them slightly upwards. Despite appearances, this is not considered a Ground Bounce and does not prevent Thor from using an actual bounce later in the combo. It allows Thor to connect a normal afterwards to start a combo - usually 2M or 5S. If Thor does not catch the opponent with an attack, they will fall back down for a Hard Knockdown. H version can option-select a throw tech, which is useful at round start. | ||||
| Damage | Startup | Active | Recovery |
|---|---|---|---|
| - | 30 | 90 | ? |
| On Hit | On Block | Guard | Properties |
| - | - | - | |
|
Thor's Flight mode. Once activated, Thor floats in the air, and can use his airdashes and aerial specials an unlimited number of times. Note that activating Flight on the ground does not raise Thor above minimum airdash height, preventing him from airdashing unless he manually floats further up. At 30f startup, Thor's flight mode activation is extremely slow, and he does not gain any meaningful advantage from canceling attacks into it, nor does he have practical combos into Flight mode. He can still use it as a mobility tool to perform multiple airdashes in quick succession, or to cancel an aerial normal and halt his momentum. | |||
| Damage | Startup | Active | Recovery |
|---|---|---|---|
| HEED MY WORDS | EVILDOERS! IF THOU | DOST WISH TO CHALLENGE | THE ODINSON, THOU WILL |
| On Hit | On Block | Guard | Properties |
| FACE THE DIVINE POWER | OF MIGHTY MJOLNIR | NEVER SHALL THE | GOD OF THUNDER RELENT |
|
Thor stands in place, gains an aura, and begins talking. This move can be maintained indefinitely by holding down the H button. After 18 initial frames, Thor begins to generate hyper meter at a rate of 24% of a bar per second. Releasing H will cause Thor to stop talking and stop generating meter, but has 22 frames of additional recovery before Thor can act again. Mighty Speech can be used for a little free meter after a snap or kill while waiting for the oncoming character. Thor can also cancel his other grounded specials into Mighty Speech. This can situationally be used to save Thor from being punished in the event of a whiffed Mighty Spark or Mighty Hurricane. | |||
Hyper Combos
| Damage | Startup | Active | Recovery |
|---|---|---|---|
| 30,000 x15 ~ x29 | 20+2 | 85 | 58 (in air: 30 / Until Grounded) |
| On Hit | On Block | Guard | Properties |
| - | -35 | Mid | |
|
Thor causes a large tornado of thunder to appear around himself, hitting several times. This is Thor's standard combo ender. It has fairly slow startup, and so only a handful of Thor's attacks can reliably combo into it, but the hyper itself deals solid damage. For the air version of Mighty Tornado, every hit except for the final hit causes a True (forced) Soft Knockdown, while the final hit causes a Soft Knockdown that the opponent can air recover from. The grounded version of Mighty Tornado always causes a True Soft Knockdown. Mighty Tornado can be used in certain Guard Break setups, taking advantage of its two frames of post-flash startup. A fast aerial normal canceled into Air Mighty Tornado can be DHC'd into an airgrab hyper, from characters like She-Hulk, Spider-Man, or Frank West. The DHC can be performed after the flash (and after the opponent leaves blockstun from the normal you canceled) but before the Tornado actually connects, making the airgrab hyper either difficult or impossible to escape. | |||
| Damage | Startup | Active | Recovery |
|---|---|---|---|
| 130,000 per hit, up to 4 hits | 24+14 | 40 | 63 |
| On Hit | On Block | Guard | Properties |
| - | -71 | Mid | |
|
Thor causes bolts of lightning to rain from the sky. The first bolt strikes immediately in front of Thor, and additional bolts strike successively farther away. It is an alternative OTG for situations where H Mighty Smash will not connect in time. It can also be used as a screen-clear against non-hyper projectiles, but has surprisingly poor durability when clashing with other hypers. Mighty Thunder deals very good damage if it hits as much as possible, but will deal significantly less damage if done close to the corner (most bolts will strike off screen) or from far away. | |||
| Damage | Startup | Active | Recovery |
|---|---|---|---|
| 90,000 + 220,000 | 4+0 | 2 | 23 |
| On Hit | On Block | Guard | Properties |
| - | - | Mid | Invuln until frame 6, |
|
Cinematic command grab hyper. Can be thought of as an enhanced version of Mighty Hurricane. However, it does not start a regular combo on a successful grab the way that Hurricane does (you can combo afterwards using a DHC, depending on the second character). It is quite fast, can't be reacted to post-flash and is invincible up through the actual grab, so it can be mashed as a reversal against close-range pressure. Because of this hyper's fast total duration, it can be used as a DHC whiff in order to combo into non-hyper attacks. This concept was popularized by Abegen who would DHC from a long, lingering hyper (like Tron's Servbot Takeout) into whiffed Mighty Punish, then perform several unscaled Mighty Sparks while the opponent was being hit for huge damage. Mighty Punish can also be used in gimmicky DHC setups where you perform an air hyper against a grounded opponent, then DHC to Thor's grab before the hyper actually hits. If you mistime your tickthrow Mighty Hurricane, you can cancel into this move as an emergency second chance. | |||
Universal Mechanics
| Damage | Startup | Active | Recovery |
|---|---|---|---|
| 50,000 (initial throw) + 30,000 (landing) | 1 | 1 | - |
| On Hit | On Block | Guard | Properties |
| - | - | Throw | |
|
Thor grabs the opponent and chucks them directly upwards into the air, where they fall back down onto him. Fairly unique among normal throws because Thor can attack the opponent before they land for the Hard Knockdown, starting a full combo without having to use an OTG. If Thor does not attack them on the way down, the opponent will take 30,000 additional damage when they hit the ground, and could still technically be OTG'd upon landing. | |||
| Damage | Startup | Active | Recovery |
|---|---|---|---|
| 80,000 | 1 | 1 | - |
| On Hit | On Block | Guard | Properties |
| - | - | Airthrow | |
|
Thor spikes the opponent straight down to the ground. Unlike the ground throw, it causes an immediate Hard Knockdown, and Thor can not start a combo afterwards. Do not use this airthrow, use Air Mighty Hurricane instead. | |||
| Damage | Startup | Active | Recovery |
|---|---|---|---|
| 50,000 | 2 | 2 | 36 |
| On Hit | On Block | Guard | Properties |
| - | -12 | Mid | Snapback |
|
Animation and hitbox based on 5H. | |||
| Damage | Startup | Active | Recovery |
|---|---|---|---|
| 30,000 | - | 20 | 34 |
| On Hit | On Block | Guard | Properties |
| - | -15 | OH | |
|
- | |||
Team Position
Thor is usually played in either the Point or Second position. When played as a Point character, Thor's lack of solid long-range tools can be more easily compensated for with assists. He can use his strong aerial mobility to compete with other highly mobile Point characters. Although Thor's solo damage is not terrible, he becomes even stronger when he can utilize assists to easily combo into his slower special moves.
Thor can be placed in the Second slot to serve as a damage engine for another lower-damage point character. His Mighty Spark assist can be exceptionally powerful if you are able to cover for its slow startup. However, Thor's support is generally suboptimal compared to his potential on point.
Notable Supports
Thor can use Rocket's support extremely well, with Pendulum being one of his favorite assists and Mad Hopper an excellent DHC which he can use for stylish raw tag combos. Rocket also works very well with some of Thor's other favorite supports, such as Doom, or Strange.
Doctor Strange, meanwhile, possesses potentially Thor's best lateral assist in Bolts of Balthakk, and his overall support value really shines when placed behind the God of Thunder. Thor can DHC from S.Jump height Mighty Tornado into Seven Rings, leading into a full strange combo. Alternately, Thor/Strange THC is very strong and kills everything. Great pairing.
Dante's Jam Session assist is very strong for Thor, and enables his high-low game exceedingly well. He also has great ability to confirm off it at superjump height thanks to j.S, Mighty Spark, and Mighty Strike. Furthermore, Thor can hard tag to Dante off any magic sequence, enabling Dante to do a full combo and build tons of meter. All in all, Thor and Dante work fairly well together, and Dante is one of his best partners.
Arthur's Dagger Toss assist is a strong lateral assist, something Thor desperately needs. Additionally, Thor/Arthur DHC synergy is excellent, with Gold Armor into a full combo being a great way to finish off an opponent in Mighty Tornado at Superjump height. Gold Daggers are even stronger than base daggers, and enable a number of powerful combos and mixes. Great pairing.
MODOK's Psionic Blaster assist is extremely strong for Thor in both neutral and combos, and MODOK also offers strong TACs and Raw Tags in many of the same situations as Doctor Doom. Hyper Psionic Blaster DHC leads into a full follow up if you've saved an assist, and since thor doesn't use wallbounce, MODOK can be a strong damage engine for him. Great pairing.
As dollar store doom, Iron Man offers a strong beam assist, good TACs, and decent DHC synergy to Thor. He is a great partner for Thor overall, and you should feel good about playing them together.
Mystic Ray is one of thor's favorite assists. It is a full screen projectile assist and screen clear that also OTGs - what more could he want? Great assist, but outside of that the synergy is more limited. Still worth mentioning as one of his best partners, however. Shuma also enables the Thor/Dormammu pairing to actually function in a way that no other partner truly does, and is worth mentioning just for that.
Rapid Slash is an incredibly strong combo extender for Thor, who can link 623H mighty smash into 421[H] charged mighty strike. This allows him to deal huge damage and build oodles of meter off any magic series knockdown in the corner. Additionally, Thor can easily DHC into sword loops from almost any screen position, even from superjump height, thanks to the slow fall qualities of his Mighty Tornado super upon DHC. Round Trip throw into hard tag thor into command grab is an exceedingly strong incoming setup. Thor and Vergil work together very well.
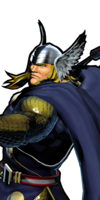
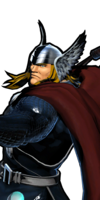
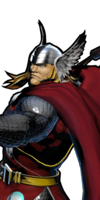
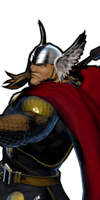
Alternate Colors
| Color 1 | Color 2 | Color 3 | Color 4 | Color 5 | Color 6 | Alt Color |
|---|---|---|---|---|---|---|
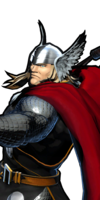
|
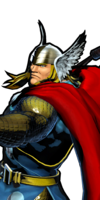
|
|
|
|
|
|

