m (→Vs. Zazie:) |
|||
| (92 intermediate revisions by 7 users not shown) | |||
| Line 1: | Line 1: | ||
[[File:fhd matlok.png|left]] | |||
<table border="0" cellspacing="2" align="right"> | |||
<tr> <td color="#303030"></td></tr> | |||
</table> | |||
<br> | |||
{| align="right" | |||
| __TOC__ | |||
|} | |||
<br clear="left"> | |||
= Introduction = | = Introduction = | ||
Not | |||
Not Glen Matlock, but Guile's British punker cousin, who has pretty similar moves along with a few of his own. | |||
Matlok was always considered a low tier in FHD for a reason. With mostly trashy normals, a poor reversal, and barebones combos, Matlok plays similar to classic SF2 Guile. Overhead Kick (Charge {{b}}, {{f}}+{{k}}) is a strong tool to mix up his pressure. The excellent Spinning Wave (Charge {{b}}, {{f}}+{{p}}), his Sonic Boom-type fireball, allows him to do a simple zoning and keepaway game, along with having some good pressure in the corner. | |||
===Weak Spot=== | |||
<table border="1em" cellspacing="0" style="border: 1px solid #999;"> | |||
<tr> <td align="center" width="125"></td> | |||
<td align="center" valign="bottom">[[File:FHD-matlok-neutral.png]]</td> | |||
<td align="center" valign="bottom">[[File:FHD-matlok-squat-1.png]]</td> | |||
<td align="center" valign="bottom">[[File:FHD-matlok-squat-2.png]]</td> | |||
<td align="center" valign="bottom">[[File:FHD-matlok-crouch.png]]</td></tr> | |||
<tr> <td align="center">Frame count</td> | |||
<td align="center">-</td> | |||
<td align="center">2</td> | |||
<td align="center">2</td> | |||
<td align="center">-</td></tr> | |||
</table> | |||
Matlok's headphones '''and''' sunglasses easily avoid many grounded attacks and special moves while standing, so use stance shift to your advantage. However, they're still susceptible to some higher attacks and especially jump-ins. The fact that his cr.HP (a.k.a intended anti-air normal) puts his weak spot at high risk rather than just doing its job doesn't help. Matlok's weak spot is also pretty safe mid-air with most of his air normals (except when he does a somersault while performing empty diagonal jumps). All in all, just don't crouch when being comboed and you'll be ok. | |||
===Color Options=== | |||
<table border="1em" cellspacing="0" style="border: 1px solid #999;"> | |||
<tr> <td align="center">Punch</td> | |||
<td align="center">Kick</td></tr> | |||
<tr> <td>[[File:fhd-matlok-color1.png]]</td> | |||
<td>[[File:fhd-matlok-color2.png]]</td></tr> | |||
</table> | |||
= Moves List = | = Moves List = | ||
=== Quick Reference === | |||
<table border="1em" cellspacing="0" style="border: 1px solid #999;" width="80%"> | |||
<tr> <td align="center" width="15%">Special move name</td> | |||
<td align="center" width="25%">Input</td> | |||
<td align="center" width="10%">Nickname</td> | |||
<td align="center" width="30%">Note</td></tr> | |||
<tr> <td>'''Spinning Wave'''</td> | |||
<td>Charge [[File:B.png]],[[File:F.png]] + [[File:P.png]]</td> | |||
<td></td> | |||
<td>fireball</td></tr> | |||
<tr> <td>'''Overhead Kick'''</td> | |||
<td>Charge [[File:B.png]],[[File:F.png]] + [[File:K.png]]</td> | |||
<td></td> | |||
<td>overhead</td></tr> | |||
<tr> <td>'''Road Hurricane'''</td> | |||
<td>Charge [[File:D.png]],[[File:U.png]] + [[File:K.png]]</td> | |||
<td>hurricane, flash kick</td> | |||
<td>anti-air, reversal</td></tr> | |||
<tr> <td>'''Loop Hurricane'''</td> | |||
<td>Charge [[File:D.png]],[[File:U.png]] + Tap simultaneously [[File:Snkc.gif]][[File:Snkd.gif]]</td> | |||
<td></td> | |||
<td>''hidden move'', don't use</td></tr> | |||
</table> | |||
== Normal Moves == | == Normal Moves == | ||
===Light Punch=== | ===Light Punch [[File:Snka.gif]]=== | ||
'''Standing ( | *'''Standing LP (Close):''' ''activation range = 39'' | ||
<table border="1em" cellspacing="0" style="border: 1px solid #999;"> | |||
<tr> <td align="center" width="91">Damage</td> | |||
<td align="center" width="30"><u>6</u></td> | |||
<td align="center" width="75" rowspan="5">Startup</td> | |||
<td align="center" valign="bottom" rowspan="5">[[File:FHD-matlok-stand-close-LP.png]]</td> | |||
<td align="center" width="75" rowspan="5">Recovery</td></tr> | |||
<tr> <td align="center">Chain cancel</td> | |||
<td align="center" bgcolor="#1E90FF">yes</td></tr> | |||
<tr> <td align="center">Special cancel</td> | |||
<td align="center" bgcolor="#1E90FF">yes</td></tr> | |||
<tr> <td align="center">On hit</td> | |||
<td align="center" bgcolor="#007D00">+6</td></tr> | |||
<tr> <td align="center">On block</td> | |||
<td align="center" bgcolor="#007D00">+7</td></tr> | |||
<tr> <td align="center" colspan="2">Frame count</td> | |||
<td align="center">2</td> | |||
<td align="center" bgcolor="#00007D">3</td> | |||
<td align="center">3</td></tr> | |||
</table> | |||
Hits middle weak spots much better than far version and also can't be crouched. Unfortunately, its proximity activation is poor, so you can only get two of these at best. | |||
'''Standing ( | *'''Standing LP (Far):''' | ||
<table border="1em" cellspacing="0" style="border: 1px solid #999;"> | |||
<tr> <td align="center" width="91">Damage</td> | |||
<td align="center" width="30"><u>6</u></td> | |||
<td align="center" width="75" rowspan="5">Startup</td> | |||
<td align="center" valign="bottom" rowspan="5">[[File:FHD-matlok-stand-far-LP.png]]</td> | |||
<td align="center" width="75" rowspan="5">Recovery</td></tr> | |||
<tr> <td align="center">Chain cancel</td> | |||
<td align="center" bgcolor="#1E90FF">yes</td></tr> | |||
<tr> <td align="center">Special cancel</td> | |||
<td align="center" bgcolor="#1E90FF">yes</td></tr> | |||
<tr> <td align="center">On hit</td> | |||
<td align="center" bgcolor="#007D00">+6</td></tr> | |||
<tr> <td align="center">On block</td> | |||
<td align="center" bgcolor="#007D00">+7</td></tr> | |||
<tr> <td align="center" colspan="2">Frame count</td> | |||
<td align="center">2</td> | |||
<td align="center" bgcolor="#00007D">3</td> | |||
<td align="center">3</td></tr> | |||
</table> | |||
Has less range than it seems, but good as an early jump stopper. In some cases, it works better as an anti-air than intended normals. Whiffs on crouchers. | |||
'''Crouching''' - | *'''Crouching LP:''' | ||
<table border="1em" cellspacing="0" style="border: 1px solid #999;"> | |||
<tr> <td align="center" width="91">Damage</td> | |||
<td align="center" width="30"><u>6</u></td> | |||
<td align="center" width="75" rowspan="5">Startup</td> | |||
<td align="center" valign="bottom" rowspan="5">[[File:FHD-matlok-crouch-LP.png]]</td> | |||
<td align="center" width="75" rowspan="5">Recovery</td></tr> | |||
<tr> <td align="center">Chain cancel</td> | |||
<td align="center" bgcolor="#1E90FF">yes</td></tr> | |||
<tr> <td align="center">Special cancel</td> | |||
<td align="center" bgcolor="#1E90FF">yes</td></tr> | |||
<tr> <td align="center">On hit</td> | |||
<td align="center" bgcolor="#007D00">+6</td></tr> | |||
<tr> <td align="center">On block</td> | |||
<td align="center" bgcolor="#007D00">+7</td></tr> | |||
<tr> <td align="center" colspan="2">Frame count</td> | |||
<td align="center">2</td> | |||
<td align="center" bgcolor="#00007D">3</td> | |||
<td align="center">3</td></tr> | |||
</table> | |||
Longest light normal Matlok has. Slightly longer range than cr.LK (by 2px to be exact). Useful instead of cr.LK for longer chain strings. | |||
'''Jumping''' - Matlok jumps with his head first | *'''Jumping LP (Diagonal):''' | ||
<table border="1em" cellspacing="0" style="border: 1px solid #999;"> | |||
<tr> <td align="center" width="91">Damage</td> | |||
<td align="center" width="30"><u>12</u></td> | |||
<td align="center" width="75" rowspan="3">Startup</td> | |||
<td align="center" valign="bottom" rowspan="3">[[File:FHD-matlok-diagonal-jump-LP.png]]</td> | |||
<tr> <td align="center">Chain cancel</td> | |||
<td align="center">no</td></tr> | |||
<tr> <td align="center">Special cancel</td> | |||
<td align="center">no</td></tr> | |||
<tr> <td align="center" colspan="2">Frame count</td> | |||
<td align="center">3</td> | |||
<td align="center" bgcolor="#00007D">∞</td></tr> | |||
</table> | |||
Matlok jumps with his head first. Active until he lands and has pretty good priority. Can be used as a crossup, but it puts your weak spot in danger. It's better to use j.LK for crossups instead. | |||
'''Jumping (Neutral)''' - | *'''Jumping LP (Neutral):''' | ||
<table border="1em" cellspacing="0" style="border: 1px solid #999;"> | |||
<tr> <td align="center" width="91">Damage</td> | |||
<td align="center" width="30"><u>12</u></td> | |||
<td align="center" width="75" rowspan="3">Startup</td> | |||
<td align="center" valign="bottom" rowspan="3">[[File:FHD-matlok-neutral-jump-LP.png]]</td> | |||
<tr> <td align="center">Chain cancel</td> | |||
<td align="center">no</td></tr> | |||
<tr> <td align="center">Special cancel</td> | |||
<td align="center">no</td></tr> | |||
<tr> <td align="center" colspan="2">Frame count</td> | |||
<td align="center">3</td> | |||
<td align="center" bgcolor="#00007D">∞</td></tr> | |||
</table> | |||
Awesome air-to-air; not many normals can beat this one. Unfortunately, with how poor Matlok's anti-airs are you might have to rely on this button more than you might want to sometimes. | |||
=== | ===Heavy Punch [[File:Snkb.gif]]=== | ||
'''Standing ( | *'''Standing HP (Close):''' ''activation range = 55'' | ||
<table border="1em" cellspacing="0" style="border: 1px solid #999;"> | |||
<tr> <td align="center" width="91">Damage</td> | |||
<td align="center" width="30"><u>28</u></td> | |||
<td align="center" width="75" rowspan="5">Startup</td> | |||
<td align="center" valign="bottom" rowspan="5">[[File:FHD-matlok-stand-close-HP-startup.png]]</td> | |||
<td align="center" valign="bottom" rowspan="5">[[File:FHD-matlok-stand-close-HP-1.png]]</td> | |||
<td align="center" valign="bottom" rowspan="5">[[File:FHD-matlok-stand-close-HP-2.png]]</td> | |||
<td align="center" width="75" rowspan="5">Recovery</td></tr> | |||
<tr> <td align="center">Chain cancel</td> | |||
<td align="center">no</td></tr> | |||
<tr> <td align="center">Special cancel</td> | |||
<td align="center" bgcolor="#1E90FF">yes</td></tr> | |||
<tr> <td align="center">On hit</td> | |||
<td align="center" bgcolor="#7D0000">-3</td></tr> | |||
<tr> <td align="center">On block</td> | |||
<td align="center" bgcolor="#7D0000">-8</td></tr> | |||
<tr> <td align="center" colspan="2">Frame count</td> | |||
<td align="center" colspan="2">4 (1)</td> | |||
<td align="center" bgcolor="#00007D">3</td> | |||
<td align="center" bgcolor="#00007D">3</td> | |||
<td align="center">18</td></tr> | |||
</table> | |||
Headbutt. Hits once. Can be linked from lights. Can be used against crossups with some effort. Its only real benefit is that the first part hits pretty high - good for scoring some hits on head weak spots. For combos it's better to use cl.HK instead. | |||
'''Standing ( | *'''Standing HP (Far):''' | ||
<table border="1em" cellspacing="0" style="border: 1px solid #999;"> | |||
<tr> <td align="center" width="91">Damage</td> | |||
<td align="center" width="30"><u>28</u></td> | |||
<td align="center" width="75" rowspan="5">Startup</td> | |||
<td align="center" valign="bottom" rowspan="5">[[File:FHD-matlok-stand-far-HP.png]]</td> | |||
<td align="center" valign="bottom" rowspan="5">[[File:FHD-matlok-stand-far-HP-recover.png]]</td> | |||
<td align="center" width="75" rowspan="5">Recovery</td></tr> | |||
<tr> <td align="center">Chain cancel</td> | |||
<td align="center">no</td></tr> | |||
<tr> <td align="center">Special cancel</td> | |||
<td align="center" bgcolor="#1E90FF">yes</td></tr> | |||
<tr> <td align="center">On hit</td> | |||
<td align="center" bgcolor="#7D0000">-1</td></tr> | |||
<tr> <td align="center">On block</td> | |||
<td align="center" bgcolor="#7D0000">-6</td></tr> | |||
<tr> <td align="center" colspan="2">Frame count</td> | |||
<td align="center">12</td> | |||
<td align="center" bgcolor="#00007D">4</td> | |||
<td align="center" colspan="2">(6) 18</td></tr> | |||
</table> | |||
Matlok throws a fierce backfist. Good range, but very slow. It leaves your weakpoint stretched for any jump-in to hit, so it's not as useful as a general poke. It's good during block strings or when your opponent blocks a fireball and such. | |||
'''Crouching''' - Matlok does a weird lunge up | *'''Crouching HP:''' | ||
<table border="1em" cellspacing="0" style="border: 1px solid #999;"> | |||
<tr> <td align="center" width="91">Damage</td> | |||
<td align="center" width="30"><u>28</u></td> | |||
<td align="center" width="75" rowspan="5">Startup</td> | |||
<td align="center" valign="bottom" rowspan="5">[[File:FHD-matlok-crouch-HP-1.png]]</td> | |||
<td align="center" valign="bottom" rowspan="5">[[File:FHD-matlok-crouch-HP-2.png]]</td> | |||
<td align="center" valign="bottom" rowspan="5">[[File:FHD-matlok-crouch-HP-3.png]]</td> | |||
<td align="center" valign="bottom" rowspan="5">[[File:FHD-matlok-crouch-HP-recover.png]]</td> | |||
<td align="center" width="75" rowspan="5">Landing</td></tr> | |||
<tr> <td align="center">Chain cancel</td> | |||
<td align="center">no</td></tr> | |||
<tr> <td align="center">Special cancel</td> | |||
<td align="center" bgcolor="#1E90FF">yes</td></tr> | |||
<tr> <td align="center">On hit</td> | |||
<td align="center" bgcolor="#7D0000">-8</td></tr> | |||
<tr> <td align="center">On block</td> | |||
<td align="center" bgcolor="#7D0000">-13</td></tr> | |||
<tr> <td align="center" colspan="2">Frame count</td> | |||
<td align="center">3</td> | |||
<td align="center" bgcolor="#00007D">1</td> | |||
<td align="center" bgcolor="#00007D">3</td> | |||
<td align="center" bgcolor="#00007D">8</td> | |||
<td align="center">11</td> | |||
<td align="center">6</td></tr> | |||
</table> | |||
Matlok does a weird lunge up into the air, so it can avoid some lows. It is intended to be an anti-air, but it doesn't always gets that job done. It trades a lot (or even gets beaten by a jump-in) and usually your weakpoint gets hit. However, the 1st active frame of it is actually good, so with practice you can do actual anti-airing with it. You have to be precise and throw it out late enough to land it though. Also, similarly to Clown's cr.HP, you can sometimes anti-air unexpecting opponents early with late active frames, but that can be risky for your weak spot.<br> | |||
Cancelable during the first part, but not once Matlok is off the ground. Interestingly, the startup for this button is lower than usual for heavies, so it's also useful for punishing opponents who ended up minus right in front of you. You can cancel it into LK Hurricane or LK Overhead Kick into a sweep, either way it's much better damage than a light string into a sweep.<br> | |||
This attack has a glitch technically similar to Karnov's teleport, so-called Kara-hop. By inputting Charge {{db}}, {{neogeoa}} ~ {{df}} + {{neogeob}} Matlok will do cr.HP without the mid-air part and move himself forward a bit. The move will only have the first 4 frames of the active part. | |||
'''Jumping''' - | *'''Jumping HP (Diagonal):''' | ||
<table border="1em" cellspacing="0" style="border: 1px solid #999;"> | |||
<tr> <td align="center" width="91">Damage</td> | |||
<td align="center" width="30"><u>28</u></td> | |||
<td align="center" width="75" rowspan="3">Startup</td> | |||
<td align="center" valign="bottom" rowspan="3">[[File:FHD-matlok-diagonal-jump-HP.png]]</td> | |||
<td align="center" width="75" rowspan="3">Recovery</td> | |||
<tr> <td align="center">Chain cancel</td> | |||
<td align="center">no</td></tr> | |||
<tr> <td align="center">Special cancel</td> | |||
<td align="center">no</td></tr> | |||
<tr> <td align="center" colspan="2">Frame count</td> | |||
<td align="center">3</td> | |||
<td align="center" bgcolor="#00007D">6</td> | |||
<td align="center">∞</td></tr> | |||
</table> | |||
An elbow drop. Pretty standard for a jumping heavy normal. Does a better job at hitting weak spots with deep jump-ins than j.HK. Landing it can convert into a 1-hit cl.HK xx LK Overhead kick combo, but only if the jump-in was close enough. It's also better not to hit deep with j.HP for this combo, since landing air normals higher helps to fight pushback. | |||
'''Jumping (Neutral)''' - | *'''Jumping HP (Neutral):''' | ||
<table border="1em" cellspacing="0" style="border: 1px solid #999;"> | |||
<tr> <td align="center" width="91">Damage</td> | |||
<td align="center" width="30"><u>32</u></td> | |||
<td align="center" width="75" rowspan="3">Startup</td> | |||
<td align="center" valign="bottom" rowspan="3">[[File:FHD-matlok-neutral-jump-HP-1.png]]</td> | |||
<td align="center" valign="bottom" rowspan="3">[[File:FHD-matlok-neutral-jump-HP-2.png]]</td> | |||
<td align="center" width="75" rowspan="3">Recovery</td> | |||
<tr> <td align="center">Chain cancel</td> | |||
<td align="center">no</td></tr> | |||
<tr> <td align="center">Special cancel</td> | |||
<td align="center">no</td></tr> | |||
<tr> <td align="center" colspan="2">Frame count</td> | |||
<td align="center">3</td> | |||
<td align="center" bgcolor="#00007D">3</td> | |||
<td align="center" bgcolor="#00007D">3</td> | |||
<td align="center">∞</td></tr> | |||
</table> | |||
A weird upward swing. Priority is not bad. It can easily hit opponents jumping over your head and has big damage to boot. It doesn't accomplish much else otherwise. | |||
===Light Kick=== | ===Light Kick [[File:Snkc.gif]]=== | ||
'''Standing ( | *'''Standing LK (Close):''' ''activation range = 39'' | ||
<table border="1em" cellspacing="0" style="border: 1px solid #999;"> | |||
<tr> <td align="center" width="91">Damage</td> | |||
<td align="center" width="30"><u>6</u></td> | |||
<td align="center" width="75" rowspan="5">Startup</td> | |||
<td align="center" valign="bottom" rowspan="5">[[File:FHD-matlok-stand-close-LK.png]]</td> | |||
<td align="center" width="75" rowspan="5">Recovery</td></tr> | |||
<tr> <td align="center">Chain cancel</td> | |||
<td align="center" bgcolor="#1E90FF">yes</td></tr> | |||
<tr> <td align="center">Special cancel</td> | |||
<td align="center" bgcolor="#1E90FF">yes</td></tr> | |||
<tr> <td align="center">On hit</td> | |||
<td align="center" bgcolor="#007D00">+5</td></tr> | |||
<tr> <td align="center">On block</td> | |||
<td align="center" bgcolor="#007D00">+6</td></tr> | |||
<tr> <td align="center" colspan="2">Frame count</td> | |||
<td align="center">2</td> | |||
<td align="center" bgcolor="#00007D">3</td> | |||
<td align="center">4</td></tr> | |||
</table> | |||
Good against some weak spots. For example, it hits both Ray's and Jean's weak spots in either stances. However, the activation range isn't great - you can get only two hits of it at best. | |||
'''Standing ( | *'''Standing LK (Far):''' | ||
<table border="1em" cellspacing="0" style="border: 1px solid #999;"> | |||
<tr> <td align="center" width="91">Damage</td> | |||
<td align="center" width="30"><u>6</u></td> | |||
<td align="center" width="75" rowspan="5">Startup</td> | |||
<td align="center" valign="bottom" rowspan="5">[[File:FHD-matlok-stand-far-LK.png]]</td> | |||
<td align="center" width="75" rowspan="5">Recovery</td></tr> | |||
<tr> <td align="center">Chain cancel</td> | |||
<td align="center" bgcolor="#1E90FF">yes</td></tr> | |||
<tr> <td align="center">Special cancel</td> | |||
<td align="center" bgcolor="#1E90FF">yes</td></tr> | |||
<tr> <td align="center">On hit</td> | |||
<td align="center" bgcolor="#007D00">+6</td></tr> | |||
<tr> <td align="center">On block</td> | |||
<td align="center" bgcolor="#007D00">+7</td></tr> | |||
<tr> <td align="center" colspan="2">Frame count</td> | |||
<td align="center">2</td> | |||
<td align="center" bgcolor="#00007D">3</td> | |||
<td align="center">3</td></tr> | |||
</table> | |||
Helps with hitting specific weak spots (particularly Lee's), but nothing else. | |||
'''Crouching''' - | *'''Crouching LK:''' | ||
<table border="1em" cellspacing="0" style="border: 1px solid #999;"> | |||
<tr> <td align="center" width="91">Damage</td> | |||
<td align="center" width="30"><u>6</u></td> | |||
<td align="center" width="75" rowspan="5">Startup</td> | |||
<td align="center" valign="bottom" rowspan="5">[[File:FHD-matlok-crouch-LK.png]]</td> | |||
<td align="center" width="75" rowspan="5">Recovery</td></tr> | |||
<tr> <td align="center">Chain cancel</td> | |||
<td align="center" bgcolor="#1E90FF">yes</td></tr> | |||
<tr> <td align="center">Special cancel</td> | |||
<td align="center" bgcolor="#1E90FF">yes</td></tr> | |||
<tr> <td align="center">On hit</td> | |||
<td align="center" bgcolor="#007D00">+6</td></tr> | |||
<tr> <td align="center">On block</td> | |||
<td align="center" bgcolor="#007D00">+7</td></tr> | |||
<tr> <td align="center" colspan="2">Frame count</td> | |||
<td align="center">2</td> | |||
<td align="center" bgcolor="#00007D">3</td> | |||
<td align="center">3</td></tr> | |||
</table> | |||
Excellent range, fast, chains into itself, and cancelable. His main combo tool. Use it. | |||
'''Jumping''' - Knee drop | *'''Jumping LK (Diagonal):''' | ||
<table border="1em" cellspacing="0" style="border: 1px solid #999;"> | |||
<tr> <td align="center" width="91">Damage</td> | |||
<td align="center" width="30"><u>12</u></td> | |||
<td align="center" width="75" rowspan="3">Startup</td> | |||
<td align="center" valign="bottom" rowspan="3">[[File:FHD-matlok-diagonal-jump-LK.png]]</td> | |||
<tr> <td align="center">Chain cancel</td> | |||
<td align="center">no</td></tr> | |||
<tr> <td align="center">Special cancel</td> | |||
<td align="center">no</td></tr> | |||
<tr> <td align="center" colspan="2">Frame count</td> | |||
<td align="center">3</td> | |||
<td align="center" bgcolor="#00007D">∞</td></tr> | |||
</table> | |||
Knee drop. Another crossup. Unlike diagonal j.LP it doesn't put his weak spot at risk, so it's better to use this instead. | |||
'''Jumping (Neutral)''' - | *'''Jumping LK (Neutral):''' | ||
<table border="1em" cellspacing="0" style="border: 1px solid #999;"> | |||
<tr> <td align="center" width="91">Damage</td> | |||
<td align="center" width="30"><u>12</u></td> | |||
<td align="center" width="75" rowspan="3">Startup</td> | |||
<td align="center" valign="bottom" rowspan="3">[[File:FHD-matlok-neutral-jump-LK.png]]</td> | |||
<tr> <td align="center">Chain cancel</td> | |||
<td align="center">no</td></tr> | |||
<tr> <td align="center">Special cancel</td> | |||
<td align="center">no</td></tr> | |||
<tr> <td align="center" colspan="2">Frame count</td> | |||
<td align="center">3</td> | |||
<td align="center" bgcolor="#00007D">∞</td></tr> | |||
</table> | |||
=== | ===Heavy Kick [[File:Snkd.gif]]=== | ||
'''Standing ( | *'''Standing HK (Close):''' ''activation range = 47'' | ||
<table border="1em" cellspacing="0" style="border: 1px solid #999;"> | |||
<tr> <td align="center" width="91">Damage</td> | |||
<td align="center" width="30"><u>28 total</u></td> | |||
<td align="center" width="75" rowspan="5">Startup</td> | |||
<td align="center" valign="bottom" rowspan="5">[[File:FHD-matlok-stand-close-HK-1.png]]</td> | |||
<td align="center" width="25" rowspan="5"></td> | |||
<td align="center" valign="bottom" rowspan="5">[[File:FHD-matlok-stand-close-HK-2.png]]</td> | |||
<td align="center" valign="bottom" rowspan="5">[[File:FHD-matlok-stand-close-HK-2-recover.png]]</td> | |||
<td align="center" width="75" rowspan="5">Recovery</td></tr> | |||
<tr> <td align="center">Chain cancel</td> | |||
<td align="center">no/no</td></tr> | |||
<tr> <td align="center">Special cancel</td> | |||
<td align="center" bgcolor="#1E90FF">yes/yes</td></tr> | |||
<tr> <td align="center">On hit</td> | |||
<td align="center" bgcolor="#A58700">-/0</td></tr> | |||
<tr> <td align="center">On block</td> | |||
<td align="center" bgcolor="#7D0000">-/-5</td></tr> | |||
<tr> <td align="center" colspan="2">Frame count</td> | |||
<td align="center">4</td> | |||
<td align="center" bgcolor="#00007D">2</td> | |||
<td align="center">1</td> | |||
<td align="center" bgcolor="#00007D">3</td> | |||
<td align="center" colspan="2">(6) 18</td></tr> | |||
</table> | |||
Two-hit kick. First hit doesn't have good range so after a chain link it can whiff due to pushback. Fortunately, this is not a problem for the second hit. When it comes to hitting weak spots, both hits covers different but big middle heights. Both hits are cancelable. A good heavy button to use in combos, especially for P2 who gets less pushback after both hits. | |||
'''Standing ( | *'''Standing HK (Far):''' | ||
<table border="1em" cellspacing="0" style="border: 1px solid #999;"> | |||
<tr> <td align="center" width="91">Damage</td> | |||
<td align="center" width="30"><u>28</u></td> | |||
<td align="center" width="75" rowspan="5">Startup</td> | |||
<td align="center" valign="bottom" rowspan="5">[[File:FHD-matlok-stand-far-HK-1-startup.png]]</td> | |||
<td align="center" valign="bottom" rowspan="5">[[File:FHD-matlok-stand-far-HK-1.png]]</td> | |||
<td align="center" valign="bottom" rowspan="5">[[File:FHD-matlok-stand-far-HK-2.png]]</td> | |||
<td align="center" width="75" rowspan="5">Recovery</td></tr> | |||
<tr> <td align="center">Chain cancel</td> | |||
<td align="center">no</td></tr> | |||
<tr> <td align="center">Special cancel</td> | |||
<td align="center" bgcolor="#1E90FF">yes</td></tr> | |||
<tr> <td align="center">On hit</td> | |||
<td align="center" bgcolor="#7D0000">-2*</td></tr> | |||
<tr> <td align="center">On block</td> | |||
<td align="center" bgcolor="#7D0000">-7*</td></tr> | |||
<tr> <td align="center" colspan="2">Frame count</td> | |||
<td align="center" colspan="2">5 (3)</td> | |||
<td align="center" bgcolor="#00007D">3</td> | |||
<td align="center" bgcolor="#00007D">4</td> | |||
<td align="center">16</td></tr> | |||
</table> | |||
''*Frame advantage is measured relatively from the '''first hitbox''''' | |||
This one really lacks range, but can be used as anti-air in specific situations, particularly against Mars. Still bad overall. | |||
''' | *'''Crouching HK:''' | ||
<table border="1em" cellspacing="0" style="border: 1px solid #999;"> | |||
<tr> <td align="center" width="91">Damage</td> | |||
<td align="center" width="30"><u>28</u></td> | |||
<td align="center" width="75" rowspan="5">Startup</td> | |||
<td align="center" valign="bottom" rowspan="5">[[File:FHD-matlok-crouch-HK.png]]</td> | |||
<td align="center" width="75" rowspan="5">Recovery</td></tr> | |||
<tr> <td align="center">Chain cancel</td> | |||
<td align="center">no</td></tr> | |||
<tr> <td align="center">Special cancel</td> | |||
<td align="center" bgcolor="#1E90FF">yes</td></tr> | |||
<tr> <td align="center">On hit</td> | |||
<td align="center" bgcolor="#007D00">kd</td></tr> | |||
<tr> <td align="center">On block</td> | |||
<td align="center" bgcolor="#7D0000">-8</td></tr> | |||
<tr> <td align="center" colspan="2">Frame count</td> | |||
<td align="center">4</td> | |||
<td align="center" bgcolor="#00007D">6</td> | |||
<td align="center">18</td></tr> | |||
</table> | |||
Mediocre sweep with the second worst range in the game, though it hits weak spots well. One of your main tools. Yeah, it's shitty, but you're going to use it a lot. | |||
'''Jumping (Neutral)''' - | *'''Jumping HK (Diagonal):''' | ||
<table border="1em" cellspacing="0" style="border: 1px solid #999;"> | |||
<tr> <td align="center" width="91">Damage</td> | |||
<td align="center" width="30"><u>28</u></td> | |||
<td align="center" width="75" rowspan="3">Startup</td> | |||
<td align="center" valign="bottom" rowspan="3">[[File:FHD-matlok-diagonal-jump-HK.png]]</td> | |||
<td align="center" width="75" rowspan="3">Recovery</td> | |||
<tr> <td align="center">Chain cancel</td> | |||
<td align="center">no</td></tr> | |||
<tr> <td align="center">Special cancel</td> | |||
<td align="center">no</td></tr> | |||
<tr> <td align="center" colspan="2">Frame count</td> | |||
<td align="center">3</td> | |||
<td align="center" bgcolor="#00007D">6</td> | |||
<td align="center">∞</td></tr> | |||
</table> | |||
Good ol' drop kick. In contrast with j.HP, it has better horizontal reach and priority. Great for punishing opponents' fireballs and meeting them in the air. | |||
*'''Jumping HK (Neutral):''' | |||
<table border="1em" cellspacing="0" style="border: 1px solid #999;"> | |||
<tr> <td align="center" width="91">Damage</td> | |||
<td align="center" width="30"><u>28</u></td> | |||
<td align="center" width="75" rowspan="3">Startup</td> | |||
<td align="center" valign="bottom" rowspan="3">[[File:FHD-matlok-neutral-jump-HK-1.png]]</td> | |||
<td align="center" valign="bottom" rowspan="3">[[File:FHD-matlok-neutral-jump-LK.png]]</td> | |||
<td align="center" width="75" rowspan="3">Recovery</td> | |||
<tr> <td align="center">Chain cancel</td> | |||
<td align="center">no</td></tr> | |||
<tr> <td align="center">Special cancel</td> | |||
<td align="center">no</td></tr> | |||
<tr> <td align="center" colspan="2">Frame count</td> | |||
<td align="center">3</td> | |||
<td align="center" bgcolor="#00007D">1</td> | |||
<td align="center" bgcolor="#00007D">6</td> | |||
<td align="center">∞</td></tr> | |||
</table> | |||
==Command Normals== | |||
*'''Dancing Head Press:''' (in air) [[File:D.png]]/[[File:Df.png]] + [[File:K.png]] | |||
<table border="1em" cellspacing="0" style="border: 1px solid #999;"> | |||
<tr> <td align="center" width="91">Damage</td> | |||
<td align="center" width="30">'''Light'''<br><u>12</u><br>'''Heavy'''<br><u>16</u></td> | |||
<td align="center" width="75" rowspan="3">Startup</td> | |||
<td align="center" valign="bottom" rowspan="3">[[File:FHD-matlok-headpress.png]]</td> | |||
<td align="center" width="75" rowspan="3">Recovery</td> | |||
<tr> <td align="center">Chain cancel</td> | |||
<td align="center">no</td></tr> | |||
<tr> <td align="center">Special cancel</td> | |||
<td align="center">no</td></tr> | |||
<tr> <td align="center" rowspan="2">Frame count</td> | |||
<td align="center">Light</td> | |||
<td align="center">2</td> | |||
<td align="center" bgcolor="#00007D">∞</td> | |||
<td align="center" bgcolor="#1C1C1C">-</td></tr> | |||
<tr> <td align="center">Heavy</td> | |||
<td align="center">2</td> | |||
<td align="center" bgcolor="#00007D">6</td> | |||
<td align="center">∞</td></tr> | |||
</table> | |||
DANCER! Matlok does a weird dance maneuver mid-air, stomps the opponent, then jumps again. Think of Chun-Li's {{d}} + MK from SF2. The LK version stays out until he lands but does less damage, while the HK version only hits during the start but does more damage. Has a quick startup, so you can do this very close to the ground and it'll still hit. Matlok can act before landing on the ground after the move hits or is blocked, so you can do some wonky combos like deep LK Press into j.HP. You can also steer Matlok a little in the air after he jumps again by holding the joystick either forward or back. Head Press can be a good corner escape tool, but after landing it the game pushes Matlok backwards and you can't really fight that, so you have to land it as a crossup to "get the right wind". | |||
== Throws == | == Throws == | ||
''' | <table border="1em" cellspacing="0" style="border: 1px solid #999;"> | ||
<tr> <td align="center" width="91">Damage</td> | |||
<td align="center" width="30"><u>32</u></td> | |||
<td align="center" rowspan="2">[[File:FHD-matlok-throwbox.png]]</td></tr> | |||
<tr> <td align="center" width="91">Range<br>(From pushbox)</td> | |||
<td align="center" width="30">34</td></tr> | |||
</table> | |||
*'''Overhead Throw:''' [[File:B.png]]/[[File:Ub.png]]/[[File:Uf.png]]/[[File:F.png]] + [[File:Snkb.gif]] | |||
Matlok tosses the opponent back to the other end of the screen with a traditional judo throw. Who said punks don't know martial arts? Useful if you want to get the opponent off of you so you can start spamming projectiles. | |||
== Special Moves == | == Special Moves == | ||
'''Spinning Wave''' | *'''Spinning Wave:''' Charge [[File:B.png]],[[File:F.png]] + [[File:P.png]] | ||
<table border="1em" cellspacing="0" style="border: 1px solid #999;"> | |||
<tr> <td align="center" width="91">Damage</td> | |||
<td align="center" width="30"><u>16</u></td> | |||
<td align="center" width="75" rowspan="3">Startup</td> | |||
<td align="center" valign="bottom" rowspan="3">[[File:FHD-matlok-spinningwave.png]]</td> | |||
<td align="center" width="75" rowspan="3">Recovery</td></tr> | |||
<tr> <td align="center">On hit</td> | |||
<td align="center" bgcolor="#007D00">+17</td></tr> | |||
<tr> <td align="center">On block</td> | |||
<td align="center" bgcolor="#007D00">+12</td></tr> | |||
<tr> <td align="center" colspan="2">Frame count</td> | |||
<td align="center">15</td> | |||
<td align="center" bgcolor="#00007D">1</td> | |||
<td align="center">16</td></tr> | |||
</table> | |||
SPIT IN WAY! Matlok throws a Sonic Boom. Button determines how fast the projectile flies. Has a pretty small charge time, think SvC Guile. Pretty fast startup and recovery too. Your main zoning tool that compensates for your shitty normals, so throw a lot of these. Becomes very deadly in the corner because of the small charge time when used in conjunction with normals like cr.LP, cr.LK or st.HP to keep the pressure on. | |||
*'''Overhead Kick:''' Charge [[File:B.png]],[[File:F.png]] + [[File:K.png]] | |||
<table border="1em" cellspacing="0" style="border: 1px solid #999;"> | |||
<tr> <td align="center" width="91">Damage</td> | |||
<td align="center" width="30"><u>32</u></td> | |||
<td align="center" width="75" rowspan="3">Startup, grounded</td> | |||
<td align="center" width="75" rowspan="3">Startup,<br>in air</td> | |||
<td align="center" valign="bottom" rowspan="3">[[File:FHD-matlok-overheadkick.png]]</td> | |||
<td align="center" width="75" rowspan="3">Recovery</td> | |||
<td align="center" width="75" rowspan="3">Landing</td></tr> | |||
<tr> <td align="center">On hit</td> | |||
<td align="center" bgcolor="#007D00">'''Light/Heavy'''<br>+6</td></tr> | |||
<tr> <td align="center">On block</td> | |||
<td align="center" bgcolor="#007D00">'''Light/Heavy'''<br>+1</td></tr> | |||
<tr> <td align="center" rowspan="2">Frame count</td> | |||
<td align="center">Light</td> | |||
<td align="center">2</td> | |||
<td align="center">16</td> | |||
<td align="center" bgcolor="#00007D">2</td> | |||
<td align="center">3</td> | |||
<td align="center">10</td></tr> | |||
<tr> <td align="center">Heavy</td> | |||
<td align="center">2</td> | |||
<td align="center">22</td> | |||
<td align="center" bgcolor="#00007D">3</td> | |||
<td align="center">2</td> | |||
<td align="center">10</td></tr> | |||
</table> | |||
OVERHEAD KICK! Matlok jumps into the air and does an upside-down Flash Kick. As its name implies, it's an overhead. The LK version is pretty fast but travels a shorter distance. The HK version is slower but travels a longer distance and can go over fireballs. Neither version knocks down, leaving Matlok plus even on block. The LK version can be comboed off of close heavy normals, so that's the main version to use. It can also be used to close the gap between your opponent, like after a sweep that hits.<br> | |||
LK Overhead Kick gives opponents 18 frames to react to it, but Ray, Ryoko and Feilin crouch low enough to miss the 1st active frame, meaning they have a 19 frame window instead. However, if they get hit, Matlok gets 1 additional advantage frame on hit (or on block if they manage to block it at the very last moment). | |||
*'''Road Hurricane:''' Charge [[File:D.png]],[[File:U.png]] + [[File:K.png]] | |||
<table border="1em" cellspacing="0" style="border: 1px solid #999;"> | |||
<tr> <td align="center" width="91">Damage</td> | |||
<td align="center" width="30">'''Light'''<br><u>24</u><br>'''Heavy'''<br><u>48 total</u></td> | |||
<td align="center" valign="bottom" rowspan="3">[[File:FHD-matlok-roadhurricane-1.png]]</td> | |||
<td align="center" valign="bottom" rowspan="3">[[File:FHD-matlok-roadhurricane-2.png]]</td> | |||
<td align="center" valign="bottom" rowspan="3">[[File:FHD-matlok-roadhurricane-3.png]]</td> | |||
<td align="center" valign="bottom" rowspan="3">[[File:FHD-matlok-roadhurricane-4.png]]</td> | |||
<td align="center" valign="bottom" rowspan="3">[[File:FHD-matlok-roadhurricane-5.png]]</td> | |||
<td align="center" valign="bottom" rowspan="3">[[File:FHD-matlok-roadhurricane-5-0.png]]</td> | |||
<td align="center" valign="bottom" rowspan="3">[[File:FHD-matlok-roadhurricane-6.png]]</td> | |||
<td align="center" width="75" rowspan="3">Recovery</td> | |||
<td align="center" width="75" rowspan="3">Landing</td></tr> | |||
<tr> <td align="center">On hit</td> | |||
<td align="center" bgcolor="#A58700">'''Light'''<br>kd<br>'''Heavy'''<br>-27/-23/kd</td></tr> | |||
<tr> <td align="center">On block</td> | |||
<td align="center" bgcolor="#7D0000">'''Light'''<br>-23/-19/-15<br>'''Heavy'''<br>-32/-28/-24</td></tr> | |||
<tr> <td align="center" rowspan="2">Frame count</td> | |||
<td align="center">Light</td> | |||
<td align="center" bgcolor="#007D00">2</td> | |||
<td align="center" bgcolor="#007D00">1</td> | |||
<td align="center" bgcolor="#007D00">3</td> | |||
<td align="center" bgcolor="#007D00">1</td> | |||
<td align="center" bgcolor="#007D00">1</td> | |||
<td align="center">2</td> | |||
<td align="center" bgcolor="#00007D">1</td> | |||
<td align="center">24</td> | |||
<td align="center">6</td></tr> | |||
<tr> <td align="center">Heavy</td> | |||
<td align="center" bgcolor="#007D00">2</td> | |||
<td align="center" bgcolor="#007D00">1</td> | |||
<td align="center" bgcolor="#007D00">3</td> | |||
<td align="center" bgcolor="#007D00">1</td> | |||
<td align="center" bgcolor="#007D00">1</td> | |||
<td align="center">2</td> | |||
<td align="center" bgcolor="#00007D">1</td> | |||
<td align="center">33</td> | |||
<td align="center">6</td></tr> | |||
</table> | |||
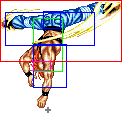
HURRICANE! Matlok starts spinning on his head legs a-flailing like a break dancer. The LK version is one hit and always knocks down. The HK version is three hits of which only the last hit knocks down and has trouble getting all of the three hits to actually hit, so stick with the LK version. Both are pretty punishable on block. The HK version is even punishable on hit if the last hit whiffs, so make it count. The LK version is good as an anti-air, if you have the charge. It's also pretty much your only good reversal, although it can still trade with stuff. You could also try to use it to escape the corner and such since the move throws you quite a bit forward at the end. | |||
''' | == Hidden Move == | ||
*'''Loop Hurricane:''' Charge [[File:D.png]],[[File:U.png]] + Tap simultaneously [[File:Snkc.gif]][[File:Snkd.gif]] ([[File:B.png]]/[[File:F.png]] to steer) | |||
'''Input note:''' after inputting CD you can tap one of the kick buttons instead of both. | |||
''' | '''Startup:''' | ||
<table border="1em" cellspacing="0" style="border: 1px solid #999;"> | |||
<tr> <td align="center" width="91">Damage<br>(first two hits)</td> | |||
<td align="center" width="30"><u>36 total</u></td> | |||
<td align="center" valign="bottom">[[File:FHD-matlok-roadhurricane-1.png]]</td> | |||
<td align="center" valign="bottom">[[File:FHD-matlok-roadhurricane-2.png]]</td> | |||
<td align="center" valign="bottom">[[File:FHD-matlok-roadhurricane-3.png]]</td> | |||
<td align="center" valign="bottom">[[File:FHD-matlok-roadhurricane-4.png]]</td> | |||
<td align="center" valign="bottom">[[File:FHD-matlok-roadhurricane-5.png]]</td> | |||
<td align="center" valign="bottom">[[File:FHD-matlok-roadhurricane-5-0.png]]</td></tr> | |||
<tr> <td align="center" colspan="2">Frame count</td> | |||
<td align="center" bgcolor="#007D00">2</td> | |||
<td align="center" bgcolor="#007D00">1</td> | |||
<td align="center" bgcolor="#007D00">3</td> | |||
<td align="center" bgcolor="#007D00">1</td> | |||
<td align="center" bgcolor="#007D00">1</td> | |||
<td align="center">2</td></tr> | |||
</table> | |||
== | '''Main part:''' | ||
''' | <table border="1em" cellspacing="0" style="border: 1px solid #999;"> | ||
<tr> <td align="center" width="91">Damage</td> | |||
<td align="center" width="30"><u>24 per hit</u></td> | |||
<td align="center" valign="bottom" rowspan="3">[[File:FHD-matlok-loophurricane-1.png]]</td> | |||
<td align="center" width="25" rowspan="3"></td> | |||
<td align="center" valign="bottom" rowspan="3">[[File:FHD-matlok-loophurricane-2.png]]</td> | |||
<td align="center" width="25" rowspan="3"></td> | |||
<td align="center" valign="bottom" rowspan="3">[[File:FHD-matlok-loophurricane-3.png]]</td> | |||
<td align="center" width="25" rowspan="3"></td> | |||
<td align="center" valign="bottom" rowspan="3">[[File:FHD-matlok-loophurricane-4.png]]</td> | |||
<td align="center" width="75" rowspan="3">Recovery</td></tr> | |||
<tr> <td align="center">On hit</td> | |||
<td align="center" bgcolor="#7D0000">-</td></tr> | |||
<tr> <td align="center">On block</td> | |||
<td align="center" bgcolor="#7D0000">-</td></tr> | |||
<tr> <td align="center" colspan="2">Frame count</td> | |||
<td align="center" bgcolor="#00007D">1</td> | |||
<td align="center">3</td> | |||
<td align="center" bgcolor="#00007D">1</td> | |||
<td align="center">3</td> | |||
<td align="center" bgcolor="#00007D">1</td> | |||
<td align="center">3</td> | |||
<td align="center" bgcolor="#00007D">1</td> | |||
<td align="center">3</td></tr> | |||
<tr> <td align="center" width="125" colspan="2">Loop cycle</td> | |||
<td align="center" colspan="8">16</td></tr> | |||
</table> | |||
'''Recovery:''' | |||
<table border="1em" cellspacing="0" style="border: 1px solid #999;"> | |||
<tr> <td align="center" width="91" height="100"></td> | |||
<td align="center" width="75">Recovery</td> | |||
<td align="center" width="75">Landing</td></tr> | |||
<tr> <td align="center">Frame count</td> | |||
<td align="center">27</td> | |||
<td align="center">6</td></tr> | |||
</table> | |||
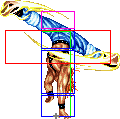
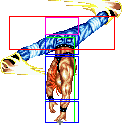
Hands down the worst special move in the entire game. Startup is identical to normal Road Hurricane, but instead of the 3rd hit Matlok begins to spin while swinging with his legs. Due to <u>huge</u> pushback, pretty much nothing connects in this move - the first and second hits at startup and that's it. If you land both startup hits at point-blank range the next intended hitbox will never connect. Even if you manage to hit the opponent with one of loop's attacks, they can easily block the next. This move is always easily punishable. Just '''NEVER''' use it. | |||
= The Basics = | = The Basics = | ||
Matlok is a charge character, so your main idea is to sit on your ass and throw Spinning Waves | Matlok is a charge character, so your main idea is to sit on your ass and throw Spinning Waves until your opponent jumps. When they do, you peg them out of the air with c.HP or LK hurricane. If you push them to the corner you can then start pressuring. His weak point is on his head, the sunglasses and the headphones, so watch your head! | ||
= Combos = | = Combos = | ||
* | *cr.LK x3~5, cr.HK | ||
*( | :: Most basic one. Jump-in with light normal is optional. Replace with cr.LP's if you need a bit more range. Cancel cr.HK into a special for shenanigans. | ||
*Overhead Kick, cr.LP, cr.HK | |||
:: After a landed Overhead Kick you can link it into a crouching light and sweep. Works better in corner. | |||
*cl.HK (2 hits) xx LK Overhead Kick, cr.HK | |||
:: Your go-to combo on dizzied opponents - it's the most damaging one you have. cr.HK is a 1-frame link on P1 side and a 2-frame link on P2 side, though sometimes it might not connect due to poor range. cl.HK can be replaced with cr.HP if you prefer it that way. | |||
*deep j.LK, cl.HK (1 hit) xx LK Overhead Kick, cr.HK | |||
:: Variation of a BnB from a jump-in. | |||
*j.HP, cl.HK (1 hit) xx LK Overhead Kick | |||
:: Conversion from j.HP, unfortunately without a knockdown. Jump-in should be done close enough and landing j.HP higher in the air will help against pushback. | |||
*(Corner only) Spinning Wave, Spinning Wave, Spinning Wave, ... | |||
::Matlok's infinite with Sonic Booms. You only have a 2(?) frame window to nail it. Trick requires use of input leniency frames (11 frame window) before throwing first Sonic Boom to pull it off. | |||
= Advanced Strategy = | = Advanced Strategy = | ||
Couple of old match videos of | Couple of old match videos of Japanese Matlok players. This is probably how you should be playing him: | ||
[http://www.youtube.com/watch?v=rsU0cJnhklA] | [http://www.youtube.com/watch?v=rsU0cJnhklA DELETED :(] | ||
[http://www.youtube.com/watch?v=DK-xJMoOwh0] | [http://www.youtube.com/watch?v=DK-xJMoOwh0 DELETED :(] | ||
[http://www.youtube.com/watch?v=xm2mGXTX1Vs] | [http://www.youtube.com/watch?v=xm2mGXTX1Vs DELETED :(] | ||
(Why is the Matlok player throwing out rapid fire s. | (Why is the Matlok player throwing out rapid fire s.LP and s.LP in the second match? I don't know, promixity blocking shenanigans maybe?) | ||
= Match-ups = | = Match-ups = | ||
== Vs. Clown: == | <table border="1em" cellspacing="0" style="border: 1px solid #999;" align="center"> | ||
<tr> <td align="center" width="100"></td> | |||
<td align="center" width="25">Ray</td> | |||
<td align="center" width="25">Lee</td> | |||
<td align="center" width="25">Zaz</td> | |||
<td align="center" width="25">Kar</td> | |||
<td align="center" width="25">Jea</td> | |||
<td align="center" width="25">Miz</td> | |||
<td align="center" width="25">Sam</td> | |||
<td align="center" width="25">Yun</td> | |||
<td align="center" width="25">Mat</td> | |||
<td align="center" width="25">Clo</td> | |||
<td align="center" width="25">Fei</td> | |||
<td align="center" width="25">Mar</td> | |||
<td align="center" width="25">Ryo</td></tr> | |||
<tr> <td align="center" width="100">Matlok</td> | |||
<td align="center" width="25">-</td> | |||
<td align="center" width="25">-</td> | |||
<td align="center" width="25">-</td> | |||
<td align="center" width="25">-</td> | |||
<td align="center" width="25">-</td> | |||
<td align="center" width="25">-</td> | |||
<td align="center" width="25">-</td> | |||
<td align="center" width="25">-</td> | |||
<td align="center" width="25">-</td> | |||
<td align="center" width="25">-</td> | |||
<td align="center" width="25">-</td> | |||
<td align="center" width="25">-</td> | |||
<td align="center" width="25">-</td></tr> | |||
</table> | |||
=== Vs. Clown: === | |||
== Vs. Jean | === Vs. Jean: === | ||
== Vs. | === Vs. Ryoko: === | ||
== Vs. Karnov: == | === Vs. Karnov: === | ||
== Vs. Lee | === Vs. Lee: === | ||
Keep this stinker away from you with sonic booms and stop his lunge punches with rapid cr.LP's. In this matchup you've got an edge with your cr.HK (a.k.a one of your main tools) that hits Lee's weak spot with ease, so you have decent chances to dizzy him. Also stance shifting comes in very handy - most of Lee's moves hit the chest, while Matlok's weakpoint is on the head. Always shift to the standing position while being comboed to defend your weak spot and avoid extra damage. | |||
== Vs. | === Vs. Feilin: === | ||
== Vs. | === Vs. Yungmie: === | ||
== Vs. Marstorius: == | === Vs. Marstorius: === | ||
You want to keep this mofo out | You want to keep this mofo out. Luckily for you his ass barely leaves the ground when he jumps, he walks slowly, and he generally has no way to approach your barrage of LP Waves without taking risks, so throw those out until he's either dead or starts using Rising Knee to go over them. When he does use Knee, smack him out of the air with LK Hurricane and turtle up again. You can also stuff his Lariat with rapid cr.LP's. If you fuck up and he gets close, you're probably dead, so keep him out at all costs. | ||
== Vs. Matlok | === Vs. Matlok (self): === | ||
Grab your popcorn | Grab your popcorn because it's an all-around turtle-fest that echoes a Guile mirror match from ST. | ||
== Vs. Mizoguchi | === Vs. Mizoguchi: === | ||
"Get hit = Die" matchup. Both Mizo's DP and HK Tatsu's obliterate your weak spot, so stance shift is useless here. Play extra safe, otherwise any failed block will lead you into a dizzy, and then Mizo will rob your remaining health with tatsu loops. Chances of survival after that are minimal... | |||
== Vs. Ray | === Vs. Ray: === | ||
Be careful here. Don't throw sonic booms at mid-range, or you'll eat a Wheel Kick to your face. Use stance shift to save your weak spot from Ray's combos and multi-hit tackle. The rest of your gameplan is the same. | |||
== Vs. Samchay | === Vs. Samchay: === | ||
== Vs. Zazie | === Vs. Zazie: === | ||
Sucks. Zazie can | Sucks. Zazie can Ducking Hellfire through your Spinning Waves and his normals are far better than yours, meaning you can't play your normal zoning game. He can also just lock you down in the corner with Hellfire and you can't do shit about it because your reversal isn't great and your normals aren't good enough to stop him. | ||
{{Template:Fighter's History Dynamite}} | {{Template:Fighter's History Dynamite}} | ||
[[Category:Fighter's History Dynamite]] | [[Category:Fighter's History Dynamite]] | ||
Latest revision as of 09:37, 19 March 2024
Introduction
Not Glen Matlock, but Guile's British punker cousin, who has pretty similar moves along with a few of his own.
Matlok was always considered a low tier in FHD for a reason. With mostly trashy normals, a poor reversal, and barebones combos, Matlok plays similar to classic SF2 Guile. Overhead Kick (Charge ![]() ,
, ![]() +
+![]() ) is a strong tool to mix up his pressure. The excellent Spinning Wave (Charge
) is a strong tool to mix up his pressure. The excellent Spinning Wave (Charge ![]() ,
, ![]() +
+![]() ), his Sonic Boom-type fireball, allows him to do a simple zoning and keepaway game, along with having some good pressure in the corner.
), his Sonic Boom-type fireball, allows him to do a simple zoning and keepaway game, along with having some good pressure in the corner.
Weak Spot
| Frame count | - | 2 | 2 | - |
Matlok's headphones and sunglasses easily avoid many grounded attacks and special moves while standing, so use stance shift to your advantage. However, they're still susceptible to some higher attacks and especially jump-ins. The fact that his cr.HP (a.k.a intended anti-air normal) puts his weak spot at high risk rather than just doing its job doesn't help. Matlok's weak spot is also pretty safe mid-air with most of his air normals (except when he does a somersault while performing empty diagonal jumps). All in all, just don't crouch when being comboed and you'll be ok.
Color Options
| Punch | Kick |
Moves List
Quick Reference
Normal Moves
Light Punch 
- Standing LP (Close): activation range = 39
| Damage | 6 | Startup |  |
Recovery |
| Chain cancel | yes | |||
| Special cancel | yes | |||
| On hit | +6 | |||
| On block | +7 | |||
| Frame count | 2 | 3 | 3 | |
Hits middle weak spots much better than far version and also can't be crouched. Unfortunately, its proximity activation is poor, so you can only get two of these at best.
- Standing LP (Far):
| Damage | 6 | Startup |  |
Recovery |
| Chain cancel | yes | |||
| Special cancel | yes | |||
| On hit | +6 | |||
| On block | +7 | |||
| Frame count | 2 | 3 | 3 | |
Has less range than it seems, but good as an early jump stopper. In some cases, it works better as an anti-air than intended normals. Whiffs on crouchers.
- Crouching LP:
| Damage | 6 | Startup |  |
Recovery |
| Chain cancel | yes | |||
| Special cancel | yes | |||
| On hit | +6 | |||
| On block | +7 | |||
| Frame count | 2 | 3 | 3 | |
Longest light normal Matlok has. Slightly longer range than cr.LK (by 2px to be exact). Useful instead of cr.LK for longer chain strings.
- Jumping LP (Diagonal):
| Damage | 12 | Startup | 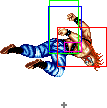 |
| Chain cancel | no | ||
| Special cancel | no | ||
| Frame count | 3 | ∞ | |
Matlok jumps with his head first. Active until he lands and has pretty good priority. Can be used as a crossup, but it puts your weak spot in danger. It's better to use j.LK for crossups instead.
- Jumping LP (Neutral):
| Damage | 12 | Startup |  |
| Chain cancel | no | ||
| Special cancel | no | ||
| Frame count | 3 | ∞ | |
Awesome air-to-air; not many normals can beat this one. Unfortunately, with how poor Matlok's anti-airs are you might have to rely on this button more than you might want to sometimes.
Heavy Punch 
- Standing HP (Close): activation range = 55
| Damage | 28 | Startup |  |
 |
 |
Recovery |
| Chain cancel | no | |||||
| Special cancel | yes | |||||
| On hit | -3 | |||||
| On block | -8 | |||||
| Frame count | 4 (1) | 3 | 3 | 18 | ||
Headbutt. Hits once. Can be linked from lights. Can be used against crossups with some effort. Its only real benefit is that the first part hits pretty high - good for scoring some hits on head weak spots. For combos it's better to use cl.HK instead.
- Standing HP (Far):
| Damage | 28 | Startup | 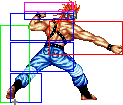 |
 |
Recovery |
| Chain cancel | no | ||||
| Special cancel | yes | ||||
| On hit | -1 | ||||
| On block | -6 | ||||
| Frame count | 12 | 4 | (6) 18 | ||
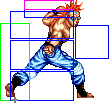
Matlok throws a fierce backfist. Good range, but very slow. It leaves your weakpoint stretched for any jump-in to hit, so it's not as useful as a general poke. It's good during block strings or when your opponent blocks a fireball and such.
- Crouching HP:
| Damage | 28 | Startup |  |
 |
 |
 |
Landing |
| Chain cancel | no | ||||||
| Special cancel | yes | ||||||
| On hit | -8 | ||||||
| On block | -13 | ||||||
| Frame count | 3 | 1 | 3 | 8 | 11 | 6 | |
Matlok does a weird lunge up into the air, so it can avoid some lows. It is intended to be an anti-air, but it doesn't always gets that job done. It trades a lot (or even gets beaten by a jump-in) and usually your weakpoint gets hit. However, the 1st active frame of it is actually good, so with practice you can do actual anti-airing with it. You have to be precise and throw it out late enough to land it though. Also, similarly to Clown's cr.HP, you can sometimes anti-air unexpecting opponents early with late active frames, but that can be risky for your weak spot.
Cancelable during the first part, but not once Matlok is off the ground. Interestingly, the startup for this button is lower than usual for heavies, so it's also useful for punishing opponents who ended up minus right in front of you. You can cancel it into LK Hurricane or LK Overhead Kick into a sweep, either way it's much better damage than a light string into a sweep.
This attack has a glitch technically similar to Karnov's teleport, so-called Kara-hop. By inputting Charge ![]() ,
, ![]() ~
~ ![]() +
+ ![]() Matlok will do cr.HP without the mid-air part and move himself forward a bit. The move will only have the first 4 frames of the active part.
Matlok will do cr.HP without the mid-air part and move himself forward a bit. The move will only have the first 4 frames of the active part.
- Jumping HP (Diagonal):
| Damage | 28 | Startup | 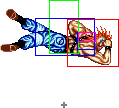 |
Recovery |
| Chain cancel | no | |||
| Special cancel | no | |||
| Frame count | 3 | 6 | ∞ | |
An elbow drop. Pretty standard for a jumping heavy normal. Does a better job at hitting weak spots with deep jump-ins than j.HK. Landing it can convert into a 1-hit cl.HK xx LK Overhead kick combo, but only if the jump-in was close enough. It's also better not to hit deep with j.HP for this combo, since landing air normals higher helps to fight pushback.
- Jumping HP (Neutral):
| Damage | 32 | Startup |  |
 |
Recovery |
| Chain cancel | no | ||||
| Special cancel | no | ||||
| Frame count | 3 | 3 | 3 | ∞ | |
A weird upward swing. Priority is not bad. It can easily hit opponents jumping over your head and has big damage to boot. It doesn't accomplish much else otherwise.
Light Kick 
- Standing LK (Close): activation range = 39
| Damage | 6 | Startup |  |
Recovery |
| Chain cancel | yes | |||
| Special cancel | yes | |||
| On hit | +5 | |||
| On block | +6 | |||
| Frame count | 2 | 3 | 4 | |
Good against some weak spots. For example, it hits both Ray's and Jean's weak spots in either stances. However, the activation range isn't great - you can get only two hits of it at best.
- Standing LK (Far):
| Damage | 6 | Startup |  |
Recovery |
| Chain cancel | yes | |||
| Special cancel | yes | |||
| On hit | +6 | |||
| On block | +7 | |||
| Frame count | 2 | 3 | 3 | |
Helps with hitting specific weak spots (particularly Lee's), but nothing else.
- Crouching LK:
| Damage | 6 | Startup |  |
Recovery |
| Chain cancel | yes | |||
| Special cancel | yes | |||
| On hit | +6 | |||
| On block | +7 | |||
| Frame count | 2 | 3 | 3 | |
Excellent range, fast, chains into itself, and cancelable. His main combo tool. Use it.
- Jumping LK (Diagonal):
| Damage | 12 | Startup |  |
| Chain cancel | no | ||
| Special cancel | no | ||
| Frame count | 3 | ∞ | |
Knee drop. Another crossup. Unlike diagonal j.LP it doesn't put his weak spot at risk, so it's better to use this instead.
- Jumping LK (Neutral):
| Damage | 12 | Startup |  |
| Chain cancel | no | ||
| Special cancel | no | ||
| Frame count | 3 | ∞ | |
Heavy Kick 
- Standing HK (Close): activation range = 47
| Damage | 28 total | Startup |  |
 |
 |
Recovery | |
| Chain cancel | no/no | ||||||
| Special cancel | yes/yes | ||||||
| On hit | -/0 | ||||||
| On block | -/-5 | ||||||
| Frame count | 4 | 2 | 1 | 3 | (6) 18 | ||
Two-hit kick. First hit doesn't have good range so after a chain link it can whiff due to pushback. Fortunately, this is not a problem for the second hit. When it comes to hitting weak spots, both hits covers different but big middle heights. Both hits are cancelable. A good heavy button to use in combos, especially for P2 who gets less pushback after both hits.
- Standing HK (Far):
| Damage | 28 | Startup |  |
 |
 |
Recovery |
| Chain cancel | no | |||||
| Special cancel | yes | |||||
| On hit | -2* | |||||
| On block | -7* | |||||
| Frame count | 5 (3) | 3 | 4 | 16 | ||
*Frame advantage is measured relatively from the first hitbox
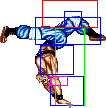
This one really lacks range, but can be used as anti-air in specific situations, particularly against Mars. Still bad overall.
- Crouching HK:
| Damage | 28 | Startup |  |
Recovery |
| Chain cancel | no | |||
| Special cancel | yes | |||
| On hit | kd | |||
| On block | -8 | |||
| Frame count | 4 | 6 | 18 | |
Mediocre sweep with the second worst range in the game, though it hits weak spots well. One of your main tools. Yeah, it's shitty, but you're going to use it a lot.
- Jumping HK (Diagonal):
| Damage | 28 | Startup | 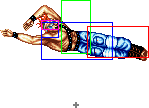 |
Recovery |
| Chain cancel | no | |||
| Special cancel | no | |||
| Frame count | 3 | 6 | ∞ | |
Good ol' drop kick. In contrast with j.HP, it has better horizontal reach and priority. Great for punishing opponents' fireballs and meeting them in the air.
- Jumping HK (Neutral):
| Damage | 28 | Startup |  |
 |
Recovery |
| Chain cancel | no | ||||
| Special cancel | no | ||||
| Frame count | 3 | 1 | 6 | ∞ | |
Command Normals
| Damage | Light 12 Heavy 16 |
Startup | Recovery | |
| Chain cancel | no | |||
| Special cancel | no | |||
| Frame count | Light | 2 | ∞ | - |
| Heavy | 2 | 6 | ∞ |
DANCER! Matlok does a weird dance maneuver mid-air, stomps the opponent, then jumps again. Think of Chun-Li's ![]() + MK from SF2. The LK version stays out until he lands but does less damage, while the HK version only hits during the start but does more damage. Has a quick startup, so you can do this very close to the ground and it'll still hit. Matlok can act before landing on the ground after the move hits or is blocked, so you can do some wonky combos like deep LK Press into j.HP. You can also steer Matlok a little in the air after he jumps again by holding the joystick either forward or back. Head Press can be a good corner escape tool, but after landing it the game pushes Matlok backwards and you can't really fight that, so you have to land it as a crossup to "get the right wind".
+ MK from SF2. The LK version stays out until he lands but does less damage, while the HK version only hits during the start but does more damage. Has a quick startup, so you can do this very close to the ground and it'll still hit. Matlok can act before landing on the ground after the move hits or is blocked, so you can do some wonky combos like deep LK Press into j.HP. You can also steer Matlok a little in the air after he jumps again by holding the joystick either forward or back. Head Press can be a good corner escape tool, but after landing it the game pushes Matlok backwards and you can't really fight that, so you have to land it as a crossup to "get the right wind".
Throws
| Damage | 32 |  |
| Range (From pushbox) |
34 |
Matlok tosses the opponent back to the other end of the screen with a traditional judo throw. Who said punks don't know martial arts? Useful if you want to get the opponent off of you so you can start spamming projectiles.
Special Moves
| Damage | 16 | Startup | 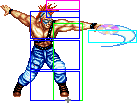 |
Recovery |
| On hit | +17 | |||
| On block | +12 | |||
| Frame count | 15 | 1 | 16 | |
SPIT IN WAY! Matlok throws a Sonic Boom. Button determines how fast the projectile flies. Has a pretty small charge time, think SvC Guile. Pretty fast startup and recovery too. Your main zoning tool that compensates for your shitty normals, so throw a lot of these. Becomes very deadly in the corner because of the small charge time when used in conjunction with normals like cr.LP, cr.LK or st.HP to keep the pressure on.
| Damage | 32 | Startup, grounded | Startup, in air |
 |
Recovery | Landing |
| On hit | Light/Heavy +6 | |||||
| On block | Light/Heavy +1 | |||||
| Frame count | Light | 2 | 16 | 2 | 3 | 10 |
| Heavy | 2 | 22 | 3 | 2 | 10 |
OVERHEAD KICK! Matlok jumps into the air and does an upside-down Flash Kick. As its name implies, it's an overhead. The LK version is pretty fast but travels a shorter distance. The HK version is slower but travels a longer distance and can go over fireballs. Neither version knocks down, leaving Matlok plus even on block. The LK version can be comboed off of close heavy normals, so that's the main version to use. It can also be used to close the gap between your opponent, like after a sweep that hits.
LK Overhead Kick gives opponents 18 frames to react to it, but Ray, Ryoko and Feilin crouch low enough to miss the 1st active frame, meaning they have a 19 frame window instead. However, if they get hit, Matlok gets 1 additional advantage frame on hit (or on block if they manage to block it at the very last moment).
| Damage | Light 24 Heavy 48 total |
 |
 |
 |
 |
 |
 |
 |
Recovery | Landing |
| On hit | Light kd Heavy -27/-23/kd | |||||||||
| On block | Light -23/-19/-15 Heavy -32/-28/-24 | |||||||||
| Frame count | Light | 2 | 1 | 3 | 1 | 1 | 2 | 1 | 24 | 6 |
| Heavy | 2 | 1 | 3 | 1 | 1 | 2 | 1 | 33 | 6 |
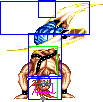
HURRICANE! Matlok starts spinning on his head legs a-flailing like a break dancer. The LK version is one hit and always knocks down. The HK version is three hits of which only the last hit knocks down and has trouble getting all of the three hits to actually hit, so stick with the LK version. Both are pretty punishable on block. The HK version is even punishable on hit if the last hit whiffs, so make it count. The LK version is good as an anti-air, if you have the charge. It's also pretty much your only good reversal, although it can still trade with stuff. You could also try to use it to escape the corner and such since the move throws you quite a bit forward at the end.
Hidden Move
Input note: after inputting CD you can tap one of the kick buttons instead of both.
Startup:
| Damage (first two hits) |
36 total |  |
 |
 |
 |
 |
 |
| Frame count | 2 | 1 | 3 | 1 | 1 | 2 | |
Main part:
| Damage | 24 per hit | 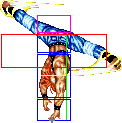 |
 |
 |
 |
Recovery | |||
| On hit | - | ||||||||
| On block | - | ||||||||
| Frame count | 1 | 3 | 1 | 3 | 1 | 3 | 1 | 3 | |
| Loop cycle | 16 | ||||||||
Recovery:
| Recovery | Landing | |
| Frame count | 27 | 6 |
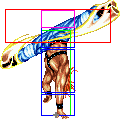
Hands down the worst special move in the entire game. Startup is identical to normal Road Hurricane, but instead of the 3rd hit Matlok begins to spin while swinging with his legs. Due to huge pushback, pretty much nothing connects in this move - the first and second hits at startup and that's it. If you land both startup hits at point-blank range the next intended hitbox will never connect. Even if you manage to hit the opponent with one of loop's attacks, they can easily block the next. This move is always easily punishable. Just NEVER use it.
The Basics
Matlok is a charge character, so your main idea is to sit on your ass and throw Spinning Waves until your opponent jumps. When they do, you peg them out of the air with c.HP or LK hurricane. If you push them to the corner you can then start pressuring. His weak point is on his head, the sunglasses and the headphones, so watch your head!
Combos
- cr.LK x3~5, cr.HK
- Most basic one. Jump-in with light normal is optional. Replace with cr.LP's if you need a bit more range. Cancel cr.HK into a special for shenanigans.
- Overhead Kick, cr.LP, cr.HK
- After a landed Overhead Kick you can link it into a crouching light and sweep. Works better in corner.
- cl.HK (2 hits) xx LK Overhead Kick, cr.HK
- Your go-to combo on dizzied opponents - it's the most damaging one you have. cr.HK is a 1-frame link on P1 side and a 2-frame link on P2 side, though sometimes it might not connect due to poor range. cl.HK can be replaced with cr.HP if you prefer it that way.
- deep j.LK, cl.HK (1 hit) xx LK Overhead Kick, cr.HK
- Variation of a BnB from a jump-in.
- j.HP, cl.HK (1 hit) xx LK Overhead Kick
- Conversion from j.HP, unfortunately without a knockdown. Jump-in should be done close enough and landing j.HP higher in the air will help against pushback.
- (Corner only) Spinning Wave, Spinning Wave, Spinning Wave, ...
- Matlok's infinite with Sonic Booms. You only have a 2(?) frame window to nail it. Trick requires use of input leniency frames (11 frame window) before throwing first Sonic Boom to pull it off.
Advanced Strategy
Couple of old match videos of Japanese Matlok players. This is probably how you should be playing him: DELETED :( DELETED :( DELETED :(
(Why is the Matlok player throwing out rapid fire s.LP and s.LP in the second match? I don't know, promixity blocking shenanigans maybe?)
Match-ups
| Ray | Lee | Zaz | Kar | Jea | Miz | Sam | Yun | Mat | Clo | Fei | Mar | Ryo | |
| Matlok | - | - | - | - | - | - | - | - | - | - | - | - | - |
Vs. Clown:
Vs. Jean:
Vs. Ryoko:
Vs. Karnov:
Vs. Lee:
Keep this stinker away from you with sonic booms and stop his lunge punches with rapid cr.LP's. In this matchup you've got an edge with your cr.HK (a.k.a one of your main tools) that hits Lee's weak spot with ease, so you have decent chances to dizzy him. Also stance shifting comes in very handy - most of Lee's moves hit the chest, while Matlok's weakpoint is on the head. Always shift to the standing position while being comboed to defend your weak spot and avoid extra damage.
Vs. Feilin:
Vs. Yungmie:
Vs. Marstorius:
You want to keep this mofo out. Luckily for you his ass barely leaves the ground when he jumps, he walks slowly, and he generally has no way to approach your barrage of LP Waves without taking risks, so throw those out until he's either dead or starts using Rising Knee to go over them. When he does use Knee, smack him out of the air with LK Hurricane and turtle up again. You can also stuff his Lariat with rapid cr.LP's. If you fuck up and he gets close, you're probably dead, so keep him out at all costs.
Vs. Matlok (self):
Grab your popcorn because it's an all-around turtle-fest that echoes a Guile mirror match from ST.
Vs. Mizoguchi:
"Get hit = Die" matchup. Both Mizo's DP and HK Tatsu's obliterate your weak spot, so stance shift is useless here. Play extra safe, otherwise any failed block will lead you into a dizzy, and then Mizo will rob your remaining health with tatsu loops. Chances of survival after that are minimal...
Vs. Ray:
Be careful here. Don't throw sonic booms at mid-range, or you'll eat a Wheel Kick to your face. Use stance shift to save your weak spot from Ray's combos and multi-hit tackle. The rest of your gameplan is the same.
Vs. Samchay:
Vs. Zazie:
Sucks. Zazie can Ducking Hellfire through your Spinning Waves and his normals are far better than yours, meaning you can't play your normal zoning game. He can also just lock you down in the corner with Hellfire and you can't do shit about it because your reversal isn't great and your normals aren't good enough to stop him.


