|
|
| (10 intermediate revisions by 4 users not shown) |
| Line 18: |
Line 18: |
| *'''No Invuln:''' Doom has virtually no invincible or armored attacks except for his level 3 hyper. | | *'''No Invuln:''' Doom has virtually no invincible or armored attacks except for his level 3 hyper. |
| *'''Everyone Knows the Matchup:''' Doom is probably the most commonly picked and most heavily played character in the game. It is very likely that any opponent you play has good knowledge of the Doom matchup, and a large amount of experience fighting against him. | | *'''Everyone Knows the Matchup:''' Doom is probably the most commonly picked and most heavily played character in the game. It is very likely that any opponent you play has good knowledge of the Doom matchup, and a large amount of experience fighting against him. |
| *'''Limited Ground Mobiltiy:''' Doom's unique ground dash can not be canceled, except by jumping. As a result, Doom cannot wavedash or plinkdash on the ground, and loses access to some basic offense tools that most of the cast can use, like cross-under dashing 5L. Doom can mitigate this to some extend by using Triangle Dash (see Unique Mechanics below), but this is a more committal option. | | *'''Limited Ground Mobility:''' Doom's unique ground dash can not be canceled, except by jumping. As a result, Doom cannot wavedash or plinkdash on the ground, and loses access to some basic offense tools that most of the cast can use, like cross-under dashing 5L. Doom can mitigate this to some extend by using Triangle Dash (see Unique Mechanics below), but this is a more committal option. |
| }} | | }} |
|
| |
|
| === Unique Mechanics === | | |
| | === Unique Mechanic === |
|
| |
|
| All of Doom's grounded normals and command normals - except for 5S and Hidden Missiles (4H) - can be dash-canceled on hit or block. Similarly, Doom can cancel all of his aerial normals and command normals, except for his j.5H "Butter Gun" into an airdash. | | All of Doom's grounded normals and command normals - except for 5S and Hidden Missiles (4H) - can be dash-canceled on hit or block. Similarly, Doom can cancel all of his aerial normals and command normals, except for his j.5H "Butter Gun" into an airdash. |
|
| |
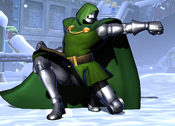
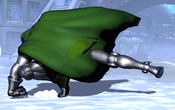
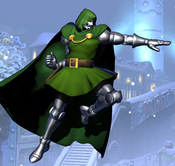
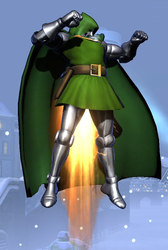
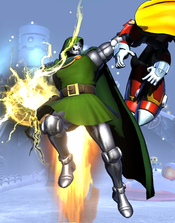
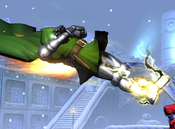
| Doom's grounded dashes (both forward dash and backdash) are fixed duration "hop" dashes. Unlike most characters, he can not cancel his ground dashes into crouching, or into attacks. However, Doom can still cancel his ground dashes by jumping. This gives Doom a rather unique method for traveling across the stage, called '''Triangle Jumping'''. To Triangle Jump forward, input a forward dash, then input a forwards jump with the desired timing. Lastly, as soon as Doom reaches the minimum airdash height on his jump, perform a down-forward airdash to return back to the ground. In terms of raw speed, it is fastest to jump-cancel roughly halfway through Doom's dash animation, but jumping earlier takes less overall time per repetition and is thus less risky to do in neutral.
| |
|
| |
|
| Doom can combine his ability to dash-cancel normals with his ability to Triangle Jump in order to effectively cancel normals directly into a Triangle Jump. This allows Doom to maintain very strong pressure on a defending opponent, and continue to be aggressive even through pushblock. An example input sequence for this technique is shown below: <br> | | Doom can combine his ability to dash-cancel normals with his ability to Triangle Jump in order to effectively cancel normals directly into a Triangle Jump. This allows Doom to maintain very strong pressure on a defending opponent, and continue to be aggressive even through pushblock. An example input sequence for this technique is shown below: <br> |
| Line 32: |
Line 31: |
|
| |
|
| If done correctly, Doom will dash-cancel his blocked sweep, then instantly cancel that dash into a jump, giving the appearance he directly jump-canceled his 2H. He will then airdash back down, remaining close to the opponent. If this sequence was done quickly enough that the opponent is still in blockstun, or tried to jump out of pressure, Doom will then attack with a 6H High Kick, which can itself be Triangle Jump canceled to continue the offensive. If the sequence is delayed slightly, the 6H input will instead throw the opponent. | | If done correctly, Doom will dash-cancel his blocked sweep, then instantly cancel that dash into a jump, giving the appearance he directly jump-canceled his 2H. He will then airdash back down, remaining close to the opponent. If this sequence was done quickly enough that the opponent is still in blockstun, or tried to jump out of pressure, Doom will then attack with a 6H High Kick, which can itself be Triangle Jump canceled to continue the offensive. If the sequence is delayed slightly, the 6H input will instead throw the opponent. |
| }}
| | |
| | |
| | === Unique Movement === |
| | |
| | Doom's grounded dashes (both forward dash and backdash) are fixed duration "hop" dashes. Unlike most characters, he can not cancel his ground dashes into crouching, or into attacks. However, Doom can still cancel his ground dashes by jumping. This gives Doom a rather unique method for traveling across the stage, called '''Triangle Jumping'''. To Triangle Jump forward, input a forward dash, then input a forwards jump with the desired timing. Lastly, as soon as Doom reaches the minimum airdash height on his jump, perform a down-forward airdash to return back to the ground. In terms of raw speed, it is fastest to jump-cancel roughly halfway through Doom's dash animation, but jumping earlier takes less overall time per repetition and is thus less risky to do in neutral. |
| | |
| </div> | | </div> |
| <div style="display: flex;flex-direction: column;flex:2;min-width:350px;padding: 10px;">{{UMVC3_Character_Query|reversals=236XX}}</div></div> | | <div style="display: flex;flex-direction: column;flex:2;min-width:350px;padding: 10px;">{{UMVC3_Character_Query|reversals=236XX}}</div></div> |
| Line 54: |
Line 58: |
| |onhit=- | | |onhit=- |
| |onblock=- | | |onblock=- |
| |properties={{softknockdown}}, Priority: Low, Beam Durability: 1 per frame for 8 frames | | |properties=Priority: Low, Beam Durability: 1 per frame for 8 frames |
| |description= | | |description= |
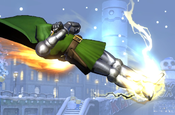
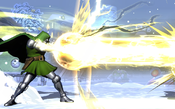
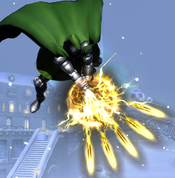
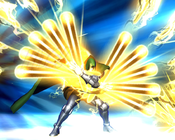
| THC Hyper: Photon Array. Recommended Assist. The gold standard against which many other assists - especially projectile assists - are compared. Doom charges up for a moment, and then unleashes a horizontal beam that covers the entire screen in front of him. The beam is elevated slightly above the ground, and although most characters can't crouch under it, many characters do have at least one low-profile attack that can go underneath it. | | THC Hyper: Photon Array. Recommended Assist. The gold standard against which many other assists - especially projectile assists - are compared. Doom charges up for a moment, and then unleashes a horizontal beam that covers the entire screen in front of him. The beam is elevated slightly above the ground, and although most characters can't crouch under it, many characters do have at least one low-profile attack that can go underneath it. |
| Line 87: |
Line 91: |
|
| |
|
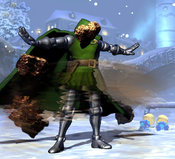
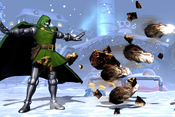
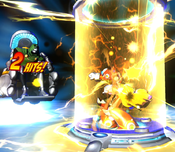
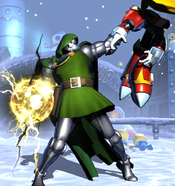
| The gap between when Missiles are initially called and when they are no longer active on stage is the longest of any assist in the game. This can be taken advantage of to perform extensions that are not possible with any other assist. Many characters can call Doom Missiles just before ending their combo with a Hyper - the missiles will fall back down on the opponent just as the hyper ends, allowing the point character to follow-up with another Hyper or even possibly a longer extension. | | The gap between when Missiles are initially called and when they are no longer active on stage is the longest of any assist in the game. This can be taken advantage of to perform extensions that are not possible with any other assist. Many characters can call Doom Missiles just before ending their combo with a Hyper - the missiles will fall back down on the opponent just as the hyper ends, allowing the point character to follow-up with another Hyper or even possibly a longer extension. |
| | |
| | Lastly, Hidden Missiles is special cancellable when used as a Cross-over Counter. This is not especially useful as a punish or reversal tool but can be used to get Doom back onto point for only one bar fairly safely when cancelled into flight. |
| }} | | }} |
| }} | | }} |
| Line 386: |
Line 392: |
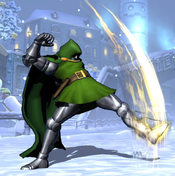
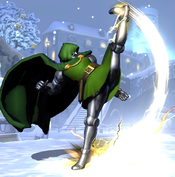
| Doom swings one leg upwards in an arcing kick. 6H acts as a launcher, comparable to his 5S. It deals less damage than 5S but is faster and reaches higher, allowing it to connect at times when 5S would drop, such as late in a combo or after an anti-air 5L. | | Doom swings one leg upwards in an arcing kick. 6H acts as a launcher, comparable to his 5S. It deals less damage than 5S but is faster and reaches higher, allowing it to connect at times when 5S would drop, such as late in a combo or after an anti-air 5L. |
|
| |
|
| 6H is also Doom's forward throw OS, and it is much, much better than his backthrow OS (Hidden Missiles). As a bonus, the upward-aimed kick will also catch opponents who try to chicken guard or jump out of your throw attempt, allowing you con maintain pressure on them. | | 6H is also Doom's forward throw OS, and it is much, much better than his backthrow OS (Hidden Missiles). As a bonus, the upward-aimed kick will also catch opponents who try to chicken guard or jump out of your throw attempt, allowing you to maintain pressure on them. |
|
| |
|
| Hard Kick is an excellent choice for Doom to Dash Cancel when pressuring the opponent, due to its lengthy blockstun. Doom has ample time to complete a tri-dash and resume attacking or throwing the opponent while they remained locked down by the kick. | | Hard Kick is an excellent choice for Doom to Dash Cancel when pressuring the opponent, due to its lengthy blockstun. Doom has ample time to complete a tri-dash and resume attacking or throwing the opponent while they remained locked down by the kick. |
| Line 660: |
Line 666: |
| |version=H | | |version=H |
| |subtitle={{dp}} + {{h}} | | |subtitle={{dp}} + {{h}} |
| |damage=15,000 x6 + 25,000 x5 | | |damage=15,000 x6 + 25,000 x4 |
| |guard=Mid | | |guard=Mid |
| |startup=13 | | |startup=13 |
| Line 906: |
Line 912: |
|
| |
|
|
| |
|
| === Notable Synergies === | | == Notable Shells == |
| | <tabber> |
| | |-| Morrigan + Doom = |
| | [[File:UMVC3 Morrigan Icon.png|center|100px]] |
| | <center>[[File:Gamma.png|20px]]</center> |
| | |
| | Morridoom might be the single most powerful shell in the game. While this mostly can be chalked up to Doom's incredible support for Morrigan's primary gameplan in Hidden Missiles, Dark Harmonizer assist is also very powerful for Doom, turning him from a pretty-good battery to one of the most powerful batteries in the entire game. Doom with Harmonizer can build 2.5 bars off most touches, and when combined with a meter-hungry third like Vergil, the duo can be incredibly strong. |
| | |
| | [https://replaytheater.app/?game=umvc3&c1=Morrigan&p1c2=Doctor+Doom Replay Theater Footage] |
| | |
| | |
| | === Players to Watch === |
| | {{PlayersToWatchTableHeader-UMVC3}} |
| | {{PlayersToWatchTableRow-UMVC3 |
| | | name = NYChrisG |
| | | charaColorOne = {{CharaColor-UMVC3|Morrigan|1}} |
| | | charaColorTwo = {{CharaColor-UMVC3|Doctor_Doom|1}} |
| | | charaColorThree = {{CharaColor-UMVC3|Vergil|1}} |
| | | region = East Coast |
| | | status = Inactive |
| | | notes = |
| | | replaysLink = [https://replaytheater.app/?game=umvc3&p1=ChrisG Replay Theater]<br> |
| | }} |
| | {{PlayersToWatchTableRow-UMVC3 |
| | | name = Escalante |
| | | charaColorOne = {{CharaColor-UMVC3|Magneto|2}} |
| | | charaColorTwo = {{CharaColor-UMVC3|Morrigan|2}} |
| | | charaColorThree = {{CharaColor-UMVC3|Doctor_Doom|2}} |
| | | region = East Coast |
| | | status = Active |
| | | notes = |
| | | replaysLink = [https://replaytheater.app/?game=umvc3&p1=Escalante Replay Theater] |
| | }} |
| | |}|-| Doom + Vergil = |
| | [[File:UMVC3 Vergil Icon.png|center|100px]] |
| | <center>[[File:Gamma.png|20px]]</center> |
| | |
| | As one of the most powerful, most iconic, and most flexible shells in the game, Doom/Vergil is an incredible pairing. With safe DHCs either way, kill combos off just about any touch, and one of the best anchors in the game to back him up, Vergil is an excellent partner for Victor Von and elevates him into a remarkable threat. Doom helps Vergil quite a bit in return, turning various awkward confirms into kills thanks to his excellent hard tag game. All in all, the pair are very strong and Doom/Vergil is an iconic top tier shell for a reason. |
| | |
| | [https://replaytheater.app/?game=umvc3&c1=Vergil&p1c2=Doctor+Doom Replay Theater Footage] |
| | |
| | |
| | === Players to Watch === |
| | {{PlayersToWatchTableHeader-UMVC3}} |
| | {{PlayersToWatchTableRow-UMVC3 |
| | | name = NYChrisG |
| | | charaColorOne = {{CharaColor-UMVC3|Morrigan|1}} |
| | | charaColorTwo = {{CharaColor-UMVC3|Doctor_Doom|1}} |
| | | charaColorThree = {{CharaColor-UMVC3|Vergil|1}} |
| | | region = East Coast |
| | | status = Inactive |
| | | notes = |
| | | replaysLink = [https://replaytheater.app/?game=umvc3&p1=ChrisG Replay Theater]<br> |
| | }} |
| | {{PlayersToWatchTableRow-UMVC3 |
| | | name = FrankieG |
| | | charaColorOne = {{CharaColor-UMVC3|Magneto|2}} |
| | | charaColorTwo = {{CharaColor-UMVC3|Doctor_Doom|2}} |
| | | charaColorThree = {{CharaColor-UMVC3|Vergil|2}} |
| | | region = East Coast |
| | | status = Active |
| | | notes = |
| | | replaysLink = [https://replaytheater.app/?game=umvc3&p1=FrankieG Replay Theater] |
| | }} |
| | {{PlayersToWatchTableRow-UMVC3 |
| | | name = Romora |
| | | charaColorOne = {{CharaColor-UMVC3|Zero|3}} |
| | | charaColorTwo = {{CharaColor-UMVC3|Doctor_Doom|3}} |
| | | charaColorThree = {{CharaColor-UMVC3|Vergil|3}} |
| | | region = Southwest |
| | | status = Active |
| | | notes = |
| | | replaysLink = [https://replaytheater.app/?game=umvc3&p1=Romora Replay Theater] |
| | }} |
| | |} |
| | |
| | |-| Magneto + Doom = |
| | |
| | [[File:UMVC3 Magneto Icon.png|center|100px]] |
| | <center>[[File:Alpha.png|20px]]</center> |
| | |
| | The Master of Magnetism and the Lord of Latveria are a tried-and-true pair, and work together in either order. Doom supports Magneto through three excellent assists, a stellar hard tag game, and strong DHC and TACs. Magneto supports doom mostly through his exceptional assist, Disruptor, which Doom can use to cover approaches or in his combos. While the pairing is usually strongest with Doom behind Magneto, it's worth considering in either order and is iconic for a reason. |
| | |
| | [https://replaytheater.app/?game=umvc3&c1=Magneto&p1c2=Doctor+Doom Replay Theater Footage] |
|
| |
|
| Just about every character in the game would love to have one of Doom's assists backing them up, and he is a safe pick to support almost any team. That said, a handful of characters particularly like to be paired with Doom (or Doom particularly likes to be paired with them).
| |
|
| |
|
| | === Players to Watch === |
| | {{PlayersToWatchTableHeader-UMVC3}} |
| | {{PlayersToWatchTableRow-UMVC3 |
| | | name = FilipinoChamp |
| | | charaColorOne = {{CharaColor-UMVC3|Magneto|1}} |
| | | charaColorTwo = {{CharaColor-UMVC3|Dormammu|1}} |
| | | charaColorThree = {{CharaColor-UMVC3|Doctor_Doom|1}} |
| | | region = West Coast |
| | | status = Inactive |
| | | notes = |
| | | replaysLink = [https://replaytheater.app/?game=umvc3&p1=FilipinoChamp Replay Theater]<br>[https://youtu.be/CrzUTXPFdJk vs TerryBogard @ Final Round 18] |
| | }} |
| | {{PlayersToWatchTableRow-UMVC3 |
| | | name = Milky |
| | | charaColorOne = {{CharaColor-UMVC3|Magneto|2}} |
| | | charaColorTwo = {{CharaColor-UMVC3|Doctor_Doom|2}} |
| | | charaColorThree = {{CharaColor-UMVC3|Dante|2}} |
| | | region = East Coast |
| | | status = Active |
| | | notes = |
| | | replaysLink = [https://replaytheater.app/?game=umvc3&p1=Milky Replay Theater] |
| | }} |
| | |} |
|
| |
|
| '''Morrigan:''' The infamous "Morridoom" shell that swept every major tournament for over a year. Doom's "hidden missiles" assist perfectly covers the superjump height that is otherwise a weak point in Morrigan's fireball game. If Doom happens to find himself tagged in, his playstyle aligns exactly with what Morrigan wants. Doom can run away and build meter using Flight and projectile specials, then throw out one of his safe Level 1 Hypers to DHC back to Morrigan with Astral Vision. A well-executed Morrigan/Doom team is borderline impenetrable.
| | |-| Doom + Dante = |
| | [[File:UMVC3 Dante Icon.png|center|100px]] |
| | <center>[[File:Alpha.png|20px]]</center> |
| | The two best supports in the game go together like Peanut Butter and Jelly. Doom uses Jam Session extremely well, and Dante's Follow My Lead in Million Dollars is perhaps the best in the entire game. Dante also loves Doom's support in return, using Plasma Beam extremely well in both combos and neutral. Whether played as Doom/Dante or Dante/Doom, this is one of the best and most flexible double support shells in the game. |
|
| |
|
| '''Players to Watch:''' ChrisG (Morrigan/Doom/Vergil), JRosa (Morrigan/Doom/Strider), Escalante (Magneto/Morrigan/Doom)
| | [https://replaytheater.app/?game=umvc3&c1=Doctor+Doom&p1c2=Dante Replay Theater Footage] |
|
| |
|
| '''Amaterasu:''' Dr. Doom's level 1 hypers have extremely short duration. Meanwhile, Ammy's level 1 "Okami Shuffle" hyper is one of the longest in the game. This leads to a uniquely powerful synergy when both characters are used in a Team Hyper Combo. When Doom calls a THC with Ammy behind him, he recovers from his hyper very quickly, and can freely act while the opponent remains locked down by Ammy's hyper for several more seconds. In this time, Doom can cross-up the opponent, go for high/low mixups, or even throw them. If Doom opens up the opponent during this time, he can easily build enough meter to THC again.
| |
|
| |
|
| '''Players to Watch:''' MarlinPie (Viper/Doom/Ammy), Zak Bennet (Firebrand/Doom/Ammy), FullSchedule (Viper/Doom/Ammy)
| | === Players to Watch === |
| | {{PlayersToWatchTableHeader-UMVC3}} |
| | {{PlayersToWatchTableRow-UMVC3 |
| | | name = Milky |
| | | charaColorOne = {{CharaColor-UMVC3|Magneto|1}} |
| | | charaColorTwo = {{CharaColor-UMVC3|Doctor_Doom|1}} |
| | | charaColorThree = {{CharaColor-UMVC3|Dante|1}} |
| | | region = |
| | | status = Active |
| | | notes = |
| | | replaysLink = [https://replaytheater.app/?game=umvc3&p1=Angelic Replay Theater] |
| | }} |
| | {{PlayersToWatchTableRow-UMVC3 |
| | | name = Dylnyan |
| | | charaColorOne = {{CharaColor-UMVC3|Zero|2}} |
| | | charaColorTwo = {{CharaColor-UMVC3|Dante|2}} |
| | | charaColorThree = {{CharaColor-UMVC3|Doctor_Doom|2}} |
| | | region = West Coast |
| | | status = Active |
| | | notes = |
| | | replaysLink = [https://replaytheater.app/?game=umvc3&p1=Dylnyan Replay Theater] |
| | }} |
| | {{PlayersToWatchTableRow-UMVC3 |
| | | name = Miya |
| | | charaColorOne = {{CharaColor-UMVC3|M.O.D.O.K.|3}} |
| | | charaColorTwo = {{CharaColor-UMVC3|Dante|3}} |
| | | charaColorThree = {{CharaColor-UMVC3|Doctor_Doom|3}} |
| | | region = JPN |
| | | status = Active |
| | | notes = |
| | | replaysLink = [https://replaytheater.app/?game=umvc3&p1=Miya Replay Theater] |
| | }} |
| | |} |
|
| |
|
| '''Strider Hiryu:''' Hiryu's "Vajra" assist causes a hard knockdown if it hits an airborne opponent. Its great tracking and nearly infinite vertical range make it a scary assist to face in neutral, but not many characters can efficiently capitalize on the knockdown it causes. Doom has no shortage of strong OTG-capable attacks, so nearly any Strider hit can be consistently confirmed into a full combo. In addition, Strider usually does not want to be on point unless he is the last character alive and has lots of meter. Having Doom on the team means that Strider has access to easy DHC options to use as an escape if he gets snapped in.
| | |-| Doom + Ammy = |
|
| |
|
| '''Players to Watch:''' JRosa (Morrigan/Doom/Strider), Clockwork (Vergil/Doom/Strider), DeadXPride (Vergil/Doom/Strider)
| | [[File:UMVC3 Amaterasu Icon.png|center|100px]] |
| | <center>[[File:Beta.png|20px]]</center> |
|
| |
|
| '''Other Players to Watch:''' RayRay (Magneto/Doom/Sentinel), Coach Steve/Insayyane (Nova/Spencer/Doom), FChamp (Magneto/Doom/Phoenix, Magneto/Doom/Dormammu), Miniboss (Spencer/Doom/Strange), ApologyMan (Firebrand/Skrull/Doom, Skrull/Frank/Doom), DiosX (Doom/Storm/Sentinel), Winrich (Wolverine/Doom/Vergil), Paradigm (Haggar/Dormammu/Doom), Joey D (Zero/Doom/Vergil), Romora (Zero/Doom/Vergil), Prodigy (Magneto/Doom/Phoenix), MameSpider (Spider-Man/Doom/Vergil)
| | Okami Shuffle? More like Oki Shuffle. Like Dante, Doom/Ammy is an iconic combination and its power largely boils down to her incredible Follow My Lead -- though Doom is also an able user of Cold Star assist in neutral as well. Ammy uses Beam and Missiles well, and the pair have strong two-way synergy. |
|
| |
|
| Note: This list is deliberately incomplete. Doom is likely the single most played character in UMvC3, and his versatility and naturaly team synergy mean that the overwhelming majority of tournament players have at least dabbled in learning Doom.
| | [https://replaytheater.app/?game=umvc3&c1=Doctor+Doom&p1c2=Amaterasu Replay Theater Footage] |
| | |
| | === Players to Watch === |
| | {{PlayersToWatchTableHeader-UMVC3}} |
| | {{PlayersToWatchTableRow-UMVC3 |
| | | name = Marlinpie |
| | | charaColorOne = {{CharaColor-UMVC3|C._Viper|1}} |
| | | charaColorTwo = {{CharaColor-UMVC3|Doctor_Doom|1}} |
| | | charaColorThree = {{CharaColor-UMVC3|Amaterasu|1}} |
| | | region = East Coast |
| | | status = Inactive |
| | | notes = |
| | | replaysLink = [https://replaytheater.app/?game=umvc3&p1=Marlinpie Replay Theater] |
| | }} |
| | {{PlayersToWatchTableRow-UMVC3 |
| | | name = Zak Bennet |
| | | charaColorOne = {{CharaColor-UMVC3|Firebrand|2}} |
| | | charaColorTwo = {{CharaColor-UMVC3|Doctor Doom|2}} |
| | | charaColorThree = {{CharaColor-UMVC3|Amaterasu|2}} |
| | | region = UK |
| | | status = Inactive |
| | | notes = |
| | | replaysLink = [https://replaytheater.app/?game=umvc3&p1=Zak+Bennet Replay Theater] |
| | }} |
| | {{PlayersToWatchTableRow-UMVC3 |
| | | name = Rokmode |
| | | charaColorOne = {{CharaColor-UMVC3|Morrigan|3}} |
| | | charaColorTwo = {{CharaColor-UMVC3|Doctor_Doom|3}} |
| | | charaColorThree = {{CharaColor-UMVC3|Amaterasu|3}} |
| | | region = West Coast |
| | | status = Active |
| | | notes = |
| | | replaysLink = [https://replaytheater.app/?game=umvc3&p1=Rokmode Replay Theater] |
| | }} |
| | |} |
| | |
| | |-| Doom + Strider = |
| | |
| | [[File:UMVC3 Strider Hiryu Icon.png|center|100px]] |
| | <center>[[File:Gamma.png|20px]]</center> |
| | |
| | Strider Hiryu's Vajra assist causes a Hard Knockdown, and Doom has one of the best kits for converting that into a kill in the entire game. Strider also quite enjoys having Doom's support behind him, using Plasma Beam in particular very well. Excellent pair. |
| | |
| | [https://replaytheater.app/?game=umvc3&c1=Doctor+Doom&p1c2=Strider Replay Theater Footage] |
| | |
| | === Players to Watch === |
| | {{PlayersToWatchTableHeader-UMVC3}} |
| | {{PlayersToWatchTableRow-UMVC3 |
| | | name = Marvelo |
| | | charaColorOne = {{CharaColor-UMVC3|Nova|1}} |
| | | charaColorTwo = {{CharaColor-UMVC3|Doctor_Doom|1}} |
| | | charaColorThree = {{CharaColor-UMVC3|Strider_Hiryu|1}} |
| | | region = East Coast |
| | | status = Active |
| | | notes = |
| | | replaysLink = [https://replaytheater.app/?game=umvc3&p1=Marvelo Replay Theater] |
| | }} |
| | {{PlayersToWatchTableRow-UMVC3 |
| | | name = DeadXPride |
| | | charaColorOne = {{CharaColor-UMVC3|Vergil|2}} |
| | | charaColorTwo = {{CharaColor-UMVC3|Doctor_Doom|2}} |
| | | charaColorThree = {{CharaColor-UMVC3|Strider_Hiryu|2}} |
| | | region = West Coast |
| | | status = Active |
| | | notes = |
| | | replaysLink = [https://replaytheater.app/?game=umvc3&p1=DeadxPride Replay Theater] |
| | }} |
| | |
| | </tabber> |
|
| |
|
| == Alternate Colors == | | == Alternate Colors == |
| Line 931: |
Line 1,145: |
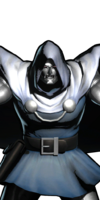
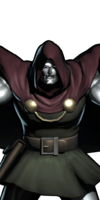
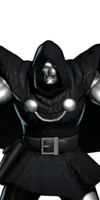
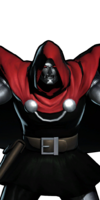
| {{Chara-Colors-UMVC3}} | | {{Chara-Colors-UMVC3}} |
|
| |
|
| | == Hitspheres and Hurtspheres == |
| | |
| | {{#ev:youtube|5R0mnQxB15Y}} |
| | |
| | <br> |
| {{Content Box|content= | | {{Content Box|content= |
| {{Navbox-UMVC3}} | | {{Navbox-UMVC3}} |
| }} | | }} |

