Mr. yagami91 (talk | contribs) |
m (moved move list showcase) |
||
| (8 intermediate revisions by 2 users not shown) | |||
| Line 3: | Line 3: | ||
==Introduction== | ==Introduction== | ||
{{ ProConTable | {{ ProConTable | ||
| pros= | | pros= | ||
* | * TBA | ||
| cons= | | cons= | ||
* | * TBA | ||
}} | }} | ||
==Movelist== | ==Movelist== | ||
<center>'''Move List Showcase''' <br> | |||
<youtube>L0mati-OkD8</youtube></center> | |||
=== Normals === | === Normals === | ||
==== Far Normals ==== | ==== Far Normals ==== | ||
| Line 199: | Line 199: | ||
{{MoveData | {{MoveData | ||
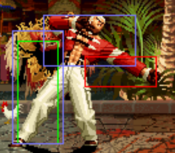
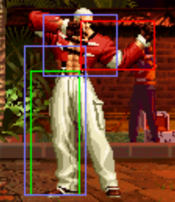
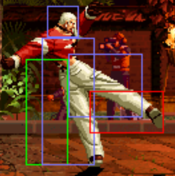
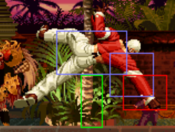
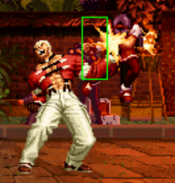
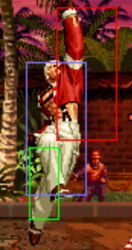
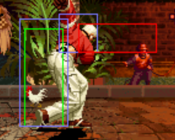
|image=KOF97 Yashiro cl.D.png | |image=KOF97 Yashiro cl.D.png | ||
|caption=50/50 | |caption=Wow! what a 50/50 | ||
|name=cl.D | |name=cl.D | ||
|input={{Icon-SNK|d}} | |input={{Icon-SNK|d}} | ||
| Line 216: | Line 216: | ||
|Block Adv=-10 | |Block Adv=-10 | ||
|invul=- | |invul=- | ||
|description= | |description= *for some reason, this button is an overhead | ||
}} | }} | ||
}} | }} | ||
| Line 631: | Line 631: | ||
<font style="visibility:hidden" size="0"></font> | <font style="visibility:hidden" size="0"></font> | ||
{{MoveData | {{MoveData | ||
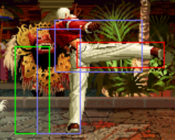
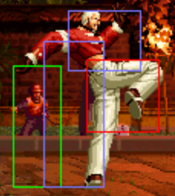
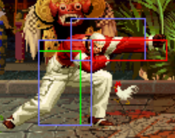
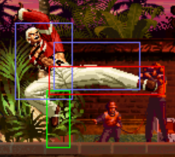
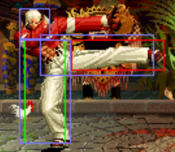
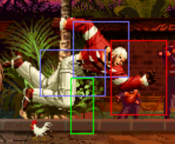
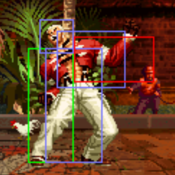
|image= | |image=KOF97 Yashiro f.B.png | ||
|caption= | |caption= | ||
|name=Step Side Kick | |name=Step Side Kick | ||
| Line 653: | Line 653: | ||
}} | }} | ||
}} | }} | ||
=== Special Moves === | === Special Moves === | ||
| Line 746: | Line 745: | ||
<font style="visibility:hidden" size="0"></font> | <font style="visibility:hidden" size="0"></font> | ||
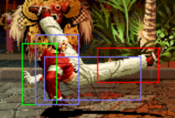
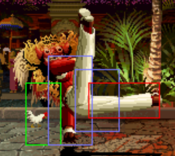
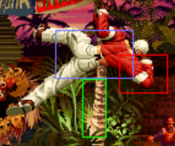
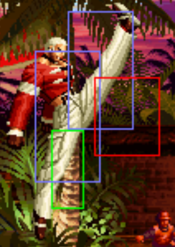
{{MoveData | {{MoveData | ||
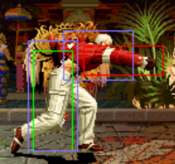
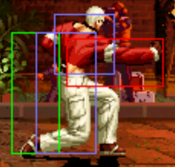
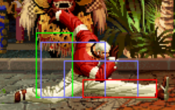
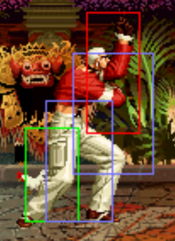
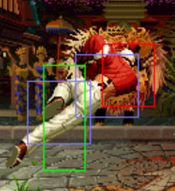
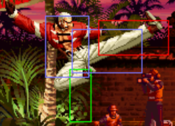
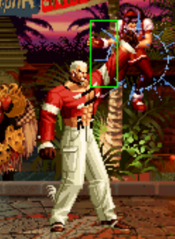
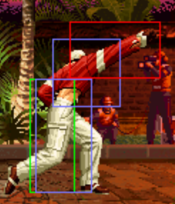
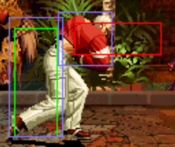
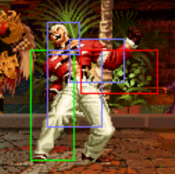
|image= | |image=KOF97 Yashiro hcb.P.png | ||
|image2=KOF97 Yashiro hcb.P(2).png | |||
|image3=KOF97 Yashiro hcb.P(3).png | |||
|image4=KOF97 Yashiro hcb.P(4).png | |||
|caption= | |caption= | ||
|name=Missle Might Bash | |name=Missle Might Bash | ||
| Line 850: | Line 852: | ||
|Block Adv= | |Block Adv= | ||
|invul=- | |invul=- | ||
|description= | |description=It has a shorter range than the HP version. | ||
}} | }} | ||
{{AttackData-KOF97 | {{AttackData-KOF97 | ||
| Line 866: | Line 868: | ||
|Block Adv= | |Block Adv= | ||
|invul=- | |invul=- | ||
|description= | |description=It has more range than the LP version. | ||
}} | }} | ||
{{AttackData-KOF97 | {{AttackData-KOF97 | ||
| Line 889: | Line 891: | ||
<font style="visibility:hidden" size="0"></font> | <font style="visibility:hidden" size="0"></font> | ||
{{MoveData | {{MoveData | ||
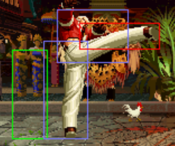
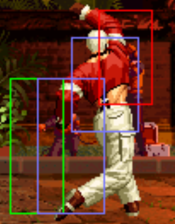
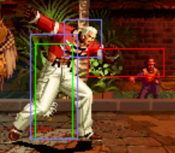
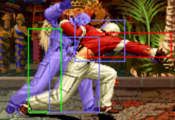
|image= | |image=KOF97 Yashiro qcf qcfP.png | ||
|caption= | |caption= | ||
|name=Final Impact | |name=Final Impact | ||
| Line 908: | Line 910: | ||
|Block Adv= | |Block Adv= | ||
|invul=- | |invul=- | ||
|description= | |description=It has a shorter range than the HP version. Hold LP for more damage. | ||
}} | }} | ||
{{AttackData-KOF97 | {{AttackData-KOF97 | ||
| Line 924: | Line 926: | ||
|Block Adv= | |Block Adv= | ||
|invul=- | |invul=- | ||
|description= | |description=It has more range than the LP version. Hold HP for more damage. | ||
}} | }} | ||
{{AttackData-KOF97 | {{AttackData-KOF97 | ||
| Line 940: | Line 942: | ||
|Block Adv= | |Block Adv= | ||
|ynvul=- | |ynvul=- | ||
|description= | |description=It has a greater range if done with HP. Hold the punch for more damage. | ||
}} | }} | ||
}} | }} | ||
| Line 973: | Line 975: | ||
==Strategy== | ==Strategy== | ||
[[Category:Yashiro Nanakase]] | |||
[[Category:The King of Fighters '97]] | [[Category:The King of Fighters '97]] | ||
{{The King Of Fighters '97}} | {{The King Of Fighters '97}} | ||
Latest revision as of 08:21, 23 May 2024
Introduction
| Strengths | Weaknesses |
|---|---|
|
|
Movelist
Normals
Far Normals
| Guard | Cancel Properties | Startup | Active | Recovery | Total | Invulnerability | Hit Advantage | Block Advantage | Stun | Guard Damage | Damage |
|---|---|---|---|---|---|---|---|---|---|---|---|
| Mid | command | 3 | 4 | 7 | 14 | - | +1 | -1 | - | - | - |
| Guard | Cancel Properties | Startup | Active | Recovery | Total | Invulnerability | Hit Advantage | Block Advantage | Stun | Guard Damage | Damage |
|---|---|---|---|---|---|---|---|---|---|---|---|
| Mid | - | 6 | 7 | 12 | 25 | - | -7 | -9 | - | - | - |
| Guard | Cancel Properties | Startup | Active | Recovery | Total | Invulnerability | Hit Advantage | Block Advantage | Stun | Guard Damage | Damage |
|---|---|---|---|---|---|---|---|---|---|---|---|
| Mid | - | 10 | 4 | 29 | 43 | - | -13 | -15 | - | - | - |
| Guard | Cancel Properties | Startup | Active | Recovery | Total | Invulnerability | Hit Advantage | Block Advantage | Stun | Guard Damage | Damage |
|---|---|---|---|---|---|---|---|---|---|---|---|
| Mid | - | 8 | 4 | 29 | 41 | - | -13 | -15 | - | - | - |
Close Range Normals
| Guard | Cancel Properties | Startup | Active | Recovery | Total | Invulnerability | Hit Advantage | Block Advantage | Stun | Guard Damage | Damage |
|---|---|---|---|---|---|---|---|---|---|---|---|
| Mid | command | 3 | 4 | 4 | 11 | - | +4 | +2 | - | - | - |
| Guard | Cancel Properties | Startup | Active | Recovery | Total | Invulnerability | Hit Advantage | Block Advantage | Stun | Guard Damage | Damage |
|---|---|---|---|---|---|---|---|---|---|---|---|
| Mid | command | 5 | 5 | 7 | 19 | - | 0 | -2 | - | - | - |
| Guard | Cancel Properties | Startup | Active | Recovery | Total | Invulnerability | Hit Advantage | Block Advantage | Stun | Guard Damage | Damage |
|---|---|---|---|---|---|---|---|---|---|---|---|
| Mid | command | 6 | 3,4 | 31 | 44 | - | -18 | -20 | - | - | - |
| Guard | Cancel Properties | Startup | Active | Recovery | Total | Invulnerability | Hit Advantage | Block Advantage | Stun | Guard Damage | Damage |
|---|---|---|---|---|---|---|---|---|---|---|---|
| Overhead | command | 3 | 5 | 23 | 31 | - | -8 | -10 | - | - | - |
| |||||||||||
Crouching Normals
| Guard | Cancel Properties | Startup | Active | Recovery | Total | Invulnerability | Hit Advantage | Block Advantage | Stun | Guard Damage | Damage |
|---|---|---|---|---|---|---|---|---|---|---|---|
| Mid | command | 3 | 4 | 6 | 13 | - | +2 | 0 | - | - | - |
| Guard | Cancel Properties | Startup | Active | Recovery | Total | Invulnerability | Hit Advantage | Block Advantage | Stun | Guard Damage | Damage |
|---|---|---|---|---|---|---|---|---|---|---|---|
| Low | - | 3 | 4 | 9 | 16 | - | -1 | -3 | - | - | - |
| Guard | Cancel Properties | Startup | Active | Recovery | Total | Invulnerability | Hit Advantage | Block Advantage | Stun | Guard Damage | Damage |
|---|---|---|---|---|---|---|---|---|---|---|---|
| Mid | command | 5 | 8 | 26 | 39 | - | -14 | -16 | - | - | - |
| Guard | Cancel Properties | Startup | Active | Recovery | Total | Invulnerability | Hit Advantage | Block Advantage | Stun | Guard Damage | Damage |
|---|---|---|---|---|---|---|---|---|---|---|---|
| Low | command | 9(3) | 3,5 | 22 | 42 | - | KD | -9 | - | - | - |
Neutral Jumping Normals
| Guard | Cancel Properties | Startup | Active | Recovery | Total | Invulnerability | Hit Advantage | Block Advantage | Stun | Guard Damage | Damage |
|---|---|---|---|---|---|---|---|---|---|---|---|
| Overhead | - | 8 | 9 | - | - | - | - | - | - | - | - |
| Guard | Cancel Properties | Startup | Active | Recovery | Total | Invulnerability | Hit Advantage | Block Advantage | Stun | Guard Damage | Damage |
|---|---|---|---|---|---|---|---|---|---|---|---|
| Overhead | - | 6 | 13 | - | - | - | - | - | - | - | - |
| Guard | Cancel Properties | Startup | Active | Recovery | Total | Invulnerability | Hit Advantage | Block Advantage | Stun | Guard Damage | Damage |
|---|---|---|---|---|---|---|---|---|---|---|---|
| Overhead | - | 9 | 10 | - | - | - | - | - | - | - | - |
| Guard | Cancel Properties | Startup | Active | Recovery | Total | Invulnerability | Hit Advantage | Block Advantage | Stun | Guard Damage | Damage |
|---|---|---|---|---|---|---|---|---|---|---|---|
| Overhead | - | 9 | 7 | - | - | - | - | - | - | - | - |
Diagonal Jump Normals
| Guard | Cancel Properties | Startup | Active | Recovery | Total | Invulnerability | Hit Advantage | Block Advantage | Stun | Guard Damage | Damage |
|---|---|---|---|---|---|---|---|---|---|---|---|
| Overhead | - | 8 | 9 | - | - | - | - | - | - | - | - |
| Guard | Cancel Properties | Startup | Active | Recovery | Total | Invulnerability | Hit Advantage | Block Advantage | Stun | Guard Damage | Damage |
|---|---|---|---|---|---|---|---|---|---|---|---|
| Overhead | - | 6 | 13 | - | - | - | - | - | - | - | - |
| Guard | Cancel Properties | Startup | Active | Recovery | Total | Invulnerability | Hit Advantage | Block Advantage | Stun | Guard Damage | Damage |
|---|---|---|---|---|---|---|---|---|---|---|---|
| Overhead | - | 9 | 10 | - | - | - | - | - | - | - | - |
| Guard | Cancel Properties | Startup | Active | Recovery | Total | Invulnerability | Hit Advantage | Block Advantage | Stun | Guard Damage | Damage |
|---|---|---|---|---|---|---|---|---|---|---|---|
| Overhead | - | 9 | 7 | - | - | - | - | - | - | - | - |
Blowback Attack
| Guard | Cancel Properties | Startup | Active | Recovery | Total | Invulnerability | Hit Advantage | Block Advantage | Stun | Guard Damage | Damage |
|---|---|---|---|---|---|---|---|---|---|---|---|
| Mid | command | 11 | 5 | 24 | 40 | - | KD | -6 | - | - | - |
| Guard | Cancel Properties | Startup | Active | Recovery | Total | Invulnerability | Hit Advantage | Block Advantage | Stun | Guard Damage | Damage |
|---|---|---|---|---|---|---|---|---|---|---|---|
| Overhead | - | 11 | 4 | - | - | - | KD | - | - | - | - |
Throws
| Guard | Cancel Properties | Startup | Active | Recovery | Total | Invulnerability | Hit Advantage | Block Advantage | Stun | Guard Damage | Damage |
|---|---|---|---|---|---|---|---|---|---|---|---|
| Throw | - | 1 | 1 | 0 | - | - | KD | - | - | - | - |
| Guard | Cancel Properties | Startup | Active | Recovery | Total | Invulnerability | Hit Advantage | Block Advantage | Stun | Guard Damage | Damage |
|---|---|---|---|---|---|---|---|---|---|---|---|
| Throw | - | 1 | 1 | 0 | - | - | HKD | - | - | - | - |
Command Normals
| Guard | Cancel Properties | Startup | Active | Recovery | Total | Invulnerability | Hit Advantage | Block Advantage | Stun | Guard Damage | Damage |
|---|---|---|---|---|---|---|---|---|---|---|---|
| Mid | - | 11 | 5 | 28 | 44 | - | -13 | -15 | - | - | - |
Special Moves
Super Moves
Combos
General notes:
- In Max Mode moves have more pushback, so some combos won't work the same.
meterless
(midscreen)
- (Cr.B,Cr.A)/(Cr.Ax2-3)/(cl.A,cl.B), (st.A,st.B)
good and easy poke string. it's slightly easier to link from cr.B to cr.A compared to kof 98.
- (J.X), cl.C / cl.D, hcb+C / f.B / hcf.P
main BnB combo. if you want stun, then do f.B or hcf P
- Standing CD(CH), qcb+P / hcf P
combo from a CH st.CD. qcb P is the most reliable option as it will always connect.
(corner)
- (Cr.B,Cr.A)/(Cr.Ax2-3), dp A
due to the lacking range on the 2nd hit of dp A, you have to do it in the corner.
with meter
- (Cr.B,Cr.A)/(Cr.Ax3), qcb,hcf+A
great light conversion. does almost about 50% dmg
- (J.X), cl.C / cl.D, qcb,hcf P
- Standing CD(CH), qcfx2 P
Strategy

