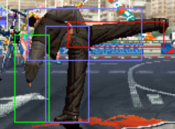
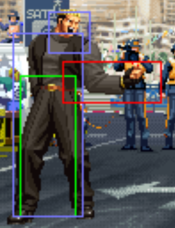
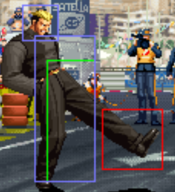
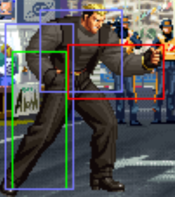
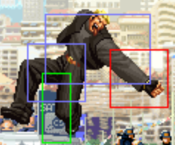
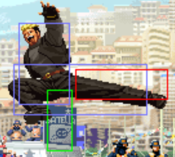
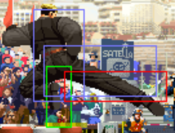
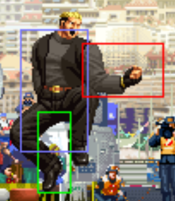
Mr. yagami91 (talk | contribs) m (→Introduction) |
m (added video) |
||
| (4 intermediate revisions by one other user not shown) | |||
| Line 13: | Line 13: | ||
==Movelist== | ==Movelist== | ||
<center>'''Move List Showcase''' <br> | |||
<youtube>PXeZOrGxVbo</youtube></center> | |||
=== Normals === | === Normals === | ||
==== Far Normals ==== | ==== Far Normals ==== | ||
| Line 18: | Line 21: | ||
<font style="visibility:hidden" size="0"></font> | <font style="visibility:hidden" size="0"></font> | ||
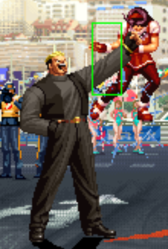
{{MoveData | {{MoveData | ||
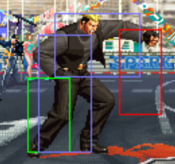
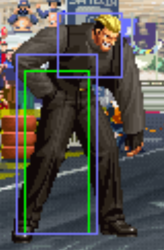
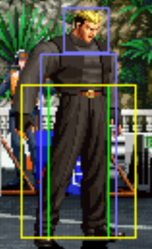
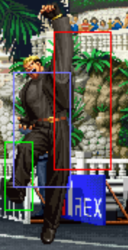
|image= | |image=KOF97 Yamazaki St.A.png | ||
|caption= | |caption= | ||
|name=st.A | |name=st.A | ||
| Line 29: | Line 32: | ||
|Cancel= | |Cancel= | ||
|Guard= Mid | |Guard= Mid | ||
|Startup= | |Startup=6 | ||
| | |active=5 | ||
| | |recovery=7 | ||
| | |total=18 | ||
|Hit Adv= | |Hit Adv=0 | ||
|Block Adv= | |Block Adv=-2 | ||
| | |invul=- | ||
|description= | |description= | ||
}} | }} | ||
| Line 43: | Line 46: | ||
<font style="visibility:hidden" size="0"></font> | <font style="visibility:hidden" size="0"></font> | ||
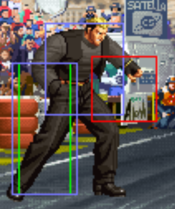
{{MoveData | {{MoveData | ||
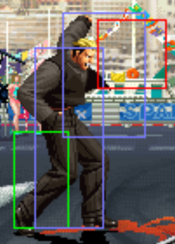
|image= | |image=KOF97 Yamazaki St.B.png | ||
|caption= | |caption= | ||
|name=st.B | |name=st.B | ||
| Line 54: | Line 57: | ||
|Cancel= | |Cancel= | ||
|Guard= Mid | |Guard= Mid | ||
|Startup= | |Startup=5 | ||
| | |active=4 | ||
| | |recovery=9 | ||
| | |total=18 | ||
|Hit Adv= | |Hit Adv=-1 | ||
|Block Adv= | |Block Adv=-3 | ||
| | |invul=- | ||
|description= | |description= | ||
}} | }} | ||
| Line 68: | Line 71: | ||
<font style="visibility:hidden" size="0"></font> | <font style="visibility:hidden" size="0"></font> | ||
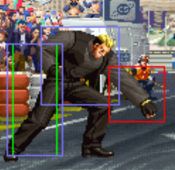
{{MoveData | {{MoveData | ||
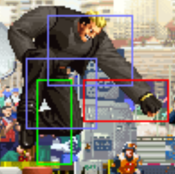
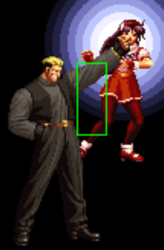
|image= | |image=KOF97 Yamazaki St.C.png | ||
|caption= | |caption= | ||
|name=st.C | |name=st.C | ||
| Line 79: | Line 82: | ||
|Cancel= | |Cancel= | ||
|Guard= Mid | |Guard= Mid | ||
|Startup= | |Startup=13 | ||
| | |active=5 | ||
| | |recovery=26 | ||
| | |total=44 | ||
|Hit Adv= | |Hit Adv=-11 | ||
|Block Adv= | |Block Adv=-13 | ||
| | |invul=- | ||
|description= | |description= | ||
}} | }} | ||
| Line 93: | Line 96: | ||
<font style="visibility:hidden" size="0"></font> | <font style="visibility:hidden" size="0"></font> | ||
{{MoveData | {{MoveData | ||
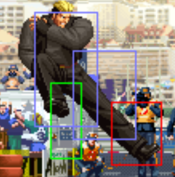
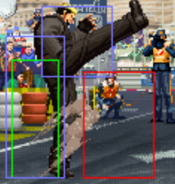
|image= | |image=KOF97 Yamazaki St.D.png | ||
|caption= | |caption= | ||
|name=st.D | |name=st.D | ||
| Line 104: | Line 107: | ||
|Cancel= | |Cancel= | ||
|Guard= Mid | |Guard= Mid | ||
|Startup= | |Startup=9 | ||
| | |active=6 | ||
| | |recovery=26 | ||
| | |total=41 | ||
|Hit Adv= | |Hit Adv=-12 | ||
|Block Adv= | |Block Adv=-14 | ||
| | |invul=- | ||
|description= | |description= | ||
}} | }} | ||
| Line 119: | Line 122: | ||
<font style="visibility:hidden" size="0"></font> | <font style="visibility:hidden" size="0"></font> | ||
{{MoveData | {{MoveData | ||
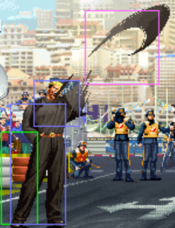
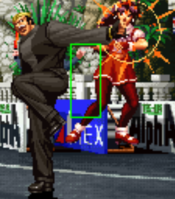
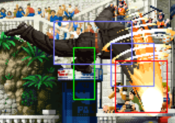
|image= | |image=KOF97 Yamazaki Cl.A.png | ||
|caption= | |caption= | ||
|name=cl.A | |name=cl.A | ||
| Line 128: | Line 131: | ||
|G. Damage= | |G. Damage= | ||
|Stun=- | |Stun=- | ||
|Cancel= | |Cancel=command | ||
|Guard= Mid | |Guard= Mid | ||
|Startup= | |Startup=3 | ||
| | |active=5 | ||
| | |recovery=5 | ||
| | |total=13 | ||
|Hit Adv= | |Hit Adv=+2 | ||
|Block Adv= | |Block Adv=0 | ||
| | |invul=- | ||
|description= | |description= | ||
}} | }} | ||
| Line 144: | Line 147: | ||
<font style="visibility:hidden" size="0"></font> | <font style="visibility:hidden" size="0"></font> | ||
{{MoveData | {{MoveData | ||
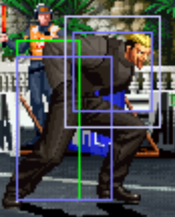
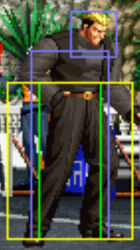
|image= | |image=KOF97 Yamazaki Cl.B.png | ||
|caption= | |caption= | ||
|name=cl.B | |name=cl.B | ||
| Line 153: | Line 156: | ||
|G. Damage= | |G. Damage= | ||
|Stun=- | |Stun=- | ||
|Cancel= | |Cancel=command | ||
|Guard= | |Guard=Low | ||
|Startup= | |Startup=4 | ||
| | |active=4 | ||
| | |recovery=7 | ||
| | |total=15 | ||
|Hit Adv= | |Hit Adv=+1 | ||
|Block Adv= | |Block Adv=-1 | ||
| | |invul=- | ||
|description= | |description= | ||
}} | }} | ||
| Line 169: | Line 172: | ||
<font style="visibility:hidden" size="0"></font> | <font style="visibility:hidden" size="0"></font> | ||
{{MoveData | {{MoveData | ||
|image= | |image=KOF97 Yamazaki Cl.C.png | ||
|caption= | |caption= | ||
|name=cl.C | |name=cl.C | ||
| Line 178: | Line 181: | ||
|G. Damage= | |G. Damage= | ||
|Stun=- | |Stun=- | ||
|Cancel= | |Cancel=command | ||
|Guard= Mid | |Guard= Mid | ||
|Startup= | |Startup=2 | ||
| | |active=6 | ||
| | |recovery=22 | ||
| | |total=30 | ||
|Hit Adv= | |Hit Adv=-8 | ||
|Block Adv= | |Block Adv=-10 | ||
| | |invul=- | ||
|description= | |description= | ||
}} | }} | ||
| Line 194: | Line 197: | ||
<font style="visibility:hidden" size="0"></font> | <font style="visibility:hidden" size="0"></font> | ||
{{MoveData | {{MoveData | ||
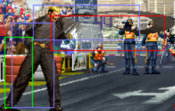
|image= | |image=KOF97 Yamazaki Cl.D(1).png | ||
|image2=KOF97 Yamazaki Cl.D(2).png | |||
|caption= | |caption= | ||
|name=cl.D | |name=cl.D | ||
| Line 203: | Line 207: | ||
|G. Damage= | |G. Damage= | ||
|Stun=- | |Stun=- | ||
|Cancel= | |Cancel=command (1st hit) | ||
|Guard= Mid | |Guard= Mid | ||
|Startup= | |Startup=5 | ||
| | |active=3,7 | ||
| | |recovery=16 | ||
| | |total=31 | ||
|Hit Adv= | |Hit Adv=-3 | ||
|Block Adv= | |Block Adv=-5 | ||
| | |invul=- | ||
|description= | |description= | ||
}} | }} | ||
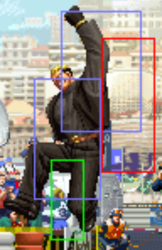
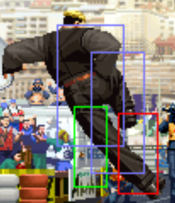
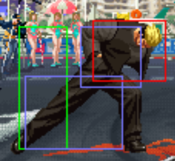
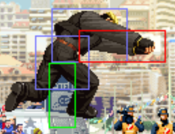
| Line 220: | Line 224: | ||
<font style="visibility:hidden" size="0"></font> | <font style="visibility:hidden" size="0"></font> | ||
{{MoveData | {{MoveData | ||
|image= | |image=KOF97 Yamazaki Cr.A.png | ||
|caption= | |caption= | ||
|name=cr.A | |name=cr.A | ||
| Line 229: | Line 233: | ||
|G. Damage= | |G. Damage= | ||
|Stun=- | |Stun=- | ||
|Cancel= | |Cancel=command | ||
|Guard= Mid | |Guard= Mid | ||
|Startup= | |Startup=5 | ||
| | |active=4 | ||
| | |recovery=7 | ||
| | |total=16 | ||
|Hit Adv= | |Hit Adv=+1 | ||
|Block Adv= | |Block Adv=-1 | ||
| | |invul=- | ||
|description= | |description= | ||
}} | }} | ||
| Line 245: | Line 249: | ||
<font style="visibility:hidden" size="0"></font> | <font style="visibility:hidden" size="0"></font> | ||
{{MoveData | {{MoveData | ||
|image= | |image=KOF97 Yamazaki cr.B.png | ||
|caption= | |caption= | ||
|name=cr.B | |name=cr.B | ||
| Line 256: | Line 260: | ||
|Cancel= | |Cancel= | ||
|Guard= Low | |Guard= Low | ||
|Startup= | |Startup=5 | ||
| | |active=5 | ||
| | |recovery=7 | ||
| | |total=17 | ||
|Hit Adv= | |Hit Adv=0 | ||
|Block Adv= | |Block Adv=-2 | ||
| | |invul=- | ||
|description= | |description= | ||
}} | }} | ||
| Line 270: | Line 274: | ||
<font style="visibility:hidden" size="0"></font> | <font style="visibility:hidden" size="0"></font> | ||
{{MoveData | {{MoveData | ||
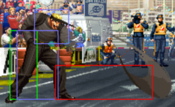
|image= | |image=KOF97 Yamazaki Cr.C(1).png | ||
|image2=KOF97 Yamazaki Cr.C(2).png | |||
|caption= | |caption= | ||
|name=cr.C | |name=cr.C | ||
| Line 279: | Line 284: | ||
|G. Damage= | |G. Damage= | ||
|Stun=- | |Stun=- | ||
|Cancel= | |Cancel=command | ||
|Guard= Mid | |Guard= Mid | ||
|Startup= | |Startup=3 | ||
| | |active=3,3 | ||
| | |recovery=24 | ||
| | |total=33 | ||
|Hit Adv= | |Hit Adv=-10 | ||
|Block Adv= | |Block Adv=-12 | ||
| | |invul=- | ||
|description= | |description= | ||
}} | }} | ||
| Line 295: | Line 300: | ||
<font style="visibility:hidden" size="0"></font> | <font style="visibility:hidden" size="0"></font> | ||
{{MoveData | {{MoveData | ||
|image= | |image=KOF97 Yamazaki Cr.D.png | ||
|caption= | |caption= | ||
|name=cr.D | |name=cr.D | ||
| Line 306: | Line 311: | ||
|Cancel= | |Cancel= | ||
|Guard= Low | |Guard= Low | ||
|Startup= | |Startup=8 | ||
| | |active=12 | ||
| | |recovery=18 | ||
| | |total=38 | ||
|Hit Adv=KD | |Hit Adv=KD | ||
|Block Adv= | |Block Adv=-12 | ||
| | |invul=- | ||
|description= | |description= | ||
}} | }} | ||
| Line 321: | Line 326: | ||
<font style="visibility:hidden" size="0"></font> | <font style="visibility:hidden" size="0"></font> | ||
{{MoveData | {{MoveData | ||
|image= | |image=KOF97 Yamazaki jp.A.png | ||
|caption= | |caption= | ||
|name=nj.A | |name=nj.A | ||
| Line 332: | Line 337: | ||
|Cancel= | |Cancel= | ||
|Guard=Overhead | |Guard=Overhead | ||
|Startup= | |Startup=3 | ||
| | |active=11 | ||
| | |recovery= | ||
|Total= | |Total= | ||
|Hit Adv= | |Hit Adv= | ||
|Block Adv= | |Block Adv= | ||
| | |invul=- | ||
|description= | |description= | ||
}} | }} | ||
| Line 346: | Line 351: | ||
<font style="visibility:hidden" size="0"></font> | <font style="visibility:hidden" size="0"></font> | ||
{{MoveData | {{MoveData | ||
|image= | |image=KOF97 Yamazaki nj.B.png | ||
|caption= | |caption= | ||
|name=nj.B | |name=nj.B | ||
| Line 357: | Line 362: | ||
|Cancel= | |Cancel= | ||
|Guard=Overhead | |Guard=Overhead | ||
|Startup= | |Startup=3 | ||
| | |active=11 | ||
| | |recovery= | ||
|Total= | |Total= | ||
|Hit Adv= | |Hit Adv= | ||
|Block Adv= | |Block Adv= | ||
| | |invul=- | ||
|description= | |description= | ||
}} | }} | ||
| Line 371: | Line 376: | ||
<font style="visibility:hidden" size="0"></font> | <font style="visibility:hidden" size="0"></font> | ||
{{MoveData | {{MoveData | ||
|image= | |image=KOF97 Yamazaki nj.C.png | ||
|caption= | |caption= | ||
|name=nj.C | |name=nj.C | ||
| Line 382: | Line 387: | ||
|Cancel= | |Cancel= | ||
|Guard=Overhead | |Guard=Overhead | ||
|Startup= | |Startup=12 | ||
| | |active=7 | ||
| | |recovery= | ||
|Total= | |Total= | ||
|Hit Adv= | |Hit Adv= | ||
|Block Adv= | |Block Adv= | ||
| | |invul=- | ||
|description= | |description= | ||
}} | }} | ||
| Line 396: | Line 401: | ||
<font style="visibility:hidden" size="0"></font> | <font style="visibility:hidden" size="0"></font> | ||
{{MoveData | {{MoveData | ||
|image= | |image=KOF97 Yamazaki nj.D.png | ||
|caption= | |caption= | ||
|name=nj.D | |name=nj.D | ||
| Line 407: | Line 412: | ||
|Cancel= | |Cancel= | ||
|Guard=Overhead | |Guard=Overhead | ||
|Startup= | |Startup=8 | ||
| | |active=7 | ||
| | |recovery= | ||
|Total= | |Total= | ||
|Hit Adv= | |Hit Adv= | ||
|Block Adv= | |Block Adv= | ||
| | |invul=- | ||
|description= | |description= | ||
}} | }} | ||
| Line 422: | Line 427: | ||
<font style="visibility:hidden" size="0"></font> | <font style="visibility:hidden" size="0"></font> | ||
{{MoveData | {{MoveData | ||
|image= | |image=KOF97 Yamazaki jp.A.png | ||
|caption= | |caption= | ||
|name=dj.A | |name=dj.A | ||
| Line 433: | Line 438: | ||
|Cancel= | |Cancel= | ||
|Guard=Overhead | |Guard=Overhead | ||
|Startup= | |Startup=3 | ||
| | |active=11 | ||
| | |recovery= | ||
|Total= | |Total= | ||
|Hit Adv= | |Hit Adv= | ||
|Block Adv= | |Block Adv= | ||
| | |invul=- | ||
|description= | |description= | ||
}} | }} | ||
| Line 447: | Line 452: | ||
<font style="visibility:hidden" size="0"></font> | <font style="visibility:hidden" size="0"></font> | ||
{{MoveData | {{MoveData | ||
|image= | |image=KOF97 Yamazaki jp.B.png | ||
|caption= | |caption= | ||
|name=dj.B | |name=dj.B | ||
| Line 458: | Line 463: | ||
|Cancel= | |Cancel= | ||
|Guard=Overhead | |Guard=Overhead | ||
|Startup= | |Startup=6 | ||
| | |active=9 | ||
| | |recovery= | ||
|Total= | |Total= | ||
|Hit Adv= | |Hit Adv= | ||
|Block Adv= | |Block Adv= | ||
| | |invul=- | ||
|description= | |description= | ||
}} | }} | ||
| Line 472: | Line 477: | ||
<font style="visibility:hidden" size="0"></font> | <font style="visibility:hidden" size="0"></font> | ||
{{MoveData | {{MoveData | ||
|image= | |image=KOF97 yamazaki jp.C.png | ||
|image2=KOF97 yamazaki jp.C(2).png | |||
|caption= | |caption= | ||
|name=dj.C | |name=dj.C | ||
| Line 483: | Line 489: | ||
|Cancel= | |Cancel= | ||
|Guard=Overhead | |Guard=Overhead | ||
|Startup= | |Startup=4 | ||
| | |active=3,5 | ||
| | |recovery= | ||
|Total= | |Total= | ||
|Hit Adv= | |Hit Adv= | ||
|Block Adv= | |Block Adv= | ||
| | |invul=- | ||
|description= | |description= | ||
}} | }} | ||
| Line 497: | Line 503: | ||
<font style="visibility:hidden" size="0"></font> | <font style="visibility:hidden" size="0"></font> | ||
{{MoveData | {{MoveData | ||
|image= | |image=KOF97 Yamazaki jp.D.png | ||
|caption= | |caption= | ||
|name=dj.D | |name=dj.D | ||
| Line 508: | Line 514: | ||
|Cancel= | |Cancel= | ||
|Guard=Overhead | |Guard=Overhead | ||
|Startup= | |Startup=8 | ||
| | |active=9 | ||
| | |recovery= | ||
|Total= | |Total= | ||
|Hit Adv= | |Hit Adv= | ||
|Block Adv= | |Block Adv= | ||
| | |invul=- | ||
|description= | |description= | ||
}} | }} | ||
| Line 523: | Line 529: | ||
<font style="visibility:hidden" size="0"></font> | <font style="visibility:hidden" size="0"></font> | ||
{{MoveData | {{MoveData | ||
|image= | |image=KOF97 Yamazaki st.CD.png | ||
|caption= | |caption= | ||
|name= CD | |name= CD | ||
| Line 532: | Line 538: | ||
|G. Damage= | |G. Damage= | ||
|Stun=- | |Stun=- | ||
|Cancel= | |Cancel=special | ||
|Guard= Mid | |Guard= Mid | ||
|Startup= | |Startup=16 | ||
| | |active=8 | ||
| | |recovery=18 | ||
| | |total=42 | ||
|Hit Adv= | |Hit Adv=KD | ||
|Block Adv= | |Block Adv=-4 | ||
| | |invul=- | ||
|description= | |description= | ||
}} | }} | ||
| Line 548: | Line 554: | ||
<font style="visibility:hidden" size="0"></font> | <font style="visibility:hidden" size="0"></font> | ||
{{MoveData | {{MoveData | ||
|image= | |image=KOF97 yamazaki jp.CD.png | ||
|caption= | |caption= | ||
|name= jp.CD | |name= jp.CD | ||
| Line 558: | Line 564: | ||
|Stun=- | |Stun=- | ||
|Cancel= | |Cancel= | ||
|Guard= | |Guard=Overhead | ||
|Startup= | |Startup=12 | ||
| | |active=4 | ||
| | |recovery= | ||
|Total= | |Total= | ||
|Hit Adv= | |Hit Adv=KD | ||
|Block Adv= | |Block Adv= | ||
| | |invul=- | ||
|description= | |description= | ||
}} | }} | ||
| Line 574: | Line 580: | ||
<font style="visibility:hidden" size="0"></font> | <font style="visibility:hidden" size="0"></font> | ||
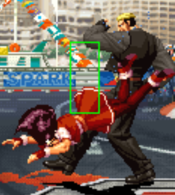
{{MoveData | {{MoveData | ||
|image= | |image=KOF97 Yamazaki C throw.png | ||
|caption= | |caption= | ||
|name=Shime Age | |name=Shime Age | ||
| Line 585: | Line 591: | ||
|Cancel= | |Cancel= | ||
|Guard= Throw | |Guard= Throw | ||
|Startup= | |Startup=1 | ||
| | |active=1 | ||
| | |recovery=0 | ||
| | |total= | ||
|Hit Adv= | |Hit Adv=HKD | ||
|Block Adv= | |Block Adv= | ||
| | |invul=- | ||
|description= | |description= | ||
}} | }} | ||
| Line 599: | Line 605: | ||
<font style="visibility:hidden" size="0"></font> | <font style="visibility:hidden" size="0"></font> | ||
{{MoveData | {{MoveData | ||
|image= | |image=KOF97 Yamazaki D throw.png | ||
|caption= | |caption= | ||
|name=Bun Nage | |name=Bun Nage | ||
| Line 610: | Line 616: | ||
|Cancel= | |Cancel= | ||
|Guard= Throw | |Guard= Throw | ||
|Startup= | |Startup=1 | ||
| | |active=1 | ||
| | |recovery=0 | ||
| | |total= | ||
|Hit Adv= | |Hit Adv=HKD | ||
|Block Adv= | |Block Adv= | ||
| | |invul=- | ||
|description= | |description= | ||
}} | }} | ||
| Line 625: | Line 631: | ||
<font style="visibility:hidden" size="0"></font> | <font style="visibility:hidden" size="0"></font> | ||
{{MoveData | {{MoveData | ||
|image= | |image=KOF97 Yamazaki F.A.png | ||
|image2=KOF97 Yamazaki f.A(2).png | |||
|caption= | |caption= | ||
|name=Bussashi | |name=Bussashi | ||
| Line 635: | Line 642: | ||
|G. Damage= | |G. Damage= | ||
|Stun=- | |Stun=- | ||
|Cancel= | |Cancel= (special) | ||
|Guard= | |Guard=overhead (mid) | ||
|Startup= | |Startup=12 | ||
| | |active=3,5 | ||
| | |recovery=24 | ||
| | |total=44 | ||
|Hit Adv= | |Hit Adv=-9 | ||
|Block Adv= | |Block Adv=-11 | ||
| | |invul=- | ||
|description= | |description= | ||
}} | }} | ||
| Line 652: | Line 659: | ||
<font style="visibility:hidden" size="0"></font> | <font style="visibility:hidden" size="0"></font> | ||
{{MoveData | {{MoveData | ||
|image= | |image=KOF97 Yamazaki Qcb.P(hold).png | ||
|image2=KOF97 Yamazaki Qcb.A.png | |||
|image3=KOF97 Yamazaki Qcb.B.png | |||
|image4=KOF97 Yamazaki Qcb.C.png | |||
|caption= | |caption= | ||
|name=Hebi Tsukai | |name=Hebi Tsukai | ||
| Line 658: | Line 668: | ||
|data= | |data= | ||
{{AttackData-KOF97 | {{AttackData-KOF97 | ||
|version={{Icon-SNK|a}} | |||
|Damage=- | |||
|G. Damage=0 | |||
|Stun=- | |||
|Cancel= | |||
|Guard=Mid | |||
|Startup=8 | |||
|active=3,5 | |||
|recovery=29 | |||
|total=45 | |||
|Hit Adv=(-18)KD | |||
|Block Adv=-20 | |||
|invul=- | |||
|description=*this can hit certian characters standing but is -18 on hit | |||
}} | |||
{{AttackData-KOF97 | |||
|version={{Icon-SNK|b}} | |||
|Damage=- | |||
|G. Damage=0 | |||
|Stun=- | |||
|Cancel= | |||
|Guard=Mid | |||
|Startup=8 | |||
|active=3,4 | |||
|recovery=31 | |||
|total=46 | |||
|Hit Adv=-11 | |||
|Block Adv=-17 | |||
|invul=- | |||
|description= | |||
}} | |||
{{AttackData-KOF97 | |||
|version={{Icon-SNK|c}} | |||
|Damage=- | |||
|G. Damage=0 | |||
|Stun=- | |||
|Cancel= | |||
|Guard=Mid | |||
|Startup=12 | |||
|active=3,4 | |||
|recovery=31 | |||
|total=50 | |||
|Hit Adv=-15 | |||
|Block Adv=-17 | |||
|invul=- | |||
|description= | |||
}} | |||
{{AttackData-KOF97 | |||
|version=[ {{Icon-SNK|a}}/{{Icon-SNK|b}}/{{Icon-SNK|c}} ]~{{Icon-SNK|d}} | |||
|Damage=- | |Damage=- | ||
|G. Damage=0 | |G. Damage=0 | ||
|Stun=- | |Stun=- | ||
|Cancel= | |Cancel= | ||
|Guard= | |Guard= | ||
|Startup= | |Startup= | ||
| | |active= | ||
| | |recovery= | ||
| | |total= | ||
|Hit Adv= | |Hit Adv= | ||
|Block Adv= | |Block Adv=- | ||
| | |invul=- | ||
|description=* | |description=Stance cancel | ||
*leaves yamazaki -4 on block and -2 on hit when canceled from light normals | |||
*leaves yamazaki +4 on block and +6 on hit when canceled from heavies and command normals | |||
*leaves yamazaki +8 on block when canceled from stand CD | |||
*leaves yamazaki -1 on block and +16 when cancel from dpK>qcb P. | |||
}} | }} | ||
}} | }} | ||
| Line 677: | Line 740: | ||
<font style="visibility:hidden" size="0"></font> | <font style="visibility:hidden" size="0"></font> | ||
{{MoveData | {{MoveData | ||
|image= | |image=KOF97 Yamazaki Dp.P(1).png | ||
|image2=KOF97 Yamazaki Dp.P(2).png | |||
|caption= | |caption= | ||
|name=Sabaki no Aikuchi | |name=Sabaki no Aikuchi | ||
| Line 688: | Line 752: | ||
|Stun=- | |Stun=- | ||
|Cancel= | |Cancel= | ||
|Guard= | |Guard=Mid | ||
|Startup= | |Startup=11(13) | ||
| | |active=2,3 | ||
| | |recovery=27 | ||
| | |total= | ||
|Hit Adv= | |Hit Adv=KD | ||
|Block Adv= | |Block Adv=-12 | ||
| | |invul=- | ||
|description= | |description= | ||
}} | }} | ||
| Line 704: | Line 768: | ||
|Stun=- | |Stun=- | ||
|Cancel= | |Cancel= | ||
|Guard= | |Guard=Mid | ||
|Startup= | |Startup=13(10,8,13) | ||
| | |active=2,3,2,3 | ||
| | |recovery=30 | ||
| | |total= | ||
|Hit Adv= | |Hit Adv=KD | ||
|Block Adv= | |Block Adv=-15 | ||
| | |invul=- | ||
|description= | |description= | ||
}} | }} | ||
| Line 719: | Line 783: | ||
<font style="visibility:hidden" size="0"></font> | <font style="visibility:hidden" size="0"></font> | ||
{{MoveData | {{MoveData | ||
|image= | |image=KOF97 Yamazaki Qcf.P(1).png | ||
|image2=KOF97 Yamazaki Qcf.P(2).png | |||
|caption= | |caption= | ||
|name=Bai Gaeshi | |name=Bai Gaeshi | ||
| Line 730: | Line 795: | ||
|Stun=- | |Stun=- | ||
|Cancel= | |Cancel= | ||
|Guard= | |Guard=Mid | ||
|Startup= | |Startup=8 | ||
| | |active=3,3 | ||
| | |recovery=28 | ||
| | |total=42 | ||
|Hit Adv= | |Hit Adv=-11 | ||
|Block Adv= | |Block Adv=-13 | ||
| | |invul=- | ||
|description=* | |description= *absorbs projectiles | ||
}} | }} | ||
{{AttackData-KOF97 | {{AttackData-KOF97 | ||
| Line 746: | Line 811: | ||
|Stun=- | |Stun=- | ||
|Cancel= | |Cancel= | ||
|Guard= | |Guard=Mid | ||
|Startup= | |Startup=8 | ||
| | |active=3,3 | ||
| | |recovery=34 | ||
| | |total=48 | ||
|Hit Adv= | |Hit Adv=-17 | ||
|Block Adv= | |Block Adv=-19 | ||
| | |invul=- | ||
|description=* | |description= *reflects projectiles | ||
}} | }} | ||
}} | }} | ||
| Line 761: | Line 826: | ||
<font style="visibility:hidden" size="0"></font> | <font style="visibility:hidden" size="0"></font> | ||
{{MoveData | {{MoveData | ||
|image= | |image=KOF97 Yamazaki Dp.K.png | ||
|caption= | |caption= | ||
|name=Suna Kake | |name=Suna Kake | ||
|input={{Motion|623}}[[File: | |input={{Motion|623}}[[File:K.png]] | ||
|data= | |data= | ||
{{AttackData-KOF97 | {{AttackData-KOF97 | ||
| Line 772: | Line 837: | ||
|Stun=- | |Stun=- | ||
|Cancel= | |Cancel= | ||
|Guard= | |Guard= Mid | ||
|Startup= | |Startup=9 | ||
| | |active=6 | ||
| | |recovery=23 | ||
| | |total=38 | ||
|Hit Adv= | |Hit Adv=+6 | ||
|Block Adv= | |Block Adv=-11 | ||
| | |invul=- | ||
|description=* Can follow-up into Hebi Tsukai (214X). | |description=* Can follow-up into Hebi Tsukai (214X). | ||
}} | }} | ||
| Line 788: | Line 853: | ||
|Stun=- | |Stun=- | ||
|Cancel= | |Cancel= | ||
|Guard= | |Guard= Mid | ||
|Startup= | |Startup=12 | ||
| | |active=6 | ||
| | |recovery=25 | ||
| | |total=43 | ||
|Hit Adv= | |Hit Adv=+4 | ||
|Block Adv= | |Block Adv=-13 | ||
| | |invul=- | ||
|description=* Can follow-up into Hebi Tsukai (214X). | |description=* Can follow-up into Hebi Tsukai (214X). | ||
}} | }} | ||
| Line 803: | Line 868: | ||
<font style="visibility:hidden" size="0"></font> | <font style="visibility:hidden" size="0"></font> | ||
{{MoveData | {{MoveData | ||
|image= | |image=KOF97 Yamazaki Hcf.P(whiff).png | ||
|image2=KOF97 Yamazaki Hcf.P(hit).png | |||
|caption= | |caption= | ||
|name=Bakudan Pachiki | |name=Bakudan Pachiki | ||
| Line 814: | Line 880: | ||
|Cancel= | |Cancel= | ||
|Guard=Throw | |Guard=Throw | ||
|Startup= | |Startup=1 | ||
| | |active=1 | ||
| | |recovery=- | ||
| | |total= | ||
|Hit Adv= | |Hit Adv=HKD | ||
|Block Adv= | |Block Adv=unblockable | ||
| | |invul=- | ||
|description= | |description= | ||
}} | }} | ||
| Line 828: | Line 894: | ||
<font style="visibility:hidden" size="0"></font> | <font style="visibility:hidden" size="0"></font> | ||
{{MoveData | {{MoveData | ||
|image= | |image=KOF97 Yamazaki Hcf.K.png | ||
|caption= | |caption= | ||
|name=Sadomazo | |name=Sadomazo | ||
| Line 834: | Line 900: | ||
|data= | |data= | ||
{{AttackData-KOF97 | {{AttackData-KOF97 | ||
|version={{Icon-SNK|b}} | |||
|Damage=- | |Damage=- | ||
|G. Damage=0 | |G. Damage=0 | ||
| Line 839: | Line 906: | ||
|Cancel= | |Cancel= | ||
|Guard= | |Guard= | ||
|Startup= | |Startup=2 | ||
| | |active=49 | ||
| | |recovery=10 | ||
| | |total=61 | ||
|Hit Adv= | |||
|Block Adv= | |||
|invul=- | |||
|description= *reverses high's,mid's,specials,Dm and SDM's | |||
}} | |||
{{AttackData-KOF97 | |||
|version={{Icon-SNK|d}} | |||
|Damage=- | |||
|G. Damage=0 | |||
|Stun=- | |||
|Cancel= | |||
|Guard= | |||
|Startup=4 | |||
|active=73 | |||
|recovery=14 | |||
|total=91 | |||
|Hit Adv= | |Hit Adv= | ||
|Block Adv= | |Block Adv= | ||
| | |invul=- | ||
|description= | |description= | ||
}} | }} | ||
| Line 854: | Line 937: | ||
<font style="visibility:hidden" size="0"></font> | <font style="visibility:hidden" size="0"></font> | ||
{{MoveData | {{MoveData | ||
|image= | |image=KOF97 Yamazaki Qcfx2.P(1).png | ||
|image2=KOF97 Yamazaki Qcfx2.P(2).png | |||
|caption= | |caption= | ||
|name=Guillotine | |name=Guillotine | ||
| Line 867: | Line 951: | ||
|Guard= | |Guard= | ||
|Startup= | |Startup= | ||
| | |active=- | ||
| | |recovery=- | ||
| | |total= | ||
|Hit Adv= | |Hit Adv= | ||
|Block Adv= | |Block Adv= | ||
| | |invul=- | ||
|description= | |description= | ||
}} | }} | ||
| Line 883: | Line 967: | ||
|Guard= | |Guard= | ||
|Startup= | |Startup= | ||
| | |active=- | ||
| | |recovery=- | ||
| | |total= | ||
|Hit Adv= | |Hit Adv= | ||
|Block Adv= | |Block Adv= | ||
| | |invul=- | ||
|description= | |description= | ||
}} | }} | ||
| Line 899: | Line 983: | ||
|Guard= | |Guard= | ||
|Startup= | |Startup= | ||
| | |active=- | ||
| | |recovery=- | ||
| | |total= | ||
|Hit Adv= | |Hit Adv= | ||
|Block Adv= | |Block Adv= | ||
| | |invul=- | ||
|description= | |description= | ||
}} | }} | ||
| Line 912: | Line 996: | ||
<font style="visibility:hidden" size="0"></font> | <font style="visibility:hidden" size="0"></font> | ||
{{MoveData | {{MoveData | ||
|image= | |image=KOF97 Yamazaki Hcbx2.P(whiff).png | ||
|image2=KOF97 Yamazaki Hcbx2.P(hit).png | |||
|caption= | |caption= | ||
|name=Drill | |name=Drill | ||
| Line 925: | Line 1,010: | ||
|Guard=Throw | |Guard=Throw | ||
|Startup= | |Startup= | ||
| | |active=- | ||
| | |recovery=- | ||
| | |total= | ||
|Hit Adv= | |Hit Adv= | ||
|Block Adv= | |Block Adv= | ||
| | |invul=- | ||
|description= | |description= *will only activate if the opponent is in grab range | ||
}} | }} | ||
{{AttackData-KOF97 | {{AttackData-KOF97 | ||
| Line 941: | Line 1,026: | ||
|Guard=Throw | |Guard=Throw | ||
|Startup= | |Startup= | ||
| | |active=- | ||
| | |recovery=- | ||
| | |total= | ||
|Hit Adv= | |Hit Adv= | ||
|Block Adv= | |Block Adv= | ||
| | |invul=- | ||
|description= | |description= | ||
}} | }} | ||
| Line 957: | Line 1,042: | ||
|Guard=Throw | |Guard=Throw | ||
|Startup= | |Startup= | ||
| | |active=- | ||
| | |recovery=- | ||
| | |total= | ||
|Hit Adv= | |Hit Adv= | ||
|Block Adv= | |Block Adv= | ||
| | |invul=- | ||
|description= | |description= | ||
}} | }} | ||
}} | }} | ||
==Combos== | == Combos == | ||
General notes: | |||
*when in max mode. moves will have more pushback which can be a problem in certian combos. | |||
==== meterless ==== | |||
''(midscreen)'' | |||
*'''cr.Bx1-2, cr.A, qcb B''' | |||
Works against all standing characters, but whiffs against small crouchers. | |||
*'''(cr.B,cl.B) / (cr.B,cr.A), dp B (cr.C), qcb B/C''' | |||
good low confirm that deals solid dmg. requires you to be close to the opponent so dp B won't whiff. you can also link a cr.C after dp B for abit of extra dmg. | |||
*'''(cr.B,cl.B) / (cr.B,cr.A), dp B~qcb B~D, dash, cr.C, dp P''' | |||
an even more damaging variation of the combo above utilizing snake canceling | |||
*'''(j.X), cl.C / cr.C, dp C / hcf P''' | |||
simple BnB combo into specials. | |||
*'''(j.X), cl.C, f.A, qcb B/C''' | |||
Combo from a close heavy starter. Use qcb+B if they're standing and qcb+C if they're a small croucher. | |||
*'''(j.X), cl.C / cr.C, dp K~qcb B/C''' | |||
Combo into dp+K. | |||
*'''(j.C/D), cl.C, dp K~qcb B~D, dash, cl.C, dp C''' | |||
combo that fully stuns the opponent. requires some timming to get this to work. | |||
*'''dp K~qcb B~D, (cr.A), dp K~qcb B~D...''' | |||
yamazaki's inafmous infinite in KOF97. one of the more doable yet difficult infinites in the game (think of it as a harder terry infinite). while it does seem easy on paper, doing consistent snake canceling can take time, you also have to be very close to the opponent so dp K won't whiff. you can also add in a cr.A for an eaiser confirm for doing this. | |||
==== with meter ==== | |||
''(midscreen)'' | |||
*'''(cr.B,cl.B) / (cr.B,cr.A), qcfx2 P''' | |||
Metered combo from lows. | |||
*'''(cr.B,cl.B) / (cr.B,cr.A), dp B~qcb B~D, dash, cr.C, qcfx2 P''' | |||
slightly more difficult metered combo for abit of extra dmg. | |||
*'''(j.X), cl.C / cr.C, qcfx2 P / hcbx2 P''' | |||
Simple metered combo from a heavy or jump-in confirm. qcfx2+P gives you corner carry and better oki, while hcbx2+P gives you more damage. | |||
*'''(j.X), cl.C, dp K~qcb B~D, dash, cl.C, qcfx2 P / hcbx2 P''' | |||
more difficult metered combo. requires some timming to get this to work. | |||
==Strategy== | ==Strategy== | ||
[[Category:The King of Fighters '97]] | [[Category:The King of Fighters '97]] | ||
[[Category:Ryuji Yamazaki]] | |||
{{The King Of Fighters '97}} | {{The King Of Fighters '97}} | ||
Latest revision as of 08:55, 23 May 2024
Introduction
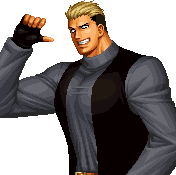
Ryuji Yamazaki is a character that is good at controlling space with his Snake Tamer attacks as well getting in close for Headbutt combos, and Infinite pressure. Along with throwing Taunt counters to people who jump attack at Yamazaki too often.
| Strengths | Weaknesses |
|---|---|
|
|
Movelist
Normals
Far Normals
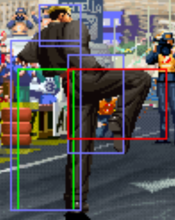
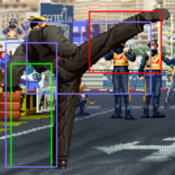
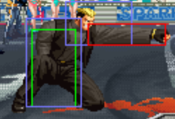
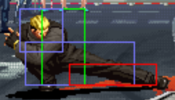
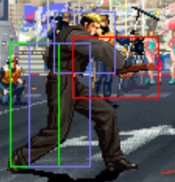
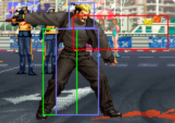
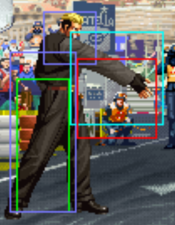
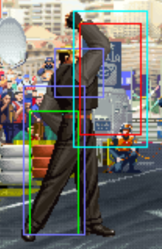
| Guard | Cancel Properties | Startup | Active | Recovery | Total | Invulnerability | Hit Advantage | Block Advantage | Stun | Guard Damage | Damage |
|---|---|---|---|---|---|---|---|---|---|---|---|
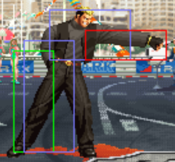
| Mid | - | 6 | 5 | 7 | 18 | - | 0 | -2 | - | - | - |
| Guard | Cancel Properties | Startup | Active | Recovery | Total | Invulnerability | Hit Advantage | Block Advantage | Stun | Guard Damage | Damage |
|---|---|---|---|---|---|---|---|---|---|---|---|
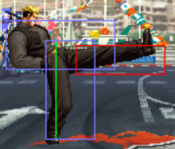
| Mid | - | 5 | 4 | 9 | 18 | - | -1 | -3 | - | - | - |
| Guard | Cancel Properties | Startup | Active | Recovery | Total | Invulnerability | Hit Advantage | Block Advantage | Stun | Guard Damage | Damage |
|---|---|---|---|---|---|---|---|---|---|---|---|
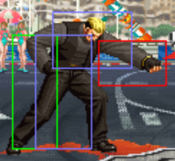
| Mid | - | 13 | 5 | 26 | 44 | - | -11 | -13 | - | - | - |
| Guard | Cancel Properties | Startup | Active | Recovery | Total | Invulnerability | Hit Advantage | Block Advantage | Stun | Guard Damage | Damage |
|---|---|---|---|---|---|---|---|---|---|---|---|
| Mid | - | 9 | 6 | 26 | 41 | - | -12 | -14 | - | - | - |
Close Range Normals
| Guard | Cancel Properties | Startup | Active | Recovery | Total | Invulnerability | Hit Advantage | Block Advantage | Stun | Guard Damage | Damage |
|---|---|---|---|---|---|---|---|---|---|---|---|
| Mid | command | 3 | 5 | 5 | 13 | - | +2 | 0 | - | - | - |
| Guard | Cancel Properties | Startup | Active | Recovery | Total | Invulnerability | Hit Advantage | Block Advantage | Stun | Guard Damage | Damage |
|---|---|---|---|---|---|---|---|---|---|---|---|
| Low | command | 4 | 4 | 7 | 15 | - | +1 | -1 | - | - | - |
| Guard | Cancel Properties | Startup | Active | Recovery | Total | Invulnerability | Hit Advantage | Block Advantage | Stun | Guard Damage | Damage |
|---|---|---|---|---|---|---|---|---|---|---|---|
| Mid | command | 2 | 6 | 22 | 30 | - | -8 | -10 | - | - | - |
| Guard | Cancel Properties | Startup | Active | Recovery | Total | Invulnerability | Hit Advantage | Block Advantage | Stun | Guard Damage | Damage |
|---|---|---|---|---|---|---|---|---|---|---|---|
| Mid | command (1st hit) | 5 | 3,7 | 16 | 31 | - | -3 | -5 | - | - | - |
Crouching Normals
| Guard | Cancel Properties | Startup | Active | Recovery | Total | Invulnerability | Hit Advantage | Block Advantage | Stun | Guard Damage | Damage |
|---|---|---|---|---|---|---|---|---|---|---|---|
| Mid | command | 5 | 4 | 7 | 16 | - | +1 | -1 | - | - | - |
| Guard | Cancel Properties | Startup | Active | Recovery | Total | Invulnerability | Hit Advantage | Block Advantage | Stun | Guard Damage | Damage |
|---|---|---|---|---|---|---|---|---|---|---|---|
| Low | - | 5 | 5 | 7 | 17 | - | 0 | -2 | - | - | - |
| Guard | Cancel Properties | Startup | Active | Recovery | Total | Invulnerability | Hit Advantage | Block Advantage | Stun | Guard Damage | Damage |
|---|---|---|---|---|---|---|---|---|---|---|---|
| Mid | command | 3 | 3,3 | 24 | 33 | - | -10 | -12 | - | - | - |
| Guard | Cancel Properties | Startup | Active | Recovery | Total | Invulnerability | Hit Advantage | Block Advantage | Stun | Guard Damage | Damage |
|---|---|---|---|---|---|---|---|---|---|---|---|
| Low | - | 8 | 12 | 18 | 38 | - | KD | -12 | - | - | - |
Neutral Jumping Normals
| Guard | Cancel Properties | Startup | Active | Recovery | Total | Invulnerability | Hit Advantage | Block Advantage | Stun | Guard Damage | Damage |
|---|---|---|---|---|---|---|---|---|---|---|---|
| Overhead | - | 3 | 11 | - | - | - | - | - | - | - | - |
| Guard | Cancel Properties | Startup | Active | Recovery | Total | Invulnerability | Hit Advantage | Block Advantage | Stun | Guard Damage | Damage |
|---|---|---|---|---|---|---|---|---|---|---|---|
| Overhead | - | 3 | 11 | - | - | - | - | - | - | - | - |
| Guard | Cancel Properties | Startup | Active | Recovery | Total | Invulnerability | Hit Advantage | Block Advantage | Stun | Guard Damage | Damage |
|---|---|---|---|---|---|---|---|---|---|---|---|
| Overhead | - | 12 | 7 | - | - | - | - | - | - | - | - |
| Guard | Cancel Properties | Startup | Active | Recovery | Total | Invulnerability | Hit Advantage | Block Advantage | Stun | Guard Damage | Damage |
|---|---|---|---|---|---|---|---|---|---|---|---|
| Overhead | - | 8 | 7 | - | - | - | - | - | - | - | - |
Diagonal Jump Normals
| Guard | Cancel Properties | Startup | Active | Recovery | Total | Invulnerability | Hit Advantage | Block Advantage | Stun | Guard Damage | Damage |
|---|---|---|---|---|---|---|---|---|---|---|---|
| Overhead | - | 3 | 11 | - | - | - | - | - | - | - | - |
| Guard | Cancel Properties | Startup | Active | Recovery | Total | Invulnerability | Hit Advantage | Block Advantage | Stun | Guard Damage | Damage |
|---|---|---|---|---|---|---|---|---|---|---|---|
| Overhead | - | 6 | 9 | - | - | - | - | - | - | - | - |
| Guard | Cancel Properties | Startup | Active | Recovery | Total | Invulnerability | Hit Advantage | Block Advantage | Stun | Guard Damage | Damage |
|---|---|---|---|---|---|---|---|---|---|---|---|
| Overhead | - | 4 | 3,5 | - | - | - | - | - | - | - | - |
| Guard | Cancel Properties | Startup | Active | Recovery | Total | Invulnerability | Hit Advantage | Block Advantage | Stun | Guard Damage | Damage |
|---|---|---|---|---|---|---|---|---|---|---|---|
| Overhead | - | 8 | 9 | - | - | - | - | - | - | - | - |
Blowback Attack
| Guard | Cancel Properties | Startup | Active | Recovery | Total | Invulnerability | Hit Advantage | Block Advantage | Stun | Guard Damage | Damage |
|---|---|---|---|---|---|---|---|---|---|---|---|
| Mid | special | 16 | 8 | 18 | 42 | - | KD | -4 | - | - | - |
| Guard | Cancel Properties | Startup | Active | Recovery | Total | Invulnerability | Hit Advantage | Block Advantage | Stun | Guard Damage | Damage |
|---|---|---|---|---|---|---|---|---|---|---|---|
| Overhead | - | 12 | 4 | - | - | - | KD | - | - | - | - |
Throws
| Guard | Cancel Properties | Startup | Active | Recovery | Total | Invulnerability | Hit Advantage | Block Advantage | Stun | Guard Damage | Damage |
|---|---|---|---|---|---|---|---|---|---|---|---|
| Throw | - | 1 | 1 | 0 | - | - | HKD | - | - | - | - |
| Guard | Cancel Properties | Startup | Active | Recovery | Total | Invulnerability | Hit Advantage | Block Advantage | Stun | Guard Damage | Damage |
|---|---|---|---|---|---|---|---|---|---|---|---|
| Throw | - | 1 | 1 | 0 | - | - | HKD | - | - | - | - |
Command Normals
| Guard | Cancel Properties | Startup | Active | Recovery | Total | Invulnerability | Hit Advantage | Block Advantage | Stun | Guard Damage | Damage |
|---|---|---|---|---|---|---|---|---|---|---|---|
| overhead (mid) | (special) | 12 | 3,5 | 24 | 44 | - | -9 | -11 | - | - | - |
Special Moves
| Guard | Cancel Properties | Startup | Active | Recovery | Total | Invulnerability | Hit Advantage | Block Advantage | Stun | Guard Damage | Damage |
|---|---|---|---|---|---|---|---|---|---|---|---|
| Throw | - | 1 | 1 | - | - | - | HKD | unblockable | - | 0 | - |
Super Moves
Combos
General notes:
- when in max mode. moves will have more pushback which can be a problem in certian combos.
meterless
(midscreen)
- cr.Bx1-2, cr.A, qcb B
Works against all standing characters, but whiffs against small crouchers.
- (cr.B,cl.B) / (cr.B,cr.A), dp B (cr.C), qcb B/C
good low confirm that deals solid dmg. requires you to be close to the opponent so dp B won't whiff. you can also link a cr.C after dp B for abit of extra dmg.
- (cr.B,cl.B) / (cr.B,cr.A), dp B~qcb B~D, dash, cr.C, dp P
an even more damaging variation of the combo above utilizing snake canceling
- (j.X), cl.C / cr.C, dp C / hcf P
simple BnB combo into specials.
- (j.X), cl.C, f.A, qcb B/C
Combo from a close heavy starter. Use qcb+B if they're standing and qcb+C if they're a small croucher.
- (j.X), cl.C / cr.C, dp K~qcb B/C
Combo into dp+K.
- (j.C/D), cl.C, dp K~qcb B~D, dash, cl.C, dp C
combo that fully stuns the opponent. requires some timming to get this to work.
- dp K~qcb B~D, (cr.A), dp K~qcb B~D...
yamazaki's inafmous infinite in KOF97. one of the more doable yet difficult infinites in the game (think of it as a harder terry infinite). while it does seem easy on paper, doing consistent snake canceling can take time, you also have to be very close to the opponent so dp K won't whiff. you can also add in a cr.A for an eaiser confirm for doing this.
with meter
(midscreen)
- (cr.B,cl.B) / (cr.B,cr.A), qcfx2 P
Metered combo from lows.
- (cr.B,cl.B) / (cr.B,cr.A), dp B~qcb B~D, dash, cr.C, qcfx2 P
slightly more difficult metered combo for abit of extra dmg.
- (j.X), cl.C / cr.C, qcfx2 P / hcbx2 P
Simple metered combo from a heavy or jump-in confirm. qcfx2+P gives you corner carry and better oki, while hcbx2+P gives you more damage.
- (j.X), cl.C, dp K~qcb B~D, dash, cl.C, qcfx2 P / hcbx2 P
more difficult metered combo. requires some timming to get this to work.
Strategy
