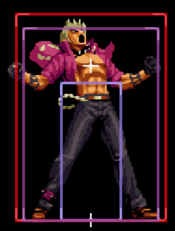
Lichmassacre (talk | contribs) m (→Movelist) |
Mr. yagami91 (talk | contribs) m (→Combos) |
||
| (87 intermediate revisions by 2 users not shown) | |||
| Line 1: | Line 1: | ||
{{TOClimit|3}} | {{TOClimit|3}} | ||
{| class="wikitable" style="float:right; margin-left: 10px;" | |||
|- | |||
! align="center" colspan="2" | 上海の戦争の神, Shanghai's God of War | |||
|- | |||
! align="center" colspan="2" | [[Image:KoF2003Portrait03-Duolon.png|center]] | |||
|- | |||
| '''Tier Placement''' || B+ | |||
|- | |||
| '''Ratio Cost (Sarsen)''' || 3 Points (4 Points Leader) of 15 | |||
|- | |||
| '''Ratio Cost (China)''' || 6 Points of 20 | |||
|- | |||
| '''Best Position''' || Solo | |||
|- | |||
| '''Good LDM?''' || Inconvenient | |||
|- | |||
| '''Crouch Height''' || Medium | |||
|- | |||
| '''Wakeup Speed''' || 22 Frames | |||
|- | |||
| '''Stun Value''' || 900 | |||
|- | |||
|} | |||
==Introduction== | ==Introduction== | ||
| Line 16: | Line 38: | ||
* high damage combos that are simple to preform | * high damage combos that are simple to preform | ||
* good buttons | * good buttons | ||
* Easy tick throw setups | |||
* Very easy to learn | * Very easy to learn | ||
| cons= | | cons= | ||
* | * lacks a good crossup | ||
* can struggle defensively as he has no reversal | * can struggle defensively as he has no reversal ouside of meter | ||
* only low confirm is with Kohyou rengeki (qcfx2 + K) | * only low confirm is with Kohyou rengeki (qcfx2 + K) | ||
* | * a bit dependent on meter to get things going | ||
* bad LDM | * bad LDM | ||
}} | }} | ||
===Colors=== | ===Colors=== | ||
{| | |||
! [[image:snka.gif]] | |||
! [[image:snkb.gif]] | |||
! [[image:snkc.gif]] | |||
! [[image:snkd.gif]] | |||
|- | |||
|[[File:KOF2003 Shen colour A.png]] | |||
|[[File:KOF2003 Shen colour B.png]] | |||
|[[File:KOF2003 Shen colour C.png]] | |||
|[[File:KOF2003 Shen colour D.png]] | |||
|} | |||
==Movelist== | ==Movelist== | ||
==== Far Normals ==== | ==== Far Normals ==== | ||
===== <span class="invisible-header"></span> ===== | ===== <span class="invisible-header"></span> ===== | ||
<font style="visibility:hidden" size="0"></font> | <font style="visibility:hidden" size="0"></font> | ||
{{MoveData | {{MoveData | ||
|image= | |image=KOF2003 Shen St.LP.png | ||
|caption= | |caption= | ||
|name=st.A | |name=st.A | ||
| Line 47: | Line 75: | ||
|b. damage=0 | |b. damage=0 | ||
|stun=- | |stun=- | ||
|cancel= | |cancel= Special/Super | ||
|guard= Mid | |guard= Mid | ||
|startup= | |startup= | ||
| Line 57: | Line 85: | ||
|invul=- | |invul=- | ||
|description= | |description= | ||
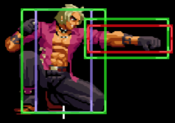
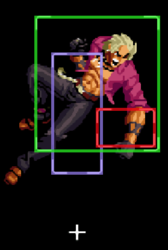
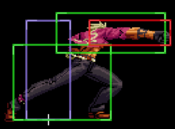
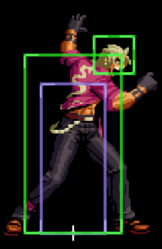
standard jab with quick and good range, useful for stopping hops | |||
}} | }} | ||
}} | }} | ||
| Line 63: | Line 92: | ||
<font style="visibility:hidden" size="0"></font> | <font style="visibility:hidden" size="0"></font> | ||
{{MoveData | {{MoveData | ||
|image= | |image=KOF2003 Shen St.LK.png | ||
|caption= | |caption= | ||
|name=st.B | |name=st.B | ||
| Line 72: | Line 101: | ||
|b. damage=0 | |b. damage=0 | ||
|stun=- | |stun=- | ||
|cancel= | |cancel= none | ||
|guard= Mid | |guard= Mid | ||
|startup= | |startup= | ||
| Line 81: | Line 110: | ||
|advBlock= | |advBlock= | ||
|invul=- | |invul=- | ||
|description= | |description= | ||
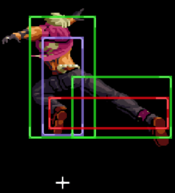
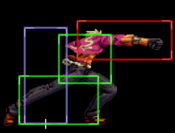
*despite appearances, this is not a low | |||
*alot of active frames | |||
*if timmed as a meaty, you can link MSA/another st.B/Kouhyou Rengeki after | |||
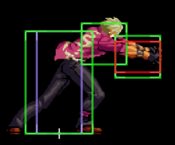
a very good poke due to the ton of active frame it has, use this as a close range poke. | |||
}} | }} | ||
}} | }} | ||
| Line 88: | Line 121: | ||
<font style="visibility:hidden" size="0"></font> | <font style="visibility:hidden" size="0"></font> | ||
{{MoveData | {{MoveData | ||
|image= | |image=KOF2003 Shen St.HP.png | ||
|caption= | |caption= | ||
|name=st.C | |name=st.C | ||
| Line 97: | Line 130: | ||
|b. damage=0 | |b. damage=0 | ||
|stun=- | |stun=- | ||
|cancel= | |cancel= none | ||
|guard= Mid | |guard= Mid | ||
|startup= | |startup= | ||
| Line 107: | Line 140: | ||
|invul=- | |invul=- | ||
|description= | |description= | ||
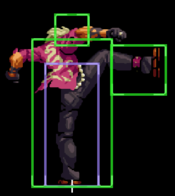
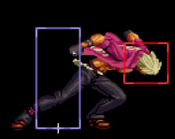
*whiffs on a crouching malin | |||
*doesn't have armor on it compared to later iterations | |||
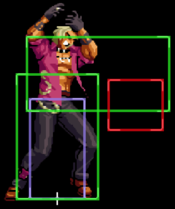
can be a decent anti-air, it's alittle on the slow side in terms of start-up and recovery | |||
}} | }} | ||
}} | }} | ||
| Line 113: | Line 149: | ||
<font style="visibility:hidden" size="0"></font> | <font style="visibility:hidden" size="0"></font> | ||
{{MoveData | {{MoveData | ||
|image= | |image=KOF2003 Shen St.HK.png | ||
|caption= | |caption= | ||
|name=st.D | |name=st.D | ||
| Line 122: | Line 158: | ||
|b. damage=0 | |b. damage=0 | ||
|stun=- | |stun=- | ||
|cancel= | |cancel= none | ||
|guard= Mid | |guard= Mid | ||
|startup= | |startup= | ||
| Line 132: | Line 168: | ||
|invul=- | |invul=- | ||
|description= | |description= | ||
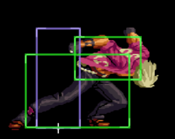
*whiffs on all crouchers | |||
*moves shen forward alittle bit | |||
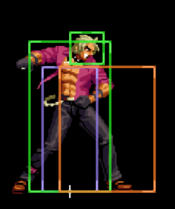
optimal anti-air, useful for hitting people hopping at him from a distance. just be careful whiffing this due to horrible recovery. | |||
}} | }} | ||
}} | }} | ||
==== Close Range Normals ==== | ==== Close Range Normals ==== | ||
| Line 140: | Line 178: | ||
<font style="visibility:hidden" size="0"></font> | <font style="visibility:hidden" size="0"></font> | ||
{{MoveData | {{MoveData | ||
|image= | |image=KOF2003 Shen Cl.A.png | ||
|caption= | |caption= | ||
|name=cl.A | |name=cl.A | ||
| Line 149: | Line 187: | ||
|b. damage=0 | |b. damage=0 | ||
|stun=- | |stun=- | ||
|cancel= | |cancel= CMD/Special/Super | ||
|guard= Mid | |guard= Mid | ||
|startup= | |startup= | ||
| Line 165: | Line 203: | ||
<font style="visibility:hidden" size="0"></font> | <font style="visibility:hidden" size="0"></font> | ||
{{MoveData | {{MoveData | ||
|image= | |image=KOF2003 Shen Cl.B.png | ||
|caption= | |caption= | ||
|name=cl.B | |name=cl.B | ||
| Line 174: | Line 212: | ||
|b. damage=0 | |b. damage=0 | ||
|stun=- | |stun=- | ||
|cancel= | |cancel= none | ||
|guard= Mid | |guard= Mid | ||
|startup= | |startup= | ||
| Line 184: | Line 222: | ||
|invul=- | |invul=- | ||
|description= | |description= | ||
*much like st.B, this hits mid | |||
*doesn't have much use. | |||
}} | }} | ||
}} | }} | ||
| Line 190: | Line 230: | ||
<font style="visibility:hidden" size="0"></font> | <font style="visibility:hidden" size="0"></font> | ||
{{MoveData | {{MoveData | ||
|image= | |image=KOF2003 Shen Cl.C.png | ||
|caption= | |caption= | ||
|name=cl.C | |name=cl.C | ||
| Line 199: | Line 239: | ||
|b. damage=0 | |b. damage=0 | ||
|stun=- | |stun=- | ||
|cancel= | |cancel= CMD/Special/Super | ||
|guard= Mid | |guard= Mid | ||
|startup= | |startup= | ||
| Line 209: | Line 249: | ||
|invul=- | |invul=- | ||
|description= | |description= | ||
*main combo starter | |||
*gives alot of frames to link MSA after | |||
}} | }} | ||
}} | }} | ||
| Line 215: | Line 257: | ||
<font style="visibility:hidden" size="0"></font> | <font style="visibility:hidden" size="0"></font> | ||
{{MoveData | {{MoveData | ||
|image= | |image=KOF2003 Shen Cl.D.png | ||
|caption= | |caption= | ||
|name=cl.D | |name=cl.D | ||
| Line 224: | Line 266: | ||
|b. damage=0 | |b. damage=0 | ||
|stun=- | |stun=- | ||
|cancel= | |cancel= CMD/Special/Super | ||
|guard= Mid | |guard= Mid | ||
|startup= | |startup= | ||
| Line 234: | Line 276: | ||
|invul=- | |invul=- | ||
|description= | |description= | ||
*does slightly more dmg than cl.C | |||
}} | }} | ||
}} | }} | ||
==== Crouching Normals ==== | ==== Crouching Normals ==== | ||
| Line 242: | Line 284: | ||
<font style="visibility:hidden" size="0"></font> | <font style="visibility:hidden" size="0"></font> | ||
{{MoveData | {{MoveData | ||
|image= | |image=KOF2003 Shen Cr.LP.png | ||
|caption= | |caption= | ||
|name=cr.A | |name=cr.A | ||
| Line 251: | Line 293: | ||
|b. damage=0 | |b. damage=0 | ||
|stun=- | |stun=- | ||
|cancel= | |cancel= CMD/Special/Super | ||
|guard= Mid | |guard= Mid | ||
|startup= | |startup= | ||
| Line 261: | Line 303: | ||
|invul=- | |invul=- | ||
|description= | |description= | ||
st.A but crouching, slightly less range but still useful | |||
}} | }} | ||
}} | }} | ||
| Line 267: | Line 310: | ||
<font style="visibility:hidden" size="0"></font> | <font style="visibility:hidden" size="0"></font> | ||
{{MoveData | {{MoveData | ||
|image= | |image=KOF2003 Shen Cr.LK.png | ||
|caption= | |caption= | ||
|name=cr.B | |name=cr.B | ||
| Line 276: | Line 319: | ||
|b. damage= | |b. damage= | ||
|stun=- | |stun=- | ||
|cancel= | |cancel= none | ||
|guard= Low | |guard= Low | ||
|startup= | |startup= | ||
| Line 286: | Line 329: | ||
|invul=- | |invul=- | ||
|description= | |description= | ||
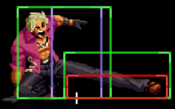
a cr.B that links into itself and cr.A, doesn't have the best reach. still important for shen. | |||
}} | }} | ||
}} | }} | ||
| Line 292: | Line 336: | ||
<font style="visibility:hidden" size="0"></font> | <font style="visibility:hidden" size="0"></font> | ||
{{MoveData | {{MoveData | ||
|image= | |image=KOF2003 Shen Cr.HP.png | ||
|image2=KOF2003 Shen Cr.HP 3.png | |||
|caption= | |caption= | ||
|name=cr.C | |name=cr.C | ||
| Line 301: | Line 346: | ||
|b. damage=0 | |b. damage=0 | ||
|stun=- | |stun=- | ||
|cancel= | |cancel= CMD/Special/Super | ||
|guard= Mid | |guard= Mid | ||
|startup= | |startup= | ||
| Line 311: | Line 356: | ||
|invul=- | |invul=- | ||
|description= | |description= | ||
*only the 1st hit is cancelable | |||
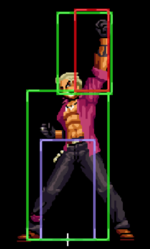
optiomal anti-air, be careful if this whiffs as you recover slowly. | |||
}} | }} | ||
}} | }} | ||
| Line 317: | Line 364: | ||
<font style="visibility:hidden" size="0"></font> | <font style="visibility:hidden" size="0"></font> | ||
{{MoveData | {{MoveData | ||
|image= | |image=KOF2003 Shen Cr.HK.png | ||
|caption= | |caption= | ||
|name=cr.D | |name=cr.D | ||
| Line 326: | Line 373: | ||
|b. damage=0 | |b. damage=0 | ||
|stun=- | |stun=- | ||
|cancel= | |cancel= none | ||
|guard= Low | |guard= Low | ||
|startup= | |startup= | ||
| Line 338: | Line 385: | ||
}} | }} | ||
}} | }} | ||
==== Neutral Jumping Normals ==== | ==== Neutral Jumping Normals ==== | ||
| Line 363: | Line 409: | ||
|invul=- | |invul=- | ||
|description= | |description= | ||
*same as jp.A but with a lowered hitbox | |||
}} | }} | ||
}} | }} | ||
| Line 369: | Line 416: | ||
<font style="visibility:hidden" size="0"></font> | <font style="visibility:hidden" size="0"></font> | ||
{{MoveData | {{MoveData | ||
|image= | |image=KOF2003 Shen Nj.LK.png | ||
|caption= | |caption= | ||
|name=nj.B | |name=nj.B | ||
| Line 388: | Line 435: | ||
|invul=- | |invul=- | ||
|description= | |description= | ||
*good for hitting people above shen, but other than that, it's doesn't really have alot of use | |||
}} | |||
}} | }} | ||
| Line 407: | Line 455: | ||
|startup= | |startup= | ||
|active= | |active= | ||
|recovery= | |recovery= | ||
|total= | |total= | ||
|advHit= | |advHit= | ||
| Line 413: | Line 461: | ||
|invul=- | |invul=- | ||
|description= | |description= | ||
*same as jp.C but with a lowered hitbox and slightly smaller hurtbox | |||
}} | }} | ||
}} | }} | ||
| Line 419: | Line 468: | ||
<font style="visibility:hidden" size="0"></font> | <font style="visibility:hidden" size="0"></font> | ||
{{MoveData | {{MoveData | ||
|image= | |image=KOF2003 Shen Nj.HK.png | ||
|caption= | |caption= | ||
|name=nj.D | |name=nj.D | ||
| Line 438: | Line 487: | ||
|invul=- | |invul=- | ||
|description= | |description= | ||
*useful for air-to-air, just be weary of the slight start-up | |||
}} | }} | ||
}} | }} | ||
| Line 445: | Line 495: | ||
<font style="visibility:hidden" size="0"></font> | <font style="visibility:hidden" size="0"></font> | ||
{{MoveData | {{MoveData | ||
|image= | |image=KOF2003 Shen J.LP.png | ||
|caption= | |caption= | ||
|name=dj.A | |name=dj.A | ||
| Line 463: | Line 513: | ||
|advBlock= | |advBlock= | ||
|invul=- | |invul=- | ||
|description= | |description= | ||
*can be a decent instant overhead | |||
*overshadowed by other normals | |||
}} | |||
}} | }} | ||
| Line 470: | Line 522: | ||
<font style="visibility:hidden" size="0"></font> | <font style="visibility:hidden" size="0"></font> | ||
{{MoveData | {{MoveData | ||
|image= | |image=KOF2003 Shen J.LK.png | ||
|caption= | |caption= | ||
|name=dj.B | |name=dj.B | ||
| Line 489: | Line 541: | ||
|invul=- | |invul=- | ||
|description= | |description= | ||
*very fast air-to-air | |||
}} | }} | ||
}} | }} | ||
| Line 495: | Line 548: | ||
<font style="visibility:hidden" size="0"></font> | <font style="visibility:hidden" size="0"></font> | ||
{{MoveData | {{MoveData | ||
|image= | |image=KOF2003 Shen J.HP.png | ||
|caption= | |caption= | ||
|name=dj.C | |name=dj.C | ||
| Line 514: | Line 567: | ||
|invul=- | |invul=- | ||
|description= | |description= | ||
*good as a jump-in, terrible as a air-to-air | |||
}} | |||
}} | }} | ||
| Line 520: | Line 574: | ||
<font style="visibility:hidden" size="0"></font> | <font style="visibility:hidden" size="0"></font> | ||
{{MoveData | {{MoveData | ||
|image= | |image=KOF2003 Shen J.HK.png | ||
|caption= | |caption= | ||
|name=dj.D | |name=dj.D | ||
| Line 539: | Line 593: | ||
|invul=- | |invul=- | ||
|description= | |description= | ||
*shen's most commonly used jump-in, hits at a good angle and has a pretty decent hitbox, use it for zoning and as a jump-in | |||
}} | }} | ||
}} | }} | ||
| Line 563: | Line 618: | ||
|invul=- | |invul=- | ||
|description= | |description= | ||
*hardknockdown | |||
*leaves the opponent next to shen | |||
*it's possible to create an ambigous roll mix-up | |||
}} | }} | ||
}} | }} | ||
| Line 570: | Line 628: | ||
<font style="visibility:hidden" size="0"></font> | <font style="visibility:hidden" size="0"></font> | ||
{{MoveData | {{MoveData | ||
|image= | |image=KOF2003 Shen MSA startup.png | ||
|caption= | |caption= | ||
|name=MSA Startup | |name=MSA Startup | ||
| Line 579: | Line 637: | ||
|b. damage=0 | |b. damage=0 | ||
|stun=- | |stun=- | ||
|cancel= | |cancel= - | ||
|guard= Mid | |guard= Mid | ||
|startup= | |startup= | ||
| Line 589: | Line 647: | ||
|invul=Strike/Projectile | |invul=Strike/Projectile | ||
|description= | |description= | ||
*shen's MSA is his cl.C, this MSA has decent range and can also be used as an anti-air like most MSA's | |||
}} | }} | ||
}} | }} | ||
| Line 595: | Line 654: | ||
<font style="visibility:hidden" size="0"></font> | <font style="visibility:hidden" size="0"></font> | ||
{{MoveData | {{MoveData | ||
|image= | |image=KOF2003 Shen J.HK.png | ||
|caption= | |caption= | ||
|name=MSA Entry | |name=MSA Entry | ||
| Line 604: | Line 663: | ||
|b. damage=0 | |b. damage=0 | ||
|stun=- | |stun=- | ||
|cancel= | |cancel= - | ||
|guard= Mid | |guard= Mid | ||
|startup=- | |startup=- | ||
| Line 616: | Line 675: | ||
}} | }} | ||
}} | }} | ||
=== Command Normals === | === Command Normals === | ||
| Line 622: | Line 680: | ||
<font style="visibility:hidden" size="0"></font> | <font style="visibility:hidden" size="0"></font> | ||
{{MoveData | {{MoveData | ||
|image= | |image=KOF2003 shen Fusen Kyaku (F+LK).png | ||
|image2=KOF2003 shen Fusen Kyaku (F+LK) 2.png | |||
|caption= | |caption= | ||
|name=Fusen Kyaku | |name=Fusen Kyaku | ||
| Line 631: | Line 690: | ||
|b. damage=0 | |b. damage=0 | ||
|stun=- | |stun=- | ||
|cancel= | |cancel= none | ||
|guard=Mid | |guard=Mid | ||
|startup= | |startup= | ||
| Line 641: | Line 700: | ||
|invul=- | |invul=- | ||
|description= | |description= | ||
*overhead | |||
*pretty slow to come out | |||
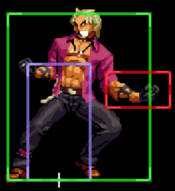
despite the appearance, this is actually his overhead. can catch some people off guard but it's fairly reactable due to the slow start-up. it also doesn't have great range which can be problem when used in combos. | |||
}} | |||
}} | }} | ||
| Line 647: | Line 709: | ||
<font style="visibility:hidden" size="0"></font> | <font style="visibility:hidden" size="0"></font> | ||
{{MoveData | {{MoveData | ||
|image= | |image=KOF2003 Shen Tenren Shuu (F+HK).png | ||
|caption= | |caption= | ||
|name=Tenren | |name=Tenren Shuu | ||
|input={{Motion| | |input={{Motion|6}}{{Icon-SNK|d}} | ||
|data= | |data= | ||
{{AttackData-KoF03 | {{AttackData-KoF03 | ||
| Line 656: | Line 718: | ||
|b. damage=0 | |b. damage=0 | ||
|stun=- | |stun=- | ||
|cancel= | |cancel= none | ||
|guard=Mid | |guard=Mid | ||
|startup= | |startup= | ||
| Line 666: | Line 728: | ||
|invul=- | |invul=- | ||
|description= | |description= | ||
*shen does a slow spin around before doing a fast kick horizontal that knocksdown on hit. | |||
*Is cancelable from his normals but is too slow to combo from anything | |||
*i don't recommend using this | |||
}} | }} | ||
}} | }} | ||
| Line 672: | Line 737: | ||
<font style="visibility:hidden" size="0"></font> | <font style="visibility:hidden" size="0"></font> | ||
{{MoveData | {{MoveData | ||
|image= | |image=KOF2003 Shen Tenren no kamae (f+D) (hold)..png | ||
|caption= | |caption= | ||
|name=Tenren | |name=Tenren no Kamae | ||
|input={{Motion|6}}{{Icon-SNK|d}} | |input={{Motion|6}}{{Icon-SNK|d}} (Hold) | ||
|data= | |data= | ||
{{AttackData-KoF03 | {{AttackData-KoF03 | ||
| Line 681: | Line 746: | ||
|b. damage=0 | |b. damage=0 | ||
|stun=- | |stun=- | ||
|cancel= | |cancel= - | ||
|guard=Mid | |guard=Mid | ||
|startup= | |startup= | ||
| Line 690: | Line 755: | ||
|advBlock= | |advBlock= | ||
|invul=- | |invul=- | ||
|description= | |description= | ||
*by holding D shen will not preform the kick | |||
*shen is vunerable throughout the entire spin | |||
*can be an OKAY tool for mix-ups | |||
}} | }} | ||
}} | }} | ||
| Line 698: | Line 766: | ||
<font style="visibility:hidden" size="0"></font> | <font style="visibility:hidden" size="0"></font> | ||
{{MoveData | {{MoveData | ||
|image= | |image=KOF2003 Shen Gekiken (QCF+P).png | ||
|image2=KOF2003 Shen Gekiken (QCF+P)2.png | |||
|caption= | |caption= | ||
|name=Gekiken | |name=Gekiken | ||
| Line 708: | Line 777: | ||
|b. damage=0 | |b. damage=0 | ||
|stun=- | |stun=- | ||
|cancel= | |cancel= Super | ||
|guard= | |guard= | ||
|startup= | |startup= | ||
| Line 718: | Line 787: | ||
|invul=- | |invul=- | ||
|description=* Can be cancelled with K. | |description=* Can be cancelled with K. | ||
*unsafe no matter the distance | |||
}} | }} | ||
{{AttackData-KoF03 | {{AttackData-KoF03 | ||
| Line 724: | Line 794: | ||
|b. damage=0 | |b. damage=0 | ||
|stun=- | |stun=- | ||
|cancel= | |cancel= Super | ||
|guard= | |guard= | ||
|startup= | |startup= | ||
| Line 734: | Line 804: | ||
|invul=- | |invul=- | ||
|description=* Can be cancelled with K. | |description=* Can be cancelled with K. | ||
*if fully charged it will become unblockable | |||
*unsafe no matter the distance | |||
}} | }} | ||
}} | }} | ||
| Line 740: | Line 812: | ||
<font style="visibility:hidden" size="0"></font> | <font style="visibility:hidden" size="0"></font> | ||
{{MoveData | {{MoveData | ||
|image= | |image= KOF2003 Shen Fukuko Geki (QCB+LP).png | ||
|image2=KOF2003 Shen Kouryuu Geki (Fukuko Geki~QCF+LP).png | |||
|caption= | |caption= | ||
|name=Fukoku Geki ~ Kouryuu Geki | |name=Fukoku Geki ~ Kouryuu Geki | ||
| Line 751: | Line 824: | ||
|b. damage=0 | |b. damage=0 | ||
|stun=- | |stun=- | ||
|cancel= | |cancel= Kouryuu Geki | ||
|guard= | |guard= | ||
|startup= | |startup= | ||
| Line 767: | Line 840: | ||
|b. damage=0 | |b. damage=0 | ||
|stun=- | |stun=- | ||
|cancel= | |cancel= - | ||
|guard= | |guard= | ||
|startup= | |startup= | ||
| Line 777: | Line 850: | ||
|invul=- | |invul=- | ||
|description= | |description= | ||
*1st hit has much more range than the animation implies | |||
*does alot of stun dmg | |||
mainly for show. used as a combo ender | |||
}} | }} | ||
}} | }} | ||
| Line 783: | Line 859: | ||
<font style="visibility:hidden" size="0"></font> | <font style="visibility:hidden" size="0"></font> | ||
{{MoveData | {{MoveData | ||
|image= | |image=KOF2003 Shen Saikou Hougeki (HCB, F+HP).png | ||
|image2=KOF2003 Shen Saikou Hougeki (HCB, F+HP)3.png | |||
|caption= | |caption= | ||
|name=Saikou Hougeki | |name=Saikou Hougeki | ||
| Line 792: | Line 869: | ||
|b. damage=0 | |b. damage=0 | ||
|stun=- | |stun=- | ||
|cancel= | |cancel= - | ||
|guard= | |guard= | ||
|startup= | |startup= | ||
| Line 802: | Line 879: | ||
|invul=- | |invul=- | ||
|description= | |description= | ||
*prioximity unblockable | |||
*re-stand's the opponent | |||
*can reflect projectiles that's not a super | |||
this is shen's command grab; however, it's not treated like one, rather it's a proximity unblockable that allows you to combo after it. If you K.O with your command grab, shen will be in the perfect position to cross-up the opponent. just be aware that it has short range, not invinicbile and has very few active frames. | |||
}} | }} | ||
}} | }} | ||
| Line 809: | Line 890: | ||
<font style="visibility:hidden" size="0"></font> | <font style="visibility:hidden" size="0"></font> | ||
{{MoveData | {{MoveData | ||
|image= | |image=KOF2003 Shen Zetsu! Gekiken (QCFx2+P) 2.png | ||
|caption= | |caption= | ||
|name=Zetsu! Gekiken | |name=Zetsu! Gekiken | ||
| Line 818: | Line 899: | ||
|b. damage=0 | |b. damage=0 | ||
|stun=- | |stun=- | ||
|cancel= | |cancel= - | ||
|guard= | |guard= | ||
|startup= | |startup= | ||
| Line 827: | Line 908: | ||
|advBlock= | |advBlock= | ||
|invul=- | |invul=- | ||
|description= | |description= *light version has lower body invinicbility | ||
*heavy version has upper body invinicibility | |||
*will cause a counter-wire on counter hit | |||
an enhanced version of his geki ken, mainly used in combos where kohyou rengeki will whiff. you can also use it to beat projeciles, but whichever version you use depends on the projectile. | |||
}} | }} | ||
}} | }} | ||
| Line 834: | Line 918: | ||
<font style="visibility:hidden" size="0"></font> | <font style="visibility:hidden" size="0"></font> | ||
{{MoveData | {{MoveData | ||
|image= | |image=KOF2003 Shen Kohyou Rengeki (QCFx2+K).png | ||
|image2=KOF2003 Shen Kohyou Rengeki (QCFx2+K)2.png | |||
|caption= | |caption= | ||
|name=Kouhyou Rengeki | |name=Kouhyou Rengeki | ||
| Line 843: | Line 928: | ||
|b. damage=0 | |b. damage=0 | ||
|stun=- | |stun=- | ||
|cancel= | |cancel= - | ||
|guard= | |guard= | ||
|startup= | |startup= | ||
| Line 853: | Line 938: | ||
|invul=- | |invul=- | ||
|description= | |description= | ||
*invinicbile on start-up | |||
*when used in combo's only the inital hit adds up to the combo counter, this causes the move to be almost unscaled in any combo. | |||
}} | |||
}} | }} | ||
=== LDM === | === LDM === | ||
{{MoveData | {{MoveData | ||
|image= | |image=KOF2003 Shen Bakushin! (HP, LP, LK, HP).png | ||
|caption= | |caption= | ||
|name=Bakushin | |name=Bakushin | ||
| Line 867: | Line 954: | ||
|b. damage=0 | |b. damage=0 | ||
|stun=- | |stun=- | ||
|cancel= | |cancel= - | ||
|guard= | |guard= | ||
|startup= | |startup= | ||
| Line 877: | Line 964: | ||
|invul=- | |invul=- | ||
|description= | |description= | ||
*shen's install super, this LDM power up shen's damage output, allowing easy 50-60% combos. | |||
*the buff will last 7 in-game seconds | |||
*if canceled into, shen will skip the start-up of the move | |||
despite what's been mention, there alot of drawbacks to using this: | |||
*a unique drawback of this move is that shen's will take much more stun dmg (this is noticeable when hitting his head) | |||
*when done raw, it starts up extremly slow, leaving you wide open to be punished | |||
*it has extremely small hitbox upon activation | |||
*you can not build meter while in the buffed state | |||
overall,shen as a leader is not recommended, as he gains major drawbacks using his LDM | |||
all for the price of more dmg. | |||
}} | }} | ||
}} | }} | ||
== | ==Combos== | ||
''' | General notes: | ||
*when landing from a standing MSA, remember to do the bnb's rather than the MSA ender (some Bnb's are more favored than others in this secnario) | |||
*for the most part, counterwire combos are dependant on where you landed the move. | |||
'''BnBs:''' | |||
* cr.B, cr.A, qcfx2 P / qcfx2 K | |||
:low-confirm in ethier super. qcfx2 K is the prefered one since it does more dmg. for an easier time doing this, do cr.B~qcf,cr.A~qcf P/K. | |||
* st.B, st.B / qcfx2 K | |||
:this only works if st.B is done as a meaty. st.B is an easy mode option while qcfx2 is alittle more difficult but more rewearding. | |||
* cl.C / cl.D, f.B, qcf P (SC)qcfx2 P) | |||
:this combo only works if you don't implement a jump-in as f.B has short range. | |||
* (J.X),cl.C/cl.D,qcb A~qcf A | |||
:combo using qcb A~qcf A. deals solid dmg. | |||
* (J.X),cl.C/cl.D,qcf P (SC)qcfx2 P/ qcfx2 K | |||
:Heavy starter into super. If you feel qcfx2 K might whiff, use qcfx2 P instead. | |||
* hcb,F.C, cl.C/cl.D,anything | |||
:proximity unblockable combo. hcb,f.C gives enough frames for shen to do a close heavy, allowing you to do any combo of your choosing. If you try to implement f.B, remember to run-up before you do cl.C/D. | |||
* qcf P (CH), qcfx2 K | |||
: counter-hit geki-ken into qcfx2 K. The timming for landing the super depends on where you hit the opponent on the screen. if you automatically cross under the opponent after CH qcf P then reverse the motion input for qcfx2 K | |||
'''MSA Starters:''' | |||
* cl.C, MSA | |||
:shen's cl.C gives enough + frames to go into MSA. requires some timming to get used to. | |||
* st.B, MSA | |||
:the st.B must be done as a meaty in order for this to work. | |||
* qcf P (CH), MSA | |||
:counter-hit geki-ken into MSA. The timming for landing the MSA depends on where you hit the opponent on the screen. if you automatically cross under the opponent after CH qcf P then reverse the motion input for MSA | |||
* hcb,F,C,(run-up st.C),MSA | |||
:proximity grab into MSA. you can add in cl.C for abit more dmg. | |||
''(corner)'' | |||
'' | * f.B, MSA | ||
:overhead link into MSA. useless set-up. | |||
'''MSA Enders:''' | |||
* (After landing from MSA) backdash,qcfx2 K | |||
:basic MSA ender. can be abit difficult to do. | |||
==Strategy== | ==Strategy== | ||
| Line 1,043: | Line 1,178: | ||
{{Navbox-KOF2003}} | {{Navbox-KOF2003}} | ||
[[Category:The King of Fighters 2003]] | [[Category:The King of Fighters 2003]] | ||
[[Category:Shen Woo]] | |||
Latest revision as of 03:04, 1 October 2022
| 上海の戦争の神, Shanghai's God of War | |
|---|---|
| Tier Placement | B+ |
| Ratio Cost (Sarsen) | 3 Points (4 Points Leader) of 15 |
| Ratio Cost (China) | 6 Points of 20 |
| Best Position | Solo |
| Good LDM? | Inconvenient |
| Crouch Height | Medium |
| Wakeup Speed | 22 Frames |
| Stun Value | 900 |
Introduction
「 Shen Woo 」
Shen is a character that excels on melee, he usually has problems with characters that can stay away and safe from his Zetsu geki ken (qcfx2 + P) using low projectiles. (Iori for example)
In general, he is a fairly solid mid-tier character and with a few interesting options that we will list throughout this page:
| Strengths | Weaknesses |
|---|---|
|
|
Colors
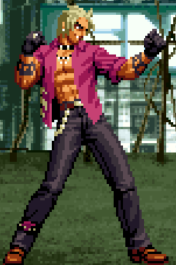
|
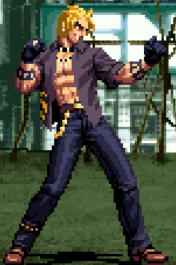
|
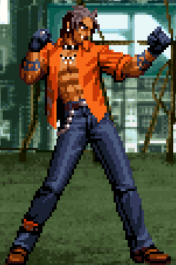
|
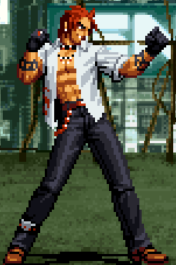
|
Movelist
Far Normals
| Damage | Counter Dmg | Guard | Guard Damage | Damage Scaling | Stun | CH Stun | Meter | Cancel Properties | Startup | Active | Recovery | Total | Hit Advantage | Block Advantage | Invulnerability |
|---|---|---|---|---|---|---|---|---|---|---|---|---|---|---|---|
| - | - | Mid | - | - | - | - | - | Special/Super | - | - | - | - | - | - | - |
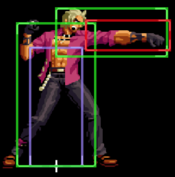
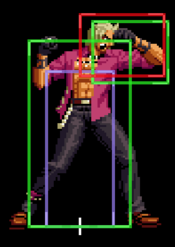
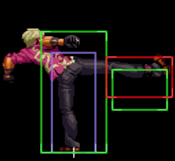
standard jab with quick and good range, useful for stopping hops | |||||||||||||||
| Damage | Counter Dmg | Guard | Guard Damage | Damage Scaling | Stun | CH Stun | Meter | Cancel Properties | Startup | Active | Recovery | Total | Hit Advantage | Block Advantage | Invulnerability |
|---|---|---|---|---|---|---|---|---|---|---|---|---|---|---|---|
| - | - | Mid | - | - | - | - | - | none | - | - | - | - | - | - | - |
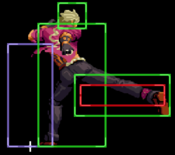
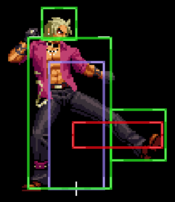
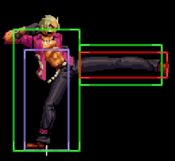
a very good poke due to the ton of active frame it has, use this as a close range poke. | |||||||||||||||
| Damage | Counter Dmg | Guard | Guard Damage | Damage Scaling | Stun | CH Stun | Meter | Cancel Properties | Startup | Active | Recovery | Total | Hit Advantage | Block Advantage | Invulnerability |
|---|---|---|---|---|---|---|---|---|---|---|---|---|---|---|---|
| - | - | Mid | - | - | - | - | - | none | - | - | - | - | - | - | - |
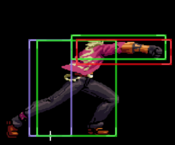
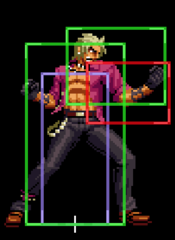
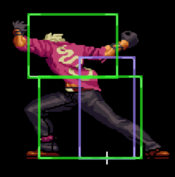
can be a decent anti-air, it's alittle on the slow side in terms of start-up and recovery | |||||||||||||||
| Damage | Counter Dmg | Guard | Guard Damage | Damage Scaling | Stun | CH Stun | Meter | Cancel Properties | Startup | Active | Recovery | Total | Hit Advantage | Block Advantage | Invulnerability |
|---|---|---|---|---|---|---|---|---|---|---|---|---|---|---|---|
| - | - | Mid | - | - | - | - | - | none | - | - | - | - | - | - | - |
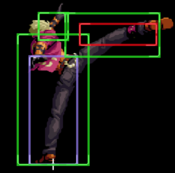
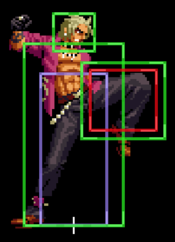
optimal anti-air, useful for hitting people hopping at him from a distance. just be careful whiffing this due to horrible recovery. | |||||||||||||||
Close Range Normals
| Damage | Counter Dmg | Guard | Guard Damage | Damage Scaling | Stun | CH Stun | Meter | Cancel Properties | Startup | Active | Recovery | Total | Hit Advantage | Block Advantage | Invulnerability |
|---|---|---|---|---|---|---|---|---|---|---|---|---|---|---|---|
| - | - | Mid | - | - | - | - | - | CMD/Special/Super | - | - | - | - | - | - | - |
| Damage | Counter Dmg | Guard | Guard Damage | Damage Scaling | Stun | CH Stun | Meter | Cancel Properties | Startup | Active | Recovery | Total | Hit Advantage | Block Advantage | Invulnerability |
|---|---|---|---|---|---|---|---|---|---|---|---|---|---|---|---|
| - | - | Mid | - | - | - | - | - | none | - | - | - | - | - | - | - |
| |||||||||||||||
| Damage | Counter Dmg | Guard | Guard Damage | Damage Scaling | Stun | CH Stun | Meter | Cancel Properties | Startup | Active | Recovery | Total | Hit Advantage | Block Advantage | Invulnerability |
|---|---|---|---|---|---|---|---|---|---|---|---|---|---|---|---|
| - | - | Mid | - | - | - | - | - | CMD/Special/Super | - | - | - | - | - | - | - |
| |||||||||||||||
Crouching Normals
| Damage | Counter Dmg | Guard | Guard Damage | Damage Scaling | Stun | CH Stun | Meter | Cancel Properties | Startup | Active | Recovery | Total | Hit Advantage | Block Advantage | Invulnerability |
|---|---|---|---|---|---|---|---|---|---|---|---|---|---|---|---|
| - | - | Mid | - | - | - | - | - | CMD/Special/Super | - | - | - | - | - | - | - |
st.A but crouching, slightly less range but still useful | |||||||||||||||
| Damage | Counter Dmg | Guard | Guard Damage | Damage Scaling | Stun | CH Stun | Meter | Cancel Properties | Startup | Active | Recovery | Total | Hit Advantage | Block Advantage | Invulnerability |
|---|---|---|---|---|---|---|---|---|---|---|---|---|---|---|---|
| - | - | Low | - | - | - | - | - | none | - | - | - | - | - | - | - |
a cr.B that links into itself and cr.A, doesn't have the best reach. still important for shen. | |||||||||||||||
| Damage | Counter Dmg | Guard | Guard Damage | Damage Scaling | Stun | CH Stun | Meter | Cancel Properties | Startup | Active | Recovery | Total | Hit Advantage | Block Advantage | Invulnerability |
|---|---|---|---|---|---|---|---|---|---|---|---|---|---|---|---|
| - | - | Mid | - | - | - | - | - | CMD/Special/Super | - | - | - | - | - | - | - |
optiomal anti-air, be careful if this whiffs as you recover slowly. | |||||||||||||||
| Damage | Counter Dmg | Guard | Guard Damage | Damage Scaling | Stun | CH Stun | Meter | Cancel Properties | Startup | Active | Recovery | Total | Hit Advantage | Block Advantage | Invulnerability |
|---|---|---|---|---|---|---|---|---|---|---|---|---|---|---|---|
| - | - | Low | - | - | - | - | - | none | - | - | - | - | KD | - | - |
Neutral Jumping Normals
| Damage | Counter Dmg | Guard | Guard Damage | Damage Scaling | Stun | CH Stun | Meter | Cancel Properties | Startup | Active | Recovery | Total | Hit Advantage | Block Advantage | Invulnerability |
|---|---|---|---|---|---|---|---|---|---|---|---|---|---|---|---|
| - | - | Overhead | - | - | - | - | - | - | - | - | - | - | - | - | - |
| |||||||||||||||
Diagonal Jump Normals
| Damage | Counter Dmg | Guard | Guard Damage | Damage Scaling | Stun | CH Stun | Meter | Cancel Properties | Startup | Active | Recovery | Total | Hit Advantage | Block Advantage | Invulnerability |
|---|---|---|---|---|---|---|---|---|---|---|---|---|---|---|---|
| - | - | Overhead | - | - | - | - | - | - | - | - | - | - | - | - | - |
| |||||||||||||||
Throws
| Damage | Counter Dmg | Guard | Guard Damage | Damage Scaling | Stun | CH Stun | Meter | Cancel Properties | Startup | Active | Recovery | Total | Hit Advantage | Block Advantage | Invulnerability |
|---|---|---|---|---|---|---|---|---|---|---|---|---|---|---|---|
| - | - | Throw | - | - | - | - | - | - | - | - | - | - | - | - | - |
| |||||||||||||||
MSA
| Damage | Counter Dmg | Guard | Guard Damage | Damage Scaling | Stun | CH Stun | Meter | Cancel Properties | Startup | Active | Recovery | Total | Hit Advantage | Block Advantage | Invulnerability |
|---|---|---|---|---|---|---|---|---|---|---|---|---|---|---|---|
| - | - | Mid | - | - | - | - | - | - | - | - | - | - | - | - | Strike/Projectile |
| |||||||||||||||
| Damage | Counter Dmg | Guard | Guard Damage | Damage Scaling | Stun | CH Stun | Meter | Cancel Properties | Startup | Active | Recovery | Total | Hit Advantage | Block Advantage | Invulnerability |
|---|---|---|---|---|---|---|---|---|---|---|---|---|---|---|---|
| - | - | Mid | - | - | - | - | - | - | - | - | - | - | - | - | - |
Command Normals
| Damage | Counter Dmg | Guard | Guard Damage | Damage Scaling | Stun | CH Stun | Meter | Cancel Properties | Startup | Active | Recovery | Total | Hit Advantage | Block Advantage | Invulnerability |
|---|---|---|---|---|---|---|---|---|---|---|---|---|---|---|---|
| - | - | Mid | - | - | - | - | - | none | - | - | - | - | - | - | - |
despite the appearance, this is actually his overhead. can catch some people off guard but it's fairly reactable due to the slow start-up. it also doesn't have great range which can be problem when used in combos. | |||||||||||||||
| Damage | Counter Dmg | Guard | Guard Damage | Damage Scaling | Stun | CH Stun | Meter | Cancel Properties | Startup | Active | Recovery | Total | Hit Advantage | Block Advantage | Invulnerability |
|---|---|---|---|---|---|---|---|---|---|---|---|---|---|---|---|
| - | - | Mid | - | - | - | - | - | none | - | - | - | - | - | - | - |
| |||||||||||||||
| Damage | Counter Dmg | Guard | Guard Damage | Damage Scaling | Stun | CH Stun | Meter | Cancel Properties | Startup | Active | Recovery | Total | Hit Advantage | Block Advantage | Invulnerability |
|---|---|---|---|---|---|---|---|---|---|---|---|---|---|---|---|
| - | - | Mid | - | - | - | - | - | - | - | - | - | - | - | - | - |
| |||||||||||||||
Special Moves
| Damage | Counter Dmg | Guard | Guard Damage | Damage Scaling | Stun | CH Stun | Meter | Cancel Properties | Startup | Active | Recovery | Total | Hit Advantage | Block Advantage | Invulnerability |
|---|---|---|---|---|---|---|---|---|---|---|---|---|---|---|---|
| - | - | - | - | - | - | - | - | - | - | - | - | - | - | - | - |
this is shen's command grab; however, it's not treated like one, rather it's a proximity unblockable that allows you to combo after it. If you K.O with your command grab, shen will be in the perfect position to cross-up the opponent. just be aware that it has short range, not invinicbile and has very few active frames. | |||||||||||||||
Super Moves
| Damage | Counter Dmg | Guard | Guard Damage | Damage Scaling | Stun | CH Stun | Meter | Cancel Properties | Startup | Active | Recovery | Total | Hit Advantage | Block Advantage | Invulnerability |
|---|---|---|---|---|---|---|---|---|---|---|---|---|---|---|---|
| - | - | - | - | - | - | - | - | - | - | - | - | - | - | - | - |
an enhanced version of his geki ken, mainly used in combos where kohyou rengeki will whiff. you can also use it to beat projeciles, but whichever version you use depends on the projectile. | |||||||||||||||
| Damage | Counter Dmg | Guard | Guard Damage | Damage Scaling | Stun | CH Stun | Meter | Cancel Properties | Startup | Active | Recovery | Total | Hit Advantage | Block Advantage | Invulnerability |
|---|---|---|---|---|---|---|---|---|---|---|---|---|---|---|---|
| - | - | - | - | - | - | - | - | - | - | - | - | - | - | - | - |
| |||||||||||||||
LDM
| Damage | Counter Dmg | Guard | Guard Damage | Damage Scaling | Stun | CH Stun | Meter | Cancel Properties | Startup | Active | Recovery | Total | Hit Advantage | Block Advantage | Invulnerability |
|---|---|---|---|---|---|---|---|---|---|---|---|---|---|---|---|
| - | - | - | - | - | - | - | - | - | - | - | - | - | - | - | - |
despite what's been mention, there alot of drawbacks to using this:
overall,shen as a leader is not recommended, as he gains major drawbacks using his LDM all for the price of more dmg. | |||||||||||||||
Combos
General notes:
- when landing from a standing MSA, remember to do the bnb's rather than the MSA ender (some Bnb's are more favored than others in this secnario)
- for the most part, counterwire combos are dependant on where you landed the move.
BnBs:
- cr.B, cr.A, qcfx2 P / qcfx2 K
- low-confirm in ethier super. qcfx2 K is the prefered one since it does more dmg. for an easier time doing this, do cr.B~qcf,cr.A~qcf P/K.
- st.B, st.B / qcfx2 K
- this only works if st.B is done as a meaty. st.B is an easy mode option while qcfx2 is alittle more difficult but more rewearding.
- cl.C / cl.D, f.B, qcf P (SC)qcfx2 P)
- this combo only works if you don't implement a jump-in as f.B has short range.
- (J.X),cl.C/cl.D,qcb A~qcf A
- combo using qcb A~qcf A. deals solid dmg.
- (J.X),cl.C/cl.D,qcf P (SC)qcfx2 P/ qcfx2 K
- Heavy starter into super. If you feel qcfx2 K might whiff, use qcfx2 P instead.
- hcb,F.C, cl.C/cl.D,anything
- proximity unblockable combo. hcb,f.C gives enough frames for shen to do a close heavy, allowing you to do any combo of your choosing. If you try to implement f.B, remember to run-up before you do cl.C/D.
- qcf P (CH), qcfx2 K
- counter-hit geki-ken into qcfx2 K. The timming for landing the super depends on where you hit the opponent on the screen. if you automatically cross under the opponent after CH qcf P then reverse the motion input for qcfx2 K
MSA Starters:
- cl.C, MSA
- shen's cl.C gives enough + frames to go into MSA. requires some timming to get used to.
- st.B, MSA
- the st.B must be done as a meaty in order for this to work.
- qcf P (CH), MSA
- counter-hit geki-ken into MSA. The timming for landing the MSA depends on where you hit the opponent on the screen. if you automatically cross under the opponent after CH qcf P then reverse the motion input for MSA
- hcb,F,C,(run-up st.C),MSA
- proximity grab into MSA. you can add in cl.C for abit more dmg.
(corner)
- f.B, MSA
- overhead link into MSA. useless set-up.
MSA Enders:
- (After landing from MSA) backdash,qcfx2 K
- basic MSA ender. can be abit difficult to do.
Strategy
UNDER CONSTRUCTION
Match Up
UNDER CONSTRUCTION
| - Ash:
| - Duo Lon:
| - Shen:
| - Terry:
| - Joe:
| - Tizoc:
| - Ryo:
| - Robert:
| - Yuri:
| - Kim:
| - Chang:
| - Jhun:
| - Leona:
| - Ralf:
| - Clark:
| - Gato:
| - Billy:
| - Yamazaki:
| - King:
| - Mai:
| - Mary:
| - Benimaru:
| - Shingo:
| - Daimon:
| - Athena:
| - Hinako:
| - Malin:
| - K':
| - Maxima:
| - Whip:
| - Kyo:
| - Chizuru:
| - KUSANAGI:
| - Maki:
| - Adelheid:
| - Mukai:
