(Reworked page using new layout. Added frame data to movelist, some common synergies and their players, and some combo videos (combo section need expanding) (24/50 reworked)) |
Kermalicious (talk | contribs) |
||
| (19 intermediate revisions by 7 users not shown) | |||
| Line 1: | Line 1: | ||
{{ | <div style="display: flex; flex-wrap:wrap-reverse;"> | ||
|name=Chris | <div style="display: flex;flex-direction: column;flex:5;min-width:300px;padding: 10px;"> | ||
{{Character Subnav UMVC3|name=Chris}} | |||
==Introduction== | ==Introduction== | ||
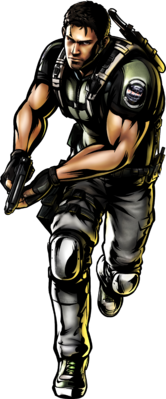
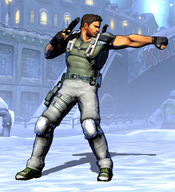
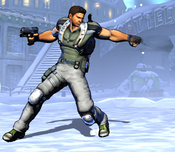
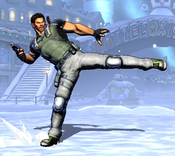
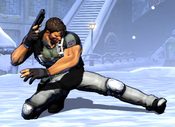
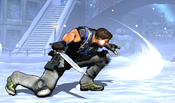
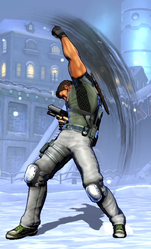
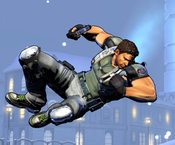
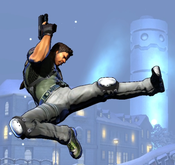
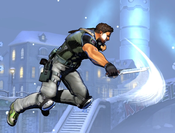
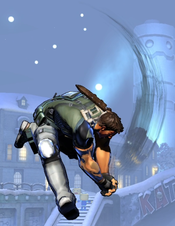
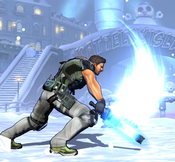
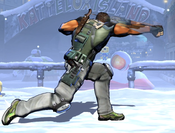
A former member of the STARS special police unit and later an agent for the BSAA international organization. His experiences in Raccoon City led to him becoming one of the main figures combating the threat of Bioweapons and Bioterrorism. An expert in firearm use and hand-to-hand combat, Chris in this game is based on his appearance in ''Resident Evil 5'', where he battles his nemesis Albert Wesker. | A former member of the STARS special police unit and later an agent for the BSAA international organization. His experiences in Raccoon City led to him becoming one of the main figures combating the threat of Bioweapons and Bioterrorism. An expert in firearm use and hand-to-hand combat, Chris in this game is based on his appearance in ''Resident Evil 5'', where he battles his nemesis Albert Wesker. | ||
| Line 29: | Line 9: | ||
{{ProConTable | {{ProConTable | ||
| pros = | | pros = | ||
*Very impressive damage potential, with several ways to extend combos either solo or via assists. Chris can | *'''Great Damage:''' Very impressive damage potential, with several ways to extend combos either solo or via assists. Chris can easily extend combos with his Grenade Launcher (236XX) hyper and finish it off thanks to his wall bounce and ground bounce Magnum (623H). His throw is also notable for starting combos no matter which throw is being used, both ground and air throws lead to full extensions. His aforementioned Magnum can lead to full screen combos that deal around 450K while keeping you at prime zoning position. | ||
*Chris can provide some useful synergy for his teammates. Gun Fire is a solid assist, his Grenade Launcher hyper is useful in both DHC and THC focused setups | *'''Meter Build:''' Along with his high damage output, Chris also builds meter like a machine. He easily builds a bar with a solo starter and then continues to build more with extensions, mainly thanks to his Flamethrower (4H), which can build close to half a bar on its own. | ||
* | *'''Good Support:''' While not the best, Chris can provide some useful synergy for his teammates. Gun Fire is a solid assist, behaving somewhat like a beam assist but worse, while his Grenade Toss assist can halt enemy approaches for a brief moment. His Grenade Launcher hyper is useful in both DHC and THC focused setups thanks to it's long duration and OTG properties. His prominent Flame Grenades (623H) can be used to enable mixups for himself or his teammates, as well as allow a somewhat safe hard tag. | ||
*'''Survivability:''' Surprisingly high health total means that opponents often have to spend extra resources or go for resets to kill him. He can outlast many other zoners in extended firefights by enduring their chip damage, and he can be called frequently as an assist with little risk of being sniped and killed. | |||
| cons = | | cons = | ||
*Chris struggles to fight characters at superjump height. His grounded specials are all aimed straight ahead, and he has no upward-angled keepaway tools. In the air, his gun specials all aim downwards. | *'''Grounded Approach:''' Chris struggles to fight characters at superjump height. His grounded specials are all aimed straight ahead, and he has no upward-angled keepaway tools. In the air, his gun specials all aim downwards, making it nearly impossible to challenge high mobility characters in their domain. His Flame Grenades enable him to cover landings, but this only gets him so far. | ||
* | *'''No Movement:''' Very limited mobility, being restricted only to universal options like ground dashes and superjumps to maneuver around the stage. Combined with his lack of reliable moves to challenge air approaches, it can be much easier to pin down Chris compared to other zoners. | ||
*Chris' | *'''Long Animations:''' Almost all of Chris' projectiles have lengthy animations regardless of how fast the hitboxes come out. This means Chris has to be much more weary than other zoners, as one misplaced projectile could lead to a full punish. | ||
*'''Limited Defense:''' Chris' normals have lengthy startup and he lacks any invincibility or armored moves except for his level 3, which is expensive and slow. As a result, Chris' defensive options are poor, and he relies on good spacing and the threat of his grenade specials to protect himself. | |||
}} | }} | ||
</div> | |||
<div style="display: flex;flex-direction: column;flex:2;min-width:350px;padding: 10px;">{{UMVC3_Character_Query|reversals=214XX}}</div></div> | |||
== Move List == | == Move List == | ||
| Line 46: | Line 28: | ||
{{MoveData | {{MoveData | ||
|image= | |image=UMVC3_Chris_AssistA.png | ||
|caption= | |caption= | ||
|name=Combination Punch | |name=Combination Punch | ||
| Line 59: | Line 41: | ||
|onhit=- | |onhit=- | ||
|onblock=- | |onblock=- | ||
|properties={{hardknockdown}} | |properties=Invuln (as Crossover Counter) frames 1-???, {{hardknockdown}} | ||
|description= | |description= | ||
THC Hyper: Sweep Combo. Has limited range and causes an unremarkable hard knockdown on hit. Notable mainly for being Chris' only assist that doesn't have Grenade Launcher as a THC, if you did not want it for some reason. | THC Hyper: Sweep Combo. Has limited range and causes an unremarkable hard knockdown on hit. Notable mainly for being Chris' only assist that doesn't have Grenade Launcher as a THC, if you did not want it for some reason. | ||
| Line 68: | Line 50: | ||
{{MoveData | {{MoveData | ||
|image= | |image=UMVC3_Chris_AssistB.png | ||
|caption= | |caption= | ||
|name=Gun Fire | |name=Gun Fire | ||
| Line 88: | Line 70: | ||
{{MoveData | {{MoveData | ||
|image= | |image=UMVC3_Chris_AssistY.png | ||
|caption= | |caption= | ||
|name=Grenade Toss | |name=Grenade Toss | ||
| Line 94: | Line 76: | ||
|data= | |data= | ||
{{AttackData-UMVC3 | {{AttackData-UMVC3 | ||
|damage= | |damage=130,000 | ||
|guard=Mid | |guard=Mid | ||
|startup=39 | |startup=39 | ||
| Line 101: | Line 83: | ||
|onhit=- | |onhit=- | ||
|onblock=- | |onblock=- | ||
|properties= | |properties= | ||
|description= | |description= | ||
THC Hyper: Grenade Launcher. Chris places a landmine immediately in front of the point character. Unlike the point version, this mine will not explode on a character who is in a hard knockdown state, and thus does not work as an OTG assist. However, it can alleviate the need for an OTG by relaunching a falling opponent before they become knocked down in the first place. Niche assist for teams that ''really'' do not need the coverage of Gun Fire. | THC Hyper: Grenade Launcher. Chris places a landmine immediately in front of the point character. Unlike the point version, this mine will not explode on a character who is in a hard knockdown state, and thus does not work as an OTG assist. However, it can alleviate the need for an OTG by relaunching a falling opponent before they become knocked down in the first place. Niche assist for teams that ''really'' do not need the coverage of Gun Fire. | ||
| Line 110: | Line 92: | ||
{{MoveData | {{MoveData | ||
|image= | |image=UMVC3_Chris_5L.png | ||
|caption= | |caption= | ||
|name=Stand Light | |name=Stand Light | ||
| Line 130: | Line 112: | ||
{{MoveData | {{MoveData | ||
|image= | |image=UMVC3_Chris_5M.png | ||
|caption= | |caption= | ||
|name=Stand Medium | |name=Stand Medium | ||
| Line 150: | Line 132: | ||
{{MoveData | {{MoveData | ||
|image= | |image=UMVC3_Chris_5H.png | ||
|caption= | |caption= | ||
|name=Stand Heavy | |name=Stand Heavy | ||
| Line 171: | Line 153: | ||
{{MoveData | {{MoveData | ||
|image= | |image=UMVC3_Chris_2L.png | ||
|caption= | |caption= | ||
|name=Crouching Light | |name=Crouching Light | ||
| Line 191: | Line 173: | ||
{{MoveData | {{MoveData | ||
|image= | |image=UMVC3_Chris_2M.png | ||
|caption= | |caption= | ||
|name=Crouching Medium | |name=Crouching Medium | ||
| Line 211: | Line 193: | ||
{{MoveData | {{MoveData | ||
|image= | |image=UMVC3_Chris_2H.png | ||
|caption= | |caption= | ||
|name=Crouching Heavy | |name=Crouching Heavy | ||
| Line 224: | Line 206: | ||
|onhit=+2 | |onhit=+2 | ||
|onblock=+1 | |onblock=+1 | ||
|properties={{otg}}, deals chip, Priority: Low, Durability: 3 | |properties={{otg}}, deals chip, Priority: Low, Durability: 3, scales as a Special | ||
|description= | |description= | ||
Very different from the standard Marvel 2H, and functions more like a command normal than a regular one. Chris crouches and fires a single pistol shot at a downward angle. This move is mainly notable for hitting OTG. Because it is a normal and special-cancelable, Chris can follow up an OTG gunshot with most special moves, the most notable being 214H and 236H. This is a core element of many of Chris' combo routes. | Very different from the standard Marvel 2H, and functions more like a command normal than a regular one. Chris crouches and fires a single pistol shot at a downward angle. This move is mainly notable for hitting OTG. Because it is a normal and special-cancelable, Chris can follow up an OTG gunshot with most special moves, the most notable being 214H and 236H. This is a core element of many of Chris' combo routes. | ||
| Line 232: | Line 214: | ||
{{MoveData | {{MoveData | ||
|image= | |image=UMVC3_Chris_5S.png | ||
|caption= | |caption= | ||
|name=Launcher/Special | |name=Launcher/Special | ||
| Line 254: | Line 236: | ||
{{MoveData | {{MoveData | ||
|image= | |image=UMVC3_Chris_jL.png | ||
|caption= | |caption= | ||
|name=Jumping Light | |name=Jumping Light | ||
| Line 274: | Line 256: | ||
{{MoveData | {{MoveData | ||
|image= | |image=UMVC3_Chris_jM.png | ||
|caption= | |caption= | ||
|name=Jumping Medium | |name=Jumping Medium | ||
| Line 294: | Line 276: | ||
{{MoveData | {{MoveData | ||
|image= | |image=UMVC3_Chris_jH.png | ||
|caption= | |caption= | ||
|name=Jumping Heavy | |name=Jumping Heavy | ||
| Line 314: | Line 296: | ||
{{MoveData | {{MoveData | ||
|image= | |image=UMVC3_Chris_jS.png | ||
|caption= | |caption= | ||
|name=Jumping Special | |name=Jumping Special | ||
| Line 336: | Line 318: | ||
{{MoveData | {{MoveData | ||
|image= | |image=UMVC3_Chris_6M.png | ||
|caption= | |caption= | ||
|name=Low Shot | |name=Low Shot | ||
|input=6M | |input=6M | ||
| Line 349: | Line 331: | ||
|onhit=-3 | |onhit=-3 | ||
|onblock=-4 | |onblock=-4 | ||
|properties={{otg}}, Deals chip damage, Priority: Low, Durability: 3 | |properties={{otg}}, Deals chip damage, Priority: Low, Durability: 3, scales as a Special | ||
|description= | |description= | ||
Low | Low Shot is a command normal that functions very similarly to Chris' 2H. Chris fires his pistol downwards, except while standing. It is still an OTG and can be used in combos in mostly the same way as 2H. | ||
Because Chris stands while firing this shot, its effective horizontal range is slightly longer than the crouching shot of 2H. As a downside, this version hits | Because Chris stands while firing this shot, its effective horizontal range is slightly longer than the crouching shot of 2H. As a downside, this version hits Mid instead of Low. | ||
}} | }} | ||
}} | }} | ||
{{MoveData | {{MoveData | ||
|image= | |image=UMVC3_Chris_j2H.png | ||
|caption= | |caption= | ||
|name=Air Low Shot | |name=Air Low Shot | ||
|input=j.2H | |input=j.2H | ||
| Line 371: | Line 353: | ||
|onhit=0 | |onhit=0 | ||
|onblock=-1 | |onblock=-1 | ||
|properties=Deals chip damage, Priority: Low, Durability: 3 | |properties=Deals chip damage, Priority: Low, Durability: 3, scales as a Special | ||
|description= | |description= | ||
The last of Chris' trio of pistol attacks. Unlike 2H and 6M, this version does not hit OTG. It has the longest potential range of the three, by virtue of Chris being able to fire it from higher up, but has limited combo potential. Chris can not chain into j.2H from aerial normals. | The last of Chris' trio of pistol attacks. Unlike 2H and 6M, this version does not hit OTG. It has the longest potential range of the three, by virtue of Chris being able to fire it from higher up, but has limited combo potential. Chris can not chain into j.2H from aerial normals. | ||
| Line 379: | Line 361: | ||
{{MoveData | {{MoveData | ||
|image= | |image=UMVC3_Chris_6H.png | ||
|caption= | |caption= | ||
|name=Stun Rod | |name=Stun Rod | ||
| Line 400: | Line 382: | ||
{{MoveData | {{MoveData | ||
|image= | |image=UMVC3_Chris_4H.png | ||
|caption= | |caption= | ||
|name=Flamethrower | |name=Flamethrower | ||
| Line 413: | Line 395: | ||
|onhit=0 | |onhit=0 | ||
|onblock=-1 | |onblock=-1 | ||
|properties=Deals chip damage | |properties=Deals chip damage, scales as a Special | ||
|description= | |description= | ||
Chris can not chain into this command normal the way he can chain into his other grounded command normals. Chris pulls out a flamethrower and fires directly ahead. By holding down the H button, Chris can extend the total duration and hitcount of this move, racking up damage. This move causes virtually no pushback on hit or block, although it is still vulnerable to being pushblocked. | Chris can not chain into this command normal the way he can chain into his other grounded command normals. Chris pulls out a flamethrower and fires directly ahead. By holding down the H button, Chris can extend the total duration and hitcount of this move, racking up damage. This move causes virtually no pushback on hit or block, although it is still vulnerable to being pushblocked. | ||
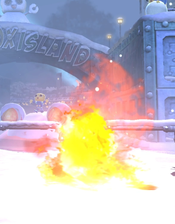
This move can be special canceled, which is a useful way to tack on extra damage to Chris' combos. This is primarily done by following up a ground bounce of any kind with 4[H] xx 214H (1st hit) xx hyper. | This move can be special canceled, which is a useful way to tack on extra damage to Chris' combos. This is primarily done by following up a ground bounce of any kind with 4[H] xx 214H (1st hit) xx hyper. | ||
Presumably due to a bug, 4H Flamethrower's initial startup frames can not be canceled into a dash, the way almost all other normals and command normals can. This means that Chris can not plink dash backwards using the H button, as he will get stuck in the Flamethrower animation. It is still possible for Chris to plink dash backwards, using a M~L+M input. | |||
}} | }} | ||
}} | }} | ||
=== Special Moves === | === Special Moves === | ||
{{MoveData | {{MoveData | ||
|image= | |image=UMVC3_Chris_236L.png | ||
|caption= | |caption=L - Shotgun | ||
|image2=UMVC3_Chris_236M.png | |||
|caption2=M - SMG | |||
|image3=UMVC3_Chris_236H.png | |||
|caption3=H - Revolver | |||
|name=Gun Fire | |name=Gun Fire | ||
|input=236X | |input=236X | ||
| Line 464: | Line 451: | ||
|onhit=- | |onhit=- | ||
|onblock=-12 | |onblock=-12 | ||
|properties={{airok}}, {{wallbounce}} into {{hardknockdown}} (grounded version), {{otg}} and {{groundbounce}} (airborne version) Priority: Low, Durability: 10 | |properties={{airok}}, {{wallbounce}} into {{hardknockdown}} (grounded version), {{otg}} and {{groundbounce}} (airborne version) Priority: Low, Durability: 10, scales by 0.85 | ||
|description= | |description= | ||
Chris pulls out one of three weapons depending on button strength, and fires it directly ahead. | Chris pulls out one of three weapons depending on button strength, and fires it directly ahead. | ||
| Line 478: | Line 465: | ||
{{MoveData | {{MoveData | ||
|image= | |image=UMVC3_Chris_623L.png | ||
|image2=UMVC3_Chris_623L_Explode.png | |||
|caption= | |caption= | ||
|name=Grenade Toss L | |name=Grenade Toss L | ||
| Line 506: | Line 494: | ||
{{MoveData | {{MoveData | ||
|image= | |image=UMVC3_Chris_623M.png | ||
|image2=UMVC3_Chris_623M_Explode.png | |||
|caption= | |caption= | ||
|name=Grenade Toss M | |name=Grenade Toss M | ||
| Line 529: | Line 518: | ||
{{MoveData | {{MoveData | ||
|image= | |image=UMVC3_Chris_623H.png | ||
|image2=UMVC3_Chris_623H_Explode.png | |||
|caption= | |caption= | ||
|name=Grenade Toss H | |name=Grenade Toss H | ||
| Line 552: | Line 542: | ||
{{MoveData | {{MoveData | ||
|image= | |image=UMVC3_Chris_214X_1st.png | ||
|caption= | |caption= | ||
|name=Combination Punch L | |name=Combination Punch L | ||
| Line 574: | Line 564: | ||
{{MoveData | {{MoveData | ||
|image= | |image=UMVC3_Chris_214LL.png | ||
|caption= | |caption= | ||
|name=Body Blow | |name=Body Blow | ||
| Line 594: | Line 584: | ||
{{MoveData | {{MoveData | ||
|image= | |image=UMVC3_Chris_214LLM.png | ||
|caption= | |caption= | ||
|name=Heavy Blow | |name=Heavy Blow | ||
| Line 614: | Line 604: | ||
{{MoveData | {{MoveData | ||
|image= | |image=UMVC3_Chris_214H_2nd.png | ||
|caption= | |caption= | ||
|name=Payoff | |name=Payoff | ||
| Line 636: | Line 626: | ||
{{MoveData | {{MoveData | ||
|image= | |image=UMVC3_Chris_214X_1st.png | ||
|image2=UMVC3_Chris_214H_2nd.png | |||
|caption= | |caption= | ||
|name=Combination Punch M | |name=Combination Punch M | ||
| Line 656: | Line 647: | ||
{{MoveData | {{MoveData | ||
|image= | |image=UMVC3_Chris_236H.png | ||
|caption= | |caption= | ||
|name=Magnum Combo | |name=Magnum Combo | ||
| Line 669: | Line 660: | ||
|onhit=- | |onhit=- | ||
|onblock=-12 | |onblock=-12 | ||
|properties={{wallbounce}} into {{hardknockdown}}, Priority: Low, Durability: 10 | |properties={{wallbounce}} into {{hardknockdown}}, Priority: Low, Durability: 10, scales by 0.85 | ||
|description= | |description= | ||
As a follow-up to 214M, Chris pulls out his Magnum and delivers a wall-bouncing shot. In most cases, it is easier and more practical for Chris to just use his 236H Magnum special directly. | As a follow-up to 214M, Chris pulls out his Magnum and delivers a wall-bouncing shot. In most cases, it is easier and more practical for Chris to just use his 236H Magnum special directly. | ||
| Line 677: | Line 668: | ||
{{MoveData | {{MoveData | ||
|image= | |image=UMVC3_Chris_214H_2nd.png | ||
|caption= | |caption= | ||
|name=Combination Punch H | |name=Combination Punch H | ||
| Line 683: | Line 674: | ||
|data= | |data= | ||
{{AttackData-UMVC3 | {{AttackData-UMVC3 | ||
|damage=50,000 + | |damage=50,000 + 90,000 | ||
|guard=Mid | |guard=Mid | ||
|startup=10 | |startup=10 | ||
| Line 698: | Line 689: | ||
{{MoveData | {{MoveData | ||
|image= | |image=UMVC3_Chris_22H.png | ||
|caption= | |caption= | ||
|name=Prone Position | |name=Prone Position | ||
| Line 722: | Line 713: | ||
{{MoveData | {{MoveData | ||
|image= | |image=UMVC3_Chris_22HH.png | ||
|caption= | |caption= | ||
|name=Prone Shot | |name=Prone Shot | ||
| Line 740: | Line 731: | ||
}} | }} | ||
}} | }} | ||
=== Hyper Combos === | === Hyper Combos === | ||
{{MoveData | {{MoveData | ||
|image= | |image=UMVC3_Chris_236XX.png | ||
|caption= | |caption= | ||
|name=Grenade Launcher | |name=Grenade Launcher | ||
| Line 758: | Line 748: | ||
|onhit=- | |onhit=- | ||
|onblock=- | |onblock=- | ||
|properties={{cptr}} (1st hit, vs grounded), {{otg}} (1st and 2nd hit), {{softknockdown}} | |properties={{cptr}} (1st hit, vs grounded), {{otg}} (1st and 2nd hit), {{softknockdown}}, scales by 0.9 | ||
|description= | |description= | ||
Chris readies a grenade launcher and fires four shots in sequence: | Chris readies a grenade launcher and fires four shots in sequence: | ||
*The first shot is a Freeze Grenade, which is | *The first shot is a Freeze Grenade, which is OTG capable. If it hits a grounded opponent, it places them in a frozen capture state. If it hits OTG or hits an airborne opponent, it only causes a short spinout into a Soft Knockdown instead. | ||
*The second shot is a Homing Grenade, unique in that it is fired upwards, rather than straight ahead. This shot will fall back down on the opponent after a brief pause, tracking them across the screen in a similar manner to Hidden Missiles or Energy Javelin. This grenade persists even if the hyper is canceled - such as by being hit or via DHC. It can be used to protect Chris or his teammates like a pseudo-assist. | *The second shot is a Homing Grenade, unique in that it is fired upwards, rather than straight ahead. This shot will fall back down on the opponent after a brief pause, tracking them across the screen in a similar manner to Hidden Missiles or Energy Javelin. This grenade persists even if the hyper is canceled - such as by being hit or via DHC. It can be used to protect Chris or his teammates like a pseudo-assist. | ||
*The third and fourth hits are standard explosives. They will not combo naturally from the first grenade shot unless the capture state is successfully applied. Thus, when using this hyper in combos, it is necessary to use a special combo route that keeps the opponent standing, or weaves another hit into the hyper to cover the gap. | *The third and fourth hits are standard explosives. They will not combo naturally from the first grenade shot unless the capture state is successfully applied. Thus, when using this hyper in combos, it is necessary to use a special combo route that keeps the opponent standing, or weaves another hit into the hyper to cover the gap. | ||
| Line 772: | Line 762: | ||
{{MoveData | {{MoveData | ||
|image= | |image=UMVC3_Chris_623XX.png | ||
|caption= | |caption= | ||
|name=Sweep Combo | |name=Sweep Combo | ||
| Line 778: | Line 768: | ||
|data= | |data= | ||
{{AttackData-UMVC3 | {{AttackData-UMVC3 | ||
|damage= | |damage=40,000 + 50,000 + (8,000 x10 if ground bounce not used earlier in the combo) + 10,000 x8 + 100,000 + 130,000 | ||
|guard=Mid | |guard=Mid | ||
|startup=10+2 | |startup=10+2 | ||
| Line 785: | Line 775: | ||
|onhit=- | |onhit=- | ||
|onblock=-31 | |onblock=-31 | ||
|properties={{groundbounce}} into {{hardknockdown}} (second hit), {{otg}} (SMG hits) | |properties={{groundbounce}} into {{hardknockdown}} (second hit), {{otg}} (SMG hits), all hits except the first two scale by 0.96 | ||
|description= | |description= | ||
Chris performs a series of attacks, starting with a two-hit knife combination, then firing all three of his guns, and finishing with a rocket launcher blast. This is Chris' standard combo ender, especially if he does not have a way to ensure all hits of Grenade Launcher will land. | Chris performs a series of attacks, starting with a two-hit knife combination, then firing all three of his guns, and finishing with a rocket launcher blast. This is Chris' standard combo ender, especially if he does not have a way to ensure all hits of Grenade Launcher will land. | ||
| Line 795: | Line 785: | ||
{{MoveData | {{MoveData | ||
|image= | |image=UMVC3_Chris_214XX.png | ||
|caption= | |caption=The reticle can be freely aimed | ||
|image2=UMVC3_Chris_214XX_Shot.png | |||
|caption2="Bring the pain!" | |||
|name=Satellite Laser | |name=Satellite Laser | ||
|input=214XX (3 bars) | |input=214XX (3 bars) | ||
| Line 821: | Line 813: | ||
{{MoveData | {{MoveData | ||
|image= | |image=UMVC3_Chris_GroundThrow.png | ||
|caption= | |caption= | ||
|name=Ground Throw | |name=Ground Throw | ||
| Line 841: | Line 833: | ||
{{MoveData | {{MoveData | ||
|image= | |image=UMVC3_Chris_AirThrow.png | ||
|caption= | |caption= | ||
|name=Air Throw | |name=Air Throw | ||
| Line 862: | Line 854: | ||
{{MoveData | {{MoveData | ||
|image= | |image=UMVC3_Chris_5H.png | ||
|caption= | |caption= | ||
|name=Snap Back | |name=Snap Back | ||
| Line 883: | Line 875: | ||
{{MoveData | {{MoveData | ||
|image= | |image=UMVC3_Chris_HardTag.png | ||
|caption= | |caption= | ||
|name=Hard Tag | |name=Hard Tag | ||
| Line 889: | Line 881: | ||
|data= | |data= | ||
{{AttackData-UMVC3 | {{AttackData-UMVC3 | ||
|damage= | |damage=30,000 | ||
|guard=OH | |guard=OH | ||
|startup=- | |startup=- | ||
| Line 901: | Line 893: | ||
}} | }} | ||
}} | }} | ||
== Team Position == | == Team Position == | ||
| Line 922: | Line 913: | ||
'''Players to Watch:''' Scamby (Wesker/Nemesis/Chris) | '''Players to Watch:''' Scamby (Wesker/Nemesis/Chris) | ||
Wesker: Despite OTG assists making their way out of the meta, Chris still appreciates one more than most characters, and Wesker's is the absolute best for just that. The low hitstun on Chris' normals make it hard for him to make lengthy solo combos, so an easy OTG option opens up a Grenade Launcher extension and a convenient way to incorporate another flamethrower into his combos. Phantom Dance as a THC also allows Chris to spend two meters for a damaging OTG pick up and can still continue the combo afterwards. Wesker can also make notable use of the THC himself, activating X-Factor immediately after startup and getting five consecutive mixups that are impossible to see. | |||
'''Players to Watch:''' LivinLegend26 (Chris/Wesker/Akuma), Jumpman (Chris/Ammy/Wesker) | |||
'''Other Players to Watch:''' St. Valentine (Wesker/Chris/Jill, She-Hulk/Spencer/Chris), ChrisD (Chris/Doom/Strider), LLND (Chris/Hsien-Ko/Ammy) | |||
== Alternate Colors == | == Alternate Colors == | ||
{{Chara-Colors-UMVC3}} | |||
{{Content Box|content= | {{Content Box|content= | ||
{{Navbox-UMVC3}} | {{Navbox-UMVC3}} | ||
}} | }} | ||
Latest revision as of 14:47, 19 March 2025
Introduction
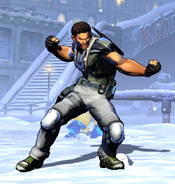
A former member of the STARS special police unit and later an agent for the BSAA international organization. His experiences in Raccoon City led to him becoming one of the main figures combating the threat of Bioweapons and Bioterrorism. An expert in firearm use and hand-to-hand combat, Chris in this game is based on his appearance in Resident Evil 5, where he battles his nemesis Albert Wesker.
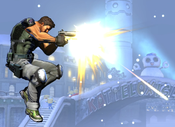
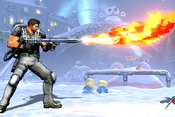
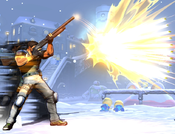
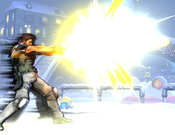
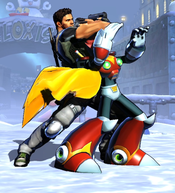
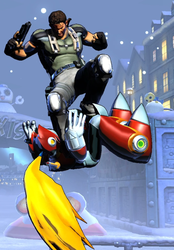
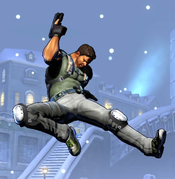
In UMvC3, Chris is a midrange or keepaway-focused character with limited mobility but strong damage output. He can utilize grenades and landmines through his 623X special to threaten opponents and start an offense, or he can run away and deal significant chip damage using his 236X gun specials (which he - unfortunately - can not aim upwards).
| Strengths | Weaknesses |
|---|---|
|
|
Move List
Assists
| Damage | Startup | Active | Recovery |
|---|---|---|---|
| 50,000 + 90,000 | 34 | 2(16)2 | 134, 104 |
| On Hit | On Block | Guard | Properties |
| - | - | Mid | Invuln (as Crossover Counter) frames 1-???, |
|
THC Hyper: Sweep Combo. Has limited range and causes an unremarkable hard knockdown on hit. Notable mainly for being Chris' only assist that doesn't have Grenade Launcher as a THC, if you did not want it for some reason. If not protected by the point character, this assist is very punishable when blocked, most characters can mash 5S to launch Chris, putting him in significant danger. | |||
| Damage | Startup | Active | Recovery |
|---|---|---|---|
| 22,000 x8 | 49 | - | 114, 84 |
| On Hit | On Block | Guard | Properties |
| - | - | Mid | Priority: Low, Durability: 1 per shot |
|
THC Hyper: Grenade Launcher. Recommended assist. Chris fires an SMG burst that functions similarly to a common beam assist. Fairly safe to call basically whenever and cover your approach or help clear out some of an opponent's projectiles. Total hitstun is not the greatest for combo extensions, but is often sufficient. | |||
| Damage | Startup | Active | Recovery |
|---|---|---|---|
| 130,000 | 39 | - | 119, 89 |
| On Hit | On Block | Guard | Properties |
| - | - | Mid | - |
|
THC Hyper: Grenade Launcher. Chris places a landmine immediately in front of the point character. Unlike the point version, this mine will not explode on a character who is in a hard knockdown state, and thus does not work as an OTG assist. However, it can alleviate the need for an OTG by relaunching a falling opponent before they become knocked down in the first place. Niche assist for teams that really do not need the coverage of Gun Fire. | |||
Ground Normals
| Damage | Startup | Active | Recovery |
|---|---|---|---|
| 48,000 | 6 | 3 | 11 |
| On Hit | On Block | Guard | Properties |
| -1 | -2 | Mid | - |
|
Chris' 5L has below average startup but a solid hitbox, and is a decent anti-air. It is also useful for converting hits at regular jump height, as it can usually be chained directly into a 5S launcher. | |||
| Damage | Startup | Active | Recovery |
|---|---|---|---|
| 65,000 | 8 | 3 | 18 |
| On Hit | On Block | Guard | Properties |
| -3 | -4 | Mid | - |
|
In a similar vein to 5L, 5M is slower than average but has a respectable hitbox. In most cases, it is outclassed by 2M, which has the same startup while reaching farther and hitting low. | |||
| Damage | Startup | Active | Recovery |
|---|---|---|---|
| 80,000 | 10 | 3 | 21 |
| On Hit | On Block | Guard | Properties |
| -1 | -2 | Mid | - |
|
Fantastic range, and advances Chris forward about one character length, which will largely negate the pushback of this move on hit or block. Thanks to 6H further advancing Chris forward, he does not need to worry about being unable to confirm into 5S or other specials, and throwing this attack out can be very rewarding. | |||
| Damage | Startup | Active | Recovery |
|---|---|---|---|
| 45,000 | 6 | 3 | 13 |
| On Hit | On Block | Guard | Properties |
| -3 | -4 | Low | - |
|
Solid range for a light attack. | |||
| Damage | Startup | Active | Recovery |
|---|---|---|---|
| 80,000 | 8 | 3 | 18 |
| On Hit | On Block | Guard | Properties |
| -3 | -4 | Low | - |
|
Great range and easy to confirm into full combos or transition into pressure. | |||
| Damage | Startup | Active | Recovery |
|---|---|---|---|
| 90,000 | 17 | 2 | 19 |
| On Hit | On Block | Guard | Properties |
| +2 | +1 | Low | |
|
Very different from the standard Marvel 2H, and functions more like a command normal than a regular one. Chris crouches and fires a single pistol shot at a downward angle. This move is mainly notable for hitting OTG. Because it is a normal and special-cancelable, Chris can follow up an OTG gunshot with most special moves, the most notable being 214H and 236H. This is a core element of many of Chris' combo routes. | |||
| Damage | Startup | Active | Recovery |
|---|---|---|---|
| 80,000 | 9 | 4 | 27 |
| On Hit | On Block | Guard | Properties |
| Launch | -9 | Mid | |
|
Fairly standard launcher. | |||
Aerial Normals
| Damage | Startup | Active | Recovery |
|---|---|---|---|
| 50,000 | 5 | 5 | 19 |
| On Hit | On Block | Guard | Properties |
| +6 | +5 | OH | - |
|
- | |||
| Damage | Startup | Active | Recovery |
|---|---|---|---|
| 70,000 | 8 | 3 | 27 |
| On Hit | On Block | Guard | Properties |
| +12 | +11 | OH | - |
|
- | |||
| Damage | Startup | Active | Recovery |
|---|---|---|---|
| 90,000 | 10 | 3 | 26 |
| On Hit | On Block | Guard | Properties |
| +15 | +14 | OH | - |
|
Airthrow OS attack. | |||
| Damage | Startup | Active | Recovery |
|---|---|---|---|
| 85,000 | 10 | 4 | 32 |
| On Hit | On Block | Guard | Properties |
| +18 | +16 | OH | |
|
- | |||
Command Normals
| Damage | Startup | Active | Recovery |
|---|---|---|---|
| 90,000 | 15 | 4 | 22 |
| On Hit | On Block | Guard | Properties |
| -3 | -4 | Mid | |
|
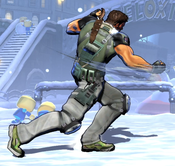
Low Shot is a command normal that functions very similarly to Chris' 2H. Chris fires his pistol downwards, except while standing. It is still an OTG and can be used in combos in mostly the same way as 2H. Because Chris stands while firing this shot, its effective horizontal range is slightly longer than the crouching shot of 2H. As a downside, this version hits Mid instead of Low. | |||
| Damage | Startup | Active | Recovery |
|---|---|---|---|
| 90,000 | 15 | - | Until landing |
| On Hit | On Block | Guard | Properties |
| 0 | -1 | Mid | Deals chip damage, Priority: Low, Durability: 3, scales as a Special |
|
The last of Chris' trio of pistol attacks. Unlike 2H and 6M, this version does not hit OTG. It has the longest potential range of the three, by virtue of Chris being able to fire it from higher up, but has limited combo potential. Chris can not chain into j.2H from aerial normals. | |||
| Damage | Startup | Active | Recovery |
|---|---|---|---|
| 90,000 | 15 | 3 | 25 |
| On Hit | On Block | Guard | Properties |
| -5 | -6 | Mid | Deals chip |
|
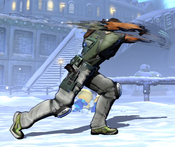
Chris advances forward a solid distance (roughly two character lengths) while making a lunging swing with his taser. During the recovery of this move, Chris takes a step back, losing a good amount of the ground he gained during the startup. However, canceling 6H into any other move will prevent this backstep and allow Chris to gain a great deal of ground while attacking. Allows Chris to capitalize on the great range of his normal attacks without having to worry about follow-ups whiffing. | |||
| Damage | Startup | Active | Recovery |
|---|---|---|---|
| 18,000 per hit, up to 25 hits | 20 | 17+ | 22 |
| On Hit | On Block | Guard | Properties |
| 0 | -1 | Mid | Deals chip damage, scales as a Special |
|
Chris can not chain into this command normal the way he can chain into his other grounded command normals. Chris pulls out a flamethrower and fires directly ahead. By holding down the H button, Chris can extend the total duration and hitcount of this move, racking up damage. This move causes virtually no pushback on hit or block, although it is still vulnerable to being pushblocked. This move can be special canceled, which is a useful way to tack on extra damage to Chris' combos. This is primarily done by following up a ground bounce of any kind with 4[H] xx 214H (1st hit) xx hyper. Presumably due to a bug, 4H Flamethrower's initial startup frames can not be canceled into a dash, the way almost all other normals and command normals can. This means that Chris can not plink dash backwards using the H button, as he will get stuck in the Flamethrower animation. It is still possible for Chris to plink dash backwards, using a M~L+M input. | |||
Special Moves
| L (Shotgun) |
Damage | Startup | Active | Recovery |
|---|---|---|---|---|
| 20,000 x10 | 25 | - | 31 | |
| On Hit | On Block | Guard | Properties | |
| +7 | +6 | Mid | ||
| M (SMG) |
Damage | Startup | Active | Recovery |
| 22,000 x8 | 25 | 13 | 22 | |
| On Hit | On Block | Guard | Properties | |
| +1 | 0 | Mid | ||
| H (Magnum) |
Damage | Startup | Active | Recovery |
| 150,000 | 22 | - | 34 | |
| On Hit | On Block | Guard | Properties | |
| - | -12 | Mid | ||
|
Chris pulls out one of three weapons depending on button strength, and fires it directly ahead.
All three versions can be done in the air. If done while airborne, Chris will aim the shots at a down-forward 45 degree angle, rather than firing straight ahead. These downward-firing shots can hit OTG, unlike the grounded versions. Additionally, Air Magnum causes a ground bounce on hit, rather than a wallbounce. | ||||
| Damage | Startup | Active | Recovery |
|---|---|---|---|
| 130,000 | 17 | - | 30 |
| On Hit | On Block | Guard | Properties |
| - | -7 | Mid | |
|
Chris places a landmine on the ground in front of him. The landmine will detonate with a small, OTG-capable explosion if any of the following conditions are met:
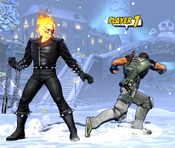
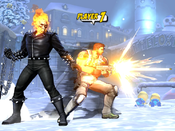
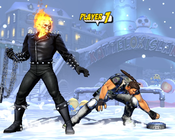
The mine is fast enough to use for relaunching in certain combos, as an alternative to Air Magnum or 2H/6M. Since the mine also automatically detonates if Chris is hit, he can stand on or near it for some solid, temporary protection against close-range attacks. As a bonus, the explosion is medium priority, and will delete any standard low-priority projectile it comes into contact with for its short duration. | |||
| Damage | Startup | Active | Recovery |
|---|---|---|---|
| 150,000 | 20 | - | 25 |
| On Hit | On Block | Guard | Properties |
| - | - | Mid | |
|
Chris tosses a standard grenade, which will bounce off walls or the ground before exploding. As an explosive, it functions similarly to his 623L Landmine, but it does not automatically detonate on contact with an opponent. It will still detonate after 90 frames, being hit by a projectile, or if Chris is hit. The explosion is OTG-capable, but this is extraordinarily awkward to utilize due to the grenade's trajectory. It does have some use in enabling all hits of Chris' Grenade Launcher hyper. As a neutral and setup tool, it is largely outclassed by 623H, which is only slightly slower but creates a long-lasting flame carpet instead of a single short explosion. | |||
| Damage | Startup | Active | Recovery |
|---|---|---|---|
| 130,000 + 15,000 x5 | 25 | 120 (grenade) + 120 (flames) | 26 |
| On Hit | On Block | Guard | Properties |
| - | - | Mid | |
|
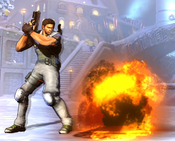
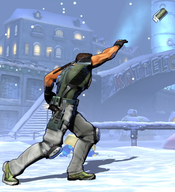
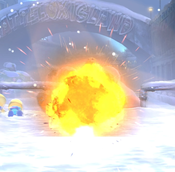
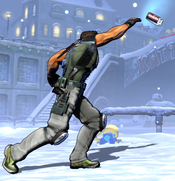
Chris tosses a grenade with a similar animation to the M version. The grenade travels in a slightly different arc, and lasts 120 frames before detonating instead of 90 (it can still detonate early if hit by a projectile, or if Chris is hit). Not only does this grenade create an explosion, it also leaves a flame carpet on the ground at the point of impact. The flame carpet has five total hits, which last a fairly significant amount of time. If the grenade makes contact with an opponent, Chris usually has ample time to confirm a combo on hit, or set up a mixup on block. H Grenade is one of Chris' primary mixup tools, and Chris players will often use their oncoming mixup time after a snapback or kill to throw one or even two of these. | |||
| Damage | Startup | Active | Recovery |
|---|---|---|---|
| 50,000 + 60,000 | 10 | 2(15)3 | 21 |
| On Hit | On Block | Guard | Properties |
| -1 | -2 | Mid | - |
|
Double-hitting special move. Chris punches twice, with the ability to perform a series of Deadly Rave-style follow-up attacks. Chris can press L in a 10 frame window starting from when the second punch connects, leading into the follow-up sequence (see below). Outside of accessing the follow-up attacks, this move is very poor. Even then, it is only worth considering on hit, and even then, it is mostly outclassed by H Body Blow. | |||
| Damage | Startup | Active | Recovery |
|---|---|---|---|
| 50,000 | 12 | 3 | 26 |
| On Hit | On Block | Guard | Properties |
| -3 | -4 | Mid | - |
|
When this follow-up makes contact, Chris has a 10 frame window to input M, which will then follow up with with Heavy Blow (see below). | |||
| Damage | Startup | Active | Recovery |
|---|---|---|---|
| 50,000 | 13 | 3 | 30 |
| On Hit | On Block | Guard | Properties |
| -5 | -6 | Mid | - |
|
When this follow-up makes contact, Chris has a 5 frame window to input H, which will then follow up with with Payoff (see below). | |||
| Damage | Startup | Active | Recovery |
|---|---|---|---|
| 25,000 + 30,000 + 80,000 | 15 | 3(18)3(17)4 | 21 |
| On Hit | On Block | Guard | Properties |
| - | -3 | Mid | |
|
Finale of the 214L combination. Causes a wallbounce on hit. | |||
| Damage | Startup | Active | Recovery |
|---|---|---|---|
| 50,000 + 80,000 | 10 | 2(24)3 | 22 |
| On Hit | On Block | Guard | Properties |
| - | -3 | Mid | |
|
Double-hitting combo attack, very similar to 214L. M Combination Punch has a much simpler follow-up pattern: a 5 frame window near the end of the second hit to input H and follow up with Magnum Combo. | |||
| Damage | Startup | Active | Recovery |
|---|---|---|---|
| 150,000 | 22 | - | 37 |
| On Hit | On Block | Guard | Properties |
| - | -12 | Mid | |
|
As a follow-up to 214M, Chris pulls out his Magnum and delivers a wall-bouncing shot. In most cases, it is easier and more practical for Chris to just use his 236H Magnum special directly. | |||
| Damage | Startup | Active | Recovery |
|---|---|---|---|
| 50,000 + 90,000 | 10 | 2(16)2 | 41 |
| On Hit | On Block | Guard | Properties |
| - | -20 | Mid | |
|
Has no follow-ups, unlike the other two 214X specials. However, this version is actually the most useful. This special causes a simple but lengthy Hard Knockdown on hit. Since Chris has multiple strong OTG options via his pistol attacks, he can confirm into this attack and then pick the opponent right back up for simple combo extensions. | |||
| Damage | Startup | Active | Recovery |
|---|---|---|---|
| - | 10 | - | 5 |
| On Hit | On Block | Guard | Properties |
| - | - | - | - |
|
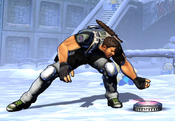
Chris enters a special "prone" stance. While in this stance, Chris can not dash, block, or use almost any of his attacks. He is able to crawl slowly forwards or backwards, and can call assists in this state.. To compensate, Chris gains an extremely low profile, allowing him to evade under almost any projectile, as well as many normal attacks. Chris can try to utilize this in projectile battles to render himself immune to an opponent's zoning, while firing back with Prone Shot. However, he is very vulnerable to even the most basic rushdown in this stance. Chris can cancel normals into Prone Position, and this technically is faster than letting many moves recover normally. For obvious reasons, this is not useful in combos or mixups. Chris can cancel Prone Position whenever he is not firing by inputting any upward direction. He will also automatically cancel the stance if he is crossed up. Canceling Prone Position manually has a 5 frame window where Chris is vulnerable, but if Chris' stance is canceled automatically, he will be invincible while standing up. | |||
| Damage | Startup | Active | Recovery |
|---|---|---|---|
| 90,000 | 15 | - | 9 |
| On Hit | On Block | Guard | Properties |
| - | - | Mid | |
|
Chris' only attack in Prone Stance. Fires a single pistol shot directly ahead. | |||
Hyper Combos
| Damage | Startup | Active | Recovery |
|---|---|---|---|
| 100,000 x4 | 15+4 | 112 | 37 |
| On Hit | On Block | Guard | Properties |
| - | - | Mid | |
|
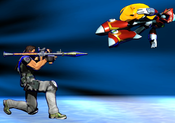
Chris readies a grenade launcher and fires four shots in sequence:
If all four shots of this hyper connect, Chris is actually significantly plus on hit or block, and Chris can even extend into a second hyper afterwards to deal high total damage. | |||
| Damage | Startup | Active | Recovery |
|---|---|---|---|
| 40,000 + 50,000 + (8,000 x10 if ground bounce not used earlier in the combo) + 10,000 x8 + 100,000 + 130,000 | 10+2 | 4(10)3(27)8(27)17(20)7(43)20 | 53 |
| On Hit | On Block | Guard | Properties |
| - | -31 | Mid | |
|
Chris performs a series of attacks, starting with a two-hit knife combination, then firing all three of his guns, and finishing with a rocket launcher blast. This is Chris' standard combo ender, especially if he does not have a way to ensure all hits of Grenade Launcher will land. If Chris has not already consumed his ground bounce during the combo, the second hit of this combo will groundbounce the opponent. Otherwise, the hit will cause a Hard Knockdown. This is important for the following attack in the combo: a highly-damaging shotgun blast. The shotgun will whiff if the opponent was not ground-bounced by the previous hit, lowering the hyper's total damage. Regardless of whether the groundbounce is used or not, the attacks after the shotgun blast will connect as normal, and Chris can still finish the combo. | |||
| Damage | Startup | Active | Recovery |
|---|---|---|---|
| 16,500 x27 | 35+1 (20 per shot) | 37 (per shot), 260 (total) | 43 |
| On Hit | On Block | Guard | Properties |
| - | - | Mid | Invuln for (35+7) frames, |
|
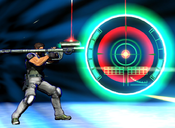
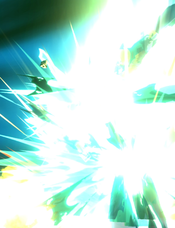
Non-cinematic Level 3 hyper. Chris produces a rocket guidance system, and a large aiming cursor appears on screen. For the duration, Chris can not move, but inputting movements will steer the cursor in any direction. When the cursor is where you would like it to be, pressing any of the regular attack buttons will cause a large, OTG-capable explosion to fall down from above. The hyper lasts until Chris has fired three total shots, 260 total frames have passed, or if Chris is hit by any attack. The lengthy startup makes this hyper difficult to combo in to, but Chris can utilize some of his longer-lasting Hard Knockdowns to set it up, and the heavy damage from three consecutive shots is worth considering. This move has quite a bit of invincibility, but not enough to last until the first shot is actually active, and thus it is not necessarily strong as a reversal. By default, the aiming cursor appears directly over Chris. This can be altered by holding an attack button during the hyper flash. Holding L will cause it to start directly in front of Chris, holding M will cause it to appear midscreen, and holding H will cause it to appear at fullscreen distance. By saving time on moving the cursor to its destination before firing, Chris can combo into this hyper at ranges where it would not otherwise be possible. | |||
Universal Mechanics
| Damage | Startup | Active | Recovery |
|---|---|---|---|
| 80,000 | 1 | 1 | - |
| On Hit | On Block | Guard | Properties |
| - | - | Throw | |
|
Chris performs a "neck snap" throw, which causes the opponent to slowly fall to the ground. Despite the crumple-like animation, Chris does not recover until the opponent is knocked down, and must follow up with an OTG attack. Luckily, Chris has several strong OTG options to use. | |||
| Damage | Startup | Active | Recovery |
|---|---|---|---|
| 80,000 | 1 | 1 | - |
| On Hit | On Block | Guard | Properties |
| - | - | Airthrow | |
|
Unlike many airthrows, Chris' airthrow brings both his opponent and himself straight down to the ground. The follow-up is thus basically the same at any height or screen position, and Chris can pick up with an OTG 2H gunshot. | |||
| Damage | Startup | Active | Recovery |
|---|---|---|---|
| 50,000 | 2 | 4 | 20 |
| On Hit | On Block | Guard | Properties |
| - | -2 | Mid | Snapback |
|
Animation and hitbox based on 5H. | |||
| Damage | Startup | Active | Recovery |
|---|---|---|---|
| 30,000 | - | 20 | 34 |
| On Hit | On Block | Guard | Properties |
| - | -16 | OH | |
|
- | |||
Team Position
Chris is typically chosen either as a point character or in the second position. He makes a poor anchor character, as he struggles to play aggressively by himself. Although X-Factor does significantly increase his ability to deal Chip Damage, many characters can simply wait out the 20 second duration while taking minimal damage. Chris' Gun Fire assist covers the same space as the more popular beam assists, but has shorter duration which makes it more difficult to use in confirms.
Notable Synergies
Spencer: Chris can usually perform solo relaunches, but these routes get a lot harder deep into a combo, when Hitstun Deterioration gets higher. Spencer can make these late stage OTG pickups much easier, by calling his Slant Shot assist while Chris OTGs with 2H, to grab the opponent and force a restand. His Bionic Maneuvers hyper is also a fantastic DHC option, as it deals good damage and Spencer can usually continue the combo afterwards. Chris can set up this DHC easily, as both of his level 1 hypers leave the opponent close to the ground.
Players to Watch: GCYoshi (Chris/Spencer/Sentinel), Senor Taxi (Chris/Spencer/Dante)
Sentinel: The Sentinel Force (Charge) assist stays on screen for a very long time (provided Sentinel himself does not get hit, which makes the drones disappear). Chris can use these drones to cover for the slow startup of many of his specials, giving him time to set up his keepaway game. Chris can also use drones assist to pick up after a full screen magnum shot, something that is much more difficult without drones. This adds a very dangerous layer to Chris' projectile game.
Players to Watch: Windzero (Chris/Sentinel/Jill), GCYoshi (Chris/Spencer/Sentinel)
Nemesis: Gun Fire is a fast horizontal assist that can cover Nemesis' advance or retreat similarly to a beam assist. Additionally, these two characters both have THC Hypers which are highly damaging, OTG-capable projectile barrages. Either of these two can call a THC with the other to turn a Hard Knockdown into heavy damage, and Chris even recovers fast enough from his own hyper to follow up with a 4H Flamethrower while the opponent is ground-bounced by Nemesis.
Players to Watch: Scamby (Wesker/Nemesis/Chris)
Wesker: Despite OTG assists making their way out of the meta, Chris still appreciates one more than most characters, and Wesker's is the absolute best for just that. The low hitstun on Chris' normals make it hard for him to make lengthy solo combos, so an easy OTG option opens up a Grenade Launcher extension and a convenient way to incorporate another flamethrower into his combos. Phantom Dance as a THC also allows Chris to spend two meters for a damaging OTG pick up and can still continue the combo afterwards. Wesker can also make notable use of the THC himself, activating X-Factor immediately after startup and getting five consecutive mixups that are impossible to see.
Players to Watch: LivinLegend26 (Chris/Wesker/Akuma), Jumpman (Chris/Ammy/Wesker)
Other Players to Watch: St. Valentine (Wesker/Chris/Jill, She-Hulk/Spencer/Chris), ChrisD (Chris/Doom/Strider), LLND (Chris/Hsien-Ko/Ammy)
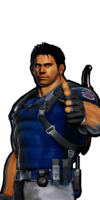
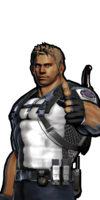
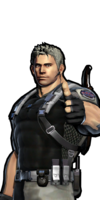
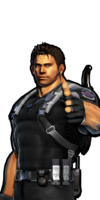
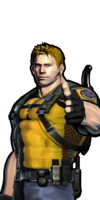
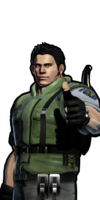
Alternate Colors
| Color 1 | Color 2 | Color 3 | Color 4 | Color 5 | Color 6 | Alt Color |
|---|---|---|---|---|---|---|
|
|
|
|
|
|
|

